
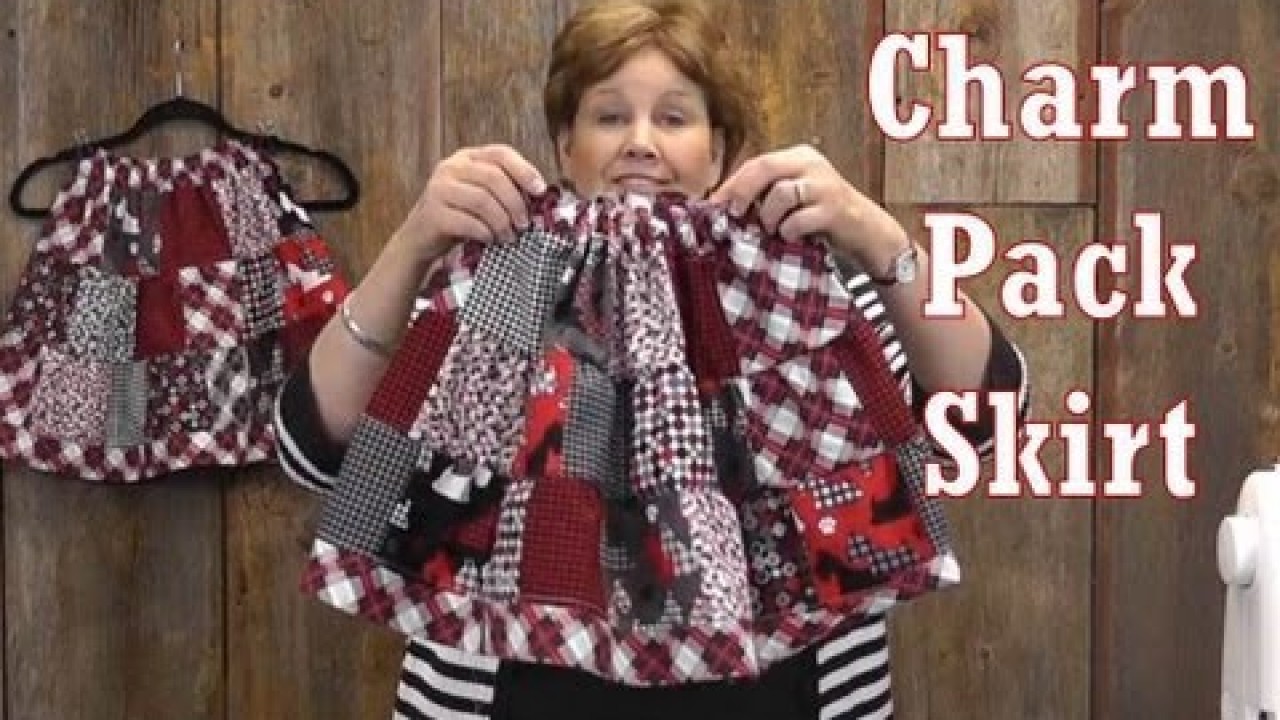
Adorable Charm Pack Skirt Tutorial
Charm Packs - the best selection anywhere!. Great Scotts precuts and yardarge (while supplies last) from Kanvas Studios of Benartex.
Instructor
Jenny Doan
Jenny Doan is an American quilter, author, and YouTube personality. Jenny started Missouri Star Quilt Company in 2008 and today it is the largest quilting supply vendor in the United States.
Shop this tutorial

Common Questions
What is covered in Adorable Charm Pack Skirt Tutorial?
Charm Packs - the best selection anywhere!. Great Scotts precuts and yardarge (while supplies last) from Kanvas Studios of Benartex.
How long is the tutorial video?
The tutorial video is 00:20:18.
Are supplies listed for this tutorial?
Yes. The tutorial page includes the supplies and materials connected to this project.
Video Transcript
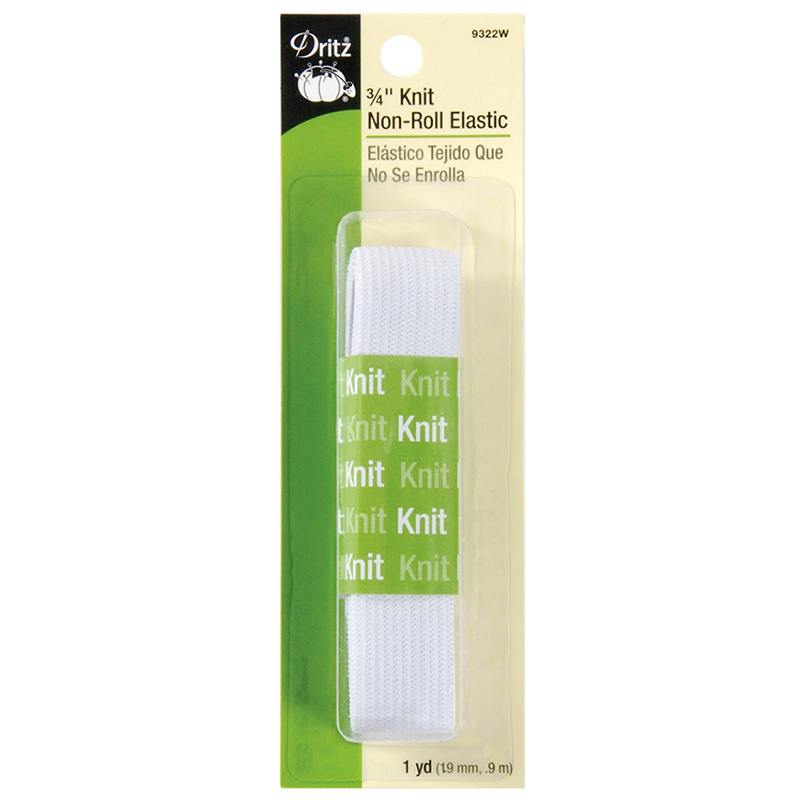
Hi I’m Jenny from the MSQC. Today I want to tell you about this darling little project. I’m always looking for something fun and new to do with pre cuts. And some of little granddaughters needed a new skirt. And so we thought, what a perfect opportunity to use a pre cut and make them a darling little skirt. So to make this little skirt you’re going to need one charm pack and a little over a ⅓ of a yard of fabric. Better get a half to be safe. You’re going to need a piece of elastic that goes around their waist. And for this project today the fabric we’re using is called Great Scots and it’s, it’s by Gretta Lynn and it’s for Canvas Fabric line. And so it is darling. We really love it. So I’ll show you how to do this. You’re going to need, you’re going to use 36 squares out of your charm pack. And you’re going to put them together in three rows. The first row is going to have nine squares. And you’re going to just randomly pick them out and sew a quarter of an inch seam. You know, two together, four together, you know two sets of four until you make a row of nine. The next row had 12 like this. And then the last row has 15. So you have three rows of charms sewn together. Nine, 12 and 15. And then you’re going to cut three four inch strips. These are four inch strips of a contrasting fabric. That’s this right here. We’re making the bottom band. And we’re also making the waist band. So you really only need a ⅓ of a yard of fabric and then you want to make sure you have room, you know a little wiggle room in case there’s a boo boo or something. So here’s your, your three four inch strips. And I’ve cut them and I’ve ironed them in half like this. I sewed this one will go on the top for the waist band. It will go up here. This one I sewed two of them together right here. And I just pressed that seam open for less bulk. You know it just, it doesn’t really matter either way but that’s just how I did it. And I cut off my selvedge end here at this end. And I’m going to put this strip of fabric along the bottom edge of my bottom row. And this is going to make the hem. And it’s already going to be done and finished. No turning under or anything. So I’m just going to lay this right sides together. And we’re going to sew all the way down this side, quarter of an inch and then press it open. So let’s go to the sewing machine and do that. Alright so I’ve got this laid right along the edge. And I’m just going to go ahead and sew this down. Ok I’m almost to the end right here and presto we’re finished. So now what we’re going to do is we’re going to trim off this strip. Let me trim these threads. We’re going to trim off this strip right here even with the charm pack. So we’ll just cut it off right like that. Then we’re going to go press it open and we’re going to press this so that this seam right here comes up onto the charm pack. Because the next thing we’re going to do is we’re going to topstitch this line just right along this edge and that will hold that seam down. So let’s go ahead and press this open And again I’m going to press this to make sure my seam is at the, up onto the top of the charm pack. And it really wants to do that because the seam always wants to lay in the direction of the biggest bulk so it will, it will slide up there pretty easily. I’m kind of pushing it up there with my finger as I’m going along. And now what we want to do is topstitch and the reason we’re going to go ahead and topstitch this down is so that it holds that seam up there and it will help with fraying. You know if you had a serger or something, you could serge right along that seam. But I would still topstitch it down. I just like that finished look. So when you topstitch you just make sure, this is the stitch that everyone is going to see so you want to make sure it’s good and straight. And I hope I can do that for you. And but what we’re going to do is you want, you want to line up, have a good guide lined up on your sewing machine. So I have a place on my foot. I always make sure that seam runs right along the side of it. And that helps me get a good straight edge. So I’m just going to come along here. And it’s ok to go nice and slow on this. And you can see right here that, see that edge is going to be nice, it’s going to be uniform because I’m following right along this fold. So I will just stitch this up and meet you back here. So now I’m going to do the same thing to the top. I’m going to take my, my folded piece. I’m going to clip off my selvedge. And I’m just going to go ahead and sew this right along this top edge just like I did on the bottom edge. So now I sewed the bottom edge of the skirt and now I’ve sewn the top. And you can see right along here, I did my topstitching but I also have another row of stitching along the side of the fabric band that I folded. And what that does is it’s going to keep that waist band from twisting and turning. That’s just a little, a little tip I learned when doing, I used to do a lot of clothing sewing. And it keeps that waist band from turning. Ok so now we’re ready to put these three tiers together. And we’re going to need to do some gathering. The gathering, there’s all kinds of ways to do gathering. My favorite way is to use a zig zag stitch or just to pin it a lot so that you’re just easing the gathers through while you’re sewing rather than doing all that gathering work. I’m going to show you the zig zag way and the pinning way. And so I’ll start with this bottom piece. The bottom piece we’re going to have to gather in so that it fits to this middle piece. The middle piece we will also gather in so that it fits to the top. So let’s go ahead and run a gathering stitch on this. And I’ll show you how I do that. So over here at the sewing machine you have your top thread and you have your bottom thread. I’m going to put my top thread behind here and I’m going to hold onto this bottom thread. And I’m going to change my sewing machine so that it does a zig zag. And I am going to move my settings so that they are as wide and as long as they will possibly go. So my settings are on 4.0 and 7.0 for the width and the length. I just want a really big stitch. And I’m going to make sure that the, my bobbin thread is, I’m pulling it out of the sewing machine. I have a big long piece so that it will stretch all the way along the top of my fabric. And then I’m just going to zig zag over the top of it. So I’m going to line up my, my thread right there. And you’ll be able to see this coming out the back of my sewing machine. I keep the thread right in the middle between the zig zags. And this is the quickest and easiest I know to do a gather without worrying about breaking a zillion threads. Oop. I kind of had a zig in my zag right there but that will be alright because we can always take the, the gathering out at the end. So now I”m going to pull this out and I’m remembering, oh, which one is, there’s my bobbin thread right there. So now you can see I have this little bobbin thread in there and it just pulls so easily. I mean you can just really. You don’t have to worry about your bobbin thread pulling. And you’ll just ease those gathers along there until it’s the same size. Ok so I sewed down the gathering stitch on here and I have my thread to pull. And then what I did was I took my row and I folded it in half and put a pin right here at the middle and folded it in half again and put pins at the quarters. Because we’re going to put these all together and we want them matched up evenly, then we’ll pull that string and do it. So then I also put pins on the next row at the middle and at the quarters so that we can match them right up. So what we’re going to do then is we’re going to pull this one. And we’re going to lay it over here. And we’re going to put a pin in our center pins together right here. And we’re going to go ahead and put one pin there and make sure we take the other one out. We only need one pin in each place. We’re going to pin the ends together like this. Over here is my end. And then we’re going to pin the two quarters together. So I’m going to go ahead and pin this quarter over here. We want to get it all pinned together before our pins fall out and we lose our place. There we go. Alright so then we’re looking for our bobbin thread here. And let me see here. I’ve kind of lost it so let me pull this out. I’ve got to make sure we get that thread right there, that’s the one we stitched over. And it’s the one that will work perfect for tightening these up. See how quickly that just tightened up and made the one piece fit to the next piece. So you’re going to have to, you know, scrunch it a little bit all the way down. And then, you know, just make sure that that, make sure that your pieces become the same size. You know we’re trying to shrink one row to the next row. And you’ll end up like a lot of times with a little bunch like this and you just want to smooth that out so that it’s evenish all along there. You know, you don’t have a big wad of gathers in one spot. And then we’re going to go over to the sewing machine and we’re just going to stitch this down. So you’ll notice when you’re sewing this one on you’ll want to make sure your bigger piece is on the top so that you can adjust things. But you’ll notice that there’s not a lot of, it’s not a lot of tight gathers. It’s just kind of a nice loose gathering that’s going on here. And because you’ve got your middles and your sides quartered you’re not going to have too much gathering in one place and not enough at the other. And then that zig zag stitch will kind of show but that’s, that’s something you’ll just pull out. It’s loose, you’ll, you know, grab a hold of that thread and pull that out because you don’t want to leave that in there. Ok so whew, take your time on this, you know this, you know gathering isn’t, you know it’s not something that’s totally easy but it’s not totally hard either. You just have to relax and not worry about it. . But what we’re going to do is we’re going to go ahead and do the same thing to the next row. See how cute this looks. We’re already almost onto our last tier. So this one is going to go on here like this one. Oh one thing I forgot to mention is if you have a print, like I have doggies on this one, you want them right side up so check that out when you’re putting your stuff together. So again on this one I’m going to go ahead and pin the middles to the middles. And the edge to the edge. And this, I’m actually going to show you how I do this one without doing the running stitch. You know me, I’m always in a hurry and I just, actually I’m not always in a hurry I just like to do things fast. I’m the Speedy Gonzalez of the quilt world. So what I’m going to do is I’m going to pin these in half. And I pulled this to make sure my middles meet up like this. And so this is my quarters. And I put a pin there and hook them together. And take that other pin out. And then I’m going to do one more pinning of eighths. So just like I did the quarters, I’m going to find the middle and I’m going to pin them together again. So then I’m just dealing with little four inch spaces that need, that need my gathers in. It’s just kind of a, of a quick way to gather without actually using a gathering stitch. The gathering stitch is definitely the easiest. But doing costuming for so many years I, I just, I just learned these little tricks where I do things real quick. Alrighty. So now you’ll see right here, this is my top row. And you’ll see I have this little extra edge right here. And what I’m going to do when I go to the sewing machine is I’m just going to kind of put a little piece in and put a little piece in as I go along. So you can see the gathering stitch would make that a lot easier. But I’m just going to do it this quick way, there’s you know lots of ways to do things. And I’m going to use the quick way. Well quick for me I guess I should say. Because I’m only dealing with like little tiny four inch places, it should come out pretty good. So as you come to the needle I just pull them out and I just keep sliding this fabric underneath the foot right there. And get, you know it’s kind of like making tiny little pleats. But it’s, it just works, it’s easy and if you put a little lotion on your hands they’ll stick to the fabric a little better and you’ll be able to get them under. Or you can lick your fingers a lot like I do. I get in such trouble for that. I don’t mean to. It’s hard to grab on that fabric sometimes. Ok so you just want to keep sliding that fabric under there and make sure that, you know they stay fairly even. It’s like little tiny pleats. Just slides under there so easy. I take the, make sure you take the pin out before you get to it, you don’t really want to sew over that pin. And I’m pretty close to the home stretch here. There we go, home stretch. Alright now let’s take out the pins and take a look at this. Run my finger along here. The fun thing about this little skirt is that it really will fit anybody from like size two to ten. I mean it’s a darling little skirt. It gets a little shorter and you can put some leggings under it. And it’s just a cute little skirt. I have some pins in the bottom here. And you can actually sew the rings together, you know each, each strip you can sew together as a ring and then sew the final one together. There’s, there’s just lots of different ways and ideas. Ok so here we go. Here’s our little skirt. We’re going to put right sides together and we’re going to sew this back seam. But we’re just going to sew up to here because we still have to string our elastic. So we’re going to lay these right sides together like this. And we make sure that this right here, that these are going to match up. Our contrasting fabric is going to match up. And the bottom is going to match up. So we go ahead and put those together and sew that back seam and that. And we are so close . We’re going to go ahead and backstitch on this because this is clothing. We don’t want your skirt to come apart. Please no! No wardrobe malfunctions. We want to try and match up our rows of charms so that they are, so that our stitch lines stay perfectly matched. We don’t want a square here and a half a square there. So then what I’m going to do is I’m going to go ahead and pull this out and I’m going to now feed the elastic through the top. And see this skirt, you know, I can be as small or large as you want. And, what I did, let me show you first. What I did was I stuck a big safety pin on the end of my elastic and then I can feed it right in there. You can use any size of elastic that will fit in your waist band. The wider the elastic the, the stiffer and taller that band will stand up. I have elastic that I bought on huge spools. So I use it for everything, whether, whether it’s the right size or not. It, it goes in whatever it is I’m working on. I’ve got the elastic threaded through here. And you want to make sure that it’s the size of the waist that you want. So you’ll wrap that elastic around whoever the skirt is for. And you know, just make sure it’s snug. You don’t want it tight. And then you’ll go ahead and just make sure both ends are sticking out. And then we’re just going to sew across here. And I’m going to double stitch that so that it won’t come undone. Make sure it’s good and lined up. There we go. Stitch down and back and down. And then I’m going to trim those off. There we go. Trim this little top piece here. And then we’re going to flip this right side out. It’s already hemmed. It’s got a little waist band. How cute is that? How adorable? Oop, I’ve got a little piece up. Let me pop that down. There you go. Take a look at that. That’s darling. Let me show you another one over here that we made. This is so cute because, I mean, a Christmas charm pack, a Valentine’s charm pack. Anything you want. And you can make this little skirt. Now on this one you can see we didn’t put the top waist band. We just folded over our charm pack and made the waist band out of that. So you know take this. If you need one a little longer you can add another row of squares. Take this idea and run with it. This is a darling little charm pack skirt. And we hope you enjoyed this tutorial from the MSQC.


