Skip to content

Free quilting video tutorials from Missouri Star

Quilting Tutorials
Easy Christmas Table Topper / Mini Tree Skirt

Easy Christmas Table Topper / Mini Tree Skirt

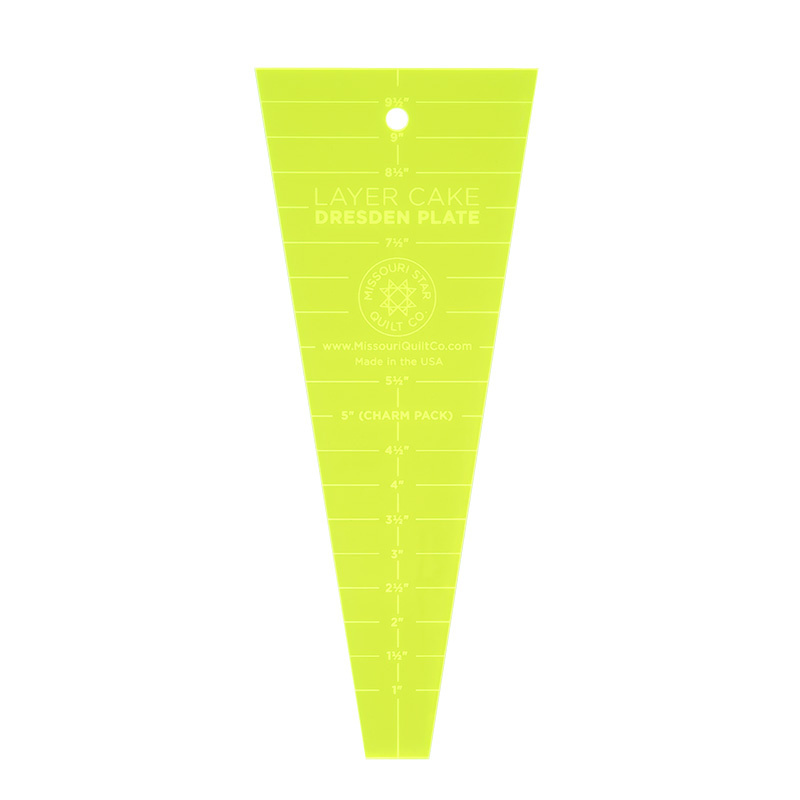
Jenny Doan shows an easy way to make an adorable Christmas Table Topper / Mini Tree Skirt using Layer Cakes (10" fabric squares) and the Layer Cake Dresden Plate Template. Layer Cake Dresden Template. Layer Cakes - the best selection anywhere!. Clover Needle Threader. John James Needles. Riley Blake Small Red Chevrons Fabric. Tis the Season Layer Cake by Windham Fabrics (while quantities last).
Instructor

Jenny Doan

Jenny Doan is an American quilter, author, and YouTube personality. Jenny started Missouri Star Quilt Company in 2008 and today it is the largest quilting supply vendor in the United States.

Common Questions

What is covered in Easy Christmas Table Topper / Mini Tree Skirt?

Jenny Doan shows an easy way to make an adorable Christmas Table Topper / Mini Tree Skirt using Layer Cakes (10" fabric squares) and the Layer Cake Dresden Plate Template. Layer Cake Dresden Template. Layer Cakes - the best selection anywhere!. Clover Needle Threader. John Jam...

How long is the tutorial video?

The tutorial video is 00:13:31.

Are supplies listed for this tutorial?

Yes. The tutorial page includes the supplies and materials connected to this project.

Video Transcript

[Music] hi I'm Jenny from the Missouri Star Quilt Company I've got a great little project for you today look at this darling little tabl topper SL mini tree skirt really quick and fun I use this fabric this is um TI the season by Rosemary laen designs from Windom fabrics and the cool thing about this is you this only takes seven layer cake squares so out of one of these one of these layer cakes you're going to be able to make a bundle of these table toppers so if you need a lot of little gifts this is the way to go so to show you how to do this the things you're going to need are s 10in squares or some scraps a 10-in strip of fabric or whatever you're going to need this dressed in ruler and that's about it until we get to The Binding so what I've done is I've used some of this Riley Blake um Chevron material that's so popular to just show you how it would look in a different way so let me scoot this tree over here and move this over and I'm going to show you how to do this this is so easy it's just like the making a normal dresdon except you don't have to turn the edges under so it makes it really quick I think this cute chevron zigzag fabric almost looks like peppermint candies you know that we have at Christmas time and so it makes it really fun so what we're going to do is we're going to take our 10 in layer cake square and we're going to take our dressing tool and we're going to place it on our square and right away you'll realize that you'll get least three cuts out of each Square so that's what I'm going to do you want to make sure though that it lines up straight across the top and then we're just going to make a cut here and we're going to cut both sides and I'm going to turn my mat to do that so I don't um cut off the end of my finger you know nobody wants to do that at Christmas time or ever for that matter okay so now now I've made this cut and you can see then my dress and my dress and ruler will fit right along the edge of that so it's it just lines up perfectly to make that second cut you only have to then cut one side so that's going to give you the best bang for your buck so if you use a 10in strip of fabric you'll be able to just lay them right alongside each other one after another after another now it takes 20 of these to make a full round plate so you'll need 20 blades so I have here some I have sewn together I think about 17 or so maybe 16 and so I just need four more to fill this in so what then you're going to do um on this one is you're going to take a white one and lay it right next to it I've already cut some out here and you're just going to sew right down one side so you're going to make that quarter inch seam and sew right down one side so let's go over to the sewing machine and do that okay so then what we want to do is we just want to um put our you know make sure we're at a/ quar of an inch and sew right down along that side piece make sure they're lined up nice and straight then we'll just go iron this open so here we are let me scoot these out of the way I'm such a piler all right now remember again I like to iron to the dark side so I lay my dark piece on the top and then I can just push with my iron and push it back like that I have another and that automatically puts that seam at the top I have a I have another one here that I've already sewn that I'm going to do the same thing too so we'll set that seam and we'll just press that back and then what I'm going to do is I'm going to take my twos that I have and and this is generally how I do a dress in anyway is I'll cut my pieces then I sew them together by twos and chain all those pieces then I sew them together by fours and then I start adding my fours together and very quickly it gets very big very fast and in just no time at all you're done so now I'm going to take this back to the sewing machine and sew this seam here and then we'll just add this piece into that Circle so now let's press this again pressing with the Dark Side Up on the top first you get and then you're just going to add this in here like this so it's just going to be perfect so I'm going to take this whole circle back over to the sewing machine and if you feel uncomfortable at all go ahead and pin this I'm just going to run this through line up my edges now we have the last seam to do and see what we have going here is hey that'll make a really cute skirt what we have going here is our dress and we're going to finish the last little seam up here I had visions of cheerleaders dancing in my head when I saw that little skirt all righty so let's press this open now sometimes in the center of these dresin you get pieces that you know they don't want to lay completely flat and um one of the things you have to remember on that is that first it's going to be covered up with a circle and if it really is driving you crazy um you can you can take your seams in just a hair but it should lay pretty flat with a little bit of Coke from your iron so now we've pressed this flat and this is how you make the table topper when it's all one round piece like this and all the seams are sewn together if you wanted to make the tree skirt you would just leave one of these seams open and just what then we would just bind all the way around it and the middle so first we're going to talk about the middle and I'll tell you how I come up with my middles I look around my house until I find the object that just suits the size of the circle I want so I've used everything from saucers to cups to a roll of duct tape that I've you know taken a few rolls off to get it the size just don't tell my husband about that but today I'm going to use this awesome cocoa cup that I have because it's I want my circle to be a little bigger so I'm just going to put it on this cardboard and I'm going to trace around my cup and then I'll cut that out just exactly on the line that I traced so let's do that really quick and I like to use the cardboards that come on the back of my um pre-cuts for um for templates you don't want to use anything that will melt because you're going to iron on this and I actually used to use margarine Lids but then I had to buy a new Iron cuz I melted that sucker to my margarine lid okay so then what you're going to do is you're going to lay that Circle in a in a whatever color fabric you decide you want for the you're going to lay that circle on there and you're going to make sure that you have about 3/4 of an inch on the outside of that um to do that and then you're going to trace that around and because this Line's going to be on the inside of your circle it doesn't really matter you know if you don't have to use like a disappearing pen or anything like that so once you have your circle drawn you need to trim that out and I'm just going to eyeball it and leave about you know 3/4 of an inch around the outside like this and then I'm going to thread my needle which uh I do much better with a needle threader I just take a one of these little um John James is my favorite because I tend to break needles I don't know what the deal is but you lay your thread across here and you push the button automatic that is the best Christmas present you can give yourself that's otherwise otherwise wi we're we're spending 20 minutes trying to find that little needle hole that we know is there because we've been threading that needle for 20 or 30 years but we can't see it anymore so I love this thing it saves me a bunch of time so then what you're going to do is you're just going to do a running Stitch which means you're just going to go in and out and in and out all the way around and it just goes around now the one one thing you do want to make sure of is that when you cut your fabric I'm only doing a single thread but make sure that thread is long enough to go all the way around your circle you want it to be one piece all right so we're almost to the end here and I can't have a knot now no there we go and then few more stitches and then what I'm going to do is I'm going to take this over to the ironing board like this and I'm going to grab my cardboard Circle that I've cut out and I'm going to set that Circle just right down there in the middle and I'm going to hold it with my fingers and then I'm just going to pull my thread and see how that gathers up maybe I should better do this over here so we can get a good overhead shot of this let's see okay so now I've got it all my stitchings in and I'm going to take this cardboard and set it right in there in the middle and then just cinch this up this will give me a perfect circle to put in my middle Isn't that cool you can do this with all sizes I've used everything from uh money washers anything you can iron on works good and then I'm going to just take a couple of quick quick stitches on here to kind of hold this so that my threads don't come out so then I can just iron with abandon just not even think about it all right so there we go clip this thread and then I'm going to leave that cardboard in there and iron it and we are just going to steam the heck out of this cuz we don't want to turn any edges under we just want to lay it on there and make sure that that gets a good flattening whoops cuz then all we have to do is tack it down around the edges so now what I'm going to do is I'm just going to kind of Bend this cardboard a little bit and slide these edges off and then bring this over here and lay that Circle there in the middle and if you're really um concerned about exactly in the middle the way to do that is to fold it in half both directions and um you know make sure that you have a just you can just line it up by the middle that way then I take a few pins and pin it around there and then I just hand Stitch it on just like you'd stitch on The Binding so now that I have this Center Circle on here all that you need to do is quilt it you can quilt it on your personal sewing machine I throw mine on the bottom of the of a project I'm working on cuz you just need a little bit of space and remember you're going to need to bind this with a bias binding because it's on a curve now we sell bias binding that's the easiest way to do it and if you want to do it yourself I've got this great red I'm going to use on mine I have a good video on how to use the bias binding tool right here which is what I do for for any of that information it'll be in the description below so we're at that time of year where we need some quick and easy projects this is one of them this makes a great little gift tabl topper mini tree skirt you know whatever you want to use it for um any time of year actually also behind me take a look this is a charm pack quilt don't forget about how easy that is we have several good videos on how to make a charm pack quilt this is just four charms great gift quick and easy also don't forget about the Tumblr ruler the Tumblr ruler uses you use a charm pack in this Tumblr ruler and these make really fun quick um table runners just put them together rows or end to end you know however however you want to do it it's fast and easy so I'd like to take a moment and wish you a very merry Christmas thank you so much for all your support we couldn't do it without you and we hope you enjoyed this tutorial from the Missouri Star Quilt Company I've got this darling little project for you this is a little tree topper no not tree topper you're going to set it right on top of your tree it's a little tree topper what

More Table Runner tutorials

See all