
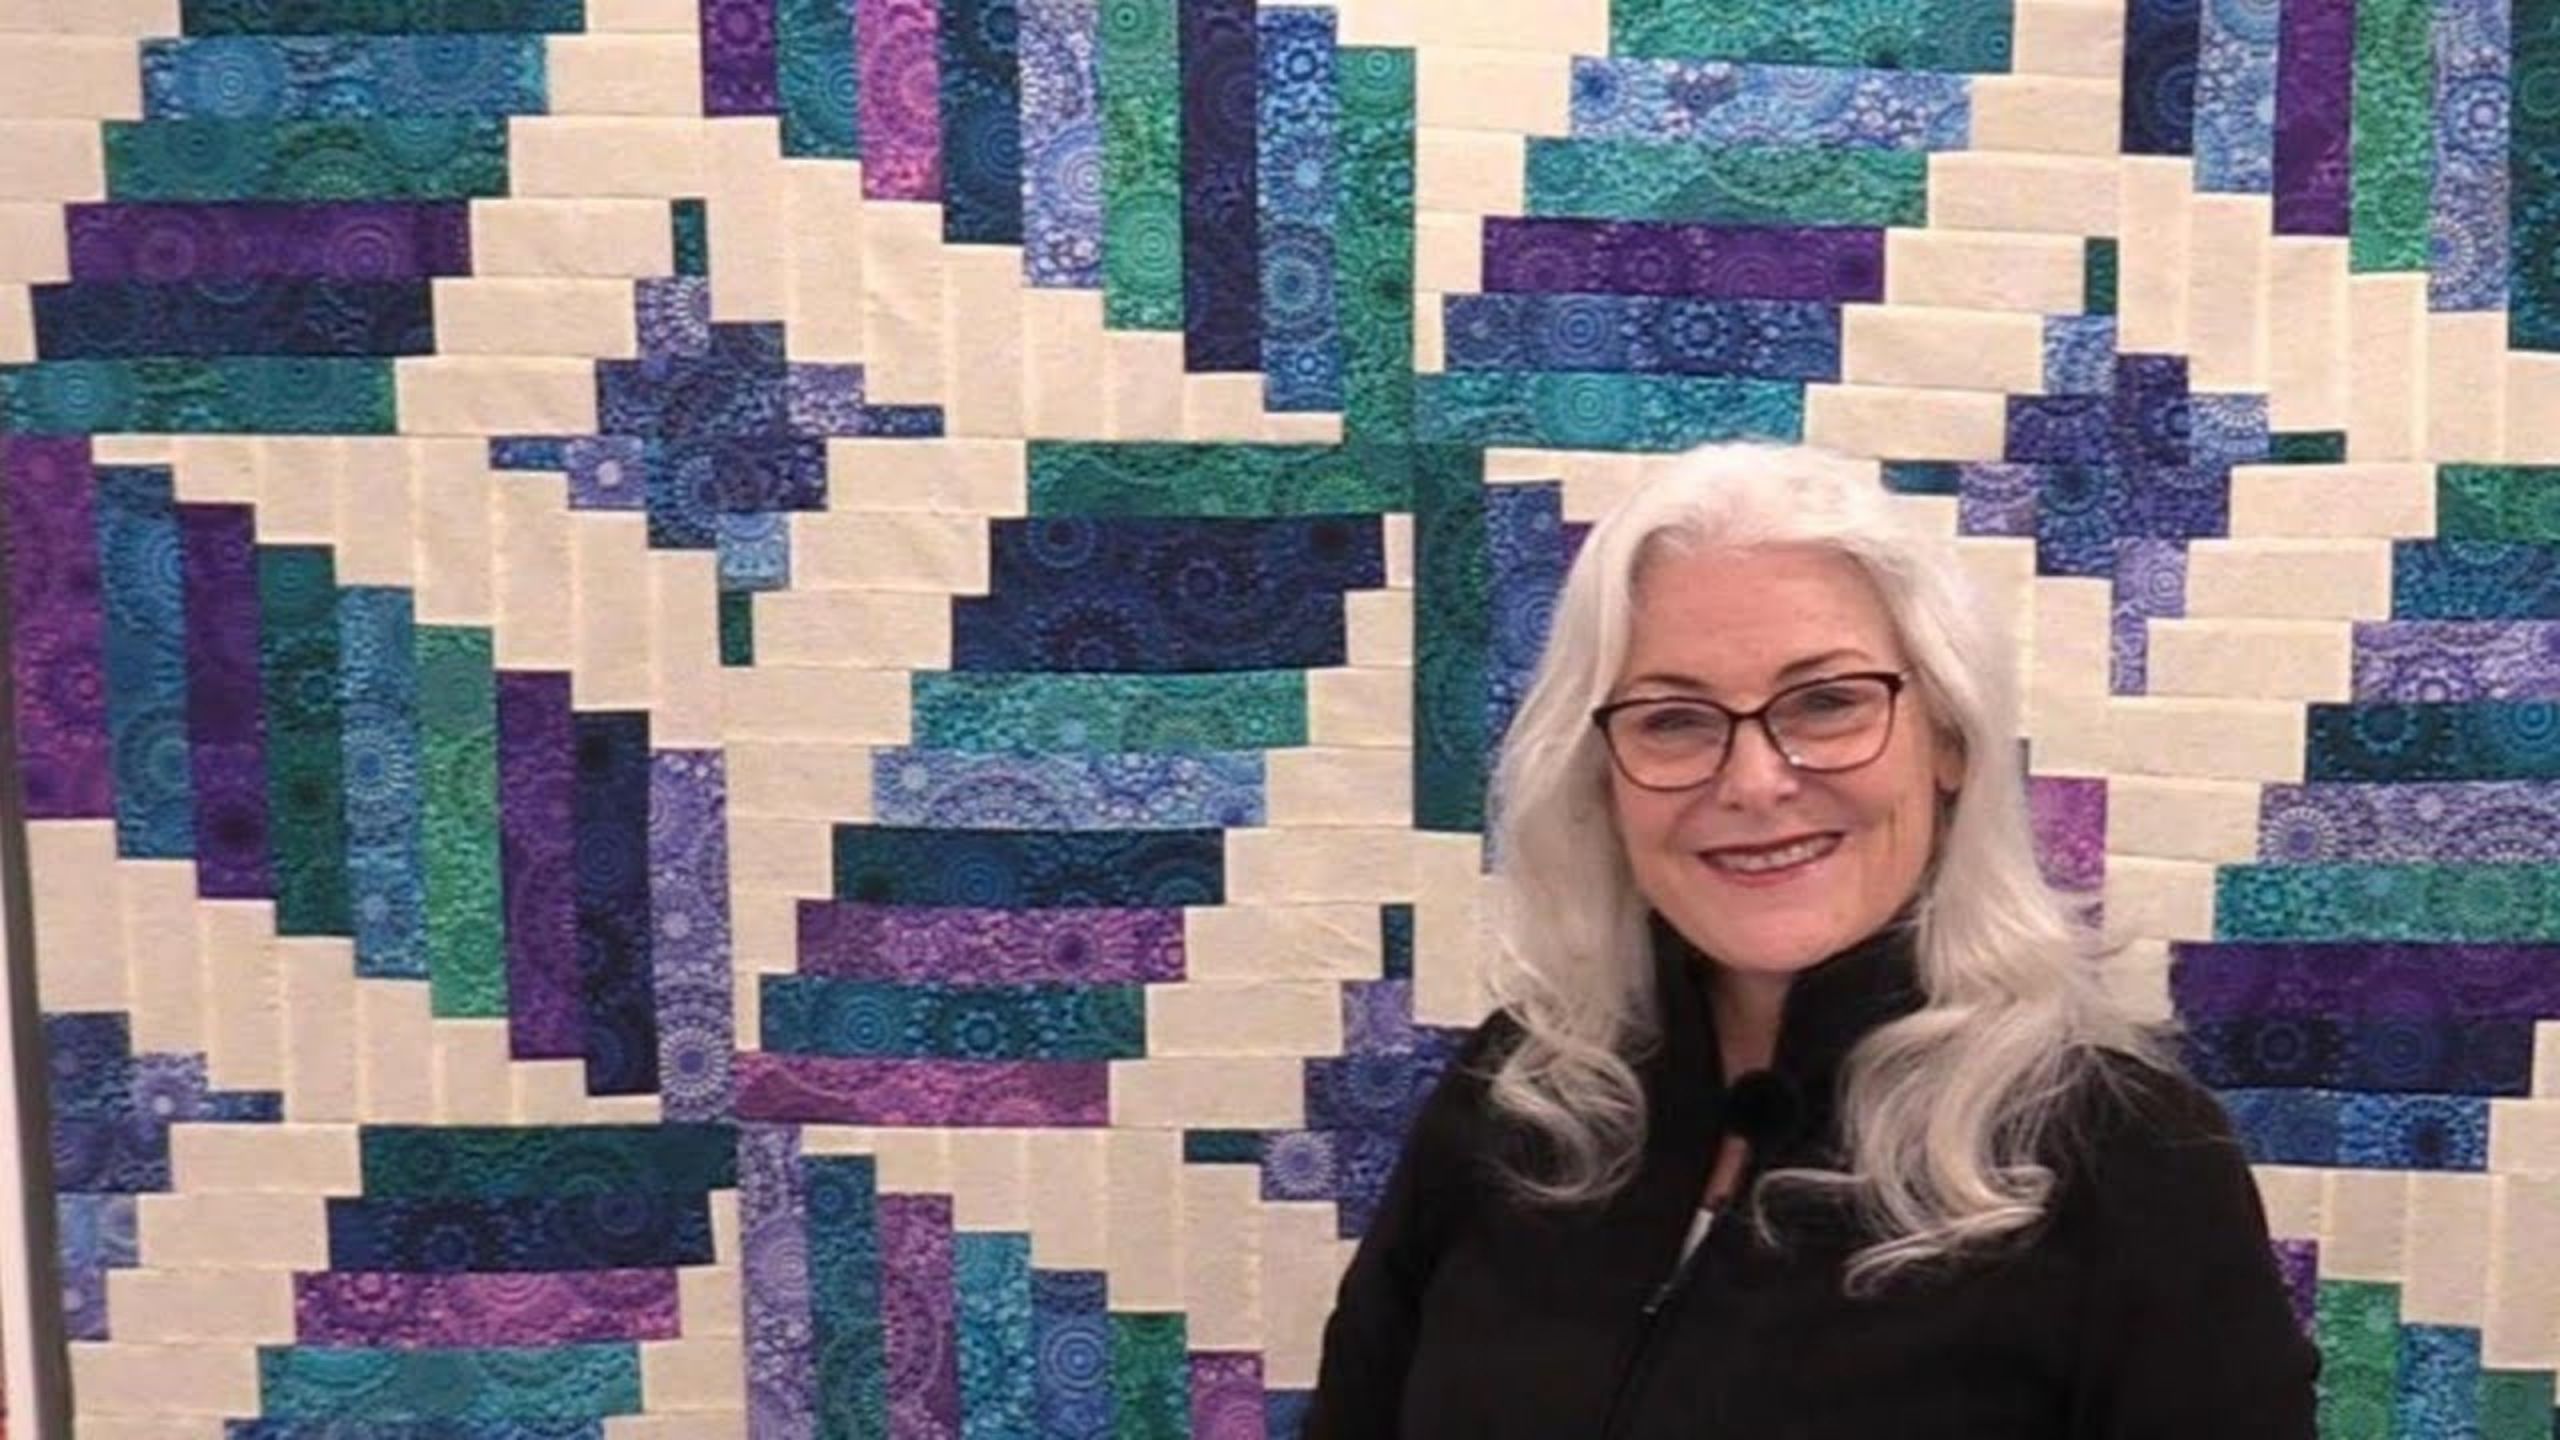
Big Pinwheel Quilt with Laura Coia from Sew Very Easy
 Laura Coia
- Jelly Roll
- Lap / Throw
- Intermediate
- Quilt size 70" × 70"
Today Laura Coia is teaching you how to use your own personal seam allowance to make this big quilt using Jelly Rolls and some background fabric!
Instructor
Laura Coia
Laura Coia is the founder and celebrity host of the very successful and inspiring SewVeryEasy YouTube channel founded in 2014. Her instructional videos have inspired thousands to start sewing, and she is the author of the book Sew Very Easy.
Shop this tutorial

Common Questions
What is covered in Big Pinwheel Quilt with Laura Coia from Sew Very Easy?
Today Laura Coia is teaching you how to use your own personal seam allowance to make this big quilt using Jelly Rolls and some background fabric!
How long is the tutorial video?
The tutorial video is 00:12:46.
Are supplies listed for this tutorial?
Yes. The tutorial page includes the supplies and materials connected to this project.
Is a transcript available?
Yes. A written transcript is available on the tutorial page.
Video Transcript
Join Laura Coia for a fun quilt made from 2 jelly rolls and 2 yards of background fabric. She'll be cutting her jelly rolls into strips of various lengths, but the end result will make it look like she fussy cut all of her pieces. There will be enough leftover 2.5" strips that you'll be able to use those for borders and binding if you wish!
Start by cutting your jelly roll strips into the follow:
144 - 2.5" x 10.5" strips
32 - 2.5" x 3.5" strips
32 - 2.5" x 2.5" squares
32 - 2.5" x 1.5" strips
From your 2 yards of background fabric, cut it all into 2.5" strips and then cut the following:
128 - 2.5" x 5.5" strips
32 - 2.5" x 4.5" strips
32 - 2.5" x 3.5" strips
32 - 2.5" x 2.5" squares
32 - 2.5" x 1.5" squares
First start by taking 16 of your 10.5" jelly roll strips, and add two of the 4.5" background strips to them, one at each end.
For the rest of the 10.5" jelly roll strips, you're going to add the 128 - 5.5" long background strips.
Laura's tip for making your background strips match your jelly roll strips: Mark that width on your ruler with painter's tape and cut the background strips accordingly so the seams will match nicely.
Now take the 128 strips and divide it into four piles of 32. Next you'll sew strips as follows:
Pile 1: 3.5" background strip to dark end of sewn strip.
Pile 2: 2.5" background square to dark end of sewn strips, 1.5" jelly roll strip to light end of sewn strip.
Pile 3: 1.5" background strip to dark end of sewn strips, 2.5" jelly roll square to light end of sewn strip.
Pile 4: 3.5" jelly roll strip to light end of sewn strip
You'll see that the resulting strips are all the same length but, when placed next to each other, create sort of an angle shape.
Now it's time to sew the strips together, creating 4 strips sets (1 from each pile). If your jelly roll strips were a bit wider than 2.5" at the start, then now is the time to adjust your seam width so the strips end up at 2" finished size. (Laura will be using a generous quarter inch seam).
Laura's tip: Fold the fabric in half and mark the center. Then measure 1" to either side of the center line. That becomes your seam allowance. You can mark the fabric accordingly, or mark your machine so you can always remember where to sew.
Once you complete your 4 strip sets, divide them into two piles, flipping the second pile by 180 degrees. Add the 16 sets you created at the beginning in between and you can see how your blocks are going to come together!
When you're done stitching, you'll have 16 nice big blocks to assemble into your quilt! Be sure to trim those down - you can either trim them to 18.5" square or 18" square.
Now lay your squares out in a 4x4 grid, lining up the smaller squares at the center, giving yourself a nice secondary pattern! The best part is that none of the seams will match so you don't have to worry about them.
Start by cutting your jelly roll strips into the follow:
144 - 2.5" x 10.5" strips
32 - 2.5" x 3.5" strips
32 - 2.5" x 2.5" squares
32 - 2.5" x 1.5" strips
From your 2 yards of background fabric, cut it all into 2.5" strips and then cut the following:
128 - 2.5" x 5.5" strips
32 - 2.5" x 4.5" strips
32 - 2.5" x 3.5" strips
32 - 2.5" x 2.5" squares
32 - 2.5" x 1.5" squares
First start by taking 16 of your 10.5" jelly roll strips, and add two of the 4.5" background strips to them, one at each end.
For the rest of the 10.5" jelly roll strips, you're going to add the 128 - 5.5" long background strips.
Laura's tip for making your background strips match your jelly roll strips: Mark that width on your ruler with painter's tape and cut the background strips accordingly so the seams will match nicely.
Now take the 128 strips and divide it into four piles of 32. Next you'll sew strips as follows:
Pile 1: 3.5" background strip to dark end of sewn strip.
Pile 2: 2.5" background square to dark end of sewn strips, 1.5" jelly roll strip to light end of sewn strip.
Pile 3: 1.5" background strip to dark end of sewn strips, 2.5" jelly roll square to light end of sewn strip.
Pile 4: 3.5" jelly roll strip to light end of sewn strip
You'll see that the resulting strips are all the same length but, when placed next to each other, create sort of an angle shape.
Now it's time to sew the strips together, creating 4 strips sets (1 from each pile). If your jelly roll strips were a bit wider than 2.5" at the start, then now is the time to adjust your seam width so the strips end up at 2" finished size. (Laura will be using a generous quarter inch seam).
Laura's tip: Fold the fabric in half and mark the center. Then measure 1" to either side of the center line. That becomes your seam allowance. You can mark the fabric accordingly, or mark your machine so you can always remember where to sew.
Once you complete your 4 strip sets, divide them into two piles, flipping the second pile by 180 degrees. Add the 16 sets you created at the beginning in between and you can see how your blocks are going to come together!
When you're done stitching, you'll have 16 nice big blocks to assemble into your quilt! Be sure to trim those down - you can either trim them to 18.5" square or 18" square.
Now lay your squares out in a 4x4 grid, lining up the smaller squares at the center, giving yourself a nice secondary pattern! The best part is that none of the seams will match so you don't have to worry about them.


