Celebration Wall Hanging Kit Tutorial
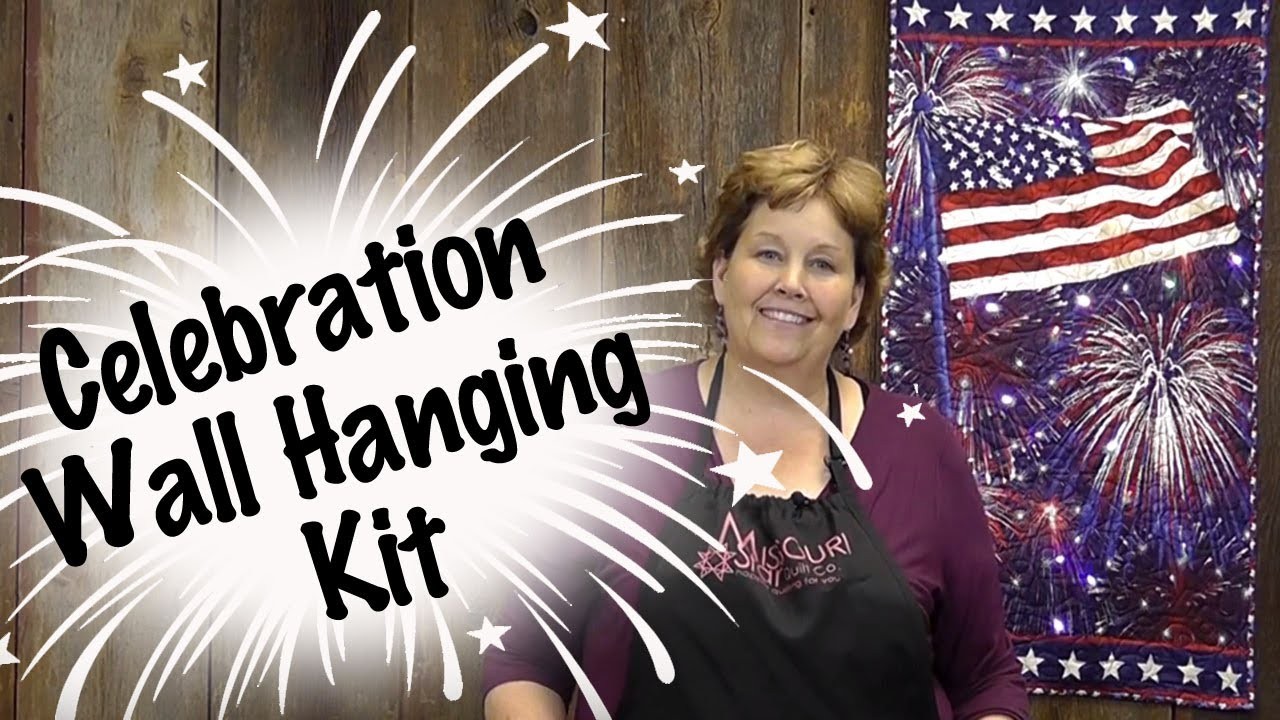
Jenny Doan shows us how to make a sparkling, patriotic wall hanging from the Stonehenge Celebration Wall Hanging Kit with Colored Lights by Deborah Edwards. Other lighted wall hanging kits are also available!

Instructor
Jenny Doan
Jenny Doan is an American quilter, author, and YouTube personality. Jenny started Missouri Star Quilt Company in 2008 and today it is the largest quilting supply vendor in the United States.
Common Questions
What is covered in Celebration Wall Hanging Kit Tutorial?
Jenny Doan shows us how to make a sparkling, patriotic wall hanging from the Stonehenge Celebration Wall Hanging Kit with Colored Lights by Deborah Edwards. Other lighted wall hanging kits are also available!
How long is the tutorial video?
The tutorial video is 00:04:51.
Is a transcript available?
Yes. A written transcript is available on the tutorial page.
Video Transcript
Hi, I’m Jenny from the MSQC. You guys might remember awhile ago I did a tutorial on this darling light up Christmas tree with all the lights and the panels, well Deb Edwards from Northcott has been at it again. She has several new panels and take a look at this darling one for the 4th of July. How cool is that? The lights are colored, they change colors and these are so simple. She also has a wreath one, a new Christmas one--if you can see that. They come with a panel like this and you get a backing and you get a set of lights. It all comes in a kit so it’s just like a really cool thing. So I wanted to show you how easy this is because 4th of July is coming. And this is a really fun thing to have up in your house or apartment. I mean it just really adds the spirit to the holiday.
So when you get your kit, it’s going to come with a panel like this, a front panel. It’s going to come with some backing and it’s also going to come with a light kit. So the first thing you’re going to want to do is quilt this, quilt the whole thing. You can do it on your home sewing machine. You can have it quilted. I sent mine out to have it quilted and you can see right here, here’s this one. It’s just like this one. It comes with this panel and this backing fabric which is just beautiful. And I had it quilted, and I had them just do an overall star pattern on it and then bound. And then you get to add the lights to it. Now when we made this Christmas one, we put a pocket on the side and we discovered that that kind of makes it hang a little wonky. So I just wanted to remind you that when you add a little pocket on the bottom here to put your, your light kit battery pack in, you will want to put it in the middle and that will help it hang straighter. And I just actually, for our little panel right here I put a little, took a charm square and I just sewed right across the top. And you do that after it’s quilted or it will be quilted into it and you won’t be able to get into your pocket which could be a problem.
So when you look at this panel that’s all quilted and done and ready to add the lights to, you see they have little star things all over. And these are places where you can put the lights if you choose. And so what I did, there’s about 40 of them, and you’ll only get 20 lights, so I just went along and remembering that your, you know that you only have about, oh only about 6 inches or 8 inches in between lights, you want to be, you know, not get them too far apart. So I just went along and I put little black dot in the center of the little star bursts that I wanted to add my lights to. And I did that first and so I started here with this and I would just come over here like this and put a dot because what I’m going to do then is I’m going to take a tiny pair of scissors or a seam ripper worked really well for me. And I’m just going to come from the top and I’m just going to stick that seam ripper right in the hole and you want to be on the top and you have to be really careful when you do this because you don’t to slide far but you’re just going to make a little tiny cut one way and a little tiny cut the other way. And you’re going to make an X. And then you’re going to be able to just stick your light right through the back like this. Unless your hole is not quite big enough and that’s actually better than too big. So let’s make that a little bit bigger, real carefully. And then you’re going to put your, stick your light right through there. And you’re going to do that to all the holes and then when you’re all done this thing will all have lights and it will light up just like this one. Honestly when I lit this up, I just wanted to sing the Star Spangled Banner, it was so, so fun.
Now all these other, these Christmas panels remember, you can get it in several colors. You can get them in red and green and blue. And you’ve got to watch this gal because she’s coming out with new panels like this all the time. So it just makes it really fun and a lot of fun celebration. We have a lot of fun at our house on 4th of July. It’s a huge family holiday. And we love fireworks. I’ll never forget, one time Alan was on a swing, swinging and he had his bottle rockets in a, in a pipe and he had like a whole packet of them in there and he lit them on fire and he went, he went to turn them and he fell backwards on swing and they were all crazily going all around him. He thought he was in a war zone. I’m amazed sometimes that my children even lived to be adults but they did and they’re safe. But they’ve done crazy things with fireworks and this is real safe way to celebrate the holiday. And we hope you enjoyed this tutorial from the MSQC.
So when you get your kit, it’s going to come with a panel like this, a front panel. It’s going to come with some backing and it’s also going to come with a light kit. So the first thing you’re going to want to do is quilt this, quilt the whole thing. You can do it on your home sewing machine. You can have it quilted. I sent mine out to have it quilted and you can see right here, here’s this one. It’s just like this one. It comes with this panel and this backing fabric which is just beautiful. And I had it quilted, and I had them just do an overall star pattern on it and then bound. And then you get to add the lights to it. Now when we made this Christmas one, we put a pocket on the side and we discovered that that kind of makes it hang a little wonky. So I just wanted to remind you that when you add a little pocket on the bottom here to put your, your light kit battery pack in, you will want to put it in the middle and that will help it hang straighter. And I just actually, for our little panel right here I put a little, took a charm square and I just sewed right across the top. And you do that after it’s quilted or it will be quilted into it and you won’t be able to get into your pocket which could be a problem.
So when you look at this panel that’s all quilted and done and ready to add the lights to, you see they have little star things all over. And these are places where you can put the lights if you choose. And so what I did, there’s about 40 of them, and you’ll only get 20 lights, so I just went along and remembering that your, you know that you only have about, oh only about 6 inches or 8 inches in between lights, you want to be, you know, not get them too far apart. So I just went along and I put little black dot in the center of the little star bursts that I wanted to add my lights to. And I did that first and so I started here with this and I would just come over here like this and put a dot because what I’m going to do then is I’m going to take a tiny pair of scissors or a seam ripper worked really well for me. And I’m just going to come from the top and I’m just going to stick that seam ripper right in the hole and you want to be on the top and you have to be really careful when you do this because you don’t to slide far but you’re just going to make a little tiny cut one way and a little tiny cut the other way. And you’re going to make an X. And then you’re going to be able to just stick your light right through the back like this. Unless your hole is not quite big enough and that’s actually better than too big. So let’s make that a little bit bigger, real carefully. And then you’re going to put your, stick your light right through there. And you’re going to do that to all the holes and then when you’re all done this thing will all have lights and it will light up just like this one. Honestly when I lit this up, I just wanted to sing the Star Spangled Banner, it was so, so fun.
Now all these other, these Christmas panels remember, you can get it in several colors. You can get them in red and green and blue. And you’ve got to watch this gal because she’s coming out with new panels like this all the time. So it just makes it really fun and a lot of fun celebration. We have a lot of fun at our house on 4th of July. It’s a huge family holiday. And we love fireworks. I’ll never forget, one time Alan was on a swing, swinging and he had his bottle rockets in a, in a pipe and he had like a whole packet of them in there and he lit them on fire and he went, he went to turn them and he fell backwards on swing and they were all crazily going all around him. He thought he was in a war zone. I’m amazed sometimes that my children even lived to be adults but they did and they’re safe. But they’ve done crazy things with fireworks and this is real safe way to celebrate the holiday. And we hope you enjoyed this tutorial from the MSQC.