

Dresden Flower Pot Tutorial
Jenny Doan shows us how to make a cute Dresden Flower Pot wall hanging using charm packs (5 inch pre cut fabric) and the Layer Cake Dresden Template.

Instructor
Jenny Doan
Jenny Doan is an American quilter, author, and YouTube personality. Jenny started Missouri Star Quilt Company in 2008 and today it is the largest quilting supply vendor in the United States.
Shop this tutorial
 Missouri Star Large Tumbler Template for 10" Squares$16.95Shop →
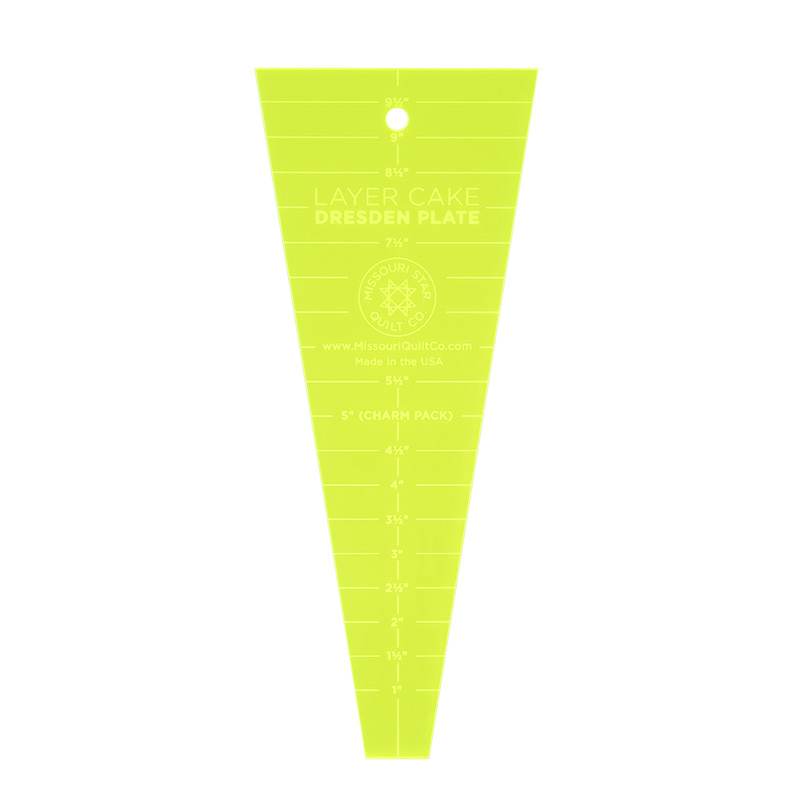 Missouri Star Large Dresden Plate Template for 10" Squares$9.95Shop →
 Olfa Splash Aqua 45mm Rotary Cutter$18.75Shop →
 Olfa Splash 24" x 36" Cutting Mat Navy$68.95Shop →
 Missouri Star 5" x 15" Ruler$15.95Shop →
 Exclusive Missouri Star Jenny TG1600 ProPlus Oliso Smart Iron$199.99Shop →
 Pellon Designer's Lite Fusible Midweight White Interfacing$4.25Shop →
Common Questions
What is covered in Dresden Flower Pot Tutorial?
Jenny Doan shows us how to make a cute Dresden Flower Pot wall hanging using charm packs (5 inch pre cut fabric) and the Layer Cake Dresden Template.
How long is the tutorial video?
The tutorial video is 00:22:51.
Are supplies listed for this tutorial?
Yes. The tutorial page includes the supplies and materials connected to this project.
Is a transcript available?
Yes. A written transcript is available on the tutorial page.
Video Transcript
Hi, I’m Jenny from the Missouri Star Quilt Company. Every time I do a trunk show, I show this
wall hanging. I’ve fallen in love with the Dresden, and I show a lot of different Dresden things,
and this is one of them. And one of the reasons I did this is because I’ve used all different parts
of the Dresden from the large tip to the middle to, to the smallest part on the Dresden. And it just
makes a really fun wall hanging. And so I wanted to do a tutorial for that because everybody
keeps asking about it. And so, here it is. The other thing that’s going to be fun about this is that,
this is really into... like a window into how my brain works, so you’ll get to see how I figure things
out.
So what we’re going to do, need for this, this is made with one charm pack. And then we’re
going to have some yardage so we’re going to have about a quarter of a yard for our pot, about
a quarter of a yard for our circles, and about a quarter of a yard for our stems and leaves. And
this is probably going to be more than you need. It’s, it’s kind of a scrappy thing, but I do, I do
know that you are going to need one charm pack. So, we’re going to do that. I’m going to make
it out of this bright color. This is Windham Fabrics. It’s “Basic Brights”, so it’s always available
and it’s just really this fun, happy, bright charm pack. Lots of fun in there.
So, the first thing I’m going to do is, I’m going to cut some of my charms in half. And the reason
I’m going to do this is because I am going to make this edge right here. When I sew these
pieces together this is going to tell me how tall my background piece needs to be. And then I’m
going to sew this picket fence together right here. And that’s going to tell me how wide my
background needs to be. So I start with my pieces, and you can see right here, I have my picket
fence and, let me show you how easy it is to do this.
So we’re just going to take one of these charms right here and we’re going to cut it in half. Just
right in half. So now you’re going to take your 2 1⁄2 by 5 inch strip and you’re going to fold it in
half, like this, and we’re going to sew straight across the top. Just that simple. So let’s come
over here and we’ll do that.
I’m going to go a quarter of an inch in, and I’m going to backstitch this a little bitnot totally
necessary, but I don’t really want it to come out. So then I’m going to trim off these threads, right
here, and I’m going to trim this point a little bit, just to take some of bulk out. And when I flip this,
it now becomes a picket, it has a little picket on the top. We can iron that down. So we’re just
going to press this down and this is going to give you that cute picket look. And you’re going to
cut 12 of those and sew them together.
So once you get your 12 pieces sewn together, that’s going to give you the width for your
background fabric. And then I went ahead and sewed 8 half charms together and that gives me
the height of my background fabric. And so, so that’s just a good thing to go on. However tall
you want it, you’re going to sew that many halves together. You know, and you can decide. This
one is a little bit shorter, but this... you really can make this your own, and so, you know, don’t
be afraid if you decide you only want, you know, eight of these. You know, whatever you want to
do, you can do. And so, I’m just telling you how I think and how I got the measurements for this
one. So, I put 12 of these, these picket fences together right here and I’m going to pin those on
and so just to hold it on there.
So when I go to sew these down, you can stitch these just like you’d stitch binding so, you
know, it would just work that easy. So then this piece is going to come over here on the side,
like this, and I’m going to make sure it matches up and it’s going to match up just perfectly. So, I
have two of these sides right here. One more, where is it? Oop, here it is, right here. So here’s
my other side, like that, and we’re going to sew our sides on, and then we’re going to sew, put in
a piece across the top right here, like that. So that’s going to give us our frame to work with and
then we just have to create our pot and flowers.
Now, the flowers are really fun. So, with my flowers, I made three different sizes. I made this big
size, I made the five inch size, and I made the little tiny two inch size. So, let’s start with the
small one and show you how to do that. Now, remember, you’re just making Dresden, so any
way you want to do them, I mean, they work the same. They’re, you don’t have to be worried or
confused, they all, they all work the same, you just cut them and you’re good to go.
So let’s start with the baby flower, and, what I did with that was I took three, I wanted to make
them blues and yellows, so, I took three of those, like this. Three charms only, and I folded them
in half, like this. Then, I took my Dresden tool, and I laid it right on the edge, just like this. So you
can see right here, if I cover the whole thing, that’s a 2 1⁄2 inch Dresden blade, and I’m going to
cut, I’m going to go ahead and cut these, like this. Don’t want them to move, like that.
And then I’m going to cut another one, I’ll turn my blade up this way, keeping it on the 2 1⁄2 inch
line, and then bring my blade back around, like this. Let me make sure. That slid a little bit, so I
can fix that right here, right now. Take that corner out, and then we’re going to cut these in half.
So, these are tiny little Dresdens and, you can use your ruler, it’s probably better than, than
guessing, but the fun thing about a Dresden is that they’re all done exactly the same way and
they look like you just worked so hard when, really, all you did was, just like the picket fence, we
take the white end, we fold it right sides together, and then we’re just going to sew this straight
across. So, I’m going to sew a few of these so you can see what happens.
So, I’ve got these little tiny ones here. I line them up right sides together, fold them, sew a
quarter of an inch, then I’ve got another one in there, and I’m going to just slide the next one in,
and one more. And then I’m going to cut these apart, and you’re going to do this to all of these.
You need 18 of these to make the little, tiny flower. So here’s my little, my little guys, and you’ll
see, just going to clip out that little front part right there and flip, and there’s your little tiny
Dresden. How adorable is that? So you’re going to do that, you’re going to do that 18 times and
with three charms you’ll get enough to do, you’ll get plenty of those. So, here’s my little flower,
right here, and I’m just going to stick him on here for a minute, and then we’re going to talk
about the medium flower.
The medium flower is the easiest one to me because it’s... you use two squares, and we’re
going to pull out an orange and... how about this fun polka dot one? And you’re going to use the
Dresden up to the five inch mark, like this, and we’re going to cut our blade. I’m going to go
over, over to the edge here, cut our blade this way and that way. And then we’re going to flip
this and cut the next one, just like this. So you’re going to cut 10 charm packs up, which is going
to give you 20 blades. You’ll need 20 blades for this big flower. So then, of course, we’re just
doing the same thing. We’re going to go over and we are going to fold these and sew these and
I’ll do that to a couple of these.
Once I realized I could make a Dresden, you know, the Dresden was really my unicorn, I just
really, gosh, you know, they looked so difficult to me. And I just didn’t know I could make one.
And once I realized I could, I started seeing Dresdens everywhere. You know, they were, they
were in flower pots, on Christmas things, I made a Dresden turkey, I did all kinds of things with it
because I knew I could do it and I just, oh, I just fell in love with it. So, this wall hanging came
from, from that excitement of realizing that I really could make a Dresden.
So then we’re going to iron this down and I’ll iron this one too, and then, basically, you just lay
these right sides together and you do a quarter inch seam all the way down on the side, and
when you get 20 of those together, you’re going to have your, your big flower, like this. This is
going to be your big pieces. Now, sometimes these don’t lay exactly flat. And, and if you just
steam them a little bit, they’ll lay down, but if you find you have, like, really big gaps or
something like that, you can just take in your seams a little bit and that will work. You know, you
just want it to be flat because you’re going to cover all this up with a circle.
So then we’ve got the big flower. Now, this big flower, I love the look of it, this. It’s a little bit
more tricky, because, what we’re going to do on it is, we are going to use the whole wide part of
the Dresden up here. So, I’m going to kind of center this on here and I’m going to put a little
mark like this, and I’m going to mark on either side because if we use this wide end down here
as the bottom, our flower is going to be like this huge and we want it to be small, tiny. So then
we’re going to slide our Dresden down here like this, keeping it in the middle and we’re going to
mark, mark our little, our little point, and we’re going to draw a line from the wide side to the
small side, like this.
And then we’re just going to cut that off. You don’t actually have to draw the line if you just want
to rotary cut it as you match up your ruler. Sometimes it’s nice to see that drawn line. So this is
going to be the blade for our big flower. So then, what we’re going to do, again, fold it right sides
together, sew straight across the top, and you can layer those in probably four. I would say you
don’t want to do too much more than four, it gets a little hard to cut.
So then here is this big guy, and we’re going to flip him and iron him. And you can see that we
get a petal that looks like this that is going to fit right in there. And just, I mean, it just comes out
with this darling, little flower.
So now let’s talk about our pot for a minute. I’ve made our pot using the, the big tumbler
template. So, I used this template and cut out the pot. One of the things that I did was I ironed
under all the edges a quarter of an inch. And, remember, with this kind of stuff there’s several
ways to applique: you can do some ironon on this and just press it down, you can machine
stitch raw applique, but I’m to use this as a hand project, so I’m going to sew along this edge
just like I would normally applique a Dresden blade onto the front of a, of a square or anything.
I’m just going to sew them on by hand and I’ll show you how to do that a little bit later because
that’s a really easy stitch. I call it a ladder stitch. It’s a binding stitch.
So now I have my pot and I have my three flowers and we need a stem. So what I’ve done is
I’ve cut 2 1⁄2 inches of, of a green for my stem, and I’m just going to fold this in half and iron it.
This is a really, really cool way to do stems because they just go together, it just lays down so
nice and it looks like you appliqued and spent a lot of time on it. So what I’m going to do now is,
I’m going to measure out a stem for this flower and I’m just kind of going to cut that off, and I’m
going to measure a stem for this flower and cut that off, and I’m going to measure a stem for this
flower and cut that one off. You might want to move that one up there just a little bit. It’s always
a good idea to give you some, a little bit of extra room. Now, with the rest of this piece, I”m
going to make some Dresden leaves. Now, I don’t have Dresden leaves on here, but I’m going
to make Dresden leaves out of this because I can because we can do Dresdens out of
everything.
Alright, so I’m going to lay this down here, like this, and I think I might want three leaves, so I’m
just kind of folding up my piece and I’m going to put it on the, well, you can put on any size you
want. I’m going to use the four, I think, and just cut out three little blades. I’m going to have to
turn this around and there we go, cut this other side. It doesn’t always work for me to cut going
the other direction. Make sure this top piece is flat, and then we’re just going to sew this across,
like this, and make our leaves, and it’s just exactly the same thing. One thing I do different on
the leaf is when I, because this is going to be a stand alone leaf, when I fold it like this, I’m just
going to fold it, and then I’m going to press these sides under a quarter of an inch. So they’re
just on there ready to go. Just like this, on both sides. And then this makes a cute leaf, and you
can just set it up under that stem.
Now let me show you how I do this stem, because this is a really, really fun way to do stems. I’m
going to, going to move some of these things off of here, I’m going to draw a line where I want
my stem to go, alright, I’m going to draw a line right here, this is where I want my short stem to
go, I’m going to draw a line right here, this is where I want my long stem to go, and I’m going to
draw a line over here, because this is where I want this stem to go. And so now I’m going to
take this, this backing right here, and I’m going to sew my stems on. And the stem, this is a
really fun way to, anytime you need to applique any kind of a stem, this is a really cool way to do
it.
So what we’re going to do is, we’re going to lay our stem piece right on the line, just on, like
that. And we’re going to sew over here a quarter of an inch, okay? So, let’s do that, real quick.
When you need a stem for anything, this is a great way to do it. Alright, so a quarter of an inch.
And I’m going to go ahead and put on all three of these stems.
So now that I have these stems all sewn on here, we take it to the ironing board and we’re just
going to fold this over, just like that, and it gives you one side that is completely finished and
sewed on, and all you have to do is either topstitch or hand sew down the other side, and it’s a
really easy way to put on a stem, and we don’t have to worry about the top or the bottom
because the pot is going to cover the bottom. So, let’s add our pot now. We’ll put that right on
there and I’ll pin it on, just like this. We’ve got our sides that got all messed up because I
whipped it apart, and our top, we’ve got our three big flowers: here’s our, our little, tiny one,
here’s our big one, and then here’s the giant, big one up here. And now we need to do the
circles for the center. That’s really all that’s left. We’ve even done our leaf. Where’s our leaf?
Here it is. We’ve done our leaf, and you can do two or three of those, I like to kind of set them in
at an angle right there, and now we have to do the center for our circles.
So, to make a circle for the middle of your flower, you’re going to look around your house, and
you’re going to find something that is going to be the size you want. Now, I like my circles to be
different sizes, so I’ll be making different circles, but this is a way to make a circle that’s kind of
foolproof; that’s kind of fun to do.
You’re going to trace a circle around whatever object you have, whatever size, and you’re going
to just sew right on this circle line and just enclose a circle. You’re going to have two pieces,
right sides together, and we’re going to enclose that circle. So, let’s just line these up, and we’re
just going to follow this around in a circle here. So, you’re just going to go around this whole
entire circle and, you want to be careful to stay right on that line you’ve drawn, and just go all
the way around and we’re almost there. Alright, there we are.
Now what we’re going to do is trim this. So, here’s my scissors, and I’m going to trim around it,
like this, just leaving about a quarter of an inch, just like this. And then I’m going to pull these
apart, like this, and the one I want to be the back, I’m just going to cut a little clip in, like this, just
make a little V, and then I’m going to turn it right from that hole. Push the whole circle through.
And I’m going to take my finger and I’m gonna run around the whole edge, like this, so that it
makes a nice, flat circle.
And then I’m going to come over here and press it. It should have a nice, roundy circle. If you
stayed on that line, it will make a nice, round circle, you won’t have any edges to turn under, and
it will just look really cute in the middle of your flower. So, if I did it on that flower, look how cute
that would be. I mean, it’s just big and fat. It’s cute on this one also, and it’s even cute on this
one. So, this you could use the same size, but I think the different sizes are fun. You know, it
just gives it a little different dimension. I have different sized circles on here, and you can see
how the circle completely changes the look of the flower.
So, the last thing you need to do is, you need to attach everything. So, I’m going to show you
that good ladder stitch that I like to use. And, and it’s just, it’s just really easy. Honestly, if you
can hem pants, you can do this. It just goes really well. So, I’m lefthanded and so I’m going to
have to start from this side. And what I’m going to do is, I’m going to line up my little picket
fence, right along the edge of here, and this is the same stitch that you’re going to use on
everything. So, let me get this, get this stuff up here. I’ve just knocked everything off, but it goes
back pretty easy. So, I’m going to come through from the back, through the fold, right like that.
So, I’m through that fold, I’m going to go right back down where I came out, and I’m going to
come up about a quarter of an inch and come right back out. I’m just going to go along and do
this, go straight down and come up about a quarter of an inch. They don’t have to be tiny or tight
together, because all we’re going to do is quilt over the top of these so we’re just coming out the
fold, going straight down. Here’s some renegade threads there. Coming out this fold, going
straight down, and coming down.
Now, if you want to, you could machine stitch all these. You could do a blanket stitch, you could,
you know, do a straight stitch across here, you could do all kinds of things. I kind of like to have
some handwork to take with me in the car or to sit and do with my husband when he’s watching
TV at night, and so I really like this kind of handwork because it doesn’t have to be careful or
perfect, It just has to hold it down, because I am going to literally quilt from one side of this to
the other. Take a look at this one. You can see it’s a small stipple, and I just quilted straight
across the sides and even though I’ve, I’ve taken the time to sew these down by hand, I haven’t
had to take tiny, little stitches or, you know, do anything that, you know, is hugely heroic in
attaching this stuff down.
So, I hope you enjoy making one of these Dresden flower wall hangings, and I hope you
enjoyed this tutorial from the MSQC.
wall hanging. I’ve fallen in love with the Dresden, and I show a lot of different Dresden things,
and this is one of them. And one of the reasons I did this is because I’ve used all different parts
of the Dresden from the large tip to the middle to, to the smallest part on the Dresden. And it just
makes a really fun wall hanging. And so I wanted to do a tutorial for that because everybody
keeps asking about it. And so, here it is. The other thing that’s going to be fun about this is that,
this is really into... like a window into how my brain works, so you’ll get to see how I figure things
out.
So what we’re going to do, need for this, this is made with one charm pack. And then we’re
going to have some yardage so we’re going to have about a quarter of a yard for our pot, about
a quarter of a yard for our circles, and about a quarter of a yard for our stems and leaves. And
this is probably going to be more than you need. It’s, it’s kind of a scrappy thing, but I do, I do
know that you are going to need one charm pack. So, we’re going to do that. I’m going to make
it out of this bright color. This is Windham Fabrics. It’s “Basic Brights”, so it’s always available
and it’s just really this fun, happy, bright charm pack. Lots of fun in there.
So, the first thing I’m going to do is, I’m going to cut some of my charms in half. And the reason
I’m going to do this is because I am going to make this edge right here. When I sew these
pieces together this is going to tell me how tall my background piece needs to be. And then I’m
going to sew this picket fence together right here. And that’s going to tell me how wide my
background needs to be. So I start with my pieces, and you can see right here, I have my picket
fence and, let me show you how easy it is to do this.
So we’re just going to take one of these charms right here and we’re going to cut it in half. Just
right in half. So now you’re going to take your 2 1⁄2 by 5 inch strip and you’re going to fold it in
half, like this, and we’re going to sew straight across the top. Just that simple. So let’s come
over here and we’ll do that.
I’m going to go a quarter of an inch in, and I’m going to backstitch this a little bitnot totally
necessary, but I don’t really want it to come out. So then I’m going to trim off these threads, right
here, and I’m going to trim this point a little bit, just to take some of bulk out. And when I flip this,
it now becomes a picket, it has a little picket on the top. We can iron that down. So we’re just
going to press this down and this is going to give you that cute picket look. And you’re going to
cut 12 of those and sew them together.
So once you get your 12 pieces sewn together, that’s going to give you the width for your
background fabric. And then I went ahead and sewed 8 half charms together and that gives me
the height of my background fabric. And so, so that’s just a good thing to go on. However tall
you want it, you’re going to sew that many halves together. You know, and you can decide. This
one is a little bit shorter, but this... you really can make this your own, and so, you know, don’t
be afraid if you decide you only want, you know, eight of these. You know, whatever you want to
do, you can do. And so, I’m just telling you how I think and how I got the measurements for this
one. So, I put 12 of these, these picket fences together right here and I’m going to pin those on
and so just to hold it on there.
So when I go to sew these down, you can stitch these just like you’d stitch binding so, you
know, it would just work that easy. So then this piece is going to come over here on the side,
like this, and I’m going to make sure it matches up and it’s going to match up just perfectly. So, I
have two of these sides right here. One more, where is it? Oop, here it is, right here. So here’s
my other side, like that, and we’re going to sew our sides on, and then we’re going to sew, put in
a piece across the top right here, like that. So that’s going to give us our frame to work with and
then we just have to create our pot and flowers.
Now, the flowers are really fun. So, with my flowers, I made three different sizes. I made this big
size, I made the five inch size, and I made the little tiny two inch size. So, let’s start with the
small one and show you how to do that. Now, remember, you’re just making Dresden, so any
way you want to do them, I mean, they work the same. They’re, you don’t have to be worried or
confused, they all, they all work the same, you just cut them and you’re good to go.
So let’s start with the baby flower, and, what I did with that was I took three, I wanted to make
them blues and yellows, so, I took three of those, like this. Three charms only, and I folded them
in half, like this. Then, I took my Dresden tool, and I laid it right on the edge, just like this. So you
can see right here, if I cover the whole thing, that’s a 2 1⁄2 inch Dresden blade, and I’m going to
cut, I’m going to go ahead and cut these, like this. Don’t want them to move, like that.
And then I’m going to cut another one, I’ll turn my blade up this way, keeping it on the 2 1⁄2 inch
line, and then bring my blade back around, like this. Let me make sure. That slid a little bit, so I
can fix that right here, right now. Take that corner out, and then we’re going to cut these in half.
So, these are tiny little Dresdens and, you can use your ruler, it’s probably better than, than
guessing, but the fun thing about a Dresden is that they’re all done exactly the same way and
they look like you just worked so hard when, really, all you did was, just like the picket fence, we
take the white end, we fold it right sides together, and then we’re just going to sew this straight
across. So, I’m going to sew a few of these so you can see what happens.
So, I’ve got these little tiny ones here. I line them up right sides together, fold them, sew a
quarter of an inch, then I’ve got another one in there, and I’m going to just slide the next one in,
and one more. And then I’m going to cut these apart, and you’re going to do this to all of these.
You need 18 of these to make the little, tiny flower. So here’s my little, my little guys, and you’ll
see, just going to clip out that little front part right there and flip, and there’s your little tiny
Dresden. How adorable is that? So you’re going to do that, you’re going to do that 18 times and
with three charms you’ll get enough to do, you’ll get plenty of those. So, here’s my little flower,
right here, and I’m just going to stick him on here for a minute, and then we’re going to talk
about the medium flower.
The medium flower is the easiest one to me because it’s... you use two squares, and we’re
going to pull out an orange and... how about this fun polka dot one? And you’re going to use the
Dresden up to the five inch mark, like this, and we’re going to cut our blade. I’m going to go
over, over to the edge here, cut our blade this way and that way. And then we’re going to flip
this and cut the next one, just like this. So you’re going to cut 10 charm packs up, which is going
to give you 20 blades. You’ll need 20 blades for this big flower. So then, of course, we’re just
doing the same thing. We’re going to go over and we are going to fold these and sew these and
I’ll do that to a couple of these.
Once I realized I could make a Dresden, you know, the Dresden was really my unicorn, I just
really, gosh, you know, they looked so difficult to me. And I just didn’t know I could make one.
And once I realized I could, I started seeing Dresdens everywhere. You know, they were, they
were in flower pots, on Christmas things, I made a Dresden turkey, I did all kinds of things with it
because I knew I could do it and I just, oh, I just fell in love with it. So, this wall hanging came
from, from that excitement of realizing that I really could make a Dresden.
So then we’re going to iron this down and I’ll iron this one too, and then, basically, you just lay
these right sides together and you do a quarter inch seam all the way down on the side, and
when you get 20 of those together, you’re going to have your, your big flower, like this. This is
going to be your big pieces. Now, sometimes these don’t lay exactly flat. And, and if you just
steam them a little bit, they’ll lay down, but if you find you have, like, really big gaps or
something like that, you can just take in your seams a little bit and that will work. You know, you
just want it to be flat because you’re going to cover all this up with a circle.
So then we’ve got the big flower. Now, this big flower, I love the look of it, this. It’s a little bit
more tricky, because, what we’re going to do on it is, we are going to use the whole wide part of
the Dresden up here. So, I’m going to kind of center this on here and I’m going to put a little
mark like this, and I’m going to mark on either side because if we use this wide end down here
as the bottom, our flower is going to be like this huge and we want it to be small, tiny. So then
we’re going to slide our Dresden down here like this, keeping it in the middle and we’re going to
mark, mark our little, our little point, and we’re going to draw a line from the wide side to the
small side, like this.
And then we’re just going to cut that off. You don’t actually have to draw the line if you just want
to rotary cut it as you match up your ruler. Sometimes it’s nice to see that drawn line. So this is
going to be the blade for our big flower. So then, what we’re going to do, again, fold it right sides
together, sew straight across the top, and you can layer those in probably four. I would say you
don’t want to do too much more than four, it gets a little hard to cut.
So then here is this big guy, and we’re going to flip him and iron him. And you can see that we
get a petal that looks like this that is going to fit right in there. And just, I mean, it just comes out
with this darling, little flower.
So now let’s talk about our pot for a minute. I’ve made our pot using the, the big tumbler
template. So, I used this template and cut out the pot. One of the things that I did was I ironed
under all the edges a quarter of an inch. And, remember, with this kind of stuff there’s several
ways to applique: you can do some ironon on this and just press it down, you can machine
stitch raw applique, but I’m to use this as a hand project, so I’m going to sew along this edge
just like I would normally applique a Dresden blade onto the front of a, of a square or anything.
I’m just going to sew them on by hand and I’ll show you how to do that a little bit later because
that’s a really easy stitch. I call it a ladder stitch. It’s a binding stitch.
So now I have my pot and I have my three flowers and we need a stem. So what I’ve done is
I’ve cut 2 1⁄2 inches of, of a green for my stem, and I’m just going to fold this in half and iron it.
This is a really, really cool way to do stems because they just go together, it just lays down so
nice and it looks like you appliqued and spent a lot of time on it. So what I’m going to do now is,
I’m going to measure out a stem for this flower and I’m just kind of going to cut that off, and I’m
going to measure a stem for this flower and cut that off, and I’m going to measure a stem for this
flower and cut that one off. You might want to move that one up there just a little bit. It’s always
a good idea to give you some, a little bit of extra room. Now, with the rest of this piece, I”m
going to make some Dresden leaves. Now, I don’t have Dresden leaves on here, but I’m going
to make Dresden leaves out of this because I can because we can do Dresdens out of
everything.
Alright, so I’m going to lay this down here, like this, and I think I might want three leaves, so I’m
just kind of folding up my piece and I’m going to put it on the, well, you can put on any size you
want. I’m going to use the four, I think, and just cut out three little blades. I’m going to have to
turn this around and there we go, cut this other side. It doesn’t always work for me to cut going
the other direction. Make sure this top piece is flat, and then we’re just going to sew this across,
like this, and make our leaves, and it’s just exactly the same thing. One thing I do different on
the leaf is when I, because this is going to be a stand alone leaf, when I fold it like this, I’m just
going to fold it, and then I’m going to press these sides under a quarter of an inch. So they’re
just on there ready to go. Just like this, on both sides. And then this makes a cute leaf, and you
can just set it up under that stem.
Now let me show you how I do this stem, because this is a really, really fun way to do stems. I’m
going to, going to move some of these things off of here, I’m going to draw a line where I want
my stem to go, alright, I’m going to draw a line right here, this is where I want my short stem to
go, I’m going to draw a line right here, this is where I want my long stem to go, and I’m going to
draw a line over here, because this is where I want this stem to go. And so now I’m going to
take this, this backing right here, and I’m going to sew my stems on. And the stem, this is a
really fun way to, anytime you need to applique any kind of a stem, this is a really cool way to do
it.
So what we’re going to do is, we’re going to lay our stem piece right on the line, just on, like
that. And we’re going to sew over here a quarter of an inch, okay? So, let’s do that, real quick.
When you need a stem for anything, this is a great way to do it. Alright, so a quarter of an inch.
And I’m going to go ahead and put on all three of these stems.
So now that I have these stems all sewn on here, we take it to the ironing board and we’re just
going to fold this over, just like that, and it gives you one side that is completely finished and
sewed on, and all you have to do is either topstitch or hand sew down the other side, and it’s a
really easy way to put on a stem, and we don’t have to worry about the top or the bottom
because the pot is going to cover the bottom. So, let’s add our pot now. We’ll put that right on
there and I’ll pin it on, just like this. We’ve got our sides that got all messed up because I
whipped it apart, and our top, we’ve got our three big flowers: here’s our, our little, tiny one,
here’s our big one, and then here’s the giant, big one up here. And now we need to do the
circles for the center. That’s really all that’s left. We’ve even done our leaf. Where’s our leaf?
Here it is. We’ve done our leaf, and you can do two or three of those, I like to kind of set them in
at an angle right there, and now we have to do the center for our circles.
So, to make a circle for the middle of your flower, you’re going to look around your house, and
you’re going to find something that is going to be the size you want. Now, I like my circles to be
different sizes, so I’ll be making different circles, but this is a way to make a circle that’s kind of
foolproof; that’s kind of fun to do.
You’re going to trace a circle around whatever object you have, whatever size, and you’re going
to just sew right on this circle line and just enclose a circle. You’re going to have two pieces,
right sides together, and we’re going to enclose that circle. So, let’s just line these up, and we’re
just going to follow this around in a circle here. So, you’re just going to go around this whole
entire circle and, you want to be careful to stay right on that line you’ve drawn, and just go all
the way around and we’re almost there. Alright, there we are.
Now what we’re going to do is trim this. So, here’s my scissors, and I’m going to trim around it,
like this, just leaving about a quarter of an inch, just like this. And then I’m going to pull these
apart, like this, and the one I want to be the back, I’m just going to cut a little clip in, like this, just
make a little V, and then I’m going to turn it right from that hole. Push the whole circle through.
And I’m going to take my finger and I’m gonna run around the whole edge, like this, so that it
makes a nice, flat circle.
And then I’m going to come over here and press it. It should have a nice, roundy circle. If you
stayed on that line, it will make a nice, round circle, you won’t have any edges to turn under, and
it will just look really cute in the middle of your flower. So, if I did it on that flower, look how cute
that would be. I mean, it’s just big and fat. It’s cute on this one also, and it’s even cute on this
one. So, this you could use the same size, but I think the different sizes are fun. You know, it
just gives it a little different dimension. I have different sized circles on here, and you can see
how the circle completely changes the look of the flower.
So, the last thing you need to do is, you need to attach everything. So, I’m going to show you
that good ladder stitch that I like to use. And, and it’s just, it’s just really easy. Honestly, if you
can hem pants, you can do this. It just goes really well. So, I’m lefthanded and so I’m going to
have to start from this side. And what I’m going to do is, I’m going to line up my little picket
fence, right along the edge of here, and this is the same stitch that you’re going to use on
everything. So, let me get this, get this stuff up here. I’ve just knocked everything off, but it goes
back pretty easy. So, I’m going to come through from the back, through the fold, right like that.
So, I’m through that fold, I’m going to go right back down where I came out, and I’m going to
come up about a quarter of an inch and come right back out. I’m just going to go along and do
this, go straight down and come up about a quarter of an inch. They don’t have to be tiny or tight
together, because all we’re going to do is quilt over the top of these so we’re just coming out the
fold, going straight down. Here’s some renegade threads there. Coming out this fold, going
straight down, and coming down.
Now, if you want to, you could machine stitch all these. You could do a blanket stitch, you could,
you know, do a straight stitch across here, you could do all kinds of things. I kind of like to have
some handwork to take with me in the car or to sit and do with my husband when he’s watching
TV at night, and so I really like this kind of handwork because it doesn’t have to be careful or
perfect, It just has to hold it down, because I am going to literally quilt from one side of this to
the other. Take a look at this one. You can see it’s a small stipple, and I just quilted straight
across the sides and even though I’ve, I’ve taken the time to sew these down by hand, I haven’t
had to take tiny, little stitches or, you know, do anything that, you know, is hugely heroic in
attaching this stuff down.
So, I hope you enjoy making one of these Dresden flower wall hangings, and I hope you
enjoyed this tutorial from the MSQC.


