Skip to content

Free quilting video tutorials from Missouri Star

Quilting Tutorials
Embroidery 101: How to Embroider a Buttonhole Wheel

Embroidery 101: How to Embroider a Buttonhole Wheel

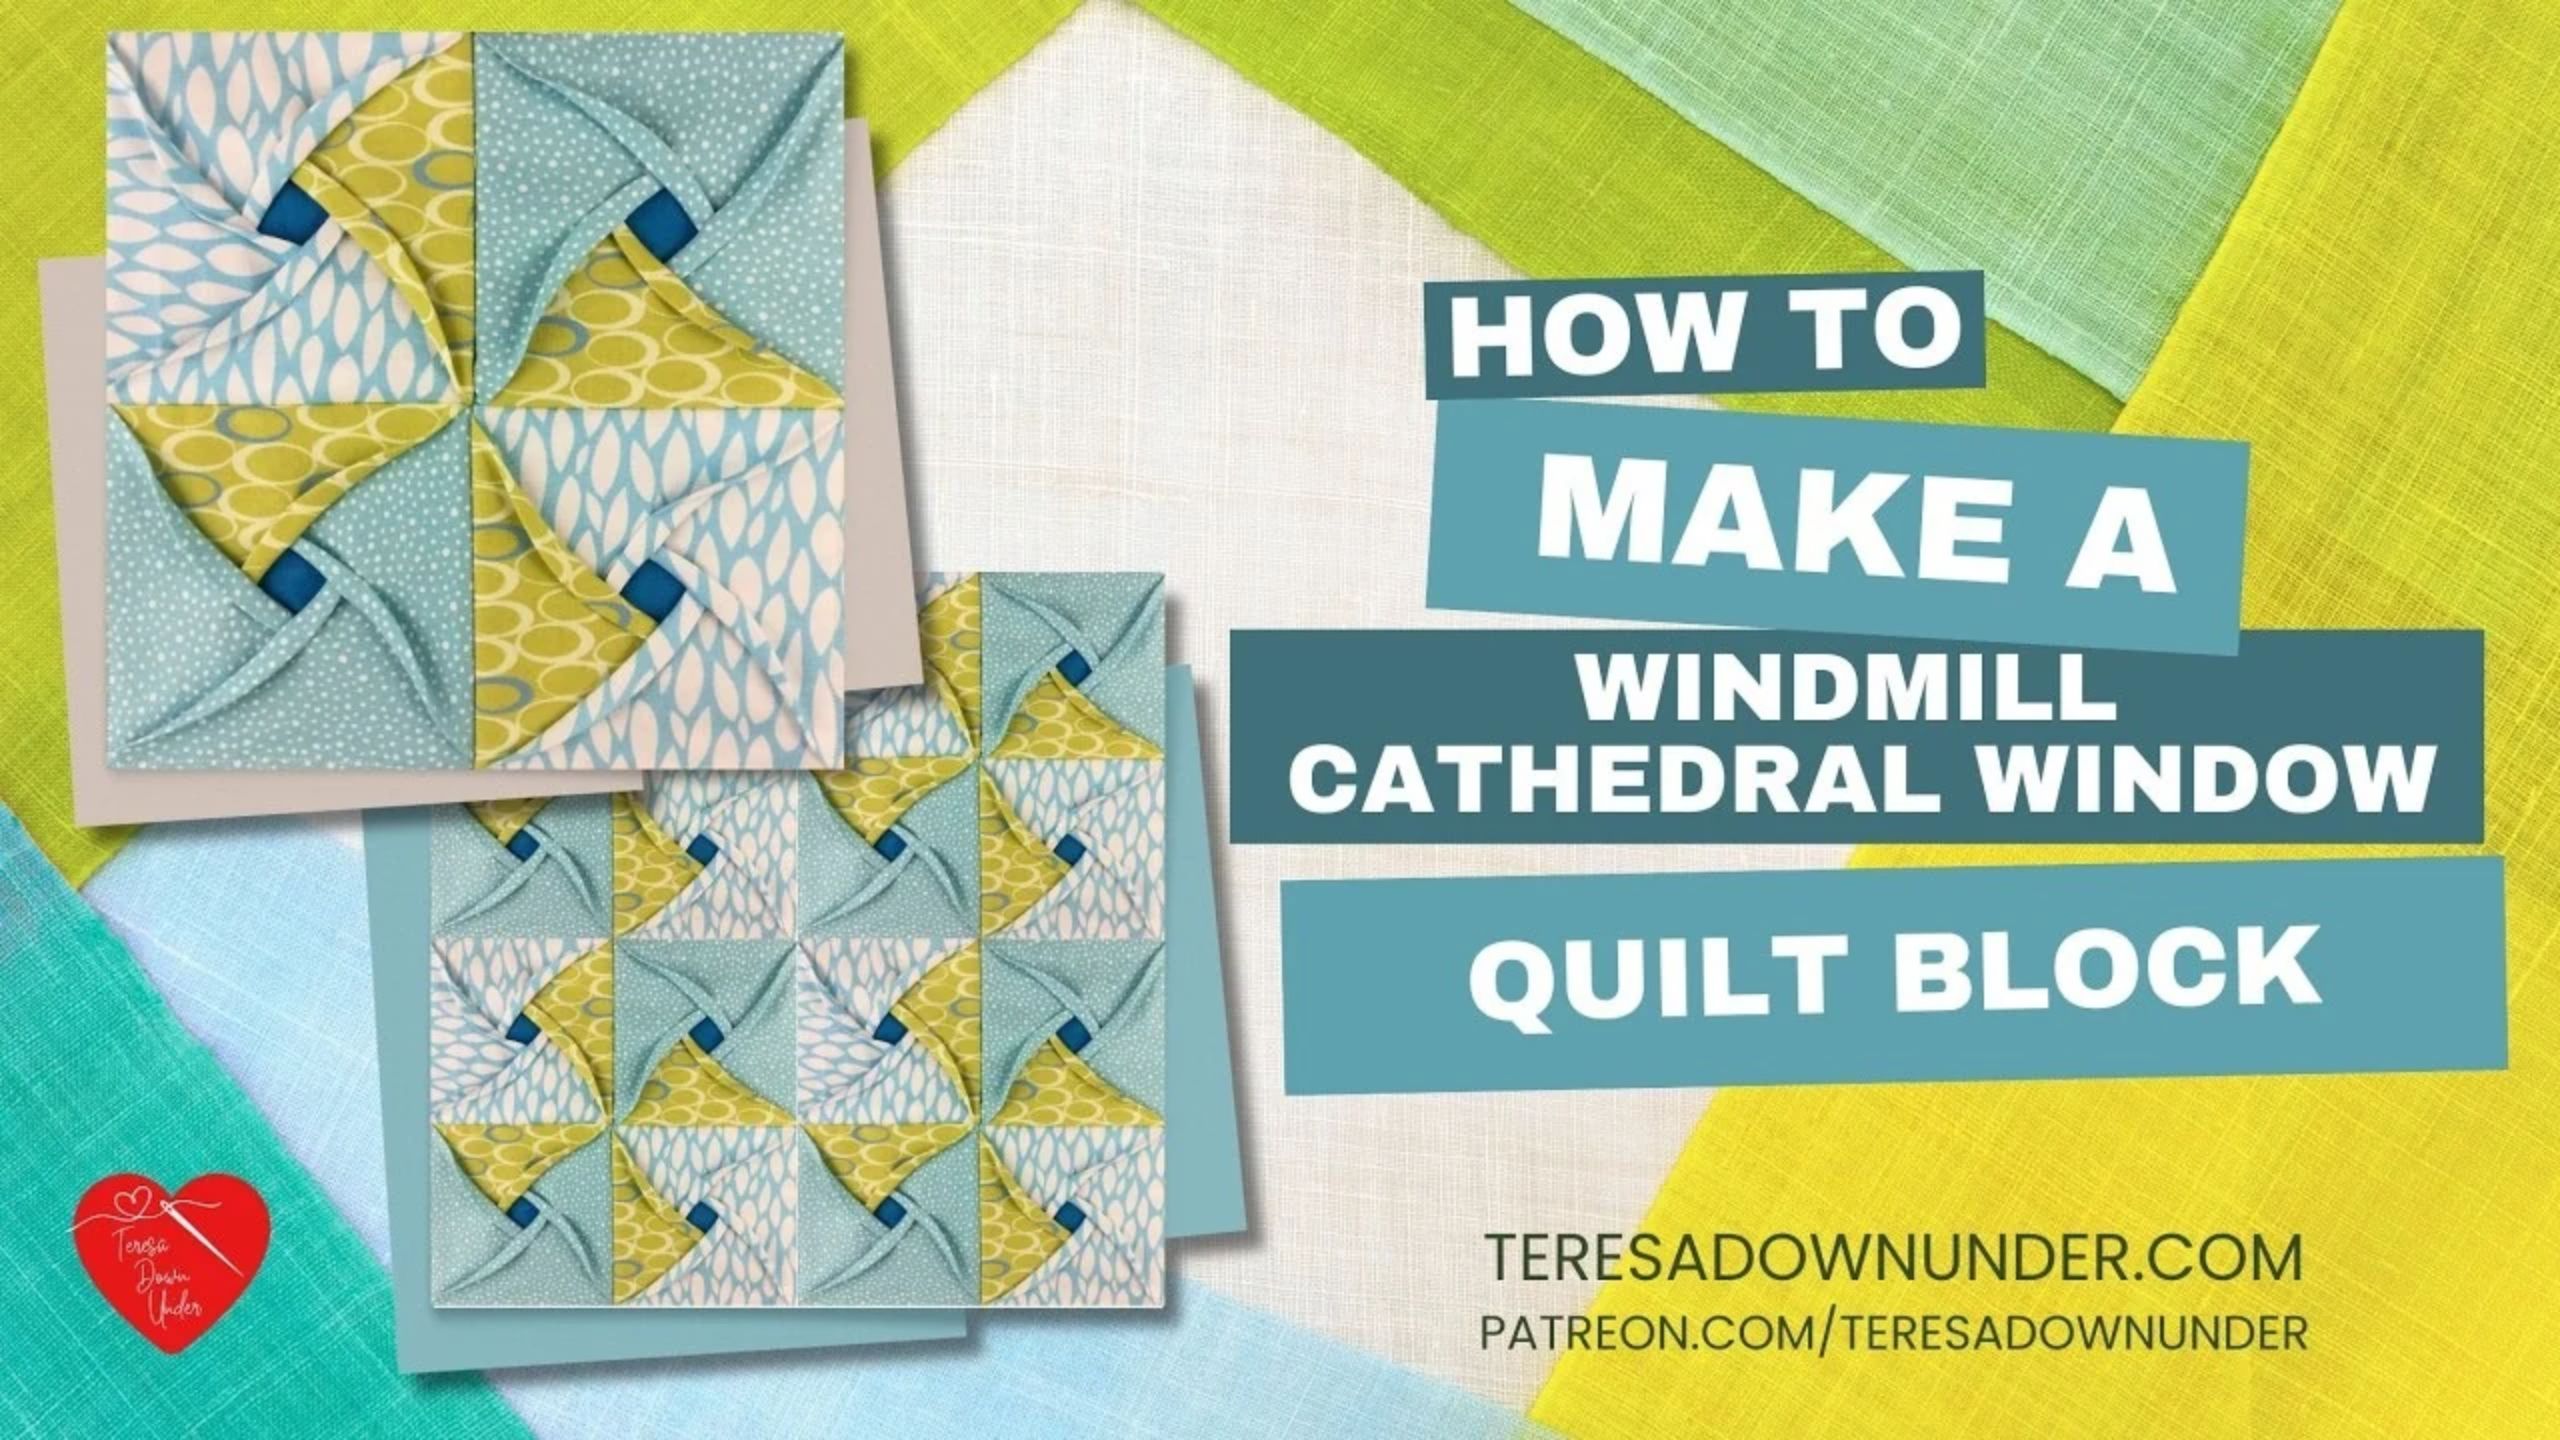
Are you ready to dive into the enchanting world of hand embroidery? Join us on this exciting journey as Natalie, a passionate embroidery enthusiast, guides beginners through the fundamentals of this timeless craft. Whether you are new to embroidery or looking to master a different stitch, this series can help enhance your craft and have you stitching like a pro in no time! Today’s video will cover how to embroider a buttonhole wheel stitch.

Instructor

Natalie Doan

Natalie is the host of Quilting 101, Embroidery 101 and the Creative Strategist and Editor of Block Magazine at Missouri Star Quilt Company. She was taught how to sew by her mom, of course, and began quilting when she grew up.

Common Questions

What is covered in Embroidery 101: How to Embroider a Buttonhole Wheel?

Are you ready to dive into the enchanting world of hand embroidery? Join us on this exciting journey as Natalie, a passionate embroidery enthusiast, guides beginners through the fundamentals of this timeless craft. Whether you are new to embroidery or looking to master a diffe...

How long is the tutorial video?

The tutorial video is 00:05:37.
Video Transcript

[Music] hi everybody I'm Natalie with Missouri Star Quilt Company and today on embroidery 101 I'm going to teach you the button hole Stitch now this is a great stitch for making flowers or wheels for bicycles or cars it's really fun and easy it looks great in like sunshiny colors um so you're going to start at the edge of your circle and this little diagram is a circle with a dot in the middle because you're going to have all of your button or blanket stitches it's it's called button hole wheel but it's made using the blanket stitch and they all um Point into the center all right so we're pulling through the bringing the needle from the back up to the front we go down into the middle we're going to leave our thread loose so that we can create a loop you come back up we're going to go to the to the right of our original Stitch about a/4 of an inch away and then you want to make sure that that thread is behind your needle so that when you pull it through it creates that original blanket stitch okay so now you go back down into the middle leaving that thread loose and then you're going to come back up again to the right of your original or your last Stitch and I want to make sure it's a little bit farther apart so I'm going to do that one again there we go and you just continue to go into the middle and come back up on the edge of your wheel qu of an inch away making sure that that thread stays behind your needle let's head over to the stand so I can show you this a little bit closer up all right so we're going to continue piercing into the middle and coming up about a quarter of an inch apart make sure our thread is behind our needle or the needle goes through the loop however you want to say that you can use your finger to push them back out if they're not quite laying down how you want them so just keep stitching through the middle and then next to your last Stitch so I paused for a minute because there's two ways to end the button hole wheel and I'm going to show you the um the seamless way first so this makes it look like your wheel has no beginning and end so what you're going to do is you're going to go down through the original Loop hooking that through and keeping your tension nice and tight and then right into the middle just like that and you can't see which spot was the very beginning oops let me tighten that up so it looks right there you go so it looks just like that so you you knot it on the back and you can't tell where this button wheel button whole wheel starts and stops but let me take this Stitch out and I'll show you a different way so you can do whichever is easiest for you okay got to rethread my needle all right so the next way as usual you're going to go down into the middle and you'll come right back up where your stitches start and stop connecting those two you'll put your needle through the loop just like you normally did so you have your con your whole button hole wheel and then all you're going to do is just tuck your tuck your needle right back through right there at the beginning pull that tight and KN your thread on the back so you just have this little Loop right there that that secures all of your stitches so there's two ways to end the button hole wheel so don't forget to try out each way to end the button hole wheel and see which one works best for you and I hope you enjoyed this video on the button hole wheel from the Missouri Star Quilt Company [Music]

Recent tutorials

See all