Skip to content

Free quilting video tutorials from Missouri Star

Quilting Tutorials
Embroidery 101: How to Embroider the Feather/Cretan Stitch

Embroidery 101: How to Embroider the Feather/Cretan Stitch

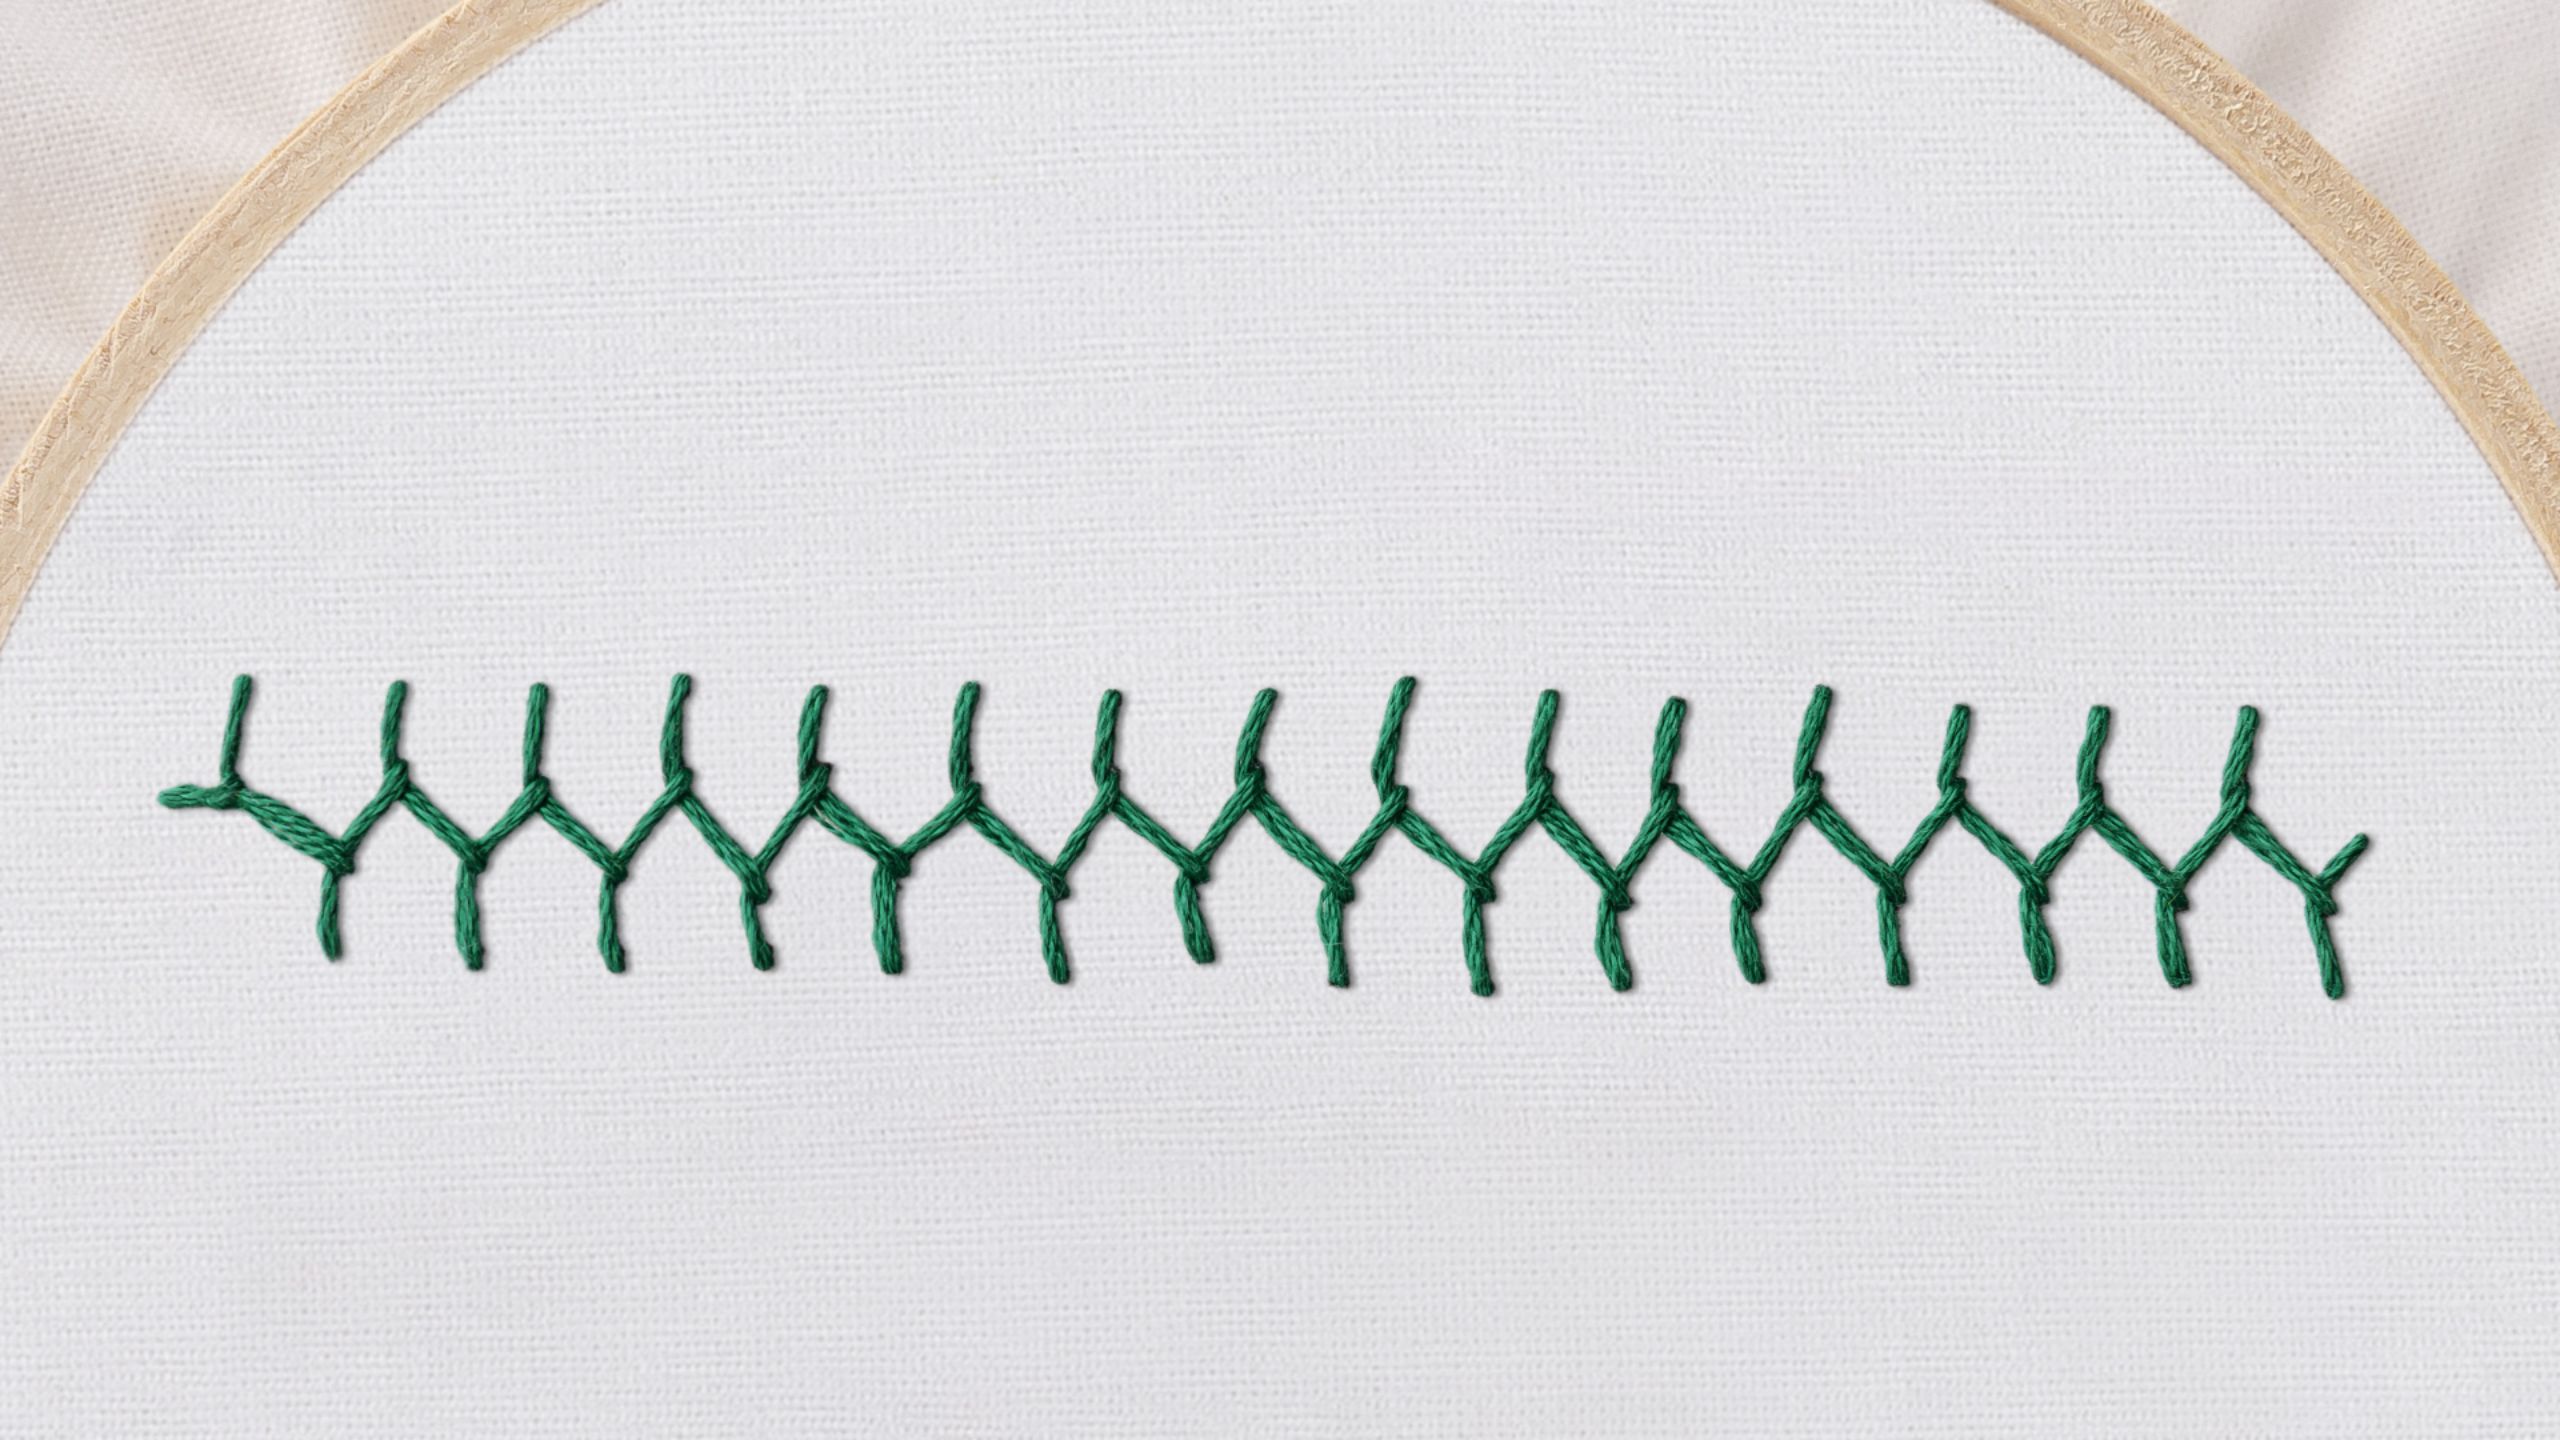
Are you ready to dive into the enchanting world of hand embroidery? Join us on this exciting journey as Natalie, a passionate embroidery enthusiast, guides beginners through the fundamentals of this timeless craft. Whether you are new to embroidery or looking to master a different stitch, this series can help enhance your craft and have you stitching like a pro in no time! Today’s video will cover how to embroider a feather stitch, also called a Cretan stitch.

Instructor

Natalie Doan

Natalie is the host of Quilting 101, Embroidery 101 and the Creative Strategist and Editor of Block Magazine at Missouri Star Quilt Company. She was taught how to sew by her mom, of course, and began quilting when she grew up.

Common Questions

What is covered in Embroidery 101: How to Embroider the Feather/Cretan Stitch?

Are you ready to dive into the enchanting world of hand embroidery? Join us on this exciting journey as Natalie, a passionate embroidery enthusiast, guides beginners through the fundamentals of this timeless craft. Whether you are new to embroidery or looking to master a diffe...

How long is the tutorial video?

The tutorial video is 00:07:58.
Video Transcript

[Music] hi everybody I'm Natalie with Missouri Star Quilt Company and today on embroidery 101 we are going to learn the Craton single stitch so this is a great stitch for embellishing your projects I see it a lot on crazy quilts it's really fun to do um and it's a lot easier than it looks so let's get started so I've got my thread it has a knot in it we're going to do this line of stitching right here and we've put these dots on here just so that you have a really good um diagram to follow now you can make these however you want in the future far apart close together bigger smaller that is completely up to you so you're going to come up halfway between these two lines um just about the middle right there then what we're going to do we're going to go in at our first dot leaving a little Loop Loop and then we're going to come up at the second dot then we're going to go to the top of the next line we'll pull that so it loops around just like that we're going to go to the top here and come back up at the bottom looping our thread around the needle and pulling it through just like that then we go down to the bottom line so you're always putting your needle in at the line and coming up in the middle and looping the thread around so that your needle goes through it so then you start back up going down and out at that Top Line keeping your needle or your your thread you kind of want to keep your thread going this direction the whole time but under the needle so you can hold that with your thumb if you like see how it makes that really cool kind of a zigzag almost like a um almost looks like a chicken wire in a way all right let's go over to the hoop and I will show you this a little bit closer all right so you keep this thread pulled to the left whoops I've got to do this on the front and you alternate the top and bottom row this Stitch Has a lot of fun variations which I'm sure we will get to in the future for right now this is the single creton stitch or creton single stitch whichever way you want to say that keep that thread looped around oops we get hung up sometimes on all those fabrics and this is one of those situations where you can flip your hoop back and forth as you go so that it's comfortable for you this Stitch was used decoratively um often on making children's clothing like the little girls dresses that have all the rouching the Stitch would have been what was put on top of them to keep all those cute little pleats together and if you miss your Loop that's okay just pull it through like I just did wasn't paying attention was thinking about cute little dresses [Music] m [Music] [Music] m [Music] [Applause] [Music] it's kind of an interesting Stitch oh goodness there we go all right we're almost to the end of our little row here so we're just going to continue with this Stitch and then when you are ready to end it what you're going to do is you're going to create that last Loop where you've youve hooked them together and then right here in this spot you can just go right in or you can you can go out a little bit so there's two ways so one way you can end it right here and it'll pull through just just like that or if you're still here in this spot you can go out a little bit like your original Stitch um at the beginning and create kind of like the little ending of the of the Stitch like it so it matches the front so those are your two ways so I hope you enjoyed this video on the Craton single stitch it's really fun it looks very fancy it'll look great on all of your quilt projects and it's a lot easier to do than you'd think so I hope you enjoy this video on the crat and single stitch from Missouri Star Quilt Company [Music]

Recent tutorials

See all