

Houndstooth Quilt
Jenny Doan demonstrates a simple method for making a stunningly stylish Houndstooth Quilt using charm packs (pre cut 5" squares) and yardage.

Instructor
Jenny Doan
Jenny Doan is an American quilter, author, and YouTube personality. Jenny started Missouri Star Quilt Company in 2008 and today it is the largest quilting supply vendor in the United States.
Shop this tutorial




Common Questions
What is covered in Houndstooth Quilt?
Jenny Doan demonstrates a simple method for making a stunningly stylish Houndstooth Quilt using charm packs (pre cut 5" squares) and yardage.
How long is the tutorial video?
The tutorial video is 00:10:40.
Are supplies listed for this tutorial?
Yes. The tutorial page includes the supplies and materials connected to this project.
Is a transcript available?
Yes. A written transcript is available on the tutorial page.
Video Transcript
Hi I’m Jenny from the Missouri Star Quilt Company. Take a look at this darling “Houndstooth” quilt behind. Isn’t that beautiful? I love this pattern and I’ve been want to make one of these for a long time. I just had to figure out how to do it with precuts. So I can’t wait to show you how easy this is.
So to make this quilt, what you’re going to need is a charm pack of blue and a charm pack of white. You’re also going to need one and a quarter yards of white fabric and one and a quarter yards of blue fabric and that was, is going to give you your strips and these are going to give you your, your colored squares. This is so cool. Wait till you see this. So this makes about a fifty by sixty-two inch quilt and it just comes together so fast. The trick to this is in the set up--it’s just really really cool.
So what you’re going to need to do is you’re going to need to cut strips out of your yardage. These are going to be these squares right here--these solids and we’re going to make a tube set for the strip set in the middle. The strips need to be cut at two and a quarter inches, not two and a half like we normally do. Two and a quarter inches. You’re going to cut sixteen blue ones and sixteen white ones.
Then what we’re going to do is we’re going to take those strips and we are going to sew them together. Let me cut a white one here. Now you can see I have my fabric folded up. I like to do that sometimes when I, you know to just to make it a little quicker. You have to have a good sharp blade to do this, but I fold it in half and you have to make sure it’s lined up right or, or you’ll get an elbow.
So two and a quarter makes our strip and then we’re going to sew these together right sides together. So you’re just going to lay them right sides together like this and sew a quarter of an inch down the side. So let’s go do that.
Alright, so we’re just going to go along and sew these together. Ok we’re almost to the end here. There we go. Alright, now we have our strip set sewn together and we need to iron it. So we’re going to lay our dark color on top. You can set that seam and then you just roll it back. And so you can just do that on the whole strip. Make sure that your seam rolls over to that dark side. You don’t want to see it on the white. And you’re going to make two of these. You’re going to put them right sides together and you’re going to sew them together on the top and the bottom, just like a tube.
So over here I have a couple already cut, right here. So what I’m going to do is I’m going to put my one strip set on the bottom. The blue is on the top on this one you’ll notice and when I put them together, I’m going to put them together opposites. So the white’s going to be on the top and the blue on the bottom, just exactly opposite. You’ll feel those seams nest up right here, but you’re going to sew a quarter of an inch along the top and a quarter of an inch along the bottom. This is going to enclose it completely.
So let’s go do that. Just keep them lined up. Do your quarter of an inch. This just goes together so quick and fun. You’re really going to love this. Alright, now I’ve sewn a quarter of an inch on the bottom side of the strip set and I’m going to sew a quarter of an inch on the top side. Alright. Now we’ve got that done.
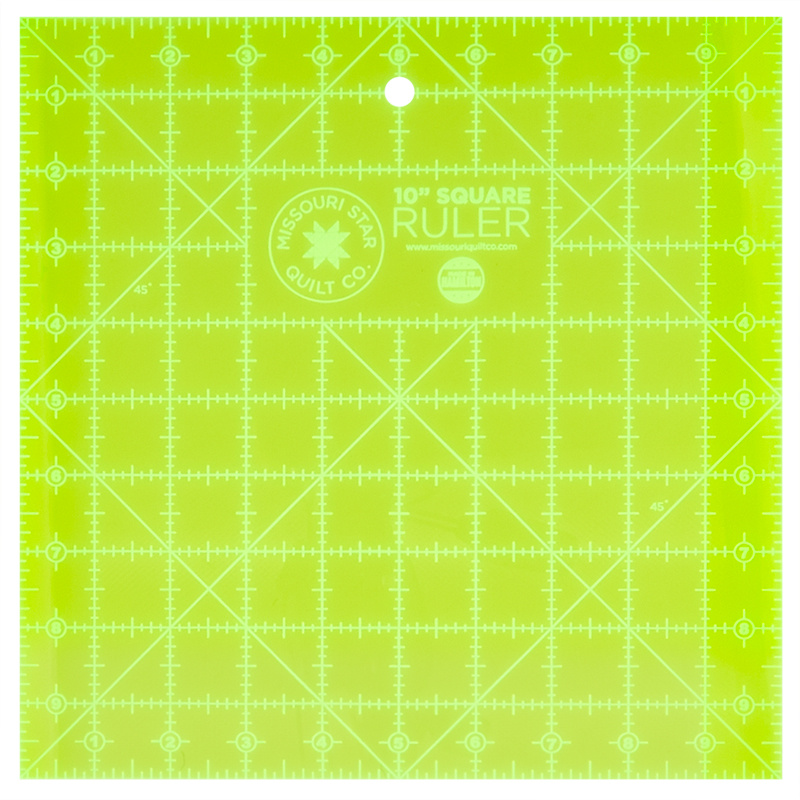
Now comes the fun part. So we’re going to take our strip set like this and when you have a full strip set, our strips cut the width of the fabric, it’s going to be a nice long strip set like this and then we have to, we, I have to show you how to get blocks out of that. So here’s what you’re going to need. So here’s what you’re going to need, you’re going to need a ruler that has a forty-five line on it and almost like ninety percent of all the squares have that forty-five line and you’re going to take that forty-five line and this is really important and you’re going to put it on the seam, not on the edge. Not on the edge, but on the seam, right here. You’re going to line up that forty-five on the line and you’re going to cut off this little piece over here. Ok?
So, then we’re going to take our ruler and we’re going to slide it this way--just like this--till it hits that seam line. Our, the edge, the point of our ruler is right at the edge of the seam line and then we’re going to cut it this way. Then we’re going to slide our ruler back up like this, till the point of that ruler hits the edge of the fabric and it lines up on the seam line and we’re going to cut it this way.
So, again, I’m just going back and forth, like this and you’re going to get about ten or eleven of these blocks out of each strip set. Alright. So, let’s see how many we got out of here. I should get ten or eleven. So let me count them. One, two, three, four, five, six, seven, eight, nine, ten, eleven, and I did get eleven, hurray it worked, haha. We’re really glad about that. Alright, so, now I’m going to iron them open and I’ve, I’ve got them all in a stack here with the dark on the top, because I want my seam to hide on the dark side and I’m just going to set it and roll it back. Set it and roll it back. Set it and roll it back. And you can see what we’re getting. This is really fun. I’m going to put them right over here. You can see what we’re getting, we’re getting those cute striped blocks. There we go.
Now the trick to this whole thing, this whole thing is in layout. So let’s take a look at this top row up here. I’m going to scoot these out of the way so I can lay this out. On this top row up here, we’re starting up in the corner with a blue solid and this whole row is going to be identical. They’re all going to be going the same way. So, the next one is a strip square and you’re blue goes up to the corner like that. So for this whole first row you’re going to do a blue, and a strip, and the blue goes up. And a blue and a strip and the blue goes to the top, just like that.
Now, for the next row you’re going to start with a striped block, but the whites going to go up. So, these are going to make like a little butterfly wing or a bow tie and you’ll know you’ve got it right if you have this bow tie right here. So then the next row is all white blocks with our striped set where the white goes up. So the first row it was, blue, blue up. The second row was white, white up and you’re just going to keep alternating like that.
So, let me stick my white one in here. There we go and one more over here and then we’ll go back to the blue. So, we’ve got blue and blue up, yep that’s right. Blue and blue up they have to be opposites. Blue and blue up right here and blue and blue up and then we do a white row and we’re going to start with the white stripe with the white triangle at the top and we’re going to put a white square and our strips square. Can you see it coming together? Can you see it happening? It’s so cool. It’s just by putting, you make a row where you have your blue squares, a row where you have your white squares and you can see it coming together and it’s just so simple. It’s so easy.
So, to make this quilt this size you’re going to put twelve blocks across by fourteen rows down and you’re just going to sew them together row by row. So what we’re going to do is we’re just going to lay these blocks right on top of each other and we’re going to sew these two together and then come across and finish our row. So let’s sew it, a few together and see what we get. Now one other thing that’s kind of fun about this block is that because it’s on the bias, it has a little bit of give to it.
So, you can make it work for you. And it should fit just perfectly in there on these and you can see I’m just, I’m just sewing them together one after the other to make a row. And I just make sure they line up at the bottom. Start them at the top, line them up at the bottom and you’ll get a whole row, whole row of these. And you can, what I kind of like to do when I’m, when I’m doing my rows is I like to iron them from the top so that I make sure that I have no folds.
And then I flip it over and I make my seams go the way I want them to. Sometimes it’s just the way they want to. You know I’m, if you do them opposites on each row then you’ll nest them together, but you can see this just goes right together so easily. So you’ll sew one row, you’ll sew the next row, then you’ll just start adding rows on and that pattern is just going to appear.
So, we hope you enjoyed this tutorial on the “Houndstooth” quilt from the Missouri Star Quilt Company.
So to make this quilt, what you’re going to need is a charm pack of blue and a charm pack of white. You’re also going to need one and a quarter yards of white fabric and one and a quarter yards of blue fabric and that was, is going to give you your strips and these are going to give you your, your colored squares. This is so cool. Wait till you see this. So this makes about a fifty by sixty-two inch quilt and it just comes together so fast. The trick to this is in the set up--it’s just really really cool.
So what you’re going to need to do is you’re going to need to cut strips out of your yardage. These are going to be these squares right here--these solids and we’re going to make a tube set for the strip set in the middle. The strips need to be cut at two and a quarter inches, not two and a half like we normally do. Two and a quarter inches. You’re going to cut sixteen blue ones and sixteen white ones.
Then what we’re going to do is we’re going to take those strips and we are going to sew them together. Let me cut a white one here. Now you can see I have my fabric folded up. I like to do that sometimes when I, you know to just to make it a little quicker. You have to have a good sharp blade to do this, but I fold it in half and you have to make sure it’s lined up right or, or you’ll get an elbow.
So two and a quarter makes our strip and then we’re going to sew these together right sides together. So you’re just going to lay them right sides together like this and sew a quarter of an inch down the side. So let’s go do that.
Alright, so we’re just going to go along and sew these together. Ok we’re almost to the end here. There we go. Alright, now we have our strip set sewn together and we need to iron it. So we’re going to lay our dark color on top. You can set that seam and then you just roll it back. And so you can just do that on the whole strip. Make sure that your seam rolls over to that dark side. You don’t want to see it on the white. And you’re going to make two of these. You’re going to put them right sides together and you’re going to sew them together on the top and the bottom, just like a tube.
So over here I have a couple already cut, right here. So what I’m going to do is I’m going to put my one strip set on the bottom. The blue is on the top on this one you’ll notice and when I put them together, I’m going to put them together opposites. So the white’s going to be on the top and the blue on the bottom, just exactly opposite. You’ll feel those seams nest up right here, but you’re going to sew a quarter of an inch along the top and a quarter of an inch along the bottom. This is going to enclose it completely.
So let’s go do that. Just keep them lined up. Do your quarter of an inch. This just goes together so quick and fun. You’re really going to love this. Alright, now I’ve sewn a quarter of an inch on the bottom side of the strip set and I’m going to sew a quarter of an inch on the top side. Alright. Now we’ve got that done.
Now comes the fun part. So we’re going to take our strip set like this and when you have a full strip set, our strips cut the width of the fabric, it’s going to be a nice long strip set like this and then we have to, we, I have to show you how to get blocks out of that. So here’s what you’re going to need. So here’s what you’re going to need, you’re going to need a ruler that has a forty-five line on it and almost like ninety percent of all the squares have that forty-five line and you’re going to take that forty-five line and this is really important and you’re going to put it on the seam, not on the edge. Not on the edge, but on the seam, right here. You’re going to line up that forty-five on the line and you’re going to cut off this little piece over here. Ok?
So, then we’re going to take our ruler and we’re going to slide it this way--just like this--till it hits that seam line. Our, the edge, the point of our ruler is right at the edge of the seam line and then we’re going to cut it this way. Then we’re going to slide our ruler back up like this, till the point of that ruler hits the edge of the fabric and it lines up on the seam line and we’re going to cut it this way.
So, again, I’m just going back and forth, like this and you’re going to get about ten or eleven of these blocks out of each strip set. Alright. So, let’s see how many we got out of here. I should get ten or eleven. So let me count them. One, two, three, four, five, six, seven, eight, nine, ten, eleven, and I did get eleven, hurray it worked, haha. We’re really glad about that. Alright, so, now I’m going to iron them open and I’ve, I’ve got them all in a stack here with the dark on the top, because I want my seam to hide on the dark side and I’m just going to set it and roll it back. Set it and roll it back. Set it and roll it back. And you can see what we’re getting. This is really fun. I’m going to put them right over here. You can see what we’re getting, we’re getting those cute striped blocks. There we go.
Now the trick to this whole thing, this whole thing is in layout. So let’s take a look at this top row up here. I’m going to scoot these out of the way so I can lay this out. On this top row up here, we’re starting up in the corner with a blue solid and this whole row is going to be identical. They’re all going to be going the same way. So, the next one is a strip square and you’re blue goes up to the corner like that. So for this whole first row you’re going to do a blue, and a strip, and the blue goes up. And a blue and a strip and the blue goes to the top, just like that.
Now, for the next row you’re going to start with a striped block, but the whites going to go up. So, these are going to make like a little butterfly wing or a bow tie and you’ll know you’ve got it right if you have this bow tie right here. So then the next row is all white blocks with our striped set where the white goes up. So the first row it was, blue, blue up. The second row was white, white up and you’re just going to keep alternating like that.
So, let me stick my white one in here. There we go and one more over here and then we’ll go back to the blue. So, we’ve got blue and blue up, yep that’s right. Blue and blue up they have to be opposites. Blue and blue up right here and blue and blue up and then we do a white row and we’re going to start with the white stripe with the white triangle at the top and we’re going to put a white square and our strips square. Can you see it coming together? Can you see it happening? It’s so cool. It’s just by putting, you make a row where you have your blue squares, a row where you have your white squares and you can see it coming together and it’s just so simple. It’s so easy.
So, to make this quilt this size you’re going to put twelve blocks across by fourteen rows down and you’re just going to sew them together row by row. So what we’re going to do is we’re just going to lay these blocks right on top of each other and we’re going to sew these two together and then come across and finish our row. So let’s sew it, a few together and see what we get. Now one other thing that’s kind of fun about this block is that because it’s on the bias, it has a little bit of give to it.
So, you can make it work for you. And it should fit just perfectly in there on these and you can see I’m just, I’m just sewing them together one after the other to make a row. And I just make sure they line up at the bottom. Start them at the top, line them up at the bottom and you’ll get a whole row, whole row of these. And you can, what I kind of like to do when I’m, when I’m doing my rows is I like to iron them from the top so that I make sure that I have no folds.
And then I flip it over and I make my seams go the way I want them to. Sometimes it’s just the way they want to. You know I’m, if you do them opposites on each row then you’ll nest them together, but you can see this just goes right together so easily. So you’ll sew one row, you’ll sew the next row, then you’ll just start adding rows on and that pattern is just going to appear.
So, we hope you enjoyed this tutorial on the “Houndstooth” quilt from the Missouri Star Quilt Company.


