Skip to content

Free quilting video tutorials from Missouri Star

Quilting Tutorials
Embroidery 101: How to Embroider a Bullion Stitch

Embroidery 101: How to Embroider a Bullion Stitch

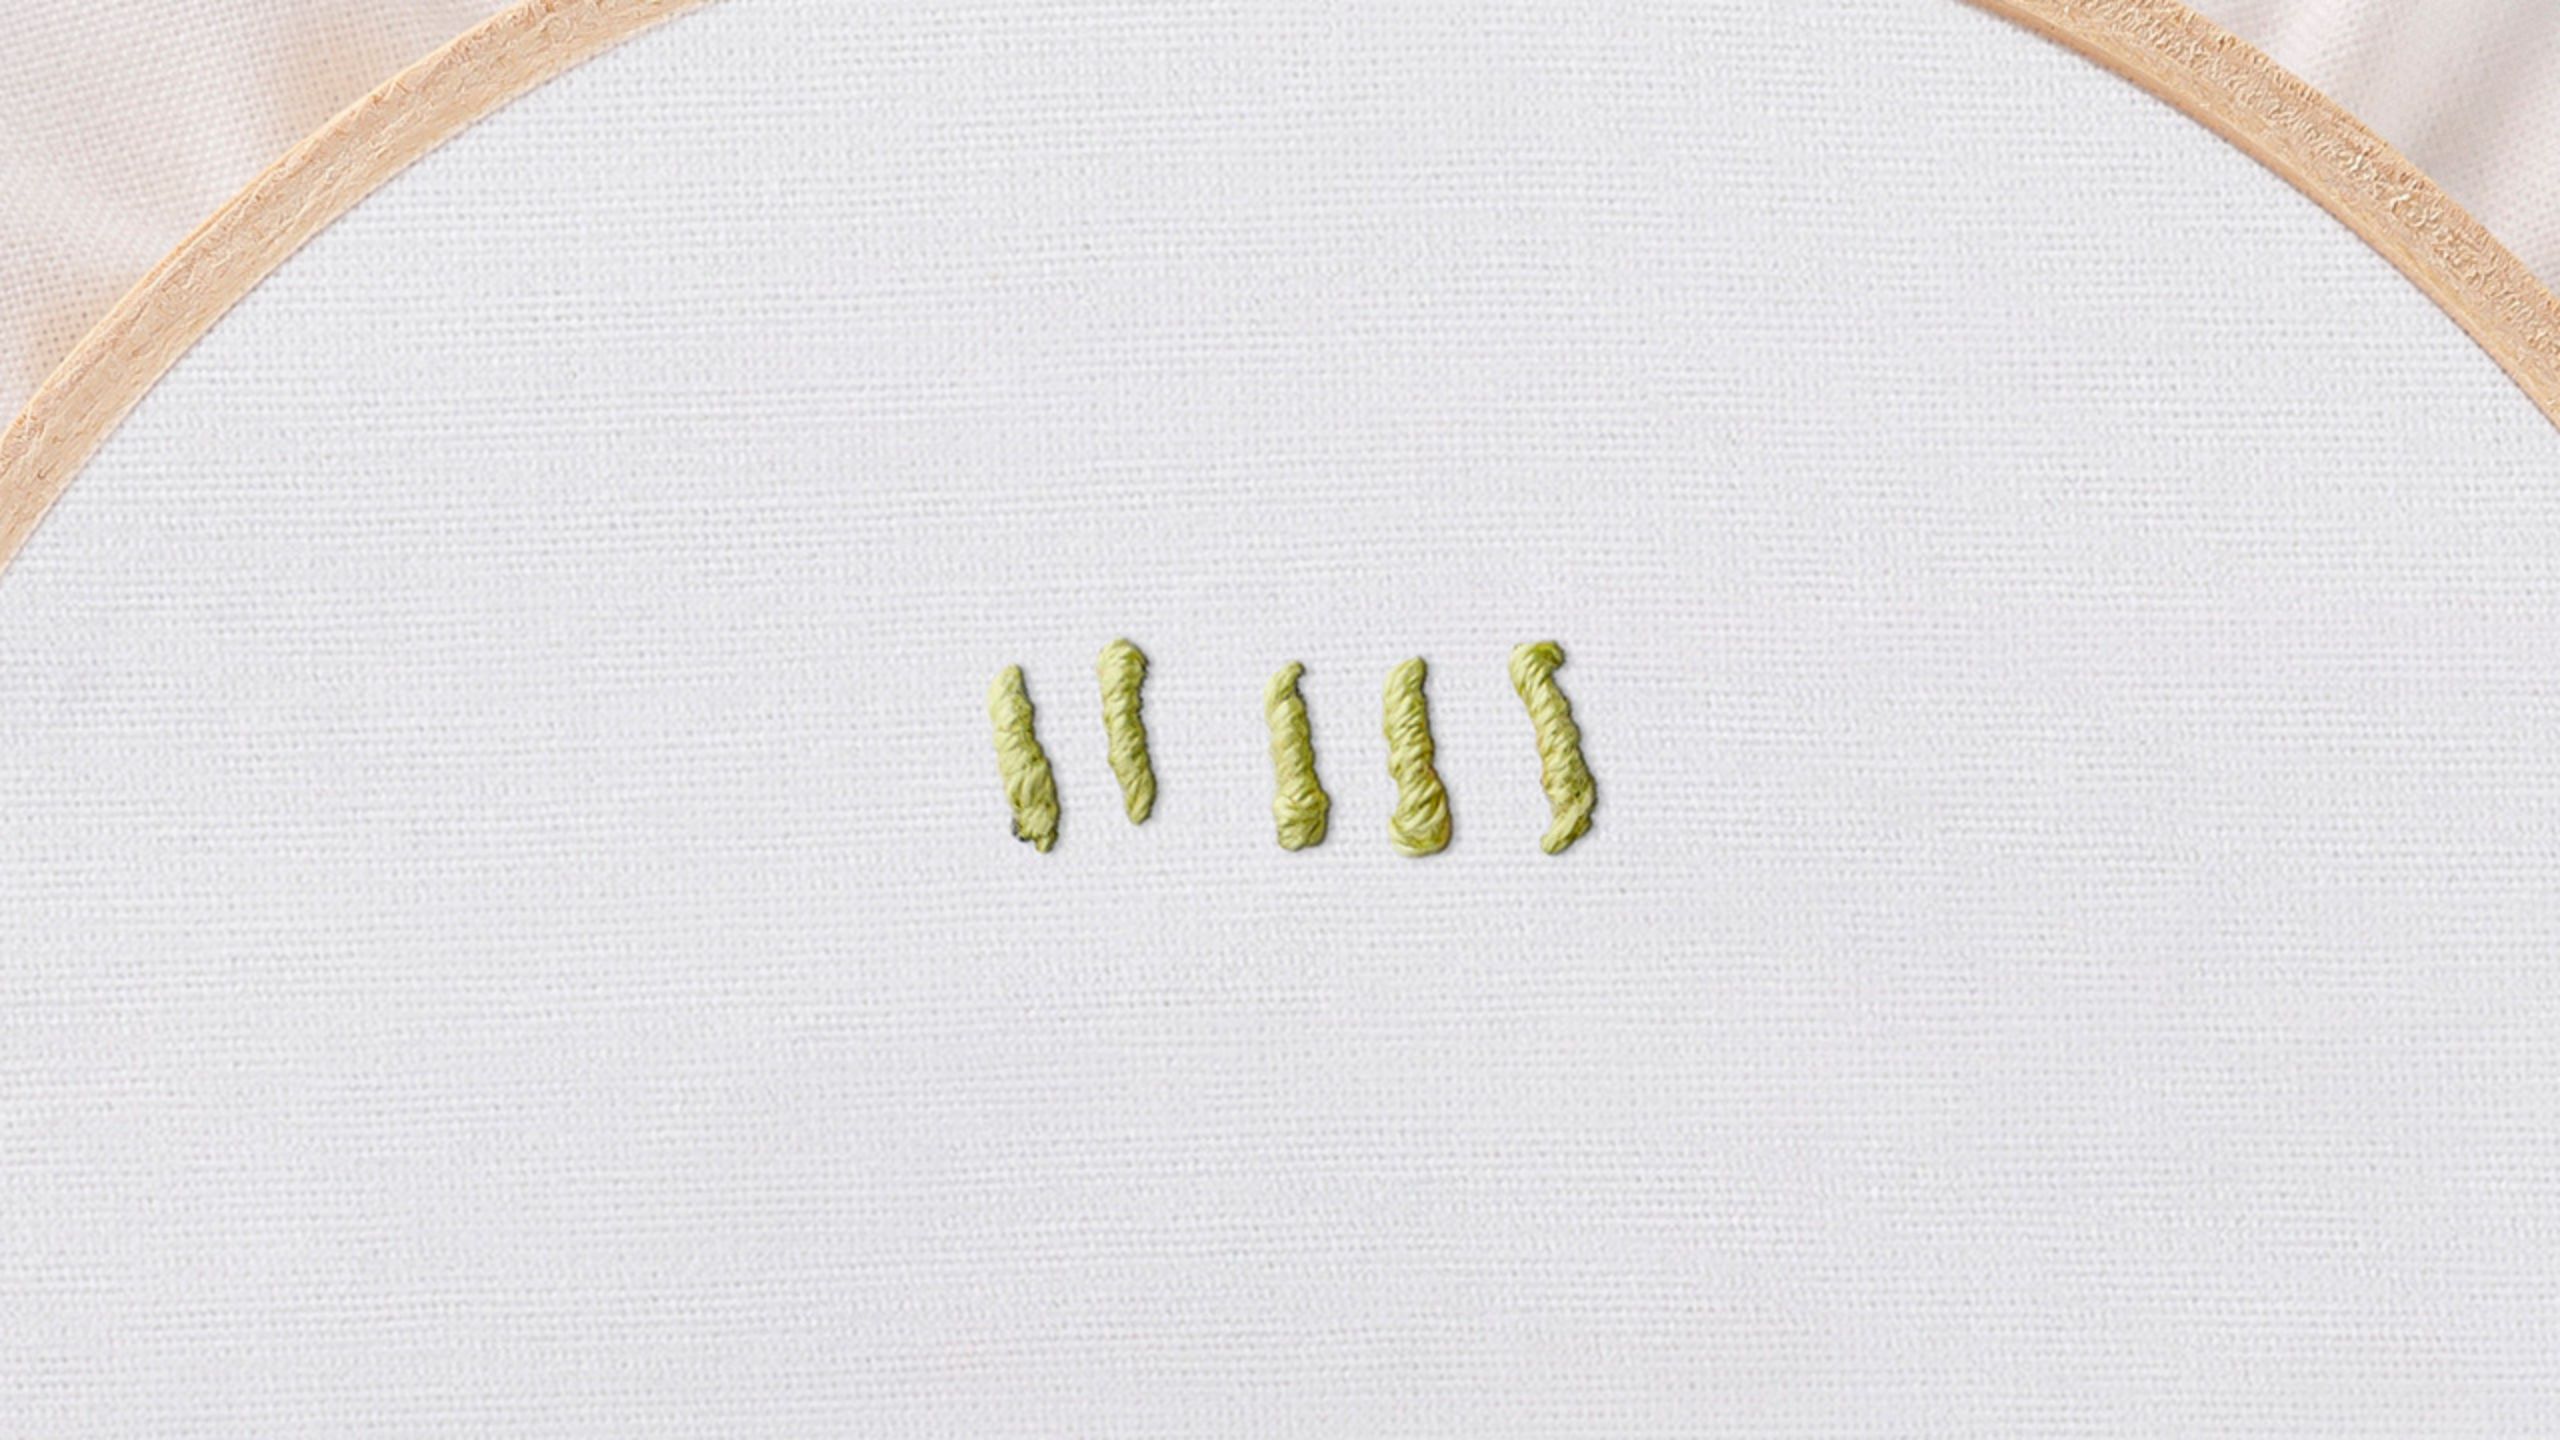
Are you ready to dive into the enchanting world of hand embroidery? Join us on this exciting journey as Natalie, a passionate embroidery enthusiast, guides beginners through the fundamentals of this timeless craft. Whether you are new to embroidery or looking to master a different stitch, this series can help enhance your craft and have you stitching like a pro in no time! Today’s video will cover how to embroider a bullion stitch.

Instructor

Natalie Doan

Natalie is the host of Quilting 101, Embroidery 101 and the Creative Strategist and Editor of Block Magazine at Missouri Star Quilt Company. She was taught how to sew by her mom, of course, and began quilting when she grew up.

Common Questions

What is covered in Embroidery 101: How to Embroider a Bullion Stitch?

Are you ready to dive into the enchanting world of hand embroidery? Join us on this exciting journey as Natalie, a passionate embroidery enthusiast, guides beginners through the fundamentals of this timeless craft. Whether you are new to embroidery or looking to master a diffe...

How long is the tutorial video?

The tutorial video is 00:08:32.
Video Transcript

[Music] hi everybody I'm Natalie with Missouri Star Quilt Company and today on embroidery 101 we're going to learn the bullion knot now this Stitch is very pretty it looks a little complicated and it can be tricky so you've got to take your time it is beautiful though I promise you're going to love it it's similar to the French knot but you wrap the thread around your needle a lot more times and you stretch it out so it kind of looks like a little worm or caterpillar it's kind of cool all right so we've got a knot in our thread we're going to pull up from the back you'll go as far as you want your knot to be and go all the way down then you leave some thread on top bring your needle back in near the Stitch that you just started with so you're coming up right next to it it can be next to it in front of it behind it either way now what you're going to do is you're going to wrap the thread around your needle you want to keep it sort of stacked on itself you can push it down but you do this as many times as it takes to cover the length of your Stitch so I don't know if you can see that we'll do we'll do a couple here and then we'll get our good closeup so you can see it so I'm going to wrap this around and then I'm going to push it down and pull my needle through so that all of these little stitches stay in a nice straight line it helps so much if the eye of your needle is the same width as your needle so you don't want one of those needles that has an eye that is fatter than the needle itself all right so get a good look at this so see how it's now pretty close you can use your needle or a fingernail to push those stitches down so that it just covers the length of your Stitch and then you put your needle back through to secure it so just like that you've got a little bullon knot so let's do another one so we'll come up from behind the fabric go back in the length of the knot you want to make these are really great on um leaves as texture Builders all right so so we're going to come right back up next to the thread the first um the first one that that we put in that's nice and secure the one that is loose that's the one that you're going to secure the end with all right we're going to wrap this around as many times as it takes to cover the length that we're going for if you want your bullon knot to to be really lumpy and loose so that it kind of Curves and creates texture you can make the knot longer than the length of your Stitch so if you add to it that makes them makes it a little bit lumpier all right so you want to keep it loose enough that you can slide your needle through but tight enough that it stays lined up how you want it so that's where this can take a little bit of patience so you're just going to pull that through it's kind of hard to see so you're holding it down with your fingers pulling it through and when you've got your thread mostly through that's when you're going to look at it and you're going to tighten it up with the point of your needle and then when you've got that the the as taut as you want it you'll just put your thread back through and pull that straight down all right let's look at this a little closer for the last three all right so we're going to create another bullon knot coming up from the back of the fabric we'll go in the length that we want to make our knot that's our loose thread we come back up by our very first thread right here can be next to it or above it behind it it doesn't really matter cuz you're going to wrap the thread around your needle however many times it takes until your the line of thread is the same length as the knot that you want to create then you're going to hold your finger on these threads and pull the needle with the thread through that line of [Music] Loops so I don't know if you can see that very well I'm holding it so that we can pull this through and once I've got most of my thread through that's when I'm going to remove my fingers and use the point of my needle to straighten it out and tighten it up you can kind of push these down and adjust them [Music] um so it looks however you want it to look when you're satisfied with it then you can put your needle through the fabric into the back of the fabric to secure it and you've got a nice little bullon knot all right we'll do it again two more times just so that you can see it cuz I know sometimes my hands get in the way [Music] and again like with the French knot if you're if you're wrapping it super tight and your needle won't move you just got to like ease up Let it loosen up a little bit and then push your needle through hold on to those stitches so they don't unwind very gently and then once you've got your threads most of the way through you're going to just use your needle to finish pulling it and hold them down so that it looks how you want it to look and then secure that knot by putting your needle back through right at the end of it and uh they're kind of kind of loose little cool textur things it was really difficult at first when I first first learned how to do this but I feel very comfortable with it now and they're um they're actually kind of fun to make wrap it around holding on to those threads so they don't come [Music] undone I didn't get quite as much thread through as I I thought okay now I'm going to tighten that back [Music] up you can fiddle around with it quite a bit to make it look the way you want it to look and then secure it when you're satisfied and that is it just like that super easy and fun I've uh I've put the bullion knot in some leaves on the tea towel and also um I'm going to teach you how to make the bullion knot into a bullion Rose so it should be pretty fun all right so you can see here in these leaves I added some bullon knots I actually put them in the leaf first and then filled in with straight stitches around it for um sort of a lumpy satin Stitch look and I really like it I think it gives it a lot of texture and makes those leaves look really fun and chunky so hopefully that gives you a good idea of some things you can do and then you'll see there's bullon knot here as well which I will teach you how to do in in the next episode if you enjoyed this video there's lots more where that came from I have a whole Channel called embroidery 101 where I teach you what you need to know to get started and also give you tons of tips and ideas to refresh your memory and help you to advance in your embroidery Journey so click the link below and I I hope you enjoy happy stitching

Recent tutorials

See all