Skip to content

Free quilting video tutorials from Missouri Star

Quilting Tutorials
Embroidery 101: How to Embroider Bullion Rose Stitch

Embroidery 101: How to Embroider Bullion Rose Stitch

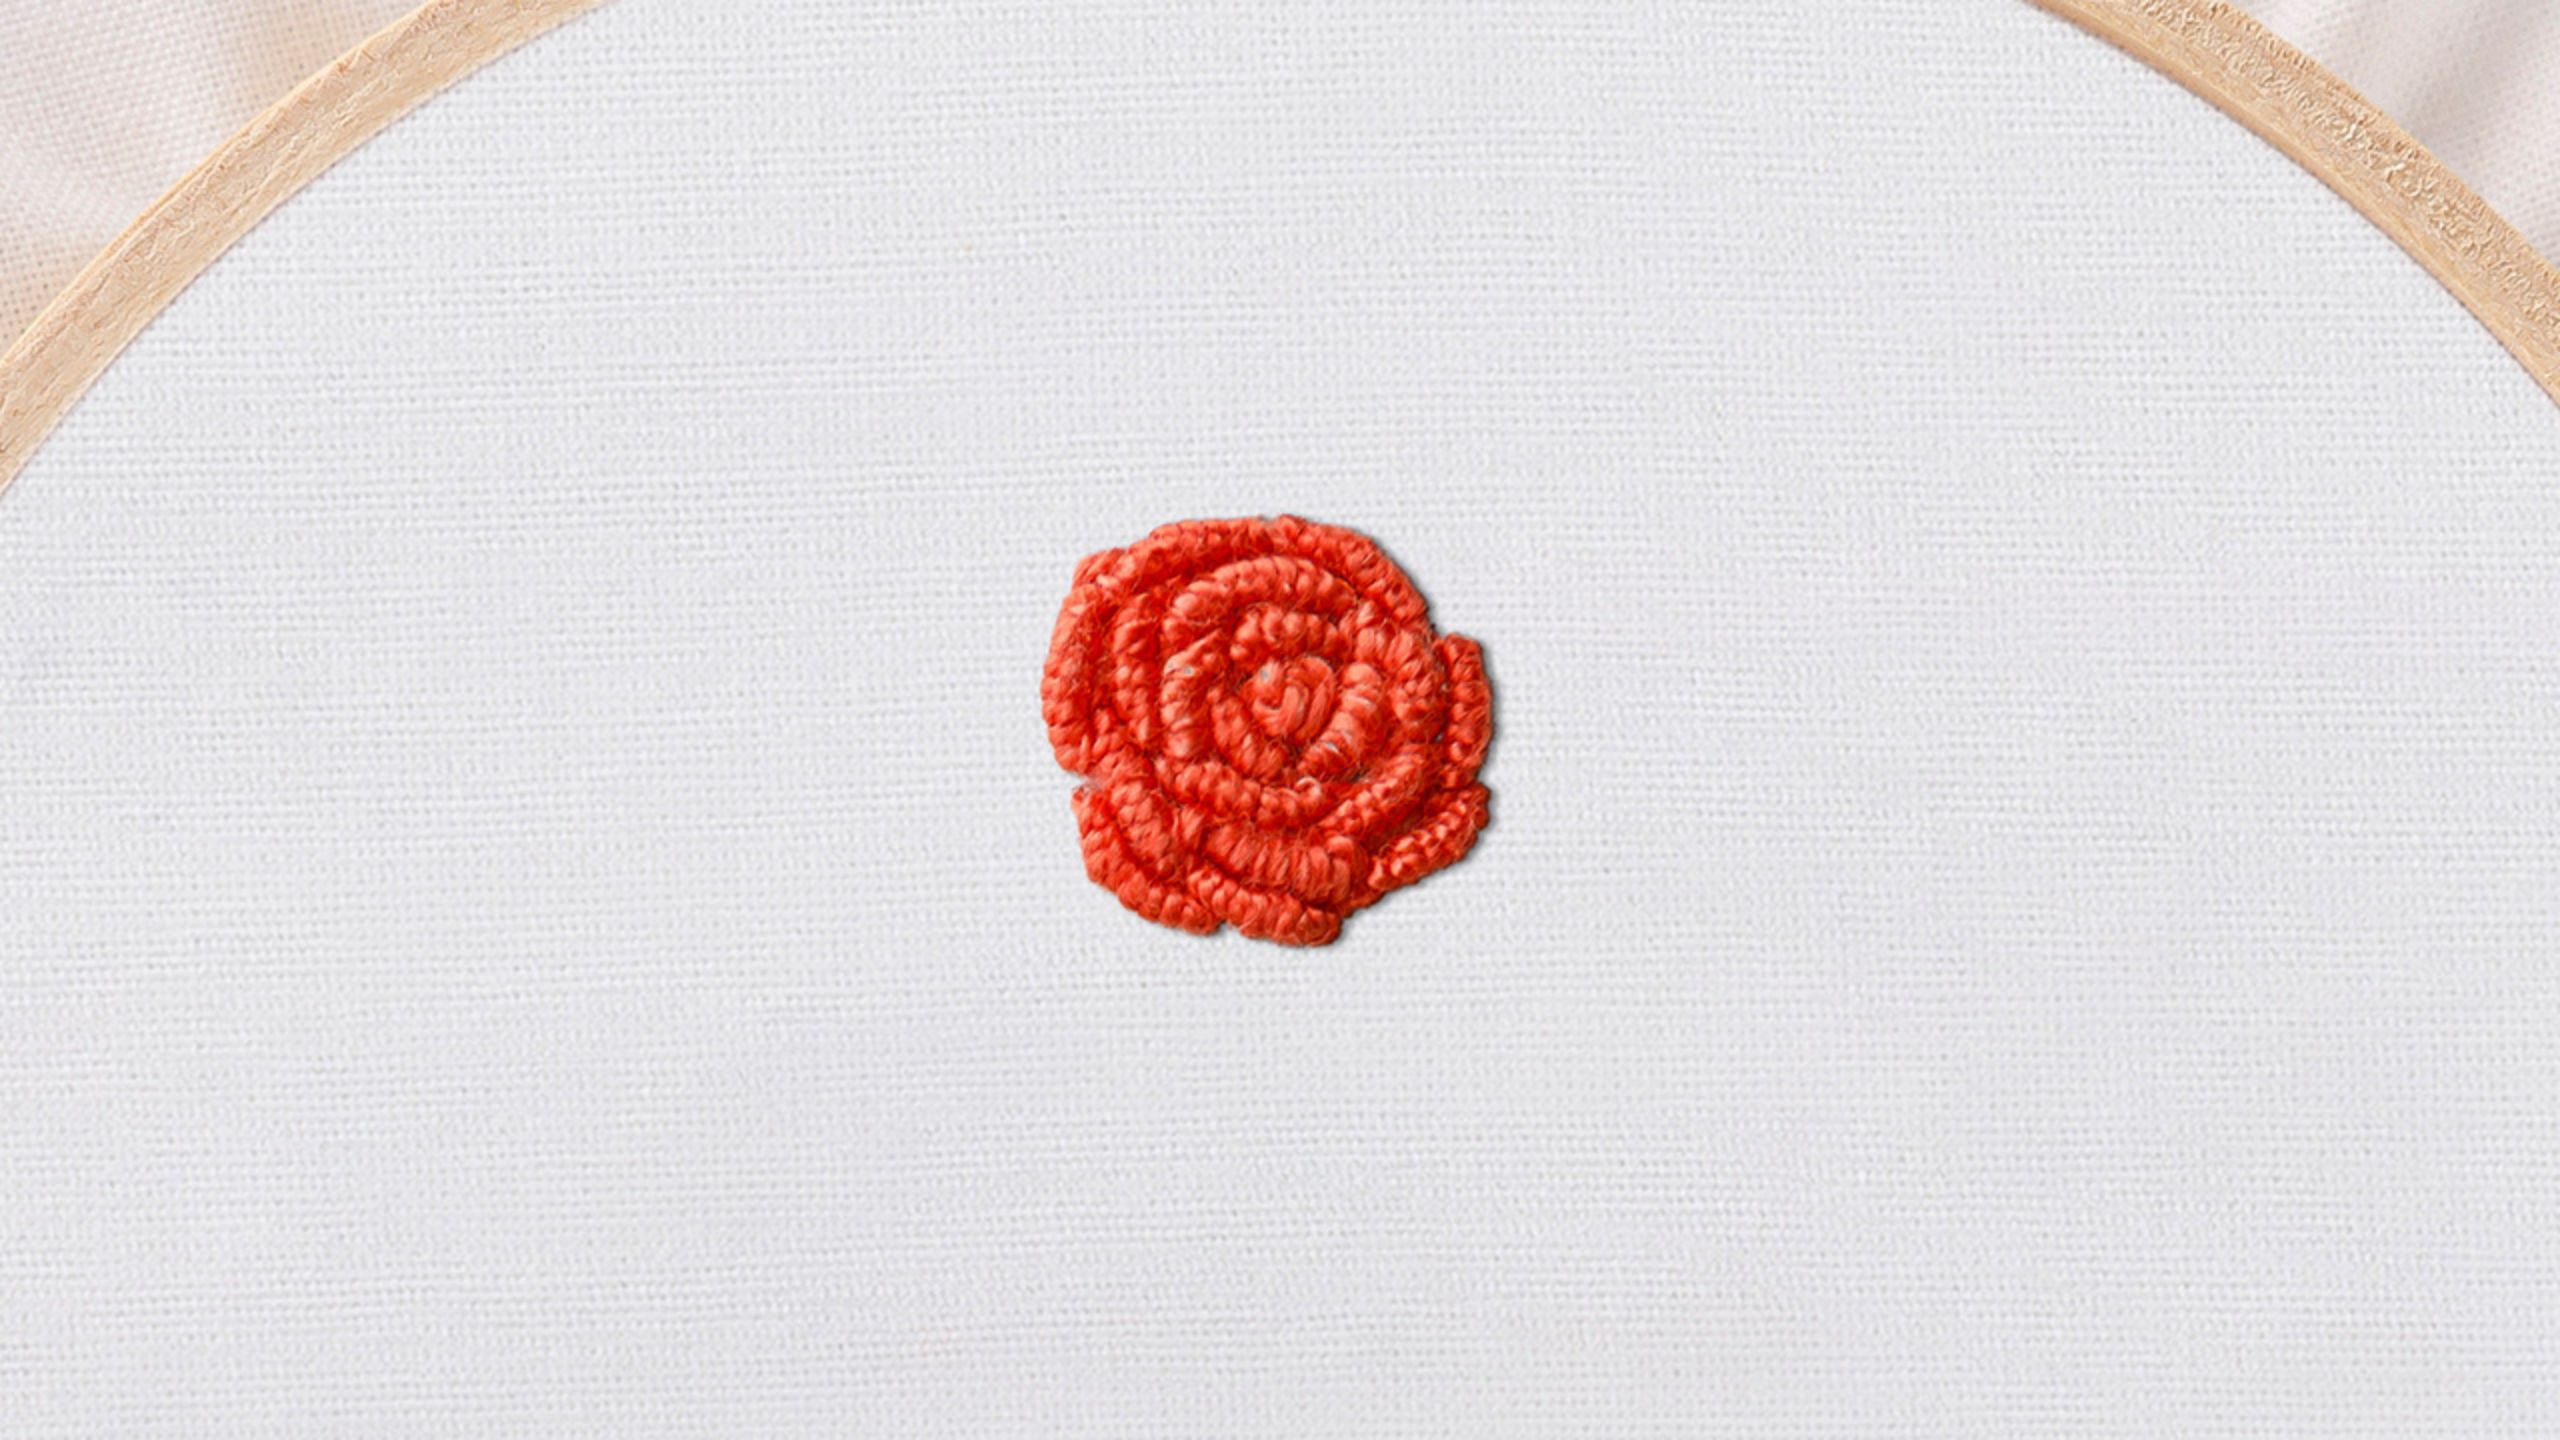
Are you ready to dive into the enchanting world of hand embroidery? Join us on this exciting journey as Natalie, a passionate embroidery enthusiast, guides beginners through the fundamentals of this timeless craft. Whether you are new to embroidery or looking to master a different stitch, this series can help enhance your craft and have you stitching like a pro in no time! Today’s video will cover how to embroider a bullion rose stitch.

Instructor

Natalie Doan

Natalie is the host of Quilting 101, Embroidery 101 and the Creative Strategist and Editor of Block Magazine at Missouri Star Quilt Company. She was taught how to sew by her mom, of course, and began quilting when she grew up.

Common Questions

What is covered in Embroidery 101: How to Embroider Bullion Rose Stitch?

Are you ready to dive into the enchanting world of hand embroidery? Join us on this exciting journey as Natalie, a passionate embroidery enthusiast, guides beginners through the fundamentals of this timeless craft. Whether you are new to embroidery or looking to master a diffe...

How long is the tutorial video?

The tutorial video is 00:11:55.
Video Transcript

[Music] hi everybody I'm Natalie with Missouri Star Quilt Company and today on embroidery 101 I'm going to teach you how to make a bullion Rose now this is using the bullion knot so if you want a more detailed view of that um I have another video using that so it's super easy I will walk through it again anyways when you're making a bullion Rose you typically start with some French knots in the middle if you're making a small one you can just do one French knot and if you're doing a larger row you can do three so I'm going to put in three French knots on this one to get started and again there is a French knot video if you want to go back for a refresher on that but you just wrap the thread around your needle two or three times and then go back in next to where your needle came out and pull that through if it's a little tight you can untwist it a bit so it's looser I'm going to do a couple of I'll do three because I think that makes the nice a nice center of the flower these tend to work out really well if you've got um almost a little bit of a triangle for overlapping these knots I think they look really pretty all right one more French knot and then we will start with our [Music] bllons this is kind of a cool Stitch it's considered a stitch but it's also the combination of two other stitches to create a new Stitch all right so for the bullion knot we're going to start by again having um an we'll pull the the needle through the back and then you're going to make make a short little Stitch this is the length that you want your bullion knot and we're going to these are going to end up being kind of curved and that's just where you put your needle in and out it's it's going to look really cool um you can determine the length it's all depends on how you want it to look so you start with smaller ones in the center and then they get bigger as they go out all right so you'll put your needle have your needle come back up where your first thread is you wrap that around until it is the length of the knot that you want to create now when you're doing the bullon rose I would recommend doing a few extra so it's a little bit longer because that way you have texture and flexibility for curving around knots um you don't want them super tight like you would if you were just making straight line bullon knots all right so you're going to use your fingers to hold those knots knots in place pull the thread all the way through and then when you've got it down this is where you're going to use your needle and you kind of are going to pull it so that it curves the way you want it to and when you've got that curved then you'll put your needle back through to finish that knot and then you get to decide where your next one goes so I'm going to put one I'm going to put one that that is going to go around this direction and then another one on this side so it's kind of a triangle effect you start from the back go down where you want that knot to end I like mine to overlap a bit so I always go a little bit past the last knot that I made and then it comes your needle comes back up next to the first um the first thread wrap it around a few times until it is the length or longer that your space is holding those threads with your finger you're going to pull the needle through till the thread is all the way done and then you use your needle to tighten it [Music] up and then you finish it off by putting your putting your needle back through right near the end and that keeps it nice and [Music] tight then you just continue to add these alternating and going all the way around your [Music] flow bringing the needle up by your [Music] first [Music] and going to do one more and then we'll go and I'll uh I'll let you get a closer look [Music] so we're going to make this next one I'm going to make it go along here don't worry about doing these exactly in the lines because you're making a flower and they're all different so just make them where they make sense so I'm going to go down here so that it kind of covers both ends of these two you kind of want them to overlap think about like a a rose a peonie something that has like a whole bunch of petals that sort of overlap and wrap around each other we're wrapping the thread around the needle so that it's a little bit longer than our space because we want these to be kind of lumpy it makes them look more like flowers and brings out that really pretty texture all right so once we've got it wrapped around we're going to hold it with our fingers hold the thread Loosely so that the needle can pull through you pull all the way through till your thread starts to tighten up make sure you're not too knotted up on the back I had to double check it felt like it was a little short now see how we've got we've got loose threads here that wrap around the thread what we're going to do now is push this back to tighten it up now if we want it a little looser you can pull them out so that they stretch to be wherever like you can really fiddle with this and make it however you want it to look so I've got that where I want it I'm going to put my needle back in here so that this one is attached and I think that looks just great so I'm ready to start another one I'm going to do this one from about this spot well maybe a little farther over I like them to overlap so we'll go there we'll go to about here I I kind of alternate short um and long I like them to get a little bit bigger as they get out towards the outside edge because that's more like a natural flower they're going to have smaller Petals in the middle and bigger ones on the [Music] outside it's more compact in the middle looser on the outside so just play along with it and if you end up with a little Gap put another one in [Music] there [Music] and you are just going to continue doing these as many as you need to until your flower is the size that you would like it to [Music] be [Music] I do like to do these with um a lot of strands so this is all six strands of floss um I have done them with pearl cotton it just they end up being smaller and um tighter so you'll have to do more rows of petals to make a a full a really full looking flour but they're really sweet if you're doing something dainty to use uh something that has less floss like the Pearl cotton or you know two or three St strands of embroidery floss instead of a six strand thread that's where the design the creativity that's where that all comes into play cuz you get to do whatever makes you [Music] happy I'm going to try and pull this one around a little bit by loosing it loosening it up and just kind of making that go where I want it to so I'm going to stretch it out a bit and have it come down there so I think I think that looks really nice I'm going to start kind of ending the this outer layer on this side cuz I think it looks pretty good this [Music] way go all the way up to this one [Music] don't worry I sometimes it gets where it feels really tight you just have to ease up a little [Music] bit and then I'll do that from here kind of pull this thread so it's as tight or as Loose as you want it and when you've got it the way you want it to look secure it where you want it to end and that's it that is the bullion [Music] Rose it's pretty simple and fun I've made a couple of projects that use the bullon rose as big flowers I think they're beautiful and I think it'll be really fun once you've once you've practiced a few times I think you're going to really love adding this embellishment to your projects if you enjoyed this video there's lots more where that came from I have a whole Channel called embroidery 101 where I teach you what you need to know to get started and also give you tons of tips and ideas to refresh your memory and help you to advance in your embroidery Journey so click the link below and I hope you enjoy happy stitching

Recent tutorials

See all