

Make a Beach Ball Dresden with Jenny and Me & My Sister
 Jenny Doan
- Jelly Roll
- Modern
- Lap / Throw
- Beginner
- Quilt size 60" × 60"
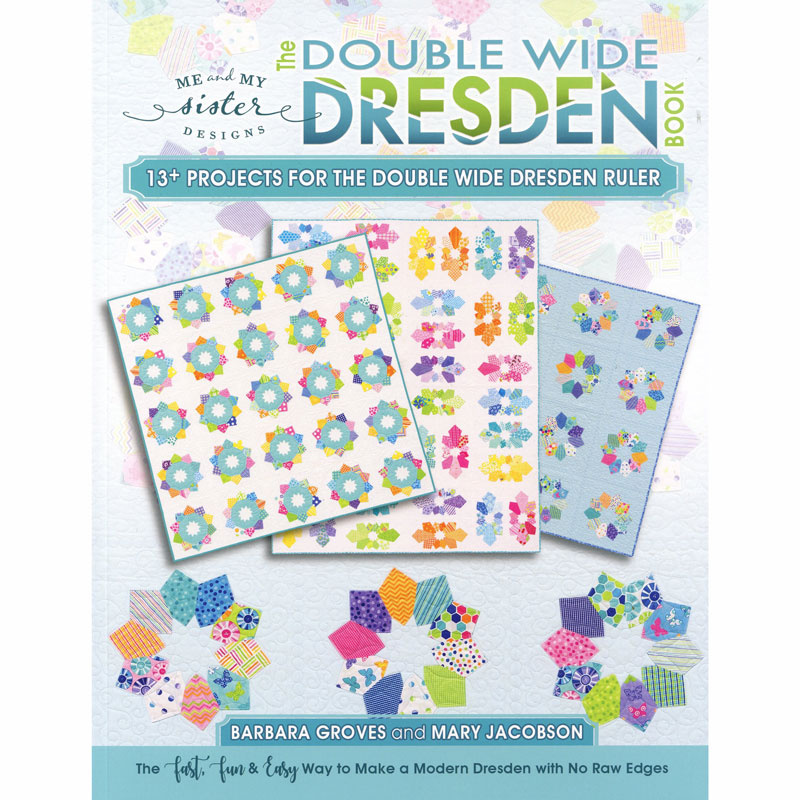
Barb and Mary of Me and My Sister Designs teach Jenny how to make a beautiful Beach Ball Dresden Quilt using a Double Wide Dresden Ruler by Me & My Sister and 2.5 inch strips of pre cut fabric (jelly rolls). They used Frolic Jelly Roll by Me & My Sister for Moda Fabrics.
Instructor
Jenny Doan
Jenny Doan is an American quilter, author, and YouTube personality. Jenny started Missouri Star Quilt Company in 2008 and today it is the largest quilting supply vendor in the United States.
Shop this tutorial



Common Questions
What is covered in Make a Beach Ball Dresden with Jenny and Me & My Sister?
Barb and Mary of Me and My Sister Designs teach Jenny how to make a beautiful Beach Ball Dresden Quilt using a Double Wide Dresden Ruler by Me & My Sister and 2.5 inch strips of pre cut fabric (jelly rolls). They used Frolic Jelly Roll by Me & My Sister for Moda Fabrics.
How long is the tutorial video?
The tutorial video is 00:10:36.
Are supplies listed for this tutorial?
Yes. The tutorial page includes the supplies and materials connected to this project.
Is a transcript available?
Yes. A written transcript is available on the tutorial page.
Video Transcript
Mary: Beach Ball
Jenny: The Beach Ball quilt made with a double wide dresden ruler. It’s just gorgeous. And so tell me what we need to make this.
Mary: Ok, so you’re using two jelly rolls.
Jenny: Oh
Mary: I’m going to use a solid jelly roll
Jenny: Ok
Mary: And a print jelly roll.
Jenny: And so this is the new line Frolic. Your lines are always so cute.Just bright and happy. I love them.
Mary: Well thank you.
Jenny: I love them. I’m a fan. I’m having a fangirl moment. Alright, so tell me about this ruler.
Mary: Ok so your traditional dresden ruler is an 18 degree ruler.
Jenny: That’s pretty, that’s kind of a fat little dresden.
Mary: Yes. So and you use 20 wedges and you put them all together and then do applique a little dot in the middle
Jenny: Sure.
Mary: Nope. This is so much easier. We went double wide. 36 degrees. So now you only need ten of your wedges instead of 20. You’re going to see that you have no center to put in there. You have a star shape, a secondary pattern come through.
Jenny: Alright, I’m going to let you get in the middle.
Barb: So you’re going to have this in half the time.
Mary: Half the time.
Jenny: Oh ya because you only need ten. That’s so awesome. You scoot over and you get in the middle over there and I’m going to come around here so I can watch you because we want
Mary: The beach ball here
Jenny: We want camera front and center right here so you can show everything.
Mary: Okie dokey. Well it comes with instructions. It’s all contained within. It shows you how wide to cut your strips. How big your wedges will be. How big your plate will be. How big to cut your backgrounds. It’s all contained
Jenny: All the information.
Mary: Might have to have your reading glasses on.
Jenny: It is little print.
Barb: But the patterns give you all the tips and tricks.
Jenny: Oh there you go. And this pattern is the beach ball pattern. Alright with a cute picture of these two girls on the back. You even get that. Alright show us how this works.
Mary: So I’ve taken a solid jelly roll and a print jelly roll and I sewed those together.
Jenny: Ok
Mary: Ok now I’m going to, I want the turquoise to be in the center of mine.
Jenny: Alright so like this right here.
Mary: Yes. So I’m going to cut them here and there. If you did it back and forth you’d have it would be pretty busy. But the turquoise would be on the outside.
Jenny: Oh I see. If you have them all the same direction
Mary: Like this. Down the thing. Ok then you’re going to take your wedge and you’re going to fold it in half. I’m going to line up those seams right there.
Barb: Right sides together.
Mary: Yes. We’re going to give it a finger press. Then I’m going to sew a quarter of an inch here and a quarter of an inch here.
Jenny: So just like a regular dresden. We’re sewing a quarter of an inch across the top but this time we add the bottom.
Mary: Yes. Ok so if you have the little 18 degree traditional you’d have an itty bitty nothing in your feed dogs. So that’s why the double wide dresden is so fun. It makes it bigger. Now we can do that with both ends. Ok then you turn them out. Here’s one that I did. Ok so we sewed the quarter of an inch. We’re going to turn it out. That little press line we did we’re now going to use to something stitches on here. And then we’re going to give it a nice good press.
Jenny: Ok let’s move this out of the way so we can see this. So this is the finger press line. Sew this together. And when you flip it, see when you open it, this is my favorite thing about dresdens. You know I thought they were hard
Mary: Oh this is the very first one I’ve ever made.
Jenny: Oh is it really. Oh my gosh.
Mary: And I couldn’t leave it alone, could I?
Jenny: So then you just sew straight across the top. We flip it. You know every time I teach this honestly I think grandmas are going to come out of the ground and slap me because it’s so much easier. They worked hard. They made cardboard templates.
Mary: It’s a possibility, it could happen.
Jenny: It could happen. Alright so then.
Mary: I’ve done this with a lot of different ways. So then you’re going to put them together. And I do them in twos. So line them up. I, my eye goes to the center because of the secondary star pattern. So I line that up first I’m going to up my, and I’m going to backstitch and backstitch into a quarter of an inch along here. And this is what I’m going to turn out with.
Jenny: And you just keep, do you do two, two, two, four, four, four.
Mary: You go the whole way
Jenny: Look at that.
Mary: Oh thank you Barbara. That was very good.
Jenny: She’s so helpful, isn’t she.
Mary: She’s so helpful. Ok so we’ve gotten further along. I do them in halves. And I will press from the outside in. For some reason my iron gets stuck under the edges.
Jenny: Oh ok.
Mary: This is just a little easier tip and trick
Jenny: And I’m noticing that your seams are all pressed open.
Mary: I like to. I come from garment construction and I just do that and it lays nice and flat.
Jenny: It is beautiful.
Mary: And look how that’s getting so cute. Now this is what’s kind of fun too. Let me see if I can find my solid piece. These things center themselves. So whatever you cut your background. And I’ve creased it one way and creased it the other way. So I’ve got these little lines to go by.
Jenny: So criss cross
Mary: I’m going to put this on here. I’m going to go point to point, seam to seam and this little thing is now centered.
Jenny: That is awesome. And the other cool thing that I noticed about this is that you didn’t like spend hours hand stitching this down.
Mary: Oh no, oh no.
Jenny: Which I, which, so cool
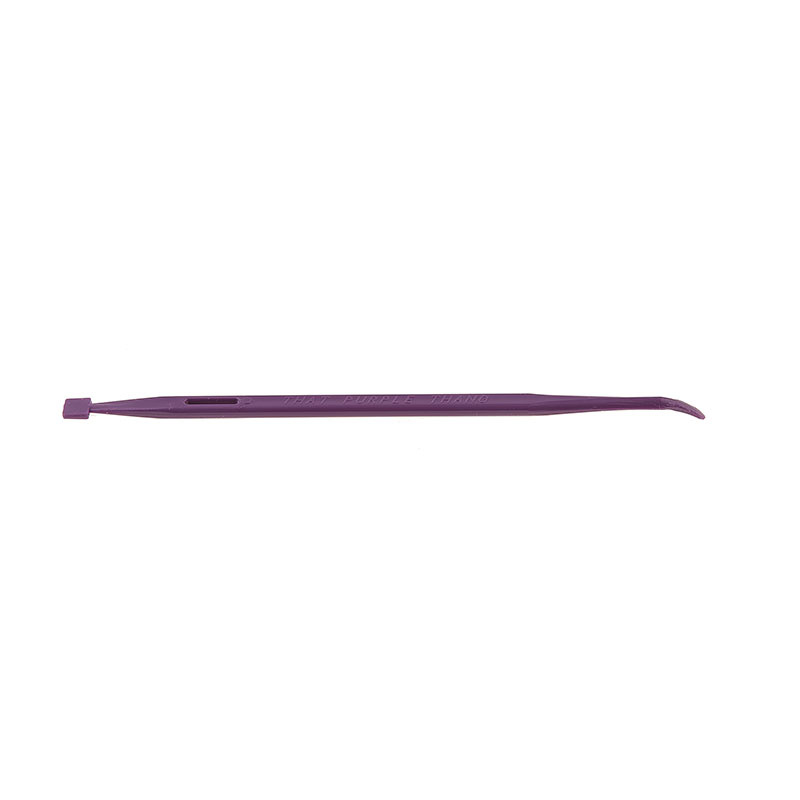
Mary: So what I did was something a purple thang. You ever have one of those?
Jenny: Oh ya. You betcha. We have a purple thang.
Mary: If you can’t find it you need to buy another one because it’s just you’ll never find it at home in all your junk. So just get another one. And it pokes the corners out really nice.
Jenny: Sure. Perfectly.
Mary: Then go through with the applique glue stick. Oh I’ve got some threads there. And I just tap the applique glue on there and hold it all down. And then I get the edge with my sewing machine. I think everybody got one. I think you’re supposed to hem your pants or topstitch with it. You know
Jenny: Oh the one has the little guide, ok ok.
Mary: Ya that one.
Jenny: Now I’ve got you.
Mary: That one we don’t know what it’s for but we have it.
Jenny: This is really nice but I’m not sure what I’m supposed to do with it. Ya the little edge.
Mary: And it goes right along
Jenny: And that keeps it perfect. I was actually just thinking you were like really perfect.
Mary: See this one is perfect.
Jenny: But you had the edge guide.
Mary: I’m going to throw that at you, Barb. See how this is, see it’s all closed off. There’s no raw edges. I’ve done some stitching on this side. It’s just nice. It turns out
Jenny: I love it. It’s so adorable.
Mary: So here’s what it looks like when it’s finished.
Jenny: And that’s so quick because it’s ten and you’re just stitching over the top.
Mary: That’s right.
Jenny: So how many of these do you have up there? One, two, three, four, five, by five.
Mary: 25
Jenny: Well of course you know, you wrote the pattern. I had to count. 25. I’m glad we came to
Mary: Stomp, stomp
Jenny: Tap it Trigger. Stop it
Mary: I did this one and I mixed them all up.
Jenny: Ok, oh so
Mary: It’s a little busy.
Jenny: So this one is done with a solid and the same solid. And this one is done with two strip sets which is really fun too
Mary: A print. Something fun
Jenny: What, could you like put something in here?
Mary: You could
Jenny: You could
Mary: Before you do that, stick something behind there. I’ve used, actually a little charm and stuck it back there.
Jenny: That is so awesome.
Barb: A little charm square fits really nice in there.
Mary: So that’s that one. Do you want to see what else we can do?
Jenny: I do. I actually do.
Mary: Do you want to see this one? What’s fun on it is it’s just not, you can do lots of things on it. I’ve got it all kind of scooched up here.
Jenny: You know that’s something, actually one of my hard things about doing a tutorial is that I see a million different things this could do.
Mary: Oh ya
Jenny: And, and so, so let’s, this is, this doesn’t even look like the same thing. I mean this is gorgeous.
Mary: I chose a 4 ½ inch strip and I cut
Jenny: Which is this.
Mary: And out of all three, yes your two jelly rolls equal that. And when I cut a strip I started at the edge of the ruler here. For my turquoise I started at the half inch. And at the blue I started at the inch. And look how that manipulation of the ruler makes that star bigger.
Jenny: Because the hole is bigger under there. I mean you’ve still got the same things.
Mary: It’s just moved along, made your little wedges a little fatter and spread them apart.
Jenny: Oh my gosh. That is so cool.
Mary: So it’s kind of fun. And there’s so many things you can do with it.
Jenny: Such a quick, we have a few things to show you, don’t we. Over here.
Mary: Yes, yes yes.
Jenny: So this is really fun because this is on the top of a present. But that’s just half.
Mary: That’s half of the dresden.
Barb: And a simple pieced block with that.
Jenny: Wait let me open it up. It’s even cuter long.
Mary: Fun with a birthday cake on it or cupcakes and just
Jenny: Oh gosh, absolutely adorable.
Mary: So it would be fun.
Jenny: And then this one again, just like the different sizes there, you’ve used different sizes here.
Barb: This is Mary’s favorite.
Mary: This is my favorite. This is a boxy rectangle
Jenny: Alright let’s get a whole one up here
Mary: It uses three different sizes on the ruler. All starting up against the one inch.
Jenny: This is like dresden on steroids, really.
Mary: Really it is. I’ve never seen one before. I thought it was kind of art deco at first.
Barb: This is
Jenny: Well and I do love the little star.
Mary: The little star
Barb: Well this is actually the first one that Mary made
Jenny: Ya
Mary: I didn’t want to start on a round one.
Barb: And she showed it to me about a year before we finally completed the quilt and I said, Mary this is so weird. No one’s ever going to buy it. So she’ll never let me live that down
Jenny: Ya I have to say, I have to say I want one of these rulers so
Mary: This has 45 of our lines of fabric in it.
Barb: Different lines.
Jenny: How cool is that. Oh interesting. Ya so it’s all scrappy. That is actually one of the things
Mary: Really good scraps
Jenny: That is actually one of the things I love about your fabric is all the lines go from year to year. It just
Mary: You don’t want your purple and your turquoise to look alike. You want it to be a little different.
Jenny: I love that
Mary: But the ruler is an eight inch so, so any size, a layer cake, a charm square
Barb: A jelly roll
Mary: You can do all kinds of things with it. You can do just about anything with fat quarters so
Jenny: That’s awesome.
Mary: So it’s kind of
Jenny: Well I pretty much think you guys are geniuses
Barb: Well thank you
Mary: Ya Barb, thank you
Jenny: Well thank you so much for joining us. Thank you so much for joining us today.
Barb: Oh thank you.
Jenny: It’s been so much fun. We hope you enjoyed this tutorial on the Beach Ball quilt from Me & My Sister and MSQC. See ya later.
Mary: Thanks
Barb: Bye bye.


