Skip to content

Free quilting video tutorials from Missouri Star

Quilting Tutorials
Make a "Crochet Rag Rug" with Misty and Sara from One Big Happy Yarn Co. on At Home With Misty

Make a "Crochet Rag Rug" with Misty and Sara from One Big Happy Yarn Co. on At Home With Misty

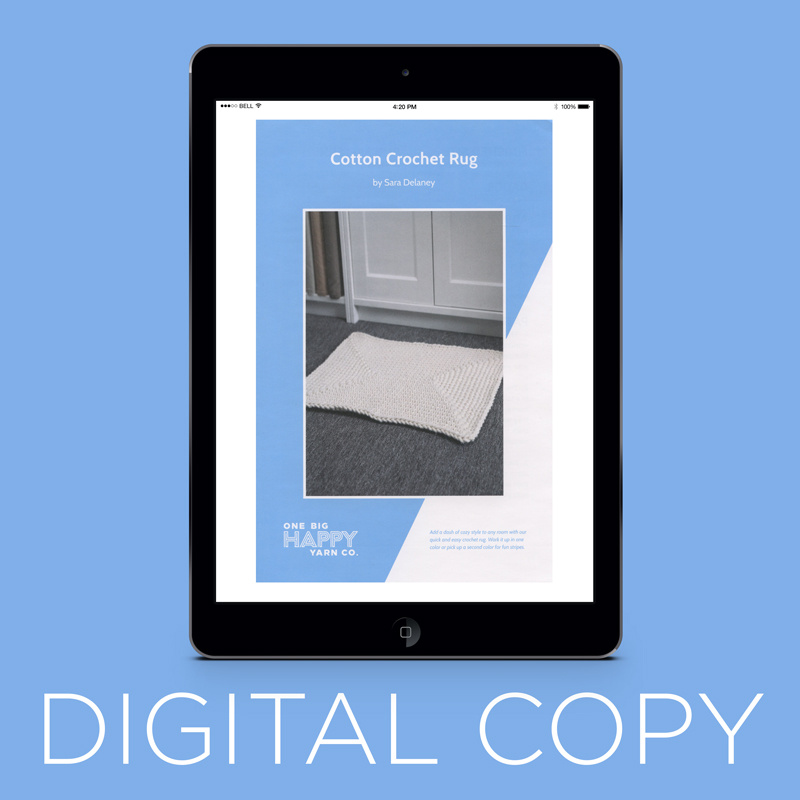
Make your floors as snug as a bug in a rug! Follow along as Misty teaches you something new in this fun crochet crossover! Our host has teamed up with One Big Happy Yarn Co. to show us how to create a beautiful Crochet Rag Rug. Make it for any room in your home to keep your feet comfortable and warm. Time to break out your crochet hooks and get to work!

Instructor

Misty Doan

Misty Doan grew up surrounded by sewing and quilting. She loves spending time sharing tutorials each week each week, and when she’s not stitching up one of her fun sewing projects for home decor, most likely you’ll find her hanging out with her husband and three awesome kids or working on a house project.

Common Questions

What is covered in Make a "Crochet Rag Rug" with Misty and Sara from One Big Happy Yarn Co. on At Home With Misty?

Make your floors as snug as a bug in a rug! Follow along as Misty teaches you something new in this fun crochet crossover! Our host has teamed up with One Big Happy Yarn Co. to show us how to create a beautiful Crochet Rag Rug. Make it for any room in your home to keep your fe...

How long is the tutorial video?

The tutorial video is 00:33:11.

Are supplies listed for this tutorial?

Yes. The tutorial page includes the supplies and materials connected to this project.

Video Transcript

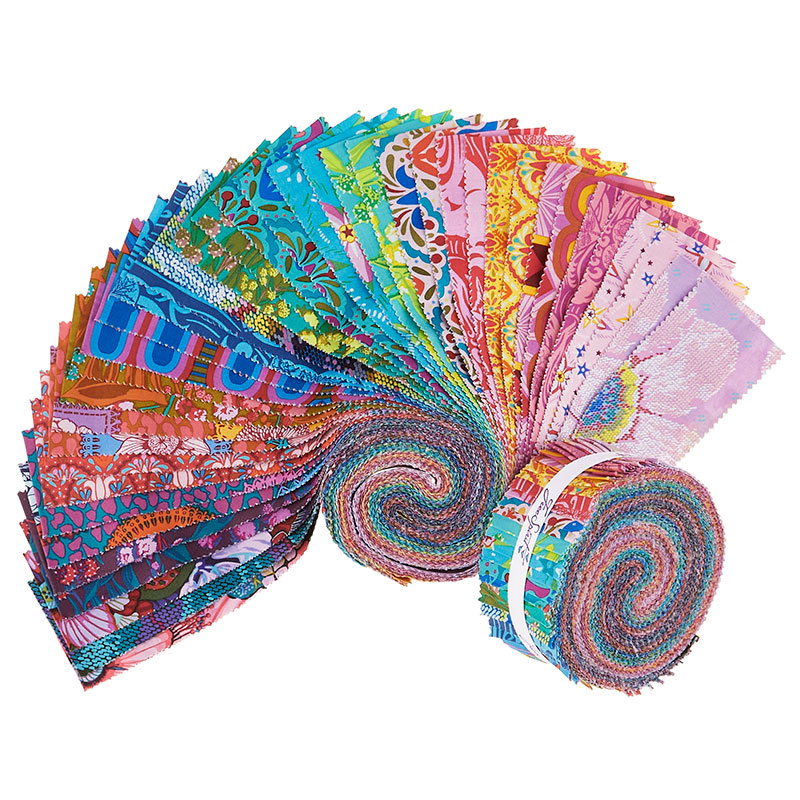
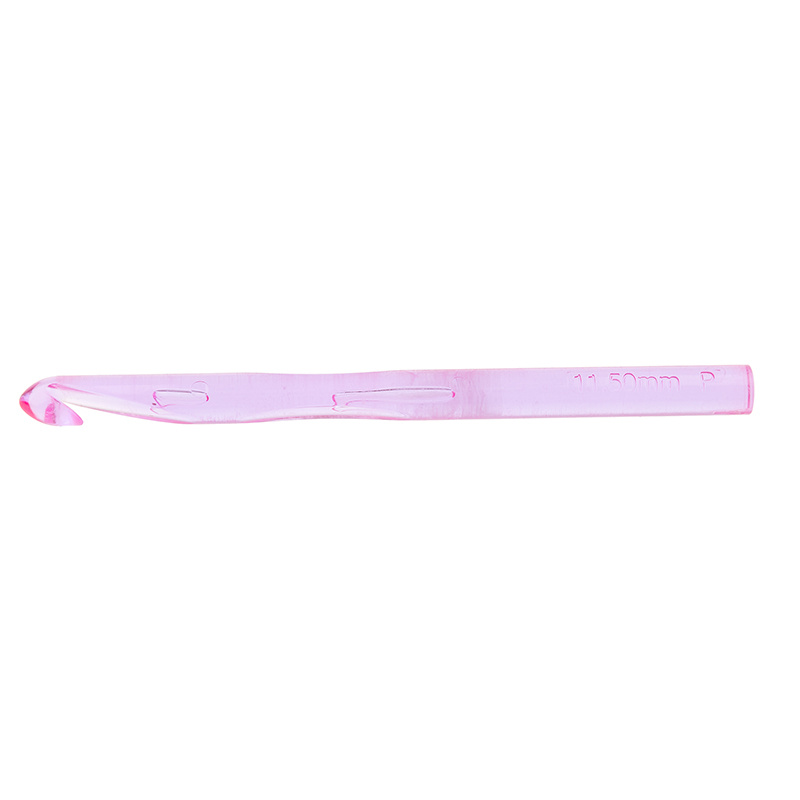
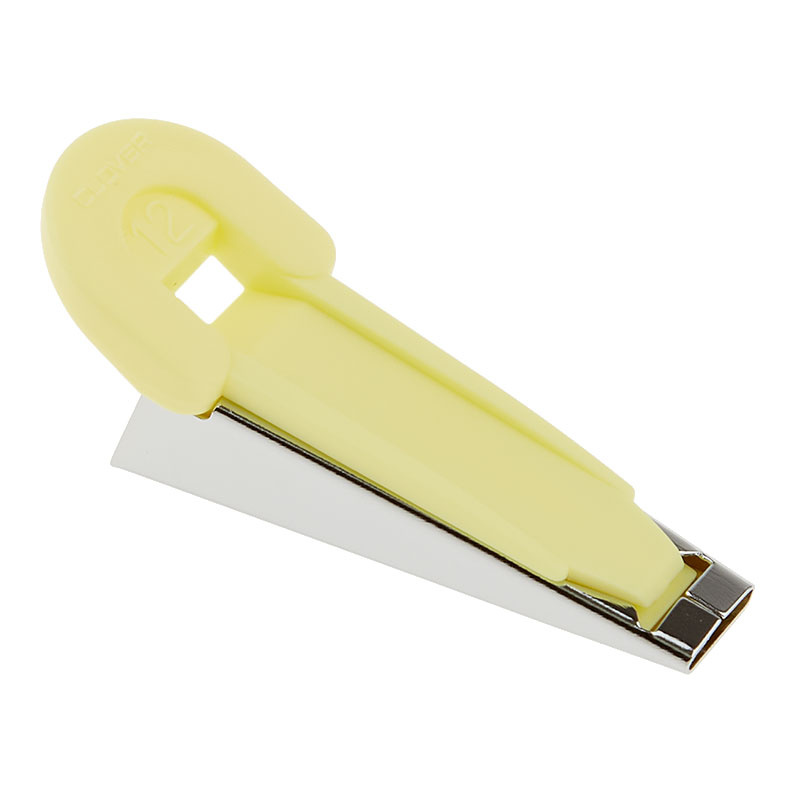
[Music] thank you thank you guys so much for being here today I am so excited Sarah thank you for joining me I'm so excited to be here with you today Misty do you want to tell everybody a little bit about yourself and what you do over at one big happy sure um so I run everything behind the scenes at one big happy I have the pleasure of working with Jenny fish on all of our knit patterns and knit tutorials and I step in once in a while and help out with crochet um I've been working in the iron industry for about two decades I have a couple of books and a couple hundred patterns so crochet really lives under my skin and I like to explore different materials and uh and just have fun with it yeah so Sarah reached out to me and had this idea and I thought it was a perfect collaboration I know so many of us who are Quilters also work with yarn and this is a great way to use those skills that we have when we cross over but also work through our stash because we're going to use a jelly roll today to make this awesome rug and the one that we've used in this sample here is welcome home by Anna Maria Horner for free spirit it's such a beautiful bright line I just really love it it's it's so happy the fabric in this jelly roll is gorgeous like every piece that I pulled out I was like I want more of this right that's how I feel every time I see Anna Maria's lines they're just so gorgeous and um you know maybe we'll get you into quilting before you know it because it's the fabric that draws you in that's that is so perfect and so um we also have two different methods Sarah's going to show you um two options of how to use your jelly roll one is to have a half inch bias tape maker so if you have that lying around or you want to grab one that's a great option but um Sarah do you want to just dive into getting started with this sure um so of course you're gonna you're gonna open up your jelly roll yeah and then take a look at all of those fabulous colors and then you kind of need to make a decision about how you're going to use those colors are you going to group them the way that they appear in the jelly roll are you going to try and line them up color by color so I went with just how they came out of the jelly okay I was gonna ask you um on this one but I have I have um another sample that I pulled that had um some kind of Americana colors too okay and I really liked um I really liked the beiges and the greens that appeared in that and I thought I could use sort of the rusty Reds and the Blues in another project Okay cool so you split them up intentionally yeah so you can change the color order and mix it up this is a great way if you have um like I have I have a friend that's a quilter and so sometimes she has 90 of the fabric in a jelly roll that she loves and the other 10 sort of sits off to the side so this is another great way to bring together those scraps and stuff together totally I love piece those together into a colorway that you really like okay awesome so let's dive into it okay get started great um so let me just get the actual rug out of here yeah uh should I open up the jelly roll yeah let's do it okay I mean I think these Fabrics are just beautiful I know I love them it's like the happiest day it really is um lint brush was your friend was it was a lesson for me I don't usually need a lint breast when I when I open up a skein of yarn um but that came in handy I mean just those colors are just so pretty and that just that Arrangement was gorgeous I loved it I agree so and I think most of the Fabrics in here there are two strips some of them there's only one and that's okay so um actually why don't I turn this over to you for cutting this okay yeah let's do it and this is perfect so there's two so we can show both both options cutting options okay so why don't I slide out of the way a little bit yep totally so one cutting option is to just cut it in half okay great it is to cut it in thirds so I'm gonna go ahead and fold this just because I I'm totally comfortable cutting through four layers of fabric and so since this is two and a half inches we need one and a quarter inch strips but I'm going to rotate this so that the the marks on my ruler make more sense so now we can just cut that in half like so perfect and then this is the option we would use with the bias tape maker correct okay so then we can set that aside and then so on these you cut it in thirds right you want to press that in for me just so we don't have any rumples when I go to cut it teamwork it's the best [Laughter] can't beat it okay great awesome same idea just gonna make sure that's as straight as can be the good news is this is pretty forgiving too yeah so I'll tell you a secret I don't have a rotary cutter at home so I did this with scissors oh my goodness it's not perfectly straight lines it doesn't have to be Perfection because that is dedication you never see those edges so what uh what measurement am I looking for on this math is hard so this is two and a half divided by three is that uh a little over three quarters yes yes is that right yes all right I'm going for it so this is where I also tell you that I eyeballed it with my scissors yeah that makes sense so we're just gonna do that same thing there's one because again it doesn't have to be exact because this is all going to be worked into those crochet stitches so nobody's actually ever going to see the width of your strips I wonder if I need to trim a little bit off you're saying it doesn't really matter it's so close look at that I just have the pink edges hanging over here all right cool so there's our second option so one option is in thirds one is in half right and Sarah you mentioned the benefit of doing it in thirds is you get extra yarn essentially so you can make a bit bigger project yeah so the great thing with the um the crochet rug pattern that we have at obh is that it it doesn't specify a size I mean we give you a certain amount of yardage and tell you that it'll make a certain size but you this pattern is great because you can just keep going with however much yeah or a bias tape or or fabric strips that you have okay so um the when we run it through the bias tape maker and then crochet with it it makes a slightly sturdier fabric so it would be like a really great welcome mat or in a high traffic area if you cut it into thirds it's just a little bit thinner but I mean the cotton is so sturdy that it really won't make that much of a difference pretty forgiving well and I love these rugs because they remind me of my grandma's house she had these crochet rugs all over her house and I just loved them I can remember laying on the floor as a little girl looking at the different Fabrics that made them up and I think this is such a great way to bring that you know traditional historical style rug into the modern day by using Fabrics that we love so super fun yeah you can't beat these colors all right so let's show them how to use this uh bias tape maker how about that let me open this up here let me grab one of the strips that you got there okay if I can get into it being difficult now there we go there's that and and this is the half inch that we're working with yeah so these are great you just feed the fabric through actually I do have a pin yeah I do I mean I would think so you would hope right yeah I'm trying to leave with my left hand on this when I'm right-handed so the pin helps you to thread your fabric through so I'm just folding my Fabric in half to start and then there's this great channel on the top of the bias tape maker where you can see the fabric coming through and then what I like to do is wiggle it back and forth a bit to sort of open up the fabric inside the bias tape maker so right now it's really you can see it's heavy on one side and not quite as much on the other so I'm gonna adjust it yeah there's still back and forth a couple of times until it seems to be centered in the bias tape maker sometimes it takes a little bit but to get there there's no rush on this right like all of our projects are on our own time yeah I say that often like I think we're so hard on ourselves when we're trying to do these projects and learn something new that we feel like it has to be in a certain amount of time but it's really just about enjoying the process and we don't have to set unreasonable expectations for ourselves just enjoy it exactly exactly I in the in the yarn world we like to talk about being a project Knitter project crocheter or process Knitter or crocheter and I am a process I crocheter I think I'm a processed quilter too yeah I enjoy the process so much it doesn't matter what the finished product is to me all right so then that pin that I used to thread it through the bias tape maker I'm going to go ahead and pin the end of that bias tape to my board now if you just have an ironing board at home you can do this on your ironing board too absolutely cool mats are so great and then I'm going to pull the bias tape maker back a little bit and I don't know if you can see that but you can see like the The pinked Edge is sort of poking out and that's totally fine because again this is all it's all going to be wrapped up in the stitches so it doesn't have to be perfect and now I'm just pulling the bias tape maker back along the fabric just ahead of the iron it's so satisfying it really is and sometimes the so I've got a spot here where the fabric opened up so it's a really kind of easy to sort of hold that in place with your finger catch it with the iron don't burn yourself and then you can just move it along I mean there's a lot of fabric right in this jelly roll so you're going to be doing this for a while yeah so I set up in my living room put on Netflix yeah and just enjoy the process right watch the movie or a show or two yeah and sometimes all right let me show you this so my fabric has rolled over and it's almost like it's making bias tape on the outside so I'm going to slide back to where I was good and then I'm just gonna kind of keep an eye on that edge as I pull along make it behave yeah that'll keep it on the inside and if you have one of the like little project irons that can be handy when you're working with something small like this as well because then it's a little bit less bulky to work with yeah yeah oh we forgot to mention sewing these all together oh yeah we got excited didn't we we did we got a little ahead of ourselves so once you've got them all cut you want to sew them all together before you start doing this yes and so then this process I found so I have just a paper towel roll here and I cut all my strips into thirds and then I just sewed them end to end with a quarter inch seam and I rolled them onto this paper towel tube just to kind of keep it all straight so then when you're doing the bias tape if you choose to do that um if you have a dowel or a barbecue skewer or a knitting needle you can poke it through the middle here maybe into the sides of a basket so then this will roll for you oh that's a great tip yeah and then and then you'll have to roll it all back up once you've once you've ironed it all so let me see if I can get should I start sewing our narrower ones then together and then they'll be stitched together for the next demo that would be great okay I will do that I'm gonna finish ironing out this little bias strip tape perfect so I am just placing these right sides together with a straight quarter inch seam this one around here and I've got one more and like Sarah said you would just continue with your entire jelly roll oh yeah it's a good chunk of time but that's all right there we go and that's it I mean that's a considerable amount of fabric yarn already yeah and that's just one strip one strip exactly all right so this is where it gets fun for me this is where we get to crochet um and it's it's really super simple so what we're using is an 11.5 millimeter hook this is one of the crystal lights from Susan Bates it's a lot of fun and then you're gonna want some Stitch markers okay so for Quilters if this is a brand new thing for you um this is a Knitter and a crocheter's friend I just learned about these this past winter oh I'm making a cowl I say making because I'm still not done because then it got warm and I didn't want to make a cowl anymore but I had to learn how to use Stitch markers so yeah and they're awesome oh they're they are lovely and most of them come in multiple colors so this pack we have yellow and we have purple and you want two colors because we want one to remind us where we start going around and then the rest are to remind us where the corners are okay and again in the in the cotton rug pattern from one big happy all of that's detailed out in the pattern for you perfect um so then we're going to start with a slip stitch which is you create a loop around your fingers the tail goes behind and then you bring the tail up through that Loop okay see that and then it sort of tightens up and you still have a loop let's show that one more time so with the tail and your right hand you're going to go all the way around your fingers so the tail goes behind and then reach through that Loop that you made and bring the tail through okay just like that okay awesome so you can do that with your strips that you were cut in thirds or the bias tape that you made and you want to make sure that you leave about two to three inches of tail sticking out okay and what is that for the tail the tail is just because um if you make it a lot closer than when you try and form that slip knot the tail could pop out and now you don't have a loop to put your hook on okay so it's just some a little extra safety yes I like it yeah there we go make that one more time all right and so then this Loop that we made with the slip knot just goes on your crochet hook okay and then you can tighten it up a little bit not too tight you want this to be able to move around on your hook nice and easy okay and then there's only two stitches that you need to know for this project you need to know how to chain and you need to know how to do a single crochet okay so let me show you the chain stitches because that's what we're going to start with your yarn is going to come up and over your Hook from behind and then as you pull on your crochet hook you see the fabric strip catches in that's called the throat of the crochet hook okay and then you pull it through the loop that we made and that leaves us with a new Loop all right I see it that's so exciting so we're gonna do that again so yarn up and over your hook catch it in the throat pull it through the loop that already exists so that's a chain stitch and with the bias tape it doesn't really matter if it rolls over and you're seeing the underside of the bias tape or the top side of the bias tape because it's fabric on you know it's the the right side of the fabric on both sides sure so you're just going to chain you're going to do this chain stitch 16 times okay just going to do one more and then I'm going to show you single crochet there we go and take your time with this cotton is not a very flexible fabric on your hands and this isn't true bias tape but we ran it through the bias tape maker we didn't cut the fabric on our eyes so there isn't any give or take yeah so take your time with this project this is not a one day project it will hurt your hands if you try to do that so do a couple of rounds each day or do whatever feels comfortable for you that's a great tip yeah so now we can look back along this chain that we made and there's the loop on our hook and then there's a chain right before that one we don't want to work into that because it'll just undo this Loop that's on our hook so we actually want to go to the second chain from our hook okay and we're just going to go under the top half of it sometimes you have to wiggle your hook to get in there and then we're gonna come over the hook catch it in the throat and bring it through and that puts two loops on our hook okay and now we're going to do that again yarn over our hook and pull through both of those that has made one single crochet stitch so single crochet stitch has this strand at the top and then these two strands at the bottom and now this is where the Stitch markers come in handy okay so we're going to take the one that's a different color and we're going to put it in that Stitch that we just made okay now we're going to do a single crochet in every chain across the chain that we've made so we're going to go into the next one just under the top half of it so after that first one though you just go to the next the next one you don't have to go twice nope okay not yet okay okay I'm really learning with you guys I was telling Sarah earlier I have tried to learn crochet and I can knit great but so far crochet has been evading me and I'm determined to get it this time we'll we'll spend some time on it yes we will so it's single crochet okay all the way across and um on the one big happy YouTube channel we have some Stitch support videos so if you need help practicing single crochet or just chain stitches you can hop over there and watch those on our YouTube channel and that's me so you'll recognize my voice on my face all right so we only did one little bias strip uh one little strip of bias tape here so I've run out of it here so what I'm going to do is actually switch over to um the strips that we cut into thirds okay and show you how to work with those two so now you could go through and iron this in half all the way through um but I found that to be more tedious than using the bias strip maker the bias tape maker okay so I just folded in half as I go okay so I just hold just a little bit at a time yeah like four or six inches at a time just enough to make the next Stitch which makes sense because you're going to have it in your hand anyway yep that that's actually really smart if you're not dexterous enough to do that and you know there's lots of reasons why you wouldn't be go ahead and iron the strip in half yeah there's no there's no saying that that's not helpful absolutely the one thing you don't want to do is just work with this strip unfolded because it inevitably I don't know what it is physics whatever some Magical Force in the world it'll always flip itself over and the wrong side of the fabric will end up showing okay and you won't get all these gorgeous colors and then we'll be sad yes we'll be very sad so all right I'm just gonna chain one more and then I'll show you that start again okay so here's our chain we don't want to use the loop on our hook and we don't want to use the chain before it so we want to go under just the top half of that second chain from the hook and we're going to single crochet and then we're going to put our stitch marker in the top of that Stitch and then we're going to single crochet our way across this chain so one single crochet in each Stitch across ah see I didn't fold that one really well so the outside of the fabric is showing that's all right yeah you can just pull it out um so student forgiving yeah students that I've had for years will recognize this phrase from me when in doubt rip it out don't be afraid of your mistakes um the best things that I've learned about crafts knitting crochet sewing um I don't quote but I do so is when you have to take something apart um and it it drives my husband crazy because I have made entire projects and gotten to the end and realized this doesn't work and I've Unwound all of the yarn and he just pulls his hair out and I say you know he's a he's a woodworker and I say if you could take all those Nails out and undo all of those cuts and go back to the original wood that you had and start over wouldn't that be such a gift that is a gift of yarn isn't it yeah it really is yeah to be able to reuse our materials okay so now I'm at the last chain because that's our slip stitch that we started with and this is where Misty's question from earlier do we put more than one in the same place comes into play okay so here in this last chain we're actually going to put three single crochets because that's going to turn us around the end and then we're going to work down the other side okay and this is where the other Stitch markers come in handy so we're going to do one in here and then I'm going to put a stitch marker in that one okay so that's one corner this is Corner number two so our first stitch marker is Corner number one this is Corner number two got it and this is another reason why we want a slightly long tail because this Stitch is going to start to open up for us and so you don't want a super short tail because it could pop out okay now we're going to do a second single crochet this one is not going to get a stitch marker this will become this side of the rug got it then we're going to do the third single crochet which will also get a stitch marker and I know this doesn't look very square right now but it will as you keep going all right and then I like to tug that tail and sort of tighten up that base chain to close everything up a little bit yeah this just looks like a very very strange candy cane right now but have faith yes persevere trust yes and so the other trick that I like to do is this little tail I just sort of keep it underneath my thumb and it'll hide inside the stitches that we make next okay so now I'm gonna go to where this single crochet went into the chain okay and you should be able to see those little holes in the Middle where those stitches went into we're just going to work our way back across the bottom of the chain into the same spaces so this is the start of those three stitches in the end so we want to go back to the next Stitch we're going to go right into that same chain but now we're working under the over the bottom of it oh and my fabric rolled again so pop it out make sure it's folded in half there we go and complete our single crochet again that that tail is a little bit fiddly you can just poke it out of the way and not worry about it but if you just take your time with it it will disappear inside your stitches and again it is in yarn it's fabric strip so sometimes sometimes it's going to roll with the wrong side on the outside just take that Stitch out take your time with it or if it really frustrates you just let it happen I was going to say and straighten it out on the next Stitch that one little Stitch is probably going to be just fine in the long run yep nobody will know all right so I'm just single crocheting in each Stitch along the bottom of that chain yeah see that one's sort of half rolled to the outside but we're just going to leave it looks great yep all right we have two more stitches here's one and then we are back to where we started oh we're gonna have just enough for this this is perfect all right so this is the chain where we worked that very first single crochet we're going to work two single crochets into this one the first one I'm just going to get a stitch marker because it's our fourth Corner okay so let me put that in there and then the second one will essentially become the fourth side of our rug that other end side right yep so that is the end of round one and it's starting to take shape like you can see the square shape is starting to form yeah our tiny little road our Tiny Little Rock I love it and from here you're going to work in a spiral okay so sometimes in crochet patterns when you're working in the round you come back around to where you started and then you join and then you start another round separately but we're actually going to work in the round it makes it uh we're going to work spirally in the round it makes it a lot easier okay so we're back to this Stitch with the stitch marker I'm going to take that out because it's kind of in the way okay and then this is our Corner Stitch and so for the rest of the rug every time you come to a corner Stitch with the stitch marker you need to do three stitches okay just like we did at the end of the chain every time you come to a stitch marker you need to do three single crochet stitches in that Stitch so we're going to do one and that's that's how it's getting bigger is by adding those stitches on the corners yes these are the increases that give you those nice Sharp 90 degree corners and enough stitches to go around them yeah all right so now we've got three stitches that we just made one two three I'm going to take this stitch marker and put it in the middle one okay so that they stay centered as we go around and around perfect let me show you that in the finished rug here so now this one was made with the bias tape okay and these are our corners that looks so nice yeah you almost can't see it no it's so smooth it just lays beautifully yeah and so because we're working in the spiral you never really see a place where the new rounds start and when you finish you just keep going until you run out of fabric and then we do a slip stitch and I can I can show you what that looks like so let me grab our other little sample here perfect this is one that I've done with um the strips that were cut in thirds and then I just folded in half as I crocheted and I'm right at the end here so let me take that back a bit I mean it's just it's so cute and it's so fun I I really have enjoyed this project thank you for um thank you for listening to my crazy oh no it's not crazy at all I was so excited when you reached out because it's something like I said I've wanted to work on crochet myself anyway and so getting to spend time with you and and also you know maybe use up some of the jelly rolls in my stash is really exciting so I'm pretty excited about that awesome so all right so I'm just going to show you how when you get to the end of your fabric you finish it off so I did a stitch and now I have about four or five inches left that's not enough to make another Stitch so I'm going to finish this off I'm going to go into the next Stitch bring up a loop and then I'm going to bring that Loop through the loop that's already on my hook this is called a slip stitch okay and then I'm going to fasten off so I'm going to yarn over again so short now I'm going to pull the tail all the way through okay and then tug that tail nice and tight that locks that stitch in place I see that yeah and now all I have to do is and this is actually I found easier done by hand okay I just tuck the tail through stitches on the back side in a couple of different directions just to kind of anchor it in there yeah I mean you could you could Stitch it in place um my machine at home would not be strong enough to go through all these layers but you could hand tack it in place too but I think this works great to just kind of weave it in and then I mean a few years if you had a really big tapestry needle and we do have some jumbo tapestry needles at one big happy you could use those as well but so there I've just woven it through about three different stitches on the back side and that's it it looks so good I just love it it's such a fun project and like I said it brings back so many fond memories for me and so that is just the sweetest I love that we can kind of come full circle because this is a craft that's been around for a long time hundreds of years hundreds of years and so to be able to continue that and make it current is just exciting so thank you so much Sarah you're welcome can I tell you one more little secret absolutely all right so this little bit that we wove in I I leave it so that I know where it is just in case I decide I want to make this bigger okay oh that's perfect unpick it back to where you were unpick that last Stitch and then you would just stitch on some more Fabric and keep going yep you find your end stitch on new strips and you can keep going brilliant so let's talk about size that you get from these two methods so this is the bias tape version which is where we cut it in half and this is the full jelly roll correct yes okay and so what does this measure about this measures about two feet by one and a half feet okay awesome so that'd be great for you know a little bath mat or anything like that that's so great and this I just keep thinking like a placemat it's like a placemat size but we're not even done with this round not even close so that would be great please meds and there's notes in the pattern too about how to change the shape of your finished rug oh um this one we were aiming for for a rug this size yeah but you can shorten that Center chain and so you could make a square piece more Square yep or you could lengthen it if you've got lots of fabric in your stash and make a runner for the hallway yeah that would be so fun yeah so fun I love it well thank you so much Sarah for being here make sure you guys check out the wonderful videos that she and Jenny fish have put together over at one big happy there's so much to learn so many wonderful projects and I'm just really appreciate you coming over to spend some time with us here at Missouri Star and sharing your wonderful talents with us oh it's been great to be here thanks so much thank you so much tell everybody again where they can find you you can find us at onebighappy.com awesome we'll see you guys next time hey everyone it's Misty thanks for watching at home if you aren't already a part of our Missouri Star Family be sure to subscribe and hit the Bell if you want a notification every time we release a new video I'll see you next Monday on the newest episode of at home [Music]

More Jelly Roll tutorials

See all