

Make a "Mr. Bones" Halloween Quilt + BONUS Runner with Jenny Doan of Missouri Star
 Jenny Doan
- Charm Pack
- Holiday
- Wall Hanging
- Beginner
- Quilt size 35" × 55"
Jenny's gettin' spooky with a new Halloween quilt made with charm packs and a creepy-cute panel from the Ghostly Greetings collection by Deb Strain for Moda Fabrics. She uses the orange and black charms to stitch up a storm of half square triangles to make a thrilling zigzag border, and the corners are adorned with flying geese—or are they flying bats? This quilt is the perfect size to hang on a door, and the leftover charms can be made into an adorable chevron table runner!
Instructor
Jenny Doan
Jenny Doan is an American quilter, author, and YouTube personality. Jenny started Missouri Star Quilt Company in 2008 and today it is the largest quilting supply vendor in the United States.
Shop this tutorial
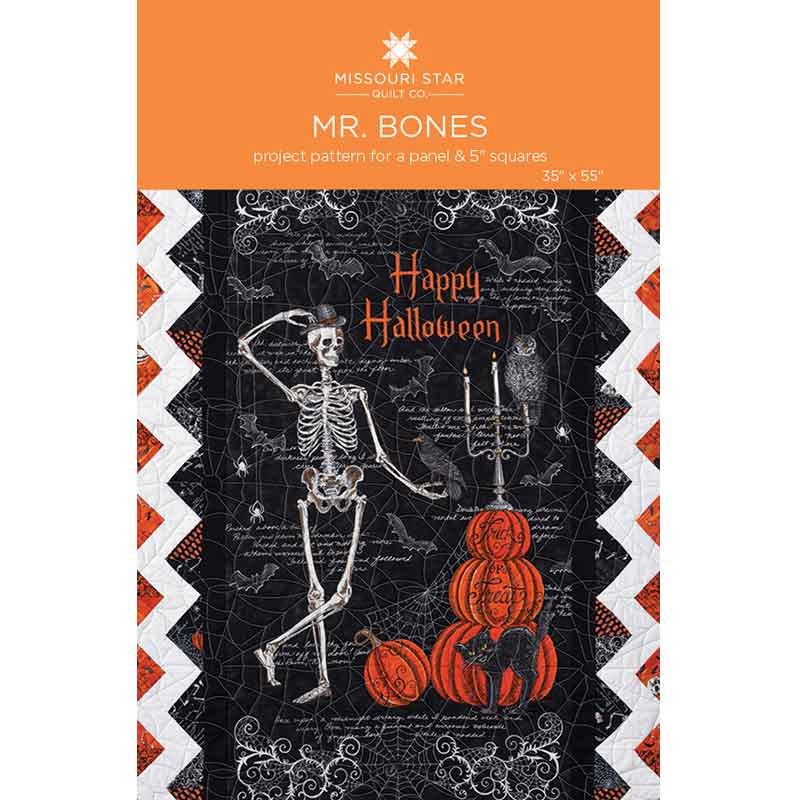 Mr. Bones Quilt Pattern by Missouri Star$6.95Shop →
 Digital Download - Mr. Bones Quilt Pattern by Missouri Star$4.95Shop →
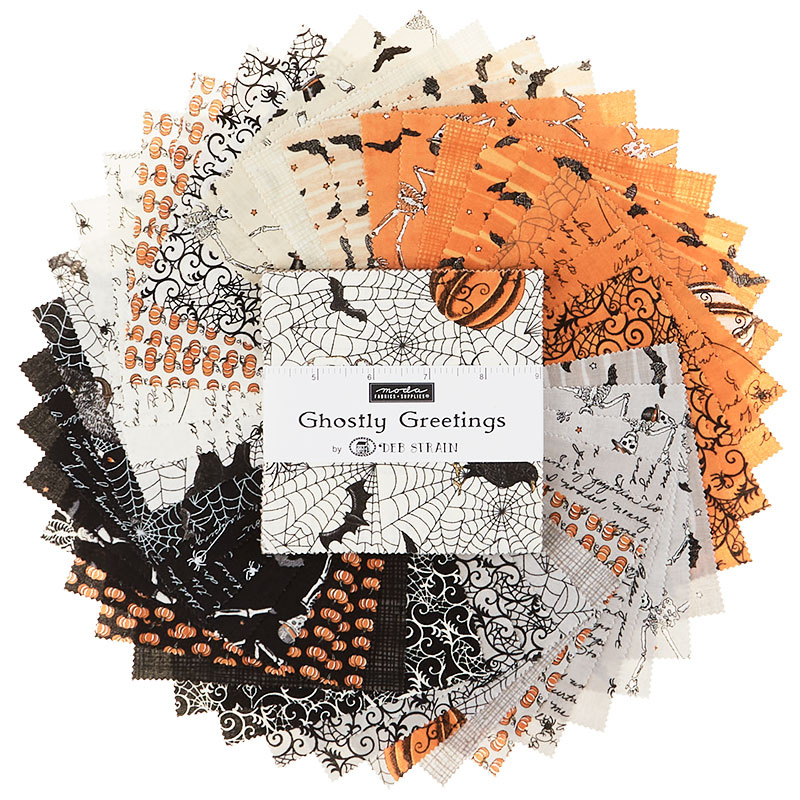 Ghostly Greetings Charm Pack$11.45Shop →
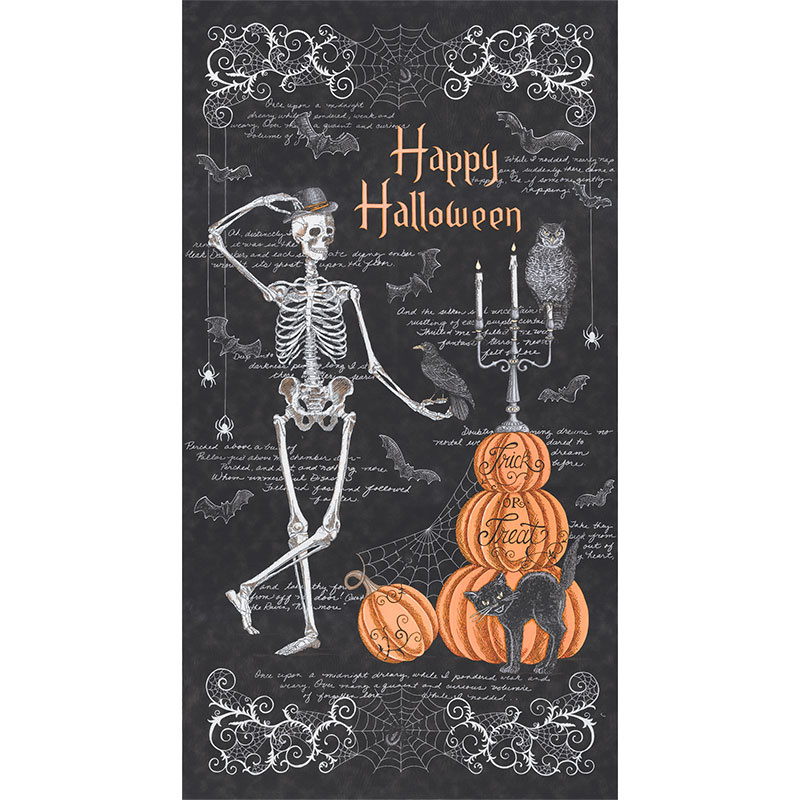 Ghostly Greetings - Skeleton Midnight Black Panel$8.45Shop →
 Bella Solids - White Bleached Yardage$8.24Shop →
 Bella Solids - Black Yardage$8.24Shop →
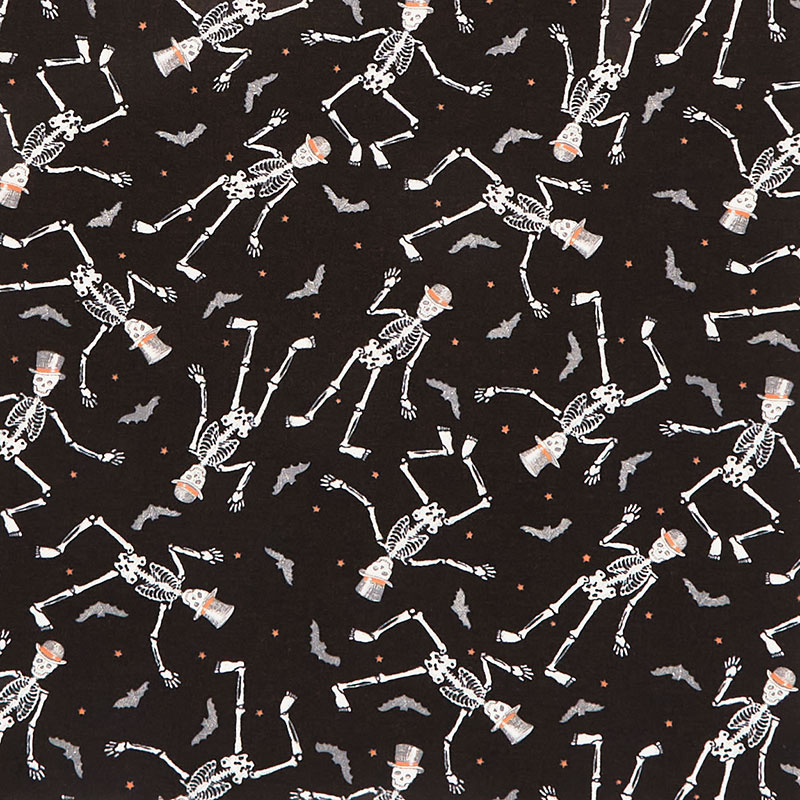 Ghostly Greetings - Dancing Skeletons Midnight Black Yardage$11.96Shop →
Common Questions
What is covered in Make a "Mr. Bones" Halloween Quilt + BONUS Runner with Jenny Doan of Missouri Star?
Jenny's gettin' spooky with a new Halloween quilt made with charm packs and a creepy-cute panel from the Ghostly Greetings collection by Deb Strain for Moda Fabrics. She uses the orange and black charms to stitch up a storm of half square triangles to make a thrilling zigzag b...
How long is the tutorial video?
The tutorial video is 00:17:45.
Are supplies listed for this tutorial?
Yes. The tutorial page includes the supplies and materials connected to this project.
Is a transcript available?
Yes. A written transcript is available on the tutorial page.
Video Transcript
So this is a panel and this is Mr. Bones. I am affectionately calling him Mr. Bones. This is such an easy little outside border and that's all we did to it, and I can hardly wait to show you how we made it.
To make this quilt, you're going to need two packages of 5 inch squares, and we have used Ghostly Greetings by Deb Strain for Moda. You're going to need some white fabric and some black fabric. For the white, you're going to need 1-1/4 yards. And for the black, you're going to need 1/2 a yard. You're going to need one panel right here, the Mr. Bones panel, or the Ghostly Greetings panel, I guess it's called, and you're going to need, for your backing, you're going to need 3-3/4 yards. I'm actually going to show you a way to make it a smaller backing if you want to. In addition, it would be helpful to have the Clearly Perfect slotted trimmer B. This tutorial also includes a bonus project, so stay tuned to see what that is.
All right, so whenever you're working with a panel, it makes it a little bit interesting and a lot of fun. You get a lot of wow for your effort. This is our panel right here, and they come to you cut. They have dotted lines that they cut them on and they send them to you. But you're going to have to do a little bit of trimming for this. How big, you ask? Well, let me tell you, you won't know that until you make your first border, because I always do it backwards.
This is what I want to happen along that first border, so what I do is I start sewing my half square triangles together, and when it reaches the right size, then I know what size to trim my border.
The first thing we're going to do today is we're going to make some half square triangles because that's all this quilt is. It's a little chevron border around a panel. To make them, I did it real simple and real easy, what I did was I took, for this guy right here, I wanted the panel to feel like it was bleeding off into that first border, so I chose the black and the orange.
In this charm pack, you can see there's blacks and grays and oranges and tans and whites. And the reason I needed 2 was because I wanted to only use the orange and the black for my outer border. And so I went ahead and pulled some of these. Let me pull one right here, and I'll show you how we make these half square triangles. So you're going to take a 5 inch square and you're going to take some of your white background and you're going to cut it into 5 inch strips and then subcut those into 5 inch squares just like this.
Now, can you use a precut of white 5 inch squares? Oh, 100%. Absolutely. Do that if you want to do that as well. What we're going to do is we're going to sew all the way around this to make our half square triangles. We're just going to do it the easy way. We're going to sew all the way around the outside. 1/4 of an inch from the edge. You can sew off the edge or you can stop and pivot. I generally sew right off the edge.
All right. Then what we're going to do is we are going to take these and we are going to cut them diagonally both directions. Let me turn this over so you can see better. Let me cut off these little threads right here. Then we're going to take our ruler, and these little 2-1/2 inch rulers are so great for that because they reach just beyond, and we're going to cut it diagonally this way and we're going to keep those together and we're going to cut it diagonally this way. Just like that.
Now what we want to do is we want to make sure that each of these triangles is squared to 3 inches. So you can iron them open and square them with a Bloc Loc tool. I like the Clearly Perfect slotted trimmer, so what I do is I'm going to lay their stitch line on my stitch line, just like this, and I'm going to look at it and I'm going to slide it over to the side if I can, and see if it lines up great, and if it does, then I only need to trim one side. This one looks like I'm going to have to trim a little bit off of both sides, just like that. It's not much trimming that you do. Again, I'm going to line up my seam and I'm going to slide this over and see if I can just make one cut. And on this one I can, so make sure that stays right in place. And then I'm just going to cut it here.
You know, you always want to find the easiest way to do things. And for me, this is a super easy way to square half square triangles. And then this one here on my seam line, even if my seam line doesn't look so good, it's the seam line, right? Right here, it's closer to the edge, but I put it on the seam line so it actually lines up. All right, we're going to iron these open, and I'm going to do that by pressing to the dark side so we can set our seam and then roll it back just like this.
Okay, so when you get ready to put these all together, you're going to sort your charm packet and you're going to pull out 15 of the orange and 15 of the black. Because there's not quite that many in one pack, you're going to go into your second pack to do that, and you're going to pull them out and you're going to make all of those. So for each one of those charm squares, you're going to need one of these background squares, which means you'll probably need about 30 background squares as well.
You'll need a couple of low volume squares for our corners right here. These corners, those are a little bit low volume, so you'll need two for that. And other than that, that's all it takes to make this.
What I'm going to do now is I want to sew these together to make a flying geese, but I want it scrappy. I have a pile of all different ones here, and we'll just start sewing them together like this. I mixed them all up as you can see, they're not the same in each one. And I did that, I wanted that scrappy look. What I'm going to do is I'm just going to head to the sewing machine and I'm going to put these colored side together, so dark side together, and then I'm going to sew these together like this. And then we'll press that open and we'll get this flying geese unit. And you're going to do that to all of your blacks and all of your oranges. Let me just sew another one together here.
Once you get all your little pairs sewn together like this, you're going to sew them together into one big long chain, and you want that chain to be the length of your panel, so let's talk about the panel for a minute.
We trimmed our panel to 22 by 43-1/2 so when you're working with a panel, you only have so much to work with. And what happened when I got to the end of my border right here with the panel, so I'm in here by the panel, was that I ended up with a half of a geese. It would only take a half of a geese, and I wanted a whole full geese on here. I wanted the full flying geese on the whole thing, even up to the corner.
So what we ended up having to do, because you want to make your side piece first, is that we ended up adding a little strip of black inch and a half to the top and an inch and a half to the bottom. To the sides we added a 2 inch border to each side of our panel. So we cut two, 1-1/2 inch strips and three of the 2 inch strips to put on the sides.
What I want to tell you about this is that everybody's quarter of an inch is a little different. Everybody's panel is a little different. We had to trim ours fairly close to the sides to make it work for my border. So don't worry about having to do that, but make this piece first and then measure it to see, because if yours happens to come out perfect, it's like, whoa, that's perfect. Mine is going to come out with one half of a flying geese so I needed to add those borders around it. Again, I added inch and a half to the top and the bottom, and 2 inches to each side of my panel. Whenever you're dealing with any panel, you want to make your first border first, and then you want to do that.
Then what I did was I had this black panel out here and I sewed it on this, and the next thing I did was I set about sewing on my orange ones. And so as you get the orange ones together, let's sew a few of those right here. I've got some already done and I've got some I'm going to do. I'm just going to sew a few of these together so I can show you how you have to offset them to get the look of the chevron. We've got here and we've got this one, and I've got this one done here. And basically when I do this, I will make all the half square triangles that I need, and then I will just chain piece those. So I'll sit like this, and I'll have a pile of these. And I know that these are kind of all the same, and I know that these are going to be a little bit different print, and I want to scrap them up so I have two piles that I draw from, and I'm just going to go ahead and start here.
I actually like to start from the bottom edge where there's only two fabrics together. And then sew off the top. Like this, we're going to start where the two fabrics come together and sew off the top. Rather than starting at the top where all those four fabric bulks are together, it's a little easier to get this right. We'll do a few more of these and then we will attach them all and I'll show you how they line up.
All right. Now what I'm going to do is I'm going to open these up and I'm just going to start laying them together, make sure they're all going the same way. If you get one turned like this, it's not going to work. So you want to make sure they're all going the same way. We're going to go right in here like this and open it up and add the next one. Actually, I think I'll add this string on here like this. And then we're going to add this one over here like this and it will give us a nice long chain.
All right. Now we're going to pretend here with our panel. We're going to pretend that we've got our panel here on the side. We've got our 2 inch strip sewed on the side like this, and we're ready to add the first row of the dark right here. We put on our first row of the dark, and I wanted my dark, again, I wanted this continuity of color out here, so we wanted to add this on. You're going to sew your little strips on all the way around first. Then you're going to start adding your side pieces of these, and then you're going to add your top piece as well.
Now in this corner up here, right here, see this going to end here and this is going to start here. And we need to talk about this little block. But first I want to show you how the orange fits in.
Here's your orange right here and if you do it so that they are both going the same direction, it just won't work, so you flip this over and what we're going to make ... I love these. These are what I call happy accidents when you find something you weren't expecting and see how these little squares appear. But I wanted the chevron, so I scoot this over just like this, and all of a sudden you get that zig-zaggity chevron look that is just so cool and so much fun to put on there and makes this little thing out here.
Now for this little corner thing up here, this is just 4 half square triangles, these point the same direction, and the other two point in. I want to point out that I actually laid a lot of little things out in my corner to see what I thought would work, what I thought would look best. This was what I was looking for right here, this piece right here to come across. You have to lay your half square triangles a certain way to get this framing piece right here. But if you wanted to, I mean this could point the other way. I mean, you can do so many things with those corners because it's basically a 4 patch of half square triangles.
Here I have, what I have is these two that go in like this, and then I have this one that comes out, and this one also comes up like this. This is my corner on my quilt, but if you wanted to do it differently, you could do it differently. It'll just give you a different look.
Let me give you an idea of what I'm talking about. If this one was turned in this way, this is what you'd get. You'd get these two coming in, this one going out, that one going out, and it would have a little bit of a stop right here. You just have to audition your squares and have some fun with that and see what you like and what makes sense to your brain.
Now, this is the perfect size for a door, well, if your door is 36, this is a 35 inch wide quilt, and I think the door is unused real estate for us quilters. We don't generally hang a lot of quilts on our doors, but I love the idea of a door panel for Halloween. This is 35 across, and the length of it, let me check on that, the length is 55 inches, so it's a great size for a door.
But you might have noticed in all this panel sewing and cute Mr. Bone sewing, I only used the dark parts of my charm pack. So of course I couldn't leave that alone. I had all these lights and I still had a few darks left over and a few oranges and a few blacks. So of course I had to make a little bonus project. Let me show you what that is here.
I love a beautiful table runner at Halloween on my table, and I just think this is so fun. I did the same Chevron, exactly how we did it, staggered it kept that stagger going. I put one row of my dark colors and I put black with orange and mixed them up. And then I put the two top rows of the lights, the creams, and the grays and against the white with this little tiny border. By the way, if you want to make this little tiny border, it just takes a half a yard of extra. Let me grab another pin here and then you can see this, how beautiful this is. But it's so quick and easy and you have so many of these left over. I have so many leftover still because these are my step outs from making two of them already, so I can actually make a third one for myself. It's just really fun idea, quick and fun for Halloween.
My bonus project right here is 20 across by 50 down. And because it's all the same pattern, you're not going to lose anything by setting something in the center. I think it's just a really great project. This is a little 3-1/2 inch border out here, and it's a half a yard of fabric for that. And our backings back here, there's our Mr. Bones on the back.
But let me tell you, so when we give you a quote for backing, we'll say you need this many yards, it's because we're going this way, we're going lengthwise with the fabric. But if you're willing to piece your back, you could actually cut your piece this wide and sew two of those pieces together for the length, because then you're going to get 90 inches. That's a way to save fabric.
And what I mean by that is instead of having your border or having your backing be one piece all the way the length of it, you could cut your pieces the width of your project, plus 4 inches on each side, so the width of your project plus 8 inches, make two cuts and then you could sew them together top and bottom, and you'll get a little more backing out of your quilt. Especially for these smaller projects, your backing will go a little further.
That's just a quick fun idea I had on the backing to share with you. And of course you guys know I love half square triangles, and I just think this is such a great project. At the Doan house, Halloween is a big deal because I used to be a costumer, so we have a lot of fun with Halloween.
We hope that you enjoyed this tutorial. We hope that you're able to make Mr. Bones and make him a part of your holiday celebration. And we hope you enjoyed this tutorial from the Missouri Star Quilt Company.
Hi everybody, it's Jenny from the Missouri Star Quilt Company. We hope you enjoyed watching this video. If you aren't already part of the Missouri Star Quilt Company family, be sure to subscribe so you won't miss a thing. And if you click that bell, it'll notify you every time a new tutorial comes out. See you next Friday.


