

Make a Self Binding Quilt with Jenny Doan of Missouri Star
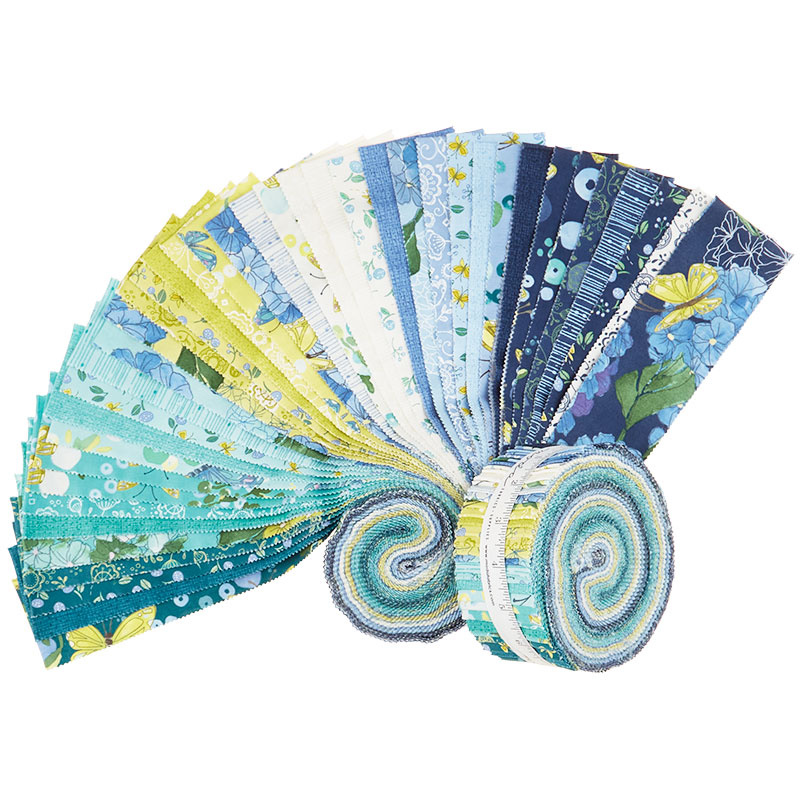
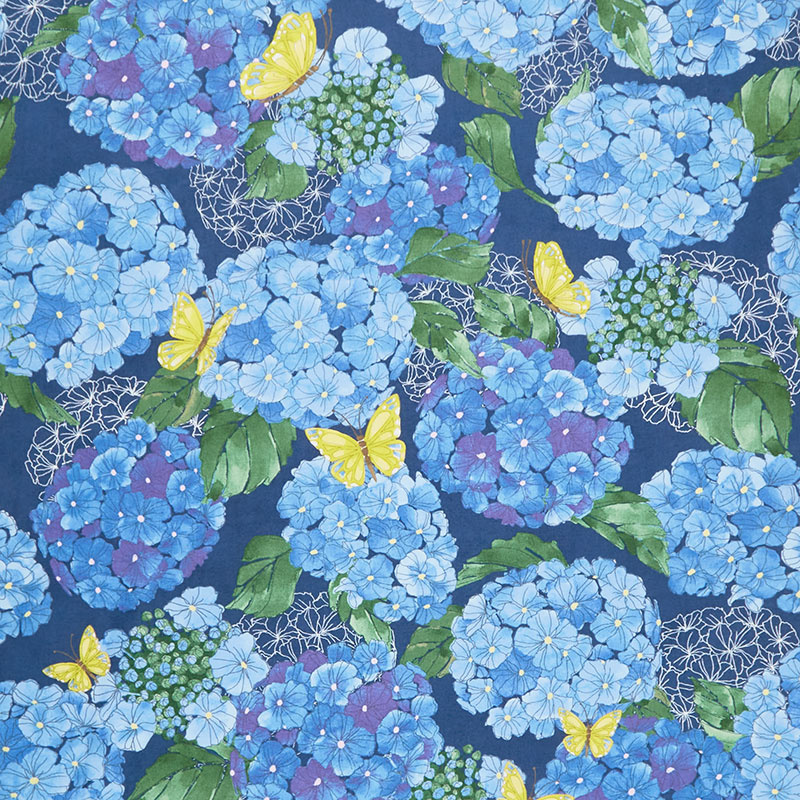
Jenny demonstrates how to make a quick and easy Self-Binding Quilt using 2.5 inch strips of precut fabric (jelly roll). For this project, Jenny chose the "Cottage Bleu" Jelly Roll by Robin Pickens for Moda Fabrics. Note: The backing of this quilt needs to be 10 inches larger than the top.

Instructor
Jenny Doan
Jenny Doan is an American quilter, author, and YouTube personality. Jenny started Missouri Star Quilt Company in 2008 and today it is the largest quilting supply vendor in the United States.
Shop this tutorial

Chapters
- 0:00We're self-binding a full-size quilt!
- 0:58Supplies to make the Fence Rail
- 1:11Quick and Easy Fence Rail
- 1:56Figuring the Backing for your Self-Binding Quilt
- 2:50Marking for Self-Binding & Pinning the Back
- 9:57Stitching the Backing On
- 15:31Mitering the Corners
- 19:57Turning it Right Side Out
- 21:48Closing the Gap
Common Questions
What is covered in Make a Self Binding Quilt with Jenny Doan of Missouri Star?
Jenny demonstrates how to make a quick and easy Self-Binding Quilt using 2.5 inch strips of precut fabric (jelly roll). For this project, Jenny chose the "Cottage Bleu" Jelly Roll by Robin Pickens for Moda Fabrics. Note: The backing of this quilt needs to be 10 inches larger t...
How long is the tutorial video?
The tutorial video is 00:23:45.
Is a transcript available?
Yes. A written transcript is available on the tutorial page.
Video Transcript
So this quilt right here we made with one jelly roll. And we did this quick and easy fence rail. Now I’m just going to go over that very quickly because most of you know how to make a fence rail. And basically you’re going to put all your strips in sets of threes, sew them together and cut them into 6 ½ inch blocks. The blocks are then going to be laid like this. You have one that goes across and one that goes up and down, and one that goes across and one that goes up and down. And every row is just going to be like that. The next row will be up and down, this one will be across, this one will be up and down. Now for this quilt right here we used the whole jelly roll. So we used, we have one, two, three, four, five, six, seven, eight by one, two, three, four, five, six, seven, eight, nine. So the middle of the quilt is 49 by 55. So the backing then just has to be ten inches bigger and we can make this work.
So let me show you how to do this. So we have taken our little quilt right here. I made a little smaller one because it’s easier to show you on the table. Same pattern, this fence rail right here, we actually put a back on ours and sent it off to the quilter. What’s really cool about this is that if this were just a plain piece of fabric, just a top, it would still work. You don’t have to actually quilt it. You don’t have to actually have batting in there. But I wondered what it would look like if we did. So this would also be a great place if you want to try out your own machine quilting on your home machine. You know, if you want to tie the middle. Whatever you want to do it’s going to work because the backing is just separate from this. So this is our middle piece right here and we have the backing that has been cut ten inches bigger. And so what we’re going to do is we’re going to mark the middles of all of our pieces. So I am going to come in here and I am going to just make a little mark. So you can make a little mark. You can put a pin in there. And I’m just going to go on the inside and make a little mark here on all my middles like this. And so I’m going to come over here to the opposite side and I’m going to do it on the backing and I’m going to do it on the front as well. And so here’s my little mark right in here. And then I’ve got this side as well. And I better close this or I’m going to draw a line on it somewhere. And so here’s this one. Oh, there’s a seam there, perfect. I don’t even have to mark that because I know there’s a seam there. Alright let’s do the same thing on our front. So I’m going to fold this in half. When you go to mark the top of your quilt you’re going to mark it on the back side because this quilt is going to be laying right sides together. And so what we’re going to do is we’re going to put our little line right here and it won’t show because it’s on the back. And so we’re going to put a little mark on all four sides. And I remember when I did this as a baby quilt. My husband was like, I’m pretty sure this isn’t going to work. I don’t know what you’re doing here. I’m pretty sure this isn’t going to work. I’m like, just watch it, just watch it you know because this is such a great technique. Alright so a little mark there. And then, let’s see, did I get all my, oop, this one needs a mark. A little mark here. Alright. Oh and I did draw a line on here but you know what, it doesn’t matter it’s going on the inside. Done.
Alright. So now what we’re going to do is we’re going to take our back right here and we’re going to lay our back out nice and flat. And we’re going to take our top and we’re going to lay it right on the top, like this. And we want to make sure that we have this going the right way. It’s going to go this way. Alright so what we’re going to do now is we’re going to pin this. And I’m going to pin this, I know you’re shocked I’m using pins, right? But this is the best way to do this so I’m going to pin this right here. And this is the middle. And I’m just going to lay this out here really neatly like this. And in this corner right here I’m going to take my ruler and I’m going to put it so that there’s a half an inch in there and I’m going to make a mark on both those sides of all my corners. So we’re going here. And I’ve got a little mark here and a little mark here. And this will show me where to stop and start. And I’m going to do this on all the corners. So basically I’m just laying my ruler right in here, a quarter inch in and then a quarter inch here too. And then I’m going to do that on all four corners so that it’s just done. So I’m doing a quarter inch here and a quarter inch so here and here like this. And you should have like a little box. It looks like a little box in the corner. So here a little quarter inch here and here. So that makes a perfect little box there in the corner. And that will let you know. The other thing that you want to mark is somewhere on one side you just want to make a start and stop place so that you’re aware of it. So that you leave a place for you to turn. And I’m just going to put that right here.
Alright so now we’re going to go ahead and pin this together. And we’re going to match the middles just like this and we’re going to pin it out to the sides. So I’m going to go here. And I’m just going to pin this right here. Just go along and put a few pins in each side like this and out here to the end. We’re going to come out here and do the same thing on the other side. You just pin along and out here to the end. And then we’re going to go to the opposite side and do the same thing. So you can see we have all of our extra fabric is down here but we’re not going to worry about that. We’re going to pull this up here. And we’re going to match our middle to the middle like this. And then we are just going to pin across here. And it leaves these funny big corners out here but I will show you what to do with those. We’re going to put a pin in out here like that. And then go this way as well. And right here at this little box I’m putting a pin.
Alright so now what we’re going to do is we are going to do the other sides. And again we have a little mark on our quilt and a little mark on our background to show us where the middle is. So we’re going to match up these two marks right here and put a pin in there. And then we’re going to again pin right down the side until we get to the end of the fabric. Now you can actually sew the two sides if you want and then come back and pin and sew the other sides. I kind of like to pin it all at once so then I can just sit down and sew but it will work either way. Alright so we’re coming along this edge, put a pin in there, coming along here. And all the way down to the end right there. Then we’re going to flip this over and do this side. So again we’re going to match up our middles and put a pin in there. And then we’re going to pin straight down the sides, again lining them up. And then all the way here to the end to our little quarter inch mark. We’re going to sew right to there. Alright so go ahead and do this side as well. We are almost there, we are almost there. Alright here we go. Pin here all the way out to the end and pin here.
Ok so now what we’re going to do is we are going to sew down the sides. And we are going to sew a quarter of an inch. We’re going to make sure none of this fabric is underneath. Make sure it’s nice and smooth. We’re going to start and stop from our little line that we’ve made out here, our little quarter of an inch line. And we’re going to do a little back tack right there to make sure that stays in place. And we are just going to, remember you don’t sew clear to the end. You start at that corner, a few stitches, back tack means you just stitch backwards just a little bit. I’m going to put my pin jar over here so I can, you never want to sew over a pin. I’m just going to sew down the side like this. And, whoops now I’m going to cover up my pin dish. There we go. And we’re just sewing along the side. And you know usually when I sew my quarter of an inch is a little bit skinny. I think this time it’s a little bit fat. That’s alright, either way, we’re just going to sew down the sides. Make sure your fabric stays lined up. And if you have, like a little fold in your backing or something like that, don’t worry about that, you’re not going to see that. It’s going to be on the inside. And then make sure no fabric gets caught. And then we’re going to come down here to our corner and stop again a quarter of an inch from the end. And back up just a little bit. There we go. Alright now what we’re going to do, we have these little funny ears out here and we’re just going to tuck that under so that we can sew straight along this edge as well and you’re going to do this on all four sides. So you want to make sure that none of that fabric gets caught under there and so go ahead and start right on that corner and sew down. Alright here’s my center. And I see right here, right next to it there’s a line. That helps me to know that that is where my opening is going to be. Because I can’t even tell you how many times I’ve sewn around this and sewn it completely closed and then you have to go make an opening. So now I have an opening because I put my marks there. And I don’t have to worry about forgetting that. And again I’m just going to sew right down the side until I get to my quarter of an inch. Stitch backwards just a little bit.
Alright again we’re turning the corner so we make sure that this ear piece is out of the way. And we’re going to start down on this side and make sure this tucks right under there. And get this pin out of here. Sew down a quarter of an inch. That pin was not even close to the seam so I could just sail on by but we don’t want to forget it. You want to make sure to get all those pins out. Alright, here we go, we’re almost to the corner. So I’m going to make sure that no fabric is under that corner but that one piece, sliding up here to the end. Take our pin out and stop at the quarter inch. And then we’re going to move our little bunny ear and come around the other side. Now right here again, make sure that no fabric is underneath there. And we’re going to start right here at this quarter of an inch, backstitch just a little bit. And we’re going to keep sailing along this side. This is our last side, you guys, and this is how fast this project is. It is a super fast project and you have a back and a binding done. And I just love this idea. And I’m pretty sure I’m just a hair wider than a quarter of an inch on all of these seams so that doesn’t have to be exact but consistency is your friend. Alright so we’re to this very end and we’re right here to this quarter inch mark. Backstitch.
Alright so now, these right here, what to do. So what we’re going to do is we’re going to take these two side pieces right here and fold them in half. And we are going to make sure that this fabric lays nice and flat in here and this lays nice and flat out here. And then what you’re going to do here. So you want to fold these two pieces together like this, make sure that these are folded up laying nice and flat and this piece comes out here. And then you want to make sure that your ruler is even on the bottom right here. So I’m going to sew right up here to this stitch mark right here. And I’m going to lay my ruler over here and I’m going to make sure that this line is even on this fold. And I’m going to draw a line here like this. And you can use a pen. You don’t have to use a sharpie marker. I just used that because it’s there. And this becomes your sew line. So we’re going to sew right on that line. Now don’t cut it first because if you’ve cut it wrong then you have a big boo boo so we’re going to sew it first like this. And then what we’re going to do is we’re going to look inside to see how it, if it lays flat. Where’s my opening? I probably should have done this on the opening side but let me just look in here and see. And we’ll get a little peek at it and then we’ll know that we’ve done it right. Because this is one of those things where you always want to make sure that, look at this beautiful miter. Look how beautiful this is going to be, you guys. Alright we’re tucking it back in and we’re going to do our other corners. And so the trick on this again, is you’re going to put these two pieces together like this. Just match up your two sides. You know, fold them so they line up. And then right here where the stitch line is, remember, you’re going to cross that stitch line and your ruler, this line has to be even on the fold, ok? So we’re going here to the edge of the stitch, right where they stop, right where you backstitch, make sure that this ruler line is exactly even on that fold. And we’re going to put a line and we’re going to sew it. And if you don’t think that I’m not going to check every single one of these, you’re fooling yourself. Because I am so angley challenged about these things and I have these little mantras to tell myself. So I am literally, before I cut any of them, I’m going to check them. So again, fold this up in half like this, match these nice together, lay this down here so nice, flat fabric, put your ruler across that stitch line. Line it up exactly here on the bottom, on the fold like this. It’s a 90° cut for those of you who are interested in those kind of things. Alright so, and so I’ve got these two together and I’ve got my little ruler coming over here and this part is flat, even with the fold. And I’m going to put a little line on here. And I’m going to sew that line and actually I’m going to look and see if it actually works as the 45 part on here. Let’s see over here. It does. So you can do it either way. Either way it’s a 90° cut. And so I’m just going to go ahead and I’m going to sew this one straight across. Alright so now I am checking all my corners to make sure they are laying the right way and they all are. They look great. So I’ve checked all four of them. I know they are right. And now what I’m going to do is I’m just going to trim off these little ears because I feel confident that my seam was going the right direction. So we’re going to trim these off on all four sides like this. And then one over here. Just trim this off.
Alright so now what I’m going to do is we’re going to turn it. And if I can find my spot. Ah here it is. So I like to put my finger in there and push that point out so that it’s nice and, you know, just nice and pointy. And I’m going to reach over here and grab this one. You want to pull it through the hole. Be careful. I hear little stitches giving. It’s good when you leave that opening to make sure that you do a little backstitch on either side so it doesn’t come apart even more. I’m just going to pull this gently through. And get those in there. And I’m going to put my hand in there and push out those points because this is such a cool thing. This one is out. This one is out. And we have done it. We have done it. And so now what we’re going to do, look at these nice edges. Look how nice that looks. Now what we’re going to do first is we’re going to come to the ironing board and we’re going to press this edge down. Because we want this edge to be nice and even all the way around the quilt. And I’ll just press one of them so I can show you. But we’re going to press this edge out like this.And look how nice that lays. It’s already finished, bound. You have your backing on there. Just across like this. You’ve got a nice mitered corner right here. And you’re going to come along.
Now right here I want to show you this because this is where we started and where we began. So right here you just want to turn that under so that it’s, you know, it’s about the same as your sewing seam. So mine was a thick quarter of an inch . And you’re just going to press that down so nice. Now when you’ve got that pressed down so nice you don’t hand stitch it. You don’t do any of that because what we’re going to do is we’re going to go across this whole stitching with another stitch. Maybe it’s a zig zag, maybe it’s a topstitch, maybe it’s a decorative stitch, any stitch you want. And it will hold. What it does is it anchors the front to the back and it holds it down so let’s look closely at this border out here. So you can see right along this border right here we’ve done a zig zag but it’s not a normal zig zag. It’s the zig zag that has a little stitches. So it’s like stitch, stitch, stitch, stitch just like that. And it comes all the way through to the back. And that’s what holds this backing to the front so that there’s not movement and play and you don’t lose your backing. And so basically you’re just going to sew all the way around there. You’re going to include the part where we turned it. And so you are just done. I mean when that’s topstitched down you are just done.
So we hope you enjoyed this tutorial on how to add a self binding backing to any quilt from the Missouri Star Quilt Company.
We hope you enjoyed watching this video. If you’re not already part of the Missouri Star quilt family you can hit the subscribe button below so you won’t miss a thing. And if you click that bell it will notify you every time a new tutorial comes out. See you next Friday.


