Jenny demonstrates how to make an awesome friendship star quilt using 5 inch squares of precut fabric (charms). We used "Painted Garden" Charm Packs by Crystal Manning for Moda Fabrics and a Bloc Loc 4 1/2" Square Up Ruler.
Jenny Doan is an American quilter, author, and YouTube personality. Jenny started Missouri Star Quilt Company in 2008 and today it is the largest quilting supply vendor in the United States.
What is covered in Make a "Sidekick" Quilt with Jenny!?
Jenny demonstrates how to make an awesome friendship star quilt using 5 inch squares of precut fabric (charms). We used "Painted Garden" Charm Packs by Crystal Manning for Moda Fabrics and a Bloc Loc 4 1/2" Square Up Ruler.
How long is the tutorial video?
The tutorial video is 00:13:25.
Are supplies listed for this tutorial?
Yes. The tutorial page includes the supplies and materials connected to this project.
Video Transcript
Hi everybody, it’s Jenny from the MSQC. And look at this darling little quilt behind me. Isn’t this great? This is so fun. Really fun, easy project and I can’t wait to show you how to do it. So to make this quilt what you’re going to need is three packages of five inch squares. And we’ve used Painted Garden. It was designed by Crystal Manning for Moda. You’re also going to need two packages of background squares, five inches again. And, and we used a white to set it off. You just want to look for some contrast. We also used that same fabric, a half a yard for this first border right here. And for this outer border out here we used a yard and that’s a small, small little four inch border. And then this backing. You’ve just got to look at this backing. Look at this big floral. Isn’t that gorgeous? I mean it’s just amazing. Anyway we used three and ¾ yards of that. And it makes a quilt that is 59 by 71. So it’s a great size quilt. Alright let me show you how to do this because this is really fun. So you’re going to pull out three sets of matching, you’re going to match up three of your five inch squares. So I’ve got pink ones, orange ones and green ones. Now one of them, we’re going to set these aside for a minute. And then with one of them, our green one right here, you’re going to cut down your center square so that it’s 4 ½ because this is going to right in the middle of your block. And I’m just going to trim that down right here. So one of the squares is going to be 4 ½ and I trimmed that down. The other five inch square, you are going to cut into four 2 ½ inch squares just like this. So we’re going to do that. We’re going to set it aside. Now with our others we’re going to make half square triangles out of them. So I’ve got squares here with the line drawn on either side. And you’re going to want to do this to all four of yours. So we’re going to lay them right sides together and I’m going to get them all ready here and I’m going to take them over to the sewing machine and do the whole chain at once. And I’ll show you how I do that. So again we’ve drawn the line side to side. You can iron the line if you want, whatever you choose. And right sides together and we’re going to head to the sewing machine. Alright so when I do half square triangles you know I like to do things pretty speedy. And when I have a bunch of them to do like this I’ll do my whole pack this way. So I’m going to go down this side like this and then I’m going to add another one. This is how I chain piece my half square triangles. So make sure your squares are still lined up. Alright so now there’s lots of ways to make half square triangles and this is just another way. And we’ve drawn the line and we’re sewing a quarter of an inch on either side of that line. And I’m just going to do it to all four of these. So I’m going to do all of them on one side just like this. I’m just going to keep going and when I do this I get a mountain of them out here because I do my whole pack. Now we’re going to flip that whole chain around and do the other side. And so again you just lay your presser foot on your drawn line so a quarter of an inch from there. And then just make sure that you keep doing that on the whole line. And then one more. Alrighty. Now I’m going to cut these apart and we’re going to iron them open. So I’m going to take my little ruler and I’m just going to lay it right here. I’m going to trim my threads, move that aside a little bit and just cut this on the line now. And so we’ve made, you know we make half square triangles all different ways. And people are always like, why did you choose this way. And generally it’s because I have a certain size pre cut I’m working with. And I also have a certain, a certain size I”m looking for. And so I’m looking for 4 ½ inch squares or size on these. And when you take a five inch square and sew on either side of that middle line you’re going to end up with about 4 ½ inch half square triangles. So let’s come over here to the ironing board and iron these open. And I”m just going to lay them over here with my dark side to the top, kind of set all those seams at once and then we’re just going to roll these back. So once you get your blocks all ironed we’re going to square them up to 4 ½ just to make sure they match that center square. And I’m using a block lock ruler which I love. And I”m just going to trim off these little bits. You won’t have much to square up but you’ll have a little bit. So here’s this side. And let me go ahead, we’re going to go ahead and do that to all of them. The way I remember how to use my block lock ruler is the words, when I do it, the words always go on the background fabric and that happens if you press to the dark side. Alright just a quick recap on how to square a block. I’m going to put my block lock ruler, it has this nice shaved part in the middle and if you press to the dark side it will lock up on that seam and so it won’t slide around. And I”m keeping this right on that seam and moving it all the way back to the corner. And then I’m trimming off this outer edge here just like this. And one more time we’ll show you. Again because I press to the dark side the words block lock are always going to go on my background fabric. And that matters. If you put it on the other way you’re going to go something is really wrong here. And so it always helps to know that that goes on the background. Alright now that we’ve got them all squared to four, 4 ½ we’re going to take those and we’re going to take one block from each color right here, actually it’s two blocks from each color. So and then we’re going to snowball this white corner in here with our green square. So what we’re going to do is we’re going to iron these in half like this. And I’m just going to press these real quick. I can actually eyeball that side to side but you may want to have a line. We’re going to center it on this corner right here, make sure it lines up on this corner and then sew straight across diagonally. And we’re going to do that to four blocks. And it’s going to be two matching sets like this. Alright let’s go to the sewing machine and do that. Okie doke. And again I’m going to chain piece these and just sew them across. And you really do get to the point to where once you’ve sewn long enough you pretty much can eyeball that little square across. Now if this were a large square I would not, I would not chance eyeballing it. You know I get asked all the time about why I don’t pin, why I don’t do that. And I’m like, because I do it so often that it just becomes habit for me. So you know depending on how much you sew is whether or not you do that. And I also don’t mind a little bit of imperfection. I’m all about finished is better than perfect so if it’s a little bit imperfect, that’s ok with me. Alright now we’re clipping these apart and we’re going to cut off that little point right there, just the edge. Take my little ruler, come in about a quarter of an inch and just trim that off. And then we’re going to press those. And then I’m going to show you how we’re going to lay this block out because it’s really fun. Okie doke. So if you’re a little bit angley challenged like me, well let me press these first before I get onto that part. I’m getting ahead of myself. There we go and there we go. Alright so if you’re a little angley challenged like me when I start a block I like to start in the center. So I’m going to put my center, that’s the one I trimmed down to 4 ½ and these now are going to go around it in this, it’s going to make a little, like a little friendship star almost, just like that. And then these I have to match up on my outside corners and so I’m looking for my matching strips like this. And I can see that I have two colors together so actually I’m going to move two of these. I’m going to move this over here to this side like this. Oop, oop there went my angley challenged-ness. There we go. This guy is over here and this one is down here. So see how that block comes together. That looks so cool. So what we’re going to do now is we’re going to sew three rows of three like this. And, and it’s going to come together and make a block. So let me sew one of those rows and show you how that’s going to go. And again we’re just going to do a quarter of an inch right along the edge of this. Okie doke. Now I’ve got my three rows sewn together. And I’m going to press them. And to make it easier for me when sewing I’m going to press my seams are going to go opposite ways. So the top and the bottom one I’m going to press to the, to the outside. So these guys are going to go to the outside. And the easiest way to do that honestly is just to come in and roll it back from the center just like that. And then my middle one right here those are, those seams are going to go inside. And so I”m just going to roll this down like this and then flip this and press it toward the middle as well. And then I’m going to turn it over and make sure it’s still nice and flat. And then we can really easily put these right together. And as long as our blocks keep lining up we know we have it right. So I”m going to add this one to this one and then put in that bottom one and we will have a finished block. And they’ll nest really nice because of how I’ve ironed them. And so take a few stitches, make sure your seams line up and feel for that with your fingers. There’s a little dog ear on this one and if you want to trim those off you can. I kind of look and see if they’re going to bother me, you know, and if they add too much bulk or they bother me then I will, I will easily, I’ll just trim those off later. Sorry, I opened it up and I got a little flustered. I was like, oh what just happened here but that’s right. Alright here we go. And nest up my seams and this one too. Alright so let’s press this open now. Oop, my board started to slide a little bit. Alrighty. So this is the block we’re looking for. Now I have some of these made over here. And basically all we did was just sew them together. So let’s take a look at this quilt behind me. Isn’t this fun? There’s no sashing between them. Here’s the block right here. And you can count your blocks with your middle square. So one, two, three, four, and then we’ve got one, two, three, four, five down. So we put four in a row like this and basically they just, let’s use a different color. They’re going to come together like this. And this is the scrappy look, you know, this is how it’s going to look if you kind of scrap them all up. And so you can see this is just really fun how this comes together. Isn’t that great? And so quick and easy and just makes a really fun project and a really cute block, love this block. So we hope you enjoyed this tutorial on the Sidekick quilt from the MSQC.


 Jenny Doan
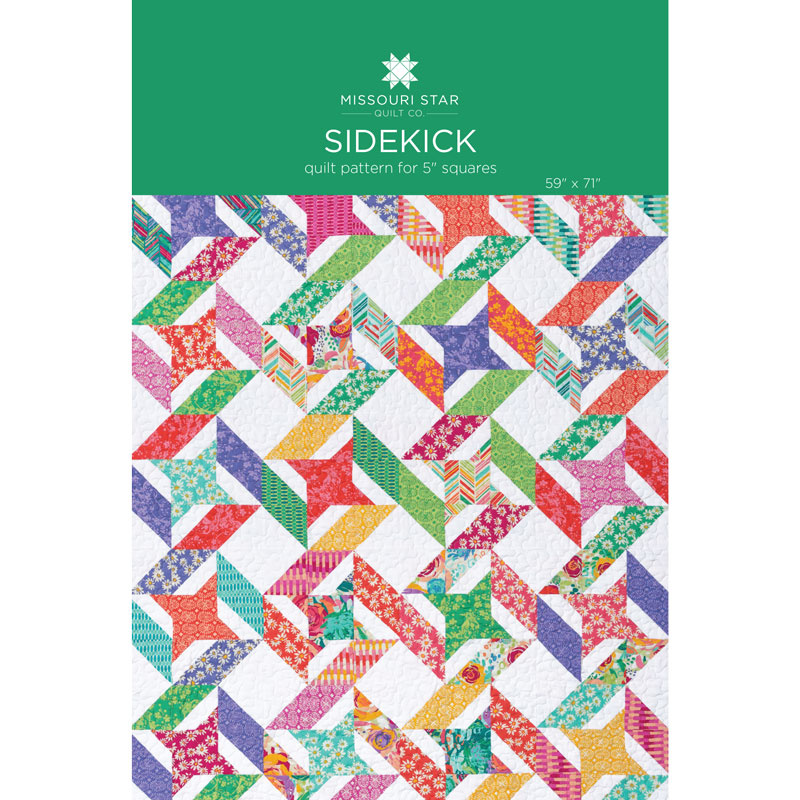 Sidekick Quilt Pattern by Missouri Star$6.95Shop →
 Digital Download - Sidekick Quilt Pattern by Missouri Star$4.95Shop →
 Olfa Splash Aqua 45mm Rotary Cutter$18.75Shop →
 Olfa Splash 24" x 36" Cutting Mat Navy$68.95Shop →
 Missouri Star 2.5" x 8" Ruler$10.95Shop →
 Missouri Star 5" x 15" Ruler$15.95Shop →
 Exclusive Missouri Star Jenny TG1600 ProPlus Oliso Smart Iron$199.99Shop →
 Missouri Star Wooly Betty Board - 17.5" x 17.5" Aqua Border$88.95Shop →
 Missouri Star Colorful Quilting Clips - Pack of 12$5.95Shop →
 Elan 8" Dressmaker Scissors$20.95Shop →
 Missouri Star 50 WT Cotton Thread White$6.95Shop →


