Skip to content

Free quilting video tutorials from Missouri Star

Quilting Tutorials
Make a "Sweet Summertime" Table Runner with Misty Doan on At Home With Misty

Make a "Sweet Summertime" Table Runner with Misty Doan on At Home With Misty

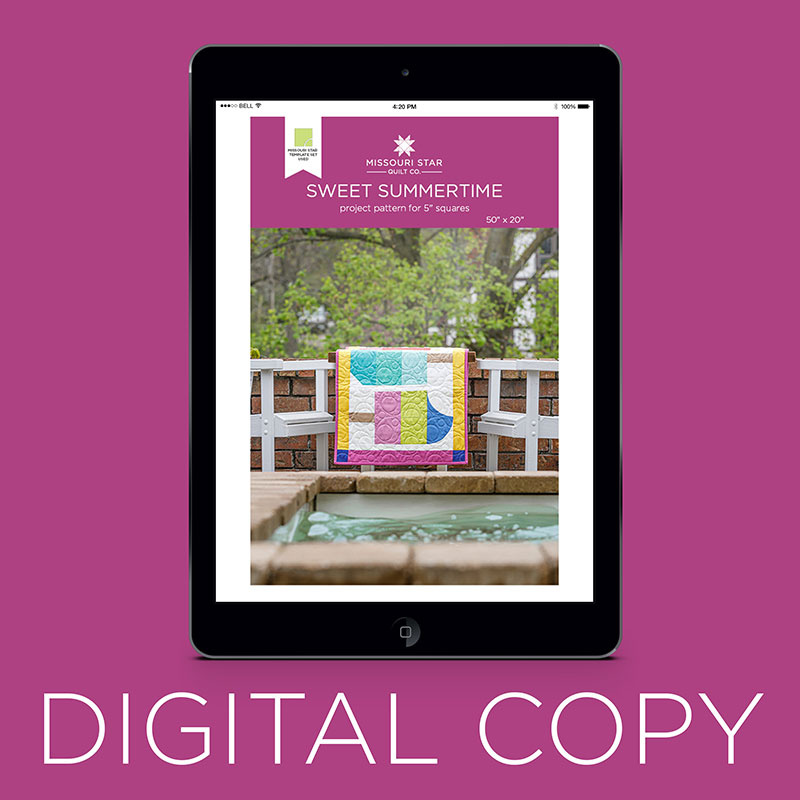
Stitch up some sweet summertime fun with Misty! This tasteful table runner incorporates all the bright colors of summer into five mouthwatering popsicles. Follow along as Misty uses 5" squares of Designer Essential Solids to make a table runner fit for all indoor and outdoor summer activities! Don't let the design fool you - this runner is fun and simple to quilt! Use the finished product to brighten up the picnic table or to bring a little extra sweetness to the dining room on those hot days.

Instructor

Misty Doan

Misty Doan grew up surrounded by sewing and quilting. She loves spending time sharing tutorials each week each week, and when she’s not stitching up one of her fun sewing projects for home decor, most likely you’ll find her hanging out with her husband and three awesome kids or working on a house project.

Common Questions

What is covered in Make a "Sweet Summertime" Table Runner with Misty Doan on At Home With Misty?

Stitch up some sweet summertime fun with Misty! This tasteful table runner incorporates all the bright colors of summer into five mouthwatering popsicles. Follow along as Misty uses 5" squares of Designer Essential Solids to make a table runner fit for all indoor and outdoor s...

How long is the tutorial video?

The tutorial video is 00:17:28.

Are supplies listed for this tutorial?

Yes. The tutorial page includes the supplies and materials connected to this project.

Video Transcript

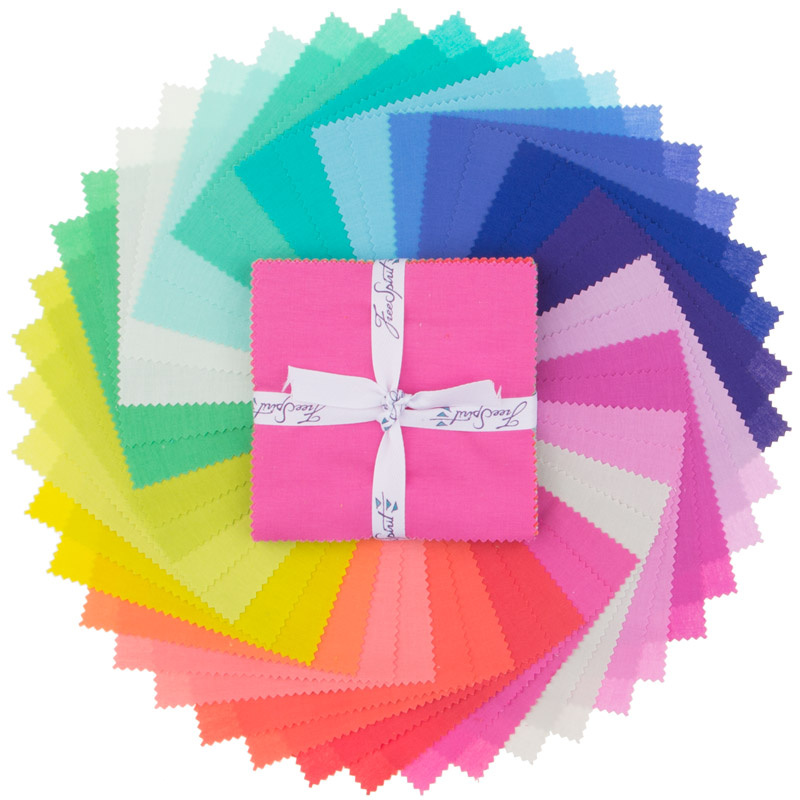
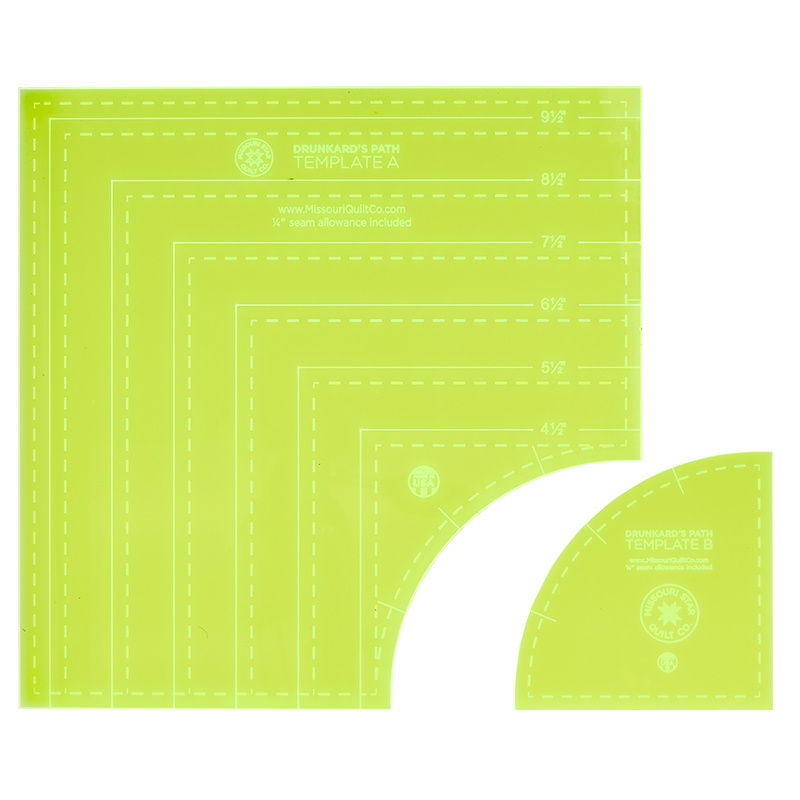
summer is in full swing so we're stitching up some sweet summertime popsicles [Music] i have been wanting to design a popsicle project for a long time and as you can see from this little runner behind me it came out so cute i'm super excited about it and i can't wait to make a full-size quilt using these blocks they're really easy so let me show you how we're going to make it i used the tula pink designer solids charm pack it has these beautiful bright summer colors that just work great for this and then you're also going to need some background fabric and an accent fabric really just one two inch strip to make your popsicle sticks and then you will need our missouri star small drunkards path template which looks just like this there's two pieces and let's go ahead and get started on so to begin we're going to make this simple block which is the full popsicle without the bite taken out of it so let me show you how we do that remember we're working with a pack of five inch squares so i've gone ahead and pulled out my blues and greens that i want to use for this block and i'm just going to go ahead and stack up these squares i've got two of each color and i need to trim these down to four and a half and the reason that we're doing that is um when we use the drunkard's path those blocks will only finish four and a half and i wanted everything to be the same if you decide that you just want to make these popsicle blocks the full ones without the bite then you could leave them five inches and just use those but if you want it to match with the ones with the bite taken out you do have to trim these down to four and a half so i'm just going to stack them up nice and straight and use my ruler and measure over four and a half make that first cut and then i can rotate this and measure over four and a half again oops i want to straighten that up just a little bit more i want to make sure they are all nice and straight better to be safe and double check at the beginning then cut them wrong okay so now these are ready to go i've trimmed them all to four and a half and we are just going to take our like colors and i'm going to chain piece them together through the machine and i'm just going to sew these two together with a quarter inch seam straight down the side and then i'll take the next two and slide them right behind just make sure they're lined up on this edge and we can just chain piece these one after the other and our last set is ready to go okay so now that those are all stitched together we can open these up and you can go ahead and press these if you'd like but i like to just lay them over and we are going to sew each of these sets together into one long popsicle so i'm just going to take a few stitches here to get started and then i'm going to come back and make sure that my middles are nesting together nicely so that means that each seam is going the opposite direction and they're just going to lock together [Applause] there we go and then we will turn this around and add this other one making sure we're nice and straight when we get started and again take a few stitches and then line up our middles so that they nest [Applause] now that i have these all sewn together i can go ahead and press these flat and we can go and add the little corners to one side to kind of give us that rounded popsicle shape and to do that i am just using two and a half inch background squares i have to decide which side i want to be the top i think i'm going to use this brighter blue as the top and so just so you know let me grab a pin here you can use a pin and you can mark corner to corner if you would like and then you will be sewing right on that marked line but i do have the diagonal seam tape on my machine and so i'll show you both ways we'll sew right on this line here that i just drew which means i'm just going to line my needle up with that and stitch right on that line all the way down and then for the other side i'm not going to draw the line i can just make sure that i put this one this side right under my needle and then this opposite end towards me i want right on this red line of the diagonal seam tape because i've lined that up with the needle and so as long as i keep that point on the line i know i'm sewing exactly corner to corner and it saves me time in marking and so you can see same result both ways and now we can just trim off that extra fabric so i'm just going to line my ruler up here and give myself a quarter inch of seam allowance on both of these there we go let's go ahead and press those back as well and our popsicle is starting to take shape now all we need to do is add the popsicle stick to the bottom so for that i have some rectangles that are three and three quarters by four and a half inches and then i have the accent color of our you know our popsicle stick this brown is two inches wide by four and a half inches tall and so we're just going to sew these together we're going to sandwich the stick in between our two background rectangles there's one can open that up and just give it a finger press for now and add our other side for our background there we go and now we can press this to the center i want to make sure my seam allowance is hidden behind the popsicle stick so i'm going to roll both sides to the middle and you can see that part is done and now this will match up exactly with the bottom of our popsicle that we made so we can just lay this on top here and sew this down i love how quick and easy this block is to make and it's just so happy and fun perfect for summertime it'd be great to make into a bigger picnic quilt i just think it's so fun so then we'll press that back and our first popsicle is complete so quick and easy so the only difference on our other popsicle here is you can see we've used the drunkard's path template to create this bite that's been taken out so let me show you how we do that i am going to take a five inch square of both my background and from my charm pack i've got this pink here and we are going to stack those up together and i always like to start with the curved template and so i'm going to line this up in this bottom corner and i'm going to cut out the curve just take your time it's a nice gentle curve make sure we got all the way through and we did perfect and so now we can take our opposite side we want to make sure they're still lined up those shifted a little bit on me and now we're going to take the other side of the template and the measurement i'm looking for is this one here that says four and a half and so i'm going to line this up in the corner again and you can see i've got a little bit of extra that i'm going to trim off that's what you're looking for so i'm going to start by cutting off these little edges and then we'll cut out this curve in the middle and so i need to pair this pink one with my white curve and this white one with my pink curve and then let's go ahead and i like to kind of finger press in the middle here of both of them and then again on the inside curve just so that i can make sure that my middles are going to match so i'm giving that that little finger press and then these are actually going to sit opposite like that when we go to take these to the machine to start sewing and now if you haven't worked with curves before you're going to want to kind of play with it do some tests and figure out what way is easiest for you i like to put one pin right there in that middle place a lot of people when they do curves they will pin and pin and pin and pin and it works for them for me i find the pins just get in my way and i end up having a harder time and so i just like to put this one pin right there in the middle let me find another one here there we go and i'll do the same on this one so i've got that little finger press i'm lining it up right on the edge and i'm pinning that middle together so i have both of those ready and so then now that i have that done i like to start with my big piece down and i pull this side around to meet it and you can see they're both square in that corner so we're just lining that up like so and i'm going to place this right under my machine to hold those together take a few stitches and then you just really it just kind of naturally eases in there especially when you have that middle pinned and i'm just letting it curve gently and as i get close to that pin that i've placed i'm going to go ahead and slide that out now because we never want to stitch over a pin and then now that i've got to that halfway mark i can start pulling this around the other way and my goal then again is to have these two ends meet up just like they did at the beginning and so i like to take a minute and line those up and then start easing them together again and you just have to take your time but you really do get the hang of this the more that you work on these curves this last little bit if you have a stiletto or even just the end of a pin to just make sure that the fabric doesn't want to shift on you because it is a small section you're working with so i'm just going to hold that there off to this side of my presser foot and now it stayed as i took a few more stitches and that ended up great and so you can see how this looks it looks really wonky this is right and so now when we take this over here to press it it's all just going to roll back beautifully you want to make sure it lays nice and flat and you don't press any tucks into it but look how great that looks we've done a curve so the first one is done let's go ahead and do it again just so you guys get a better idea again we're gonna line up that first side together we're gonna slide that under the machine take a few stitches to start and then begin easing our fabric keeping our sides lined up removing the pin as you get close stopping at that middle section and pulling the other end around to match and i find taking the time to do this really helps make sure that i don't end up with a bunch of extra at one side because if you pull too hard there is some bias there with that curve and you can get a little bit of extra on one side or the other so now we're just going to continue let that lay down it's one to flip up under there there we go ta-da and again just give it a press so you can see how great these turned out and so now just like we did in our other popsicles we just need to arrange this so that it looks like a bite has been taken out so you can see if this was a full curve or a rounded top of a popsicle you could totally do that and put two of the colors together but we're just going to rotate this so it looks like we took a nice big bite out of the top there we're going to put these right sides together make sure that's all lined up and sew this with a quarter inch seam there we go all right let's give that a press okay so now remember because we used the drunkard's path these blocks ended up four and a half inches so just like i did on our first popsicle any of the squares you're going to use for this block also need to be four and a half inches so i've gone ahead and trimmed those down and from from here from the curve the construction is exactly the same as that first block we made so we start with our drunkards path blocks and then we have another set of four and a half inch squares and we drop another one in below and then our popsicle stick goes on the bottom and so you can see that finished block right here how that all comes together just like that and so for this finished runner i used three of the bite blocks and two of the whole blocks and you'll notice in the middle i just changed the side that the block the bite was taken out of does that make sense so you've got two blocks made this way and on the one in the middle i you don't change how you construct them at all it's just the placement of your drunkards path blocks and so five blocks together and then i just sashed them in the middle with a one and a half inch background strip and i put a two and a half inch outer border it's a great little summertime project and i hope you enjoyed this tutorial i will see you next time hey everyone it's misty thanks for watching at home if you aren't already a part of our missouri star family be sure to subscribe and hit the bell if you want a notification every time we release a new video i'll see you next monday on the newest episode of at home [Music]

More Charm Pack tutorials

See all