Skip to content

Free quilting video tutorials from Missouri Star

Quilting Tutorials
Palette Pop Episode 4: Piecing a Ring of Stars

Palette Pop Episode 4: Piecing a Ring of Stars

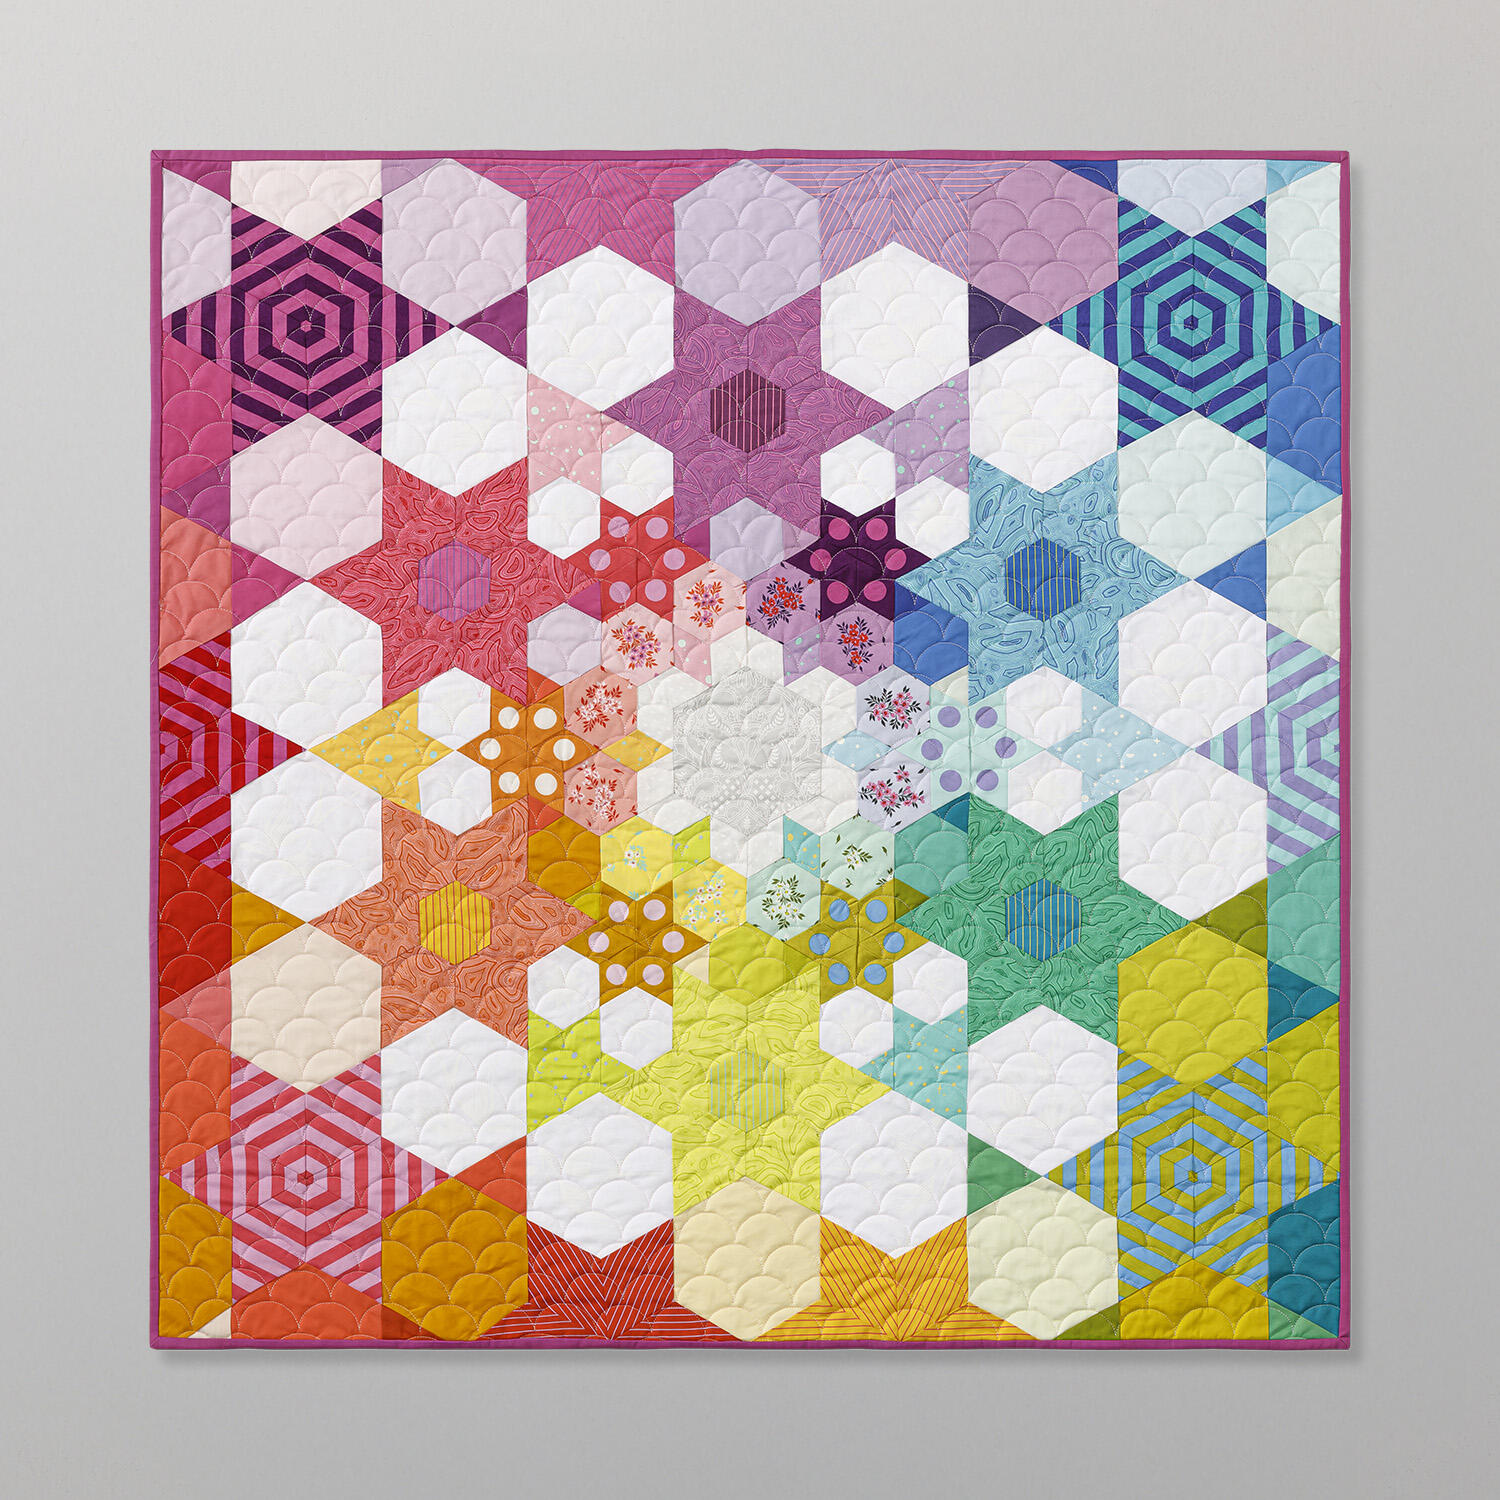
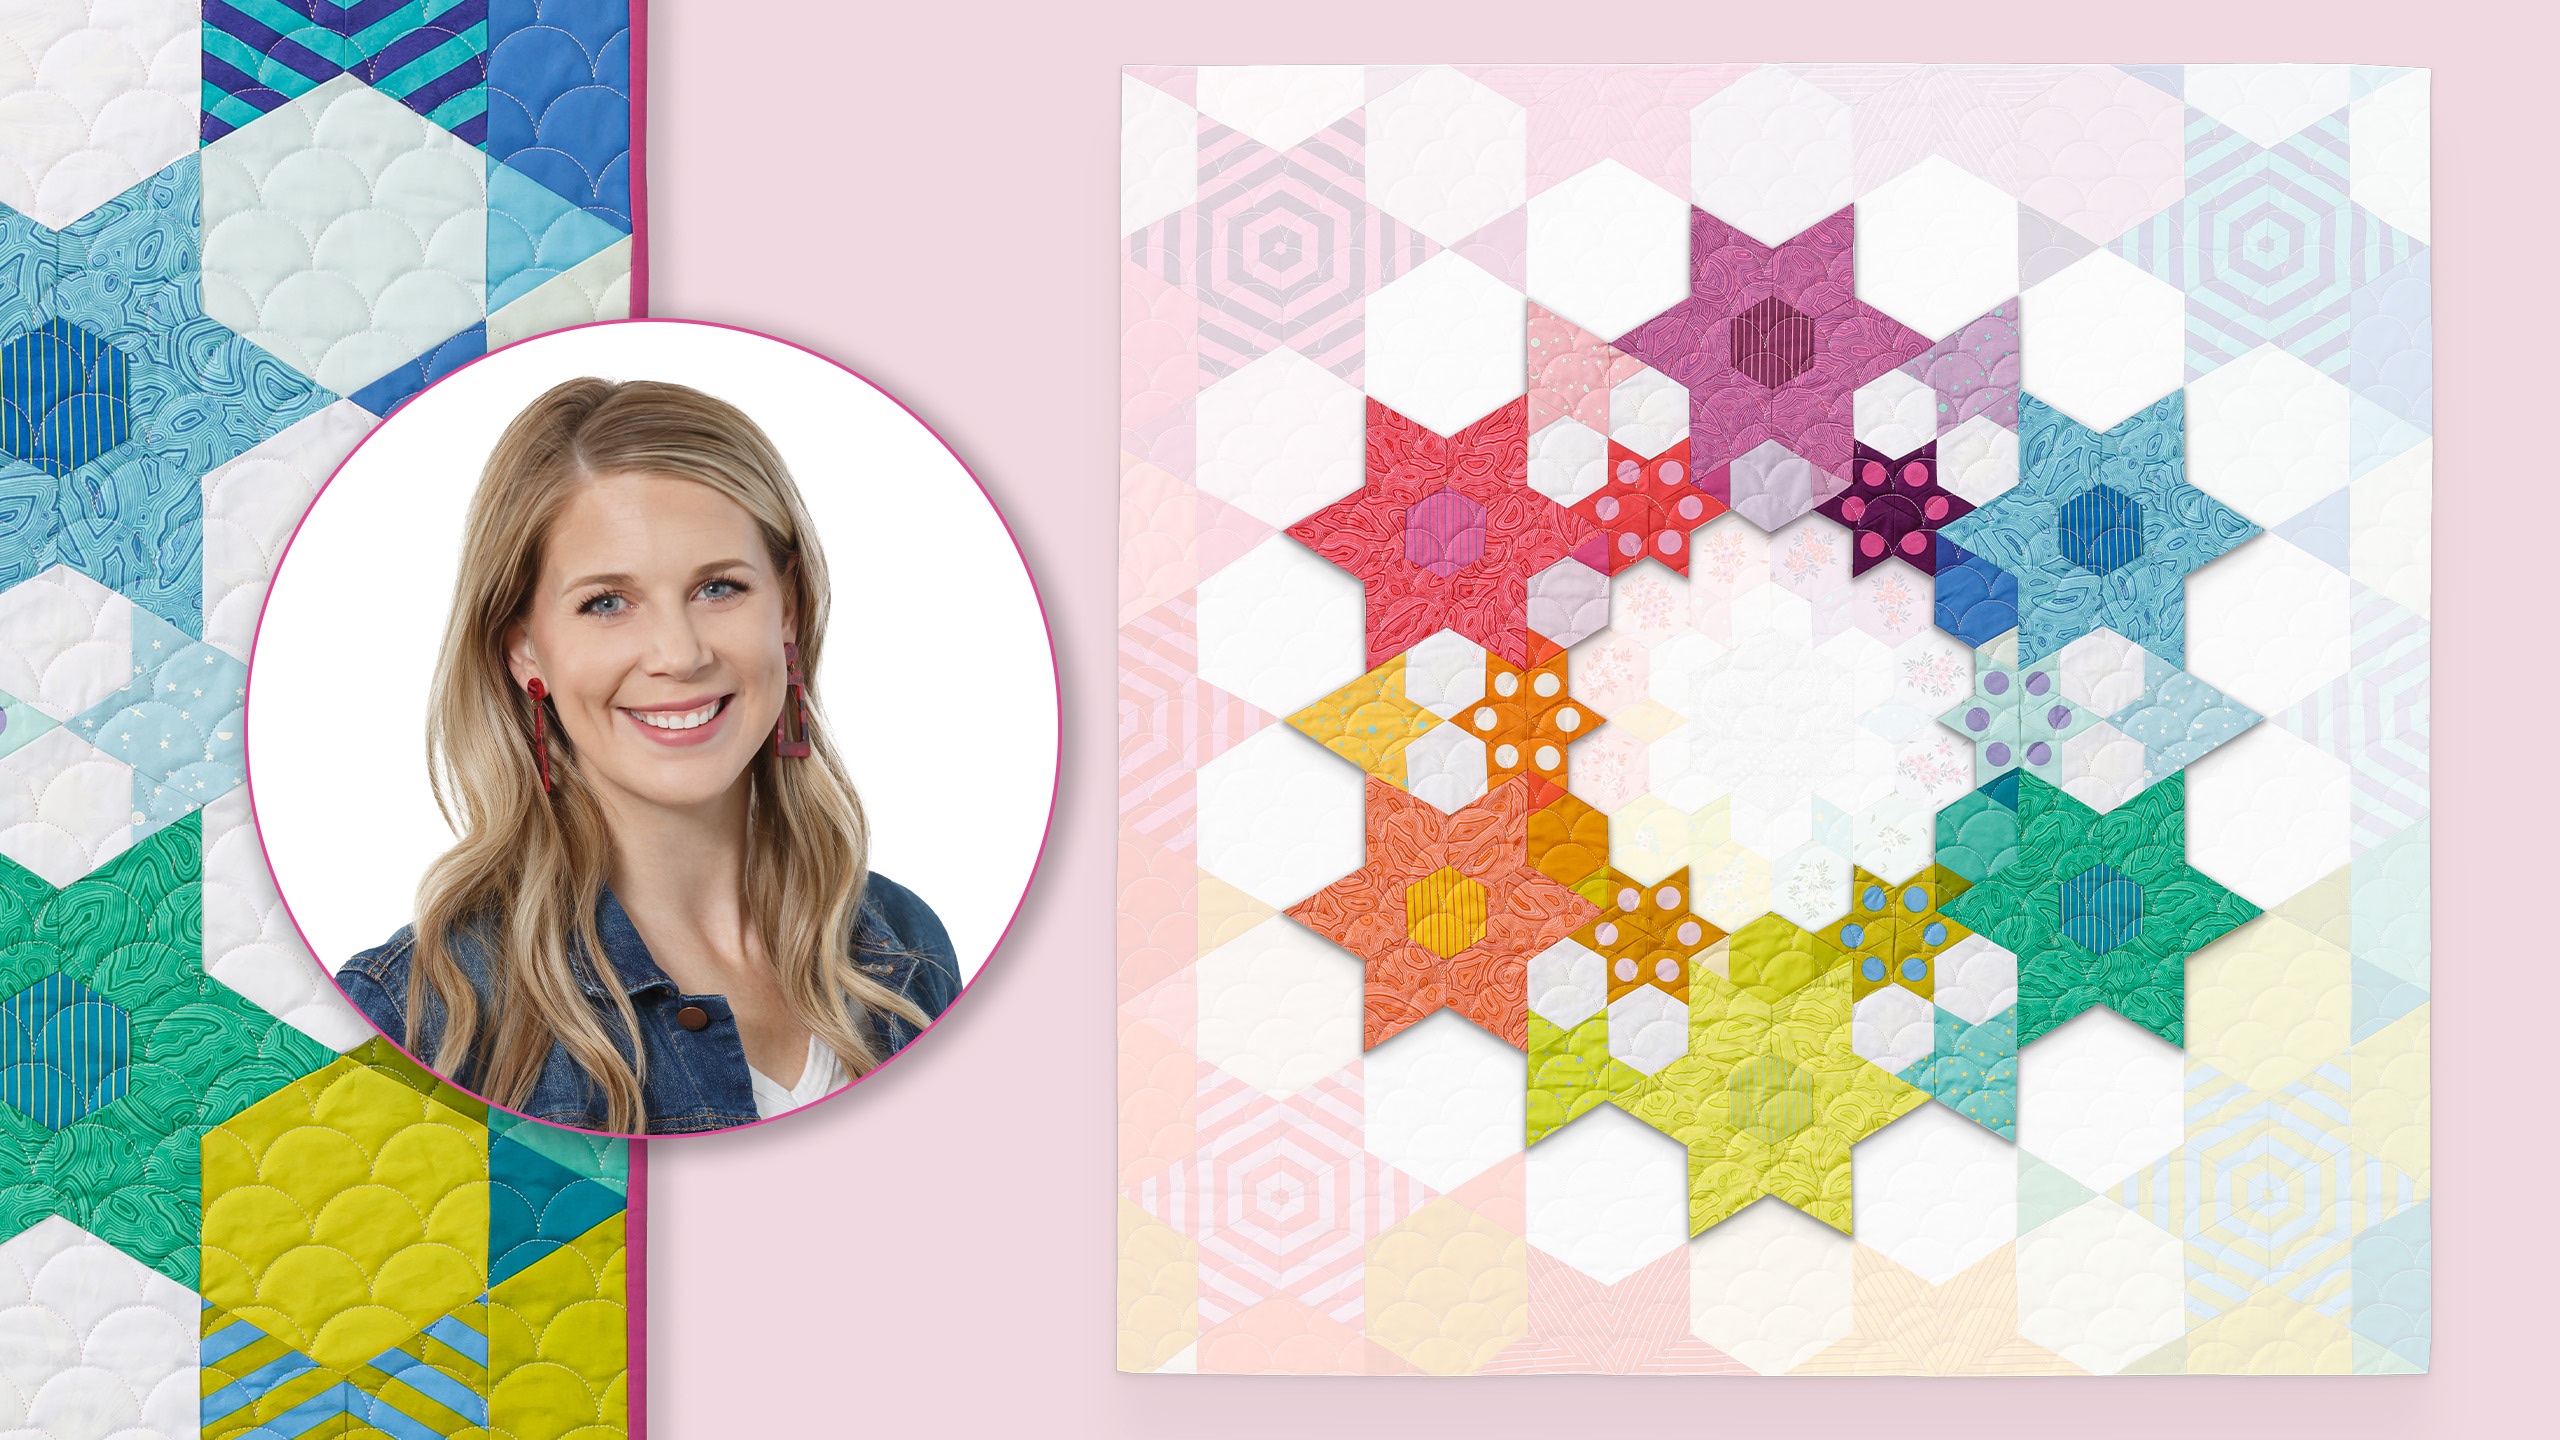
Join Misty in Episode 4 of the Palette Pop EPP Quilt tutorial to learn how to piece the ring of stars in an eye-popping English paper pieced quilt. This gorgeous quilt features hexagons, stars, and flowers made with vibrant Tula Pink fabrics that give the quilt a real WOW factor! And the MSQC English paper piecing templates make it fun and easy to do. Follow Misty through all the Palette Pop EPP Quilt tutorials as she walks you through the quilt-making process from start to finish!

Instructor

Misty Doan

Misty Doan grew up surrounded by sewing and quilting. She loves spending time sharing tutorials each week each week, and when she’s not stitching up one of her fun sewing projects for home decor, most likely you’ll find her hanging out with her husband and three awesome kids or working on a house project.

Common Questions

What is covered in Palette Pop Episode 4: Piecing a Ring of Stars?

Join Misty in Episode 4 of the Palette Pop EPP Quilt tutorial to learn how to piece the ring of stars in an eye-popping English paper pieced quilt. This gorgeous quilt features hexagons, stars, and flowers made with vibrant Tula Pink fabrics that give the quilt a real WOW fact...

How long is the tutorial video?

The tutorial video is 00:07:47.

Are supplies listed for this tutorial?

Yes. The tutorial page includes the supplies and materials connected to this project.

Video Transcript

hi everyone welcome to the next episode of our series on this pallet pop English paper piecing wall hanging we are going to tackle stitching zone two of the project remember this is what we completed last time this is zone one so let me show you how to do [Music] [Music] that welcome back everyone so like I said we'll be stitching zone two today and that's going to take us to all of these outer stars that you see here we're just continuing to add to the middle of this beautiful project that we've started and so let me show you how to do this remember like I said before everything is kind of ombred so think of this in sections of color if you will and that really helped my brain kind of work through this and so we're going to keep on that same path where I'll show you this little pink segment and I have some of the other colors ready to go and so with those pink shapes there's a few different ones that you're going to make so up first you have this small star with the dots then we have this kind of special fancy diamond shape where we add the two little triangles to either side of our hexagon and this is all solids and then this one I lovingly refer to as the gnome it just reminds me of a little gnome face and so that's made up of two of our white hexagons our little pink triangles and the larger pink diamond and then the last shape is going to be made with our stripe hexi center and the then these petal shapes are going to come in around it just like so and so all of the stitching is done exactly the same way that I showed you in the previous tutorials nothing different really you're just going to make each shape at one at a time until you have the colors together and so then now we can attach those to our center here so let's go ahead and move this up out of the way i'll bring in our middle and remember we're starting with the pink here and so the first thing that I always do is I set in this star with the polka dots because it's going to touch the pink floral hexagons so that's where it fits in and then our little gnome comes in right on top of that this little guy is going to set in just like so and you do want to make sure the pink is going towards the pink shapes and the orange is point pointing down toward the orange section and then this guy is going to slide in just like so make sure everything's going to fit there we go give that a little spin so you can see how that pink section is going to fit in there so now that you can see how this is going to come together I'm actually going to pull this middle away because I kind of assemble this unit first that's the way that it's instructed and so of course I would stitch this whole flower together first that would be step one and then you know you're going to add your little triangles to this hexagon shape and then I would add this elongated diamond to my flower that would be my first order of business then I would come back and stitch these two together and then attach them and once I've done that I'll show you on the purple here what that unit looks like it's going to look just like that and I will do that for every single color to make my way all the way around the middle let's slide this back up here and you can see how this will all fit together so here's how the purple would set in and then the blue And you'll just continue all the way around let me talk about a few other little tips that might be helpful for you as you go as you're maneuvering this and stitching this by hand they can get a little wonky and so don't be afraid to gently press this even with the papers in it it's not going to cause any issues at all so you can definitely do that the other thing that you can do and let me show you on here is you can actually remove some of the papers where you no longer need to attach other shapes and so you can see I went ahead and pulled out all the papers from the middle of this one and just left the outside edge where I'm going to be actually stitching and so then it's just a little less bulk for me to maneuver with my hands and makes it a lot easier so let's go ahead and sit this back in so we can see how it looks and then I'm going to go ahead and use the purple to start stitching this so I will just fold the first one back make sure I have it in the right place and I'll start with this little straight edge and I'll attach this and make my way all the way around and I'll meet you back here when I have this all done one more little tip on this one when I start stitching you can see this is like a partial seam here this bottom piece extends farther past so I'm just lining up just these hexagon shapes right here and I'll start stitching right where those two meet and then I'm just going to make my way and continue down until I reach this pivot point and I will do the longest stitch I can without cutting my thread [Music] all right so I've done that first little stretch and now I'm going to just pivot this because I need to line up these purple edges and so same idea we're just going to keep stitching where those seams meet i do like to do another lock stitch by just taking two stitches right there in the same place to make sure those little junctures meet very nicely and we don't have any gaps in our seams and we'll just keep making our way around and I'm going to continue adding all of my colors until I have the whole center done all right look at this beautiful center it turned out so nice i do want to point out I pulled out all the papers from the middle and I've just left that outer edge to prep me for the next round and to make it a little lighter and less bulky to deal with but otherwise this is complete and now we can just finish this up in the next episode by adding our four corner sections so let's take one look at how this fits into the project behind us just like so and you can see whoops how those four corners are just going to round this out finish it off and it's going to be done before you know it so I will see you next time for our final episode hey everyone thank you so much for watching at home we're so excited to be almost a million quilters strong here at Missouri Star and so if you haven't already joined our family be sure to subscribe and hit that notification bell so you can be notified of all of our future tutorials and we'll see you soon [Music]

More Wall Hanging tutorials

See all