

The Love Notes Quilt
 Jenny Doan
- Charm Pack
- Holiday
- Wall Hanging
- Beginner
- Quilt size 39" × 50"
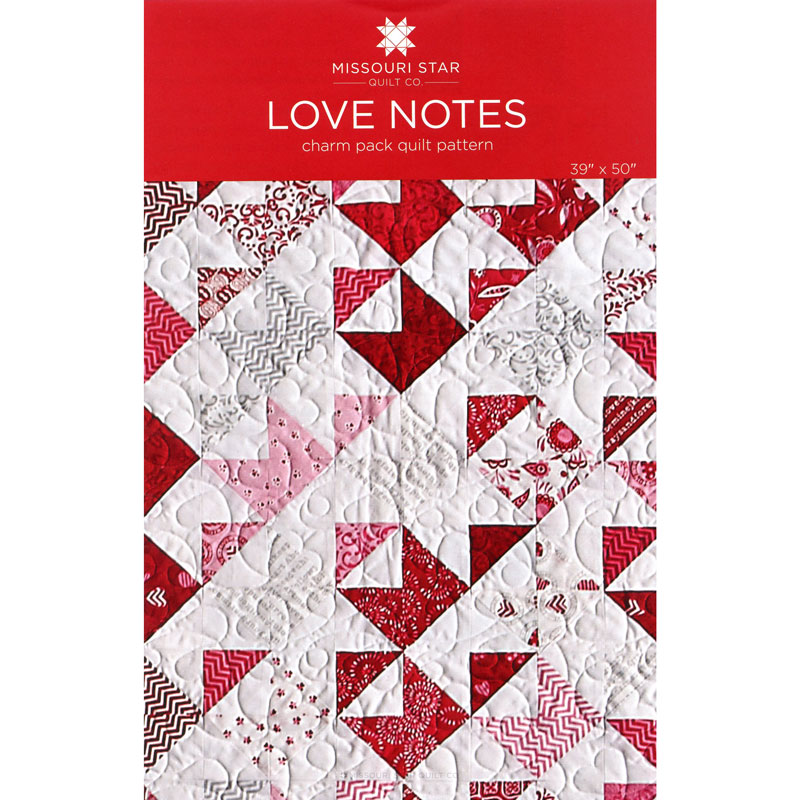
Jenny Doan shows the mini version of our popular "You've Got Mail Quilt. She calls it "Love Notes". With a cute Valentine's charm pack, it makes a great Valentine's Day Project.
Instructor
Jenny Doan
Jenny Doan is an American quilter, author, and YouTube personality. Jenny started Missouri Star Quilt Company in 2008 and today it is the largest quilting supply vendor in the United States.
Shop this tutorial




Common Questions
What is covered in The Love Notes Quilt?
Jenny Doan shows the mini version of our popular "You've Got Mail Quilt. She calls it "Love Notes". With a cute Valentine's charm pack, it makes a great Valentine's Day Project.
How long is the tutorial video?
The tutorial video is 00:05:37.
Are supplies listed for this tutorial?
Yes. The tutorial page includes the supplies and materials connected to this project.
Is a transcript available?
Yes. A written transcript is available on the tutorial page.
Video Transcript
Hi, I’m Jenny from the Missouri Star Quilt Company. A while ago we shot a video called You’ve got Mail. This is it, right here. It’s got these big envelopes that are made just with half square triangles--such an easy quilt-- and you can find a link for that in the description below, but we decided to do it mini. So, take a look at this quilt behind me. Look how cute these are! These are like little tiny love notes. Little bitty love notes. And we did these with charm packs instead of, instead of layer cakes. So, let me show you how we did that. I’m going to set that over there.
So, this fabric behind me is coming out just in time for Valentine’s Day and it’s called Surrounded by Love and it’s by Deb Strain for Moda and it’s just a darling line. And what you’re going to do, we’re going to make our half square triangles the way I always make them, which is by sewing a light and a dark fabric together all the way around the outside edge, a quarter of an inch. And I’ve already done that and so now what we’re going to do is cut them. Cut them corner to corner, both directions, like this. There we go. Got to make sure those are lined up just right. And I’m going to cut both of these--I have two of them here-- because to make this block you need three squares: three half square triangles from one block and one from another. So, this will give us two, two blocks. There we go.
Alright, so now we’ve got to iron these open because these now are our half square triangles and if you haven’t seen this method, this will speed up your time so much. So, I like to lay them with the dark on top and then just roll them, roll them back to iron them, so that my seam stays on the dark side. And we’re pressing to the dark side. Giggle, giggle. I always think I need a Darth Vader helmet when I say that.
Alright, here we go. This is such a great little block. And I just think it looks so adorable in the, in the minis. And it’s just fun to see what happens when you use a different precut. The first ones were the 10 inch squares and these are the 5 inch squares. And, remember, you can cut your own. You know, you guys probably all have a bunch of stash.
So, what we’re going to do with these is we’re going to create our envelope by setting these together, three pointing at each other, like this, and then the last one goes like this and that makes the little envelope. So, it’s just the same over here. We’ll do this one with the blue where we have, we put two together and the third one points down to it, makes an envelope, and this piece goes in, like that. So, your little colored piece comes up here on the top so it looks like, like your flap is opened up.
So, how we sew these together is just like the four patch. So we’re going to put these together, like this, and put these together, like this. I’m going to take both sets over to the sewing machine and we’re just going to sew down this one side. Alright, and we’ll chain piece these. Just make sure you don’t move them. You want to make sure you have your, your right sides together. I always finish a block and lay it out so I have a little guide. It’s a little map for me so that I can see where I’m going. I’m a little angle-y challenged so I have to be able to see that block. So, I finish one and lay it right up here and then all the rest of them go together so well.
So now we’re going to press this open. So now we have the two together and these two and we’re going to match them up and I’m going to iron this seam going the other direction because I want this to lay, to nest really well. So we’re going to nest these two seams right here. Just line them up, snug them up really tight. You can feel with your finger if they’re meeting up good and then we’re going to sew that seam together. Here we go. Just sew them down.
Alright, now we’re going to iron this open and this is going to be our first little love note. So cute! So, that’s your little love note, right there. Now, on this quilt, we used one charm pack so we have 1, 2, 3, 4, 5 across by 7 down. That gives us 35 squares and it just makes a darling little quilt. So, we hope you enjoyed this tutorial of the miniature You’ve got Mail, I call it the Mini Love Notes, from the Missouri Star Quilt Company.
So, this fabric behind me is coming out just in time for Valentine’s Day and it’s called Surrounded by Love and it’s by Deb Strain for Moda and it’s just a darling line. And what you’re going to do, we’re going to make our half square triangles the way I always make them, which is by sewing a light and a dark fabric together all the way around the outside edge, a quarter of an inch. And I’ve already done that and so now what we’re going to do is cut them. Cut them corner to corner, both directions, like this. There we go. Got to make sure those are lined up just right. And I’m going to cut both of these--I have two of them here-- because to make this block you need three squares: three half square triangles from one block and one from another. So, this will give us two, two blocks. There we go.
Alright, so now we’ve got to iron these open because these now are our half square triangles and if you haven’t seen this method, this will speed up your time so much. So, I like to lay them with the dark on top and then just roll them, roll them back to iron them, so that my seam stays on the dark side. And we’re pressing to the dark side. Giggle, giggle. I always think I need a Darth Vader helmet when I say that.
Alright, here we go. This is such a great little block. And I just think it looks so adorable in the, in the minis. And it’s just fun to see what happens when you use a different precut. The first ones were the 10 inch squares and these are the 5 inch squares. And, remember, you can cut your own. You know, you guys probably all have a bunch of stash.
So, what we’re going to do with these is we’re going to create our envelope by setting these together, three pointing at each other, like this, and then the last one goes like this and that makes the little envelope. So, it’s just the same over here. We’ll do this one with the blue where we have, we put two together and the third one points down to it, makes an envelope, and this piece goes in, like that. So, your little colored piece comes up here on the top so it looks like, like your flap is opened up.
So, how we sew these together is just like the four patch. So we’re going to put these together, like this, and put these together, like this. I’m going to take both sets over to the sewing machine and we’re just going to sew down this one side. Alright, and we’ll chain piece these. Just make sure you don’t move them. You want to make sure you have your, your right sides together. I always finish a block and lay it out so I have a little guide. It’s a little map for me so that I can see where I’m going. I’m a little angle-y challenged so I have to be able to see that block. So, I finish one and lay it right up here and then all the rest of them go together so well.
So now we’re going to press this open. So now we have the two together and these two and we’re going to match them up and I’m going to iron this seam going the other direction because I want this to lay, to nest really well. So we’re going to nest these two seams right here. Just line them up, snug them up really tight. You can feel with your finger if they’re meeting up good and then we’re going to sew that seam together. Here we go. Just sew them down.
Alright, now we’re going to iron this open and this is going to be our first little love note. So cute! So, that’s your little love note, right there. Now, on this quilt, we used one charm pack so we have 1, 2, 3, 4, 5 across by 7 down. That gives us 35 squares and it just makes a darling little quilt. So, we hope you enjoyed this tutorial of the miniature You’ve got Mail, I call it the Mini Love Notes, from the Missouri Star Quilt Company.


