

The Wedge Quilt
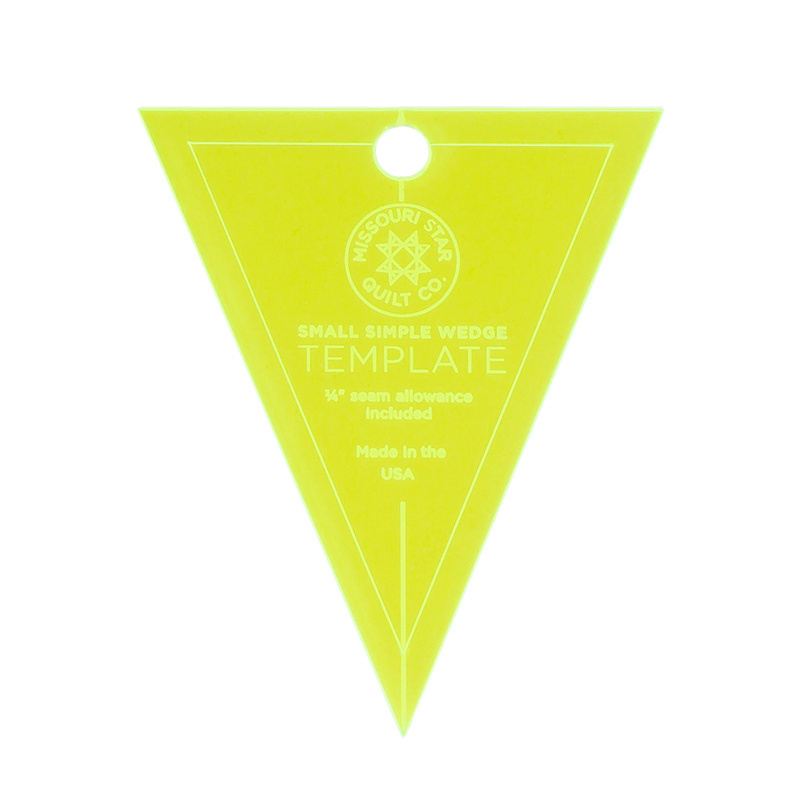
Jenny Doan shows a great use for the Small Simple Wedge template. Small Simple Wedge Template from MSQC.

Instructor
Jenny Doan
Jenny Doan is an American quilter, author, and YouTube personality. Jenny started Missouri Star Quilt Company in 2008 and today it is the largest quilting supply vendor in the United States.
Shop this tutorial



Common Questions
What is covered in The Wedge Quilt?
Jenny Doan shows a great use for the Small Simple Wedge template. Small Simple Wedge Template from MSQC.
How long is the tutorial video?
The tutorial video is 00:06:43.
Are supplies listed for this tutorial?
Yes. The tutorial page includes the supplies and materials connected to this project.
Video Transcript
[Music] Hi, I'm Jenny from the Missouri Star Quilt Company. I'd like to show you this darling little quilt behind me. Isn't this so cute? I love these little triangle quilts. The first time I saw one, it was an antique quilt that was made in old shings and things like that, and it was just beautiful. And I thought I would try it with some little more modern fabrics, and it's just adorable. So, really, no matter what fabric you choose for this, it's going to be a pretty quilt. To make this quilt, you're going to need the simple wedge ruler, and you're going to need two charm packs, uh, printed ones, and two white ones. And that's it for the whole quilt. Now, the reason we came out with the simple wedge ruler wasn't because the world needed another template. It didn't. The reason we came out with it is because I don't like waste. So, normally when you put a triangle ruler on a pre-cut, you get lots of waste here. And you don't have that with ours because with our ruler, you're going to put the edge of your ruler on the edge of the fabric. So, I like to say you put your wedge on the edge and then you get two cuts out of one charm pack. So, let's go ahead and cut that. We're going to go right down this side right here. And then I like to come across here like this. And um make sure I got all those. There we go. And oh, I missed that little point right there. And then you still have what's left of your charm pack here. And when you put your wedge over on this other side, and again, you just line up and you put your wedge on the your ed your wedge on the edge. Then you just trim off it. See, it just leaves this tiny little bit of room in here. And then we just cut the end off over here like this. And you get this these perfect little wedges. And um Oh, I see I cut two out of each one. Look at that. Look at that. And so then you need to cut your white ones as well. And you can use a charm pack um if you have that. If you don't want to use a charm pack, it's a little more efficient to use uh a strip of fabric. And mine is five inches wide. And you're just going to put your wedge on like this. And you lose your first little piece right here. But then all you're doing is is cutting and and you'll scoot this out. And you flip it over and you just, you know, you can just move it back and forth like that. And it makes it an easy way to cut these out. um uh and kind of a little a little bit better use of fabric. Not you, as you can see, we have very little waste on our charm pack, but this just helps a little bit. So, either way you want to do it. So, in thinking about this quilt, this is a really easy quilt to put together because you're just sewing these together in long rows. So, I tried to think about the things that would really help you. When I was sewing them together, I would grab two of these and sometimes my colored piece was on top and sometimes it was on the bottom. What happens when you do that is you get pieces that are going that are that won't line up together. They don't they you'll have one piece and it it you it's a you know turn the wrong way. And so I started always putting my um light piece on the bottom and then I put my colored piece on the top. The other thing that you have to remember is that here's the wide part of this fabric is where your point goes. And on our templates we don't have the edges cut off to line up. So right on these edges, they just have to hang over a quarter of an inch. So you'll have what I call bunny ears and it sticks over on this end. And then the other little white part peaks out on the other end. And you sew them together a quarter of an inch right up there. So I want to show you how to do that because it's important to get a nice straight line that way. So, we're going to come over here and sew these down and see see if we lined them up good. So, then when you open them up, see how nice that lines up here. Let me press this so you can see this better. And I probably should press it the other direction. Keep my darks to the dark. So, here's this piece right here. And when I sewed this together, what I did was I sewed twos and twos and twos and then fours and fours and then I would put them together as long as I needed them. So when I put mine together in rows, I put them in rows of 13. You can you can really choose whatever size you want. You know, mine mine just happened to come together that way. It's actually 12 1/2 because we're going to take that end piece off to make it straight so we can put our border on. But I'm going to go ahead and lay this one over and sew this for you one more time. So again, you see this little piece peeking out here and this little piece peeking out here. And we're going to go ahead and sew this on. And I'll make this row a little longer so you can see what I'm talking about a little better. All right. Now, let's iron that over. The the next thing I wanted to mention to you is that right here at the top of the point, you can see that it leaves a little bit of room for your seam. And you don't want to put your seam so low that it cuts off the top of that point. So, what I do when I sew them together here, let me iron this way so you can see this. This is really a really a good rule of thumb right here. I did a terrible ironing job, but we're not going to look at that. We're looking at this part right here where the seams cross over. If you will stay when you sew this together, if you will stay to the outside edge of your seam. So right here where it crosses over, I'm going to get a little pointer here. Right here where it crosses over, you're going to say stay on this side of that cross. As long as you stay on that side of the cross, you'll never lose your point. And that's good for any almost any kind of quilt that you make that has points that come together. And we do points a lot in quilting. So where this comes together, you just stay on this side of it, on the seam side of it, and you won't have any trouble with your points. So um those were about all the hard things that I could come up with this quilt. It's a darling quilt. It looks great in any fabric you choose to put it in. And we hope you enjoyed this tutorial from the Missouri Star Quilt Company.


