

Triple Play: 3 Double Square Star Halloween Quilts with Jenny Doan of Missouri Star
 Jenny Doan
- Charm Pack
- Lap / Throw
- Beginner
- Quilt size 63" × 75"
We have a new tradition here at Missouri Star: Triple Play! Once a month, Jenny, Misty, and Natalie each demonstrate their own, unique take on a favorite block, technique, or template. This week these talented Doan ladies are showing off three Double Square Star projects, and they are all quick and easy Halloween quilt patterns!
Instructor
Jenny Doan
Jenny Doan is an American quilter, author, and YouTube personality. Jenny started Missouri Star Quilt Company in 2008 and today it is the largest quilting supply vendor in the United States.
Shop this tutorial
 Double Square Star Table Runner Quilt Pattern by Missouri Star$4.95Shop →
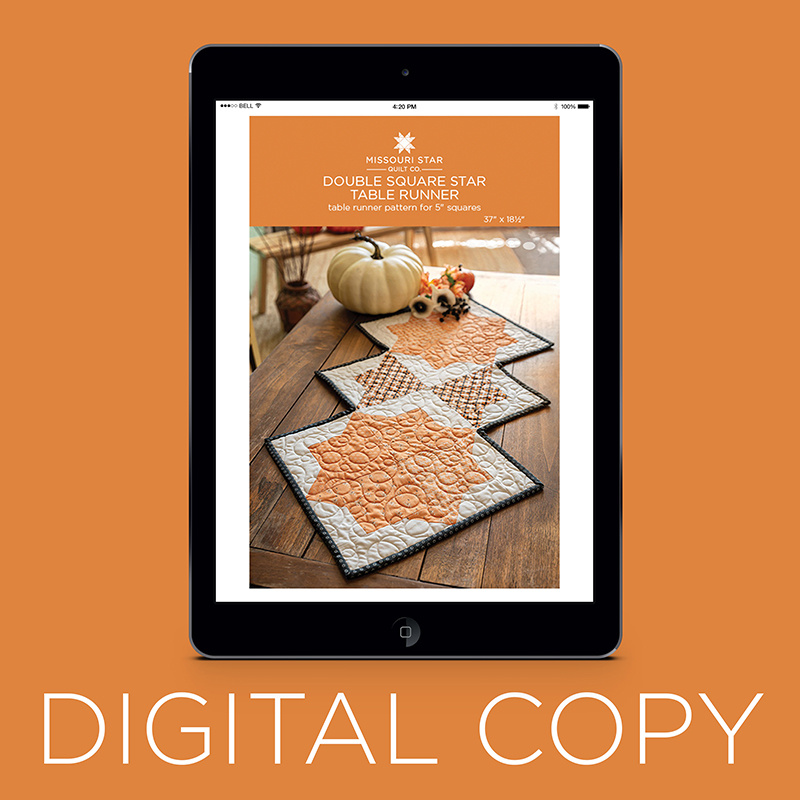 Digital Download - Double Square Star Table Runner Quilt Pattern by Missouri Star$3.95Shop →
 All Hallow's Eve Charm Pack$9.95Shop →
 All Hallow's Eve - Flourish Midnight Yardage$10.45Shop →
 Bella Solids - White Bleached Yardage$6.95Shop →
 All Hallow's Eve - Polka Dot Circles Midnight Yardage$10.45Shop →
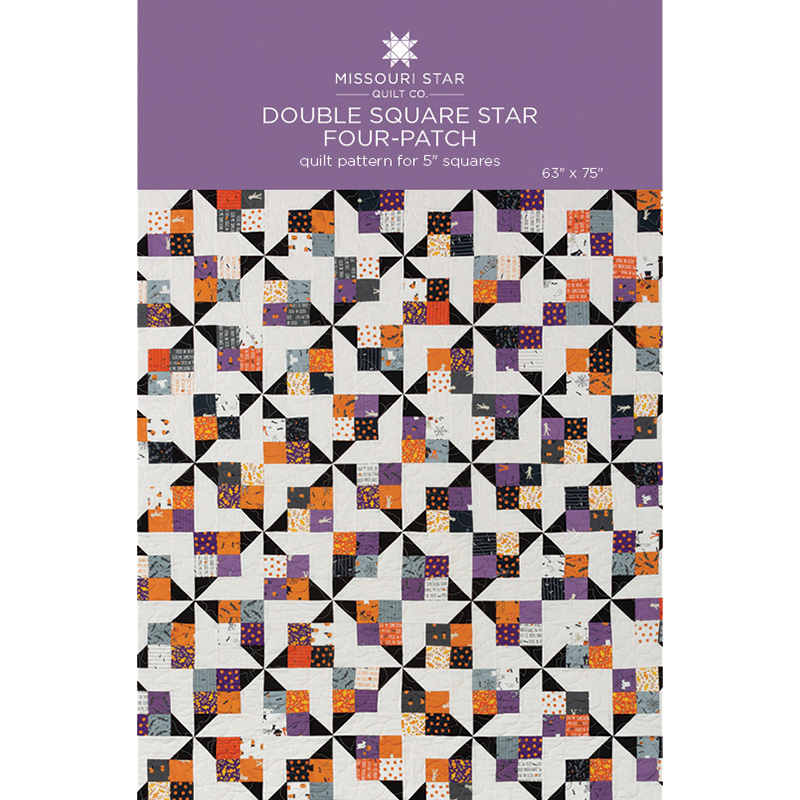 Double Square Star Four-Patch Quilt Pattern by Missouri Star$4.95Shop →
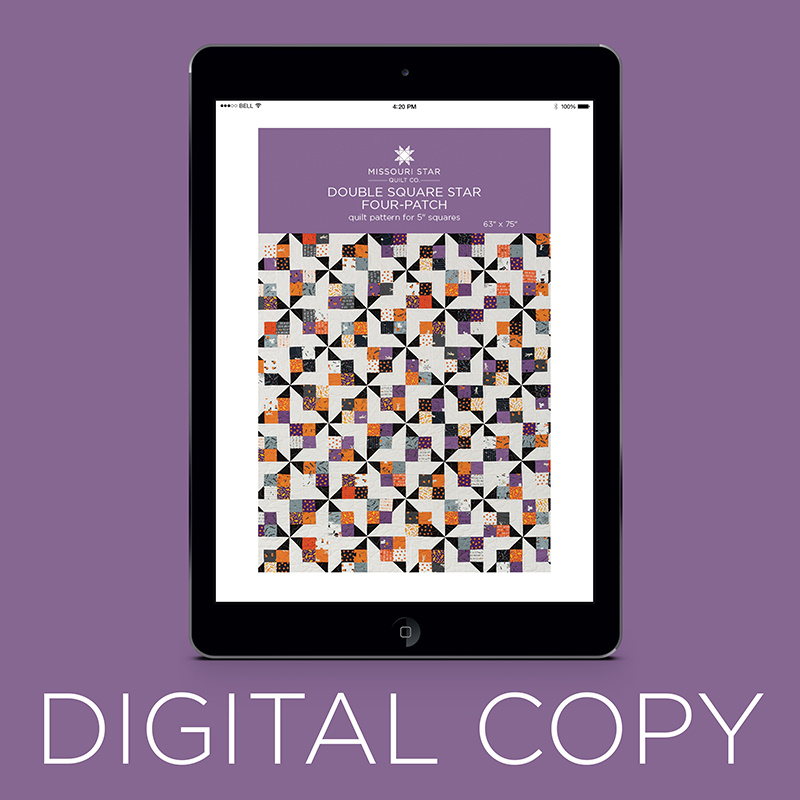 Digital Download - Double Square Star Four-Patch Quilt Pattern by Missouri Star$3.95Shop →
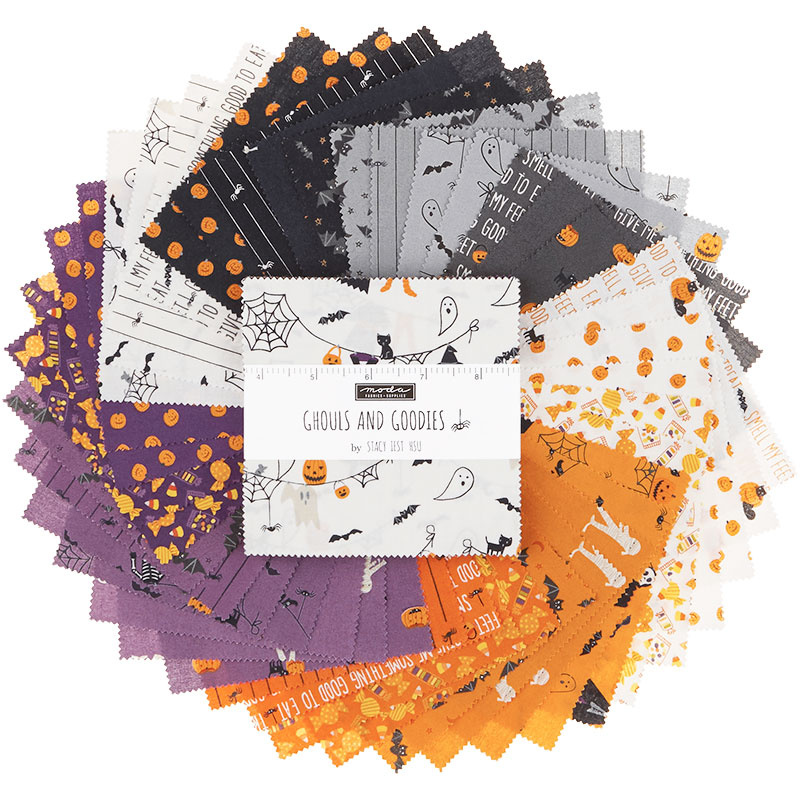 Ghouls and Goodies Charm Pack$9.95Shop →
- Bella Solids - White Bleached Yardage$6.95Shop →
 Ghouls and Goodies - Pumpkin Toss Licorice Yardage$10.45Shop →
 Ghouls and Goodies - I Want to Suck Your Blood Candy Yardage$10.45Shop →
 Kona Cotton - Black Mini Charm Pack$6.25Shop →
 Sashed Double Square Star Quilt Pattern by Missouri Star$4.95Shop →
 Digital Download - Sashed Double Square Star Quilt Pattern by Missouri Star$3.95Shop →
 A Spooky Good Time Single Scoops$9.95Shop →
 Bella Solids - Black Yardage$6.95Shop →
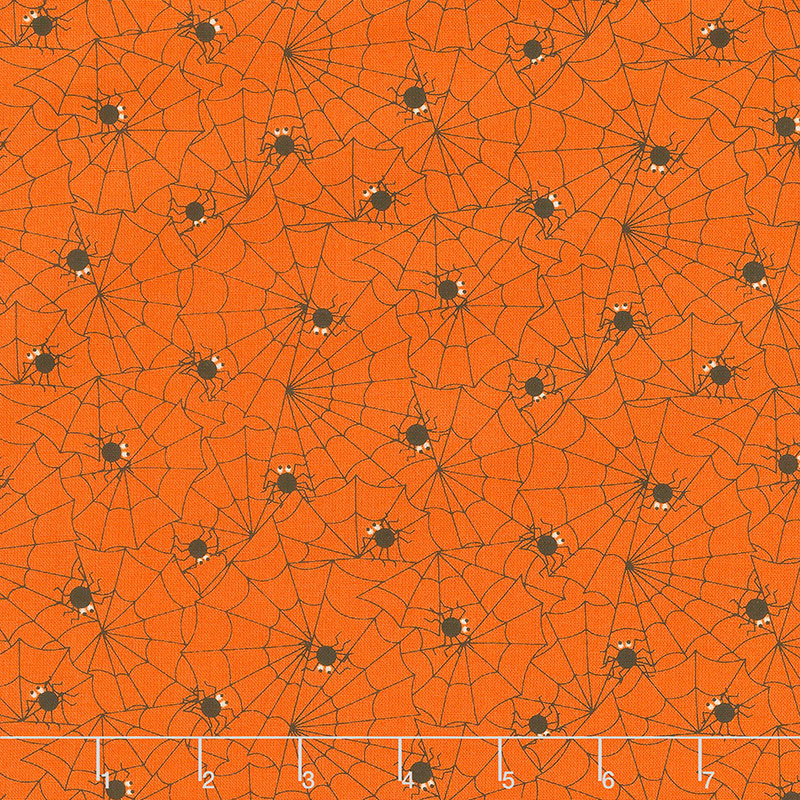 A Spooky Good Time - Spider Web Pumpkin Yardage$10.45Shop →
Common Questions
What is covered in Triple Play: 3 Double Square Star Halloween Quilts with Jenny Doan of Missouri Star?
We have a new tradition here at Missouri Star: Triple Play! Once a month, Jenny, Misty, and Natalie each demonstrate their own, unique take on a favorite block, technique, or template. This week these talented Doan ladies are showing off three Double Square Star projects, and...
How long is the tutorial video?
The tutorial video is 00:29:10.
Are supplies listed for this tutorial?
Yes. The tutorial page includes the supplies and materials connected to this project.
Is a transcript available?
Yes. A written transcript is available on the tutorial page.
Video Transcript
Misty: Misty
Jenny: And with
Natalie: Natalie
Jenny: And we have three projects that are all based around the double square star. So if you haven’t had a chance to go look at that tutorial, look at the tutorial on the double square star and you will see how fun these things are. These are all takes off of that block and we can’t wait to show you. So we’re going to start with Misty first.
Misty: Alright. Let’s dive right in.
Jenny: And this is her quilt behind us.
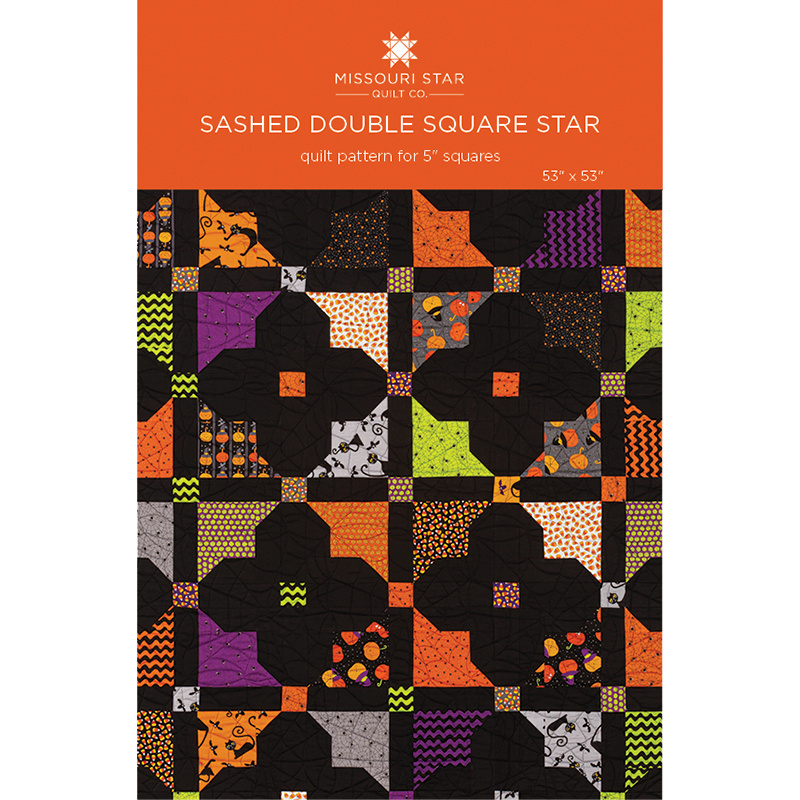
Misty: Yes, this is my quilt. I called it the Sashed Double Square Star because we just added some sashing and cornerstones to it.
Jenny: Now one of the most fun things is these are all Halloween fabrics.
Misty: Oh yes we’re going to use fun Halloween fabrics
Jenny: In case you couldn’t tell we like Halloween a little.
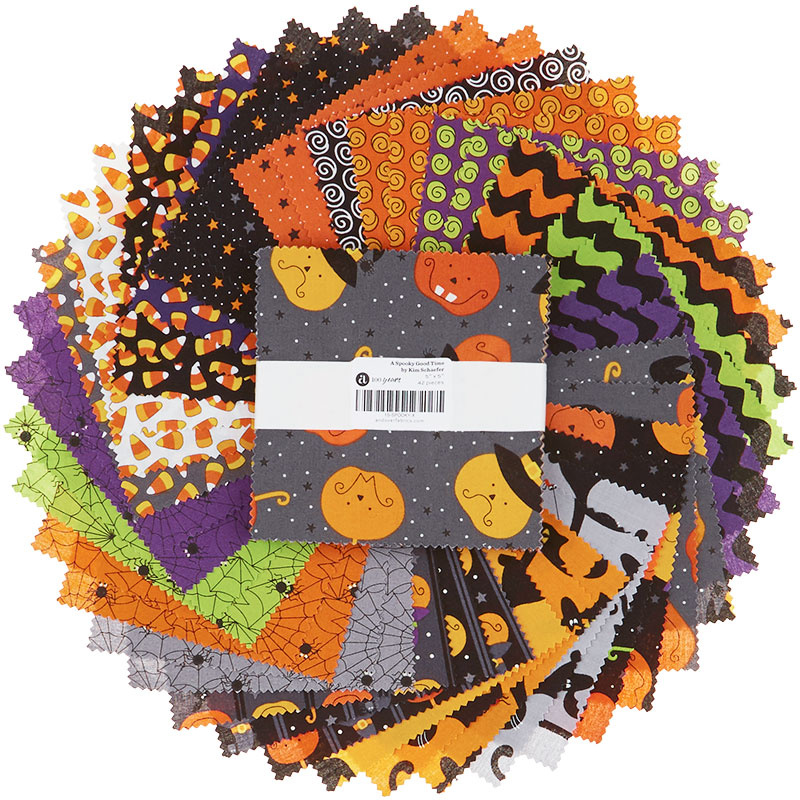
Misty: Yes, Jenny loves Halloween. I love Halloween too. The fabric I used for my quilt is called a Spooky Good Time by Kim Shafer for Andover. And it’s really cute. And to make this quilt behind me you’re going to need two packs of these five inch squares as well as two yards of the black background fabric. And so pretty easy to remember. And it’s really simple to make. Let me show you how we do it. So I’ve got all my goodies here. Actually I think I’m just going to start with this. And so the beauty of this charm pack is there is two of pretty much all of your prints. And then because you’re using two packs, even the ones that there’s only one of, you then have two. So I kept them together in pairs like that. And you’re going to keep one whole and then you’re going to take the other one and you’re going to cut it down into 2 ½ inch squares. So we’re going to cut it in half both directions.
Jenny: This is such a cool pattern. When I did this I can remember that everybody was like, oh my gosh.
Misty: I know. It’s so fun.
Jenny: What if you do this, you know, there were so many ideas that came with it so when we were thinking about an idea for this one it was just like, we’ve got to do this.
Misty: So fun, totally. And so then you’re going to take two of these and keep it with your five inch square for your block. And the other two are going to set aside for your cornerstones. And so then you’re going to need a five inch and seven inch black strip, well 2 ½ inch by five and seven, sorry. And then we’re going to use these 2 ½ inch squares to snowball in opposite directions on these. So I’m just going to lay those right sides together and we’re going to go corner to corner this way and then corner to corner this way making sure they’re going opposites. It doesn’t really matter as long as they’re opposites. So if you want to do that.
Jenny: Ok. So this one goes out?
Misty: Sure.
Jenny: I had to actually set mine next to the block so I knew which direction to sew. So I’m pretty amazed at this right now.
Misty: And then this one will just go in that way.
Jenny: Ok.
Natalie: And if you’re making a lot of blocks you can just do all of the five inch ones at the same time going one direction and then all of your sevens going the other direction.
Misty: True. Ya, I just chained pieced them all like this just
Jenny: And it’s so smart we have white thread in here so you can see.
Misty: Yes, so you can see. And so then we’re just going to trim off the excess. And we can press those back. I’ll let you do that Nat. There we go. And that one.
Jenny: This is one of those blocks where it really has a lot of, you know, pizazz for what you have to do.
Misty: Oh absolutely. And then we’re just going to attach this to one side and this to the other. And that is as easy as that.
Jenny: Let’s do that.
Misty: There’s that one.
Jenny: And I will just finger press this back and add this other strip on and you can iron all at once.
Misty: Ya that’s how I did it too.
Jenny: And you want to make sure that this triangle, the color hits color. And that’s actually why I had to lay mine down and look at them because I was like ahhh! I’m so angley challenged.
Misty: Perfect.
Natalie: Well and the beauty is that even if you did yours opposite directions you could still put your short one on this side and the long one on this side.
Misty: Exactly. As long as they’re opposites.
Natalie: And still have the same points.
Misty: Yep. Because now that I’m looking at it when I made these step outs I’m pretty sure I did do mine the opposite directions but it really doesn’t matter because as long as they’re opposite they’re good.
Jenny: Ya your seam lines are going to disappear.
Misty: Ya exactly. They’re all going to work out. And so to make, I actually did make blocks just like the original quilt but I went ahead and put sashing in between it so this is my block here. And so because our block finishes up at, this block I should say, finishes up at seven inches square then all of our sashing pieces need to be 2 ½ by seven inches. So I cut a big stack of those and then I just laid out some of my double square quadrants I guess we can call them. And I started by
Jenny: I’m just helping you.
Misty: Oh it needed to go that way, thank you.
Jenny: Color to the middle.
Misty: There we go. And we just sewed our sashing strips in the middle like this. And then we have, I keep losing things, oh here we go. And then we have the seven inch strip with the 2 ½ inch cornerstone in the middle and another seven inch strip. And this will all sew together just in rows to give you your finished block which is like this. And it’s so great and so easy. And because of how this is all put together you use the exact same size strips and sashing in between your blocks as well. And I decided to just carry it through because it kind of made it connect and web. And then I also think even if this wasn’t in a Halloween print it would be a really cute like florally flower that sort of appears which is really, really great. And so you can see here I have this sashing strip made and so it would just sit in here. You would start with a sashing and then your block and then a sashing and then your block. And this would just go in between your rows. And so it just comes together super quick, super easy and just adds a little extra pizazz by putting those cornerstones in there.
Jenny: And you have three across?
Misty: Ya this is just three by three. Just a nice little throw size. Really quick and easy. And for the backing we used these cute little stars.
Jenny: It’s darling.
Natalie: So great.
Misty: And it’s 3 ¼ yards that you need for that.
Jenny: So what size does it end up?
Misty: It’s 53 square, 53 inches square.
Jenny: It is really cute. It would be great for a table. But you know what I’m thinking is, what if you reversed these and this was the color?
Misty: I know.
Jenny: And this was the background.
Misty: Exactly.
Jenny: You know it’s all those what if moments.
Misty: All the fun things you can try. So I’m excited to play around with it some more. But I’m really happy with how it came out.
Jenny: Oh it’s just darling.
Natalie: So beautiful.
Misty: Really fun. So we can swap it out and Jenny will be up next.
Jenny: I get to show you mine.
Jenny: Ok so for my quilt, take a look at this quilt. It’s so different, isn’t it? And yet it’s made exactly the same. We just made a few little changes. So to make this quilt you’re going to need two charm packs and we have used Ghouls and Goodies by Stacy lest Hsu for Moda fabrics and you can see it’s a darling line of fabrics. You’re going to need a little bit of accent fabric. And that’s the black right here. And you can use one of these little packs or you can use, you can use ¾ of a yard of accent fabric and that your little 2 ½ inch black squares. We have this other background fabric here. Our background fabric is 1 ¾ yards. For our inner border, I kind of, I love these prints so much and so I just had to not throw in an ordinary border but one of these fabric borders. And I used a half a yard for this. And the outer border is a nice big six inch border. And it’s 1 ¼ yards. So let’s look at the backing on this. Again, I used that pumpkin fabric and I just think it’s so cute. And also if you’ll notice my quilting pattern, these are little bats. And so, you know, when you use a holiday fabric, it’s fun to use a holiday quilting pattern. On Misty’s I noticed she used spider webs on hers and it’s just fun to be able to do those fun quilting patterns that we don’t get a chance to do.
Misty: Right, exactly.
Jenny: But I also don’t want you guys, even though we’re doing all Halloween fabric for this because Halloween is coming, I want you guys to look at this with open eyes and see these things in other fabrics too because these are great patterns that are going to look great in, you know, lots of different fabrics. Not just the Halloween.
Misty: Yes, absolutely.
Jenny: But Halloween, I have to admit, it was super fun for us, wasn’t it?
Misty: It was.
Natalie: Ya we don’t often get to use Halloween fabric.
Jenny: We don’t. So my quilt is actually 63 by 75, a little bit bigger. And that’s just two charm packs so I figured, I feel like that’s a good size for this.
Misty: Absolutely.
Jenny: And what I did, so my block you can see right here is the same idea. You know, it’s got the center square and the two side pieces with their little snowballed corner. But instead of a solid square I did a four patch in the middle. So let me show you how I did that. So what I’m going to do here is I’m going to pick two contrasting colors and I’ll take this dark black one and maybe we’ll get something over here, this candy would be cute. And I made four patches and this is how, this is just, you know there’s a zillion ways to make four patches and this is just how I did it. So what I’m going to do is I’m going to put these right sides together and I’m going to sew a seam on both sides. So if you’ll do that.
Misty: Absolutely.
Jenny: A little quarter inch seam on both sides. I think that would be, that will work. And the math on this is going to change just a little bit because when you take two seams on either side of a charm your square is going to end up being 4 ½. And so our math changes a little bit and you just have to be aware of that. So once you get these sewn together like this, it’s still five so I’m going to lay my ruler right on the very edge. This is one of the things I love about these 2 ½ inch rulers. And we have two pieces now of this. And so Natalie if you’ll press these to the dark side.
Natalie: Sure
Jenny: And as long as you always press to the dark side these will, these blocks will just nest together so nice. And then I’m going to have you iron this one. I have some others that I made here because we want to scrap these up. We want them to be all mixed up and scrapped up. So we’re going to take these . And I’m going to take one of these that I did and one that I did from before and we’re going to put these right sides together like this. And because we’ve pressed to the dark side the seams are laying going the right directions and we’re just going to feel those and make sure they’re nested up nice and tight. And Misty I just want you to sew on the sides again.
Misty: Absolutely.
Jenny: So the first one on the sides of the five inch square, put these together, we’re sewing on the sides again with the seams running horizontally.
Misty: There we go.
Jenny: So now this width is still five inches so we can still just lay our ruler on the edge like this and make a cut. And then we have two four patches just like that.
Natalie: They’re so cute.
Jenny: It’s kind of a fun way to make a four patch, a little bit different and it’s just fun sometimes to throw some of these things in there, different ways to do things. Alright now I’ve got my 2 ½ inch background strip right here and I need to cut some pieces. And I know that my first cut is going to be 4 ½ because my block should measure 4 ½. And I will actually check that. So we’re going to have a four inch, I’ve left mine cut in half because I love cutting multiple sets at a time. And I’m just going to lay this ruler on here like this. This is a 4 ½. And the other one should then be 6 ½. Is that right? Isn’t that right?
Misty: Ah huh, yep.
Natalie: That’s right.
Jenny: Isn’t that right? Somebody help me. Alright here we go. Alright now I’m going to look at this and make sure it actually is 4 ½ because sometimes when we have those little pinked edges it does mess with our cutting a little bit. And it looks like we’re pretty close. Make sure the side’s lined up. No, I’ve got nothing to trim there. Turn it here. And see how this side is.
Natalie: Pretty much perfect.
Jenny: Yep. It looks really good. Alright so now again we’re going to do this side here and this side here. But we have to put our little black square on the side. And so I’m just going to kind of finger press these. And I actually set up my little block like this because for those of you who like me are angley challenged, I needed to know that my color has to touch the four patch. And oftentimes, there was several blocks where we had a white on here and I tried to make that white not touch the background fabric because I wanted it to show up. And so I went ahead and used the whites but I just made sure they weren’t
Misty: Kind of watched your placement?
Jenny: Yes, whew!
Misty: You got it.
Jenny: I got it. Alright. If you’ll sew that down there and then this one can follow.
Natalie: Sewing right on the line.
Jenny: Ya when you press the line, you sew right on the line. . That’s a really good point because so often we sew on both sides. We are not doing that on this block. Alright and I will trim these off.
Misty: I hope I got those right. Ya I did.
Natalie: As long as they’re opposites it doesn’t matter.
Jenny: Ya as long as they’re opposites it doesn’t matter. Alright so then I’m going to trim this off. Thank you Natalie for ironing those.
Natalie: No problem.
Jenny: And then I’m going to hand this over to Misty and let her start pressing these on, I mean sewing these on. So we’re going to just sew this right here like this. Actually I’m going to, nope, like this. That’s what we’re going to do. We’re going to sew this one here like this. And you can sew that down and then we’ll add this guy on the side. Throw that in the trash. We have a little trash can down there. And then one over here on this side.
Misty: Alright.
Jenny: We tried to get our nails all pretty for you this week. You know, oop Natalie is hiding hers.
Natalie: Not I.
Jenny: Misty came in and she had her, you know, we do the glue on.
Misty: Ya I was going to say
Jenny: We don’t actually, people are just, people are like, I love your manicure. And I’m like, I just, these are just glues. Ya we’re all like gardeners and you know out there doing stuff
Misty: House flippers and we’ve got all the projects so
Jenny: We’ve got all the projects.
Misty: Nails don’t really last long for us.
Jenny: No, no. But people are always impressed with my manicure so, now you know my secret. You can have it too. You too can have this wonderful manicure.
Misty: Ta dah!
Jenny: Ya Misty’s are like nude. Or what a ballet dancer
Misty: Or blush or something I don’t know.
Jenny: Alright so you need four of these to make your block and we could put it together just like this
Misty: Which would still be so cute
Jenny: Which would still be so cute, right? But I decided that I wanted to see what would happen if. And so what I did was I took two of my blocks and I put one in this way. And I put one in this way and sewed it together like a four patch. And all of a sudden it was really completely different. So Misty if you want to sew these together.
Misty: Sure.
Jenny: And it goes together just like a four patch. And you have, you don’t really have match up places so you can’t really get off on this. I mean you do want to try to make them fit, you know, so that your blocks come out the same. This little piece here on the bottom you could nest, you know, your little. Oop hang on here
Misty: I’m sorry I didn’t cut the thread.
Jenny: It’s alright. Don’t cut it. I’ll just clip it there. There we go. And then, so right here, this seam you could nest right here to make sure that they kind of line up because it will form these little, it forms these little pinwheels just by putting the blocks together. So here’s this one. And we’ll go ahead and sew, let’s go ahead and sew this one to this one.
Natalie: Do you want me to press that other one?
Jenny: No, she’s going to live on the wild side.
Natalie: Ok.
Misty: Living on the edge.
Jenny: Living on the edge. With a spider.
Misty: That’s right. You do have some more places that you can match up when you put these together though.
Jenny: Oh ya when you put the sides together you want to watch where you little seams come together. I actually love that when you’re putting a block together and there’s, you know, you’re at a 2 ½ inch block, you can actually straighten up your block every 2 ½ inches because you’re matching those up together.
Misty: Making sure they stay together.
Jenny: Right.
Misty: Ya I like that too.
Jenny: Since I’m kind of like a random, quick sewer. Alright Nat if you can go ahead and iron this.
Natalie: Yep.
Jenny: And I’m going to show you how this block fits into the quilt behind me. So here’s our blocks right here. And wherever there’s a pinwheel, that is the beginning of the next block.
Misty: I love it.
Jenny: And so it’s, you know, I can even come down here. It’s right here and here and here and here. And so we’ve got four across and five down. I believe, one, two, three, four, five, down. And so it’s 20 blocks that you’re making of this. And you can see just by adding another charm pack you could make this a bigger quilt. If you did it with a layer cake, you could cut those into fourths and do them. It’s just a great pattern, fun and a great twist on the double square star.
Misty: I love it.
Natalie: Nice.
Jenny: Alright Natalie, you’re up.
Natalie: Ok I have a great project. It’s super simple and quick and easy. I had time to do something bigger but I thought it might be time for us to just do something small and simple.
Misty: That’s right.
Natalie: So I only used a few of my charm squares and put together these cute little table runners.
Misty: It’s so cute.
Jenny: Oh, oh!
Natalie: With a package you can make several. And this line that I used is so sweet. It’s called All Hallows Eve by Joanna Figuora for Fig Tree. And it is such a sweet line. It’s just so soft and subtle.
Jenny: It’s beautiful.
Natalie: It’s beautiful for fall or Halloween. It’s not super, it’s not super Halloween. Like it doesn’t have spiders or things like that but it’s beautiful fall colors and I just loved it. The nice thing about it is because, whether it has duplicates or not you have such similar colors that you can match them all up and make this gorgeous little table runner. So let me show you how I put this together. And I did two so on this one I have a white background and on the other one I have a black background. Will you grab that one for me?
Jenny: Sure
Misty: So fun.
Natalie: Ya so I have this one as well that I did with the lighter squares in the middle and then a darker background. So all we do is we make two of the regular double square star blocks and put those together just like this.
Jenny: So two regulars and two singles?
Natalie: Yes. So these go together in a little four patch. And these are made just the same way Misty’s are made and Mom’s, only minus the four patch for Mom.
Misty: So same measurements?
Natalie: Right same measurements as Misty’s, goes together in just the very similar way. Oh we’ve got two of these so I”m going to put them opposite like that. So these get stitched together, no problems, same square. Do you want to stitch or do you
Misty: I can, while you’re talking through it.
Jenny: So we’ll have two of those?
Natalie: Two of those, yep. And then in between those two squares you’re just going to put two opposite squares facing in the middle . And I’m going to use these ones because they stand out against those other two. So just like this, these two point. And so as soon as you get that square put together what you’re going to do is basically here you’re going to have this first square and then you’re going to add this second one to the side. And you’ll do the same thing over here putting this square to this side and then sew this seam to join them together.
Jenny: Oh ok. I was wondering how you did that.
Natalie: Yep so you still make your first two solid blocks just like normal. And if you want we can throw one more together just so that we can show the entire thing because it goes together so fast and then I have pointers on the binding because you don’t often bind in that zig zag shape so. Just grab another one. We could do two of these.
Jenny: Ok.
Natalie: Ya you’ve got it. And I’ll give these to Misty and let her sew them together as well, in a little strip piece fashion.
Misty: Perfect.
Natalie: It really does go together fast and you can make several from your one charm pack.
Jenny: So I love things when you can make several things because I like to do, you know, quick little gifts for, you know, and think about this in Christmas fabric or anything. I mean
Natalie: In any fabrics and it looks so cute like
Misty: Whoops am I in your way?
Natalie: Nope but look how cute. I’ve got a little pumpkin on the table runner. It’s adorable. Can you even see his face? Did I turn it right? There.
Jenny: He’s looking out so happy. Alright can you show me how this attaches to the square then?
Natalie: Right so this kind of sits a little bit on point and this piece
Misty: I feel like I’m kind of missing out because I can’t watch and sew.
Natalie: Well you’re going to get the grand finale.
Misty: Ok good.
Natalie: So this piece, let me move this right out of the way so you can see. This piece just attaches right here and it’s just a short little side seam.
Jenny: Now do you sew it all the way to the end?
Natalie: Yes.
Jenny: Ok because there’s no Y seam. We’re just sewing it on.
Natalie: And as far as like matching it up, it will automatically match up if you line up this end. You can check to see that your points match but it’s not going to make a lot of difference because that is going to be in the binding.
Jenny: Right.
Natalie: Alright so stitch this one.
Jenny: And I’ll iron this one
Natalie: And you can just start it there and go down.
Misty: There we go.
Natalie: And then you can
Jenny: Do you want me to press it?
Natalie: Ya sure. So just so that you know these do go exactly the same way. So this also goes
Jenny: Oh so it will match up?
Natalie: Ya because you flip it and you just flip it.
Jenny: Oh ok. So have Misty sew that one and then let’s show it where they sew it together.
Natalie: Ok so this also goes like this so see how these two are basically the same piece. And then you’re just going to take this piece and you’re going to flip it and you’re going to match these two points up in the middle and just sew another little half seam to join these and you’ve got your table runner done.
Jenny: So then you quilted them, at this point you quilted them?
Natalie: Yes, I went ahead and quilted them and bound them as usual.
Jenny: And look how cute this quilting is. This is candy, like for Halloween candy.
Natalie: It has lots of candy on it.
Jenny: Ya and so then the binding
Natalie: The binding, it does seem like it might be a little bit more complicated but it’s not. I’ve got this attached partially. So you can see on this one I’ve partially attached the binding. And the outer corners, the ones that point out, you do them in the same way that you do any of your normal corners on quilting. You’re going to flip it out and then flip it back like this and pull it straight back down. And that’s going to miter on the other side. So just like a typical. And then this one is the fun one. So for this space, when you get down here, what I would do is go ahead and put a little clip in this seam but not super far back. Not a clip, I meant scissors.
Misty: Like a snip
Natalie: You cut it. So what you do is you pull this apart, pull this flat, straight, just like this.
Jenny: Try to get it as straight as you can.
Natalie: Yep, so you’re stitching along and when you get
Misty: Do you want to sew it Nat? Then you can show it.
Natalie: Sure, that would be great. Good idea, I didn’t think of that. Alright. So we’ll go around this corner. I’m just going to start here and bind as usual on this one. You’re going almost to the edge, about a quarter of an inch, pull it up. Where’s that thingy? There we go. Flip it back and then back down. Ok. Alright so now that I’m getting close to the corner, what I’m going to do or the inverted corner
Misty: The inside corner
Natalie: The inside point, I’m just going to keep, I’m going to twist it a little bit and pull it straight. So I’m sewing towards the middle. And once I get to the middle I kind of leave it in a needle down position and really pull it out so that it straightens that seam. So it’s a little bit tight but if you leave your needle in the down position you can pull it and get it straight and sew straight across.
Misty: It’s the same way as when you do scallops
Natalie: It is the same as when you do scallops
Misty: Ok
Jenny: Like on this right here you can see how these, it’s just straight. And then when you let it go it makes its own little pleat
Misty: So great.
Natalie: Right. So you’re going to go ahead and finish that as normal with the same method you use on a regular quilt. And then when you’re getting ready to bind the other side when you hand stitch it down, you’re still going to want to pull apart. But it might need a little bit of a clip because it makes this kind of funky, it just seems a little tight so if you clip the seam right here
Jenny: Not through your threads
Natalie: Not through your thread, yes making sure that you don’t the actual seam that you’ve just sewn then it will pull across easier and you continue to hand bind. Let me flip this around so you can see.
Misty: It just gives you that flexibility.
Natalie: Yep. As you hand bind you continue to keep that straight and stitch it down and it will bounce back into this really beautiful, just easy inner corner.
Jenny: Just kind of makes its own pleat.
Misty: Ya and it lays flat and beautiful. It looks great.
Jenny: And you can put the pumpkin on here.
Misty: He’s got to face out.
Jenny: Oh I didn’t know. And the spider.
Natalie: And you can see on this table runner I did a cute little candy, Halloween candy and this one is loops and swirls. They’re so easy and fun. A table runner is actually a great place to do a really dense fun pattern because you really get to look at it on the table.
Misty: That’s true.
Natalie: And it’s a smaller space so it doesn’t take quite as much time.
Jenny: If you do it on a whole quilt it takes a bit longer.
Misty: A lot longer.
Natalie: The denser patterns definitely take more time and more thread.
Jenny: That is fun. And it’s fun to use patterns around the holiday times.
Natalie: Yep, yep.
Jenny: So this has been so much fun for us, with the Halloween fabric and these projects based on the double square stars. It’s been so fun. Misty let’s recap, show us yours.
Misty: Yes, I just added the sashing
Jenny: Sashed double square star.
Natalie: So cute.
Jenny: And Natalie with her cute runner.
Natalie: It’s so quick and easy and even the pointed binding, you can totally handle it, I promise.
Jenny: And mine back here, the four patch double square star. It’s time for a little fun and mischief. And we hope you enjoyed this Triple Play on the Double Square Star from the MSQC.


