

Triple Play: 3 New Dresden Projects with Jenny Doan of Missouri Star
 Jenny Doan
- Charm Pack
- Traditional
- Lap / Throw
- Beginner
- Quilt size 49" × 58"
We have a new tradition here at Missouri Star: Triple Play! Once a month, Jenny, Misty, and Natalie each demonstrate their own, unique take on a favorite block, technique, or template. This week these talented Doan ladies are showing off three adorable dresden projects.
Instructor
Jenny Doan
Jenny Doan is an American quilter, author, and YouTube personality. Jenny started Missouri Star Quilt Company in 2008 and today it is the largest quilting supply vendor in the United States.
Shop this tutorial
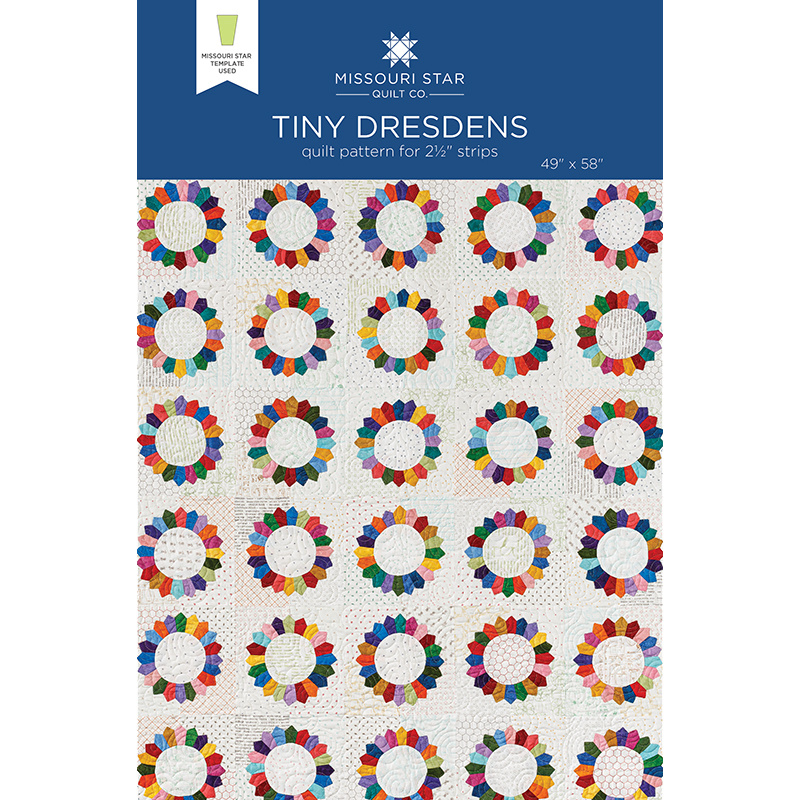 Tiny Dresdens Quilt Pattern by Missouri Star$4.95Shop →
 Digital Download - Tiny Dresdens Quilt Pattern by Missouri Star$3.95Shop →
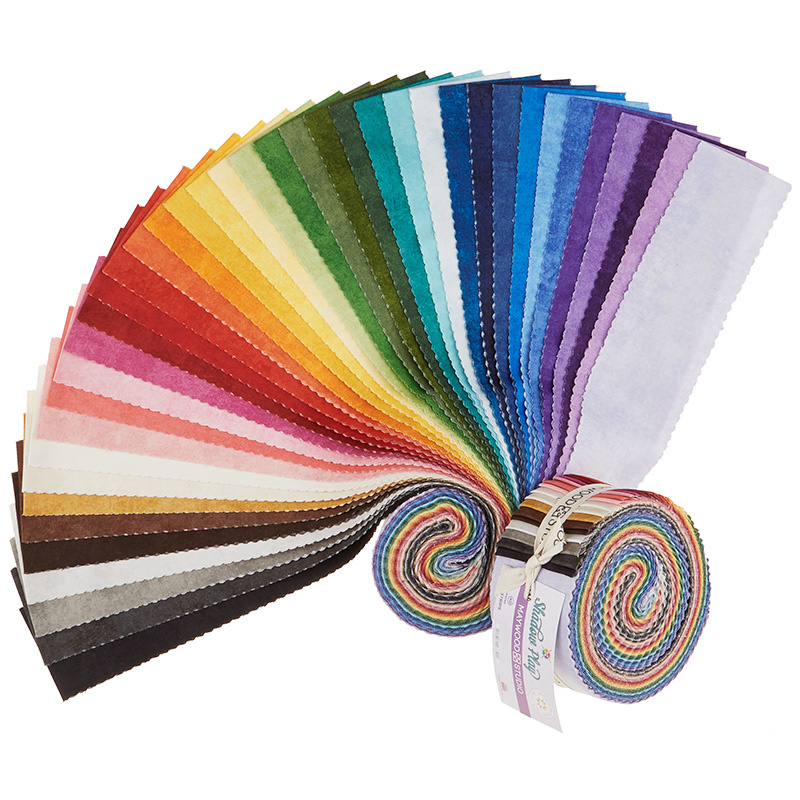 Shadow Play 2.5" Strips$35.95Shop →
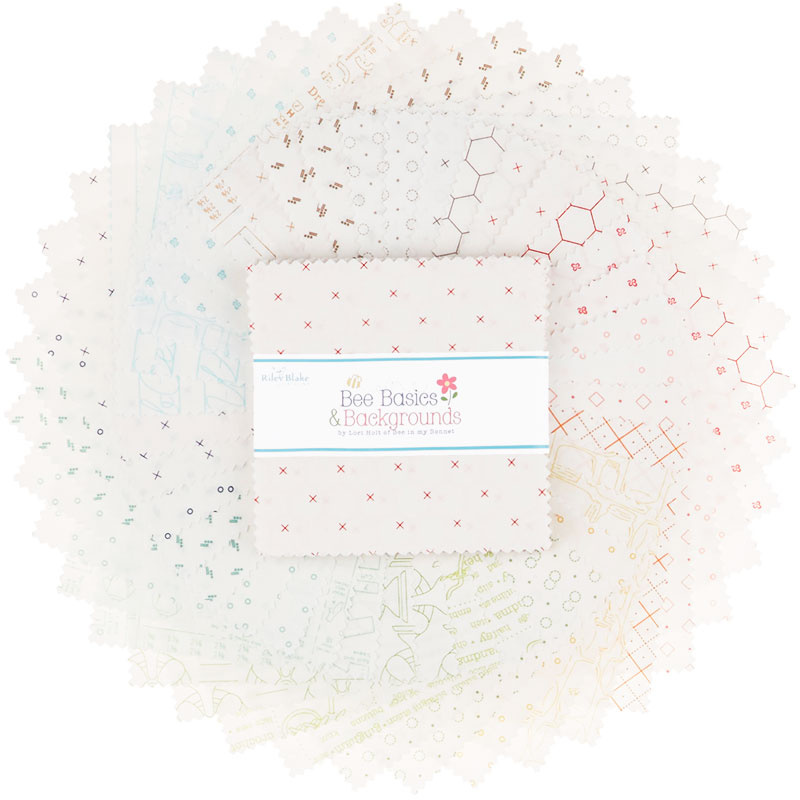 Bee Backgrounds 5" Stackers$9.95Shop →
 Shadow Play - Charisma Yardage$10.45Shop →
 Shadow Play - Limoges Yardage$10.45Shop →
 Heat-N-Bond Feather Weight White Yardage$2.15Shop →
 Missouri Star Quilter's Best Blend Throw Batting$19.95Shop →
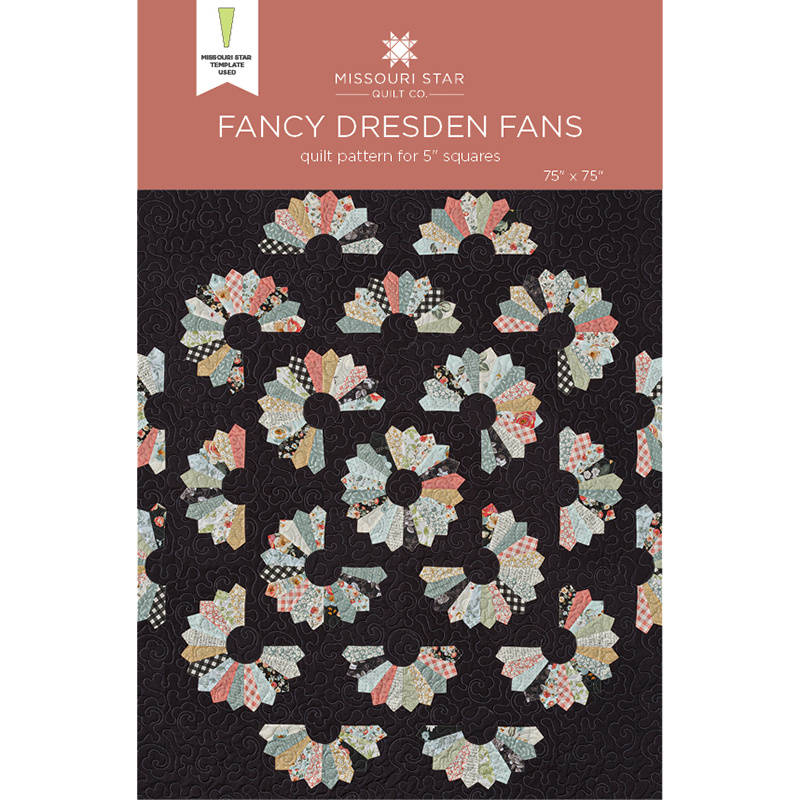 Fancy Dresden Fans Quilt Pattern by Missouri Star$4.95Shop →
 Digital Download - Fancy Dresden Fans Quilt Pattern by Missouri Star$4.00Shop →
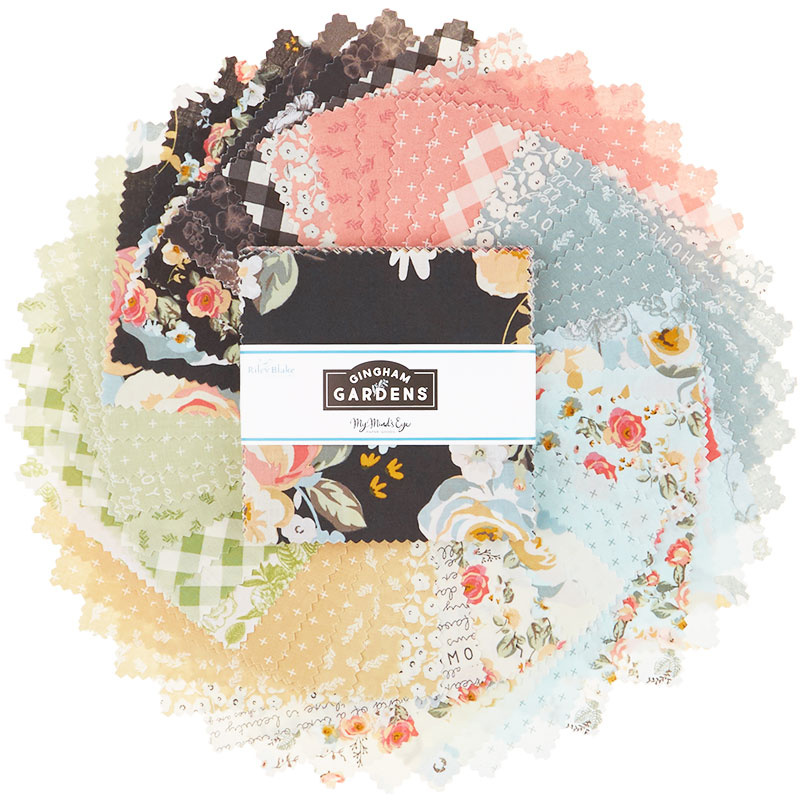 Gingham Gardens 5" Stackers$9.95Shop →
 Kona Cotton - Charcoal Yardage$6.25Shop →
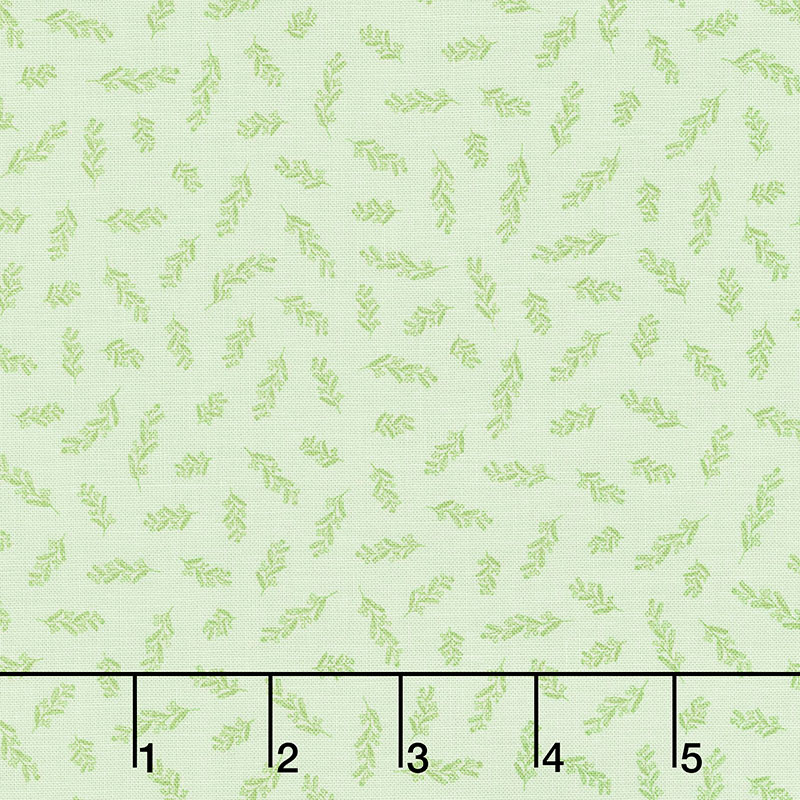 Gingham Gardens - Stems Green Yardage$10.45Shop →
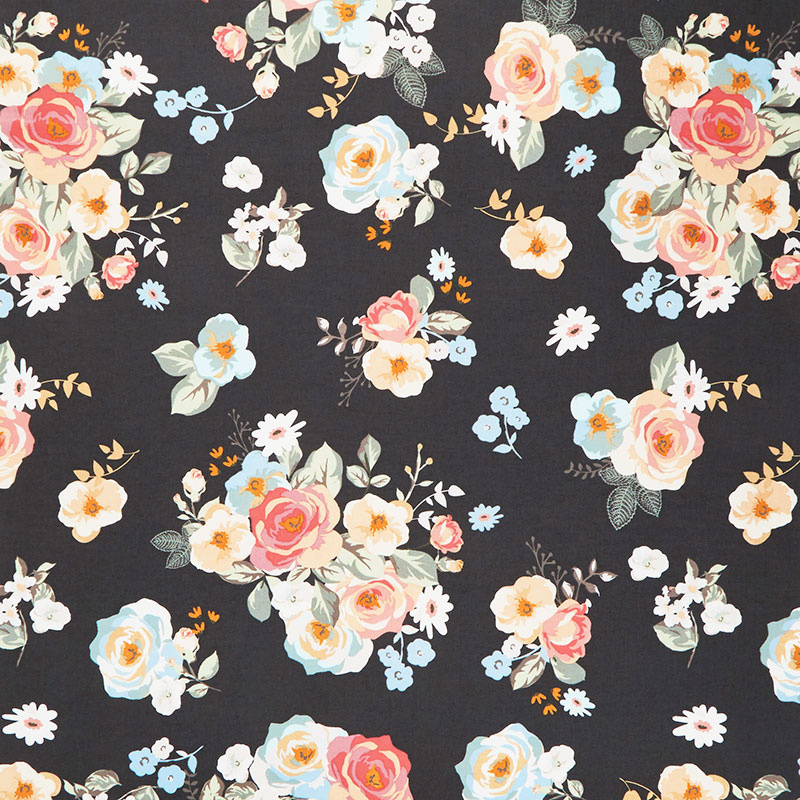 Gingham Gardens - Main Charcoal Yardage$10.45Shop →
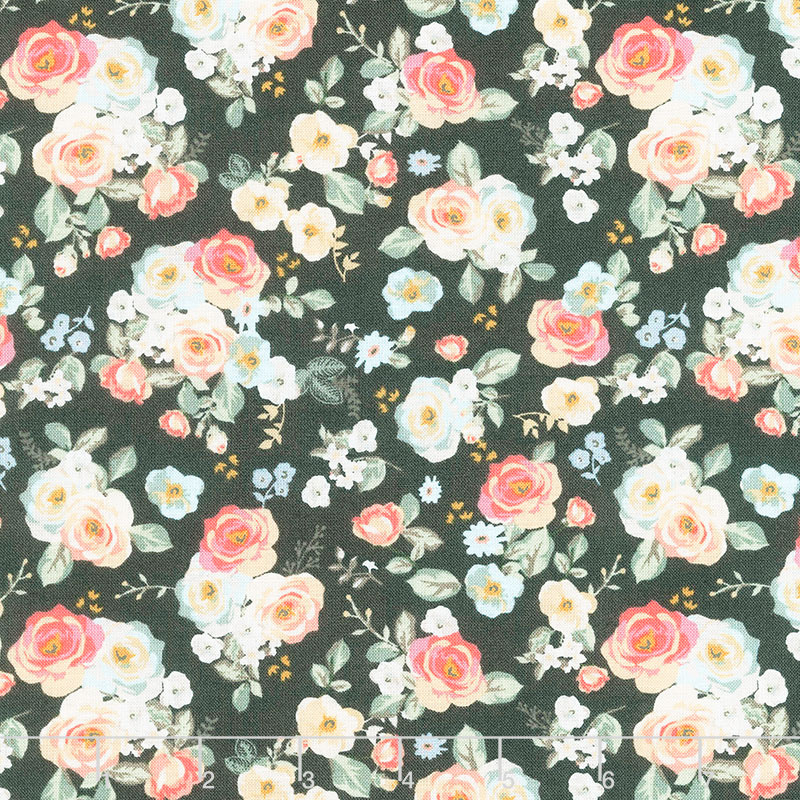 Gingham Gardens - Floral Charcoal Yardage$10.45Shop →
- Heat-N-Bond Feather Weight White Yardage$2.15Shop →
 Missouri Star Quilter’s Best Blend Full Batting$31.45Shop →
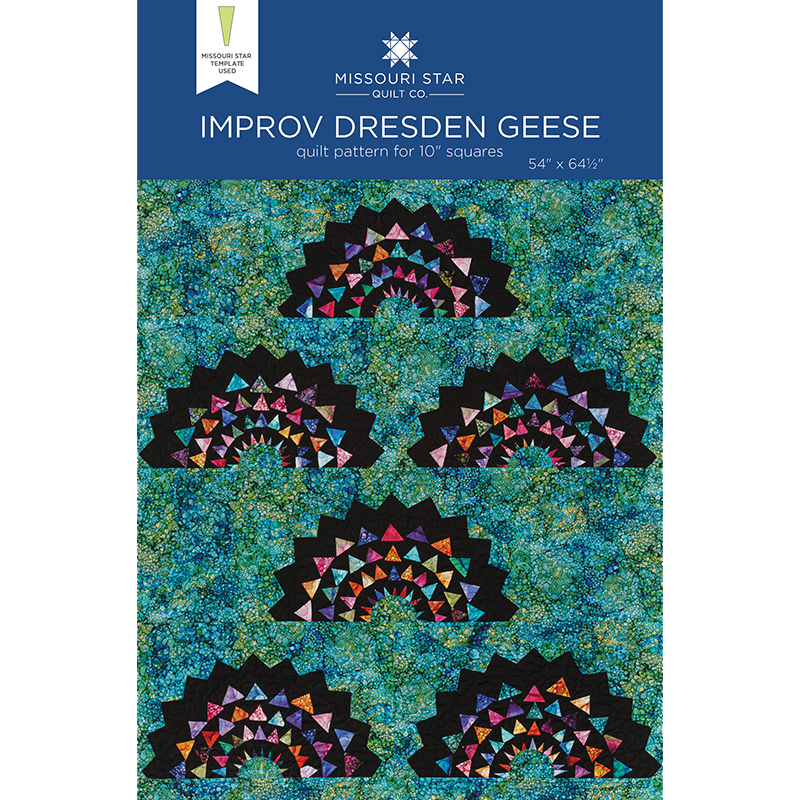 Improv Dresden Geese Quilt Pattern by Missouri Star$4.95Shop →
 Digital Download - Improv Dresden Geese Quilt Pattern by Missouri Star$3.95Shop →
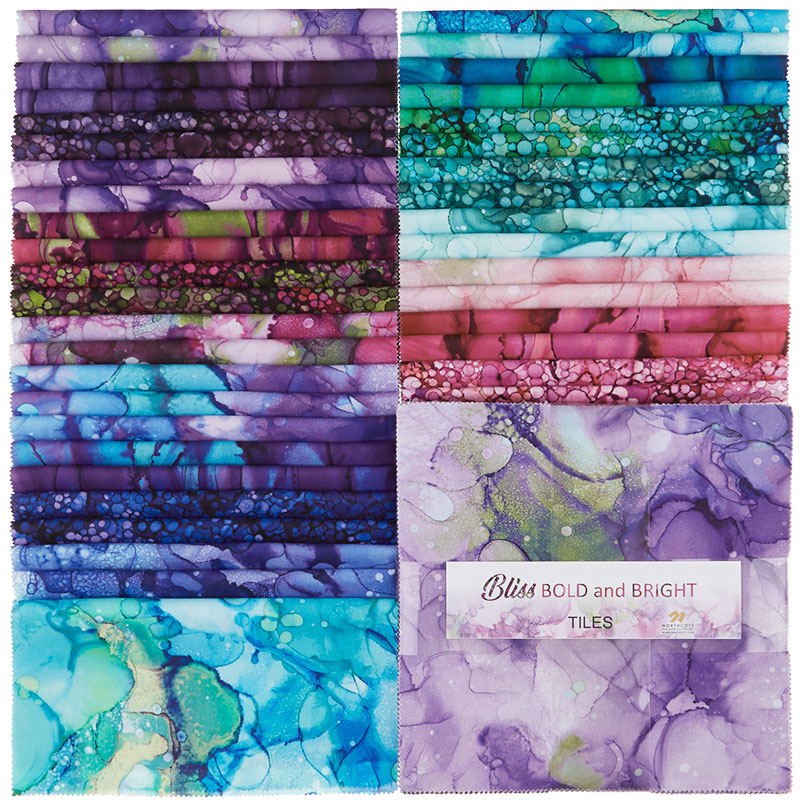 Bliss Bold and Bright Digitally Printed Tiles$36.95Shop →
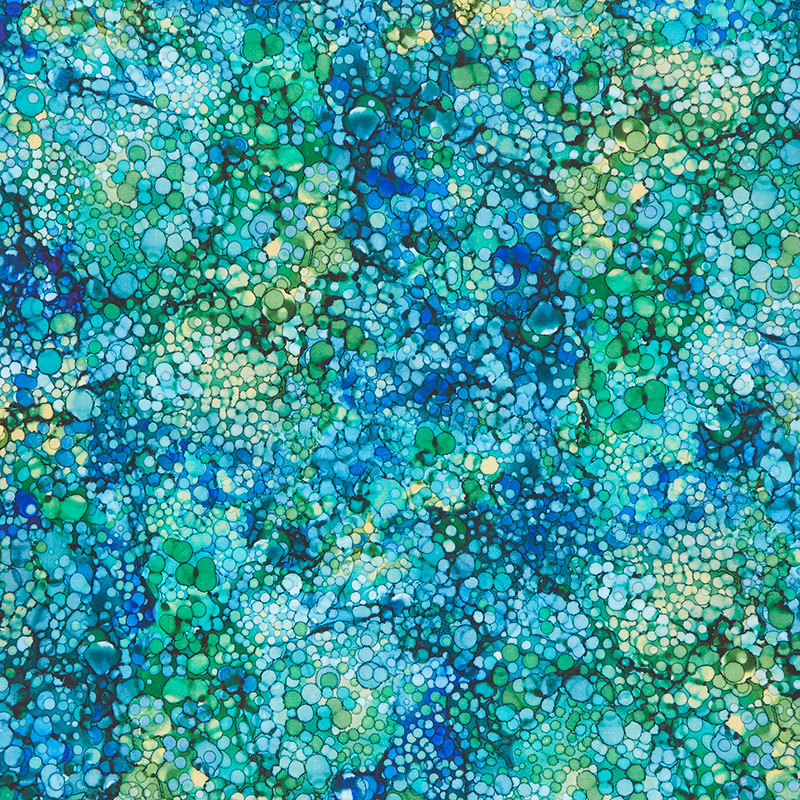 Bliss Bold and Bright - Oasis Peacock Digitally Printed Yardage$11.90Shop →
 Kona Cotton - Black Yardage$6.25Shop →
 Missouri Star 10" Paper Piecing Squares$8.95Shop →
- Heat-N-Bond Feather Weight White Yardage$2.15Shop →
- Missouri Star Quilter's Best Blend Throw Batting$19.95Shop →
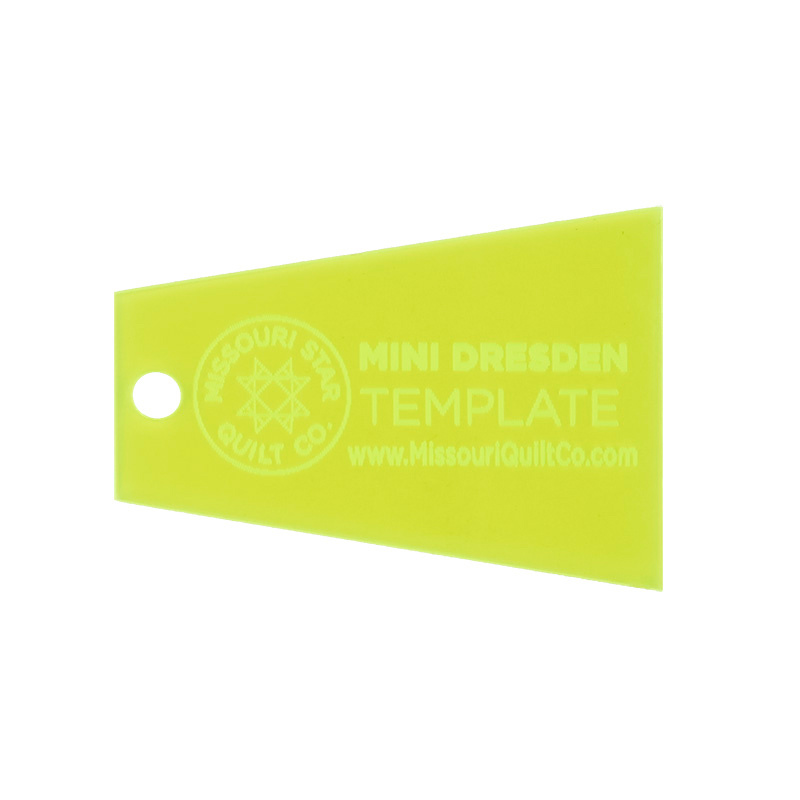 Missouri Star Mini Dresden 2.5" Template$3.95Shop →
 Missouri Star Large Dresden Plate Template for 10" Squares$9.95Shop →
Chapters
Common Questions
What is covered in Triple Play: 3 New Dresden Projects with Jenny Doan of Missouri Star?
We have a new tradition here at Missouri Star: Triple Play! Once a month, Jenny, Misty, and Natalie each demonstrate their own, unique take on a favorite block, technique, or template. This week these talented Doan ladies are showing off three adorable dresden projects.
How long is the tutorial video?
The tutorial video is 00:50:20.
Are supplies listed for this tutorial?
Yes. The tutorial page includes the supplies and materials connected to this project.
Is a transcript available?
Yes. A written transcript is available on the tutorial page.
Video Transcript
Misty: Misty
Jenny: And with
Natalie: Natalie
Jenny: And we are so excited about today’s challenge. We actually love a dresden.
Misty: Yep.
Jenny: We do. And we have three awesome projects for you today. And the first one is mine. I get to go first today. And so I have done the tiny dresden. And this is my project back here.
Misty: It’s so cute.
Jenny: I mean these are so tiny. Look how tiny they are. Usually Misty snags the tiny but it was me this time. I snagged the tiny. So let me show you how to make this.
Jenny: So to make this quilt you’re going to need one roll of 2 ½ inch strips. And we have used this beautiful Shadow Play by Maywood Studios. And I actually only used 17 strips out of this. When you’re cutting tiny little dresdens you get a lot out of there. And that’s an exclusive roll for Missouri Star so it’s really fun that they put some of those together just for us. Also let’s talk about the background because on the back of my blocks, you probably can’t see this but there are four different fabrics. And these are the Bee Basics and Backgrounds. And this is by Lori Holt for Riley Blake Fabrics. And I just love that we made a four patch for them all and then in addition put another one right in the center for the circle. So you’re also going to need a few more things to make this. You’re going to need some interfacing, that’s for your circles in the center. And this has a smooth side and then it has a glue side on the other side.
Misty: The fusible feather weight.
Jenny: Oh, ok good. Ya just like the soft stuff, you know. You’re going to need a turning tool and I like this little bamboo thing. It sits in a jar by my sewing machine. You’ll need some invisible thread or whatever thread you choose is fine. I like the invisible because then I don’t have to change my thread at all. We have a little border out here. It’s a little three inch border so you’re going to cut some three inch strips. Your backing out here is, how much is the backing? 3 ¾ yards and look at this quilting pattern. This is actually one of my favorite quilting patterns because it’s cute little flowers but it is twirly and swirly and it’s called Curly Twirly Flowers. So let me show you how to make this.
Jenny: The first thing you’re going to do is you’re going to choose four of your background squares out of this and these are the cutest.
Misty: They are so cute.
Jenny: Everything from pattern pieces to chicken wire to writing in directions. Oh look at these little bicycles. So Misty if you’ll sew four of these together.
Misty: Sure.
Natalie: I love this background fabric.
Jenny: I do too.
Natalie: It’s great in low volume
Jenny: I just think it’s so cute because it’s all different. You know, I love a low volume. Those of you who got my Christmas box you’ll notice that was one of the charms I put in there was a low volume charm because I love those pieces.
Misty: I do too. I like to have a little bit of something as opposed to just a plain solid background. It’s nice to have a little bit of texture.
Jenny: So Misty is sewing a quarter of an inch down. She chain pieced these and opens them up and then can plop them right together. It doesn’t matter what square goes where.
Misty: Whoops. If I can hold onto them.
Jenny: You’re just looking for four squares and that makes your background fabric. So while she’s finishing that up we’re going to talk a little bit about our dresdens because this is what they’re going to look like this when you get finished with them. How tiny is that? Look on my finger. Just so tiny. And so I like to use this little tool and I actually used about half of my jelly roll to make this quilt behind me. Alright. Natalie, if you can press these nice and flat.
Natalie: Yes, I would love to.
Jenny: Alright so for the dresdens, what I did was I stacked up about two strips, you know, I left them folded, stacked up about two so you’re cutting four at a time. And I just laid my little dresden on here like this. And you cut both sides like this. And if you are ambidextrous, that works great. If not, you’ll just make your first cut and then arrange it so you’re always just cutting one side because once you cut this first one, you can just line this up and you can just cut. And then you’ll put it over here, then you’ll cut. And I’m always cutting from the left side because that’s my strong side and you’ll get all these colors. So you’ll want to cut a whole bunch of strips because as you can see my dresdens are, were just loads of different colors.
Misty: I love it.
Jenny: Now one of the cool things about a dresden is that anytime you take a straight edge like this and fold it in half and sew right across the top, it’s going to make that peak. So if you want to make a picket fence, I mean, anything that has a peak, if it has a straight edge and you fold it in half and sew straight across the top, it will peak. Now these are so tiny that I recommend that you shorten your stitch length a little bit so that they don’t just come apart
Misty: Oh, what did you set it at?
Jenny: Well I just turned it a few clicks
Misty: Down to two?
Jenny: Yep, by the two, right before the two.
Misty: Ok.
Jenny: So just so that those stitches are tinier because it’s such a little area that you’re turning. And I didn’t want it to come apart and I didn’t want to take the time to backstitch because literally I had all these and I’m just sewing, sewing, sewing, sewing a million
Natalie: It’s actually a really cool, hold it up and you have this tiny banner
Jenny: It was really cool, a banner. It’s really cute. Alright so then what I do here, and there’s a couple of things you can do. You can trim this corner if you want. But I didn’t worry about that I just fold the edge over. I put my thumb inside here, fold the edge over and then I push it out like this. And then I take that little turning tool and I just push it up in there to make sure that the point is nice and sharp. Alright, everybody see that.
Misty: Yep
Natalie: Yep
Jenny: Alright press that down.
Natalie: And you want to make sure when you’re pressing these that the seam goes straight down the middle.
Jenny: The seam stays in the center.
Natalie: Otherwise your dresdens get a little wonky
Jenny: They get a little wonky, they do. Alright so then what I do if I start sewing mine together. And I sew them in groups of twos. So there will be two, two, two. And then I add the twos together and it’s four, four, four. And I keep going. And it actually takes 20 of these blades to make a plate. And so you’re literally just going to sew these together groups of four, you know, until you get 20. All the way around in a circle. And then you form your circle. And then we’re ready to pick up our background square and put it on. Now when I put this on, I eyeball it, I do. I’m about the same on either side. I feel like nobody is going to come and measure to make sure mine are exact. I’m not going to worry about it too much. I mean you can do that if you want to but I am not going to worry about that. So then I pin it on. Now I’m ready to add my circle on here. And the circle is interesting for dresdens for me because we’re generally looking for something that’s the size I have in my brain. You know, in my brain I have a size of a circle that I want and I kind of start searching for it. And it’s usually a mug or an oatmeal container. And this one happened to be my button coaster that was sitting on my desk. And the thing about a dresden that is really cool is that you want to make sure that it covers up this width right here. You have to cover this part. But if you change the size of that circle it changes the whole look of the dresdens. So you literally go from a daisy with a small circle to one that looks more like a sunflower with a big circle. And I decided I wanted a bigger circle. So what I did for that, and this is a cool way to do circles. Now there’s lots of ways to do them and I don’t even know if the girls all did theirs the same. We never actually know until we get here. But what I do is I take my pattern, I make a pattern. And I’m going to draw it on my interfacing. And I’m going to draw it on the soft side. So here’s my soft side right here. And I’m going to trace this around here and draw it on there. And this happens to be a 4 ½ inch circle because I wanted it to be able to fit on a charm. So this is a five inch square and it’s going to go in the center of here. And so I’m going to put this right sides up with the sticky side down. So my sticky side is facing my right side of my fabric. And I’m going to sew directly on this line. So Misty if you could sew right on that line.
Misty: I did make my circles the same way.
Jenny: Oh did you.
Misty: I did, yes.
Jenny: So I’ve also done where you’ll take your cardboard and you’ll cut your fabric out about half an inch bigger and do a running stitch all the way around and cinch it around there and just iron the heck out of that. That’s a great way to make them as well. You can actually raw edge applique them. There’s just all kinds of ways to do a circle.
Natalie: That’s how I did mine.
Jenny: Everybody kind of has their favorites so you know, we’ll just let it go at that and I’m looking for a little pair of scissors. Here’s a little pair right here.
Misty: I did an alright job staying on the line.
Jenny: You sure did. Now that is important. If you want your circle to look round then you need to go slow and careful and stay on the line. So what I’m going to do here is I’m going to move these apart so that I don’t cut my fabric and I’m just going to clip a little snip in here like this. And then I’m just going to cut like a little slit. So I’m just going to cut it over like this. And then I’m going to take my scissors and I’m going to cut right around this about a quarter of an inch. So you don’t really want to cut these out until you’ve sewn them. Well you can actually but then you’re cutting twice so this means you’re only going to cut it once.
Misty: If you cut them out before you sew, you might be like me and accidentally cut on the line that you meant to sew on. Then your circle is too small.
Natalie: Then your circle is a half an inch smaller than it needs to be
Jenny: That can happen
Misty: So don’t make that mistake.
Natalie: And don’t not notice it until they’re all done.
Misty: Exactly. Because that is true. That is what happened.
Jenny: That’s what happened to Misty.
Natalie: So you’ve had a lot of design adventures with this project
Misty: Ya it’s been fun.
Jenny: I think we all love the dresden though.
Misty: Oh ya
Natalie: Sure.
Jenny: Now one of the things you have to remember is that this is fusible so now by putting the fusible next to it when we turn it the fusible is now on the outside.
Natalie: I think that is such a cool trick.
Misty: It is
Jenny: It’s a cool trick but you do not want to iron it
Misty: Until it’s time
Natalie: Until it’s in place
Jenny: And I tell you that because I did iron one to my little wool mat.
Natalie: And then all of a sudden
Jenny: All of a sudden I remembered
Natalie: A cute little circles on your wool mat.
Misty: I do love this tool though, it really smooths it out
Jenny: So if you have any like where it’s a little point or something, you can just smooth this out along this edge. I put my tool so that it is on the fabric side of the seam because if you put it on the interfacing side, you could push it right through.
Natalie: You’re like, will it stretch or rip. The other thing I think is interesting to point out is you’re using the back end of the tool for this part, the wide, rounded edge. And so it’s going to push out a smoother seam.
Jenny: Ok. So here’s actually something I want to show you too right here. Let me just scoot these things out of the way. So you’ll notice on this right here, I have these nice flower pins that a lot of us quilters have and love. And over here I have these nice silicone pins. Now I did iron one of these and it does melt to your iron so don’t do that.
Natalie: That’s not fun.
Jenny: You want pins that, you either want to take them out before you’re ready or whatever but
Natalie: But do you think it matters to stitch the dresden outside down before you put a center on or do you prefer the other way?
Jenny: So when I first started making my dresdens I stitched them down and then I came back once they were stitched down and I ironed this on and did it. And as I was going along I got to where I had my dresdens where I wanted them and I would just pull these pins out like this. And then I would set my little center on it like this and then I would iron them on. And then the center held them on then I could sew the outside and the inside all at once. So that happened after I melted my pins so just look at it again and make sure everything is in the center.
Natalie: Alright and then we just hit it.
Jenny: And just hit it with an iron and press it down. And look how nice and flat it presses down. I mean it just, they press down so nice. And they look so dang cute. And then what I did, you’ll may or may not be able to see. You need a machine that does a little applique stitch. So you can see right on here, you can just barely see my stitches. And this is the straight stitch where it goes stitch, stitch, stitch, over. Stitch, stitch, stitch, over so it kind of grabs it.
Natalie: It’s a blanket stitch.
Jenny: Ya it is. And it makes a great little applique stitch. You can do a tiny zig zag . We’ve used all kinds of stitches on ours but you will need that. You can actually straight stitch yours on which I think you did.
Misty: I did.
Jenny: So we’re showing you all kinds of things with these dresdens and giving you all kinds of tips. This right here is invisible thread. And it comes in several different shades whether you’re working with white or dark fabric.
Natalie: Really
Jenny: But people always ask me, ya there’s like a smoky gray and
Misty: Interesting
Natalie: That makes sense because I think I’ve heard you say that in the studio the other day that invisible thread shows up on dark fabric.
Jenny: And then I discovered that they actually have a darker invisible thread.
Natalie: That’s very cool
Jenny: So that’s hallelujah. So Natalie I want you to go ahead and iron on this so that you
Natalie: That was my next question because it looks like fishing line and it kind of seems like it would just melt right off, whether you’re using the iron or the dryer.
Misty: You’re braver than me. I probably would have never even tried
Jenny: Which would be dreadful. But it works. It really does work.
Misty: That’s amazing.
Jenny: So when you use invisible thread, one thing I want to point out is don’t change your bobbin thread to invisible thread. Do not spend time winding a bobbin with invisible thread because it is a little like fishing line and it’s just going to cause you untold hours of frustration.
Natalie: So would you say that you use the same color as the background fabric or?
Jenny: Well I did. I just used white on here. And you can see kind of my white stitches.
Natalie: Would it ever show through. You know what’s cool about that though is it’s pressed flat to begin with and then it flipped while you were topstitching but it doesn’t matter. It’s still a flat block.
Jenny: Here’s what you guys have to remember, nobody ever looks inside your quilt to see which way your seams are going. They don’t. And my block lays nice and flat. So let’s talk about this right here. So we’ve got one, two, three, four, five, by one, two, three, four, five, six. So 30 blocks on this. Now I could have made this twice as large because literally told you I only used half my dresdens. I did have a few leftover. And I did put them together in a little pillow.
Misty: They’re so cute.
Jenny: How cute it this you guys?
Natalie: It is the cutest.
Jenny: So just four blocks. I sewed them together. I did the regular pillow backing. Now we sell these pillows. Do we have a pillow form here?
Natalie: We do have a pillow form.
Jenny: Here somewhere.
Natalie: It’s just a 16 or 18 inch
Jenny: It is 18 inch. And when I do this, I do them so they’re the same height tall so this makes an 18 inch square. And then I actually overlap them about six inches. And so I just sew one side down. And then I sew them on the outside of the pillow.
Misty: And you just bind it like normal.
Jenny: And I bind it like normal.
Natalie: It’s all bound on the edge.
Jenny: So I have to tell you, Natalie’s daughter Hannah works binding a lot of our quilts and she is a dang good binder and probably as good as I am. You know, and she’s quick and she’s good. And when she saw that we made this pillow with binding she was like
Natalie: It blew her mind a little bit.
Jenny: She was like, that’s all that is?
Natalie: I can make pillows
Jenny: She was like really surprised and it was really fun. So, you know, just four little projects and you can make a pillow as well. So you know, I hope you enjoyed my tiny dresdens and now we’re on to Misty.
Misty: Alright.
Misty: Alright, so this is my quilt and I was inspired by Jenny’s original Grandmother’s Fans and so this is called Fancy Fans. And I wanted to see how it would look kind of, if we deconstructed this dresden plate and had it come together in pieces. So I think it turned out really, really fun. The fabric I used
Jenny: Well I just love how different it is when you use a different colored background.
Misty: Ya, doesn’t it kind of pop?
Jenny: It just pops out.
Natalie: And this fabric really is so adorable.
Jenny: It is.
Misty: It’s really cute. It’s called Gingham Gardens by My Mind’s Eye for Riley Blake and I absolutely love all the colors in this. It’s just really subtle but it’s beautiful. It’s really, really beautiful.
Jenny: How many of these did you use?
Misty: I used three packages of five inch squares. You actually will need to cut an additional eight blades out of your border so just keep that in mind. That’s included in your amounts. And so for my background I used this great charcoal color. And you’re going to need four yards of that. And then the inner border is ¾ of a yard. And the outer border is 1 ½ yards. And that’s a six inch border. So it turned out really good. And then the backing is this nice large print.
Jenny: Oh I love a large print.
Natalie: So cute.
Misty: It’s so pretty and I think you need five yards of the backing fabric. And then it’s kind of hard to see my quilting pattern on the back but I used Curls of Flowers.
Jenny: Ya you can kind of see it better on the front.
Misty: Ya better on the front. So really, really cute. So let me just show you how I made this. I used the regular dresden template. And I just took my packages of five inch squares and cut a full five inch blade. You get two out of each five inch square. So you just lay one this way and then turn your template to the other side and you’ll get two. And so I just cut them all first and had them all ready to go and then started chain piecing and so again just like Jenny’s, mine’s just a little bit larger. You’ll just fold that right sides together and sew a straight stitch. And then when you turn it these are what your blades look like. And let me show you how I did this because originally I was just going to make quarter plates and attach them to a background square. And I just found that that actually didn’t work when I went to start sewing my blocks together. When you put your blocks together where the dresden meets never lined up right. So a giant pain. I was frustrated and I was like, this shouldn’t be frustrating. It should be fun.
Jenny: So you came up with an easier way.
Misty: I came up with an easier way. So let me show you what I did. I did cut my background into, I believe, eight inch squares, yep eight inch squares. And so what I did was I actually sewed my background squares into four by four big blocks.
Jenny: Oh so you did with like a quadrant?
Misty: Like a quadrant. I split this in fourths.
Jenny: Very cool.
Misty: And I, the reason that I opted to go ahead and have the squares is because now I can line up my dresdens. These are, you know, basically marked.
Jenny: A grid.
Misty: Yes a grid where my blocks need to go.
Jenny: That’s a really cool idea.
Natalie: That’s so smart.
Misty: It worked really well. And so then when I was sewing my dresdens I did the one complete 20 blades in the middle. I did, I believe, what did we say, eight
Jenny: Eight of those, ya.
Misty: Eight of the ¾ and so this is 15 blades sewed together. And then you need 12 of the half dresdens. And so this is just ten blades sewed together. And so I just made all those, had them ready to go. And then I am going to start pinning them in place on these background squares. So let me get these out. So let’s start with our ¾ and actually you can see this is got a raw edge so we need to just turn and press a quarter of an inch on either side there.
Natalie: I can do that.
Misty: Get those ready to go because we don’t want to have those raw edges hanging out.
Natalie: Something little bitty
Misty: Ya just a little turn under. Perfect.
Natalie: Let me get this other side.
Jenny: And then you can just topstitch them.
Misty: Exactly.
Jenny: Such a cool method.
Misty: It worked really well. I was pleasantly surprised after the headache of the initial design I was like, why is this not working out? And then this actually worked out really great. And then by doing it in quadrants I didn’t have so much bulk under the machine. And so then now that we’ve got those pressed, thanks Nat, we can use that seam line of our background and just lay this right along the edge. And I just put some pins in it.
Jenny: Now a lot of times if you find, you guys, which this happens to me, that it doesn’t lay exactly flat, give it a good shot of steam and press it. And then also if it still isn’t flat you may have to just take in those middle seams because it’s based on a seam allowance and our seam allowances are all different and so.
Misty: Well and I did find on the dresden, more than anything else I’ve made, is if my seam allowance did get wonky, it really showed.
Jenny: It showed on this, ya.
Natalie: Every little bitty bit. Wait until you see mine.
Misty: Oh. Whatever. But I think that’s important to note. You do really have to be careful when you’re sewing a dresden.
Jenny: But the remedy to that is just take a minute.
Misty: Ya you can always correct it and that’s the nice thing because it is loose and until you sew it down you can go back in and adjust it as you need to.
Jenny: And it is our hope that all of yours are perfect.
Misty: Absolutely.
Jenny: Absolutely perfect.
Misty: Or good enough. Good enough because that’s what mine were. And I’m happy with it. So we pinned that one on. And then I went ahead and just kept pinning on
Natalie: The ¾ all the way around
Misty: The ¾ and again this would need turned under. I just forgot to do that. But I just went ahead and pinned all of these in place like that. And then we have halves that come in here.
Natalie: That’s awesome.
Jenny: Ya you guys will actually get a diagram in your pattern. You’ll be able to see exactly where to put these. You don’t have to memorize this.
Misty: You don’t have to memorize it. This is easy. And each of the quadrants is made exactly the same. You do all four of them just like this.
Jenny: So then correct me if I’m wrong but you would have to sew all four quadrants together to make your center.
Misty: Exactly. But also you have halves that connect them
Natalie: The blocks
Misty: You do and so
Natalie: I was going to ask about that also. It looks so cool.
Misty: Exactly. I made these quadrants first. I went and I pinned these all in place and I actually made my centers just like Jenny. If I can keep track of my pieces. Here we go. And so you can see here I actually have a little bit smaller, I did a 3 ½ inch circle. And so I just drew that on my interfacing. Here you go, you can see it here. And put bumpy sides down and sewed right on that line. And then here you can see same method.
Natalie: Trim it
Misty: Trim and turn and cut it.
Natalie: It’s nice too that you can just cut through that stabilizer because it’s not going to show in any way and presses flat.
Jenny: And irons on
Misty: And irons on. And so then once I had this pinned and everything I did just like Jenny showed and I ironed these on. And it kind of helped stabilize these. Took it to the machine and I just topstitched with a straight stitch. I ended up using this kind of silvery thread because it blended with the most colors. I just felt like it disappeared.
Jenny: And honestly what you want to do is just lay your thread across all the colors and see what disappears, you know, if you’re laying a black or if you’re laying a pink or whatever. And I am always surprised at what thread disappears.
Misty: Exactly.
Natalie: It’s not always what you think it will be.
Jenny: It’s not.
Misty: I really thought it would be cream with the blades on top and it wasn’t. The silver disappeared more and so that’s the one that I chose. And so I did, I just straight stitched all the way around. You can see on the quilt here just right close to the edge.
Jenny: Ya you can’t even hardly see it
Misty: Nope.
Jenny: Beautiful stitching.
Misty: And then around the circles. And so once I did all of my quadrants then I sewed my two halves together and added the middle on both sides so that’s these right here. You can see here’s my quadrant. And so I added these once I sewed those. Then once I had my whole top I only had to attach three, here, here and here with the whole bulk of the quilt under the machine.
Jenny: Ok very cool.
Misty: And so it made it really easy and manageable because most of my topstitching was done with just this size which is totally doable.
Natalie: That is so great.
Misty: It was great. It was really simple and I really enjoyed it. And I like how like I said, it just kind of deconstructs that plate in the middle.
Jenny: Can I just say I loved that you used, I tend to be white in the border. I love that you used a color on the border out here.
Misty: Thank you. I think it turned out really great
Jenny: And honestly having this grid, people, you guys can do anything you want.
Misty: Exactly. It gives you that reference point of where to line them up and it was really helpful to me, really freeing once I came up with that.
Jenny: I love the dark background.
Misty: Thank you.
Natalie: I do too.
Misty: So I think it turned out really fun and so Nat you’re up next.
Natalie: Alright.
Natalie: Alright so I used a package of ten inch squares to make all of the geese, these colored little geese. They’re Blessed and Bold Bright Tiles by Northcot Fabrics.
Jenny: Beautiful fabrics.
Misty: It’s really pretty.
Natalie: I think so too. And then you’re going to need some black fabric to do all of this background, about 3 ¾ yards. And then the background background which is this piece back here is 2 ¾ yards.
Jenny: Which again I love that you set it on something, ya you used a print to set it on. I love that.
Natalie: Ya I think for just
Jenny: So does your, I’m sorry to interrupt you. But does your background yardage, does that include this first border?
Natalie: Yes it does.
Jenny: Oh cool.
Natalie: And this is a 2 ½ inch border. I felt like it needed a little bit of a frame but not too much.
Misty: I really like it.
Jenny: What did you use on the back?
Natalie: This is a piece from the line.
Jenny: Oh nice.
Natalie: And actually this line has beautiful 108 options. I mean you can use your 45 obviously and piece it together but it has some really beautiful 108 options.
Jenny: It looks like you just stippled it
Natalie: I did just a simple meander. And it just depends, you know, where you get it from. It could be called stipple or meander or simple stipple or simple meander.
Misty: You can’t go wrong.
Jenny: It covers everything.
Natalie: Yes and I kind of wanted to make sure that I had plenty of stitching to cover, to hold it all together.
Jenny: Perfect.
Natalie: Alright so this is going to be a really fun thing. I think you guys will find it very interesting so let’s get started.
Misty: I’m super excited.
Jenny: Well you also used those paper squares didn’t you?
Natalie: Exactly.
Misty: Alright
Jenny: Wow
Natalie: So I did use foundation pieces. And I just want to make sure everybody knows paper piecing and foundation piecing and English paper piecing are all different things. So this is foundation pieced which means that all of your fabric is laying on top of the foundation facing pretty much the way it goes. So it’s not super crazy. But I cut out all of my dresden backgrounds out of a foundation piece.
Jenny: I’m pretty sure you stacked those papers too.
Natalie: I stacked as many as I could. We’re just going to do one for now because that’s all we need.
Jenny: But you can actually get three full blades out of a ten inch square.
Natalie: Ya and I’m going to pull that away and flip this around.
Jenny: Don’t do any crazy cutting.
Natalie: I will mention just before you get started you might want to build a little nest because everytime we take a seam or two we’re going to flip, we’re going to trim and we’re going to press. So you might want to have your little cutting mat, your wool ironing mat all those things really close.
Jenny: Right around you.
Natalie: Yes because otherwise you’re getting up every three inches.
Misty: A sewing marathon.
Jenny: However if you do get up and move a lot it can count as exercise.
Natalie: Oh for sure. Definitely wear your step counter. Alright. So this paper is super easy to use and easy to cut through.
Jenny: Do you know it’s interesting how far we’ve come. We used to use old phone books. And we would go, when fast food came out, we would go and I would ask for twenty wrappers around that.
Natalie: Pizza boxes. We were so inventive back then. Alright. So to get started what you’re going to do is start with a base. And this is going to be a piece that you just fit over. Oh sorry. I totally forgot. All these little pieces, they come from your layer cake or your ten inch square pack.
Misty: And you just cut them randomly.
Natalie: No I actually cut two inch strips. I thought two inch would be great and what it did is it gave me four geese in each blade.
Jenny: Perfect.
Natalie: And those will vary depending on how high you place the black fabric, where you put the point, and because it’s improv it’s going to vary.
Jenny: And then all the points are black too.
Natalie: And you can see that a lot of different, you know, there’s some that are higher, some that are lower.
Misty: I love it. It’s so much movement.
Natalie: It’s just where you place it.
Jenny: It’s the improv thing that’s so fun. So do I put this
Natalie: Put it facing up. This is one part that is different than everything else. So I would just cut it a little bit. And so what you’re going to do is line it up with the bottom. And then you can stitch right across the top to keep that in place. You could also use a little dab of glue if you wanted to. We glue a lot on foundation paper pieces just to keep that first piece from moving.
Jenny: Now this doesn’t have to be a quarter of an inch or anything like that.
Natalie: None of your seams have to be a quarter of an inch.
Jenny: None of it matters.
Natalie: Until you assemble your blades. But we’ll go from there. Alright so the next thing you’re going to do, so I have this black background and I cut mine into small pieces because it was easier to work with. I could have used an entire 2 ½ inch strip but I didn’t. So what I did is I took the folded strip. I folded it and folded it because I don’t really care for measurements, I just clipped them.
Jenny: She’s so like her mother.
Natalie: And then you’ll actually be able to get several of the side pieces from this strip. But it’s a lot easier to work with a smaller piece.
Jenny: Alright. So what do I have to know about sewing this piece on.
Natalie: Ok so another thing that’s actually helpful which I should have done probably before but now is fine. I would finger press a little fold because that gives you a center line for all of those flying geese points.
Jenny: Perfect.
Natalie: And when you’re doing this you’ve got to remember that you’re going to be flipping it back to make that point so you can start, whichever feels natural for you.
Jenny: So it’s kind of like wonky legs?
Natalie: Uh hm. Totally wonky legs. So you’re going to cross the middle and then down here at the base it might, sometimes it helps to trim this, whoops, so you can see that corner, that bottom corner. And we’re going to do this as we go all the way up because otherwise you
Jenny: You don’t know where you seam is going to go.
Natalie: Exactly, you don’t know where to place that fabric.
Jenny: So that’s why you need the nest
Natalie: Yes, that’s a helpful tip.
Jenny: So I’ll take one of these then and I’m going to cross them over and I line up on this edge down here and then across from the center?
Natalie: Yep.
Jenny: So I love wonky legs. This is going to be fun for me.
Natalie: Alright. Flip it back. I did a lot of little finger pressing because it works super well. And then what I did a lot is I just took my scissors, cut that off and put the other piece on using that same piece of fabric.
Jenny: Alright.
Natalie: As many times as it will flip back and cover, you can use it.
Jenny: Ok so this way?
Natalie: The only thing about it that one tip I’ll give is you want to make sure that if you have a piece that’s kind of triangular shaped, put the fat end at the top because at the bottom you only have a sliver to cover. At the top you have that triangle. So now we’re going to just trim that excess off. I’m going to have Misty give it a quick press. This is fun isn’t it?
Jenny: This is fun.
Natalie: You get to pick a different piece. It’s all
Misty: I am so fascinated.
Natalie: Ok so next because you want to make sure you can cross and have everything match up and line up the way you want it to. And you can use your, so to trim you can use the dresden template or a straight ruler works as well. You just line it up with the edge of the foundation. So I’ll go ahead and keep that trimmed
Jenny: Would you have found that you used a rotating mat, did you use a rotating mat?
Natalie: I didn’t.
Jenny: Ok.
Natalie: But you could.
Jenny: Was that because you didn’t or would it be a good idea?
Natalie: It doesn’t matter either way because it’s just a lot of cutting and spinning. So one other thing, this will often be a little bit crooked. But you can trim that off if you want to. This is sewn all the way up so we’re probably just going to start here. But if you have a piece that is wonky you can just fold your paper back and cut it straight across. And that way you have a straighter line. So you’re going to stick your fabric on next.
Jenny: But now it goes this way
Natalie: So now it’s upside down and it goes along the edge of the seam that you just sewed.
Jenny: So the first
Natalie: It’s not the seam, the cut edge
Jenny: So the first one is face up and the rest?
Natalie: And the rest are face down, exactly. So same business. We’re going to
Jenny: I get to sew. Natalie gets to do the work.
Natalie: We’re going to flip this back and trim and then you’re going to add the wonky legs. So you’ll notice here we’ve almost even got a little bit of a tilt here but this piece doesn’t cover the foundation. And the reason that doesn’t matter is because you’re also going to be stitching fabric this direction that will flip back and cover that. So it’s not a big deal.
Misty: That is awesome.
Jenny: So the thing I find kind of interesting about this is probably no matter how hard you try every single one of these looks different.
Natalie: Yes, every single blade in the entire quilt, you won’t find two identical blades.
Jenny: That is so cool.
Natalie: And some of them we lost a little point here or there and others fit in perfectly and it’s just, I think it’s great just the way it is
Jenny: So just clip this off?
Natalie: Yep just trim off that extra fabric. And we’ll get it more exact after we press and trim. But for now you just want to conserve your fabric and not have that big flap hanging off. I will also say that after I did the first couple I started doing more assembly sewing. So you can sew all your little bottom pieces on and then you can do all the corners for that piece. So go ahead and press that. And then we’ll trim it up. And finger pressing works fairly well for most of it but I do also like to keep it super flat before I trim because I feel like the trimming is the part that gets where your accuracy gets tested.
Jenny: Let me see, I have a blue and I’m going to do a light color.
Natalie: Alright and I am just going to trim this little bitty edge right here. And I’ll flip it and trim this side. I think using the template helps quite a bit just because if anything gets a little bit off.
Misty: You know the angles will stay right.
Natalie: Yes.
Jenny: And there’s plenty to cut off right there.
Natalie: Completely. But one other thing that I’ll mention is that if you have that fold line pressed in you can kind of go straight down the middle and keep your line straight. And it’s not a big deal if you don’t want to free sew it. Just use a ruler. And then you can keep going. So add that next color.
Misty: That is so fun Nat
Jenny: Ok so since this is going to fold, oh it doesn’t matter because I cover it with black.
Natalie: It doesn’t matter. You kind of want to overlap just enough that it will. But really
Jenny: Let me pull this up.
Natalie: I also want to mention this is all leftover from my original ten inch square pack. And so you could make more of these. But I found that it was getting kind of large already and I knew that if I added more it was going to be really large. And because it’s kind of time consuming. You’re going to need another piece of black to do those two sides. They do get easier. The bottom, the little tiny bottom flying geese is the toughest one. And as you go up the blade they get bigger. And it starts to look more interesting. Where’s your scissors?
Jenny: It is so weird that it gets bigger because it’s all two inch strips. In my mind they should stay the same
Misty: And that’s why I thought maybe you cut it all different sizes.
Natalie: They’re all the same size but you have more room to work with and so the geese get bigger because the base gets bigger. Alright do a little press and then we’ll flip it and trim it. We’re almost to the top guys, only one more geese to go.
Misty: I love it. Now I want to go make these.
Natalie: I know. I’m probably going to make myself just one little thing and hang it up on my mini wall.
Jenny: Everybody loves a mini.
Natalie: They’re so cute. Alright. So we’ll trim this and then we’ll flip it and trim that other side.
Jenny: And then I’m going to pick a
Natalie: Choose your next color. Ok. Then I’m going to fold that back just because it is so much easier to not have to worry about those pieces hanging off. Although this fabric is dark enough if you wanted to leave it you could. You wouldn’t see it.
Jenny: Alright I’m going to do this purple. So this is fun too because I could purple
Natalie: This fabric was so fun. I got so many different color variations out of all the different squares. Some that looked really blue and some that looked green and then you have yellow, orange pieces, reddish. Really fun.
Misty: That’s so vibrant and pretty
Jenny: And then I’m just going to clip this off
Natalie: Yep look at you, you’re a professional now
Jenny: Oh my gosh. Alright now
Natalie: You want to flip that around.
Jenny: This way. Put the fat end to the top?
Natalie: The wider end at the top and the narrower end at the bottom. And that’s just the nice thing about the solids is it’s double sided so you can flip them and use whichever side you need to.
Jenny: And then this guy right here. Alright here we go. Well I have so much trouble with angles anyway so it’s like, everything is, I look twice so I don’t have to rip.
Natalie: Alright one more press and one more trim and we’re almost done.
Jenny: I have to say at this moment I feel pretty proud of myself. This looks so much more difficult than it is.
Natalie: Ya it’s really not that crazy hard but it gives you a quilt that’s a pretty wow factor.
Misty: What a great way to use scraps too.
Natalie: Yes, all the little pieces that you have will work for this. Alright. One more time. Now this is the last little bit at the top. And the reason that I did this is because I wanted to have a good peak. And I didn’t want the flying geese to get in the way. So the top piece is about three by four or four by 4 ½ maybe. But I did the same thing where I cut the width and then I just folded this strip. Like same idea. I just folded and folded and then cut the sides. And then you just stitch that straight on. Yep. Just like you’re starting again. We’ll press it back.
Misty: Ok
Jenny: Trim it up. You could really get a rhythm going on this too.
Misty: Absolutely
Natalie: Definitely
Jenny: Although honestly we should not be afraid really to slow down and enjoy what we’re doing.
Misty: It’s true.
Jenny: You know, I tend to do things so fast, things like that.
Natalie: You make an excellent point
Jenny: There just isn’t anything wrong with really enjoying the process.
Misty: It’s true. Take the time.
Jenny: And I just think that we need to remember that sometimes.
Natalie: Alright so now you have this piece with all this paper on it though. And you’re just going to want to tear that off. You can leave it if you want. The other thing I will say because there’s a lot of seams on here you’re going to have little tiny triangles. Just ignore that. It’s going to wash out. It’s such thin paper. Rip off what you can and ignore the rest. This is a great thing to give to a kid that wants to help you. But I’m going to leave everything that’s stuck in these little places and it’s not crispy. And another too so these are just going to hang out because they’re covered up by the seams on the front. Just ignore it. It’s fine.
Jenny: Let it go.
Misty: Let it go.
Jenny: Let it go
Natalie: So same concept though. Fold that across. Now you have a traditional dresden quilt. You’ve made this blade all by yourself and now you’re going to make your plates the same way.
Jenny: So with black fabric I would normally use black thread
Natalie: Absolutely
Jenny: But let me just give you a little hint because sometimes, here get that little thing.
Natalie: Get her the poker.
Jenny: So this is just a little hint. Sometimes I don’t change my thread the first few times and I’m like I really should be sewing with black. But if your white thread shows through on the front, a permanent sharpie marker will fix that. Just a little dot on those little places where it shows.
Natalie: Now Misty will you grab, I’ve got ten blades sewn together. This is one of those really fun, tricky things that happened as I was designing. I thought, certainly ten blades would be perfect for a half dresden. And I don’t know if it’s because there’s so many little seams and things just, maybe my seam allowance wasn’t perfect. I have no idea. So you’re going to want to experiment and see if ten works for you. If not I added an 11th blade.
Misty: Ok, it’s a quilting mystery.
Jenny: In the quilting dimension.
Natalie: And I was able to get them nice and flat. So I just measured my width and my height. And I ended up thinking that a 25 by 15 or 25 ½ by 15 inch wide piece was good for sticking this on. So what I did was I cut
Jenny: So can we go ahead and add
Natalie: Yes, you can go ahead and add that one
Jenny: While you’re telling about it.
Natalie: Should we cut that piece?
Misty: Sure.
Natalie: Because I want to show how it fits.
Misty: Let’s do it. Ok
Natalie: Ok. And also it seems like it might be a little bit wasteful because you’re not using the full width of the fabric. You’ve got 45 inch wide fabric and you’re cutting a 25 inch wide chunk out of it but, sorry I’m going to fold this in half. It’s a little easier to cut.
Jenny: Here Misty do you want to press this down.
Misty: Absolutely. I do.
Natalie: And I’ve got to go all the way to the edge of this mat.
Jenny: You know anytime, this is actually a really good trick, you guys, to watch what she’s doing because anytime you can fold fabric, you know, making sure that it’s straight. And not have to cut long like this.
Natalie: You still want to make sure that your selvedge edges are lined up and that your fold is nice and flat and along the grain. Otherwise you’ll end up with a piece that’s pretty crooked.
Jenny: You just want to make sure it’s all folded evenly. So much easier to fold fabric when you cut.
Natalie: And then I’m going to go 15 wide. And we’ll use that for something else. Right now that’s just an extra. Ok so then I’m going to open it up because I need the 25 width for the, I’m going to cut this edge off and slide it over. Here we go.
Jenny: This has a really wide selvedge.
Natalie: It does have a pretty wide selvedge and it’s not very straight but that is ok. We’re going to trim it up. It’s really such pretty fabric though. I can’t fault it for anything
Jenny: No, it’s gorgeous.
Natalie: Ok. So I took that off. I’m taking it over to the edge. This is one of those times where it’s better to use the mat for measuring because I don’t have a 15 by 25 ½ ruler. So go all the way over to 25 ½. Whoops, I’m going to have to
Jenny: Make sure there’s nothing underneath.
Natalie: Yep. Make sure it’s all lined up flat. And then what I’m going to do is I’m going to go up almost all the way and then I’m going to keep my rotary cutter exactly where it’s at and slide my ruler up just a little bit to make sure that I can get the rest of that cut and have it be straight. Ok so this piece is what you’re going to use to put your half dresden plate on.
Jenny: So 15 by 25 ½?
Natalie: Yes and this, these pieces are going to be squared to make up these sides here because we have a centered block and then we have two together and then another centered block. The other thing you’ll use this for is your little middles. And we’ll get to that.
Jenny: Now you’ll notice this is actually different but we ran out of this fabric on this so we’re using this print to show.
Natalie: But this would have been a great background too. So I just want to show you, I also eyeballed it. And I want you to see how this is just not perfect. See how it doesn’t quite line up? You’ll have a little bit of trimming here. This one’s nice and straight.
Jenny: That’s why it’s improv, right?
Natalie: I’m not sure. Exactly.
Misty: That’s so interesting.
Natalie: Alright so what I did is I got it, I got everything as close as I possibly could and then I just trimmed it off. So for the circle, I want to show you. I’ve got one right here. Let’s iron it sticky side to the back. Just press that down for me.
Jenny: Now what size circle is that?
Natalie: It’s a 4 ½ inch circle. And I did use what was sitting next to me which was my button coaster.
Jenny: We all have a cute button coaster.
Natalie: But I do think you’re making a little template is a good idea.
Misty: I used the thimble cup for mine. That guy right there.
Natalie: Nice. Top or bottom?
Jenny: I love that. We all have that size in our head and we just have to find what is around. Now there are great circle rulers out there. To be fair.
Natalie: Absolutely.
Jenny: But most of us, you know, we kind of, it’s just like whatever is handy.
Misty: We just make do.
Natalie: It just needs to be round and cover that raw edge opening.
Jenny: Now yours you want to make sure not to cover up these beautiful little geese.
Natalie: Exactly. So that’s what we’re going to talk about. So I don’t know how well you can tell because I think I did a pretty good job with the circles in the background kind of blending. But mine are not all at the same height. And it really depended for me on how much of the star I wanted to show. To me this is like a little starburst. So I just laid it on there. And when I figured out where I wanted it I took the adhesive off. And I took it over to my ironing mat and I used either a piece of the foundation paper or the cardboard from the back. I just slid it underneath. And then I pressed the whole thing flat. And then trimmed it off. I just cut right through whatever paper.
Jenny: Hence again, improv.
Natalie: Right. So actually this would be ideal. Rather use this than the top. Then it’s completely, it’s pressed to that but you can just cut it right off. So you’ve pressed this down. I will say that I used some heat n bond pieces to keep this in place. But you could also that fabulous basting powder.
Jenny: Or pins or whatever.
Natalie: Also pins. I pinned and pressed because I didn’t want it to move.
Jenny: So when I use heat n bond, you know, wherever you cut out there’s those scraps are left and I just take those and I just ironed them on.
Natalie: That’s what I did. I just had some little pieces that I wasn’t using for anything else.
Jenny: One thing I want to point out too on this is that even though our strips are basically the same size these points differ.
Natalie: Yes and that depends entirely on where you place the next colored strip.
Jenny: And I love that because they’re all black, it doesn’t show.
Natalie: It completely blends right in.
Jenny: That’s awesome. I think it’s a great project.
Misty: Super fun.
Natalie: So ya once you get it pressed on and trimmed then you’re just going to topstitch everything and join your squares together. And then one more thing I wanted to point out, as I put this together I had this little space at the top and no space at the bottom. So I added, is it three inches? It looks like three inches to this base so that the whole thing would be kind of centered from side to side and top to bottom.
Jenny: Have a little bit of color all the way around.
Natalie: Yes and so I think that turned out great.
Jenny: It’s gorgeous.
Misty: It’s so pretty. I love it, Nat
Jenny: It looks like it’s so hard.
Natalie: But it’s not.
Jenny: No. I love things like that
Natalie: It’s not crazy difficult. It’s a little time consuming and you do have to do all the little steps because it, you need them in order to stay on track but otherwise, ya.
Jenny: Well I just love how creative it is and how much license it gives you to just do whatever you want.
Natalie: That’s the great thing about foundation papers as well because we could have crumb pieced this entire paper and then cut our dresdens out.
Jenny: Oh my gosh, ya.
Natalie: Or you can cut the shape first or you can cut the shape after and then really, I mean, foundation is just. It’s one of my favorite things to do. I’m planning a few more projects for this year.
Jenny: Get ready for those.
Natalie: I enjoy the creative license. I really do.
Jenny: So we hope you enjoyed this Triple Play. We gave you three great ideas. And just so you know we love the dresdens so we’ve done tons of different things with these dresdens. We’ve actually put together a playlist for you if you check in the description below. Be sure and subscribe if you haven’t subscribed. But one of the things we did a long time ago is we made these turkeys. I have them this size which is Misty’s blade size. I have them huge which is Natalie’s blade size. And of course I had to make a tiny one. Now that I’ve got that tiny blade we had to try them. So be sure and check those out. And we hope you enjoyed today’s Triple Play on the Dresden Plate. We’ll see you later.
We hope you enjoyed watching this video. If you’re not already part of the Missouri Star quilt family you can hit the subscribe button below so you won’t miss a thing. And if you click that bell it will notify you every time a new tutorial comes out. See you next Friday.


