

Triple Play: 3 New Pins & Paws Quilts with Jenny Doan of Missouri Star
We have a fun tradition here at Missouri Star: Triple Play! Once a month, Jenny, Misty, and Natalie each demonstrate their own, unique take on a favorite block, technique, or template. This week these talented Doan ladies are showing off three adorable ways to use our beloved Pins and Paws cat quilt block.

Instructor
Jenny Doan
Jenny Doan is an American quilter, author, and YouTube personality. Jenny started Missouri Star Quilt Company in 2008 and today it is the largest quilting supply vendor in the United States.
Shop this tutorial
 Itty Bitty Kitty Committee Quilt Pattern by Missouri Star$4.95Shop →
 Digital Download - Itty Bitty Kitty Committee Quilt Pattern by Missouri Star$3.95Shop →
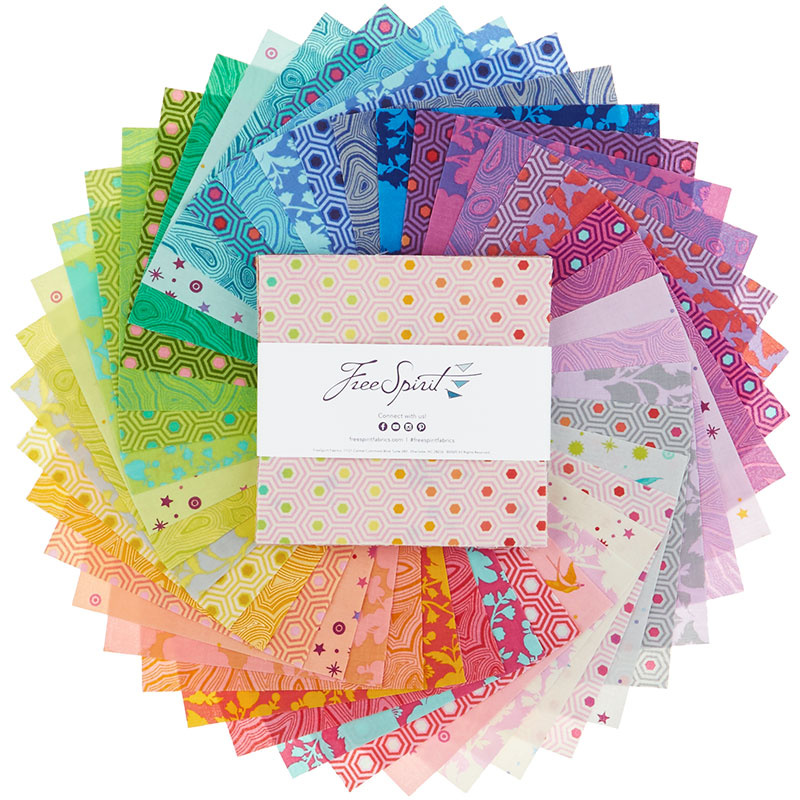 Tula Pink's True Colors Charm Pack$12.95Shop →
 Kona Cotton - White Yardage$6.76Shop →
 Tula Pink's True Colors - Wildflower Azalea Yardage$11.96Shop →
 Tula Pink's True Colors - Fairy Dust Mint Yardage$11.96Shop →
 Tula Pink's True Colors - Mineral Topaz Yardage$11.96Shop →
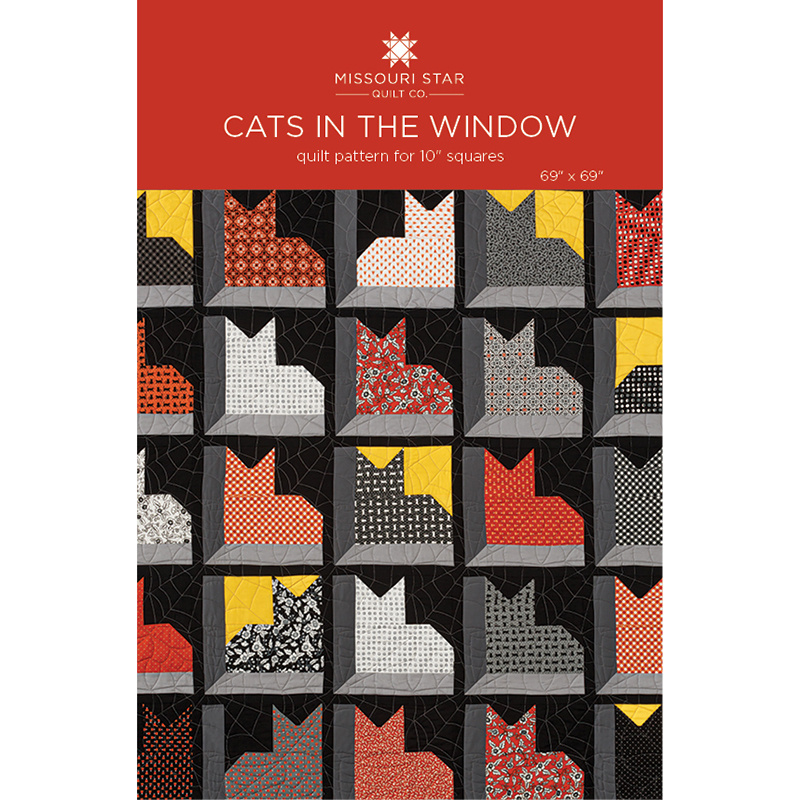 Cats in the Window Quilt Pattern by Missouri Star$4.95Shop →
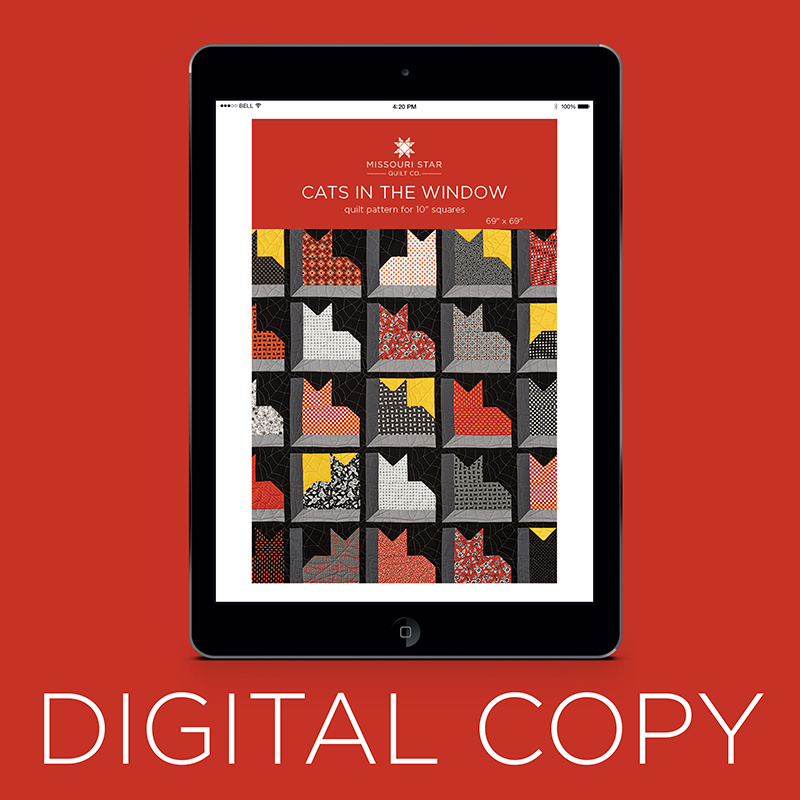 Digital Download - Cats in the Window Quilt Pattern by Missouri Star$3.95Shop →
 Kona Cotton - Graphite Yardage$6.76Shop →
 Kona Cotton - Iron Yardage$6.76Shop →
 Kona Cotton - Canary Yardage$6.76Shop →
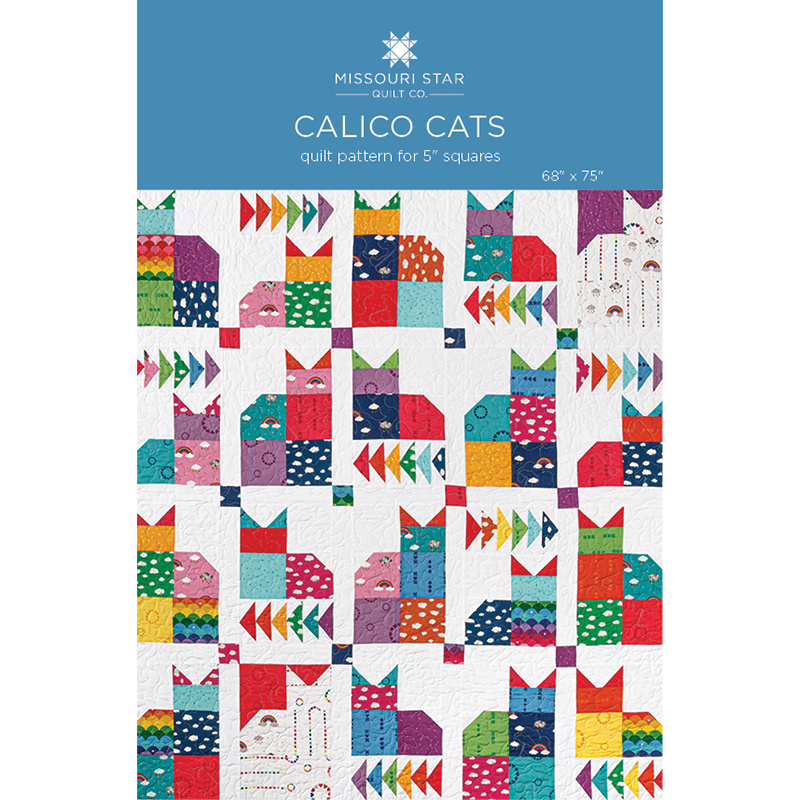 Calico Cats Quilt Pattern by Missouri Star$4.95Shop →
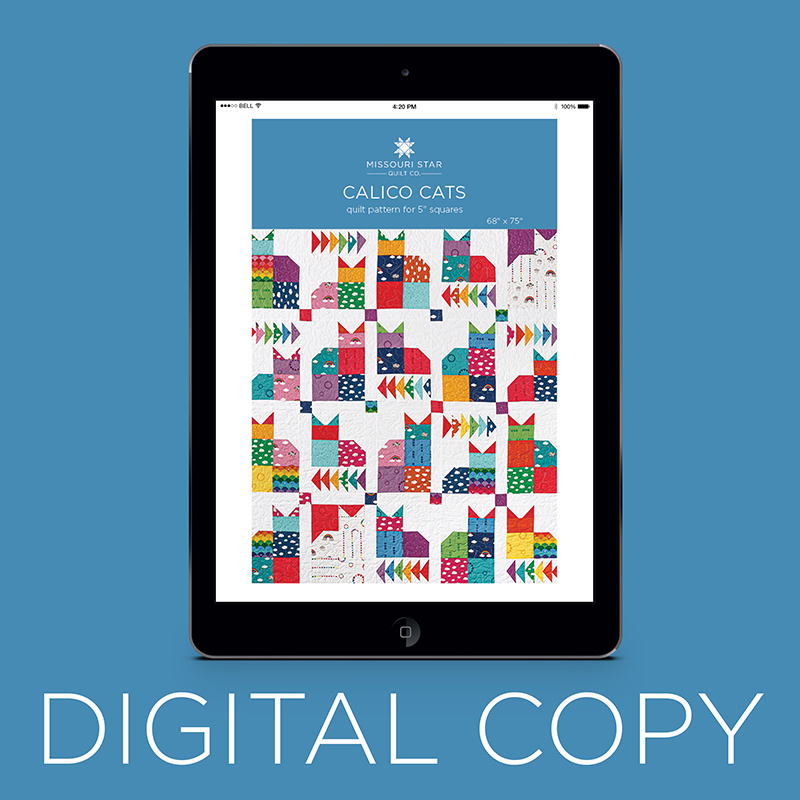 Digital Download - Calico Cats Quilt Pattern by Missouri Star$3.95Shop →
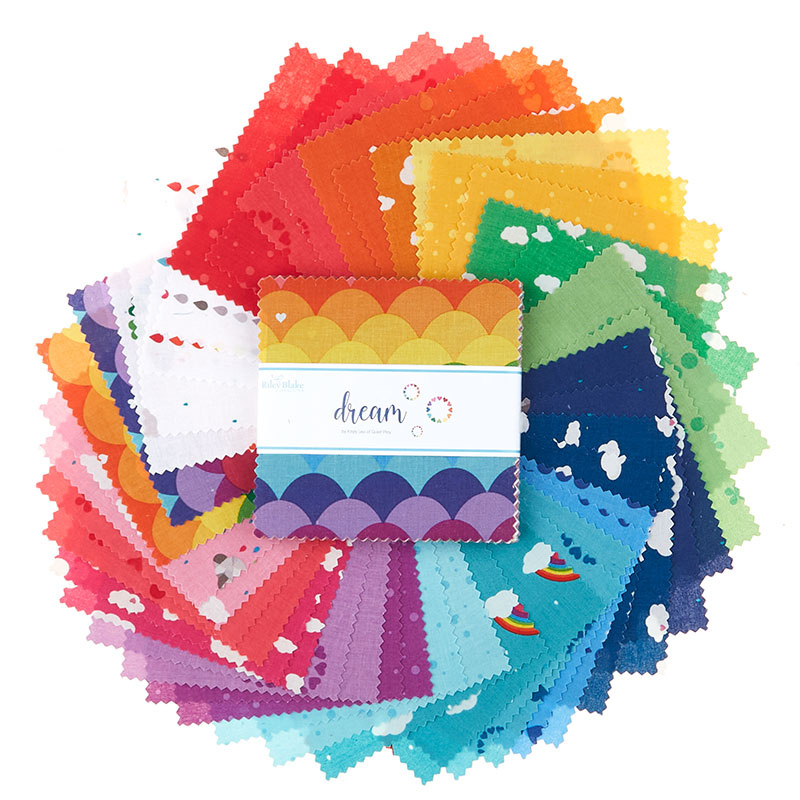 Dream 5" Stackers$10.95Shop →
- Kona Cotton - White Yardage$6.76Shop →
Common Questions
What is covered in Triple Play: 3 New Pins & Paws Quilts with Jenny Doan of Missouri Star?
We have a fun tradition here at Missouri Star: Triple Play! Once a month, Jenny, Misty, and Natalie each demonstrate their own, unique take on a favorite block, technique, or template. This week these talented Doan ladies are showing off three adorable ways to use our beloved...
How long is the tutorial video?
The tutorial video is 00:36:20.
Are supplies listed for this tutorial?
Yes. The tutorial page includes the supplies and materials connected to this project.
Is a transcript available?
Yes. A written transcript is available on the tutorial page.
Video Transcript
Natalie: The original pattern is Pins and Paws.
Jenny: It’s Pins and Paws and then Attic Window quilt that we used with a panel. But actually any quilt block you make could actually be sashed in that attic way. And I think it’s just kind of fun to see all the little kitties sitting in their windows.
Misty: That’s perfect because cats always hang out in the windows.
Jenny: They do. They love it. So to make this quilt you’re going to need one layer cake. And we have used Midnight Magic Two by April Rosenthal for Moda. Your accent fabric is going to be ¼ yard. You’re also going to need ¾ of a yard of a light solid fabric. And you’re going to need ¾ of a yard of a dark solid fabric. You’re going to need 1 ½ yards of black and that includes your sashing. Your border is a nice big six inch border. And you’re going to need 1 ¼ yards for that and your backing is 4 ¼ yards of fabric, vertical seams or 2 ¼ yards of a 108 wide.
Jenny: So to make this quilt, what I’m going to do is I’m going to take one layer cake square. It’s all made with layer cakes and I’m going to cut this right in half right here just like that. This is going to be the body of my cat. And I’m going to cut actually a half an inch off because as we sew this kitty together we’re going to take a seam in the top part of the block. So out of the top piece you’re going to get the face and the ears. And so we are going to cut a three by five inch piece for the face and then our ears are going to be little 2 ½ inch squares. So we’re just going to cut a 2 ½ inch strip and then we’re going to cut that in half and that will be our little ear blocks. Now you can see on the quilt behind me we’ve used some background and so I have some black up here. And then some of the kitties I put yellow so it looked like the light was on in the room. To me this whole quilt reminded me like of a when you look at a high rise or something like that and you see. And cats are always sitting in the windows so these are the people that are home, you know. Ya, the other lights are dark. Also we have some cats facing this way and some cats facing this way and that is just a matter of swapping which side your head is on and I’ll show you how to do that. So first what we’re going to do is we’re going to take some black also and cut out our pieces. So we need a background piece, a 2 ½ by five inch piece. This is for the ears. And our ears are going to go, we’re going to put a 2 ½ inch square on either side. And I’m just going to finger press these and Misty I’m going to give you this and if you will just sew right on that line.
Misty: Yep.
Jenny: That way and then we’ll sew the other way as well. Now I’m going to get the other black pieces ready for mine. Alright, I’ll trim this and Natalie, you can press it.
Natalie: Alright.
Jenny: There we go. Oop, got a long string there. Our beginning string of the day, that’s what that was.
Misty: Exactly.
Jenny: There you go and then we're going to put a two and a half on the other side as well. Let me go ahead and press a line on that. You can finger press, you can draw the line, you can also just use your diagonal seam tape. Line it up in the corner like that and sew right on the line.
Misty: Okay. There we go.
Jenny: All right now I'm going to trim this one off and Natalie you can press that back
Natalie: Ok
Jenny: Now on our cat body right here we have this 9 ½ by five inch rectangle and whatever side you want your kitty to face you're going to put, you're going to put that curve of the back of the cat on one side or the other and that will determine which which way your cat points. So we're going to put him over here.
Misty: Ok.
Jenny: And then you can just sew right across on that and she's going corner to corner doing the diagonal seam tape.
Misty: There's that one.
Jenny: And then on this right here I'm going to have you sew the ears to the face so just this is our, this is our three inch by five inch and we're sewing them right to the ears. Now make sure your ears, you know, are our instinct is, is it's a flying geese.
Misty: Yeah.
Jenny: Like this but it won't look like kitty ears if we do that so we're gonna put this on here like that.
Misty: All right.
Jenny: And Natalie if you'll press this guy back. There we go. Alright so here's, here's our cat body and then here is our little head right here. Will you press that flat?
Natalie: Yep.
Jenny: Now the other piece you're going to need to make this cat is you're going to need the background and it's a five inch by five inch square. And it’s going to line right up next to this one right here. Whoops.
Misty: Flip flopped.
Jenny: We don't have a tail in the face. Sometimes we do with the kitty so this makes your cat block. So Misty, if you’ll sew this down right here.
Misty: Of course.
Jenny: These go together so quick and they're just so fun. I think we all really had a fun time with this.
Natalie: Yeah I did.
Jenny: It's super fun. I can't wait for you to see the girls because it's just it's just so fun when you see just, you know, the little changes make a big difference. All right press that back. When I came out with the pins and paws everybody was like, are you going to do a dog and I thought, well I haven’t found an easy dog yet, easy way to do it. Alright, so then, oh wait, I better tell you this. So we put the top of the cat block, making sure our tail is on the opposite side of the head, which means if you’re going to do one the opposite way, you know, your tail would be over here and you would swap these blocks when you put them together. And so now we’re just going to sew this seam right here and that finishes up our block. And I’m going to grab some background pieces over here.
Misty: There we go.
Jenny: Alright. Press that little kitty. So to make any block into an attic window block what you’re going to do is you are going to measure the size of your block. This is 9 ½. And we’re going to attach a lighter strip down here. So what I’m going to do, I’m just going to trim this little edge off right here because actually when I start sewing mine together, I have one long strip and I just put cat, cat, cat, cat, cat on there and then cut them all apart. So if you will sew this lighter strip on the bottom right there.
Misty: Yep.
Jenny: And then what you’re going to do is you’re going to take your darker strip for contrast and we are going to put, snowball this corner just like this. And we’ll sew side to side like this. And by doing that it gives it this corner look right here. See where it’s got this, it gives that depth of being in a window. Now the lighter your bottom strip is the more contrast you’ll have. The more it will look like it’s really stepping back in the window so just keep that in mind.
Natalie: So that side length is just the side measurement?
Jenny: The side length is just this whole side measurement and then we will iron this back and trim this off. So I’m going to, and you know, we tell you that so you can do this with any block. You know when they have to write patterns it has to be written to fit the actual block that you have the pattern for but, you know, I just love the idea of, you know, using this as a setting and it just makes it so cool. Now this is a little bit longer, so instead of worrying about cutting it, I’m just going to put it on here like this. And Misty I want you to sew from this side down like this.
Misty: Ok.
Jenny: Now you'll notice when I put these together I didn’t actually pin it or make it line up because it’s a 2 ½ inch square on a 2 ½ inch strip that sews next to a 2 ½ inch strip. It actually should fit in there pretty close and so we’re going to take a look at this as soon as Natalie presses it.
Natalie: Ok
Misty: See how I did.
Jenny: See how she did. It’s pretty forgiving. You know, that little corner is pretty forgiving because they’re all the same size.
Natalie: It’s a little bit off.
Misty: Yeah but I don't think that's something you’ll notice.
Jenny: I don't think so either you know.
Misty: It’s really forgiving
Jenny: Yeah. So I actually, ya I think that’s fine. And actually on this right here if we had actually scooted that just a hair it would line up exactly. And so here’s one that lines up exactly. But you know, those are things that, those kind of things, see this is a little off. I would never, I would never even notice it. It wouldn’t bother me in the least.
Misty: Yeah.
Jenny: So on the yellow ones, it’s exactly the same. You’re doing your yellow 2 ½ inch square back here. You’re doing your ears on a 2 ½ by five inch strip. And this is a five inch square on the other side and we swapped sides. And so let’s talk about the setting of this and how we put this together. So right next to the cat, so let’s go from here. So we have on the side, this side has our sashing on it
Misty: Sorry.
Jenny: This side has our sashing on it and so we put a black strip on the right hand side of every block. And then we put a black strip in here. Now these strips are the inch and a half strips. And so what I did was I just took this and trimmed off my selvedges like this and then just sewed down the side that did not have the attic window frame on it. So they all go down on this side and it doesn’t matter what way they’re facing that you’ll sew that strip on the side of them. And then when you start putting them together they just line up and it looks like, it makes kind of the sash line for the next cat is what it does. It makes that window frame and I would just, here Misty, slide this under and keep going. And you can chain piece these all the way down your strip and it’s a simple way to do it.
Misty: Perfect. Whoops. The seam flipped up under there.
Jenny: Here you go, one more right there.
Misty: Perfect.
Jenny: I just have to make one more cat and I have a cute little pillow. Actually one that’s done.
Misty: There we go.
Jenny: Alright, let’s trim these off. So if you turn them over you can see exactly where you want to trim. And I’m just going to trim that. And then we’ll trim this and right up here next to it.
Misty: Chain piecing really does make it so fast.
Jenny: It goes so much quicker. And then we’ve got this one right here and this one. We’ll let you press those out.
Natalie: There we go.
Jenny: So then when you’re ready to set your cats you’re going to, we have five in a row and they will go just like this. And we’ll put the next one up here. And do you see how that blends in. That makes the window sash.
Misty: Is there any rhyme or reason to where you put the yellow windows?
Jenny: No.
Misty: Ok.
Jenny: No, I just thought it would be fun to have a few that had a brighter background and I like the cats that go different direction. But there really wasn’t. I think I have three or four of them on here. One, two, three, four, five of them, six actually. And for me there was no rhyme or reason. I was just doing it. It was fun. I love that I have this cute Halloween kind of fabric in it and then we just put a regular six inch border on the outside. And then our backing back here, the little skulls and bones. But we quilted this with a spider web and I think that’s really fun to use especially for, you know, Halloween-esp type quilts.
Misty: It turned out so cute.
Jenny: And we, again we have five across and five down and it was just really fun for me. So next is, who’s next?
Misty: Nat
Natalie: I’ll go next.
Jenny: So Natalie is up next.
Jenny: You’re up.
Natalie: Alright. So my quilt I called Calico Cats because it was so colorful.
Misty: It’s so cute.
Natalie: So cute. I had charm squares to work with and so the construction of my block is basically identical to mom’s but I used two charm squares to make the five by 9 ½ inch body, everything else is the same size. To make my quilt you’ll need three packages of five inch print squares and we’ve used Dream by Christy Lee of Quiet Play for Riley Blake Designs. You’ll need about two yards of background and this includes your sashing and your inner border. You'll need 1 ¼ yards of outer border and we've used this same fabric. For the backing you'll need 4 ½ yards with vertical seams or 2 ½ yards of 108. And on this quilt I used a fun binding print. And you'll need 3/4 of a yard for your binding. So to make the taller cats we're just gonna add
Jenny: I love the taller cats.
Misty: I love it so much.
Natalie: Extra charm squares at the bottom. And so that is that block. But because I had charm squares to work with I also had this little two inch piece leftover when I cut the three by five piece so that is what I made all of these little flying geese.
Misty: They’re so cute.
Jenny: They are so darling. It adds so much to the quilt.
Natalie: They ended up being, you know, all the same size because these are five inches long which is the same length as the other two.
Jenny: It’s perfect. So then the block is the same?
Natalie: Yep.
Jenny: Oh that’s awesome.
Natalie: Yeah, so all these blocks are the same size. I just put the flying geese either on top or on bottom.
Misty: Of the shorter cats, right?
Natalie: Whichever way I wanted to. And you can see here in this top corner I had some really, really light blocks and I thought if I used a couple of the charm squares to make a darker background that they would stand out. They kind of blend a little bit. I could have used a different background color but just like with any fabric line that you have sometimes you might have lights or darks that don’t blend in and you can just do an opposite block.
Misty: So cute.
Jenny: True, true. I love that.
Natalie: Alright so since Mom easily taught the whole cat block I’m not going to put a lot of effort into that. But what I would like to show you is this fun flying geese. It’s wonky so you don’t have to be super exact. But we used a two inch by five inch square or rectangle. So we’re going to take our charm square and cut two by five because the three by five piece is what’s you’re going to use for your face. Right.
Misty: I love that you mixed it all up
Natalie: I didn’t want to have leftover pieces.
Jenny: I love that they’re calicos. It’s so cute.
Natalie: They are so cute. So this little flying geese corner is not any specific size, it’s just whatever length it needs to be.
Misty: And you just crossed over the middle?
Natalie: Yep.
Misty: Ok.
Natalie: So we’ll just do a little finger press at the top and go from there.
Jenny: Oh it’s a wonky goose?
Natalie: It’s a wonky goose.
Jenny: Wonky goose. I get it.
Natalie: So you can kind of see when you look at it, they don’t all end in the same place. They’re not necessarily all centered but
Misty: I love it though.
Natalie: I think it’s fun and creates a really cool movement. Alright so this one you’ll want to go ahead and
Jenny: Make sure it covers the corner
Natalie: Yep. So you can just use your ruler and trim that off because we do want that middle to cross so that you have a little bit of space so you can keep your point.
Jenny: That is really fun.
Misty: Such a fun idea.
Natalie: And then this will just go that direction. I do cut the color out because, if you leave it in you can see through it. You can see through the white. So I like to trim that piece out just on these particular flying geese. I don’t always do that if the fabric is dark enough to cover it.
Jenny: So then I start right here on the bottom, in the corner and I just cross over this. Now do you cross it like a quarter of an inch or?
Natalie: Yeah, pretty much
Jenny: Alright.
Natalie: It’s just eyeball.
Jenny: There we go.
Natalie: I’ll let you go ahead and press the whole thing just so we can get it squared really neatly.
Misty: You betcha.
Jenny: This is so cute.
Misty: There we go.
Jenny: Such a grand idea to use it all. I love it when we can use everything.
Natalie: Get this all squared up.
Misty: Having no waste is pretty awesome.
Natalie: Ya it works out really well. One more on this side and then we’ll cut out that purple.
Jenny: And again, that piece is two by five?
Natalie: Yep. Two by five, so even if you’re squaring and something isn’t, you know, you can always square it to that size.
Jenny: Alright, there’s your little
Natalie: So this is a great line and it had tons of great colors and I just went ahead and lined them up in rainbow colors because it’s very soothing to my soul.
Jenny: Oh that’s awesome.
Misty: I love it.
Natalie: Alright so then you just, we’re going to add this purple. In every single one there are six pieces.
Misty: It’s so magical that something like that worked out.
Jenny: Kitties, it did, it worked out so great.
Natalie: So great.
Misty: Yeah, it’s the best.
Jenny: There we go
Misty: Alright press it back.
Natalie: And then we can decide, do you think we should put it on the top or the bottom. It doesn’t matter.
Jenny: Oh the short kitties get the geese.
Natalie: The short kitties get the flying geese.
Misty: Did you do half one way and half the other or did you just totally mix it up?
Natalie: It’s roughly half and half.
Misty: Ok.
Jenny: And some on the top and some on the bottom.
Natalie: Yeah but it wasn’t, I didn’t really plan out, you know, I need to make this many exactly and that many exactly. The pattern will tell you. If you follow the directions your quilt will look exactly like mine but .
Jenny: Actually kind of a fun fact but because we generally come up with the pattern and make it and then the pattern people, the writers try to figure out what we did.
Misty: Our writers, they are rock stars. They’re so great.
Natalie: We tell them and they put it into words.
Jenny: Yeah it makes it really cool. Alright so
Misty: And make the math work
Natalie: So if this is your base cat, made the same way that you taught us except for the bottom is two charm squares but it measures the same.
Jenny: Right.
Natalie: Five by 9 ½.
Jenny: Yeah you don’t have to trim a half an inch off there.
Natalie: Right exactly. No trimming on mine. So if you wanted a tall cat you just add two more squares and if you wanted a cat with flying geese then you add the flying geese either top or bottom. What do you guys think?
Misty: I think we put it on the bottom because the cat’s ears match that one flying geese at the end. That’s just how my brain works. It doesn’t have to work out that way.
Natalie: And if you have a little bit of extra which sometimes we do when we’re adding things that have fewer or more seams, sometimes based on our seam allowance we may end up with a piece that’s, you know, a little bit more fabric on one side. Then you can center your center seam because we have six and so you’ll get a nice good center and then put the wider piece on the bottom and it will ease in.
Jenny: Big bottoms to the bottom.
Natalie: Right.
Jenny: I always say. Alright.
Natalie: Those feed dogs will pick up just a little bit more fabric. It won’t ruffle it. It will just make it fit.
Jenny: It just eases it.
Natalie: Make it fit nicely.
Misty: It’s one of those sewing magic things.
Jenny: It really is
Natalie: It’s a handy hack.
Misty: Every time, I’m like, I don’t why this works but it does.
Natalie: It totally does. And you just have to watch your middles and your ends and then everything works out. It’s so cute.
Misty: You want me to press it.
Natalie: Sure. Give it a good press. So I had three charm packs. And out of that I also got these cute little cornerstones, they’re just 2 ½ inch squares. And it’s sashed with a 2 ½ inch wide sashing. And I did that for the inner border as well so it’s really just like the cats are just floating in rainbow land and hanging out.
Jenny: So it’s five by four?
Natalie: One, two, three, four, five, by one, two, three, four because these blocks are quite a bit longer than they are tall. You don’t need as many down.
Jenny: And so the size it comes out?
Natalie: It measures 66 by 73.
Jenny: Great size.
Natalie: I did a nice six inch size border. And you’ll notice that the fabric is directional. So I went ahead and cut my fabric so that the top and bottom would line up in a directional manner. So all my rainbows are going the same way. So if you look at all of the borders, the rainbows are all the same. So the way that you do that with directional fabric, you’ll notice how it’s printed. And we normally print with our selvedge edge to the bottom and that would give me cuts that go this way. And that works great for my top and bottom borders because then my rainbows are facing the way that I want them to. But if I want to cut border pieces that go the other direction, all I have to do is turn my fabric and cut length of fabric instead of width. So I just did that and cut this direction. I lined up my selvedge edge and folded it down and made sure everything was really straight. And then I just cut my borders going this way instead of selvedge way.
Misty: I love that.
Jenny: I love your binding.
Natalie: And it’s pretty cool. And my binding is also directional and I also cut it length of fabric to get the sideways little rainbow prints with the scallops. It’s so cute. I love these little hearts.
Jenny: So you cut it this way?
Natalie: I did.
Misty: I also really love your quilting with the umbrellas. So cute.
Natalie: Oh isn’t that great? I love the umbrella quilting. And the backing, again, is this rainbow. It’s just such a beautiful fabric. I love it.
Jenny: It’s really happy.
Misty: And cheerful.
Natalie: I love these rainbows. I love the umbrellas too. So cute.
Jenny: Really cute.
Misty: Great job, Nat I love it.
Natalie: So yeah I hope you guys enjoyed that learn something new. And now we’re on to Misty
Misty: My turn.
Misty: Ok so this is my quilt. You know I love tiny so I had to make these itty bitty kitties and so we decided to call it Itty Bitty Kitty Committee because I couldn’t resist it.
Jenny: I love it.
Misty: So the quilt is 54 by 65. It comes together really quick. And one thing I wanted to do so I started with a charm pack but I wanted to make sure that my block still finished at five inches so that I could set it with these charm squares. So let me show you how I did that. To make my quilt you’re going to need two packages of five inch squares. And I used Tula Pink’s True Colors for Free Spirit fabrics. You’ll need 1 ¾ yards of background fabric, a ¼ yard of accent fabric, one yard for your outer border and 3 ½ yards backing with horizontal seams. So the assembly is essentially the same as yours and yours, it’s just smaller.
Jenny: Only the sizes have changed.
Misty: That’s right. And so we’re going to start with our five inch square and I’m going to cut a 2 ½ by five inch rectangle. And that’s going to be the bottom of our cat.
Jenny: That was easy.
Misty: Super easy. And then
Natalie: Almost done.
Misty: It’s almost done, exactly. And so then for the little chin piece we need a 1 ½, oops I need to turn this around, 1 ½ by 2 ½. So I’m just going to cut that off. And that is our chin. And I’m going to trim this down to 1 ½ and I’m going to cut two 1 ½ inch squares for the ears. So there’s one and one more. And this is our little bit of waste. We won’t need that.
Jenny: Perfect.
Misty: So there is all of our cutting from our charm pack. And then we’re going to pair that with some background fabric. So you can see I’ve got a 1 ½ inch background square and we’re just sewing that corner to corner. One thing I do want to point out and I’ll show you when we do the cat ears. But when you’re working with these tiny blocks like this you need to be really careful when you’re sewing these corners. And so when I would draw my line or press my line, I used the diagonal seam tape, I actually make sure that the points instead of being right on the centerline, I put it just like a needle’s width over so that I had a little bit extra fabric to fold over and make sure it ends up square.
Jenny: Ok, perfect.
Misty: Because you’re more likely to end up with not quite enough fabric when you’re dealing with these tiny blocks. So let’s go ahead and trim this one off and then that.
Natalie: I do that too. Just a little bit to the right of the line, whichever side you’re wanting to flip back you go on the other side.
Misty: On the other side and it gives you just a little bit of extra.
Jenny: I throw caution to the wind and just make it work. But that’s why I love that we’re so different.
Misty: Exactly.
Jenny: So I feel like any little difference you can catch in that quarter inch seam
Misty: Yeah and I just like my blocks to finish up just square and so then for the ears we’re going to use a two inch by 2 ½ inch background piece. So we’ll just take our 1 ½ inch print square and go corner to corner here.
Jenny: Ok so not doing it the way you do it so let’s just take a little closer look at this. So my corner is right there under my needle. Am I just moving a hair this way?
Misty: That way. Just a smidge. So see
Natalie: Do you want to draw a line so you can see?
Misty: Let’s do that so people can see. Let’s grab a pen. Good idea, Nat
Jenny: Well I mean for most of us we’re taught sew on the line, sew on the line and we can sew on the line but if you’re going to move it over just a little hair.
Misty: Just a little bit.
Jenny: That makes sense. I would have never known this.
Misty: So let’s do this. So we’ll draw the line.
Natalie: Because the thread, when it’s that tiny the thread will make a little bit of a difference and when you’re folding something back there’s just the tiniest bit of excess.
Jenny: Well and even if it folds over a little extra you can square that up.
Misty: You can square it. Exactly.
Jenny: Ok that makes sense. Alright, I learned something new today. I love that.
Misty: Exactly and so see now I’m just going to put my needle right on this side of the line
Jenny: The outside edge? Ok
Misty: Yep. Exactly.
Jenny: Alright, so let’s line this up here and we are just going to sew right here
Misty: Just right on the other side of it.
Jenny: Also when you’re sewing little pieces I just want to mention that it will help them stay in because it’s such a shorter line if you just shorten your stitch length a little bit.
Misty: That’s a good tip too.
Natalie: And go slow.
Misty: Yep, take your time.
Jenny: Did you guys see how slow I went?
Natalie: I am so proud of you.
Misty: Alright so we’ll trim that off and Nat if you will press that back. Maybe we should show that one more time.
Natalie: Do you want to see this one because I was going to say you can actually see if you zoom in really closely you can see that we’re just a tiny bit to the right of that line.
Misty: And so our stitch is just about a needle’s width on the other side of where we marked.
Natalie: It’s super, super close.
Misty: Yeah that’s a great call. Thanks, Nat
Jenny: Whew, we passed the test.
Misty: We did. It looks great. And so then
Natalie: And I can’t get it out, there we go.
Misty: When we roll it back you can see how great that turns out. Just really nice. So then we’ll do the same idea here. Do you want me to mark it again?
Jenny: Of course.
Misty: Ok. Make it a little bit easier.
Natalie: You can still eyeball this, it’s not a big deal. It’s really just knowing that you move it just a tiny bit. It helps a lot to keep things square.
Misty: I actually didn’t mark ever because I use that diagonal seam tape. But it will help you visualize to figure out where you are trying to go.
Jenny: The thing about when you’re learning this skill is that it helps to do it the actual correct way and few times because then you used to eyeballing it just a hair over and then
Natalie: It’s muscle memory.
Misty: So there we go.
Natalie: That will come into play once you’ve done it a few hundred times.
Misty: And so we’ve already got this bottom squared up.
Jenny: I love that they’re so tiny.
Misty: They’re so cute. And so there’s our ears. And we can just put that right with our little chin piece and sew those together.
Natalie: I think it’s funny that you call it a chin. I call it the face.
Jenny: I call it the face too.
Natalie: But you’ve called it the chin this whole time. Even in our design process, the chin, the chin.
Misty: I don’t know why. That’s just in my head, I guess.
Natalie: There is a chin on a cat. It’s real.
Misty: This is also a face. You’re not wrong. It’s all the things. So we’ll press that. And then now we’re going to add our little ear, our little face piece to a three inch background square. Whoops.
Jenny: And by cutting the backgrounds a larger size it keeps your square at five.
Misty: Exactly. So you just end up with a little extra white up here on top of the ears. But
Natalie: I think it looks great.
Misty: I do too. Our block is going to end up exactly five.
Jenny: Now you made all your cats facing the same direction, right?
Misty: Yeah I did. I just decided to put them all one way and for a moment I thought about switching it but I had gotten so far in the process so I was like, nope I’m just going to have them all hang out in the same direction.
Jenny: Well that’s what’s fun about all this.
Natalie: I love so much that they’re five inches because that just opens up a ton of new idea possibilities.
Misty: Exactly and you could do the same thing with a ten inch square and set it with that and just change your background pieces to have it work. So then we’ll just press that.
Jenny: It’s true. We get in a way of thinking and it’s fun when you can make it a little different.
Misty: Yeah because when I first made it they finished 4 ½ but I was like, well I don’t want to cut down all of my charm squares so there we go. There’s our finished five inch kitty block, itty bitty kitty block. And you can see I kind of used the beautiful gradient in this quilt. And I just started with my cat . And I have eight across alternating between a cat block and a print block. And I just sashed with a 1 ½ inch strip in between. But I want to take a minute and talk just a little bit seam allowance and measurements when you’re working with small blocks because I think one of the things that drives people a little crazy when they’re dealing with tiny piecing is when they’re like, I’ve used all these things and they’re just lining up. And when you’re working with smaller blocks, a variation in your measurement adds up much faster.
Jenny: It really does.
Misty: It really does and so one thing I noticed is these particular pre cuts for some reason even though they’re supposed to be five, they actually end up, they’re like 5 ⅛. And so for our cat it’s not a huge deal because we’re cutting it down. We’re cutting our pieces down. But when I’m setting it with my charm square I noticed I kind of had to float it a little bit. And I had to do the trick where you put the wider side down to get it to ease in because even that little ⅛ inch adds up.
Jenny: Well on most of them they have that pinked edge and so there’s already that little bit of play in there. Just measure your squares and then just decide where you’re going to cut them from.
Misty: Exactly and so I brought this little piece that’s from a honey bun. And I want to show you it’s kind of the same thing. So if we have our pinked edges. And it’s again, you’ve got about ⅛ inch of extra play.
Jenny: They measure from the inside of the pinking.
Misty: I know but in my brain, I sew to the outside.
Natalie: When you’re trying to line it up, if you have these cut from fabric they’re going to be 1 ½ square exactly and then it’s not going to line up with the 1 ⅝ square.
Misty: Yeah so for that reason I opted to cut my strips and use yardage because I found for my background pieces I was working much harder trying to get everything to make it match by using the pre cut in this instance and so
Jenny: That is a brain thing though because my brain does not recognize those pinks as fabric so I cut them off in my head. And so just watch what your brain does because that way you’ll know.
Natalie: Well and it might be worth your time to just take these pieces and just trim off that ⅛ inch extra.
Jenny: And to Misty’s point, if you’re going to trim all of these strips you may as well just cut them out of yardage.
Natalie: Exactly. So if you’re going to match honey bun strips with these squares, maybe instead of 1 ½ these are 1 ⅝.
Misty: Exactly. You could just change the cut that you make.
Natalie: So that would be less cutting than trimming your whole honey bun down to match the other squares.
Jenny: I would do it with yardage.
Misty: Exactly. And so hopefully that wasn’t too much but I just think it is important to point out because when you’re dealing with smaller blocks it’s a very common issue. And so just check all those measurements because that could be where it’s going wrong.
Natalie: The other thing is a super consistent seam allowance.
Misty: It’s true.
Natalie: Go slow. Take your time. And keep it the same. And then everything will match up better.
Misty: Exactly. And so yeah we just have the inch and a half strips in between every block. And then I want to show you a trick for the sashing row. I actually make a strip set. So then I have my five inch background strip and then inch and a half accent strip. And then we’re just going to cut this into inch and a half strips.
Natalie: That’s so smart because then you never have to work with that teeny tiny little square.
Jenny: That is so smart.
Misty: Exactly. Never going to match that up with anything so.
Jenny: Wait, you want to cut your selvedge off don’t you?
Misty: Oh yeah, that’s what I am. I was just taking a big cut. I don’t care. That’s all good. Alright.
Jenny: Don’t care.
Misty: There we go. And so you can see I would just cut a bunch of those. I would have a few more already cut and then we can just sew those together. And I actually started with a solid and then I used all of my strip sets to go from there to go all the way to the end.
Jenny: So smart.
Misty: And so then that went really, really quick. It’s a great sashing hack to make it go faster for you. Yeah and so then I just carried that sashing into the inner border, that’s just an inch and a half. We have a nice five inch border and I love this print. And then we have this fun backing so
Jenny: Now what is this quilting? Oh this is quilted with Cotton Candy.
Misty: Cotton Candy, yep.
Jenny: A really cute pattern too.
Misty: So it was a really fun quilt to make and I hope you guys enjoyed it.
Natalie: Ya it’s great.
Jenny: So we hope you enjoyed this Triple Play on all of our cool cats and kittens from the Missouri Star Quilt Company.
We hope you enjoyed watching this video. If you’re not already part of the Missouri Star quilt family you can hit the subscribe button below so you won’t miss a thing. And if you click that bell it will notify you every time a new tutorial comes out. See you next Friday.


