

Triple Play: Half Hexagon Projects with Jenny, Natalie & Misty of Missouri Star
 Jenny Doan
- Lap / Throw
- Beginner
- Quilt size 63" × 74"
We have a new tradition here at Missouri Star: Triple Play! Once a month, Jenny, Misty, and Natalie each demonstrate their own, unique take on a specific block, technique, or template. This week these talented Doan ladies are demonstrating three new ways to use the magnificent Half Hexi template.
Instructor
Jenny Doan
Jenny Doan is an American quilter, author, and YouTube personality. Jenny started Missouri Star Quilt Company in 2008 and today it is the largest quilting supply vendor in the United States.
Shop this tutorial
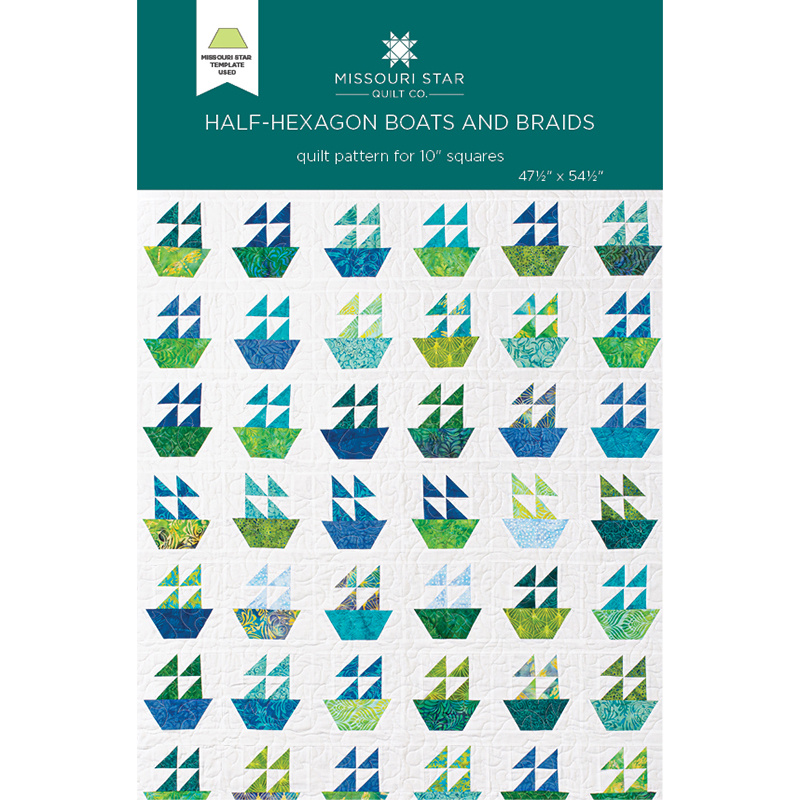 Half-Hexagon Boats and Braids Quilt Pattern by Missouri Star$4.95Shop →
 Digital Download - Half-Hexagon Boats and Braids Quilt Pattern by Missouri Star$3.95Shop →
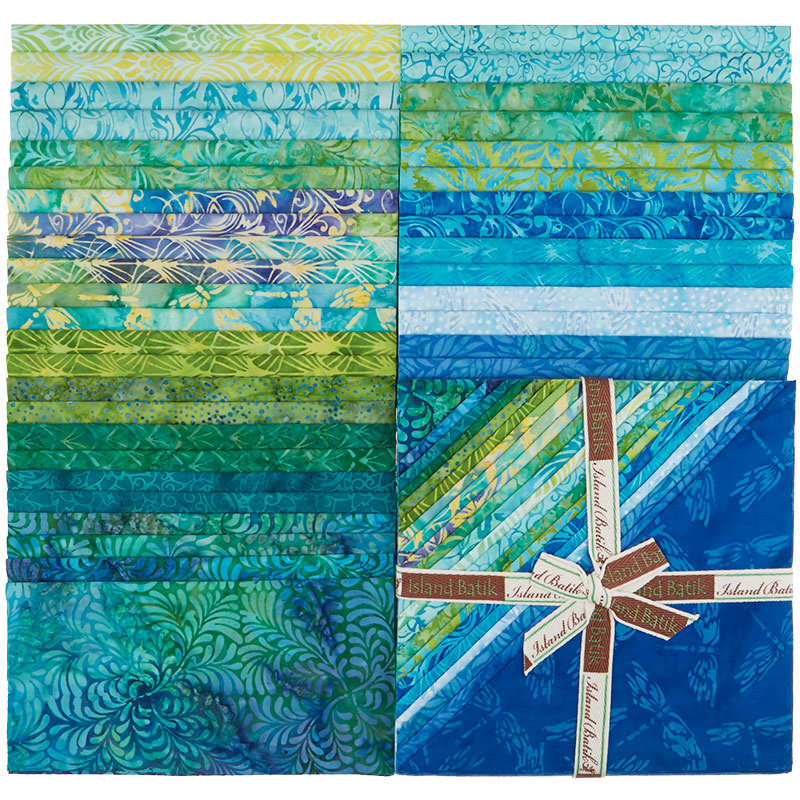 Lemon Grass Batiks Stacks$37.95Shop →
 Simply White Batiks - Solid White Yardage$10.50Shop →
 Half-Hexi Whirligigs Quilt Pattern by Missouri Star$4.95Shop →
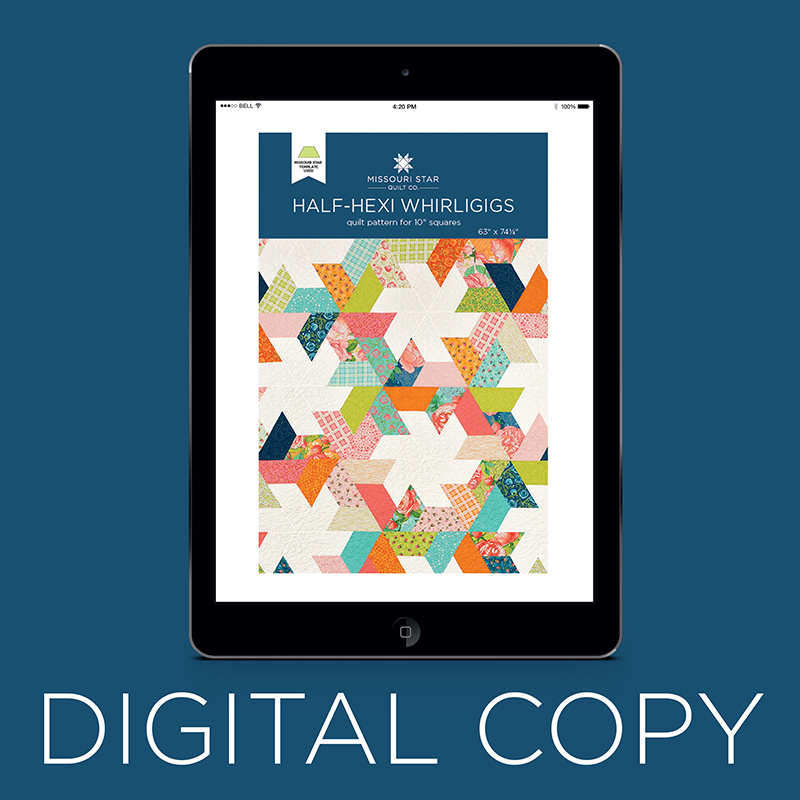 Digital Download - Half-Hexi Whirligigs Quilt Pattern by Missouri Star$3.95Shop →
 Bella Solids - White Bleached Yardage$6.95Shop →
 Half-Hexi Links Quilt Pattern by Missouri Star$4.95Shop →
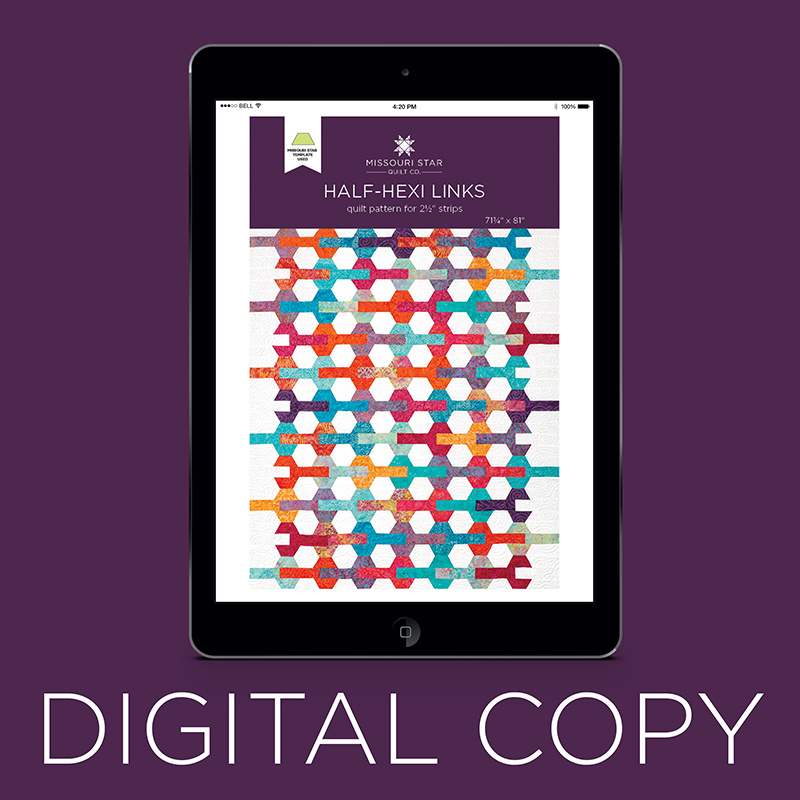 Digital Download - Half-Hexi Links Quilt Pattern by Missouri Star$3.95Shop →
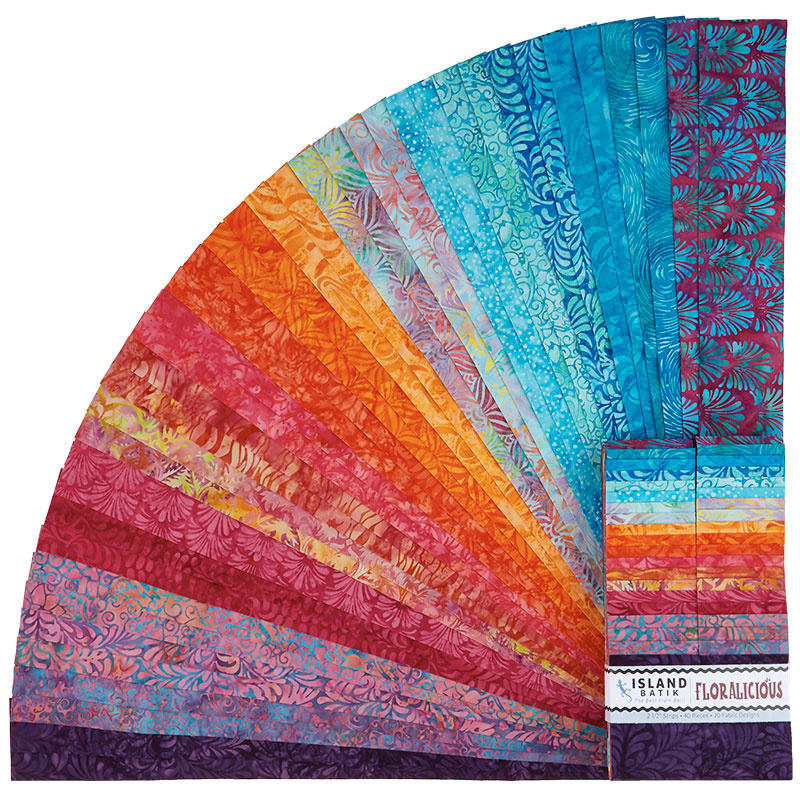 Floralicious Batiks Strips$37.95Shop →
 Simply White Batiks Solid White Strips$35.95Shop →
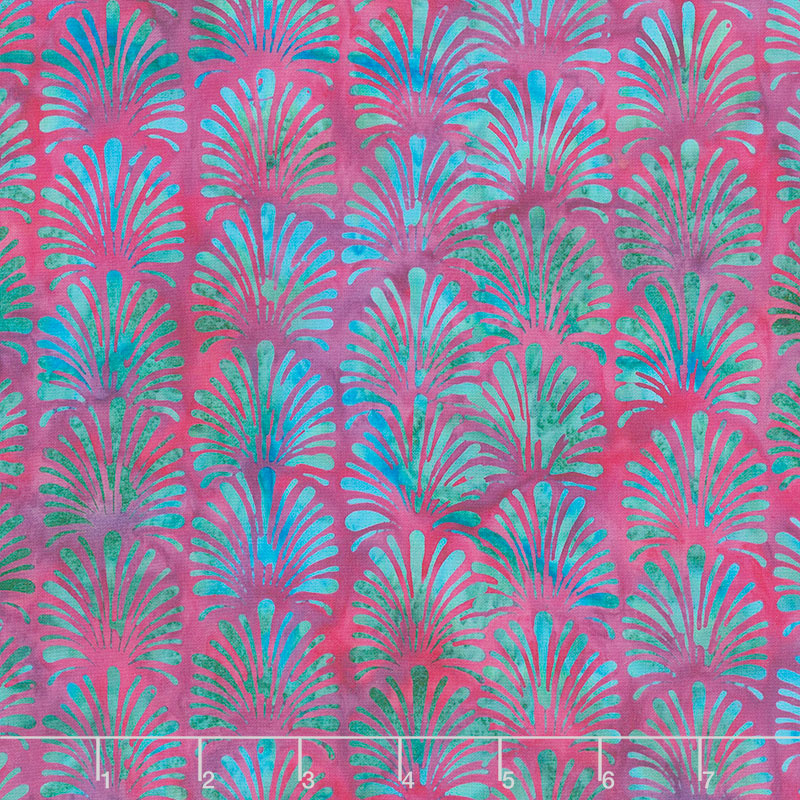 Floralicious Batiks - Vertical Plumes Mixed Berry Yardage$10.95Shop →
 Olfa Splash Aqua 45mm Rotary Cutter$18.95Shop →
Common Questions
What is covered in Triple Play: Half Hexagon Projects with Jenny, Natalie & Misty of Missouri Star?
We have a new tradition here at Missouri Star: Triple Play! Once a month, Jenny, Misty, and Natalie each demonstrate their own, unique take on a specific block, technique, or template. This week these talented Doan ladies are demonstrating three new ways to use the magnificent...
How long is the tutorial video?
The tutorial video is 00:38:14.
Are supplies listed for this tutorial?
Yes. The tutorial page includes the supplies and materials connected to this project.
Is a transcript available?
Yes. A written transcript is available on the tutorial page.
Video Transcript
Natalie: Yep.
Jenny: And I am here today with
Natalie: Natalie
Jenny: And
Misty: Misty
Jenny: And we have some awesome projects for you today. And they are all based around the half hexagon template. Now you guys know that, you know, if a template is good for one thing that’s great, but if you can do lots of things with it it becomes a really valuable tool. And so we’ve got some really awesome things to show you today.
Natalie: So fun.
Jenny: And honestly if you have our app and you go to the app and you scroll through it, you know, you search through half hexagon quilts there are a lot of them on there.
Natalie: Yep.
Jenny: But we just keep coming up with more and more ideas.
Misty: This one was really fun.
Jenny: Ya these are really fun. So we’re going to start with Natalie today and this is her quilt behind us and why don’t you tell us about this. I’ll let you get this center stage.
Natalie: Alright, alright. So this quilt I called Half Hexagon Links because the hexis are linked together like a little chain link. It’s 71 by 81 and we used a jelly roll of Floralicious by Cathy Engle for Island Batiks. We also use a roll of background strips, that’s this white fabric. And it also includes your inner border.
Jenny: And that’s still the same 2 ½ inch strip?
Natalie: Yep.
Jenny: Perfect.
Natalie: Yep, 2 ½ inch strips. The outer border is a yard and a half and these are six inch borders. And then the backing is this pretty swirly batik fabric.
Misty: It’s really pretty. It looks like water.
Natalie: Alright so this quilt is really fun to make. It looks more difficult but I promise it’s not and you’re going to see, so quick and easy. So to cut out the hexagons and all the strips that you need, you’re going to leave your strip folded in half. And then you cut two, because these are together you’re going to get two at a time. So you’ll cut two hexis. And I just flip them. And then you’ll cut a 7 ½ inch strip. And you’ll have enough to make two of these little shapes which just kind of looks like a little bit of a wrench.
Jenny: It looks like a crescent wrench. That’s what I was going to say. I just think this would make such a cool guy quilt. If you change up the colors.
Misty: Absolutely.
Natalie: Ya
Jenny: I mean I think your dad would love one of these.
Misty: Ya he’s a mechanic.
Jenny: Because it looks like a crescent wrench. Ya I love it.
Natalie: We’ll have to make one again using like grays and blacks and all those pretty colors.
Jenny: So on this cutting
Natalie: Ok so I’m going to, I’ll go ahead and show how to cut real quick. I just wanted to move that because my strip is a little longer than
Misty: You’ll want to move it up a little.
Natalie: Oh ok. Good idea. Alright so I’ll demo that real quick. So what I do and these don’t really have much of a selvedge so you can kind of go all the way to the end. And from this set of supplies you’ll have enough leftover to do another little project. So save your stuff.
Jenny: Which we love.
Natalie: Batiks are useful. They can be mixed with all the other batiks.
Jenny: Ya
Natalie: So you’ll have a lot leftover. So I just cut that straight and then I do the little notch. And then I cut this one kind of in the opposite direction and I do a little notch. And it does seem like, if that bothers you to go backwards, just spin it around.
Misty: Yep, absolutely.
Natalie: So you’ll end up with these. And I kept my stacks together because you’re going to want a top and a bottom of each row. So this is essentially, instead of a block we have a row. And it has these three strip sets in it.
Jenny: Right.
Natalie: So you’re going to be building those together.
Jenny: So it’s a row of hexis
Natalie: Yep
Jenny: Row of strips. And a row of hexis
Natalie: So you need two matching hexi tops and then one strip. So it’s a two to one difference. So you’ll cut two sets.
Jenny: And you just flip your template over.
Natalie: Absolutely. Flip it over, line it up with that other cut line, cut it straight across, slide that over and then cut your little dog ear pieces.
Jenny: No, don’t say dog ears.
Natalie: Don’t cut dog’s actual ears because that is cruel.
Jenny: Somebody said that time because in a tutorial I did I said, you just cut the dog ears off. And they’re like, no don’t cut the dog’s ears. So when you said notches, I thought oh we’re home free.
Natalie: Yes.
Misty: Yes notch is better.
Natalie: Cut the notch that helps you line up for your quarter of an inch
Jenny: That’s right.
Natalie: Alright so you could actually start with your 7 ½ inch strip. That kind of makes more sense because now I’m losing this little bit because I’m going to cut it straight. But I didn’t think of that at the time. And I think because you’re going to have extra fabric, it will work out either way.
Jenny: It will work out.
Misty: Well and you’re going to use it whichever way you do it.
Natalie: So I’m just going to trim that straight. And then this needs to be 7 ½ inches. This is five, so that’s six, 7 ½. And I typically use
Jenny: Ya count twice, cut once.
Natalie: So you can, and when you’re cutting, you can use the mat and count your 7 ½ or you can flip it and use your 7 ½ on the ruler like this which is actually a little bit more accurate.
Jenny: I actually like to use the ruler to count long way, you know, you always think of them up and down but I like to use it long way.
Natalie: So now what you have is you have your little strip and then you’re going to have each of your top and bottom pieces. And they line up like this. So they’re off set.
Misty: So cute.
Jenny: That’s so cute.
Natalie: Ya so you get the off set by adding this longer strip to the strip set.
Jenny: Ok
Natalie: And then there’s nothing at the other end.
Misty: Oh
Jenny: Oh I see.
Natalie: So this is 8 ¼ and it’s going to scoot that back. And then these rows both have a 7 ½ and all you do for that one is you’re going to cut your little white strips ahead of time into 7 ½ inch strips out of your background fabric. And then all you do when you have, this is a little bit long so I’m going to trim that down.
Jenny: 7 ½, let me grab that.
Natalie: Sorry, 7 ½ here and then all you do to make that the exact right shape is just cut the, use the hexi to get that angle again.
Jenny: Yep, perfect.
Natalie: So then you line them up, you line up with an angled 7 ½ inch strip and then hexi, hexi, hexi, hexi, they’re just print, background, print, background, print, background.
Misty: And so it starts and ends with one of these on the hexi rows, right?
Natalie: Yes absolutely. So I have a couple of these rows kind of laid out and we can stitch it on if you want because the stitch, when you’re stitching hexis, so the row strip just goes in whatever order. And what I did with mine when I was putting them together is I decided, I laid out each row kind of how I wanted it to look. And then I just lined up my colors. So you know for which piece I wanted to go in what order. And I kept my hexis, I lined them up like this so I had like this color, this color, this color, so I had them all kind of laid out on my sewing table and then I did the same thing with my strips so I knew, you know, the order.
Jenny: What went next.
Natalie: Ya. Now the other thing I did when I’m piecing, I pieced the two hexi rows at the same time. So picked up both of them and I stitched the first one. And then whatever way the first one went, I did the other one opposite.
Jenny: Oh ok.
Natalie: Because they all work, like it doesn’t matter which one you start with because you’ll either use it for the top or the bottom. But they do need to go opposite directions. So you start with your white strip and you add your hexi. And then the other one you want to make sure that your angle is going opposite and you add your hexi going the other way. So that’s really the only part that’s complicated about it. And the rest of it like
Jenny: And then when you put them together, so when you assemble it, did you put it together in rows of three?
Natalie: I did.
Jenny: And then all of these rows, like I just kind of mixed and matched them and you see a couple places like I did end up with two blues here and a couple of like pinks and
Misty: Oh and you flip flopped which ways, which direction the wrenches go.
Natalie: So these ones go facing that way and
Jenny: So it ends with a strip, starts with a strip, ends with a strip, starts with a strip.
Misty: I love it.
Jenny: It is way easier than it looks.
Natalie: So it’s super easy.
Jenny: Alright so any
Natalie: I wanted to show just really quick putting this, I have some hexis cut here. And when you get ready to sew them you can’t just like line them up. It has to go funky like that. So it doesn’t, it’s not like regular sewing where you lay them on top of each other and it lays flat. These lay at a funky angle and you want to line up the notches.
Jenny: So the notches don’t go to anything?
Natalie: They do because see how
Misty: They still match up the quarter of an inch
Natalie: Right here.
Jenny: Oh that little one.
Natalie: So this top
Jenny: Well in my world they go to nothing. I’m just like, ok which, just hanging this over a bit and hanging this over a bit.
Natalie: No so the way it works is this top point matches with that little.
Misty: Here, Nat, put that right here so they can see.
Natalie: Oh ok. So right here, the top point here matches with the top point here and the notch in the top here as well. And then what happens, so if you put your tool next to it, you can see that your quarter inch seam should actually hit where those two pieces, where the little point is, does that make sense?
Jenny: Ya
Natalie: And then when you’re done sewing that and you open it up, it should make them line up flat. Let’s sew it.
Jenny: Let’s sew it. Do you want me to sew it?
Natalie: Ya that would be great.
Jenny: AHHH!
Natalie: You can do it, mom. I know you can.
Misty: You’ve got it.
Jenny: Ya but my quarter of an inch is always a little skinny.
Natalie: Make it fatter than your normal quarter.
Jenny: Ok, here we go.
Natalie: Because this is a, because it’s cut on acrylic it tends to be a tiny bit bigger but it’s not, it should line up exactly.
Jenny: See how that looks.
Natalie: So then ya when you
Misty: Looks lovely.
Natalie: Do you want to press that open?
Misty: Absolutely.
Natalie: It’s just a little like, I mean it’s not totally perfect but
Misty: It’s just a little off. You can catch that in the quarter inch seam
Natalie: But pretty close.
Jenny: Ok so this is actually a really good lesson. See how this is not totally perfect right here? It will still fit in that quarter inch seam
Natalie: You’re 100% going to catch it
Jenny: You don’t have to stress about it. When you put your other seam on, you’re going to line it up here, you’re going to sew straight across. And that is going to get that little difference is going to get caught in the seam. So I don’t stress when I do that.
Natalie: Shall we go ahead and just add these? This is the last part of the row.
Jenny: You want me to do it again?
Natalie: Yes. Try, try again.
Jenny: Try, try again.
Natalie: So this, well that’s kind of the complicated part, right? So this time, you know, you see them how they line up like this but this one flips up instead of flipping down.
Jenny: Ya and I always do
Natalie: You can go back and forth and
Jenny: The nice thing about a batik too is that if you happen to get the wrong side, it’s not going to show. Which I love about batiks. Either side works. Alright so let me see if I did any better. Oh that’s a little bit closer.
Natalie: It’s pretty good.
Misty: That looks great.
Natalie: Now add this strip to the end of this one.
Jenny: Ok.
Natalie: And then we need to decide which end is going to be our open end and we’ll put the white on it.
Jenny: You know I’m going to go in a little bit further because I’m pretty sure your quarter of an inch is fatter than mine.
Misty: Losing your pieces.
Natalie: I’m not doing well.
Jenny: Alright. At least you’re not losing your marbles.
Natalie: That’s true.
Jenny: Just pieces is ok but not marbles.
Natalie: Marbles are harder to find.
Jenny: This is so cute.
Natalie: Alright, that one and then this one. And, shall we add the white to the pink end?
Misty: Sure, why not?
Natalie: Ok. Sounds like a plan.
Misty: Works for me.
Jenny: Oooh, that is perfect.
Natalie: This one here.
Jenny: Oh another?
Natalie: Two more seams. Two more seams and then we’ll lay out the three rows.
Jenny: Oh my gosh.
Natalie: Because it is super easy. I did my two hexi rows almost like a strip piece so I would do the two prints and then the two whites, and the two prints and I would just do them all together.
Misty: Cruise through.
Natalie: Ya
Jenny: It is true, I’m getting better and better so
Natalie: Ya, awesome.
Misty: Practice
Jenny: Right.
Natalie: So Misty if you’ll press these ends of these two rows. I’ll go ahead and clear this. Oop, Mom. It’s done already. Look at that. She’s speedy.
Jenny: Ta dah! Well that was a straight seam. It was pretty easy to sew straight fast.
Natalie: The fastest quilter in the Midwest.
Misty: She absolutely is.
Natalie: 100%. Ok so I’m going to lay this out. And these stitch together so easy. It’s pretty long. I don’t know that we’ll be able to see the entire strip set.
Jenny: So is that how long it is in the quilt?
Natalie: This is the, well
Jenny: Ok, so let’s see, one, two, three, four, five, six, seven, eight
Natalie: I didn’t add the long end of this white strip set.
Jenny: One, two, three, four, five, six, seven. It’s one less up here on the wall.
Natalie: Is it?
Jenny: It is. Maybe I counted the wrong row. One, two, three, four, five, six, seven, it is seven in a row. Look how cool that looks.
Natalie: Well I made it a little bit longer for this.
Jenny: Right.
Misty: So cute.
Jenny: It’s so cute. So see how these three go together and you just want to make sure these hexis match up.
Natalie: Well and they, you don’t have to worry about it too much in this section because these don’t really match to anything.
Jenny: They don’t touch, ya.
Natalie: But when you put this row next to the next row these points need to match so that your little white hexagons are looking good. That’s the only thing you’ve got to keep an eye on. And they kind of, because they’re at an angle it feels kind of weird sewing them but they match up pretty good. It’s really pretty easy.
Jenny: That’s awesome. Really cute project. I love it.
Misty: Alright.
Natalie: That’s about it.
Jenny: Who’s next?
Misty: I think I’m next.
Natalie: I think I’m going to let Misty go next.
Misty: I’m next, yes. So let me clean up.
Misty: Ok so this is my quilt and I called it Half Hexi Whirlygigs. As you see we get this kind of spinning, whirlygig effect.
Natalie: It’s so cute.
Misty: So it seemed right to call it that. And you know when Natalie made the half hexi template the whole point was to not have to do Y seams but I figured why not Y seam? So we’re going to tackle that today.
Natalie: There are some patterns that are so cute that it’s worth it.
Misty: It’s worth it. Exactly. And I chose the larger of the half hexagon templates for this so it would be really easy for you guys who haven’t tackled a Y seam before to be able to do that today.
Jenny: And you did find it was a lot easier than you thought
Misty: Oh totally. I knew it was easy.
Jenny: You did
Misty: Yes. I’ve done it before with my grandma and so I knew that it was easy. But I just think as quilters we kind of have this fear that’s around Y seams. And so it’s nice to stretch ourselves a little bit every now and then. And so before I forget the fabric I used is called Abby Rose by Robin Pickens for Moda. It’s really cute. And so you’re going to need one package of that. And then you’re also going to need a yard and a half of the background fabric. And that includes these white hexis. And this inner border. So you’ll need 1 ¼ yards for your outer border. It’s a five inch border here. And then on the backing, it’s 4 ¾ yards. I used the same fabric as I did on the border and it measures 63 by 74. So super great throw size and it’s really easy so let me show you how we did it. So your blocks in this quilt are actually a triangle. This is what you’re going for. And so what you need is you’re going to take your ten inch squares and out of every ten inch square you’re going to cut two of your large half hexis already cut out and ready to go. And we’re going to just make them all exactly the same for this quilt. So I’ve got, I always started at the beginning by just kind of laying out piles on my sewing table because I wanted it to be nice and scrappy. So you can see here I’ve got, this is how I’m going to put it together. And my brain works like really methodically so I went and I attached all of my prints together first. So I am going to lay these together. And I want to show you what I’ve done here. I went ahead and used my ruler and I marked a quarter of an inch in on both sides. And I know that’s where I want my needle to stop so that I can leave room for my Y seam. So I’m going to take this to the machine and I’m going to start sewing here and I’m going to stop right at the point of that X. So you want to do that?
Jenny: I do.
Misty: Alright.
Natalie: This might be Mom’s very first Y seam ever.
Jenny: I think so.
Misty: Is it really? I don’t think so.
Jenny: Actually I don’t think so but I rarely do them
Misty: Rarely, ya.
Jenny: Because my brain always tries, goes the other direction but I love the look of this so stop here?
Misty: I did try to figure it out without a Y. And you can backstitch if you’re worried about those threads popping loose. But yep that looks great. Then we’re just going to press that open.
Natalie: Ok.
Jenny: If we all had a sewer and a presser wouldn’t that be neat?
Misty: It would be the best.
Natalie: It does make things go along much quicker.
Misty: It really does. So then once that’s pressed then we know this guy, oops, there we go. This guy needs to go in here. And so I start by folding it up. And I’ve marked my little X again. And the way that you can tell if that’s right, let me make sure you can see this. That little X should line up exactly with this seam. And so you can feel it with your fingers. And so again your needle wants to stop on that X and it should be right in your seam line. So we’re going to do that and just leave your needle down and then we’ll pull this around to finish it.
Jenny: Oh Ok. I’m glad you said that.
Misty: Ya
Jenny: Ok and these marks are super helpful.
Misty: Aren’t they? I think if it’s your first time tackling it, it’s really helpful and you just have to mark that one side. You’re just marking where they come together.
Jenny: So then lift your machine.
Natalie: Needle down.
Misty: I leave it in the machine with the needle down and then I just pivot. Make sure you don’t have any of your bulk in the way. And then line those up.
Jenny: It looks like I’m a little
Misty: Are you too far over?
Jenny: Or not far enough over. But we’ll try it.
Misty: Try it. Let’s see how it looks. There we go. And then you just roll this back. That looks really good to me.
Jenny: Ah! I did good.
Natalie: It looks so cool. That is so cool.
Jenny: Ahhh!
Misty: And that is it. That’s it. It’s totally doable and then for this quilt all your blocks are made exactly the same. And then you just start laying them out. And you put all of your white background squares kind of towards the middle and they just go in big rows where you’re sewing these together.
Natalie: And then you cut the sides straight? Is that right?
Misty: Yep, I did. Exactly. So then I came in, once I had it all laid out and done which I think it is, just let me think here. One, two, three, four, five, six, seven, eight across by one, two, three, four, five down. So eight across by five down because of the angle it’s kind of different for our brains but eight across in our rows by five down.
Jenny: Now you’re talking eight of these individual blocks
Misty: Eight of these triangles, exactly.
Jenny: Now so did you put it together in whirlygigs?
Misty: I did. So I just laid it out so that I got this spiral that formed just like that. And then I just kept kind of building. Oh ya that one goes there.
Jenny: So then you can actually sew this together as a row?
Misty: Exactly.
Jenny: With no Y seam.
Misty: No Y seam.
Jenny: You’re just sewing here and you’re sewing up, you’re sewing down, you’re sewing up, you’re sewing down.
Misty: Exactly. So your Y seam only is in the block, that’s it.
Natalie: I bet you could put this together in different patterns maybe.
Misty: Oh I’ve got some other ones. But I decided to limit myself just a little bit.
Natalie: Ok, alright.
Misty: So yes I’ve got some other, there’s lots of fun layouts you can do.
Natalie: I have some Y seam ideas too now.
Misty: I know, right?
Jenny: Oh no you guys we’re in trouble now.
Misty: They’re not as hard as they look but I did want to show you, I have one more little thing to show. I decided since this is a block that takes three pieces that it would probably make a great three color quilt.
Natalie: Yes it would.
Misty: So I made a tiny.
Jenny: Of course she made a tiny.
Misty: I made a small one, a runner.
Jenny: Oh my gosh.
Natalie: It looks so cute.
Jenny: So cute
Misty: I’m just, I just used solids that we had and I just thought this was super for fun. But when I was making this I did learn something else. In order to get the three spirals to form you actually do have to
Natalie: Pay attention to where the colors are placed?
Misty: It’s not even just that. You have to make opposites. Yes and so I created, let me make sure I’ve got this split right. Yes so if you’ll see, I kept my gray in the same place and I just alternated my blue.
Natalie: Half
Misty: You have to do half and half.
Jenny: So when you put them together, did you do this? Or kept all these together and all these together?
Misty: So you have to alternate them when you lay them out. So like you do this
Natalie: One of each.
Misty: And then this.
Jenny: Oh I see, ok. So one from each pile.
Misty: Exactly. And then when you go to add the next one
Natalie: So I think if you were just doing the center ones it probably wouldn’t matter but if you want the secondary ones to whirlygig you have to have those in the right place.
Misty: You have to alternate. Exactly.
Jenny: That is so cool. And so it’s really two rows right here and you didn’t trim it off straight so you kept that little corner in.
Misty: I kept the point. I thought it worked great on the little runner.
Jenny: It’s perfect.
Misty: And I just straight line stitched.
Jenny: So up, down, up, down, up, down. This is great. And how cute is that?
Natalie: Ya
Misty: So quick and easy. It was a pleasant surprise to see it come together so quick. So I hope you guys enjoyed it.
Jenny: I loved it.
Misty: And right, Jenny you’re up next.
Jenny: I’m up next but I want to kind of piggyback on Misty’s for a minute because a lady sent me this project in the mail.
Misty: Oh my gosh.
Jenny: Look how cute that is.
Natalie: It’s so cute.
Misty: Now I have to make that.
Jenny: It’s just so cute and it’s such a great idea. And of course we love the tiny.
Natalie: I think this calls for a live. You should do this.
Misty: I should do this tiny on live.
Jenny: You can’t have that. It’s mine.
Misty: And you can keep that but I’ll bring it in.
Natalie: I don’t think that actually has Y seams, does it?
Misty: Well no
Natalie: It’s triangles together.
Jenny: So this is actually two strips. So she sewed the color to the white and then cut the triangle. But it makes the hexi look and spiral. And when I saw your whirlygig I was like Oh I must show this.
Natalie: That is adorable. I love it.
Misty: Very good. Alright.
Natalie: I might make myself some coasters.
Misty: I know, right?
Jenny: Right.
Natalie: I might actually use them.
Jenny: You might.
Natalie: Exactly, oh I need a coaster.
Misty: Alright should I sit at the machine or
Jenny: Now the big reveal. We need to reveal my quilt.
Natalie: Ready.
Misty: Ta dah
Natalie: I can’t quite reach. There we go.
Jenny: Look at my quilt. Alright so first of all I want you to notice you know I don’t tackle tiny too much but look how tiny these are.
Misty: So cute.
Natalie: These are so cute.
Jenny: So I actually did a long, long time ago a sailboat quilt where I made big boats, you know.
Natalie: Out of large half hexis.
Jenny: And I wanted to see what it would look like with tiny boats.
Misty: And just like always, it’s adorable. Of course.
Jenny: And I have a paper. I need my paper. My cheat sheet. Their brains are much younger than mine. So we’re calling this Half Hexagon Boats and Braids because this border out here is also made with the hexagon and it’s a braid border. And this is a braid boat, I mean a hexagon boat and we’re going to show you how to do all of these. So to make this quilt I used this, I had a layer cake but you could do it with charms. And I took my ten inch squares and I cut them in half both directions. And I have to say I love how Island Batik lays out their layer cakes.
Misty: They’re so beautiful.
Natalie: So pretty.
Jenny: You can actually see every color and it’s just, I mean it’s just beautiful. So is Lemon Grass Batiks by Cathy Engle for Island Batiks and it just makes an absolutely gorgeous quilt. And so I started by cutting my pieces into fourths. So I have five inch squares. Now this quilt is made up of or this block, this little boat block is made up of two blocks. So we have our hexagon here and this up here are little tiny four patches, I mean
Misty: Half square triangles
Jenny: Little tiny half square triangles. Thank you.
Natalie: Technically they are sewn into a four patch
Misty: Ya so you’re right on both counts.
Jenny: Thank you, thank you. So then what we’re going to do is we’re going to take this little guy and we’re going to cut half hexis out of it. Now when I cut hexis out of a charm, you can actually fold this in half and cut two. But one of the tricks that I learned is that, you know, if you’re going to cut these always make sure your widest part is toward the middle. Because if you’re cutting in like this it’s very hard to stop your cutter right there and that little cut will go into the next piece. So I always cut with my long piece.
Natalie: You could always cut with a strip
Jenny: And that’s what I do a lot. A lot of times I’ll just take this and I will cut it into the 2 ½ inch strip like this.
Misty: It makes it easier to cut down.
Jenny: Yes. And then I’m just stacking them up like this. And then I’m going to cut my little boat here into, lay my thing across this strip up here. And then basically I’m just cutting off this side. And then I’m going to flip this around. And I’m going to cut off the other side.
Natalie: It’s so much smarter than what I did.
Jenny: Like that. So then I need these little sides. I need to make, build the bottom of this block. And so again I’m going to take my hexagon. And I’m going to cut a hexagon out of a 2 ½ inch strip or half of a charm or whatever. And I’m just going to cut that straight in half. And then these pieces up here will fit just perfectly along the sides to make the bottom half of our boat.
Misty: Perfect.
Jenny: So I’m going to let you go ahead and sew one of these.
Misty: Alright.
Jenny: I have a, and you can do the little match up thing.
Misty: Yep, got it.
Jenny: Oh and here’s the other side. And so for me on these I didn’t know there were like points to match up and so I just kind of eyeball them and make them work and so knowing that there’s, that the bottom little point goes against the fabric, that’s super helpful to me. And I’ve been making these for a lot of years. So obviously you can make, you know, you can make it work but this is kind of cool.
Misty: There we go.
Jenny: Now with the fabric, the white fabric and the batik fabric either side works. So it doesn’t matter, you know, you don’t have to cut so many going this way and so many going this way because either side will work. Alright. So we’re done with the whole bottom half of our block. And now for the top part, the top part is the sails and we are actually going to do the easy eight on a five inch square.
Misty: Perfect.
Natalie: Tiny little triangles.
Jenny: Tiny little triangles. So we’re going to go here. I’ve drawn my X on both sides. Now what we’re going to do is Misty is going to sew a quarter of an inch on both sides of this. For the easy X, I mean easy eight.
Misty: Easy X, that’s a whole new thing.
Jenny: Was a whole new thing.
Misty: Oops, might have got a little skinny there. It’s alright.
Jenny: That’s alright because all of these are going to be squared.
Natalie: They’re going to be squared up anyways.
Misty: Oh good.
Jenny: Ya I’ve got my little squaring tool here.
Natalie: That’s probably the part that takes the most time.
Jenny: It is, it is. And, but I got so excited about how cute the little boats were that I actually, what I would do is I would square four and put one together. You know, I mean I just wanted to see. And usually I’m a very rote sewer. I’ll do all my half square triangles and all, you know, but this one it was just like every time I was just like look how cute this is. Because you know I don’t usually do tiny. So this little block actually measures, let’s see. Wait I’ve got the ruler backwards.
Natalie: 6 ½ by 5 ½.
Jenny: Ya 6 ½ by 5 ½, 6 ½ by 5 ½. And you know I didn’t tell you how big this quilt is. This quilt is like 47 by 54. And we used our backing back here.
Misty: So cute.
Natalie: Pretty
Jenny: Cute, pretty backing. 3 ¼ yards for that. And our background which is all this white fabric is actually 1 ½ yards. And you can use it out of five inch squares. You can use it out of, you know, out of 2 ½ inch strips. It’s all going to work until you get to this guy. And then you need a five inch square for him. So sometimes what we do instead of telling you five inch squares we tell you yardage because it’s probably going to be cheaper for you to do that. Alright now I just made a mistake, actually it’s not really a mistake, no wait, wait, it is for me, for my brain. So let me show you why. There are lines here for me to cut on. And when you do the easy eight you want to cut in half first because there are no lines so you keep your block together and you cut in half both directions. And this is how it works for my brain. I’m going to push these back in, come here, cut in half like this. And then now we have all these kind of pieces so we can just cut on the lines.
Natalie: Oh ok I always keep mine together anyways
Misty: Ya me too.
Jenny: Alright you want to iron some of these open.
Natalie: Sure, yep.
Jenny: Just iron four so we can make a little, a little sail.
Natalie: I will do that.
Jenny: And I’m going to start squaring these as you bring them off.
Misty: And what do you square them to?
Jenny: I’m squaring these to two. And I’m going to look for, these little bloc loc rulers are nice because they have this little edge and it slides up. You always want, whatever side the words are, that’s the side that I put on my background because I iron to the dark. And then I only have to generally cut two sides. And so I’m going to make sure all these work. So you square these to two. And then when you get two of them together you’re going to lay out your sails and they’re all going to go the same directions. So my sails go this way and this way. And Misty you can sew those together while I square these last two. And cut and cut. And one more here. Oh that’s a big guy. It’s so funny to me how some of them you’re like barely.
Misty: I got a little wonky on that one.
Jenny: This one needs to be squared from both sides. So I’m going to make sure that this side is now flat. This has a little bit of a thing. When you’re working with smaller blocks you do want to make sure they’re pretty accurate. So let’s see, this way and this way.
Misty: Alright.
Natalie: You want me to press that one.
Jenny: Oh ya, press that one.
Natalie: Ok
Jenny: It’s so nice to have a presser, right?
Misty: There we go.
Jenny: One more. And then you’re going to sew those together.
Misty: Alright. There we go.
Jenny: One more. And she’s just going to nest that middle seam and sew right down the side. And all our half square triangles are going the same direction.
Misty: Line that up again. There we go.
Jenny: And we’re going to press. Alright so now what we’re going to do is we’re going to add two blocks on the outside right here, these two blocks right here. And they are two by 3 ½. And so we’re just going to sew those on either side like that.
Misty: I’ve got lots of sewing to do in this little chair. This one wants to be, my seam must be a little skinnier than yours. There we go. Made it work.
Jenny: Well these are just so quick and easy and in the tutorial, again, I used, the one I did earlier I did a big boat.
Misty: Ya they’re so cute in both sizes
Jenny: Alright. Iron that back.
Natalie: Ok.
Jenny: And obviously this one has a lot more, the big boat has 12.
Misty: 12 sails?
Jenny: 12 boats. Alright so now what we’re going to do is I’m going to center this up and it should fit pretty good. If you want it exactly center you can fold this right here, finger press this line and then line it up on this seam right here so it matches and then you’re just going to sew right down the side of that.
Misty: Alright.
Natalie: So technically the measurements should line up anyways but if you’re worried you can always center it and then trim the sides just in case or do you square them?
Jenny: It should and because when I started I didn’t know what size they were going to end up. You know I don’t have a computer thing, I just do it from Oh I want to do this and it’s what’s in my brain. And so I started making them and then I would like square everything up. And then I figure out as I go along, oh this ends up two by 3 ½ and it all fits together in this cute little boat.
Misty: Adorable.
Jenny: Isn’t that so cute?
Natalie: Cute.
Jenny: Alright so let me talk to you about this for a minute because we’ve got one, two, three, four, five, six, and one, two, three, four, five, six, seven, going down. Now this quilt, the boat is a little bit longer, the block is a little bit longer than it is wide. Now you will notice here that all of my sails go the same direction except this row right here.
Natalie: And that’s the one you demo-ed.
Jenny: Oh I demo-ed the backwards.
Natalie: The one wonky row, which I love it. It’s so cute.
Jenny: Well in actuality I had made like four or five of these that were backwards because you guys know I’m angley challenged, right?
Misty: So funny.
Jenny: You know so I made four or five backwards and I thought, do I want to tear all those out or do I want to make it intentional?
Misty: You just embraced it.
Jenny: So I made an intentional row that goes this way and the rest of them are all the other way. And I just think it’s really cute. It gives it a lot of movement and a lot of fun. So let’s talk about this border out here because I made a braid border and so this is so easy to make a braid with and it perfectly lines up your 45s on the side with no trouble at all.
Misty: And you got all of this out of your one layer cake?
Jenny: I did, I did. And so, matter of fact I have these leftovers right here from that one layer cake.
Natalie: The same, ya the same pack.
Jenny: Alright so the hardest part of this is starting. And the starting you’re going to put a bottom to a side. So I’m going to lay this on here like this and you’re just going to sew this far.
Misty: Ok.
Jenny: So you can turn this over and you can see how far to sew, sar to foe! You can see how far to sew. I’m forever mixing up my words.
Misty: So just like there?
Jenny: Yep. Alright so Natalie press that back.
Natalie: Ok.
Jenny: And now the magic begins. Natalie was actually the one who figured this out. She was playing with this template and she was looking at it and she was like, oh my gosh, look what we can do.
Natalie: I guess it doesn’t matter.
Jenny: It doesn’t matter. So now here’s the beginning of your braid right here and it looks kind of weird. But then all you’re going to do, watch this now, watch it carefully. Make sure you can see. All you’re going to do is you’re going to sew on a bottom here. Sew on a bottom here. Sew on a bottom here. Sew on a bottom here. Sew on a bottom here like this. You just keep adding them on. It’s one straight seam across from then on, it’s one straight seam like this. Back and forth, back and forth, back and forth. It lines up and makes this perfect braid and it’s just perfect for a little border out here. Now you can see I did mine so they kind of followed around in a pattern. And what you’re going to do is you’re just going to make one giant long braid and then you’re going to cut the pieces. And when you cut them to size of your quilt, you know, what you’re going to do, this part is going to be the beginning part and you’re just going to lay your, make sure your braid is lined up going straight, which let me line up a few more here so you can see this. And here and here and here and this is so so fast. So then what I did was I just came across here like this and I just trimmed this straight off. So you can see like right at the beginning here, you know, this has a cut here and I just cut those pieces off. And I put my sides on and then I put the top and the bottom so it just kind of follows itself around. And I just think it makes such a great border but it also makes a really great quilt. You know, if you did these braids in a quilt and just did rows of them, it’s darling. If you put a sashing in between it’s darling. It makes a great, have you ever seen those like sometimes they make, it’s like a table runner but it’s for the end of your bed?
Misty: Yes, a bed runner.
Jenny: A bed runner and you can use the small or the large, you know, or any size you want and it just looks so cute and it’s fun and quick. And you just feel super like AH!
Misty: I love it.
Natalie: It looks harder than it really is.
Jenny: It really does and honestly I’m in the baby quilt phase because we had new babies. Alan has new babies and I’m thinking about baby quilts all the time and so that makes it really fun. So girls, think it’s about time for us to wrap this up?
Misty: I think so. It was so great.
Jenny: You’ve learned some wonderful things. You’ve learned a Y seam, you’ve learned, you know, the matching up, you’ve learned the cutting. And we hope that these templates right here, your half hexagon, I don’t know where the large one went. But we hope that these become even more valuable to you. And we hope you enjoyed this triple play from the MSQC.


