

Zig Zag Charm Pack Table Runner
 Jenny Doan
- Charm Pack
- Modern
- Table Runner
- Intermediate
- Quilt size 19" × 44"
Jenny Doan shows a quick and easy table runner project that uses a single charm pack. Not all charm packs contain the same number of pieces inside, so always read the product details before purchasing to ensure you buy the correct amount.
Instructor
Jenny Doan
Jenny Doan is an American quilter, author, and YouTube personality. Jenny started Missouri Star Quilt Company in 2008 and today it is the largest quilting supply vendor in the United States.
Shop this tutorial
 Zig Zag Table Runner Pattern by Missouri Star$6.95Shop →
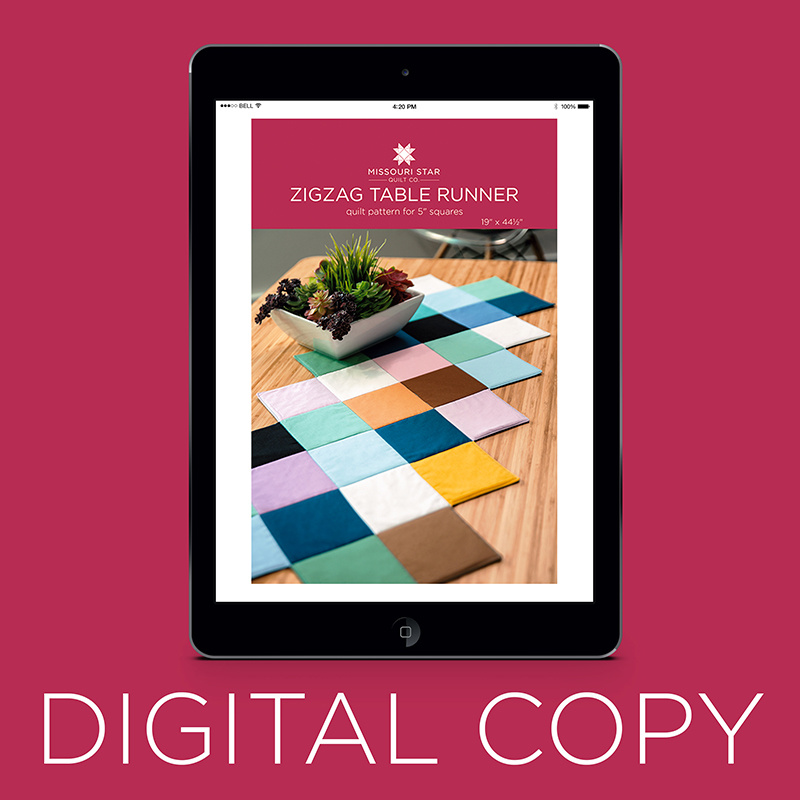 Digital Download - Zig Zag Table Runner Pattern by Missouri Star$4.95Shop →
 Exclusive Missouri Star Jenny TG1600 ProPlus Oliso Smart Iron$199.99Shop →
 Missouri Star Wooly Betty Board - 17.25" x 25.5" Orange Border$98.95Shop →
 Missouri Star Quilter's Best Blend Bed/Table Runner Batting$14.95Shop →
Common Questions
What is covered in Zig Zag Charm Pack Table Runner?
Jenny Doan shows a quick and easy table runner project that uses a single charm pack. Not all charm packs contain the same number of pieces inside, so always read the product details before purchasing to ensure you buy the correct amount.
How long is the tutorial video?
The tutorial video is 00:15:56.
Are supplies listed for this tutorial?
Yes. The tutorial page includes the supplies and materials connected to this project.
Is a transcript available?
Yes. A written transcript is available on the tutorial page.
Video Transcript
So what you’re going to need for this quilt is charm squares. And I am using a whole charm pack on this one so it’s going to make it quite a bit longer. You’re going to need a scrap of batting that is the same size as your runner. And you’re going to need a scrap of backing also. So I’m going to use this Cuzco from, by Kate Spain to lay this out. And the trick really is in the layout. So what you’re going to do when I open a charm pack like this you can see that it’s divided by color. And what I do is I separate the colors. So I’m going to put the light colored stack. I’m going to put my purples and my oranges. And the reason I do this is so that I can get a good mix of color all along the whole thing. So let me see I’ve got one more purple here. There we go. And I’ve got a stack of pinks. And then I’ve got some blues.
First we’re going to start and we’re going to put two right here. One row of two. Then we’re going to do a row of four. And I have these stacks all separated so I can pull things together. And so we have a row of two, a row of four. Now we’re going to do a row of five. And this is the only time, your, your row of five is going to match together up at this end. And then we’re going to pull these. Oop that’s too close. Oh same pattern, holy smoke. You guys are going to be here all day waiting for me to get this right. I’m kind of crazy about how things go together. Alright so let’s get an orange in here. So I’ve got four, now here’s five. So now the trick with this runner is that you’re going to make it as long as you want it to be by adding rows of five. Your next row of five will come down in just a little bit like this. And then you do a row of five. Oop. There’s three. So you can see how this is, you know, each one here then you’re going to add down here. And that’s what gives it that zig zag look. The two on the ends is what gives it that finished look. When you get all the way to this end and you’re ready to finish it, you’ll be doing rows of five, five, five, five, until it get’s as long as you want. Then you’ll do a row of four and a row of two. And it will end up just the same as this. Now I’ve got one already done so let me grab that.
Ok so here’s this one I have all finished. I used a whole charm pack for this so it’s nice and long. And it will go great on my long table. But you can make them any size you want. When I came up with this pattern, the first time I used scraps from my stash. And I just cut them myself. And I needed an Easter table runner. So I wanted to use all those pastels and pinks and it was just beautiful. Now we’re lucky we have charm packs that are all matched and set out for us. So it’s perfect. But you can see here on this layout, I have two here that I have sewn together. Four sewn together, five sewn together. Five, five, five, five, five, five, down to four and two. And that’s how the layout goes. Now I want you to take a look on the back of this. And I want you to see right here I’ve just sewn clear to the edge of this. You don’t leave a quarter of an inch. You just lay your two on right here. You know you, you’ve got your piece here that you’re sewing down and you’re going to sew right off the edge. You’re just going to make sure that these center points match together right here. And you’ll do that on all your rows. So the next time you add a row, you match where your junctions are. And when it gets ready to come off here on the end you just sew straight off. You don’t have to leave a quarter of an inch or anything like that.
So here we have this one all finished. And now it’s fun because we get to really finish it at home. We don’t have to send away to get it quilted. And I am going to show you how to do that. The first thing, remember you’re, what’s fun about these runners is that you get to use leftovers. So I have a leftover piece here off the bottom of a quilt. And I also have a leftover piece of batting. So what we’re going to do is we’re going to put this batting down first just like this. Lay it out nice and flat. It helps to have a nice area to, to spread things out. And you just want to make sure that it’s a little bigger than your runner. Then we put the backing on. And we’re just going to lay that out. Make sure it stays nice and smooth. And then we put the top on. Now I can smooth these things over here too. This is such a quick project. Really fun. I like to make sure that’s all straight. Then I’m going to lay this top but I’m going to turn it the right side down.
Now this next part is all, all of it now is just, it’s a little time consuming. And you just want to make sure you put a pin in every corner like this. And so we’re going to go along and pin these. You make sure it’s flat, all the way flat underneath. You don’t want to feel any bumps or wrinkles with your hands as you’re smoothing along. You just make sure that it’s nice and straight. No creases or folds.
So once you get it all pinned what you’re going to do is you’re going to trim this out about a half an inch bigger. So let me show you how I do that. And I really just take my scissors and just trim like this. Just so it’s a little bit bigger because we’ll trim that down later but we want to make sure that we have enough room. And once you get that all trimmed up then we’re going to take it to the sewing machine and we’re going to sew a quarter of an inch all around the whole thing. Around the zigs and all the zags. And we’ll leave about a six inch opening at the end of one of these twos so that we can flip it right side out. So let me go ahead and finish that and meet you back here.
So we’re at the sewing machine and we’re going to use the edge of the charm pack as our pattern. That’s our guide. That’s where our presser foot is going to go. And we’re going to sew down here to the, where the two seams come together like this where you sewed your charms off the edges. And then you just turn it. And we’ll sew down. You’ll sew down to the inside point, stop about a quarter of an inch in where those seams juncture and pivot again. Now this last piece here is where our opening is going to be so we’re going to sew in, about, oh two inches or so. And then I’m just going to lift up my needle and I’m just going to scoot this across to the other side. So it leaves a little bit of an opening. And then I’m going to sew down to the corner again. Put my needle down and pivot. Sew up. And you can see right where this comes together right here. We’re going to put our needle down right there, lift our presser foot and pivot. And then we’re right where we started. We end where we started.
So now we’ve sewed all the way around this a quarter of an inch and we need to trim it. So we’re going to trim right in like this. And the way to make this work and lay really flat is you’re going to clip off your corners, not cutting into your seam but just clipping them off. And you’re going to clip in here to the seam without going through. So you need a, a good pair of scissors that has a nice point on them. And see I’m cutting across there. And then this is our opening. And I kind of like to leave this like a, you know, leave a little bit of the extra on there for the opening. It gives you a little more to turn in. Let me clip down here. And then I come in here and I just put the point of my scissor right next to where that seam is going to line up. And clip in there. And that’s going to give it the movement it needs to open up and lay nice and flat.
Ok so now you want to check and make sure it’s all clipped, get all your pins out. Oh here’s a corner I missed. Just go around and give it a look and make sure because that’s super important when you turn it so that it lays nice and flat. So again, your, your insides are cut and your outsides are trimmed. And I think we’re ready to flip this. So you go in between your backing and your top. And I just reach my hand in there. And then I’m just going to pull it through this hole. Grab ahold of it and pull it through. It’s like wrestling an elephant or something.
Ok so now I find, anything pointy will work, you can use scissors, pencil or pen. And you’re going to go in with your hand and you’re going to push out these corners because you want nice pointy corners. So it shows the zig zag. And you can get most of it out with your finger and then use your pencil to just push it out there. See how nice that looks. We’re going to go all the way around and do this whole thing. Alright now we want to lay it out there. And right here where these junctions come together sometimes there will be like a little bit of a wrinkle and if you just kind of pull those it stretches out and it will lay nice and flat. And then what we want to do is we want to go over and iron this. I like to iron it. So right here, this is the very end, where we, our opening, where we went in and turned it. And what we’re going to do is we’re just going to tuck this under like this. And tuck this back piece under. And then we’re going to iron this so it gives it a nice clean edge. Because when we, the next thing we’re going to do is we’re going to sew a quarter of an inch all the way around this. And so that will catch that in. We won’t even have to do any hand work or anything. We won’t have to close that by hand. So we’re just going to make it lay nice and flat and press that. Give it a shot of steam so it won’t go anywhere. And then finish pressing the rest of our corners. And what we’re going to do is we are going to sew a quarter of an inch all the way around the outside edge of this. That’s called topstitching. And it’s what, it’s just the beginning of our machine quilting.
This is the easiest machine quilting you’re going to do. So we are going to stitch right along here. I’m going to set my presser foot right along the edge of the quilt. I’m going to lift my needle and come in about a quarter of an inch. And I’m actually going to put a pin right here where this opening is because I want that to stay nice and closed so that when we, so it has a nice finish to it. So I’m just going to sew along here. I get almost to the corner and you want to stop about a quarter of an inch. And then you’re going to flip it and you’re going to do the same thing we did when we sewed it together. You’re just going to do it to the outside this time. And when you get to this little juncture right here in the middle, you just come into your next square a little bit. Make sure your needle stays right in there so you can pivot. And then turn. And we’re going to do this all around this whole little table runner.
Ok so now comes the fun part. Because what we’re going to do now is we’re going to stitch in the ditch. And I want to show you, stitching in the ditch means that you’re going to stitch right here where the seams come together. And what’s fun about doing this runner is that you can come down here and then you reach a junction and you can go down here. And you can keep sewing and almost quilt this whole runner with just picking up and moving your needle two times. So stitching in the ditch is actually one of the hardest things for a quilter to do because it’s, you have to be so exact. It takes some practice. I like to start my people on a lined paper, following the line, practicing staying on that. And really that’s all it takes is practice because it’s just straight stitching. If you don’t want to worry about that or you don’t like the look of that, this is a great time to use your decorative stitches. And you know they’ll go all over that line and you’ll just look good no matter what you do because it’s just going to be all over it. So let’s go over to the machine and we’ll start some stitching in the ditch. And this will quilt your whole project. It will all be done when you’re done with this.
So I’m just going to line up my needle on the seam. And mine aren’t perfect. And I don’t die over it. I just do the best I can. And see you just keep going from juncture to juncture. And then I’ll get all the way down here to the edge and it looks like the edge but then if you turn it you get to go a whole other direction. And you always make sure your needle is lined up. So I’m going to be working on this stitching in the ditch for a bit. So let me show you this finished one. Let’s take this one out that I’ve finished earlier. And I want to talk to you, I want to show you the back here. You can see all the stitch lines. It just gives it a real nice quilted look. And it’s finished and you did it at home. When we flip this over I want to point out right here you can see that I kind of jumped the ditch a little bit right there. But unless you tell somebody nobody’s going to notice. So we don’t die over these things. We just go the best we can. And we hope you enjoyed this tutorial on the zig zag table runner from the MSQC.


