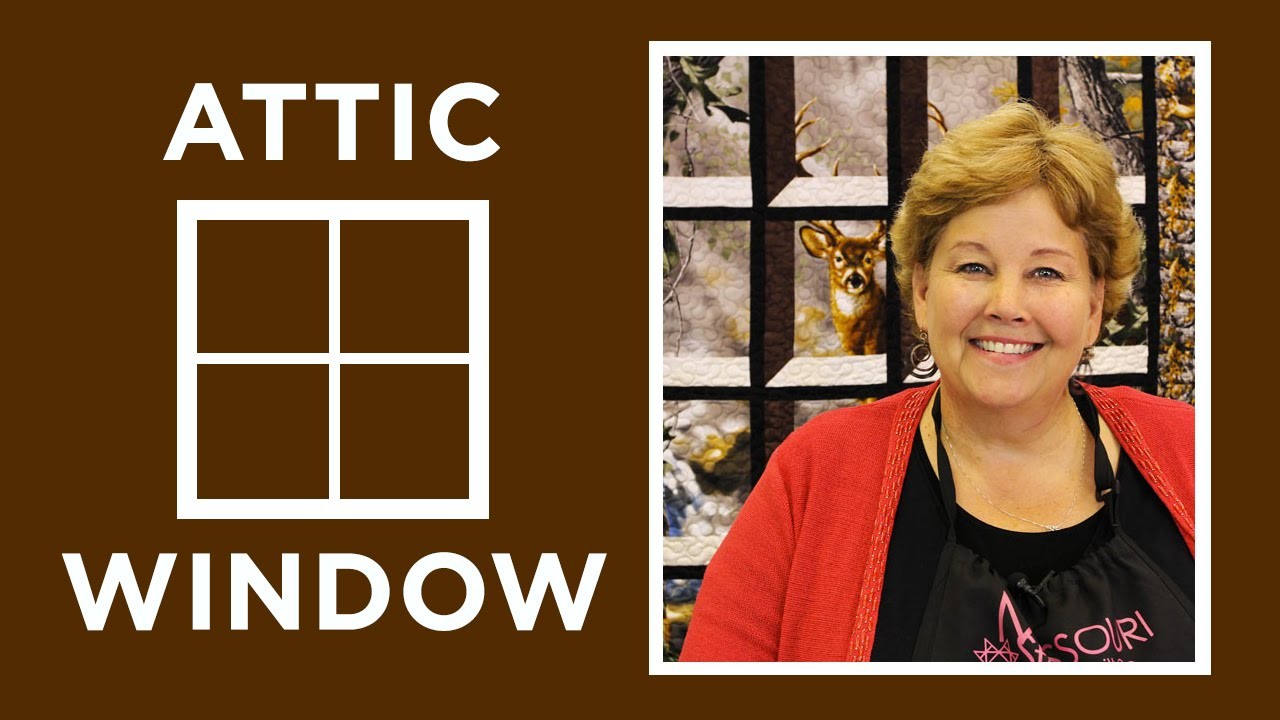
Attic Windows Quilt with a Panel
Jenny shows us how to make a fun variation on the traditional Attic Window Quilt that uses a panel to create a beautiful scene. Or, check out our entire website here!

Instructor
Jenny Doan
Jenny Doan is an American quilter, author, and YouTube personality. Jenny started Missouri Star Quilt Company in 2008 and today it is the largest quilting supply vendor in the United States.
Shop this tutorial


Common Questions
What is covered in Attic Windows Quilt with a Panel?
Jenny shows us how to make a fun variation on the traditional Attic Window Quilt that uses a panel to create a beautiful scene. Or, check out our entire website here!
How long is the tutorial video?
The tutorial video is 00:16:31.
Are supplies listed for this tutorial?
Yes. The tutorial page includes the supplies and materials connected to this project.
Is a transcript available?
Yes. A written transcript is available on the tutorial page.
Video Transcript
Attic Windows Quilt with a Panel: Easy Quilting Tutorial with Jenny Doan of Missouri Star Quilt Co. Jenny shows us how to make a fun variation on the traditional Attic Window Quilt that uses a panel to create a beautiful scene.
Hi everybody, it’s Jenny from the MSQC. And I’ve got a really fun project for you today. Take a look at this quilt behind me. Isn’t this great? This is the original old Attic Windows block. And we have taken it and used it in a panel. Now let me just tell you, I love the Attic Windows block and originally it was made just using regular fabric. So your regular fabric was here and then, you know, your window was on the side and so it gave it some dimension. And they just used any kind of printed fabric. But one day there was man who came to visit me in my studio. And he had used the Attic Windows block on a panel. And it was a panel of Santa, you know, it was like an outdoor scene where Santa was out by a tree and it was snowing and that sort of thing. And so we were able to go ahead, and he cut it up, you know, figured out how to cut up the panel and made each block into an attic window. And it was just such a cool idea that I really wanted to show you. So today we’re going to do it with this panel. It’s called Real Tree Deer quilt panel. And it is made by Cycle Enterprises. And I just think it’s just a fun panel. I love how it came out with the two deer looking through the window, you know, looking inside. I just think it came out really great. So why don’t I show you how to do this.
So to make this quilt, what you’re going to need is one panel. And here’s our panel right here. And, I mean, you can see this is it all told, this is what it looks like before, before we cut it up. And I mean, it’s just a great little panel, really fun. And of course, you can use any panel. And hopefully you’ll be able to adapt what I’m telling you to whatever panel you choose. And then you’re also going to need three quarters of a yard of your white. Three quarters of a yard of your brown, three quarters of a yard of your black and, surprisingly, three quarters of a yard for your border. So just remember that number three quarters, you’ll be able to have it. And of course this is for this size quilt which is, we’re going to cut the panel into 20 blocks. And it makes a quilt that is 56” by 58”.
Ok, so now we’re going to make the deer tree panel. And when it comes to you, it’s going to come bagged like this. And so you want to pull it out, you want to open it up. And then the first thing you want to do is, is trim off your selvedge edges. Just trim those off. Trim off your white edges on the sides and the top and bottom so that you have just a plain panel because you want to measure the panel. Now I have one here that I’ve done that. And when your panel, whatever it measures you want to make sure that it’s easily divisible by a number. So, you know, I wanted, I wanted straight numbers so this, this with the selvedge edges off was 36”. I took it down to 35”. 35” for me was a good measurement because it’s seven times five is 35. So I knew that I could get seven inch wide blocks on this. The length was, the length on this was 45”. And I took it down to 40”. So I took a bit off the top and a bit off the bottom, so that it would square up because four times ten is 40. And now I’m going to be able to have a seven by ten inch block. So you just want to make sure when you, when you cut your panel, that it becomes easily divisible in numbers. So what I did then was went ahead and folded it in half. You can fold it as many times as you want or if you’re nervous about it, you can, you can leave it straight. Do a straight cut. I’m just going to fold this in half and then I’m going to come in here and I’m going to cut at ten inches. Because my length is the four by ten, remember, it’s 40. So I know I can get ten inch squares. One, two, three, four, five, six, seven, eight, nine, ten. Always good to count. And we’re going to go ten more. One, two, three, four, five, six, seven, eight, nine, ten. There we go. And ten more. One, two, three, four, five, six, seven, eight, nine, ten. And this last piece should be ten also so we’re going to check that right here. And we’ve got ten, perfect.
So now what I do, now that I’m getting into this, I’m going to grab some, some Post It Notes right here. And a… Ok, I got my Post It Notes. So then I’m going to label my rows. That’s the first thing I want to do. So I’ve got row one here. Row two. And then I’ve got three and four. And four. And any little piece of paper will do. And then what we’re going to do is we’re going to cut our rows. So we want to keep these in line. And it looks like I’m going to have to pin these on here. Cuz my paper’s not sticking. You don’t really want to get these confused up. Actually you know here’s a really good tip. If, when you start this, you should take a picture of the panel with your cell phone. And then as you start, you know, if you get mixed up, you have that picture to refer back to so that you can know where your pieces go. So now we’re ready to cut this, this first row. It’s 35 inches so we know that’s going to be a seven inch square. Seven times five is 35. I want to go with the bigger square. You want to be sure to open it up to make sure that all your pieces work out, you know, just right. And your measurements are right. And there’s no fold in the middle so we’re going to count over seven. One, two, three, four, five, six, seven, like this. And we’re going to make a cut. And seven.
So now what I do is I stack these up, one on top of the other like this with my last piece on the bottom. Just like this. Alright. So you’re going to do that to all your rows. I have this row done and I’m just going to, I’m going to, I mean, I’m going to show you how to make the block with this row. Because I have other pieces over here cut out.
So now for the window frame. You’re going to frame your windows. And what I like to do is I’m going to take my, my three quarters of a yard, and these are all two and a half inch strip cuts. So I’m going to take a cut like this. And this is going to be the bottom. This is the bottom of the frame right here. Where is looks like the light is coming in. And so the bottom, the width of our block is seven, so these are going to be seven inches, one, two, three, four, five, six, seven. We’re going to come across seven, like this. And this is kind of quicker way to get a lot of cuts out of a piece. If you come in the width, then all these little pieces you cut, you go ahead and cut two and a half, and then you get a lot, it’s a lot, it’s a lot quicker to get all your strips that you need for the bottoms of your blocks. So I’m cutting, this will be about, I think I need four more after this. But this should be pretty close to what I need. But it will be enough to show you on this first row. So then what I do is I leave this row pinned together. I leave it pinned together just like this. And I take these over to the sewing machine and I am going to add one, one of these strips to the bottom of each square. And I’m going to leave them pinned actually while I do it. So let me show you how I do that. So that you can see how this goes together. It really goes together very quickly because we are, you know, everything stays together and it doesn’t get mixed up. And that really helps me because I tend to be, you guys know I’m a little angle-y challenged. So I’m going to actually put my, my solid piece on, on the bottom like this. And sew straight across here a quarter of an inch . Then I’m going to flip this back and I’m going to do the next one. And really, you guys, do what works for you. If it works better for you to lay out the row and just pick it up and put down each, each piece, you can do that. Mine is, this way happened to work for me. I was able to do it really quickly. And, usually I get real confused on these things but I was able to keep it right together. And just keep on sewing. Alright, now here we are at the end of this one. And we’ve gotten the bottom piece sewn on all of our blocks. And we’re going to come over and we’re going to press them down. Let me scoot my Post It Notes out of the way. And I’m just going to roll this edge over like this. Let me just put this down here. Alright, so we’re going to just keep pressing these until they’re all pressed, nice and flat. And then we’re going to come back. Now we still have our row intact.
Now the next thing we’re going to do is we’re going to prepare the piece for the side. The side is going to be your darker, you know, or your more shaded side. And I have some strips cut here. And what you want to do then is you want to measure this block with the added piece on. So we’re going to go ahead and measure that. Oop, here we go. And it measures 12”. And so we’re going to cut some 12 inch pieces. And you can go ahead and cut these for your whole quilt. You’re going to make 20 blocks so you know you need 20 of them. One, two, three, four, five, six, seven, eight, nine, ten, eleven, twelve. I’m just going to do a couple to show you how I do this. And then you need to prepare these blocks. These blocks are prepared by dogearing one of the corners. And what I mean by dogearing is you take a 2 ½ inch strip and we are using the same fabric that we used on the bottom. And we’re going to sew it to the bottom of our strip right here. So this is the piece, see this is your piece right here. And we’re just snowballing this corner. So this is the added windows made easy. Really made easy because there’s usually a white seam in here but we’re just going to snowball the corner right there. You want to make sure that it’s going to right direction. So I always lay it up on here because what you, the look you’re going for is this look right here. So you want this to curve down here right here which means we’re going to sew, we’re going to put this on here and sew from this side down here. And I have finger pressed a little line on here and I’ll just do two of them real quick so we can see how that works. And again, because I’m an assembly line sewer, I like to just do all of these and have a whole stack of these to work with. And then as I put my panel pieces together, they’re all clipped in rows and so they’re all ready to go. You know, I can just sit and put a side piece on every single one. Alright. So you’re going to do that with all of yours. I’ve got mine done with two here. I’m going to clip these apart and trim off this extra piece up here. And you do want to make sure that you’re going the right way before you trim off because that would just be terrible. So now I’m just going to press this down, like this on both of these. And then you can take your whole stack back over with you, to the sewing machine with you and then just start putting these on the sides.
So we’re going to do these now. And I’m just going to take a couple of these. And if you have to move this paper over, I move it over here to this side so it gives you a little more leeway. And then I’m just going to put them on like this. So I peel that back, lay this on here. So see, this is going, this is matching up right here, this bottom part right here is matching right up along there. And we’re just going to sew a quarter of an inch right along that seam. So then when we open it, it will have that attic window look. Alright so here we go. Make sure I’m lined up here. And we’ll add one more on. And you would go ahead and add all of yours on. I’m just going to do a couple so that I can show you how to actually finish this whole block.
There we go. So now this block, let me show you. Now this block has the attic window look to it. See like this. It’s got that look to it. And this is the attic window block. We chose to sash it which means we’re going to add one more little black strip right here, this piece. And this is actually going to go on this side of the block. So we can just lay this on here. And again you can ahead and cut them 12. I’m just going to take these over here and sew two down so that we have our whole block. Whenever you add a sashing onto a block, you should always have, the sashing should always be on the top. And that’s just because those feed dogs take in more fabric and you’ll end up with a little bit of wavy borders or sashings. So your borders are the same. Make sure you sew your border, your border pieces on the top of your block. Alright.
So let me iron this back. And then, so this is your finished block for your panel, just the finished block. And so I have a row of these done and I want to show you how they lay out because it’s really fun to see when it all starts coming together. So here’s my first row. So once you get your piece on all your, your side, all your pieces on your blocks like this, then you can lay them out and starting to go together. And this is how you’re going to sew them together, just like this. So this black piece becomes the sashing. Just like that. And that’s the whole, whole top first row. And then here comes row two. So you just line them up. And then in between these rows, we went ahead and added another sashing. So before we sew the row together, you’re going to lay that sashing in here like this. And you’re going to put it on. And, and this is that row right here on, on these blocks. So you can really see how this is starting to come together. It’s looking awesome. I mean it’s just such a great idea. Great way to use your panels. Really fun block. Don’t forget that the attic window can be used in all kinds of quilt blocks. You’re going to go ahead and finish it up. You’re going to sew your squares together all your top row. All the way down. Add your border. It’s a little four inch border. And it just completes the whole project. And we sure hope you enjoyed this tutorial on how to make an Attic Window out of a panel from the MSQC.
Hi everybody, it’s Jenny from the MSQC. And I’ve got a really fun project for you today. Take a look at this quilt behind me. Isn’t this great? This is the original old Attic Windows block. And we have taken it and used it in a panel. Now let me just tell you, I love the Attic Windows block and originally it was made just using regular fabric. So your regular fabric was here and then, you know, your window was on the side and so it gave it some dimension. And they just used any kind of printed fabric. But one day there was man who came to visit me in my studio. And he had used the Attic Windows block on a panel. And it was a panel of Santa, you know, it was like an outdoor scene where Santa was out by a tree and it was snowing and that sort of thing. And so we were able to go ahead, and he cut it up, you know, figured out how to cut up the panel and made each block into an attic window. And it was just such a cool idea that I really wanted to show you. So today we’re going to do it with this panel. It’s called Real Tree Deer quilt panel. And it is made by Cycle Enterprises. And I just think it’s just a fun panel. I love how it came out with the two deer looking through the window, you know, looking inside. I just think it came out really great. So why don’t I show you how to do this.
So to make this quilt, what you’re going to need is one panel. And here’s our panel right here. And, I mean, you can see this is it all told, this is what it looks like before, before we cut it up. And I mean, it’s just a great little panel, really fun. And of course, you can use any panel. And hopefully you’ll be able to adapt what I’m telling you to whatever panel you choose. And then you’re also going to need three quarters of a yard of your white. Three quarters of a yard of your brown, three quarters of a yard of your black and, surprisingly, three quarters of a yard for your border. So just remember that number three quarters, you’ll be able to have it. And of course this is for this size quilt which is, we’re going to cut the panel into 20 blocks. And it makes a quilt that is 56” by 58”.
Ok, so now we’re going to make the deer tree panel. And when it comes to you, it’s going to come bagged like this. And so you want to pull it out, you want to open it up. And then the first thing you want to do is, is trim off your selvedge edges. Just trim those off. Trim off your white edges on the sides and the top and bottom so that you have just a plain panel because you want to measure the panel. Now I have one here that I’ve done that. And when your panel, whatever it measures you want to make sure that it’s easily divisible by a number. So, you know, I wanted, I wanted straight numbers so this, this with the selvedge edges off was 36”. I took it down to 35”. 35” for me was a good measurement because it’s seven times five is 35. So I knew that I could get seven inch wide blocks on this. The length was, the length on this was 45”. And I took it down to 40”. So I took a bit off the top and a bit off the bottom, so that it would square up because four times ten is 40. And now I’m going to be able to have a seven by ten inch block. So you just want to make sure when you, when you cut your panel, that it becomes easily divisible in numbers. So what I did then was went ahead and folded it in half. You can fold it as many times as you want or if you’re nervous about it, you can, you can leave it straight. Do a straight cut. I’m just going to fold this in half and then I’m going to come in here and I’m going to cut at ten inches. Because my length is the four by ten, remember, it’s 40. So I know I can get ten inch squares. One, two, three, four, five, six, seven, eight, nine, ten. Always good to count. And we’re going to go ten more. One, two, three, four, five, six, seven, eight, nine, ten. There we go. And ten more. One, two, three, four, five, six, seven, eight, nine, ten. And this last piece should be ten also so we’re going to check that right here. And we’ve got ten, perfect.
So now what I do, now that I’m getting into this, I’m going to grab some, some Post It Notes right here. And a… Ok, I got my Post It Notes. So then I’m going to label my rows. That’s the first thing I want to do. So I’ve got row one here. Row two. And then I’ve got three and four. And four. And any little piece of paper will do. And then what we’re going to do is we’re going to cut our rows. So we want to keep these in line. And it looks like I’m going to have to pin these on here. Cuz my paper’s not sticking. You don’t really want to get these confused up. Actually you know here’s a really good tip. If, when you start this, you should take a picture of the panel with your cell phone. And then as you start, you know, if you get mixed up, you have that picture to refer back to so that you can know where your pieces go. So now we’re ready to cut this, this first row. It’s 35 inches so we know that’s going to be a seven inch square. Seven times five is 35. I want to go with the bigger square. You want to be sure to open it up to make sure that all your pieces work out, you know, just right. And your measurements are right. And there’s no fold in the middle so we’re going to count over seven. One, two, three, four, five, six, seven, like this. And we’re going to make a cut. And seven.
So now what I do is I stack these up, one on top of the other like this with my last piece on the bottom. Just like this. Alright. So you’re going to do that to all your rows. I have this row done and I’m just going to, I’m going to, I mean, I’m going to show you how to make the block with this row. Because I have other pieces over here cut out.
So now for the window frame. You’re going to frame your windows. And what I like to do is I’m going to take my, my three quarters of a yard, and these are all two and a half inch strip cuts. So I’m going to take a cut like this. And this is going to be the bottom. This is the bottom of the frame right here. Where is looks like the light is coming in. And so the bottom, the width of our block is seven, so these are going to be seven inches, one, two, three, four, five, six, seven. We’re going to come across seven, like this. And this is kind of quicker way to get a lot of cuts out of a piece. If you come in the width, then all these little pieces you cut, you go ahead and cut two and a half, and then you get a lot, it’s a lot, it’s a lot quicker to get all your strips that you need for the bottoms of your blocks. So I’m cutting, this will be about, I think I need four more after this. But this should be pretty close to what I need. But it will be enough to show you on this first row. So then what I do is I leave this row pinned together. I leave it pinned together just like this. And I take these over to the sewing machine and I am going to add one, one of these strips to the bottom of each square. And I’m going to leave them pinned actually while I do it. So let me show you how I do that. So that you can see how this goes together. It really goes together very quickly because we are, you know, everything stays together and it doesn’t get mixed up. And that really helps me because I tend to be, you guys know I’m a little angle-y challenged. So I’m going to actually put my, my solid piece on, on the bottom like this. And sew straight across here a quarter of an inch . Then I’m going to flip this back and I’m going to do the next one. And really, you guys, do what works for you. If it works better for you to lay out the row and just pick it up and put down each, each piece, you can do that. Mine is, this way happened to work for me. I was able to do it really quickly. And, usually I get real confused on these things but I was able to keep it right together. And just keep on sewing. Alright, now here we are at the end of this one. And we’ve gotten the bottom piece sewn on all of our blocks. And we’re going to come over and we’re going to press them down. Let me scoot my Post It Notes out of the way. And I’m just going to roll this edge over like this. Let me just put this down here. Alright, so we’re going to just keep pressing these until they’re all pressed, nice and flat. And then we’re going to come back. Now we still have our row intact.
Now the next thing we’re going to do is we’re going to prepare the piece for the side. The side is going to be your darker, you know, or your more shaded side. And I have some strips cut here. And what you want to do then is you want to measure this block with the added piece on. So we’re going to go ahead and measure that. Oop, here we go. And it measures 12”. And so we’re going to cut some 12 inch pieces. And you can go ahead and cut these for your whole quilt. You’re going to make 20 blocks so you know you need 20 of them. One, two, three, four, five, six, seven, eight, nine, ten, eleven, twelve. I’m just going to do a couple to show you how I do this. And then you need to prepare these blocks. These blocks are prepared by dogearing one of the corners. And what I mean by dogearing is you take a 2 ½ inch strip and we are using the same fabric that we used on the bottom. And we’re going to sew it to the bottom of our strip right here. So this is the piece, see this is your piece right here. And we’re just snowballing this corner. So this is the added windows made easy. Really made easy because there’s usually a white seam in here but we’re just going to snowball the corner right there. You want to make sure that it’s going to right direction. So I always lay it up on here because what you, the look you’re going for is this look right here. So you want this to curve down here right here which means we’re going to sew, we’re going to put this on here and sew from this side down here. And I have finger pressed a little line on here and I’ll just do two of them real quick so we can see how that works. And again, because I’m an assembly line sewer, I like to just do all of these and have a whole stack of these to work with. And then as I put my panel pieces together, they’re all clipped in rows and so they’re all ready to go. You know, I can just sit and put a side piece on every single one. Alright. So you’re going to do that with all of yours. I’ve got mine done with two here. I’m going to clip these apart and trim off this extra piece up here. And you do want to make sure that you’re going the right way before you trim off because that would just be terrible. So now I’m just going to press this down, like this on both of these. And then you can take your whole stack back over with you, to the sewing machine with you and then just start putting these on the sides.
So we’re going to do these now. And I’m just going to take a couple of these. And if you have to move this paper over, I move it over here to this side so it gives you a little more leeway. And then I’m just going to put them on like this. So I peel that back, lay this on here. So see, this is going, this is matching up right here, this bottom part right here is matching right up along there. And we’re just going to sew a quarter of an inch right along that seam. So then when we open it, it will have that attic window look. Alright so here we go. Make sure I’m lined up here. And we’ll add one more on. And you would go ahead and add all of yours on. I’m just going to do a couple so that I can show you how to actually finish this whole block.
There we go. So now this block, let me show you. Now this block has the attic window look to it. See like this. It’s got that look to it. And this is the attic window block. We chose to sash it which means we’re going to add one more little black strip right here, this piece. And this is actually going to go on this side of the block. So we can just lay this on here. And again you can ahead and cut them 12. I’m just going to take these over here and sew two down so that we have our whole block. Whenever you add a sashing onto a block, you should always have, the sashing should always be on the top. And that’s just because those feed dogs take in more fabric and you’ll end up with a little bit of wavy borders or sashings. So your borders are the same. Make sure you sew your border, your border pieces on the top of your block. Alright.
So let me iron this back. And then, so this is your finished block for your panel, just the finished block. And so I have a row of these done and I want to show you how they lay out because it’s really fun to see when it all starts coming together. So here’s my first row. So once you get your piece on all your, your side, all your pieces on your blocks like this, then you can lay them out and starting to go together. And this is how you’re going to sew them together, just like this. So this black piece becomes the sashing. Just like that. And that’s the whole, whole top first row. And then here comes row two. So you just line them up. And then in between these rows, we went ahead and added another sashing. So before we sew the row together, you’re going to lay that sashing in here like this. And you’re going to put it on. And, and this is that row right here on, on these blocks. So you can really see how this is starting to come together. It’s looking awesome. I mean it’s just such a great idea. Great way to use your panels. Really fun block. Don’t forget that the attic window can be used in all kinds of quilt blocks. You’re going to go ahead and finish it up. You’re going to sew your squares together all your top row. All the way down. Add your border. It’s a little four inch border. And it just completes the whole project. And we sure hope you enjoyed this tutorial on how to make an Attic Window out of a panel from the MSQC.