
Cathedral Window Quilt using the Circle Magic Ruler
Jenny Doan shows us how to make a gorgeous Cathedral Window Quilt using the nifty Circle Magic Ruler. Circle Magic Ruler. Layer Cakes. Rotary Cutters. If you'd like to get started on quilting and need supplies, come on over and check us out at or take a look at our awesome deals every day at.

Instructor
Jenny Doan
Jenny Doan is an American quilter, author, and YouTube personality. Jenny started Missouri Star Quilt Company in 2008 and today it is the largest quilting supply vendor in the United States.
Shop this tutorial



Common Questions
What is covered in Cathedral Window Quilt using the Circle Magic Ruler?
Jenny Doan shows us how to make a gorgeous Cathedral Window Quilt using the nifty Circle Magic Ruler. Circle Magic Ruler. Layer Cakes. Rotary Cutters. If you'd like to get started on quilting and need supplies, come on over and check us out at or take a look at our awesome dea...
How long is the tutorial video?
The tutorial video is 00:08:18.
Are supplies listed for this tutorial?
Yes. The tutorial page includes the supplies and materials connected to this project.
Is a transcript available?
Yes. A written transcript is available on the tutorial page.
Video Transcript
Well then, recently somebody showed me how to do it that is quick and easy. So, I’m really excited to show you about that today. This is what you’re going to be able to do. We’re going to be able to make a quilt that looks like this. So it has the Cathedral Window look and you can do it in a fraction of the time. So let me show you how to do that. I’m going to set this over here, so, you can keep drooling while you’re watching.
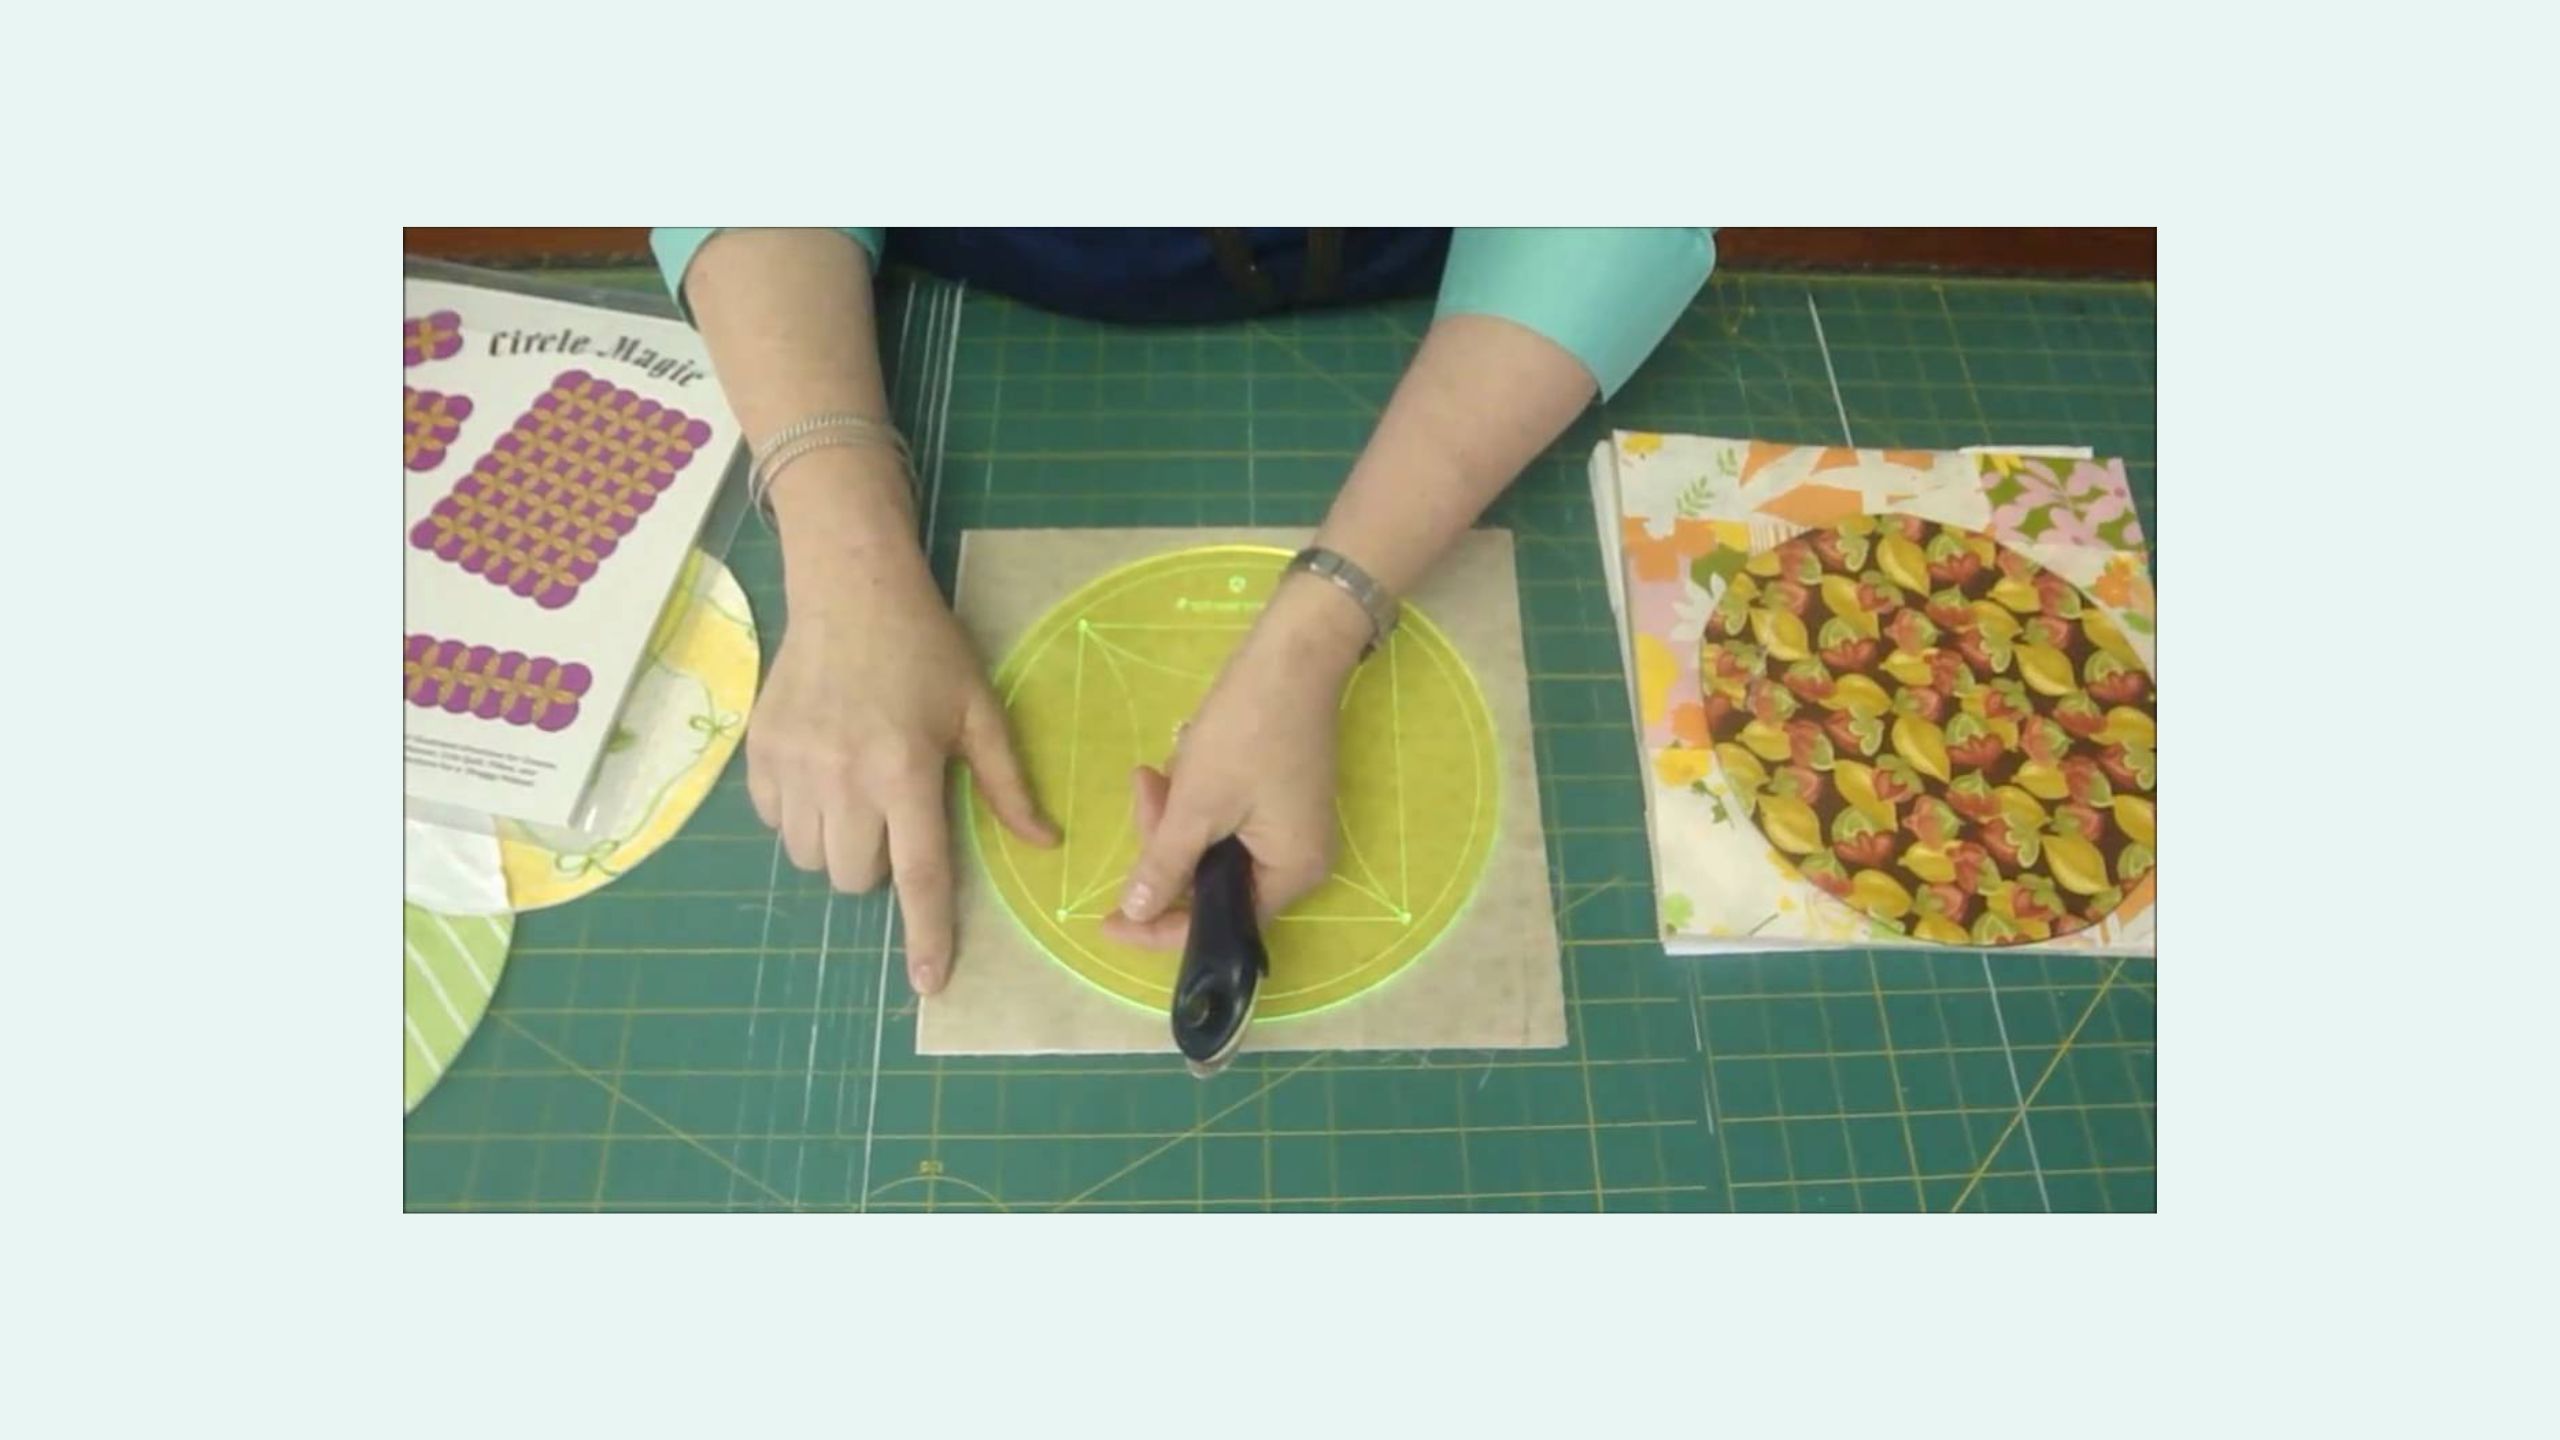
So, the way I’m going to do this is I’m going to use this circle magic ruler. If you’ve got one great, if you don’t you can pick one up at the shop, or if you’re really creative you can use the circle cut ruler that we have, because what you’re doing is making circles. So, let me show you how to do that.
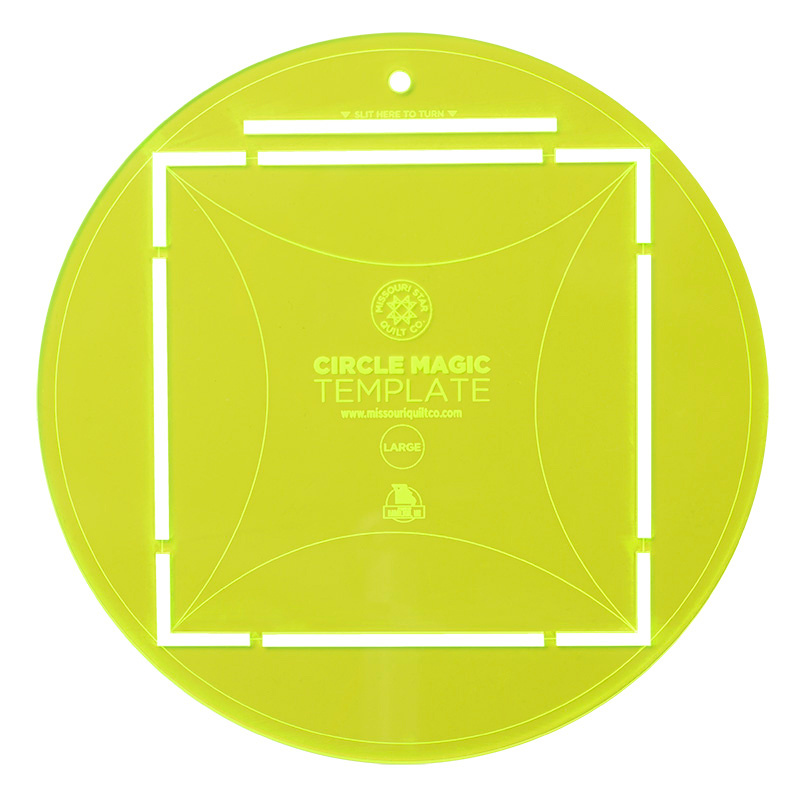
This is what the ruler looks like right here, and the markings on it are significant. You’re going to lay your ruler, and I did it on top of two pieces of a Layer Cake, you could probably use more if you’re careful, and the regular rotary cutter works. You just follow around the edge of the circle, and we’re just going to cut all the way around here. Let me make sure I’m getting this up. We’re going to turn it a little bit.
There we go, we’re all clear on that corner. Let’s turn it a little more. This is the problem us lefty’s have. We’re one directional cutters. Alright, let me get that little piece right there.
OK, so now we’ve cleared that off. Now right here you’re going to notice on this ruler it has these little holes in it and you’re going to want to mark these holes with your pencil. You can use any pencil this is all going to be on the inside. So, we’re going to mark these points on here. Just like that. And then we’re going to go in and we’re going to sew ¼” all around the outside of this circle to enclose it and make it a pocket. So, let’s go to the sewing machine and do that.
OK, so what we’ve done now is we’ve sewn ¼” all the way around the outside edge. Our right sides were together. So, this has completely enclosed this now. This is a completely closed up circle, and so we’re going to go back here, and I don’t know if you can see on this ruler right here, but where we made the first two dots it says, “Slit here to turn.”
So, we’ve got our two dots that we made in those little holes right here. Show you again, and then what we’re going to do is you have to pull the fabric apart because you’re just going to slit on one layer, and you’re going to make this slit on your top layer or the layer you want to be in the middle of your fabric. So, I’m going to make a little tiny cut here. Got to not get that other fabric. This is the part where you have to be really careful. Let’s see, pull that other piece out. OK so I made a little V, and now I’m just going to cut straight across like this. And then, what you’re going to do, you’re going to use this to turn it.
So now we’re going to turn it. You don’t really need to clip it because it’s all an outside curve. We’re going to push that through, and then what I like to do is I like to take the, well you can use your Purple Thang, or your pencil, or if you have a good finger nail, and just run it along that seam on the inside there to push that out. So when you go to iron it it’ll just make it easy and flat because you’ve already kind of opened up that seam. So, then what we’ll do is, we’ll head over to the iron, and we’re just going to iron this flat and make us a nice even circle. So, let me go iron that.
One of the things I do when I iron this is I kind of roll that seam back and forth with my fingers to make sure that it all comes out to the front edge. A lot of times you can get a little fold in there, and that won’t be good for this particular pattern. So, I just kind of roll it, make sure the seam is out to the front, and press right along that edge. So, you want a nice clean circle, and I think we’ve got that.
So, now that we have our circle all ironed, we’re going to lay our ruler back on the top and we’re going to make it get that circle as close on that line as we can. This part has to be marked on the front. So, we’re going to take our pencil and mark it on the front in these four holes right here. So, we have the four holes marked, and then what we’re going to do is we’re going to watch these marks but we’re going to take a ruler. So, once you’ve marked your dots, what you want to do is take a straight edge ruler and you’re going to draw a line from dot to dot.
So, here we go, we’re drawing our line here. And what you’re making is a square inside this, and these will be your sew lines. So, line up our dots, there we go, draw a line. Here’s our dot, there we go. OK, so what you’re going to do is, you’re going to do this on all of them. Now for mine I used a Dream On Layer Cake but you could use any cake this would be darling in anything and for my back piece, of course, we love the Bella Solids that are already cut, so, they’re real easy and quick.
So, now that you have your circle ironed, you’ve put your dots on, and drawn your line, the next thing we’re going to do is start making long rows of these. S
o, what we’re going to sew is we’re putting our presser foot right along, this is going to be our guide, that’s not going to be where we sew. We’re actually going to sew, if your foots right along here your going to sew in about ¼” just right along here and you’re going to sew right off the ends. Now you’re only going to do it on one seam because you’re going to make long rows of these and so I’m just going to pin this together to show you what’s going to happen. So, we’re pretending I’m sewing, and then this will open up and then these parts will fold down like this.
Now, I want to show you over here on the finished quilt. Let me just move this. Over here on the finished quilt you can see, see we’ve taken a row, and this is the outside row, and I left them down. You can fold them up, but I like the look of a scallop so I left them down, and we’ve got where you just sew this seam and you going to sew circles to it for as long as you want it. Then you sew the next row with the circles together.
Here’s your seam again. You’ve laid it over and then you finally can put this row together and you just do the same thing. You lay your circles flat like this. You’re going to sew right along this line, and then when you put them together this way. You’re going to lay them flat and you’re going to sew right along these lines because all your lines are marked remember, so it just makes it really easy to go ahead and stitch right along that edge, and then you’ll come back later and you’re going to top stitch and sew all this down right here to make the Cathedral Window look. Isn’t that awesome? I mean it’s just so quick and fun!
Anyway, we hope you enjoy this tutorial from the Missouri Star Quilt Company.



