
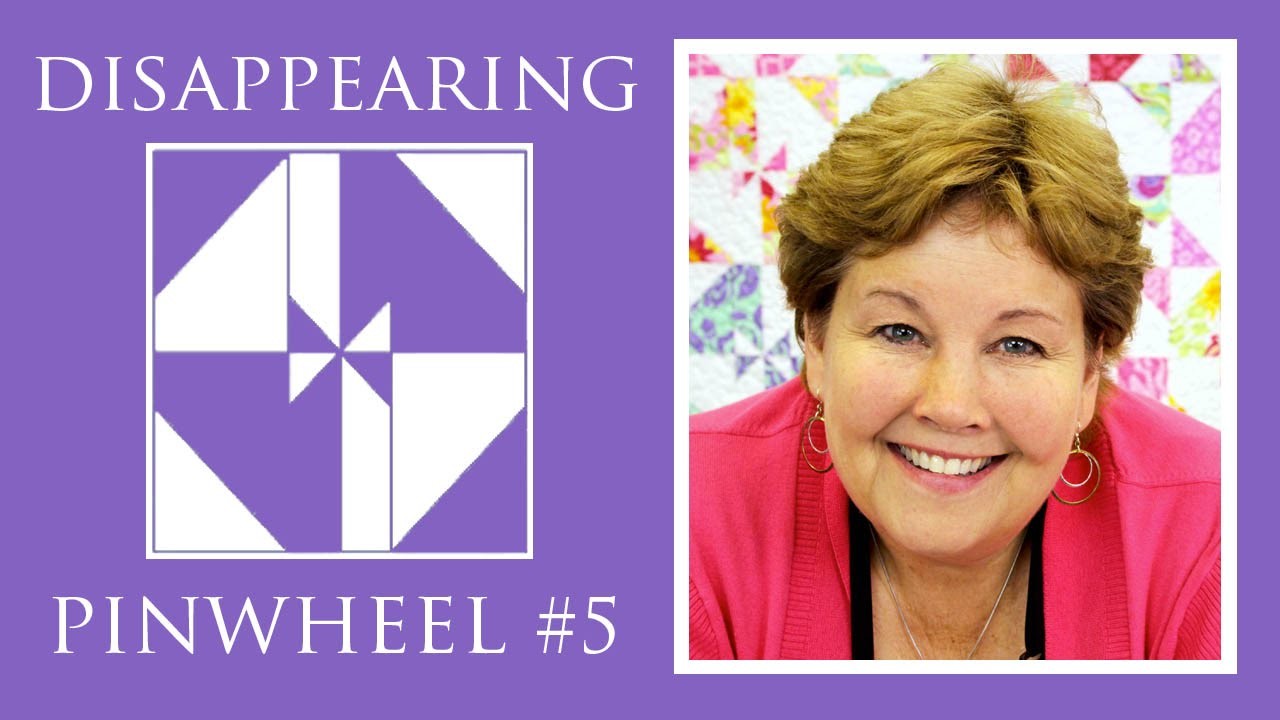
Disappearing Pinwheel Quilt Variation Five
MSQC"s Jenny demonstrates how to make the quick and easy Disappearing Pinwheel 5 Quilt.

Instructor
Jenny Doan
Jenny Doan is an American quilter, author, and YouTube personality. Jenny started Missouri Star Quilt Company in 2008 and today it is the largest quilting supply vendor in the United States.
Shop this tutorial


Common Questions
What is covered in Disappearing Pinwheel Quilt Variation Five?
MSQC"s Jenny demonstrates how to make the quick and easy Disappearing Pinwheel 5 Quilt.
How long is the tutorial video?
The tutorial video is 00:09:20.
Are supplies listed for this tutorial?
Yes. The tutorial page includes the supplies and materials connected to this project.
Is a transcript available?
Yes. A written transcript is available on the tutorial page.
Video Transcript
Today's tutorial with Jenny Doan from Missouri Star Quilt Company is the Disappearing Pinwheel Five, where she teaches you a new spin on the classic pinwheel quilt block! The result is so darling and looks difficult, but it's so easy! (We love that)
Hi everybody, it’s Jenny from the MSQC. And I’ve got a really fun project for you today. This project is based on the disappearing pinwheel and so we’re calling it Disappearing Pinwheel 5. And the idea came from our friend Eunice and I just can’t wait to show you this. So let’s take a look at the quilt behind me. Isn’t this gorgeous? I mean it is fun, it is bright, it is happy. And of course the fabric lends itself to that as well. The fabric we’re using today is called Extravaganza and it’s by Lila Tuller for Riley Blake. And it’s just a happy, happy line. So to make this quilt, what you’re going to need is one packet of ten inch squares, 42 of them. And again we’re using this Extravaganza line by Lila Tuller which is just so beautiful. You’re also going to need one packet of ten inch squares for your background fabric. You’re going to need ¾ of a yard for this little inner border right here. And for your outer border you’re going to need a yard and ¾ because we put a nice big six inch border on this just to make it fun.
So what we’re talking about today is this pinwheel block right here. We need to make a pinwheel. And how we do that is we’re going to put two squares together with contrast. We’ve used our colored print and our white print. And we are going to sew a quarter of an inch all the way around the outside edge. Now I’ve already done that here and you can see so there I’ve got my sewing line all the way around the outside edge. . Then we’re going to cut it diagonally both directions. So we’re going to take our ruler and we’re going to lay it from corner to corner like this. We’re going to make our cut and then we’re going to put it corner to corner this way. And again make our cut. Now what we have is four half square triangles right away and we need to press those. So let’s go to the ironing board over here. Alright so I’m just going to lay these on top, give them a quick setting of the seams. And when you set the seams basically you’re just relaxing the threads so that they lay nicer. And we’re just going to roll these back like this. And one more. And now what we’ve got to do here is we’re going to make a pinwheel.
So we are going to put these together. And when you make a pinwheel together, light, dark. I’m sorry dark, light, dark, light, dark, light. And all of our seams are going to run to the center like this. There you go. So now what we’re going to do is we’re going to sew these two together right here on this side and these two together right here on this side. So let’s take these to the sewing machine. We’re going to sew these together. And I like a take a few stitches and then kind of anchor myself and then go down the side. Just straight down, just straight down, we’re doing a quarter of an inch . Now because these are on the bias you can really make them fit. So if your, if your cut lines are just a little off or your seam lines are just a little off, you just make them fit. You just line them up so that they lay nice together. Now we’re going to press these open so they lay nice and flat. And we want to make our seams go the opposite way. So we’re going to want this seam to lay down this way. That way they can nest nicely. And by nesting, what I mean is they’re going to lay together really nice. So when we put these this way you should have one outer seam going that way and the other seam going that way. And that’s what we’ve got here. And then we’re going to match these two middle seams up right snug them. You can just feel them with your fingers when there’s no, no space in there. You see how this one appears just a little longer bit because we’re going the bias we’re just going to hold those two together. And we’re just going to give them a little encouragement to match up. And so that will help them just match up a little bit. So we’re going to go ahead and start this. Make sure our centers are lined up. Make sure that seam stays laying down, it kind of popped up right there. There we go. Going to line this up as well. Oop. And now we get to press this and, I’m going to, I’m going to trim off these little bunny ears right here and then we’re going to press this. Now if you find that you have a lot of, a lot of seams coming together right here you can press that seam open. I’m just going to press it to one side. And I’m just going to set my iron right here in this middle and give it a burst of steam, make sure it lays down really nice and we’ve got a great looking pinwheel right here. Alright.
So now when we do all the other disappearing pinwheels we’ve got cutting on all four sides. For this pinwheel, the disappearing pinwheel 5 we are only going to cut on two sides. This is so much fun. So we’re going to come 2 ⅛ inches out from the center seam right here. 2 ⅛ just like that. And we’re going to make our cut. And then we’re going to come 2 ⅛ inches, let me just turn that right around, from the center seam on the other side. 2 ⅛ just like this. Just like that. And now we have these three great pieces like this. And that’s all the cutting we have to do. So we’re making two cuts like this. We’re going to move this to the outside and put this, these on the outsides. So this one moves to the middle. So again, I feel like I did it like a shuffling game for you there. Let me put it back together so you can see what I did. So here’s our pinwheel because this is something I really don’t want you to lose and I actually just in my brain occurred an easier way to do this. I think if we turn these outside pieces around it might work. Ah, it does. So that’s easier, that’s easier for you to see. Alright so then we’re going to sew this together. And so we’re just going to lay this on here and sew this piece down.
Ok so once you get your block all done you’re going to head to the ironing board and give it a press. Make sure it’s nice and flat and then this is your block. It’s gorgeous, it’s beautiful, it’s quick, it’s easy. It looks like you worked really hard and, but it’s a great little block. Now one of the things I want to point out is that this is now a rectangle. Because we only took the seams on two sides it is no longer a square block. So it’s a rectangle. So then when you go to put them together you’re just going to put them together side by side by side. You can’t turn the block, it won’t fit if you turn it. You just have to put it together side by side. So because we have 42 blocks in our pre-cut packet you’re going to have six across and seven rows.
So let’s take a look at how we’re going to put those together. You’re just going to set them together like this and they will naturally checkerboard right there. And so you’re going to do six of these in a row and then you’re going to come back along and add another row doing the exact same thing and then these will automatically checkerboard as well too. So it’s just a great little project. Let’s look at how this quilt came together. So you can see we’ve got six blocks up here and seven rows down. And it just, it’s just magical how much work it looks like you did and yet it’s really, really fun.
So just a few tips to help this go easier for you. When you’re ready to put your pinwheels together, make sure they’re all going to same direction, just all going the same direction. As a matter of fact, I would go ahead and sew all my pinwheels together first. That will make it easy for you and they’ll all be done. Also when you’re cutting that, that seam that 2 ⅛ inch seam, it doesn’t have to be perfect because we’re only cutting on two sides. So you can relax about that and not die over it having to be so perfect. Anyway I really enjoyed putting this together. I hope you do too. And we hope you enjoyed this tutorial on the Disappearing Pinwheel 5 from the MSQC.
Hi everybody, it’s Jenny from the MSQC. And I’ve got a really fun project for you today. This project is based on the disappearing pinwheel and so we’re calling it Disappearing Pinwheel 5. And the idea came from our friend Eunice and I just can’t wait to show you this. So let’s take a look at the quilt behind me. Isn’t this gorgeous? I mean it is fun, it is bright, it is happy. And of course the fabric lends itself to that as well. The fabric we’re using today is called Extravaganza and it’s by Lila Tuller for Riley Blake. And it’s just a happy, happy line. So to make this quilt, what you’re going to need is one packet of ten inch squares, 42 of them. And again we’re using this Extravaganza line by Lila Tuller which is just so beautiful. You’re also going to need one packet of ten inch squares for your background fabric. You’re going to need ¾ of a yard for this little inner border right here. And for your outer border you’re going to need a yard and ¾ because we put a nice big six inch border on this just to make it fun.
So what we’re talking about today is this pinwheel block right here. We need to make a pinwheel. And how we do that is we’re going to put two squares together with contrast. We’ve used our colored print and our white print. And we are going to sew a quarter of an inch all the way around the outside edge. Now I’ve already done that here and you can see so there I’ve got my sewing line all the way around the outside edge. . Then we’re going to cut it diagonally both directions. So we’re going to take our ruler and we’re going to lay it from corner to corner like this. We’re going to make our cut and then we’re going to put it corner to corner this way. And again make our cut. Now what we have is four half square triangles right away and we need to press those. So let’s go to the ironing board over here. Alright so I’m just going to lay these on top, give them a quick setting of the seams. And when you set the seams basically you’re just relaxing the threads so that they lay nicer. And we’re just going to roll these back like this. And one more. And now what we’ve got to do here is we’re going to make a pinwheel.
So we are going to put these together. And when you make a pinwheel together, light, dark. I’m sorry dark, light, dark, light, dark, light. And all of our seams are going to run to the center like this. There you go. So now what we’re going to do is we’re going to sew these two together right here on this side and these two together right here on this side. So let’s take these to the sewing machine. We’re going to sew these together. And I like a take a few stitches and then kind of anchor myself and then go down the side. Just straight down, just straight down, we’re doing a quarter of an inch . Now because these are on the bias you can really make them fit. So if your, if your cut lines are just a little off or your seam lines are just a little off, you just make them fit. You just line them up so that they lay nice together. Now we’re going to press these open so they lay nice and flat. And we want to make our seams go the opposite way. So we’re going to want this seam to lay down this way. That way they can nest nicely. And by nesting, what I mean is they’re going to lay together really nice. So when we put these this way you should have one outer seam going that way and the other seam going that way. And that’s what we’ve got here. And then we’re going to match these two middle seams up right snug them. You can just feel them with your fingers when there’s no, no space in there. You see how this one appears just a little longer bit because we’re going the bias we’re just going to hold those two together. And we’re just going to give them a little encouragement to match up. And so that will help them just match up a little bit. So we’re going to go ahead and start this. Make sure our centers are lined up. Make sure that seam stays laying down, it kind of popped up right there. There we go. Going to line this up as well. Oop. And now we get to press this and, I’m going to, I’m going to trim off these little bunny ears right here and then we’re going to press this. Now if you find that you have a lot of, a lot of seams coming together right here you can press that seam open. I’m just going to press it to one side. And I’m just going to set my iron right here in this middle and give it a burst of steam, make sure it lays down really nice and we’ve got a great looking pinwheel right here. Alright.
So now when we do all the other disappearing pinwheels we’ve got cutting on all four sides. For this pinwheel, the disappearing pinwheel 5 we are only going to cut on two sides. This is so much fun. So we’re going to come 2 ⅛ inches out from the center seam right here. 2 ⅛ just like that. And we’re going to make our cut. And then we’re going to come 2 ⅛ inches, let me just turn that right around, from the center seam on the other side. 2 ⅛ just like this. Just like that. And now we have these three great pieces like this. And that’s all the cutting we have to do. So we’re making two cuts like this. We’re going to move this to the outside and put this, these on the outsides. So this one moves to the middle. So again, I feel like I did it like a shuffling game for you there. Let me put it back together so you can see what I did. So here’s our pinwheel because this is something I really don’t want you to lose and I actually just in my brain occurred an easier way to do this. I think if we turn these outside pieces around it might work. Ah, it does. So that’s easier, that’s easier for you to see. Alright so then we’re going to sew this together. And so we’re just going to lay this on here and sew this piece down.
Ok so once you get your block all done you’re going to head to the ironing board and give it a press. Make sure it’s nice and flat and then this is your block. It’s gorgeous, it’s beautiful, it’s quick, it’s easy. It looks like you worked really hard and, but it’s a great little block. Now one of the things I want to point out is that this is now a rectangle. Because we only took the seams on two sides it is no longer a square block. So it’s a rectangle. So then when you go to put them together you’re just going to put them together side by side by side. You can’t turn the block, it won’t fit if you turn it. You just have to put it together side by side. So because we have 42 blocks in our pre-cut packet you’re going to have six across and seven rows.
So let’s take a look at how we’re going to put those together. You’re just going to set them together like this and they will naturally checkerboard right there. And so you’re going to do six of these in a row and then you’re going to come back along and add another row doing the exact same thing and then these will automatically checkerboard as well too. So it’s just a great little project. Let’s look at how this quilt came together. So you can see we’ve got six blocks up here and seven rows down. And it just, it’s just magical how much work it looks like you did and yet it’s really, really fun.
So just a few tips to help this go easier for you. When you’re ready to put your pinwheels together, make sure they’re all going to same direction, just all going the same direction. As a matter of fact, I would go ahead and sew all my pinwheels together first. That will make it easy for you and they’ll all be done. Also when you’re cutting that, that seam that 2 ⅛ inch seam, it doesn’t have to be perfect because we’re only cutting on two sides. So you can relax about that and not die over it having to be so perfect. Anyway I really enjoyed putting this together. I hope you do too. And we hope you enjoyed this tutorial on the Disappearing Pinwheel 5 from the MSQC.



