
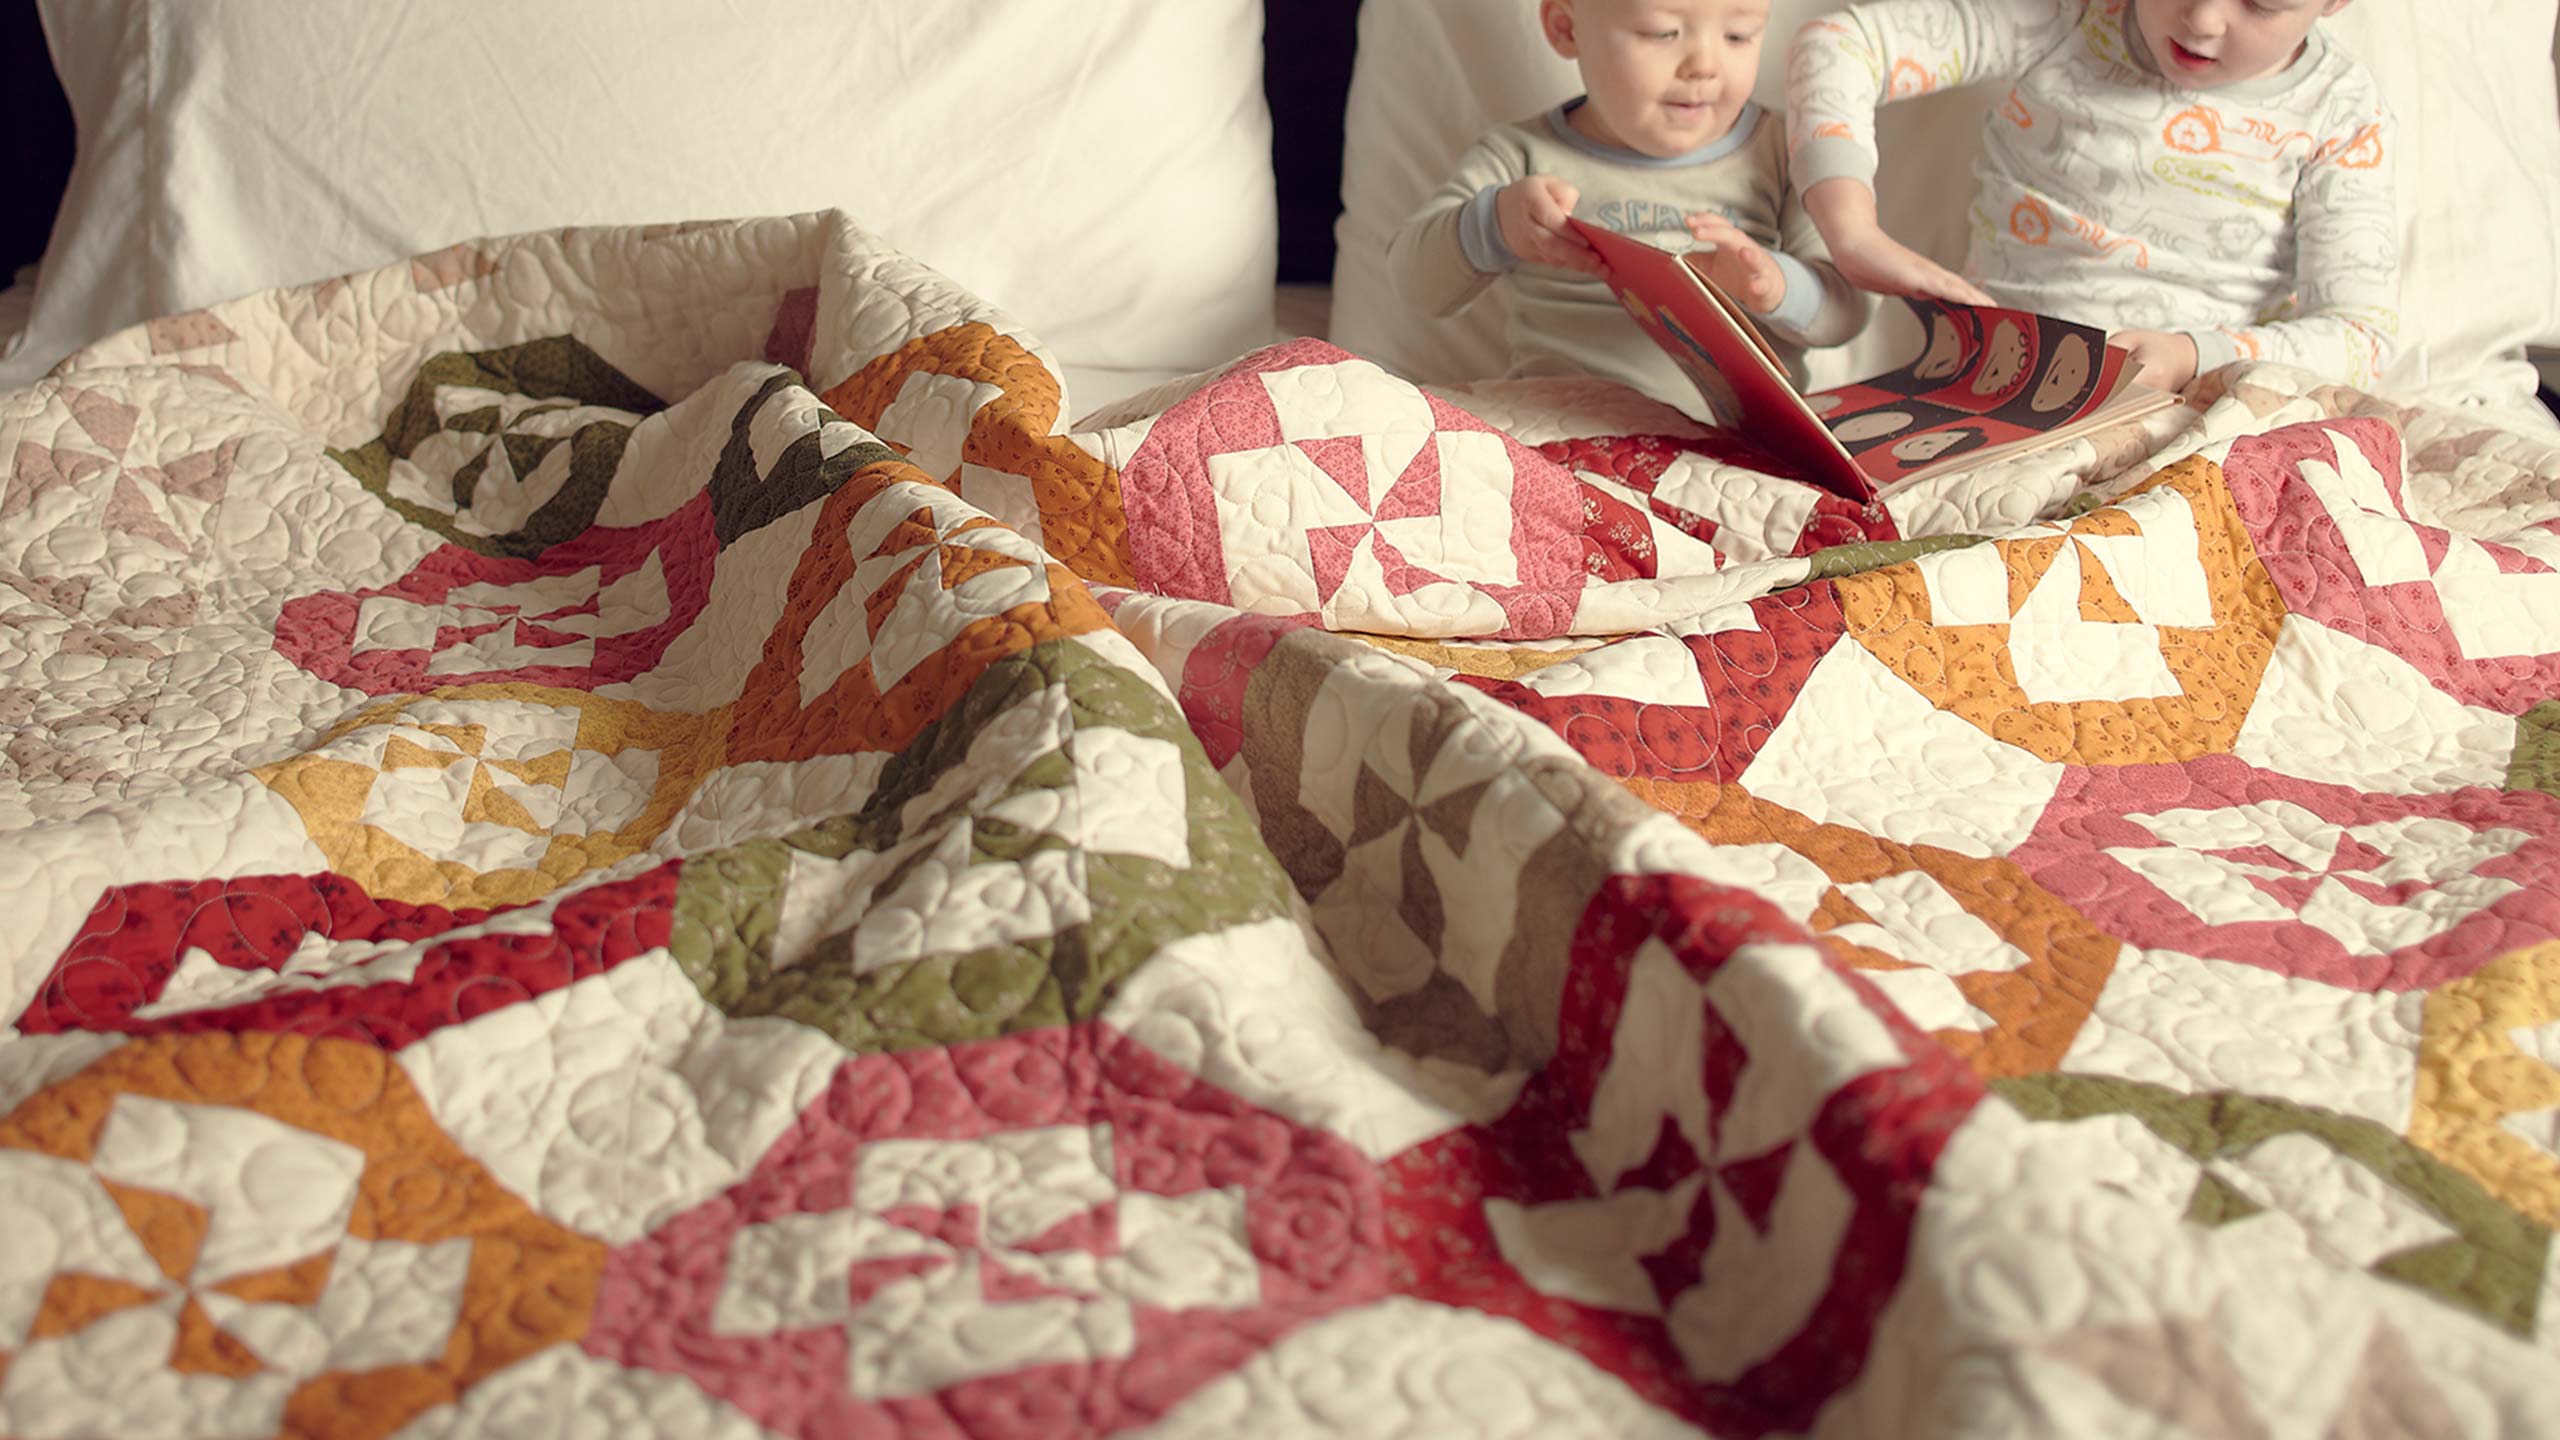
Disappearing Pinwheel Quilt
 Jenny Doan
- Layer Cake
- Traditional
- Twin
- Beginner
- Quilt size 81" × 92"
Don't you love surprises? This engaging pattern takes a simple pinwheel block, cuts it precisely into nine equal pieces, and makes a whole new block, just like magic! Pick up a package of printed 10" squares and a package of solid 10" squares and tune in to Jenny's easy tutorial to make your very own version of this spectacular quilt.
Instructor
Jenny Doan
Jenny Doan is an American quilter, author, and YouTube personality. Jenny started Missouri Star Quilt Company in 2008 and today it is the largest quilting supply vendor in the United States.
Shop this tutorial




Common Questions
What is covered in Disappearing Pinwheel Quilt?
Don't you love surprises? This engaging pattern takes a simple pinwheel block, cuts it precisely into nine equal pieces, and makes a whole new block, just like magic! Pick up a package of printed 10" squares and a package of solid 10" squares and tune in to Jenny's easy tutori...
How long is the tutorial video?
The tutorial video is 00:09:59.
Are supplies listed for this tutorial?
Yes. The tutorial page includes the supplies and materials connected to this project.
Is a transcript available?
Yes. A written transcript is available on the tutorial page.
Video Transcript
Hi, I’m Jenny from the Missouri Star Quilt Company. Take a look at this gorgeous quilt behind me. Isn’t this fun? This quilt is about 70” by 80” when it’s all said and done and you are going to be amazed at easy this is to put together. So, to make this quilt, you’re going to need two layer cakes. I used this one called Floral Gatherings from Primitive Gatherings and a solid so that it gives your colors that, that pop. And we are going to make pinwheels out of this to start with. Now, you’ve heard of the Disappearing Nine Patch and you’ve heard of the Disappearing Four Patch. Now we’re going to show you the Disappearing Pinwheel. This is really exciting to me because this is a fun block and there’s so much you can do with it. But first, we’ve got to make the pinwheel.
So, what you’re going to do with that is, you’re going to choose, you’re going to take one of your solids and you’re going to take one of your colors and you’re going to put them right sides together, like this, and you are going to sew all the way around the outside edge, a quarter of an inch. And if you have any trouble remembering this, we have a whole tutorial on easy pinwheels where you can go look at that. So, I’ve got my piece here sewn all the way around a quarter of an inch and we are going to cut it both directions, diagonally. So, let me grab this ruler. So, you just put it corner to corner on your block, like this, and you’re going to go ahead and make the cut and then make sure they stay together and pop your ruler over here and corner to corner and you have your four half-square triangles, like this. This is what’s going to make your pinwheel.
So then what we’re going to do now is, we’re going to take these over and iron them open and I’ll show you how these go together. So, set that seam and roll them back. So, once you get all your half-square triangles ironed open, you’re going to set them together as a pinwheel and we’re going to do that like this. Let’s turn this and this one. You just line them up so you have color every other block, just like that. Then, you’re going to sew them together like a four patch. So, you’ll sew these two and these two and then the two halves together, and you’ll end up with a pinwheel that looks like this. Now, this is where our block begins and this is really fun because what we’re going to do is we’re going to divide up this block into three equal pieces so we have basically a nine patch where the blocks are all the same size. So you have to, what you’re going to have to do is figure out what size your block is and divide that by three. For mine, it’s about 2 ⅛ from the middle seam. And then what I’m going to do, I guess I should tell you that before I start, but what I’m going to do is, I’m going to cut this on all four sides, just like this, on all four sides and wait until you see what happens. This is so much fun.
So, here we are. We’re going to cut it this way and then I’m going to turn my mat. And you can see, I’ve just used a smaller mat here. You can use a rotating mat or a smaller mat. And, again, my measurement out from the middle is, is about 2 ⅛ on mine, but you’ll want to measure yours to make sure that it’s exactly in thirds because that depends on your seam allowance. And one more cut. This was so fun. I started playing around with this one year when we were up at the lake and, and it was just so fun to see all the possibilities. This really can do a lot of things but this is the one we’re talking about today. So, now you can see, we have this cut on all four sides and what we’re going to do first is we’re going to take these two stripe squares and we’re going to turn them to the outside, like this, all four of those. And then on these, right here, we’re going to turn them to the middle, like this, and it’s going to make this awesome shoefly block. Look at that! A shoefly block with your pinwheel in the center. How cute is that?
So then you just go about sewing this together, just like you would sew a nine patch. So I, I fold my pieces in, like this, and I’m going to sew this one to this side and this one to this side, and I just sew the three rows together. So, let’s go to the sewing machine and put this block together.
Alrighty. So I have a dark thread on here so you can see what I’m doing, but normally I would not use a dark thread. I would use a thread that matches a little better. But this will help you see exactly what I’m doing here. There we go. Now we’re going to sew all three of these rows together, like this, and then we’ll put the block together. So, I’ll meet you back here in a minute.
So now I have these three rows sewn together, like this, and you can see we need to press them. So, what I want to do is I want to press the middle ones going out and the si--, the top, and bottom ones going in and that way they’ll nest together better. So, we’re going to press these outward and I like to do that from the back and then I like to turn it over. Make sure that it’s nice and flat from the front. And then these we’re going to press pointing inward. That will just make less bulk in our, in our strips, help them line up better. And one more here.
Alright, then all we need to do is attach these together. Now this is the only part, you can see on the other parts I just actually just sewed, I did not even have to line anything up, nothing had to match, I just sewed. So, right here, now we need to make sure that these little corners line up, right here. So, because our seams are going opposite directions, we are going to be able to do that pretty easily. We are going to see where they nest right here. They just come right together, like that. You can put a pin in there if you want. You can feel it with your finger. And, and I’m just going to go ahead and feel it and go ahead and sew these rows together. It comes together so nice. There we go. Make sure that’s lined up. Because some of these are cut on the bias you, you have a little more permission to make your fabric behave. You can actually make it completely fit to the block, which I love. I love that part. Alright, now I’m just going to bring this other row over here and we’re going to do the same thing. We’re going to nest those blocks and because we’ve ironed our seams going opposite directions, it will, it will just lay down there. And I just pull and make sure that it’s right next to that. Keep that one laying down. And then here we go over here. And then we’re going to make this one match up. Now we just get to go press it.
Alrighty, so we’re going to press this down and roll it back. Press this one down and roll it back too. And this is your whole block. How easy was that? Isn’t that crazy? Look at that. Look how cool that is!
So once you get your block done, we’re ready to lay them out and you’re just going to put them together in rows. And they just line up just right smack together, like that. You’re going to match them up when you sew them. Make sure that your corners meet up, that’s kind of essential. And then we’ll just put them together one after the other. I have five across and six down in this, so we’ve used 30 squares in the center part of the quilt. Then what I did was, I took a 2 ½ inch strip and bordered that middle part of the quilt. Then I took the rest of my squares that were in my packet, after choosing the 30, I took the rest of my squares, which are all this light color, like this. You can see like here, these, these are all lighter colors, and I took that layer cake and cut it into fourths. So now I had four, four little pieces and I made pinwheels out of those. And just, we just made them the same way. Sewed around the outside, cut diagonally both directions, put them together and made these sweet little pinwheels. So then, I just made a row of those around, used these pinwheels as a border row and used for the final row a border of pinwheels and then a 2 ½ inch strip again on the outside just to frame in the pinwheels and keep them in there nice and tight.
So we hope you enjoyed this tutorial on the Disappearing Pinwheel from the Missouri Star Quilt Company.



