

Double Take: Card Trick
Want to see a cool trick? In today's Double Take, Natalie and Misty make two unique versions of the Card Trick quilt.

Instructor
Natalie Doan
Natalie is the host of Quilting 101, Embroidery 101 and the Creative Strategist and Editor of Block Magazine at Missouri Star Quilt Company. She was taught how to sew by her mom, of course, and began quilting when she grew up.
Shop this tutorial
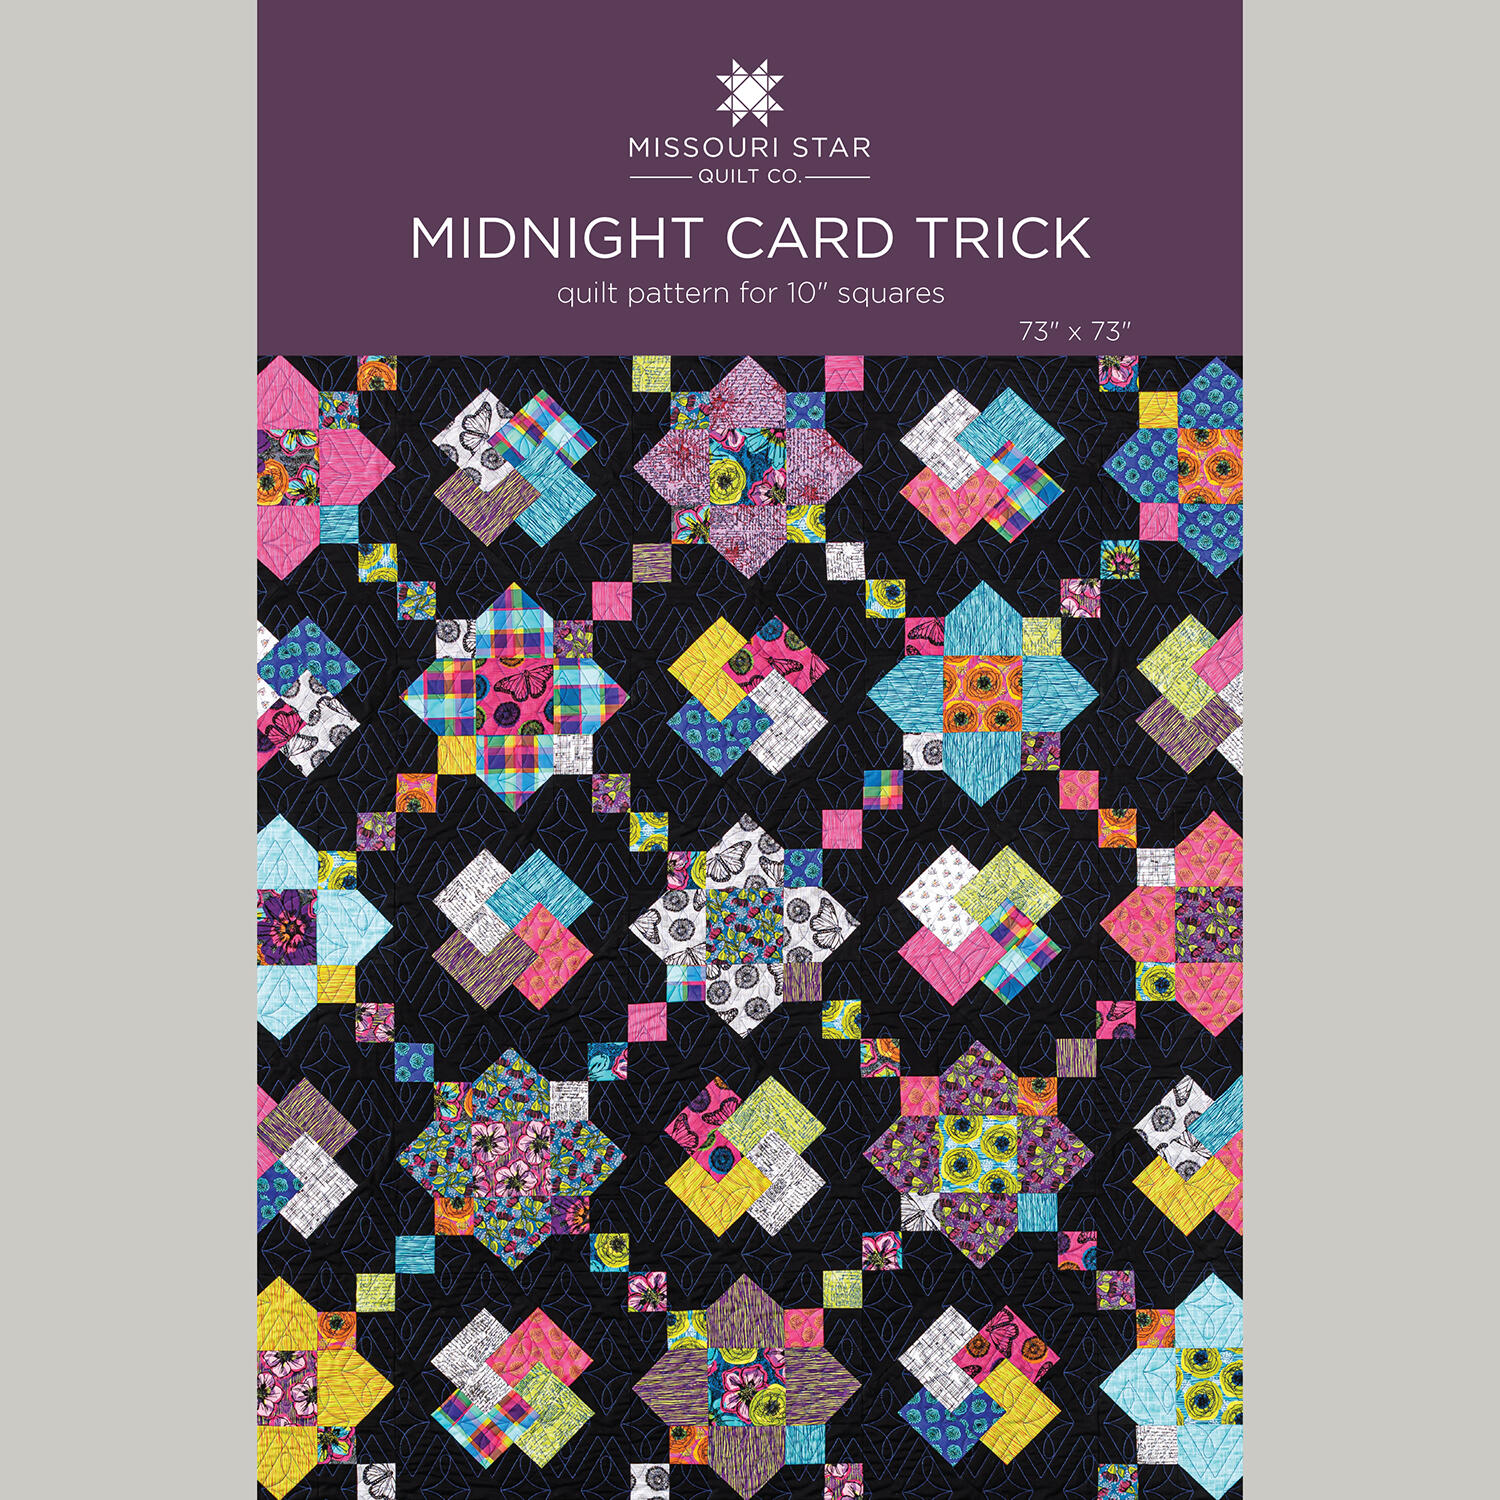 Midnight Card Trick Quilt Pattern by Missouri Star$8.50Shop →
 Digital Download - Midnight Card Trick Quilt Pattern by Missouri Star$6.95Shop →
 Colorworks Premium Solids - Black Yardage$8.12Shop →
 Missouri Star Quilter’s Best Blend Full Batting$32.95Shop →
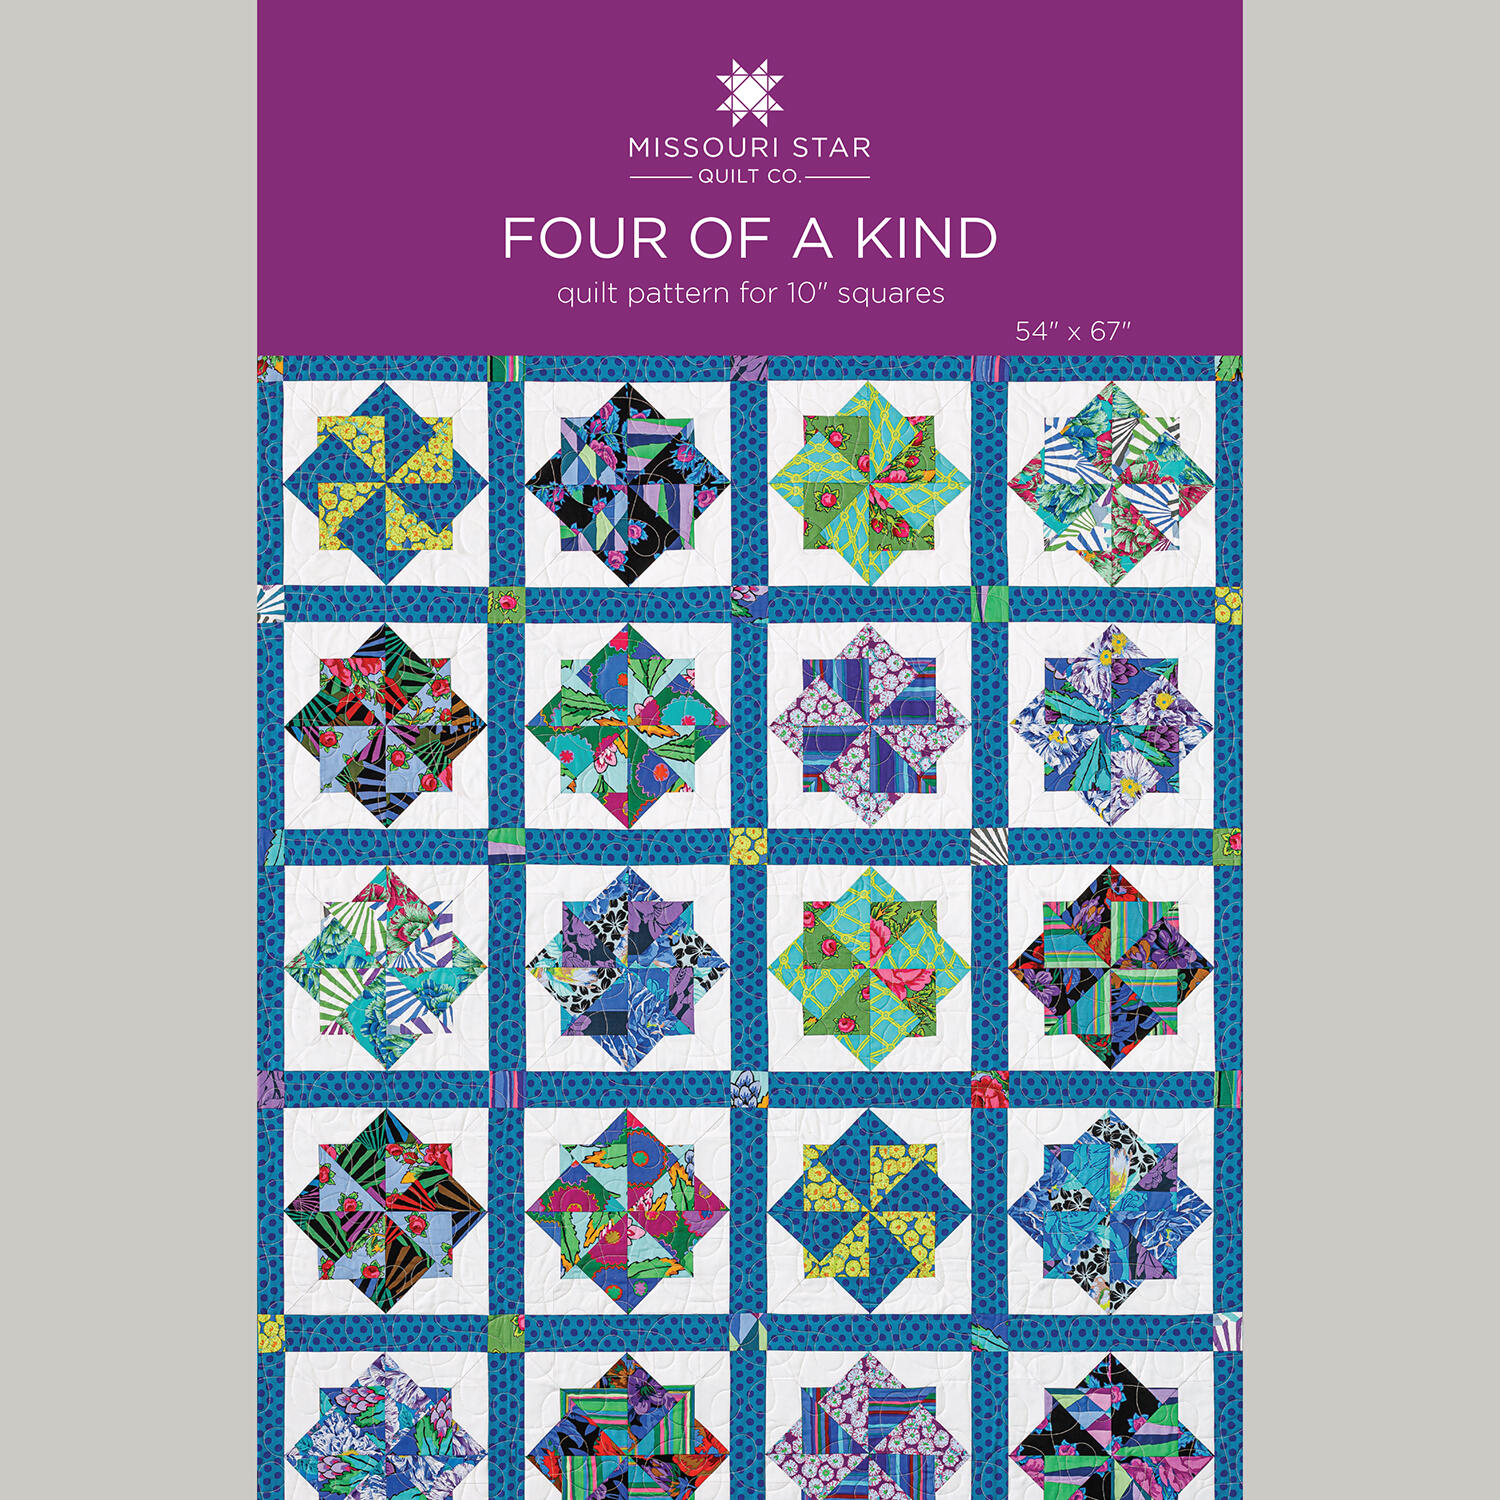 Four of a Kind Quilt Pattern by Missouri Star$8.50Shop →
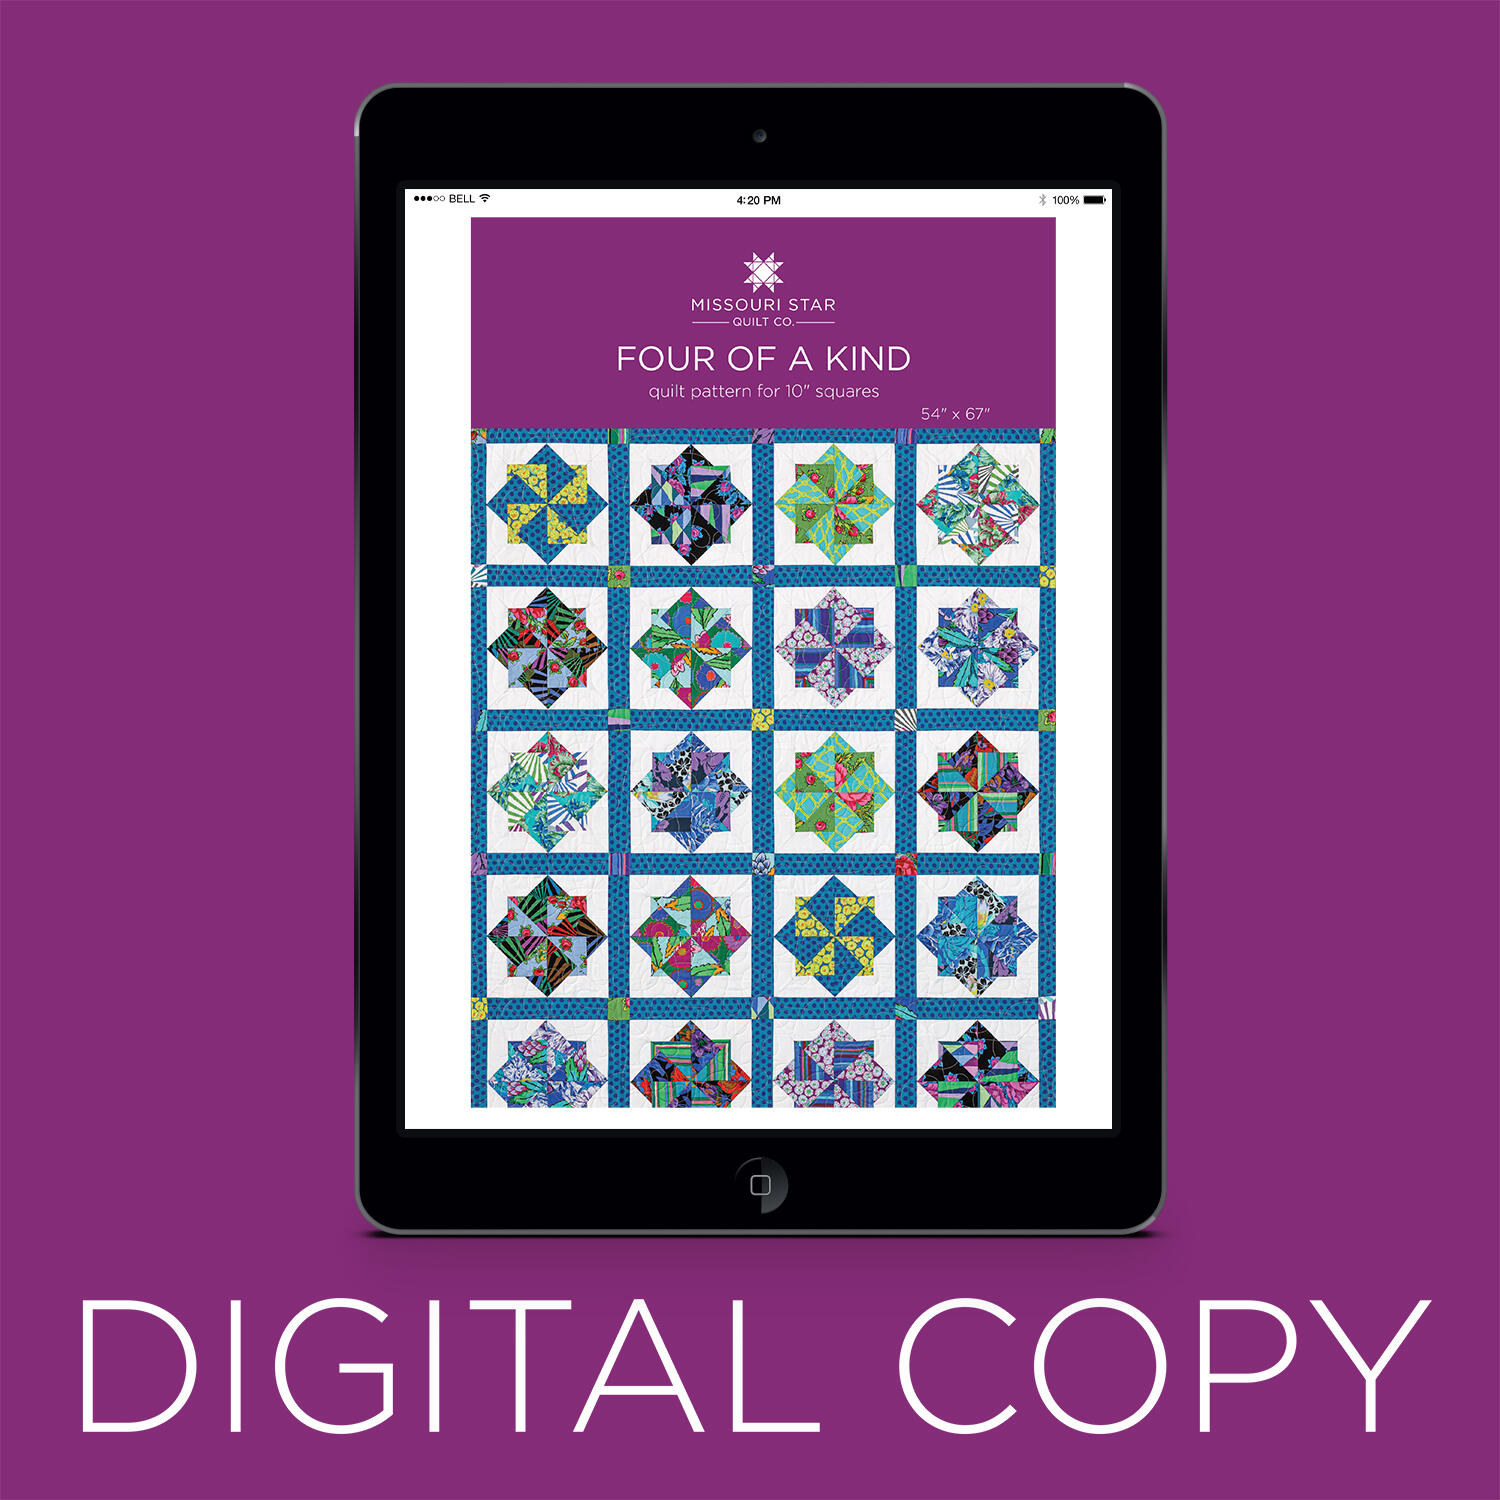 Digital Download - Four of a Kind Quilt Pattern by Missouri Star$6.95Shop →
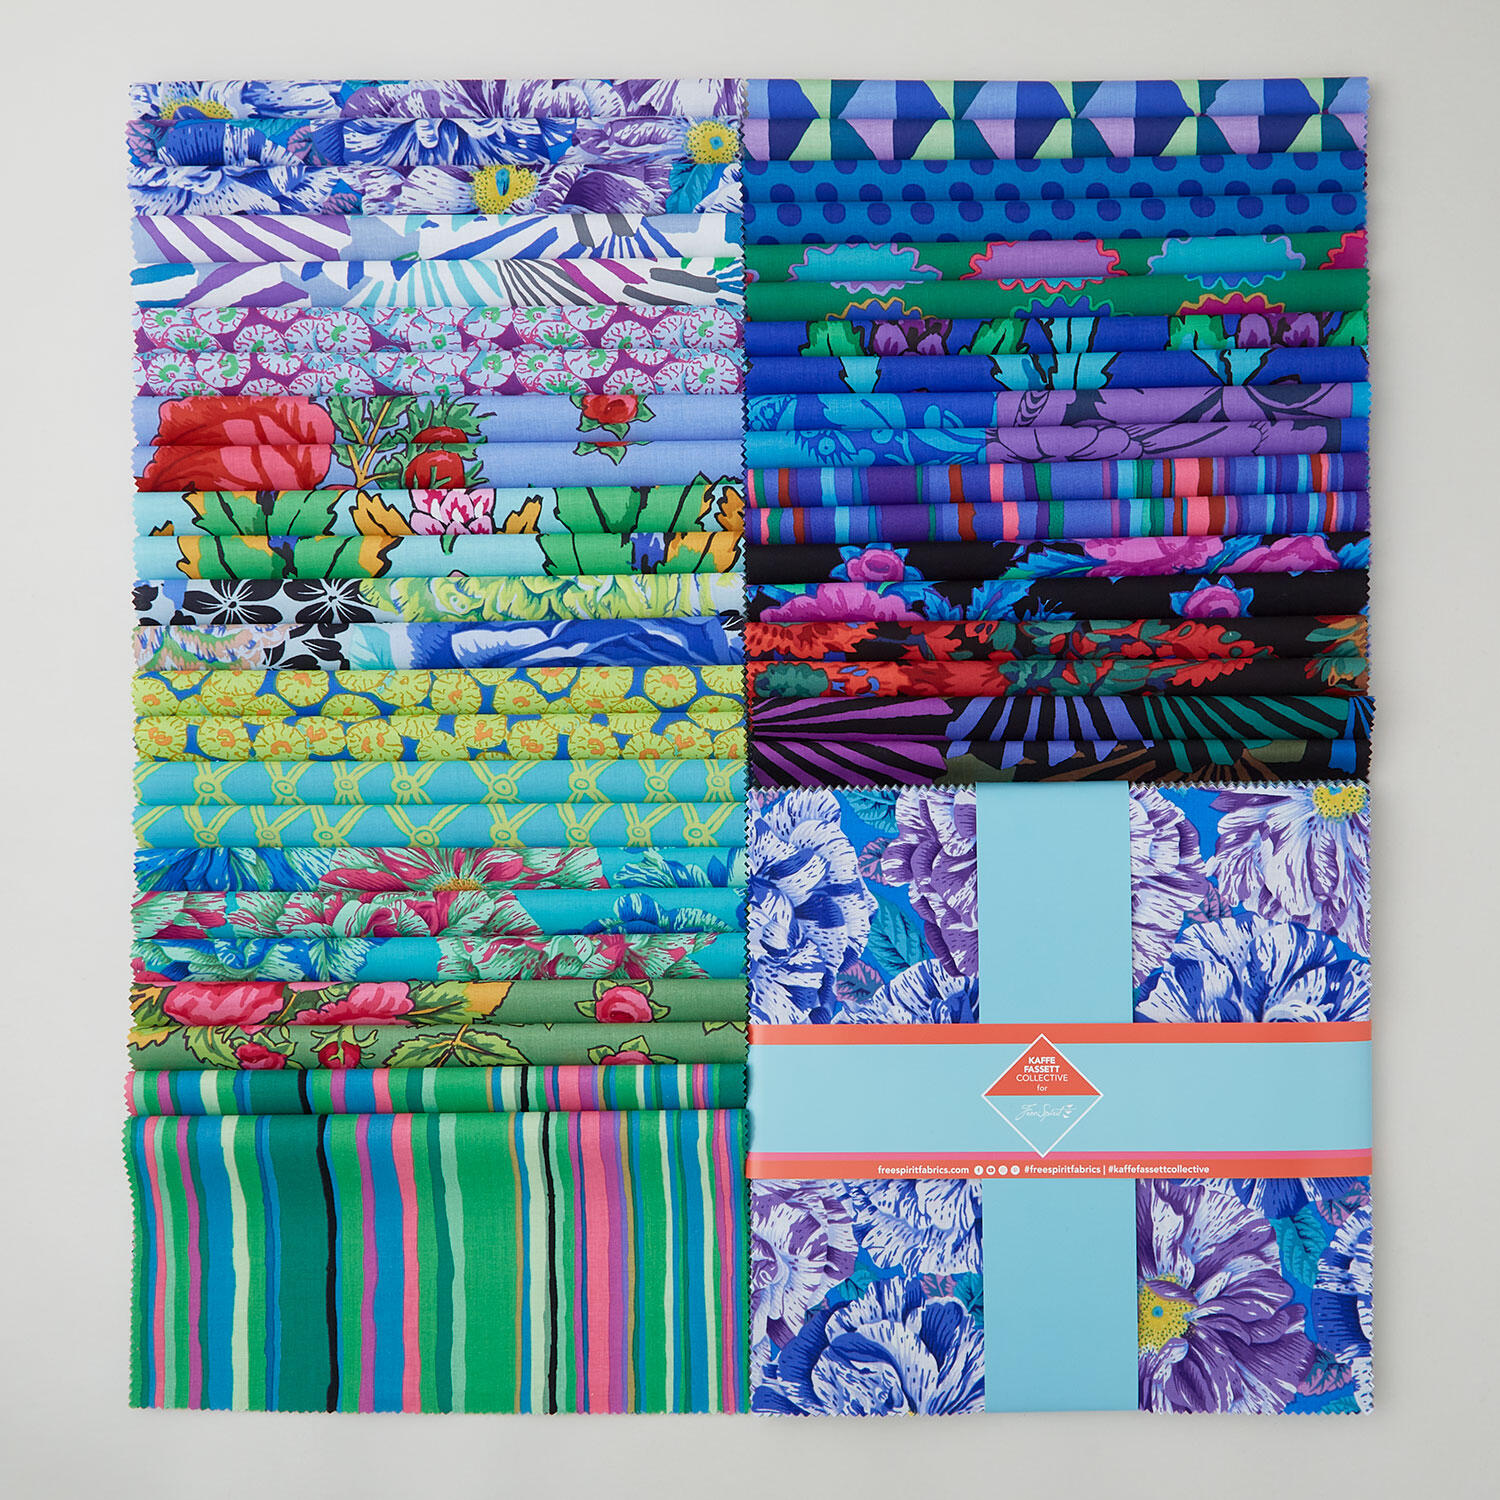 Kaffe Fassett Collective - February 2026 Cool Colorway 10" Squares$53.45Shop →
 Colorworks Premium Solids - Superwhite Yardage$8.12Shop →
Chapters
- 0:00Welcome & Getting Started
- 0:23Natalie's supplies
- 2:19Making the Card Trick block
- 16:02Making the Quatrefoil Block
- 24:26Chatting layout
- 25:15Machine quilting pattern: Diamond Loops
- 26:05Misty's supplies
- 26:46Discussing the pattern
- 27:14Cutting & sewing the blocks
- 39:57Talking squaring
- 41:31Laying out the blocks
- 42:22Machine quilting pattern: Cake Walk
Common Questions
What is covered in Double Take: Card Trick?
Want to see a cool trick? In today's Double Take, Natalie and Misty make two unique versions of the Card Trick quilt.
How long is the tutorial video?
The tutorial video is 00:43:07.
Are supplies listed for this tutorial?
Yes. The tutorial page includes the supplies and materials connected to this project.
Video Transcript
Hey everyone, welcome to Double Take Week. It's our favorite week of the whole month. Yes, I love Double Take. I do too. It's so always so fun to see how our brains work and what we come up with. I love this challenge. So, this month we're tackling the card trick block. Yeah. And I think Natalie's going to go first. All right, let's do this. [music] All right, so this is my quilt. I'm calling it Midnight Card Trick. I think it turned out really cute. I combined the card trick block with a quattrafoil block and I just love the way they chain and it kind of and that block is set on point a little bit. So, it's really fun. One of the things that um kind of made me laugh is I was looking at the card trick block and trying to figure out what I was going to do with it. I started trying to figure out how I wanted to construct the block and then all of a sudden I had this like moment where I said I'm just gonna go look up mom's tutorial and it was so easy and I was like oh that is exactly what I want to do with that particular block. I just it I don't know why I was just in my mind that was the challenge block and I didn't even think to watch the video. Oh well it's adorable. I can't wait to see how it all comes together. So it's super easy and fun. I think you guys are going to like it. All right. So, to make this quilt, you are going to need a package of 42c count print squares. And I've used Winding Road by Natalie Barnes for Windom Fabrics. You'll need some background fabric, 3 and 1 eigh yards, and that includes your inner border. I've used ColorWorks Premium Solids in Black by Northcot Fabrics. For your outer border, you will need a yard and a quarter. And we did a nice 5 in border. And then for your backing, you'll need four and 1/2 yards if you have regular um 45inch wide fabric. or if you use a 108, you'll need 2 and 1/4 yards. This is such a fun print. It's beautiful. This whole line is just very vibrant and bright. And I love that we were able to pair it with a darker background because that just makes all the fabrics really just pop. It really does. It's been really fun to work with. All right. So, are we ready to get started? I think so. Okay. All right. So, this quilt is made up of two blocks. So, we have our card trick block here. And then we also have the quattrafoil block. And I love I just love how it comes together. It's It's really really fun. So, we'll start by making our card trick block. We are going to need some background pieces. So, from your background, you're going to cut some 10in squares, some 2 and 1/2 in strips, and oh, I've got to cut these down. We need some 8 and 1/2 in squares for setting our card trick block on point. I think I'll just cut those when we get to that spot. And then also some 2 and 12 in squares. So that's those are the cuts you'll need from your background. And then from our print squares, we are going to cut the pieces that we need for this block first. When we get to this one, we'll cut for that block. Perfect. All right. So for our card trick, we're going to cut a 4 and 1/2 in rectangle. And you're going to want to keep your pieces together because each of these um you need your matching prints to create this little um hook that makes the card trick. So we're going to cut this piece and we are going to then subcut it into 2 and 1/2 in strips or rectangles. So So the way that I kind of worked it out in my mind, you need 12, I believe, of the card trick block. And so if you take three or four squares and kind of cut them all at the same time, you have enough to make all 12. Okay? And so I did that and cut them and uh kept my sets together so that then it was easy for me to go back and put together those blocks. So you could very easily stack them all up and then have them ready to go. So you know, this would be like one part of four blocks. Yes. And then the same thing for this. this. We're going to cut two 2 and 1/2 in strips. And we're going to subcut those down into 2 and 1/2 in squares. And that looks like it was just a little on the big side as far as Yeah. Oh, no. It's because it was a 4 and four and I was thinking something isn't right here. [laughter] That was a 10 in square, but no, my brain is just not quite awake yet today. All right. So then we'll have our two and a half inch squares and we'll put one with each because that is what we need to create our um our card trick blocks. And then the rest of these can be used in four patches for your quattrafoil. Perfect. So those will just go in a separate pile. All right. Now [clears throat] I've got the other pieces already cut for the rest of this block. So now it really is just time to lay it out. So what we'll do is we'll have one of these. We're going to first make our little four patch in the middle. And how you lay this out is is totally up to you, but we're going to probably put this one. And then I think that one. Awesome. And then as you go through, you'll see that the the print has to match and make that little L. So, we're going to put these around this way. It was so easy the way that mom put this together. I was just kind of floored because the way that I was imagining it, it had like an hourglass in the middle and some half square triangles and it seemed it was obviously doable, but it was just a little bit more complicated in my head than what I was hoping to work with. And I thought, man, this is going to be kind of hard. But this just makes it so easy. So now we're just going to sew this together. Okay, I think we can start with our four patch in the middle. Sounds good. And I'll give you these two pieces here. There we go. And can I just open them and put them together? You can open them. Just put those seams in opposite directions so they nest. Yep. Take a few stitches. And then I think I'll just hand you these as well. You can sort of chain piece these to keep this part going cuz we're going to add the Oh, okay. We'll just give you those and I'll press this one. I do like to set my seams. I think it makes everything lay nice and flat. Yeah, that's one of those little steps that really does make a difference. It does. And then as you as you can see, as long as these are touching, you know, you can go ahead and stitch that side down. Okay. And I will press these guys. Want me to add the blue to the other side of this? That would be great. Okay. Make sure that that's going opposites. Yep. Okay. Okay. And then I'm going to hand you the um these pieces with their other little black background squares to the corners. So you can do all that. Okay. There's that one. Give that a press. Good teamwork. Yes. It comes together so quick. It really does. I Every time we do this, I think, man, it would be so nice if everybody could just have that that sewing buddy all the time. Always. Yes. this. All right. So then now you can see that we're going to add this piece to the bottom and this piece to the top and we'll have our whole cute little trick. Yeah. Let me I want to make sure and press these to the inside just so that it's easy for nesting. Perfect. I know a lot of times we get in a habit of pressing everything to the dark, but if you sometimes if you pay attention and press those things in opposite directions, it makes piecing a lot easier. Definitely. So then I can just put those two together now. Uhhuh. And then this one is coming at you in just a sec. Perfect. [snorts] Okay. Oops. Started a little far in. There we go. Sometimes I do that just because I don't want the fabric to get sucked under. One and two. Nice. Nest these little spots. Okay, there we go. Perfect. That's it. That's That is the main part. Oops. I'm gonna just a tiny little pair of scissors or the big pair is fine. Okay, that's the one I can grab. Easy peasy. I just want to snip that thread so it's not sticking through the top. Perfect. Oops. And give this a press. And then it's time to set it on point cuz that's the part that gives you that real illusion that it's spinning. That it's spinning. Yeah. I think it's really cute. It's adorable. Okay, there you have it. We've got our beautiful little card trick block. Okay, so from our background, we're going to grab our 8 and 1/2 in rectangle and we are just going to cut some 8 and 1/2 in squares and then these get cut um diagonally once. I'm first going to clean up this first edge. Then we'll go eight and a half over which is there. And then what we're going to do is just cut this diagonally. And because it's background, it doesn't really matter which which side is up or which way they go. And then to to set these on point, all I'm going to do, this is just very Jenny method. We're going to just fold the middles and finger press them so that we have something to match up with. And then I do remember mom saying like if you um if you put the what is it like the valley the peak in the valley or something like that. So, the way that this is pressed, if you lay it on top of it, oops. Oh gosh, why can't I get that apart? There we go. Sort of face down like that, you can line them up. You could stick a pin in it if you wanted to, but you've got plenty of overhang. So, these are going to be This is going to give you plenty of room. The other thing that's cool to know about this is that if your block that you were combining it with, whatever size it is, you'll be able to square this particular block to match that. So, if this was, you know, 11 and a half or or, you know, 13, you would be able to match it to that size, which I thought was kind of cool. That is cool. All right. So, that just gets stitched. And we'll do both sides. Perfect. Both of our opposite sides first. Make sure I'm still straight. Yep. And same thing up our little point in the middle there. Mhm. There we go. My sewing was a little wonky on this side. That's okay. We got I was going to say we got room to straighten them up cuz we are going to square this block. You'll never know in the end. That's right. I love that. No, no need to worry. I also think I mean this is just a fun way to to play with your blocks anyways because you could take any blocks, even like orphan blocks. You know how sometimes we'll get um maybe antique blocks that don't necessarily all square to the same size. If you wanted to set them on point in this manner, that would give you um an opportunity to put those blocks together without them having to to actually fit. Yes. All right. So now what we're going to do is fold this in half the other direction. We're going to finger press those middles. And then we're going to lay our setting triangles on the opposite sides. Again, you don't trim off your extras. I was going to say you can if you want to. Um that is entirely up to you. You can trim it before you stitch or after. But it should overlap both ways. Um do you want me to trim it? Would that make it easier for you? Let's do one trimmed and then one without. How about that? That works cuz you can you can trim it after or you can trim it before. Makes sense. I feel like that is just a preference thing. Some people like to see that point hanging over and then other people are like this is weird. So it just is whatever whatever works for you. You get the same result in the end. Exactly. Perfect. Okay. So then we will start here. Yep. Make sure there's one. Here's this one for this side. Perfect. Find that little mark. Yeah. And really, as long as like both corner, the little peaks peek out. Mhm. Then that's all you need to worry about. Perfect. Perfect. There we go. Awesome. So now I will go ahead and trim these off because you just don't need that extra bulk. Although it's not a lot. So if you wanted to leave it in, you could. Not a big deal either way. Okay. Get this pressed back. Just think they look so pretty. They really do. It's so satisfying. Yeah. Get it all And this really is such a fun fabric collection. It is. It's so bright. Bright and cheerful. All right, so now we're just going to square it to 12 and 1/2 in. And that's where the the having a a ruler that's exactly the size you need it is going to come in handy. Um, and then also there's some lines on this that help me out a lot. So you can see that we have these like 45° angle lines. And I usually just kind of eyeball it. I look at where all of that stuff hits. You can line up your 45° crisscross with the center of your for patch to make sure that you get that block really really centered right in the middle. And then you're just going to trim right around it. Perfect. Just trim off all that excess fabric, which you know there's there's quite a bit. So, you do have room on this one, but I don't feel like it's so much that I wanted to make my squares smaller. No, definitely not. I just I like having that little bit of play so that I can make everything match up really nice. Well, and like you said, knowing that you can set it with different blocks and square it accordingly. The you definitely have some room there. Now, here I'm just going to turn this. Make it easier. Yeah, I'm just going to turn it cuz, you know, I don't need to be making funky looking cuts. Whoops. I got a little If you have a spinning mat that you love that can handle a 12 and 1/2 inch block, that'd be great. But you can also do the whole like shift your body, just turn it around. Yeah. Oh, so cute. And there we go. Block A is done. So, you're just going to make a few more of those and set them aside. And now we're going to move on to our little quadrofoil block. Perfect. So, this one has a couple of fun techniques. One of them is um we're going to make our four patches using our fulls size squares. So, that's where your 10-in background square and your 10in print square is going to come into play. So, we'll do some of these. We're going to put these right sides together. and you're just going to select a few. I I'm sure like actual numbers are written down somewhere, but um we're going to draw a line down the middle. Okay. And this is one of those things. I was at a class a couple of weeks ago and somebody said, "Do I have to make my four patches like this?" And I said, "No, no, you don't have to." She said, "I really like to just cut squares and sew my squares together." And I said, "That's great. You could. It's the same the same thing. As long as you have four patches that come out to four and a half, that's what you're looking for, it's fine. You can cut them into strips and sew them together and then subcut, whatever. This is just a fun hack that makes me feel like I'm doing less sewing and um and so I kind of think I enjoy it. I think it's cool. So, we're going to sew on both sides of this line and then also on either side of our um 10in squares. Perfect. And so for making the whole quilt, you're going to end up with lots of little bits of four patches here that you can mix and match to make them scrappy. I I need you to just sew me one little piece so that we can make another scrappy four patch so we don't have to do, you know, what you would do for the entire quilt. Perfect. What I'm going to do now is cut this in half on that line in between the two that we stitched. And then we're going to cut these down into 2 and 1/2 in strips. And you are going to use the the edge. You're not going to necessarily go by your seam line. Although you do kind of want to make sure that it stays at that quarter inch mark. Um but we're just going to cut these in half. And I'm going to put these aside because what we're going to do next is cut these the opposite direction still in two and a half inch segments. Just like that. And then you're just going to mix and match these. These end up being little 2 and 1/2 in square these segments. These little segments that are ready to mix up. Yeah. So we'll press them. I'm going to move that out of my pressing mat. And this is the one I had Misty sew earlier. Oh, the feet came up. All right. And now, if you press these all to the dark side, which I just I know I just did the opposite, but if you press them all to the dark, they will automatically nest when you flip them around. And so then you're going to just flip these and make all of your four patches scrappy. Perfect. Just mix them up. And you can also use some of the ones some of the squares from your other cuts. So it's kind of a combination of both techniques, but you know, either way you get what you want so that you have Yeah, you just need four four patches for each block. So let's go ahead and stitch this together nesting those seams, of course. And then we'll move on to the next piece. All righty. So, this one does use um multiple squares and different types of cut. There's that. All right. Perfect. There you go. So, we've got we've got our four four patches made for our corners. Now, we're going to make the middle section of our block. And that looks like this. This is the I guess you call it the middle kind of like a petal. It kind of m Yeah, a petal or like a a square on point. So, what you're going to do for that is just grab another square and we're going to cut it down into four and 1/2 in squares. Now, I like to just fold it in half and then cut my four and 1/2 here. It's a good little time. Yeah. Then you're just going to cut them all at once. Don't cut your ruler. [laughter] We're going to turn that and subcut our four and 1/2 inch squares. So you'll have all four. Whoops. Think that was my fault that I was going to say might have nicked the blade. Darn it. I think I did. It happens to us all. Well, there we go. Okay. So then you'll have you'll have these little squares. And what we're going to do is we're going to combine them with our background 2 and 1/2 in squares. And I've got three done in this fabric already. So, in order to stick with that, we're going to use this piece. Perfect. We are going to snowball the two top corners. And what we'll do is just sew diagonally from corner to corner. Now, you can draw a line if you want. You can mark a line. You can eyeball it. You can press it. Whatever you like to do. You can use your seam tape. Um, but yeah, we're just going to corner corner to corner stitching perfect diagonally. And I am just going to live on the wild side and eyeball it. I've sewn a few of these. You know, you get pretty good at it with time 100%. Okay, so what we'll do next, I'm going to go ahead and trim off this excess. And I just line up. Usually I do a quart of an inch seam allowance because that is just pretty safe. And then we're going to press it back. call it like a stitch and flip method, I guess. I don't need to really like attack it. And then we'll do the same thing on the other side. Crisscrossing that middle so that we get a really nice point and stitch from corner to corner again. All righty. There's that one. Perfect. Thank you. You bet. All right. Trim it, press it, and flip it. Do it three more times. [laughter] And we've got what we need to make this block. The middle piece is just another 4 and 1/2 inch square cut. So, this is going to come out of some of those other cuts that we made earlier. Um, just mixing four and a half inch squares. Yep. All right. Okay. So, to put this block together, we'll start with our center and then these go facing out with the the color the prints touch and the points point out. Now, you could very easily swap this and make it a star. Yes. So, if if you wanted to, you could. We're going to keep our prints touching. That creates that pretty um chaining effect. We'll do that one. and that one. Perfect. So, if you want to see, I'll I'll flip it around so you can see it as a star because I think it's also very cute. I was half tempted to do the star. Yes, cuz I just love stars. I do, too. I have a thing for stars in quilts. I don't know why, but I feel like it's very traditional and beautiful and I I love stars. So, if you love stars, too, you could make your whole quilt with stars instead of the square. Yeah. But for this quilt, we have them flipped. But that is that's one of my favorite things about quilting is how just flipping things around can create a totally different look. Brand new. All right. So now we're just going to stitch this together. And you can just use like your your chain piecing method where we're going to join these two, these two, and these two. And then we will join our strips. Yeah. And it's going to be a big nine patch. Yeah. And it goes together and it makes a block that looks just like this one. And this should come out 12 and 1/2. If you need to, you can lay your square on it and trim off any little extras that you know, sometimes our fabric gets a little stretched with pressing or our seams are a little wide or a little narrow in different places and that helps your stuff go back together easier. Absolutely. It's so cute. So, this one does not have any sashing or cornerstones. You'll notice they just they go together just like this every other block and they just create this beautiful chaining pattern. I love it. And I think it looks so fun. So I also added a 2 and 1/2 inch inner border and a 5 inch outer border. And then I want to show you we did some really cute things. So we have these cute little tags that pop up here on the on the back. I think they're so fun. Adorable. You can put a little It's made with love for so you can write who you made it to. You can write the year. And these are so cute. They get stitched into the binding and they just look great. And also, isn't this backing beautiful? It's gorgeous. I love this fabric. It is so pretty. And I absolutely love the quilting pattern that you chose in that thread. This pattern is called Diamond Loops. It's one of our newer patterns. And I just think it's beautiful. I love how we quilted it with this vibrant blue thread. I think it looks great on the background fabric. Um, it comes together in a quilt that is 73 by 73, which I just think it's a great picnic size. It'd be it'd be perfect for all kinds of fun things. throw it in your car and use it out all summer long camping or build blanket forts out of it. I don't know. I just think it's perfect. I love it. All right. I think you're up next. Let's do it. All right. So, this is my quilt. I'm calling it four of a kind. And to be honest, this was kind of like a personal challenge. I feel like it's inspired by that card trick, the spinning squares. And I'm really excited to share it with you guys. It's so cute. Thank you. I love how it turned out. So, to make this quilt, you're going to need one package of 10in squares. And I use this February 26 cool collection from the K Facet Collective. You also need some background fabric. I just used super white from ColorWorks. And you need 1 and 5/8 yards of that. 1 and 38 yard for your sashing fabric. And I pulled this great little dot print from the collection. For your backing fabric, you need three and a half yards with a horizontal seam or 1 and 3/4 yards of a 108. And if you have a little 6 in squaring ruler, that will also come in handy. And a marking tool. So, let's get started. So, this quilt actually you end up with two blocks that spin opposite ways as you make them. That's cool. So, you have kind of an A block and a B block, but you get them at the same time. So, I love that. Yeah, it's pretty fun. And so to begin with, one thing you do need to keep in mind is to make this, you need matching prints of all 40 squares. So you need 20 sets of matching prints. Does that make sense? Yes. And so for each block, we actually need a total of four 10in squares. Ah, so two of each. Two of each matching. Okay. And so we're going to start by cutting these two. And we are going to cut a sevenin strip. Whoops. Got all these rulers here. Yes, we are ready to go. Okay. So, we'll cut this one into a sevenin strip. And then I'm going to subcut this into seven in squares. Whoops. Cool. There we go. That's correct. And [snorts] then this little bit can just go in your stash. You won't need that. And then on this piece, we're going to cut this into a 2 and 1/2 in strip. And we will subcut this into two and a half inch squares. Awesome. There we go. Just make our way across here. And you do kind of want to keep your print fabrics together because it will help you later on. So, there we go. And now I'll just set that aside for now and we can get ready to cut this one. Is that the same cuts? They are. They are a little different. Okay. So, different cuts from this one. And we actually cut these two squares a little bit different as well. So, for these to begin, we're going to cut a 4 and 1/2 in strip off of both of these. So, I'll line up my ruler here. There we go. And then of these leftover sections, one of these can go to our stash. We don't need it. Nice. And these we will subcut into four and a half inch squares. Very cool. I'm so intrigued. It's a lot of little steps, but once you get it all worked out, it's pretty fun how it comes together. Here's this one. And now from this piece, we need to cut a 3-in strip. And we just need two 3-inch squares. They keep sticking together. There's like a little static electricity or something happening there. And then this last 2 and 1/2 in strip, we will also subcut into two and a half inch squares. It's a great use of fabric. Yeah. And the pieces that you have left over are a really nice size. Yeah. They're definitely good for other projects. They're not not just crumb piecing. Exactly. There we go. All right. So, now the first thing we're going to do is we're going to take one of those uh 3in squares. Well, actually both of them cuz we need to make two of these. Okay. And then from our background, we're going to cut all of that into 2 and 1/2 in strips. And then we're going to subcut those to different sizes. Okay. Okay. So, these first ones are 3 in. Mhm. 3 by 2 and 1/2. Exactly. Okay. And we'll sew one on each side of our center. You're going to do the exact same thing with both of these. All right. And well, I have some sewn. So, I'm just going to lay these out to save us a bit of time cuz there's there's a lot of sewing. No worries. I was just going to sit through good. You're good. Oh, wait. Let's see. And so then these should be 7 in. That's right. And so then your 2 and 1/2 by 7s will go top and bottom. And so you kind of get this square and a square. Yeah. Block. And they look just like this when you're done. Whoops. Dang it. Got butter fingers today. There we go. So, you're going to make two identical units just like that. Okay. So, let's go ahead and set these aside. Makes my life easy. Yeah. Don't worry. You will get to sew. I promise. And so, now we're going to pull in those sevenin squares that we cut from our other print. Okay. Okay. And we're going to pair these right sides together. Just line those up. And then we are going to take our ruler and we are going to draw a line corner to corner. And I'm going to have you sew on both sides of both of these. Okay. So, it's a great opportunity to chain piece. Excellent. Make sure you can see that line. There we go. There's the first one. All right, I'll start on this. And just take your time. We will have a chance to square these up later. And then there is that one. Once you finish all you this and then I'll do the next. And so then I'm going to go ahead and cut on that drawn line now to trim these two apart. We go. And then we can press these over here at the iron. Move some of this out of the way. So you're going to get four little units that look like this. All righty. Do you want to cut that one in half and I'll keep pressing? Okay. Thank you. Yeah. So we'll set that seam. Roll it back. Do these get squared at this point? Not yet. We can wait. Okay. So, we will just finish these and then we're going to set them aside for a minute. There's that one and this one. That's already a cool block. I know, right? It's already fun. So, there's those four that are ready for us. And so now we get to move on to the other half of this, which we're going to use our 4 and 1/2 in squares for. And so then from our background, I've cut some 4 and 1/2 and some 6 and 1/2 in pieces here. Okay. And then that's when we're going to pull in these little 2 and 1/2 in squares. Mhm. And so we are going to make sure that we do these in opposite directions. And I've already done a few. So, let me just make sure I'm doing it correctly. Okay. So, we're gonna place this here. And we're gonna uh snowball this one from point to point this way. Okay. And this one from point to point this way. The other direction. They have to be opposites. Okay. So, then this one would go this way, right? That's right. Exactly. Okay. And so, I'll let you take that to the machine. Yep. Absolutely. And we're sewing on the line. On the drawn line. That's right. Okay. All righty. Perfect. Now we can trim those apart. Cut off our little bit of excess here. and this one. And now we can take this, press it back really quick. There's one and two. It's interesting because this is from the same print, but they look so different because it's just where you cut. Yeah. And so then you're going to make sure the print is touching your print square when you put these together. Just like so. So if you want to sew this one. All right. And then add that. Okay. That I can do. Perfect. It is satisfying when it just lines right up, isn't it? Perfect. Okay. So, we can press this. And then you will repeat this exact same thing four times. You need four of this little unit to complete your blocks. There we go. And so, I have those other three done for us. And so, now we have these two pieces here that we bring in. And so, just like we did when we made this, we're going to pair these right sides together. Now, okay. You do want to kind of match up these points as best as you can. We're gonna square, so it's not a huge deal. Uhuh. Actually, this one's a little smaller, so we'll put it on top. Okay. And then we are just going to draw our line corner to corner again. Ah, so interesting. You want to make sure you're intersecting that, that point, that seam there. Okay. And I promise it's much more forgiving than you think it's going to be. [laughter] And so we're just going to draw that line. And you're going to sew on both sides again. Okay. And so I will keep prepping these. I'm doing all four. Doing all four so we can finish our block. Okay. Does it need to be kind of scant or does it I would be a little scant just to make sure you have room to square. Okay. It's a great question. And so we will just make our way through these four sets, sewing on both sides, and we'll meet you back here when they're all done. I wanted to reiterate just one more time really quick how to make sure you are successful when you're doing this. And so if you look on these two blocks, we have the same print squares that we want to line up. So, take a minute, line up your halves, make sure that little point is meeting, and if it's helpful for you, absolutely put a pin in there because that's really all that matters. The rest of it we will handle as we square it up later. And so then once that point is lined up, you're just going to sew that scant quarter inch on both sides of your drawn line. Okay. So, let's do that for our last one. Then we'll square it up. and she can just flip it around. Go right down the other side. All right, time for the big reveal. All right, you can kind of test it by just folding back those halves, but look how nice that looks. That's perfect. This side looks great. So beautiful. Now we can cut on that drawn line. We'll take this over to the ironing board. Press these back. Just roll that. There's one. And two. I should also point out that these halves at this point are what give you your opposite spinning blocks because they're going in different directions. You can see that here how the blue hooks this way and then that way. So now let's talk about squaring. So I've got my little 6in square ruler. And there are a couple things that I am looking for. I've got the 45. I want that to run as close to possible on that 45 seam line. And then I can check this little square in the middle. I kind of eyeball that. And then I want to be able to get these in the corner. So sometimes you have to just shift just a little bit to make everything work. But I would rather have this outer background seam be off from that point than these. These will be much more noticeable. Yeah. And so we're just going to square this up now to six inches. And then we'll spin this. And now we can cut the other side. And And then you just want to add these to the piles that are spinning the same way. Yep. Keep your matching ones together. That's right. We'll finish off this little guy. Squaring really is just the It's the trick that makes everything look good. It really does. It just brings everything together so you don't have to fight with it. Yeah. And then spin. There we go. You'll notice I had plenty to square up all of these. So, they will just come together great. And so now we get to lay these out into our blocks. And they just simply spin just like so. Nice. There's one. That's right. And here is block two. And you'll notice how these prints start to match up and it gives us that illusion of these cards spinning. Ah, I love it. It's so fun. I was just so excited when I figured out that it would work. It was some tricky quilt math. And so I just set these together four across by five down. So I just cut my sashing strips at 2 and 1/2 in. And then all of your little cornerstones came from those extra 2 and 1/2 in squares that we cut from our prints. So that's where you'll get those. This finishes at 54 in by 67. So a great little throw or picnic size. And I quilted it with a new to us pattern called Cakewalk, which is pretty fun. It's very cute. And it's got this nice big print on the back. This is actually a 108, but it's just kind of a print from the line that they've blown up to this bigger scale. It's so cute. And then look at these adorable little tags. I love this one. Comfort level expert. They're so fun. So cute. So, I hope you guys enjoyed this one. I'm calling it four of a kind. And that's our double take. Awesome. Well, I think these quilts turned out so great. I had a lot of fun doing the card trick block for our double take. Yeah, it was super fun and I hope you guys enjoyed both of these ideas and we'll see you next month for another fun double take. That's right. See you.



