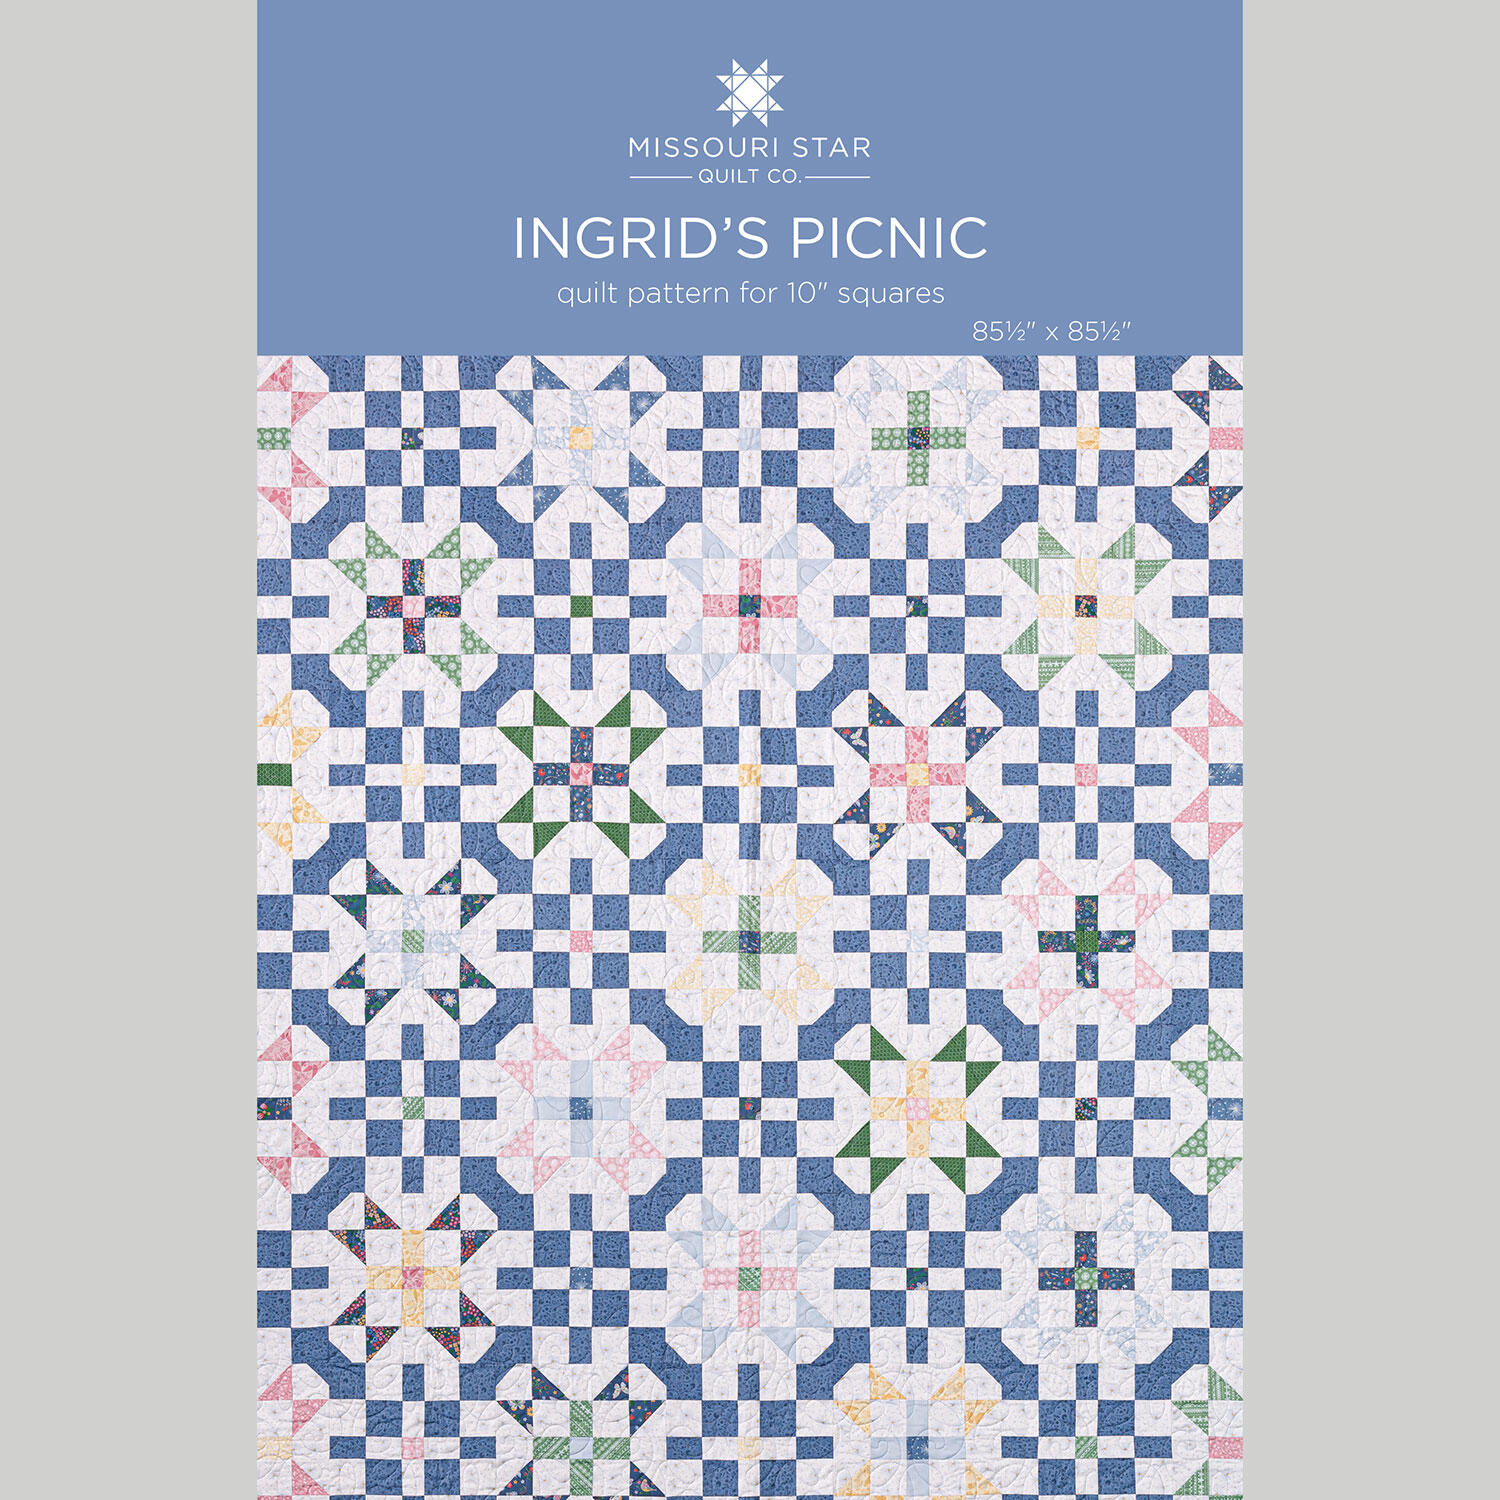
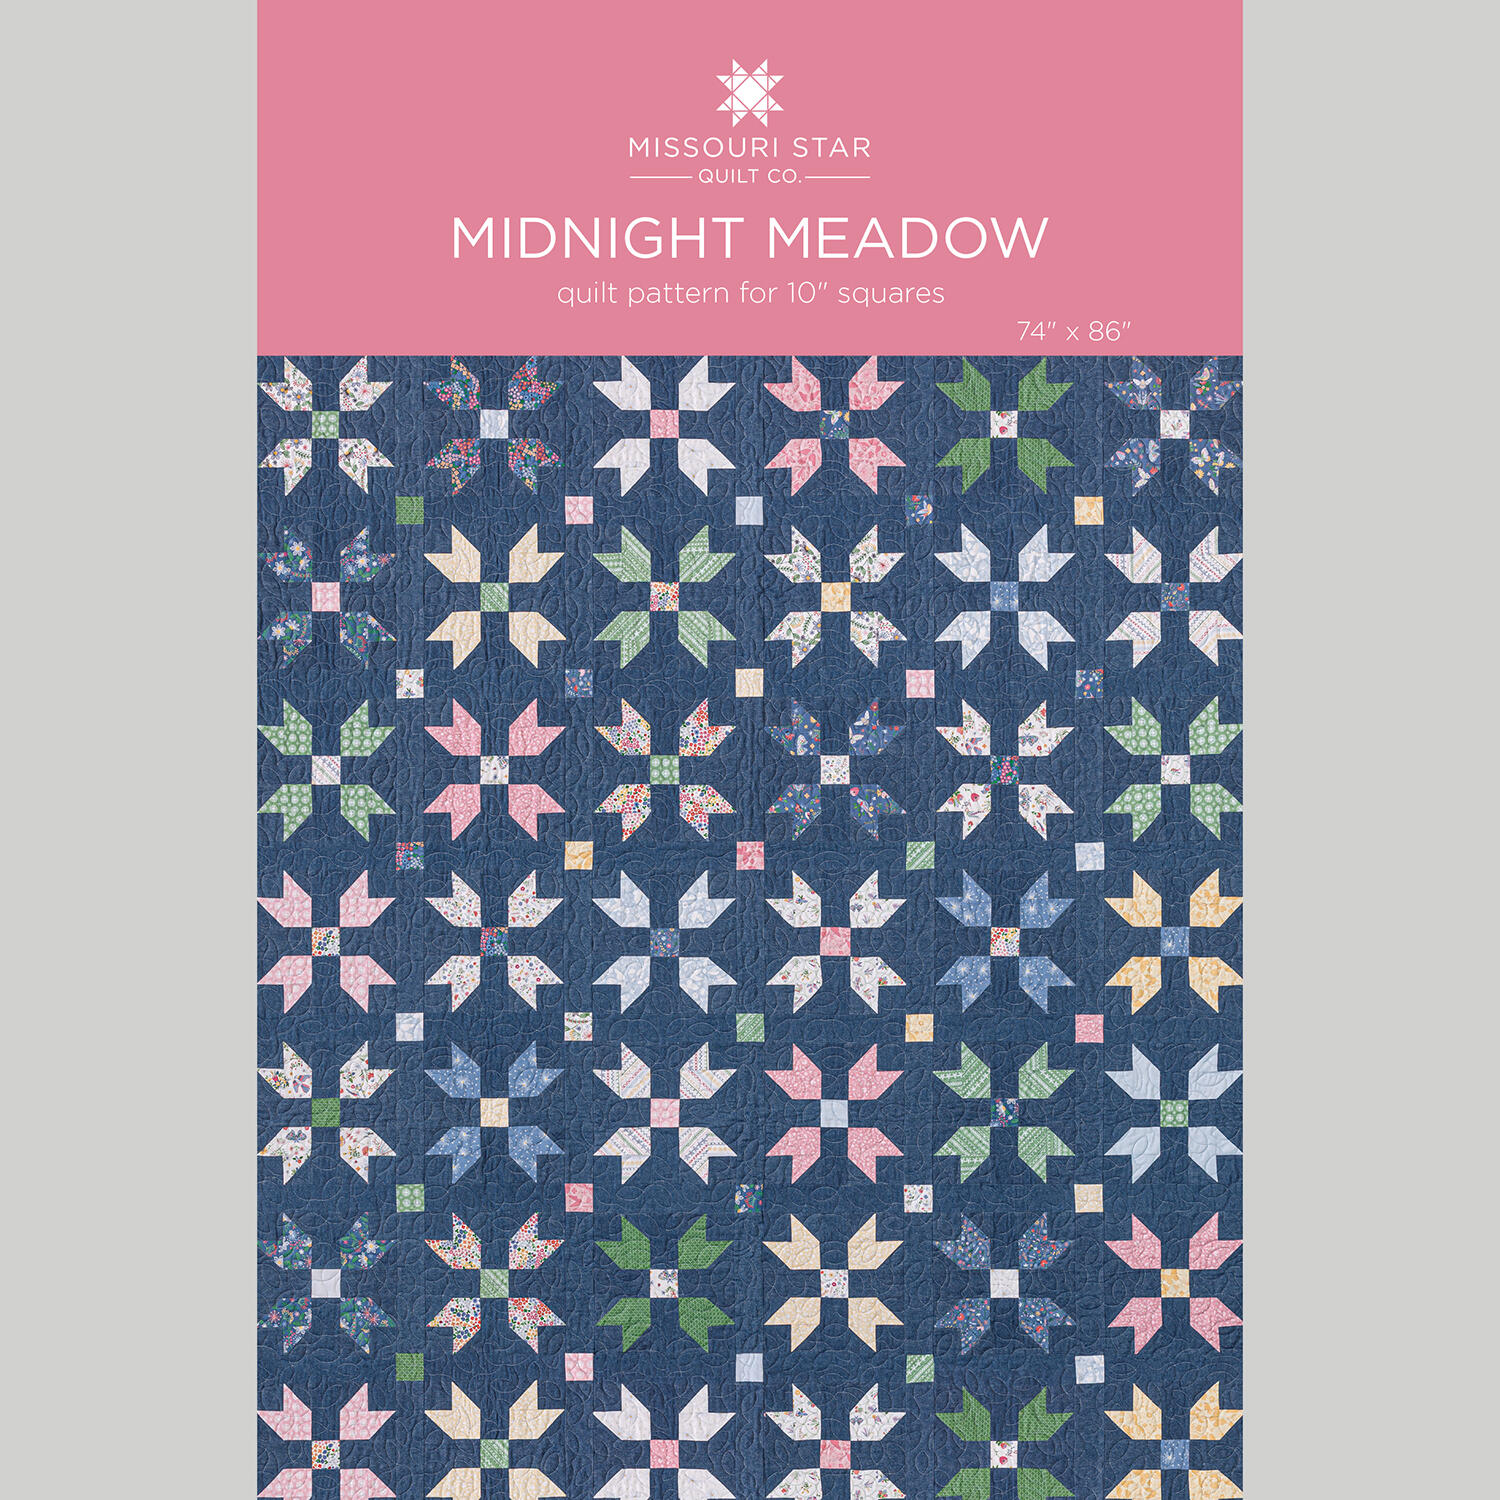
In this Double Take, Natalie and Misty are celebrating something extra special - the launch of our brand new Ingrid’s Wildflowers fabric collection! Using the stunningly classic Studio Star block, Natalie and Misty each create their own unique version, showing off the beauty and versatility of this fresh collection. Filled with graceful florals, soft movement, thoughtfully coordinated colors, and a pinch of nostalgia, Ingrid’s Wildflowers brings a light, artistic touch to every block.
Natalie is the host of Quilting 101, Embroidery 101 and the Creative Strategist and Editor of Block Magazine at Missouri Star Quilt Company. She was taught how to sew by her mom, of course, and began quilting when she grew up.
In this Double Take, Natalie and Misty are celebrating something extra special - the launch of our brand new Ingrid’s Wildflowers fabric collection! Using the stunningly classic Studio Star block, Natalie and Misty each create their own unique version, showing off the beauty a...
How long is the tutorial video?
The tutorial video is 00:25:06.
Are supplies listed for this tutorial?
Yes. The tutorial page includes the supplies and materials connected to this project.
Video Transcript
Hey everyone, it is time for another double take. So, I am Misty and of course I'm here with Natalie. Yep, we are excited. We've got fun projects today and a great new fabric line to tell you about. I know. I'm so excited about that. Both of these quilts are inspired by the Studio Star block that Jenny taught a few years back. So, let's show you what we've made. All right, Nat, it looks like you're up first. This is so beautiful. Oh, thank you. I'm calling it Ingred's Picnic. I um I added this fun like checkerboard block and it just reminded me of those really cute picnic tablecloths and I think it's fun. It's easy to make so I think you'll be surprised. Awesome. Um to make this quilt you're going to need one package of 10in squares and we are using Ingred's Wild Flowers. It's our fun new line based on Ingred's embroidery and I just love it. I think it's so cute. You'll also need some accent fabric about 2 and 2/3 yards. You'll need some background fabric about 4 and 3/4 yards. Your outer border is 3 in. So you'll need one yard for that. And then your backing, you'll need seven and 7/8 yards with a vertical seams or if you use a 108, you'll need two and 5/8 yards. Awesome. Other helpful tool, we have some half square triangles. So a trimmer tool or your favorite squaring tool will be helpful. Perfect. All right, so let's get started. All right, so to make this quilt, we're going to make two blocks. We have our main studio star block. That's half square triangles and a little sashing. And then we've got our accent block, which is four patches and a little sashing. They both come together really quick and easy. And uh so let's start with our studio star block. So to make this one, we're going to grab a couple of contrasting pieces from our 10in squares. And those make up the half square triangles and the little sashing bit. And then also this little two and twoin square comes from a different piece. Yeah. You're just mixing them all up. Yeah. So you mix and match. So all of our um all of our 10in squares are cut the same. First we're going to cut a 10x5. And then we're going to cut that down into 5 in squares and set those aside. And then we're going to cut a 3in piece 3-in strip and a 2in strip. Now, from our 2-in strip, we're going to subcut some 2in squares for the centers of all of our blocks. Perfect. I think you really only need about two from each set because um there are fewer of those, you know, than Sure. than than the rest of it. So, the rest just can go in your little uh scrap bin. Perfect. Save it for later. So, we'll set these aside. From your background, you're going to need some 3in squares and some 5 in squares. And then also your accent fabric here. We're going to get some 2in squares and these are going to snowball our corners. Perfect. All righty. So, the first thing we'll do is make our half square triangles. And we're going to grab our 5 in background square and pair it up with a 5 in print square. I do just have to say I love this little dandelion wish fabric. Me, too. It is great. And I love using a printed fabric for my background because I feel like it just adds a lot of texture. It really does. It's beautiful. All right. So, we're going to put these right sides together. And then we're just going to stitch all the way around the outside edge. All right. I think I can handle that. Cool. It's going to be good. One more here. Perfect. There we go. All right. So now, because this is um sewn around the outside edges and I have this cool little clearly perfect trimmer, I'm just going to line it up and cut them right out of the square. If you don't have the clearly perfect or you're not feeling confident, you can cut it cut it diagonally both directions. But I'm just going to line that up with my seam line and cut this way. I'm going to turn my body a little bit and cut the opposite direction. And I have a W. Yes, that would be great. Perfect. Then I'll go ahead and cut the rest of them. Lining up with my seam line and just cutting right along those edges. And then I've got one more here. Just saves a little bit of cutting. And again, just in case I didn't mention it, we are cutting these to 3 in. Perfect. And that matches with the rest of our fabric in the the strips and all those things that we had cut earlier. All right, I've got three ready. Here's our last one. Perfect. Okay, there you go. Excellent. So, now we're going to take these and we're going to create this little four patch unit that goes up in the corner. And we can trim these off or we can cut them off with scissors or you can ignore them. That's whatever you guys whatever your preference is. Um I'm just gonna I forgot to cut them with the notches. I sometimes I just don't feel like I want to put my blade in there. Well, it can be Yeah. tricky. It can get a little tricky. All right. So, we're going to match these two prints facing each other pointing to the middle. And then we'll add our background three-inch squares and just make a cute little four patch. Okay, perfect. And you'll want to do this particular piece four times for each block. Got a little shifting happening there. That's okay. It's all pretty forgiving. Yep. Then we can just open this up. Yep. You kept them kept them together. That chain piecing hack is so great. When I can get it right, it makes me pretty happy, you know. Yes. It's very satisfying. Yep. So, I'll just take a few stitches to start and then make sure that little center seam is nested. Perfect. And then we can zoom down. Excellent. There we go. I'll give this a quick press. Set our seams and roll it back. And you'll want to do all four of these. So then the next thing we'll do, and honestly you could do this at this point or you could wait till your block is put together, but we're just going to snowball one corner and it's going to be one of these outside corners. So the the pieces that don't have a half square triangle in them. Perfect. So we will grab one of our accent color fabrics and you can draw a line or you can just eyeball it corner to corner. We are just snowballing. So, we'll stick that up in that corner and just sew right on the line. Perfect. All right. There's that one. Excellent. Okay. So now I'm just going to trim that off and then we'll press it back. Have a cute little snowballed four patch. Okay, I've got the other three already made so we can sort of lay it out and see where we're going. We've got these four that are going to make up the four corners of our studio star. And now it's time to make our little sashing. Okay. So, for that, we're going to grab one of the 3-in strips that we cut from our precut our 10in square. And then we're going to need um a piece of our background, a 3-in strip of that. And I'm just going to cut this down to 10 in so that it is ready to stitch together. I'm going to trim off my salvage and then flip this one around and go to 10. I got to flip that back around now. I'm I'm feeling good today. Sometimes we're just all twisted around. It happens. That happens to me a little more often than it should. All right, so we're just going to create a little strip set. We're going to sew down one side. Doesn't matter which one because these can flip around. You got it. Okay, there is that. Perfect. Now, what we're going to do, and I tend to like to cut these before I press them open. I think it's just a little bit easier to line everything up. We're going to cut these into 2in segments. And that is going to create our little sashing. So we've got you need four per block. Let me start pressing those for you. Okay. If you like there's room. Move a little bit of that. Okay. You will have a little bit extra. That's okay. Gives you room for making sure that you have really nice cuts. All right. So, then we've got I put the print to the middle. These are looking great. And then we're going to grab our one of our little squares, our twoin squares from our pile. And you can mix and match these. We could use green or yellow or whatever colors we wanted to. And that goes right in the middle. And then you just sew it up. And you've got all of your block a blocks done. First block is complete. That's right. We'll do like the magic. Magic. Okay. The next block, believe it or not, is even easier. So, what we're going to do there is we're going to grab our 3-in background strip. We're going to combine it with our 3-in accent strip, and we're going to stitch. I've actually already got one of these stitched down the side because that's just a little bit timeconuming for one long straight seam. So, what we're going to do here is cut this into segments. So, the pieces that we're going to need are 3in squares to make our four patches, and then we're going to need some 2in strips to make our sashing. So, this comes together very fast. Oh, that's awesome. All right, so let's start with some 3-in squares. We will need two of these per unit. And typically in quilting, you have a block and then the pieces that make up the block are units. So when I say a four patch unit, I'm specifically talking about these pieces. So you mean, you know, we'll need four four patch units. But to make one unit, we only need two cuts of these little squares. So I'll press these back. Strip piecing is so satisfying because it just makes it go really fast. It really does. All right. So then to make our four patches, we're just going to flip these around and stitch them together. And if you have pressed all to one direction, they'll nest perfectly. Just stitch that down the side. Okay. And I do have a couple more of those already made. Okay, perfect. So, we've got that one. One more there. And these ones, all of our accent fabric or the blue fabric is going to go towards the middle. Like that. That's right. Perfect. Okay. Now, for our sashing strip, we're just going to cut two inch pieces off of this same strip set. So, we will need one, two, three. And you can keep pressing. I'll just dosey do behind you. Oh, perfect. And then that comes together real quick. And then from that same stack of twoin squares that we cut from our 10-in pre-cuts earlier, we're just going to grab another fun color, whatever we like and put um a 2 in in the middle. Perfect. So that gives us some added color and kind of unifies things. And then these ones go the opposite. So this one, our background comes in the middle and it continues that uh that sort of checkerboard look that's so fun. That I think is really fun. So that's pretty much it, you guys. This goes together so fast. I love it. What a fun block. Yeah, there is our secondary block. And you know, voila, you're done. Perfect. So that that is the whole quilt. I alternated them with we've got studio star and then secondary block or checkerboard. And we've got one, two, three, four, five, six, seven across by I believe seven down. One, two, three, four, five, six, seven down. 7 by seven. So there's no additional sashing. It all just gets sewn right together. And I love how it creates these little bow tie sort of like it sort of circles around the studio studio star. I just I think it turned out so great. It really did. So let me show you the backing here. Oh, also I added a 3-in outer border because I thought it needed a little frame but not super big cuz this quilt is already large as it is. Yeah. But that does also give you the opportunity where if you wanted to make this king-size, you really could just by enlarging your border. It would be so easy to do. Or do an inner and then an outer additional. There's lots of options here. Yeah. All right. So, this is my backing. So, this is one of our prints from the line and it comes in a 108 and I think it's absolutely adorable. Um, we also have these really cute little tags that come or that you can get that. This one is so cute. It says wildly loved. I love that and this one says made with love for. So you can write who you made it for, who it was made by, the year, whatever little info you want to add. It's really important that we label our quilts because I know for me, I forget so quickly what I made and who I made it for. So it is machine quilted with one of our new patterns called Chantelli Lace. And I think that is just so fun to say. I love I love it. I love the name. It's very um whimsical and cute and uh yeah. So that's my quilt. So I think Misty, it's your turn. You're up. All right, let's do it. All right, Misty, let's see your quilt. Well, this is it. I'm calling it Midnight Meadow. And I really wanted to use denim as my background kind of as a nod to great grandma's embroidery. I love that. She always stitched on denim, so it felt right. It's so pretty. Thank you. I really love how it turned out. So, to make this quilt, you're going to need one package of 10in squares. And of course, I also used this beautiful Ingred's Wild Flowers, which is our newest signature line here at Missouri Star. For your background, I use this light washed indigo denim. And you're going to need four and a quarter yards of that. But I want to note because this is wider than typical quilting cotton. It's 56 in wide. If you're using regular cotton, you would actually need 5 and 1/4 yards. So, just keep that in mind. You're also going to need a squaring tool. I'm going to use Clearly Perfect slotted trimmer A for mine. You need some backing fabric, 5 and 1/4 yards with vertical seams, or if you use this beautiful 108, you just need 2 and a/3 yards and 3/4 yards for your binding. So, let me show you how to make it. So, this is the little block that we're going to be making today. I really kind of dialed it all back because the denim is a little bit more bulky than regular cotton. Fewer seams makes it a little easier. Exactly. And I thought it really looked like one of the little flowers that great grandma would stitch. So, it felt right. And so we are going to cut all of our 10in squares the same way from our pack. And so we'll start by cutting a 5 in strip. And then we will subcut this into two 5 in squares. The first one we're going to sub cut into little 2 and 1/2 in squares. And this will make up the middle of our block and all of our cornerstones in the quilt behind me. Nice. Make sure I'm straight there. So, you can just stack those up. Then, this one we will trim down to four and a half. There we go. And this we will cut a 4 and 1/2 in strip. And we will subcut this into two and a half inch rectangles. And one more cut here. Perfect. All right. So then once we have that, we are going to pair up a 4 and 1/2 in background square with our print square. Okay. And just like you did, we're going to sew on all four sides. Perfect. So, I'll let you do that. All righty. My table slid was heading somewhere. Yep. Perfect. All right. And so now we are going to cut our half square triangles. When I'm using my Clearly Perfect trimmer, I have one little hack. Oh, nice. I like to cut this diagonal line first. Yep. I've done that before, too. You the back of the ruler. Yeah. Then we have one straight edge. And then we can come in and we're going to cut this at 2 and 1/2. Perfect. And I can line that first side up. And then you don't risk accidentally cutting into the tips of the other triangles. Exactly. It just gives you a little bit of space. That's so smart. I like it. And so then now we can turn this. Use the other side. Use the other side. We have plenty of room on these, but it's just a great little hack. And so I have some of these already ready to go, but you'll go ahead and square all four. You need all of them for your block. Okay. So, let's go ahead and press these back. Now, just set that seam and roll it back. Sometimes you have to make that denim behave and go where you want it to go. It is lighter than like a traditional um jeans denim. It's more like this chambre like my shirt. So, it's not hard to work with. Still thicker than a quilters's cotton. That's exactly right. Perfect. All right. So, then now we're going to take our little uh rectangles that we cut the 2 and 1/2 by 4 and 1/2 and we are just going to place a 2 and 1/2 in background square. And we can draw a line or press the line. I guess we don't have the um diagonal seam tape on there. So, let me go ahead and draw these new machine. Yep. So, we will just lay this corner to corner and I will draw a line here. Perfect. There we go. I'm pretty confident to eyeball them, too. To get started. And we just want to make sure that we're going to snowball all of those in the same direction. So, does it matter which way they go or is it just always going to be top left? It really doesn't because we can make the uh half square triangle go the opposite. So So just as long as you're consistent with all of these. Excellent. So I'll let you just chain piece those one after the other. There we go. Perfect. Grab a Oh, I can use my little rotary cutter to trim them apart there. Excellent. There we go. And so now we will just trim off our excess and we can press these back. I'll press them for you. That'd be awesome. Thank you. Yeah, no problem. One more here. There we go. Perfect. And so then once we have these pressed, we get to make our little corner units. And we do that. Oh, where'd I put my half square triangles? They wandered off on me. All righty. There's those. We're going to make them just like so. Okay. And so I have three of these already made. So we just need to make one. So we'll sew the 2 and 1/2 in background square to that half square triangle. Okay. And then we'll add this to it. I'm going to flip this one so that I can start from the flat side. There you go. Don't have to worry about that. Yeah. That way I don't get I don't have to start it at a a thicker seam. And then I can still do a quick little finger press on that. And then this one needs to come like so. Okay. Excellent. Perfect. Adequate. No, it's it's just right. All right, I'll give that a press. It is a little tricky and I feel like the denim has a little bit more stretch to it. It It can. So, you just want to use a little starch and just be patient and try not to stretch the fabrics. I tend to have like a little bit of a heavy hand with pulling things to make them match up and sometimes my fabric gets out of whack. Okay. So, then now we are ready to basically put our block together. And so, we have our four little corners. It is so cute. Thank you. And then from our background, I've cut the exact same size from our print. That's just two and a half by four and a half. So, those are going to set in between just like so. Whoops. And then I just swapped out just like you did on your block. So, I had a different print mix and match for the center. And then when you sew it together, it's just like that. I did put a sashing in mine. And so when you do that, you're just going to measure your block. Let's see. This one ends up at 10 and 1/2. So a great size. So they're just cut at 2 and 1/2 by 10 and 1/2. And then it is just six blocks across by seven down. I quilted it with meandering leaves, which I really like. So cute in this kind of soft blue color. And then I have that same beautiful backing and these adorable little tags. love blooms here and cultivate kindness that go along with it. I didn't know, but I love that these are just specific to Ingreds. There's all the little flowers and some cute little sayings. I'm very excited about this. They're adorable. I absolutely love it. So, this quilt finishes at 74 by 86. I think it turned out super fun and so hopefully you guys have two great ideas for the Studio Star. Well, this has been so much fun. I absolutely love the Studio Star block. I think our quilts turned out so cute and I adore this line. I do too. It's so fun to see this, you know, kind of family history take shape into this fabric. Proud. I hope so. I think so. I don't know. Please just punch. It's just pretty sweet. So, thank you guys. We hope you enjoyed our two ideas on the studio star and we'll see you for the next one.