Skip to content

Free quilting video tutorials from Missouri Star

Quilting Tutorials
Elemental Coat with Teresa Coates

Elemental Coat with Teresa Coates

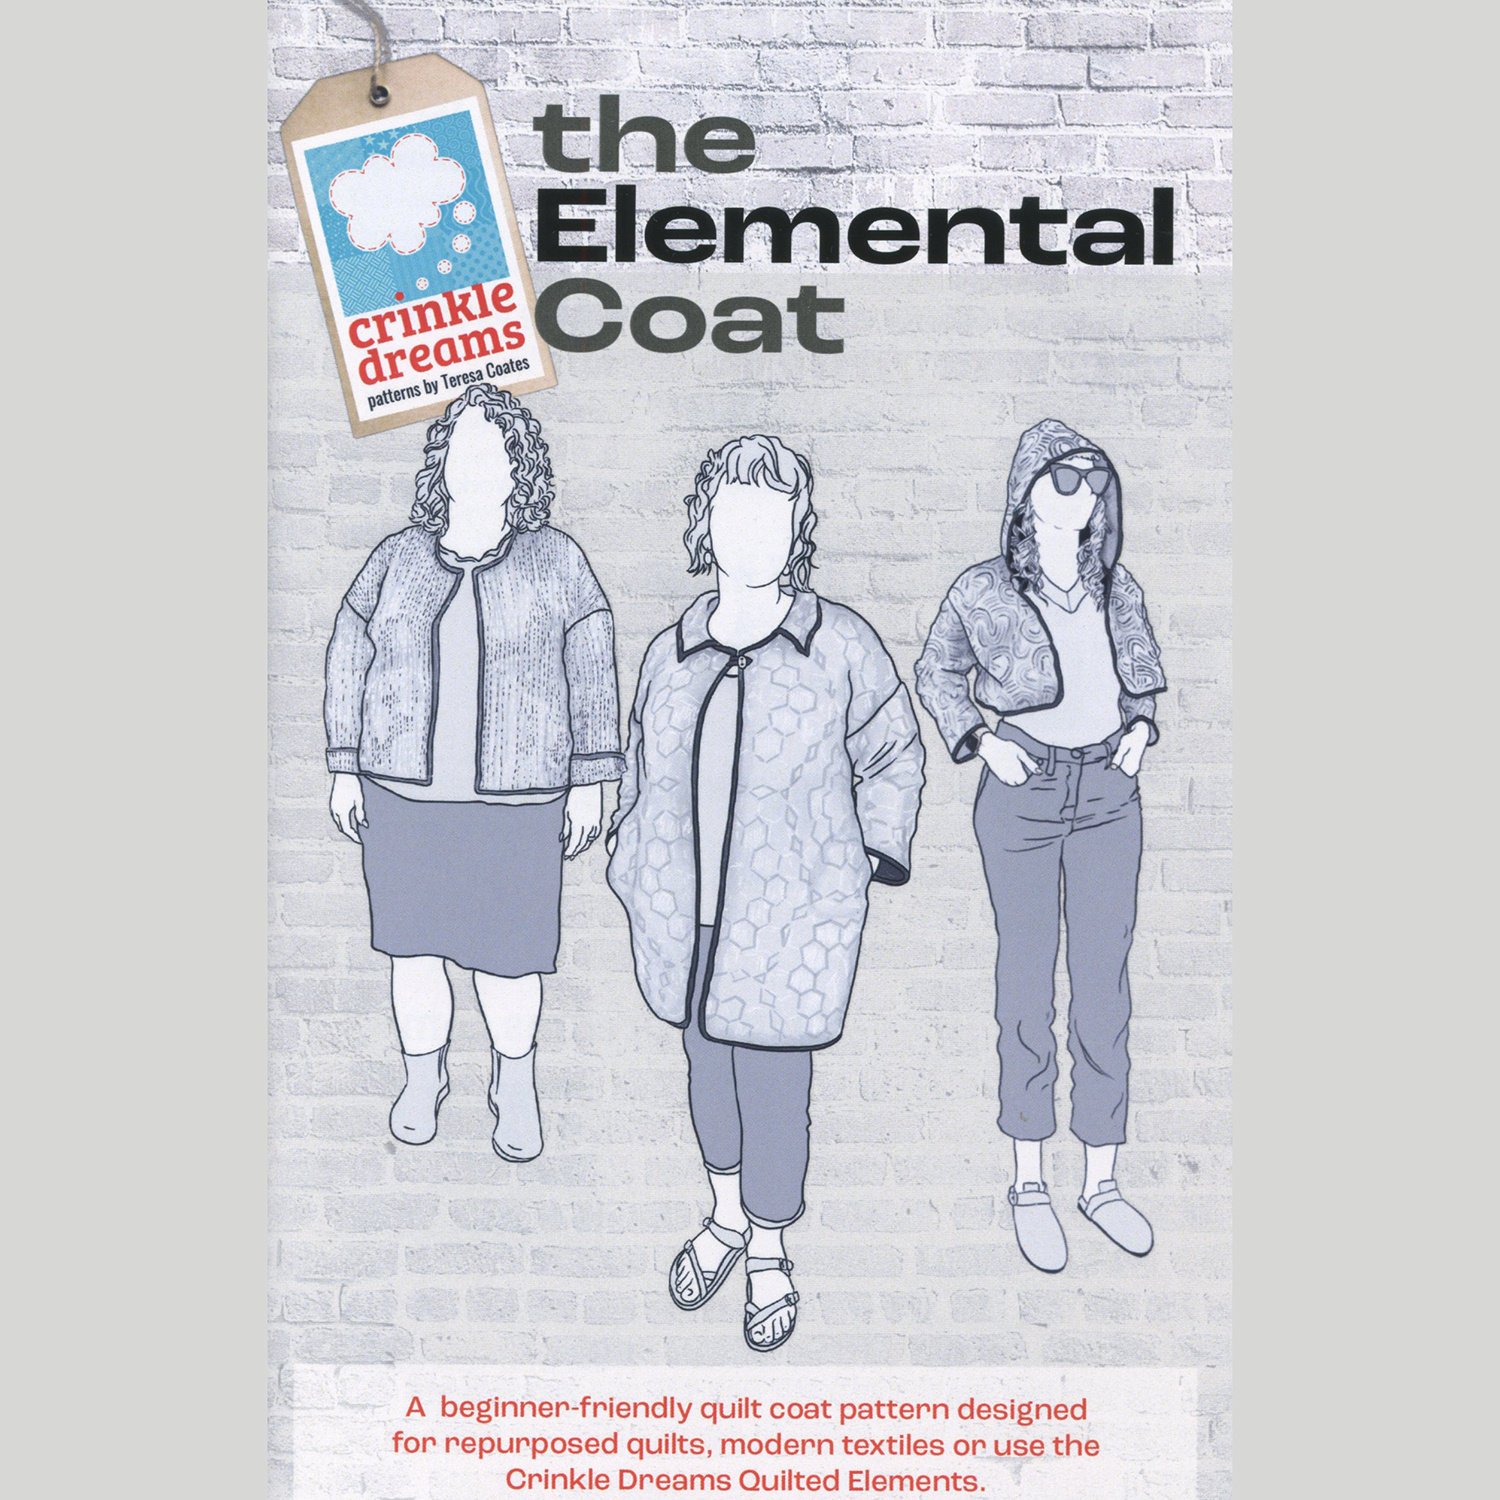
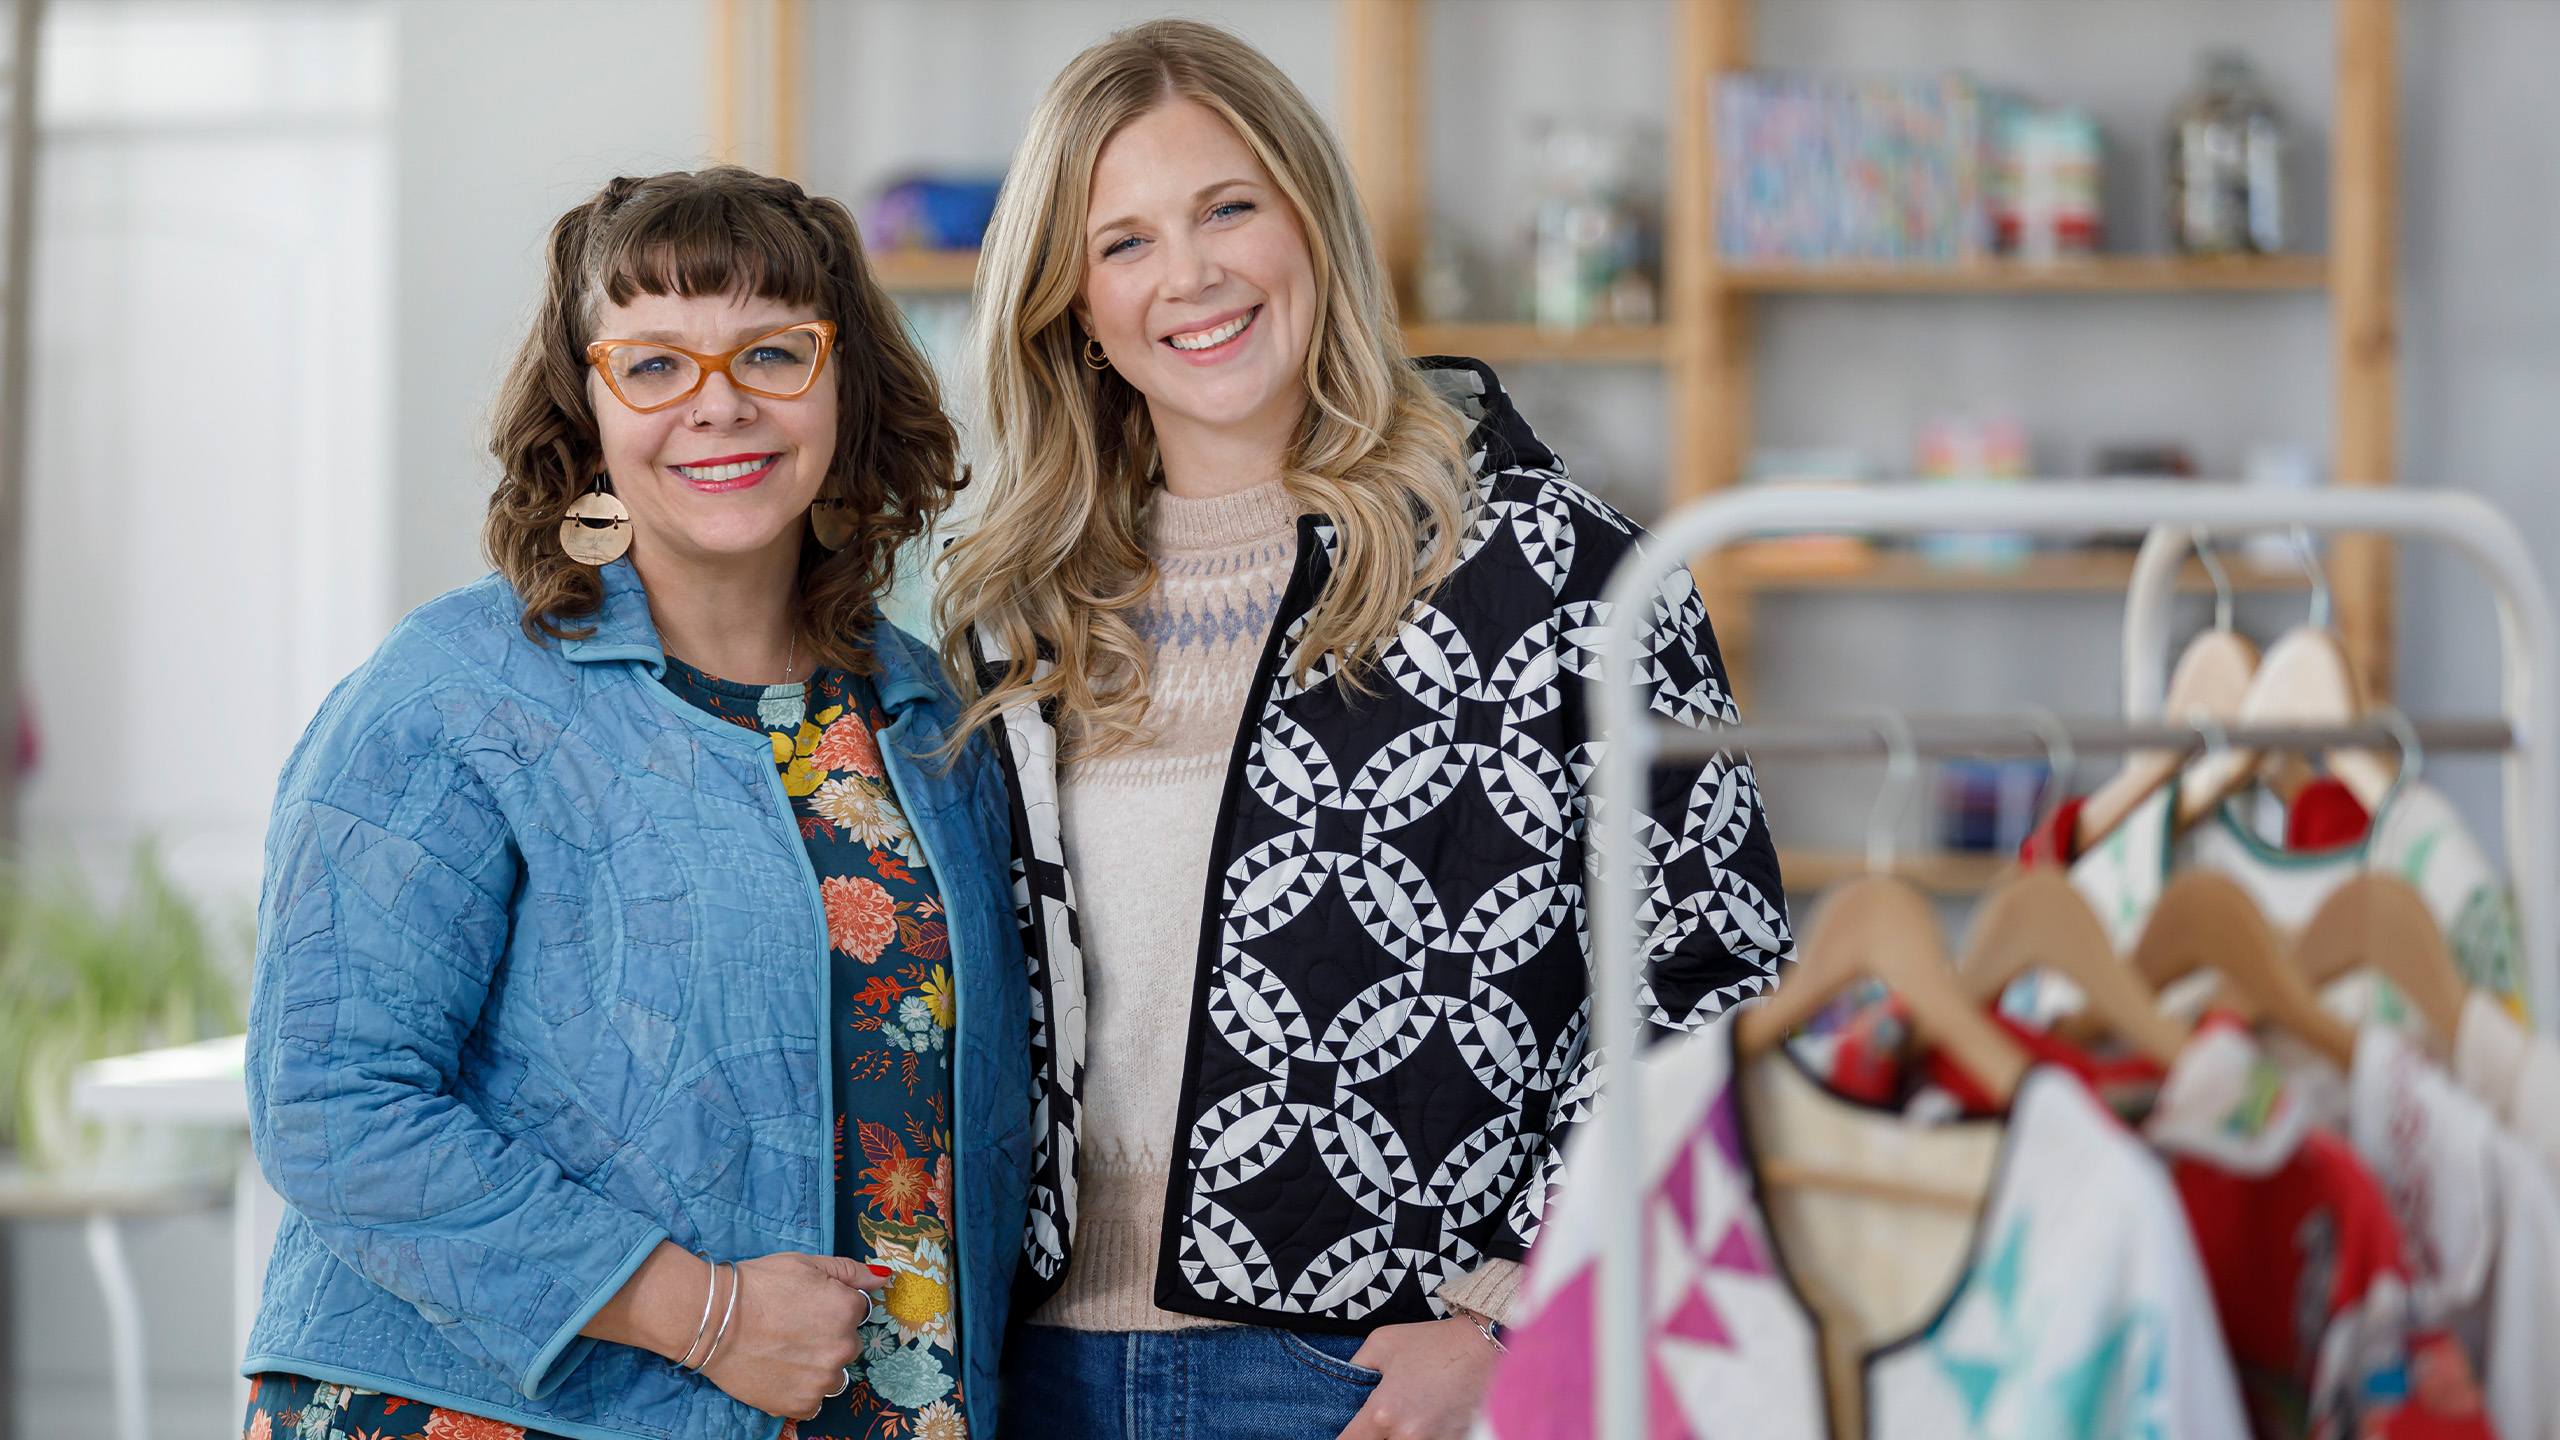
Wear your love on quilting on your sleeve–literally! The Elemental Coat uses quilted elements (or even a repurposed quilt!) to make a fashionable coat. Make it full-length, mid-length, or cropped. Choose a sleeve length. Add a hood. Guest designer Teresa Coates shows you how to take your quilting to a whole new level!

Instructor

Misty Doan

Misty Doan grew up surrounded by sewing and quilting. She loves spending time sharing tutorials each week each week, and when she’s not stitching up one of her fun sewing projects for home decor, most likely you’ll find her hanging out with her husband and three awesome kids or working on a house project.

Common Questions

What is covered in Elemental Coat with Teresa Coates?

Wear your love on quilting on your sleeve–literally! The Elemental Coat uses quilted elements (or even a repurposed quilt!) to make a fashionable coat. Make it full-length, mid-length, or cropped. Choose a sleeve length. Add a hood. Guest designer Teresa Coates shows you how t...

How long is the tutorial video?

The tutorial video is 01:25:03.

Are supplies listed for this tutorial?

Yes. The tutorial page includes the supplies and materials connected to this project.

Video Transcript

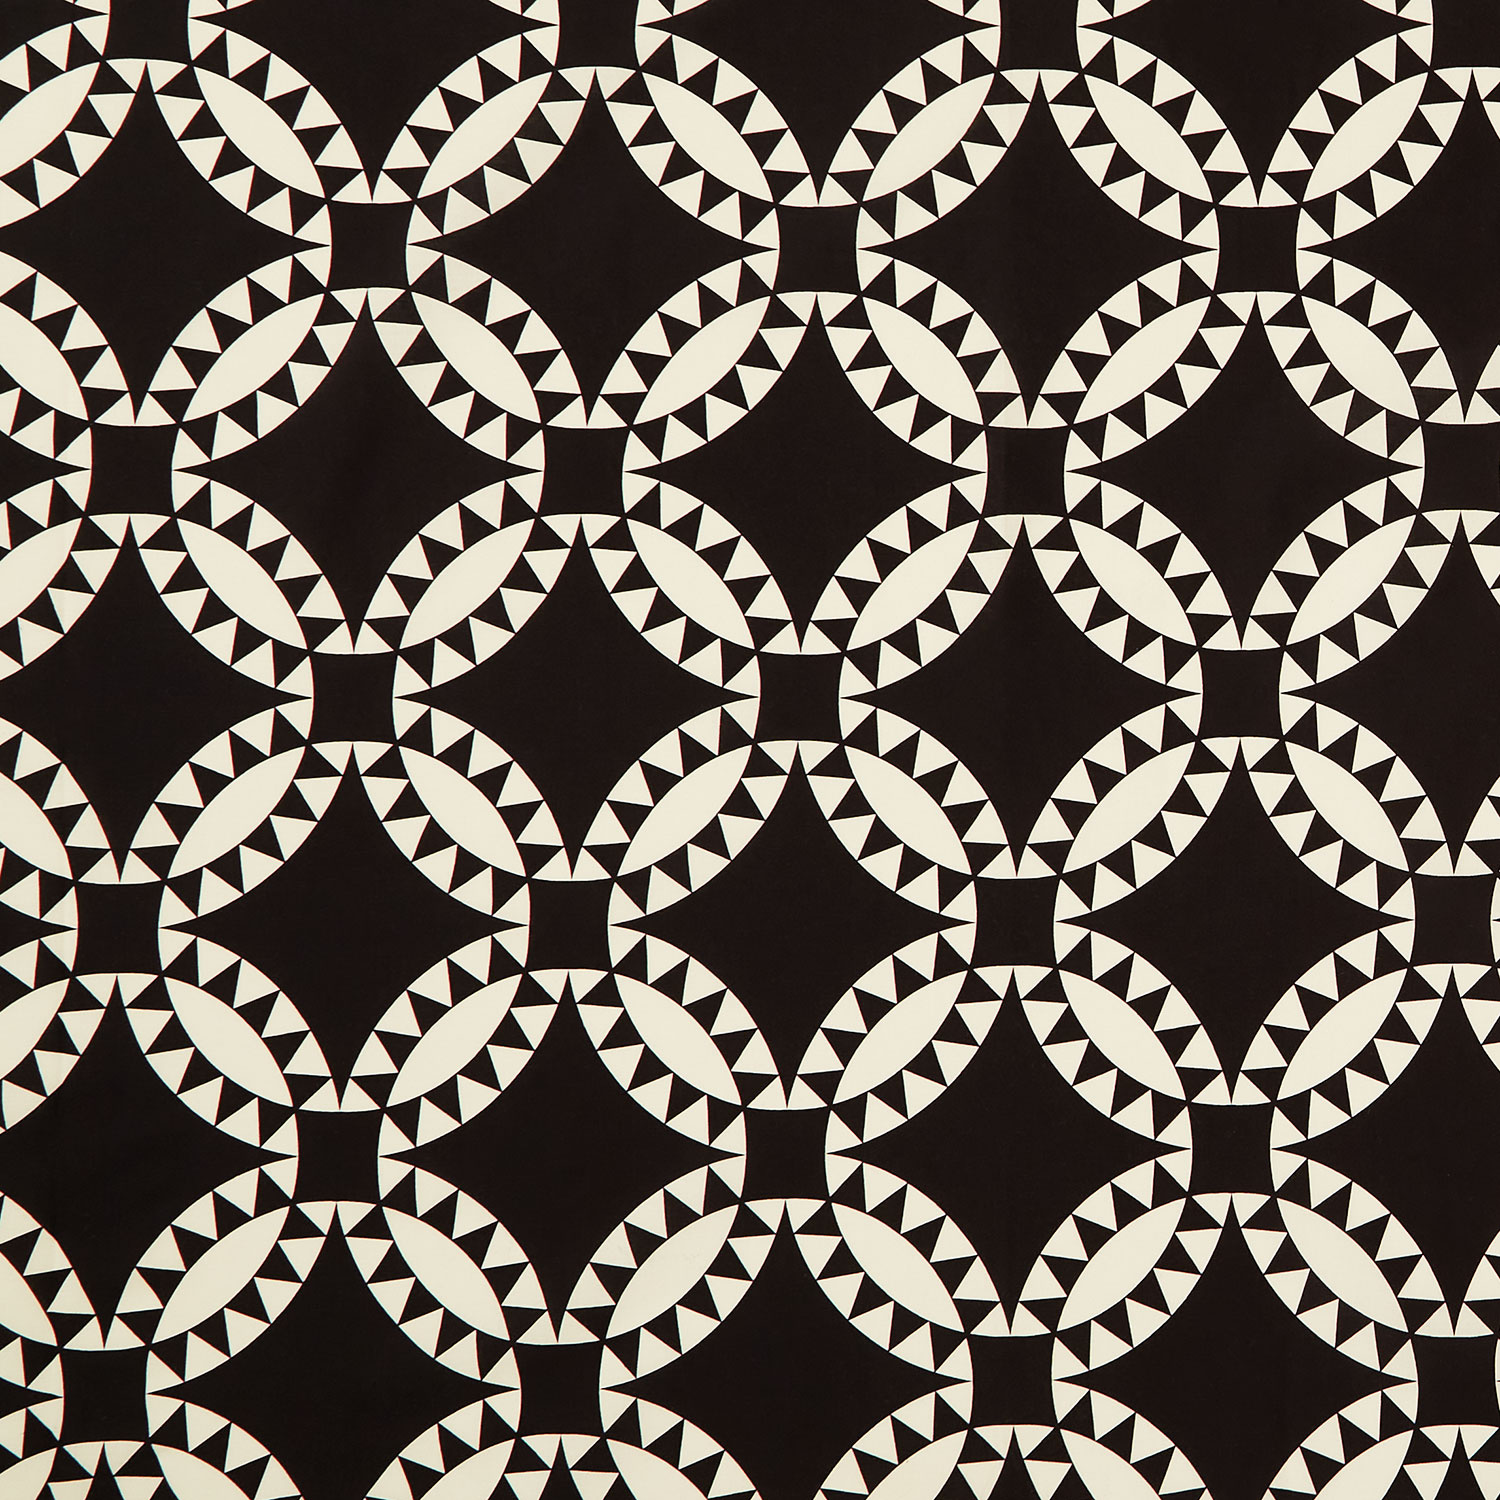
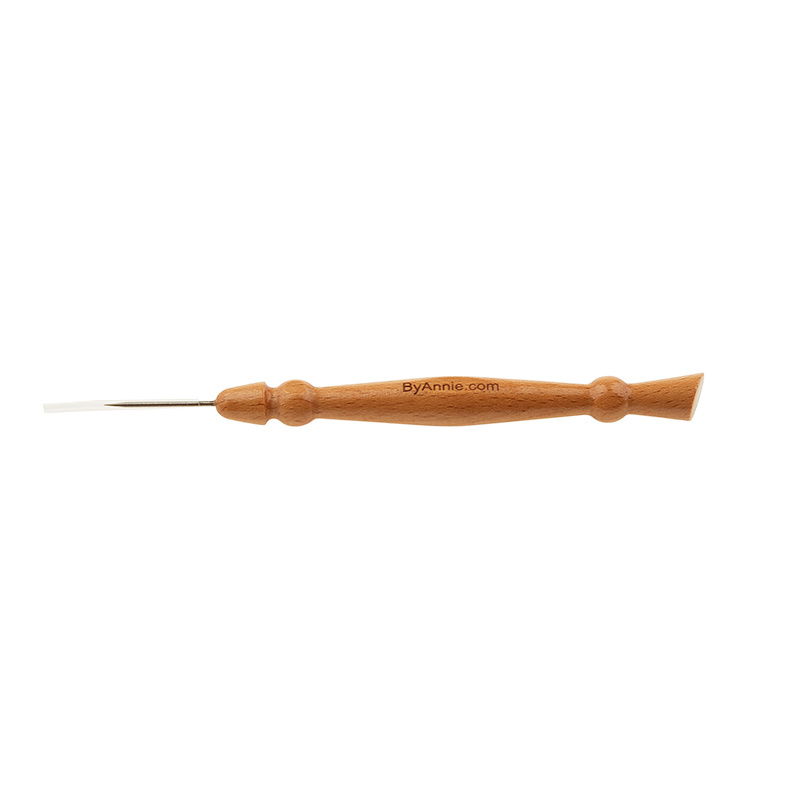
hi everyone I am so excited to be joined by Teresa coats this week and we are going to teach you how to make her Elemental coat [Music] [Music] pattern Teresa thank you so much for being here absolutely I am so excited I've been wanting to make a quilt coat for a long time and I know you have the most Quilters friendly pattern I think exactly yes and so we are going to dive in and tell everyone a little bit about yourself and then I'm going to let you just take it away cuz you are the expert here sounds great so I'm Teresa coats I am the designer behind crinkle dreams patterns and the designer of the elemental coat so I've been sewing and quilting for a really long time and quilt Cates have been popular for a while y I had made one I got a lot of compliments on it and I was like I need to figure out a pattern for this so that's kind of where this came from and I am really excited to share both the quilting and the sewing um tips and tricks with this to make your own quilt coat that is absolutely make you can make it yourself like for you and how you want it it's really really um all the all the different design choices are there for you and that's what I really love about this is it's very personable I love that okay all right so the pattern is called the elemental coat pattern so let me show you when you get the pattern it has a little pattern booklet and the pattern pages okay so it's a big one sheet we're not going to unfold it cuz it's it's big but it's a typical pattern page yes okay and then inside is a full pattern step by step all the steps so we're going to go through this I'm going to try not to look at the pattern okay and we'll go through it and make your make you a coat I'm so excited so when we start off making the coat the first thing we want to do is obviously is Trace out the pattern and use it so a lot of people want to cut out the pattern and not trace it and I really suggest that you use the pattern EAS to actually trace it out so let's get some of this stuff out of our way and I will show you how to do that okay all right so the way that the pattern Comes This is one that's already cut out okay right along the edges which you can use it's the way this one is done but what what I like to do instead is to actually trace and have you used patternes before I never have okay so patternes is a product from Pelon that is see-through okay so I trace the pattern and what I want to do is this is the the collar pattern so this is a great one to start with and you'll see why I like it because if I were to cut this out on the fabric it says cut on fold but you know that if it's a big quilt it's going to be really thick you can't really cut it on the fold because it's not it's not going to be flat IDE it's not ideal okay the other thing is you can't see through that pattern for placement so we're going to do that so the way that I do this is I'm going to grab a pen so all I do pattern weights are great for this is you're just going to trace around it and there are this one I'm cutting out to a size B okay which is 810 okay and so I've done the sizes are kind of um loose so it's a loose fitting jacket is really what I wanted with something that you could wear over a sweater sure a little more oversized a little more oversized exactly and um so the sizes are kind of yeah it's not exact and that's okay and so they're a b CDE e so it goes up basically to a 24 awesome and um yeah has lots of lots of flexibility in there okay so now I've got this traced out and I'm going to Mark here so then I just flip this over and I'll get myself a whole collor which makes a lot of difference in being able to lay this out so trace this around here and you may have noticed there were little notches up there I didn't I didn't transfer those and I probably should okay so when I do this when I trace out the pieces I always write on here what the size is what pattern it is and how many I cut okay okay so on here I'd WR Elemental coat size B collar cut one okay okay now we Trace that out and then we have our piece so now when we have it like this I can actually see through it and I can play with placement a little bit so one I don't have to fold it in half but two I can actually play with the placement and make sure you're happy with that exactly so this one I can lay it out this way there's enough room on the fabric I can lay it this way and if I do that I can actually get it pretty centered if I want to I can play with the I've marked the center here so I can kind of play with that figure out where I want it exactly which makes it really nice I love that yeah what a you'll notice that if you put it on point it does a totally different design oh yes so that's the fun part and why I really recommend putting it on the the pattern e is because you can play with the layout for all of it yeah and we'll talk about some coats later that I've put on point the whole thing which really makes it kind of sing but you can't see that through the paper that makes sense okay so tracing it out is really what we want to do with this one because this is mostly black I would go ahead and pin this and cut around it generally I want people to trace it but when it's this dark it's hard to see on the fabric so um so that's what we do okay great I got all my pieces cut out already okay and finish the edges so we should specify though we have this is a a cheater print that I've used and we have just put two together and quilted the whole thing and so all of our shapes are going to be cut out of that right okay yep perfect yeah and it's all cheater which is great because this is if you're not braid like me to cut a finished quilt right or that you don't want to do all these piecing amen those little triangles I'm telling you that's right we're gonna start with the back of the coat okay so all of the pieces I got them prepared before so that we could save a little bit of time so I've got them cut out and then I finished all of the edges just with an overlock stitch on the sewing machine great so at home I like to use my serger it works really well you just kind of zip it through and it works very well you can also do a zigzag and I have another one that we'll do that with but I'll show some examples but you just want to finish those edges because the edges of the quilting will kind of come apart so as you're working with it and the stitches will come apart and I noticed that even when I was doing this those the quilting will start to come apart sense and because you only have a half inch seam allowance you don't really want those those threads to come out very far exactly so we just cut it out seal it up right away and then it can hang around and wait for you to sew it all the way so we're here now all right so the first thing I want to do is put the back the pockets on okay so one of the big questions that I get is there's only two pockets there's only two pockets so there really is only two pockets we're going to sew them onto the back and then make the front the front part of the pocket okay so this gets a little weird but it works really really well I'm trusting you okay good thanks I appreciate it all right so now I'm going to have to get out my pattern so this was also a piece that I did the whole way in the pattern it shows half a back and I trace it out so it's a full back okay and then you can actually Center a medallion or anything like that on the back I love which works really well okay so on here I've got my marks and this is something that happens all the time is I make the marks and then I lose them in my stitching so once I've done all the stitching that I I can't see them again so I just go back and use the pattern and I'm going to stick a pin in here and I'm going to stick a pin in here okay that makes sense right yep got it okay so those are the marks on there and I'm going to do the same thing here actually if you would stick the pins in that side you bet that would be great so I just line up this bottom Edge and pin accordingly yes yep so we're measuring from the bottom oh you know what you marked these ones oh those I can see I can see them yes okay the joy of it being black and white too was like depending see these ones ended up in the black so I probably marked the batting and now that has disappeared cuz I lost it there we go the edges now we've all right so then on the pocket so I just mark on the on here use the board to measure half an inch and they're in the in the pattern there's dots okay but the dots often get lost so this is how I go back and and re well this a good reminder to all of us right that just because we forgot a step all is not lost right we can go back and fix this exactly and I know depending on the the ink that you use like I've used air erasable and then waited too long and they go away y I've used the Heat ones and they go away exactly yeah okay so now I've got that on where it goes we're going to do this one you do that one right sides together so a half an inch from the top half inch is where those are going to go together so overlapping this pen a half an inch is that right okay got it so in the pattern I'll tell you to sew from dot to Dot and that's what I'm talking about is those dots okay so we're going to do that I'm going to do one side you'll do the other is that okay yeah that's great I love it okay all right so we're going to sew this with a 2 and 1 half U millimeter Stitch length so just a regular kind of stitch length not going to uh expand it at all or anything and we're just going to sew from dot to dot okay all right and this is really important so I'm going to I'll do this side then I'll hand it over and you can do the other one sounds good so and we're going to do this with a quarter inch seam allowance so I will say that in the pattern the seam allowances kind of vary a little bit for a while specifies and it for a purpose and I'll explain each of them as we go because it will make it'll make sense once we get there so I'm going to do this with a/ quarter inch and I'm going to go ahead and back stitch or I'm going to do a little lock stitch here so if we can do a little back stitch or a lock stitch there it'll hold it securely cuz that's where it's going to get some real um stress as we're sewing all right I get to the end do a little back stitch and clip my thread all right all right so I'm going to let you show the other side trade with you bring that around quarter inch right quarter inch yep okay got real close to my needle there but you didn't hit it nope that's great all right okay all right so now we're going to take this over to the iron and press those okay so now what we're going to do is we're going to press these seam allowances out toward the pocket okay all right so I just lay it down here and press that up give it a good little press and now we have a claer yes let's stick that on there there we go so you understand what a Clapper is I do so the clappers are super great and they started out in garment making I've had one for years and years that I've used them and I've been so excited that quilter clappers are now avilable have made their way over they have and they are so effective at what they do I really love it because they do make your seams really flat and depending on the quilt that you're using you kind of need it more or less if it's a thicker quilt you really got to use that Clapper um just to get that that edge to lay nicely a nice crisp seam exactly so I'm do the same thing here press it out I just kind of want to give it a little bit of a tug so it lays nice and flat I'm going to let that sit there and then we'll press it from the other side just to make sure that it's great it's good cuz sometimes we get those little puckers in there all right so then from this side I'm going to just give it one more little press make sure it's where I want it to be I know I've only pressed things from the wrong sign and turned it over in bit surprised all right so now we're going to do a little top Stitch and we're going to stitch from where that dot was okay so where we started to where we stopped so I just kind of pull this up to find out where it's at okay so that's loose so I'm going to stitch between these two and it's really just to secure that seam allowance over toward the pocket makes sense all right and I'm going to do that about an eighth of an inch away so just a tiny little little top Stitch here and I'm just eyeballing it but if you have a edge Stitch foot or a stitch in the ditch foot this is a great place to use it okay so you can offset your needle and do a really nice top Stitch all right perfect I'll let you do the other one doy dough yep bring this around and I do find it helpful to mark it with the pins just cuz it's sometimes hard to see where it ends it's true I was just looking at that so I've got this one here then I don't have to guess here get in there there we go okay and so I want to top stitch on the pocket side now that I onet make sure I've got it right yep it's on the pocket side securing the seam allowances to that pocket and back switch there okay got it okay number one thing people run right past the stop I'm like don't do it do it it means we have to unpick and nobody wants to unpick black on black fabric we don't want to do it okay so now we're going to put this aside and we're going to work on the fronts okay we kind of do this in little steps to the pockets if you don't want to do the pockets you don't have to do this they are totally optional um but I do this at the beginning so that we don't have to put pockets in at the end and have this big huge unwieldy thing okay so we're going to work on these at the same time you get aide and it a side okay okay to come back over here all righty all right so let's grab the pattern cuz this is how we do and we can actually just use the back pattern and just line them up the same same thing and so I left the pins over there if that's what we need let's do it okay so I've got one here there's one oops and two perfect then I'm going to borrow your pattern yep mark it on mine and and then I hid the pins all right so now this is going to create the front opening for the pocket okay so what we're going to do is we're going to do a little Stay Stitch line here and so we're just going to stitch from just before the pin okay so when we get there we're going to want to pull the pin out of the way and then put it back okay okay so if you have with this fabric it's a little bit different because you can't really see it very well so if we had a lighter fabric I could just mark it with a with a pen sure and be able to see it um but we're going to stitch from just before the pen to just past the pen okay okay and we're going to do that with a scant half inch okay all right again I'm just going to kind of move the pin out of the way put it back just above that perfect okay all right now I'll let you do it all right I think I am GNA sit do it just so I can see that'll make you sew better I know right okay so now that you were sewing badly before no but I can definitely see better that's for sure all right so just before okay we're SE in the wrong direction oh you're right flip it around I just need to start at that first pin and come down right yep okay you started at the top and yeah that's what was confusing mhm so just before the pin okay just past the pin let me grab [Music] that we can totally remeasure and put those pins back in the right place oh yeah sorry no problem I'm doing a new thing so I'm uh hyperfocused here yep all right and then trim it's perfect and put that one back and then we'll just have to weate that one yep exactly we'll remeasure it's totally good all right so we can't be too far off it's all good okay so now we're going to take and we're going to snip it right at those pins okay up to but not through the stitching line the seam line okay there's that one and that one there we go all right so let's use a couple of Wonder clips and that's the easiest way to hold this little Edge down okay so I'm going to use these here I'll just let you all right and then you can do the same thing so you're just going to press it what we're trying to do is get it so that that stitching line we just did comes to the inside okay okay so from the inside we should be able to see it and from the outside we should not got it and we're just going to clip it in place yep and what that's doing is just creating a little bit of extra strength right there plus it gives us um a fold line which is pretty nice so that makes sense all right okay there we go so now I'm going to sew it with a quarter of an inch seam allowance basically and I'm going to top Stitch here down this side and across the bottom okay okay so we just come in get minute one side Bring It Around go out the other okay and I just kind of eyeball it if you had a quarter inch foot this would be the time yeah yeah I want to keep that nice and straight and we're trying to get that back part to get sealed down so we want to make sure that if it ends up being a little bit smaller that we're still catching that edge okay so what I've done is there have been times when it hasn't caught that bottom Edge and you can just come over and do a second row of top stitching in a little bit Yeah and catch it and then it's you know you're good to go it's a design Choice that's exactly right all right so that that's what that's going to look like that looks great is this little top stitching line I'm going to give that a press and you can sew yours all right pivot [Applause] fabulous all right there we go yay all right so give that a little press cuz sometimes it wants to kind of curl up when we've sewn it so give it a little press and then we're going to put front and back together all right and just like that it'll start looking like a coat oh my goodness this is so exciting all right okay so I've got my back piece here and I've got my front pieces now this is a place that sometimes people get a little bit confused and they sew the the wrong the you know the right side to the left side the left side to the right side so we want to make sure that we've got our coat out we're matching our shoulder seams and we've got this scoop in the middle okay so I will say this is a drop shoulder pattern so there is no like normal arm side that you would see in a in a blouse pattern okay and so that will sometimes confuse people and they think that that's the arm side it's not it's the neckline put it at the neck otherwise you're going to be in trouble so we're just going to go ahead and pin the top across there okay we're going to pin both sides and if you don't mind I'll just let you so both of those yeah absolutely I will do whatever you tell me to all right we're going to sew these with a half inch seam allowance and try to get so you started at the shoulder which is exactly right we want to start at the shoulder where it's going to match and this neckline we're going to see that it comes over just a little bit here at the top so there's a little bit of that triangle that's perfectly fine it should be at about a/ an inch here okay this is one of those places where if you doing this out of different fabric it will end up different okay and it's okay as long as they somewhat reach each other we have to man pretty good yeah yeah this worked out really well I've found that sometimes with vintage quilts because they have a lot more like flexibility in them and sometimes they won't match quite as perfectly and because we're going to at the end just trim this and bind it if it's not even we just make it even it's okay we make it work I like that attitude okay so half inch make sure to back stitch at each end okay you got it okay there's one and one one more here okay whoops make sure we are staying lined up there yes yeah the shoulder is actually fairly important it's not a crisis if it doesn't match but it is a place to keep keep a check on keep an eye on it y all right all righty all right there we go so now we've got our seam sewn so I'm going to go ahead and give this a press this is another one of those places that needs a good press before we move on perfect and what I found especially in uh garment making is that you really need to take the time to to do the pressing as you go it's true it really makes a difference it really does so I'm just going to kind of shove this out of the way press this open you have your Clapper over there I do okay we're going to do that get that seam lay nice [Music] okay and I will say um depending on the batting it actually makes a big difference on how well this lays afterward if it you can't get it to lay super flat it's totally fine uh I just try to get it there in the beginning because every time you wash this it's gonna kind of ruffle up there that makes sense yeah it's really just to make the sewing easier all right fix that part there I really love your approach to this that it's all just like doable and we can make it work we can make it work yep it's one of my my key phrases yeah make it work it's fine okay so this is this is where I'm talking about so this is a good example is that this didn't line line up perfectly we're never going to take that out okay okay totally fine pretty close it's pretty close it is pretty close but and this this one landed perfect okay so you can just brag about this one all day yes I got half of it correct yeah this I mean but this is so close that it doesn't matter we're just going to trim it and make sure that it matches and really that's because we're going to bind it with a quarter inch um binding so it needs to be even there and we just will trim it and make it match that Mak sense okay so we can do that now I'll take my you grab me those scissors okay so I'm just going to take the scissors and there we go it matches perfectly now perfect no one will ever know then I'm going to take that little triangle off there okay all right and now now these are going to match up fine and we can bind that edge and it'll be great easily okay all right so now now we've got to this point where this is kind of like almost a poncho yes all right so it starts looking like something which is my favorite is when it actually starts coming together I'm going to move these let me get all these out of the way for us okay so I'm going to lay this out because this is one place that people can get a little bit confused when we're doing this so when we're putting the sleeves on we want to make sure that we're doing it in the right place okay so sleeves are important and really laying this out I will say it's surprisingly because so much fabric and like you said you're learning something new so a lot of times in classes people yeah put the sleeves on the wrong places um including the neckline which has happened a few times oh goodness it get so funny so we just try laugh and move on you laugh and move on and then take out some stitches that's right but if you lay it out like this you can see here's a front a front your back it starts to make sense where the sleeve goes all right so the sleeves are as or they are symmetrical so normally in garment sewing you have a front of a sleeve and a back of a sleeve and you have that so that you can actually have more wiggle room in the back and that you have movement in this one because it is a drop sleeve and because I made it so that it would be kind of loose fitting we don't have to do that which makes it easier yeah okay so sleeves are symmetrical I'm going to go ahead and fold this and Mark my Center okay and then from each end uh we're going to measure half an inch okay and we're going to start a half2 in CH on each end so on the pattern it has a little Dot and the pen I used yesterday apparently isable disappear because they're gone and I made sure to mark them on the white side so they're they're gone uh which is fine because I know the measurements it's all good so half inch in is what we're starting this is really important so these dots that are on the pattern when you're tracing the pattern make sure that you are okay exchange putting them over there because they will come in handy okay so we're going to we're going to put this on we're going to sew from dot to dot okay we're going to keep these little flaps up this is our Center which we're just going to match at the shoulder seam okay okay so what I have found is that depending on the fabric again this can change how much flexibility this has so I really want to make sure that I'm not stretching this especially on a vintage quilt it will want to stretch a little bit more so I'm just going to be careful and I'm going to pin across here and I don't pin starting at one end and going to the other I pin from the center and work your way out and work my way out and then we're going to measure on the other side and make sure that it's even okay okay and this is especially helpful if you're using a vintage quilt this one is new and doesn't have a lot of stretch to it which is great but I want to make sure folks are doing at home yeah get it right you can be successful no matter what exactly less frustration for everyone okay so there I've got it that's how far down the sleeve is going to go so all I'm going to do is fold this in half and I'm going to make the sleeve match if I can grab it here okay so I'm going to make these match front to back y does that make sense yes it does okay and then I'm going to pin it right there now I can work my way backward and ease this in so this is where it has to get eased because you have a slight arc on both sides and that can uh intimidate people sometimes but it really doesn't need to it's it's really no big deal right pin across here and I just kind of work work my way and if I feel like there's a place I have to ease a little bit more I do yeah and it will all be fine we'll make it work absolutely I have no doubt all right okay so now we're going to sew this and I like to sew this from the sleeve side and I'm going to so I can see where my where I'm starting and stopping and I'm going to sew from here all the way over to here leaving those little half inch leaving the little half inch little tabies and then we're going to make sure that this is open and it's really just so that it'll lay a little bit flatter great okay I'll go ahead and sew that sounds good okay so because there is a lot of bulk under there I need to make sure that this is going to stay flat as I'm going so you can see it's going to be kind of wed up and I'm just going to work my way through and um not let it get puckered underneath that's really the key is that we don't want to add any puckers let that seam to stay nice and flat exactly all right take my pins out as I go and just kind of manipulate the fabric we're trying to keep that edge even if it gets a little off it's okay I have my little stiletto here I'm going to grab it I love the Stiletto to keep my fingers away from the needle especially on things like this when you need to do some maneuvering it's better to stay safe yes I've been so for 40 some years now and I've yet to sew over my finger so I'm trying real hard to make that never happen yeah and this little stiletto is good because you can kind of pull the fabric out from underneath and keep your edges even so using a using some extra tools is always helpful all right so I can feel it's kind of puckering up again move things my way down okay so if I've got any extra which I've got just a tiny I'm just going to give it just a little tension and make it kind of feed it in okay I'm going get down here and I'm going to stop at that other pin where my DOT was a little back stitch perfect and cut my thread all right so normally we would do this to both sides we're just going to do one at a time so we can show um all of the steps here CU this is where it will start taking a little bit that's okay okay so once we've gotten it to this point I'm going to go ahead and I'm going to push my seam this way I'm going iron it this direction so toward the sleeve this is not critical which way you do it but we do want to press this seam okay right now that now that we've sewn it it's really important like I said to just kind of keep pressing as we go okay all right so that looks beautiful awesome okay so this is where it becomes like the big whole thing fing thing where you're like maybe it's still a quilt it's so large um but we're going to bring this around so now we're going to sew the sleeve okay this is the the often maligned y seam is what we're doing here but it's a large scale I was going to say this is approachable yes totally approachable it's large scale so it's easy to do all right I want to pin the cuff we didn't talk about sleeve length but sleeve length you can absolutely add to this because everything gets bound so if you want to add a longer sleeve you want to change the length of your jacket you can just change it because all the edges are just bound so there's no trying to figure out how much do I have to add for the Hem blah blah blah just customize it to you just customize it okay so to get these to match up the way that we want to I'm going to use that little quilter trick and I'm going to stick a pin right through the end and right through the other side where I want it to match go seams okay so I'm going to get those there and now I need to pin this in place so I'm going to go ahead and pin kind of through the fabric and then into the seam allowances okay and that will help keep those seam allowances over so that when I'm sewing I don't catch any of them cuz with the Y seam that's what we need is to keep those seam allowances out of the way exactly so that's what we're trying to do there and I'll just go ahead and pin the rest of this and then we'll sew it again with a half inch you want to do this one sure all right I will try my best okay we'll do this so so as you're sewing you're just going to make sure that when we get down here that stiletto comes in really handy to press this out of the way and then stop right there do a little back stitch okay okay so we're going to start at the h all the way at the edge all the way at the edge so if you start in a little bit and back stitch that works really well sounds good half inch right half inch okay and again this is a place that if you found that you know you wanted your sleeves to be a little looser just make a little smaller seam allowance okay that makes sense it's all very easy going okay okay so as you get down to this bottom I find it yeah that you kind of have to manipulate the fabric get it to lay out like you want okay and then take your time getting into that corner and what you're trying to do is get this Stitch to end the other stitching line because I want to come all the way down to here right y okay just make sure I'm shooting for the right spot yep a little back stitch M we want to secure that seam nicely all right all right that looks great perfect yeah that's exactly what we want it's for these to come together this is a pretty thin batting that we used in here so it this works pretty nicely if you're using one that had a had a thicker batting and it was kind of harder to get in there this is a place that you can just come in and hand Stitch a little and it's okay I also tell people it's it's under your arms so nobody's really going to see it true so if there's a little hole it's fine you can leave it there yeah all right so you can probably guess what the next step is it's the rest of this y seam okay okay so I'm going to put my sleeve out here see it's starting to look like something right it's almost there okay so now we're going to do our side seam and we're going to leave the pocket open so I want to sew these parts here and here okay all right so what I do is I like to sew from here down to the armpit okay so I'm going to move it like this so we can pin it okay so again I'm G to do this so that these these seams stay out of the way yes what I have found is that this added bulk down here is a little difficult to deal with sometimes and if you don't mind we can just snip that off trim it off yeah I want to make sure I'm not cutting anything else and that will loosen up that bulk a lot Perfect all right so now I can come come in here and easily pull these out of the way and I'm going to again stitch up to here so I'm going to pin make sure that's basically going where we want it to sometimes they like to shift a little bit always want to do a double check all right and then this one it should fit really nicely underneath there okay all right so we're going to leave the pocket loose right now so don't do anything to the pocket and we're going to make that fit all right and then I'm going to pin these down here as well from the Hem up to the pocket and again the pocket flips in there okay okay and as you're sewing this it's really important would you give me the Stiletto and I'll y I can point a little bit better with the Stiletto so as you're doing this side scene your half inch should be right here okay but what we're worried about more is right here so if it's not half an inch it's fine just make sure that it hits right here so you're going to start stitching here back stitch come along here stop where they meet meet okay and then you'll Stitch this part and then you can end right here so aim for that spot right there and then keep your pocket out of the way as you're sewing okay all right sounds good and so would you start you do this seam first I do and I start here okay and so toward the armpit got it okay so I am starting just a little bit of maneuvering huh I see what you mean yep here's your stiletto thank you that will be very handy okay all right yeah I'm getting all of this up onto the taable yeah really helpful again I'm really taking my time here but do it and then we're going to aim up to that stitching line yep not going to pass it keep that stuff out of the way okay I'm going to go ahead and then go ahead and back stitch that too because that would be a part that gets a little bit more stress too yeah that makes sense definitely want the Stiletto here it is so handy it really is okay see how I did sure it's perfect yeah that's great that's exactly right so we want it to all land here together beauti and then when we turn it to the outside turn our sleeve inside out here and you can see we have a really that turned out it's hard to see in the black but it's a beautiful y it turned out wonderful it is a beautiful y seam excellent work okay so now we need to put our pocket on Okay so we've got the side seam and it's oh we didn't do the bottom one oh my gosh I got so excited about that y seam I forgot you did great you did great it's always fun though in class and people want to try it on at this point cuz it's got side seams and they're so excited and then they put their in their pocket the pockets aren't done yet so we'll do the pockets next and then it's actually tryable thing I want to come up to this this corre spot right corre yep so you're going to sew right next to that fold okay and then make sure to give it a good back stitch there we go we should be good now yeah okay now we can create a pocket yes okay so now we've got the we've got the pocket opening we need to make this into a pocket so this is how that works where we only use one pocket and the reason I did that originally was because I wanted to I didn't have a lot of fabric and I wanted to make it like simple and it worked really well you can do this by machine or you could do this by hand so if you were using like a vintage quilt or a quilt that was really sentimental to you you probably wouldn't want top stitching on the outside so you can absolutely just hand Stitch this and I've done that on several we're going to machine Stitch it because we can we can exactly this is really curvy so it's not going to look any any different really okay so what I generally do is give this a good pin and then we're going to flip it over make sure it looks right I get that pin get a a sharper one there there we go all right so what this should do is kind of butt right up to that okay so I'm gonna unpin and repin this from this side and we'll see if we can get that to lay a little flatter CU what I want is this to land at that seam allowance gotcha okay so that's how that is this is why we did the the quarter of an inch because now you can see we have a little bit that's inside the seam allowance basically that it will kind of hide the pocket so if yeah so if you need to use a different fabric it's not really going to show okay so we're going to stick these pins in here again and then from the other side we're going to sew it okay so from this side I can actually uh see where I need to stitch it so if you sew it from the other side you kind of just have to guess where the edge of the pocket is sense so we're going to sew it from this side I will say that for ones that I've wanted to do nice top stitching on like I did a denim one and I wanted to do nice top stitching on it then I basted it from this side went around the other side and kind of copied it that's great um then I could do a nice I did a double Stitch with a double needle you can't do it from this side and have it turn out right so so that works well it's just P it down so now we're going to fold that out of the way you're going to start sewing right basically in the seam allowance here okay so needle down here do a little back stitch and Stitch right along kind of the edge of that okay I try to do about an eighth of an inch away so it's kind of in the overlock Stitch there okay you'll Stitch all the way down here you'll notice I was going to ask about this our pocket hanging over our pocket hanging over yes it's fine so what we're going to do is we're going to sew around to here and you're just going to chop it off great okay so depending on where you have it some of them make a little bit shorter you chop off more of the pocket it's all good it's fine as long as you have a little side seam here you'll still have a pocket great so okay okay we're going to go ahead and do that get this all under the needle and then we are going to start in this seam M and then do I just kind of ease into this outside bit um you can actually start up closer start up more totally fine it yep and then just Stitch all the way around the pocket okay there we go there's only a few places on here where we get picky like under the arm where we have to stitch otherwise it's it's pretty loose all right I'm going to get going and then I think I can zoom there we go make sure I don't have any other bulk under here yep and then back stitch yep and then you'll want to come around this other little part of the curve right there okay finish this little guy off just so we don't throw any you know M&M's in our pocket and have them fall out that would be a sad day okay great all righty all right so now we'll take these pins out put those away and now we have a whole side of a jacket oh my gosh it looks so nice doesn't it look great all right so I've got one that's got both sleeves okay all right so I'm going to have you go ahead and you can try this on okay cuz now it feels like a jacket we can start becoming something where's my sleeve there we go I love it that looks great so exciting okay Pockets work yes I well I said yes but let me test them let's try them oh oh there we go cuz I didn't Stitch across the bottom okay all right so let's do that so that's the one thing is we want to stitch across the bottom you trimmed it we're going to actually bind that edge but I do feel like that's a place where we're going to put our hands in we put our hands in and it will pop out that bottom so that's exactly what that other top stitching is for is to make sure that it's solid Stitch straight across that bottom just straight across the bottom yep and it's just a securing Stitch because you will bind it but the binding is not going to be strong enough really that makesense in my opinion well and it's better to just be safe right you don't want to go to all this trouble and then have it not be secure right and nobody likes to fix things when they're you know after they've sewn it nobody wants to fix it there we go now that is all secured great all right so at this point we get to um decide do we want a collar or do we want a hood we have both so I've got the I've got the hood done the hood is two pieces to turn this inside out so you can see so the hood is two pieces that I sewed together and then I bound that Inside Edge beautiful you don't have to but it does make the inside of the hood really nice so and then we bound the outside of the edge they're the outside edge so now I'll turn this inside out okay here's a cute little Hood now we have to bind the collar if we're going to use that so let's go with the hood okay let's go with the hood let's go with the hood all right so I will bind the collar next we'll show how to do that so we're going to get the hood attached to yours okay so we want to find the middle of the hood which is super easy there's a scene there okay then we're going to find the middle of the coat which I just fold together and there is a Mark that we made at some point you know I'm really a fan of just B didn't find the center yeah okay so now we've got the center of that so we want to put these right sides together okay so this is important is that it's different between the collar and the hood okay so we're going to do this and then we're going to pin out one side just like we did the sleeve and make sure that they match when we're um after we've pinned out all up yep so that way it's the same on both sides it is one place that if they are not even you'll totally see it and even if it's like a quarter of an inch weirdly your eye will notice and it's funny to me the things that we don't notice the things that do yeaha true it's just a good reminder to take take the time here so that you're happy with it at the end and it's a very easy way of measuring this so I've got this to here now I'm going to line up my other side so I've got the two fronts I'm going to line them up I see where that is right so what I do is I stick a pin Right Where I Need to bump the other side up too so then I come along here put my that right in place put my binding right up to that and then I pin it okay and now that like what creates the lapel yeah is the same size on both both fronts Perfect all right I will let you go ahead and pin the rest of that ease that in and then we're going to sew that and because the hood we're going to sew that with a quarter inch seam allowance because we're going to bind that okay so just so just you can do kind of a scant quarter inch right now because then when we put the binding on it'll cover our original Stitch okay that one is a little dull isn't it there are a couple of them you might need to clean it out later freshing up those pins yeah treat ourselves that's right we all deserve nice sharp pins yeah okay I think that looks pretty good so now you're just going to sew this so I find it easiest to sew it with the hood up because this is big and wants to kind of get caught under here but do make sure the same way that we were talking before as you're kind of you know easing things out of the way and like I said a scant quarter inch is best for that perfect all right and the only part that's going to be slightly difficult is going over that Center binding okay is a little bit thicker so just take your time with it take your time over the middle okay so scant quarter inch here I'm going to back stitch a little move that pin out of the way get my handy stiletto handy dandy stiletto that's right make sure yeah cat that that stilet works super well to do that and because you do have a tiny seam allowance here it's important to make sure you grab both sides that makes sense well and it you know it looked like it was lined up perfectly there at the beginning and then I just got a little worried that we had some slipping happening well and because we're dealing with again we're sewing a straight edge to a curved Edge so it's not going to lay perfectly as we're sewing kind of have to yep keep manipulating it make sure it stays where we want it to that makes sense okay that's great and we're over that Center bulk perect ease through there there we go we made it oh boy make sure that doesn't get caught I would be very sad I think okay let's take our time there we go okay yeah get that up and over yeah you just got to make it behave yes and really like we were talking about earlier is getting that weight up off of you is really important and sometimes it doesn't work so well um until a certain point you can throw it all on the table but it will it will help to get the weight off as muchin makes a huge difference then you're not fighting all that that bulk you know exactly okay we almost yeah and depending on the batting You' used the weight can vary as a cotton batting will be much heavier warmer polyester batting tends to be a little lighter okay right let see how I did did I do okay I think it looks okay did I get a little tuck we got a little tuck in there but it's gonna go over the binding do we care I think it's okay okay good and the Hood's gonna hang down and cover it so exactly it's fine it's fine and really nobody should be looking inside here so it's going to be on you it's great okay so now all we're going to do is bind it okay so that's what we have left so the first thing we're going to do is bind the Cuffs I'm going show you how to do that I do it a little bit different which is not surprising all right um so what I'm GNA do is I'm going to measure my cuff and I've got six and a half inches here okay so I'm going to double that and that's going to be 13 and then I'm going to add a half an inch okay so half an inch oh 13 and a half 13 and a half got it okay and that's a quarter inch both what you did okay so the way that I do this so our number was 13 and A2 yes so I'm going to measure from this point over to 13 and A2 and then I'm going to cut this at the same angle that it's cut over here okay okay so I like to do this by if I don't have an angle cut that I cut that angle first and that's just a 45 it's just a 45 I'm going to do the same thing over here find my mark there it is 13 and a half okay I want to move this down so I get my 45 line there okay trying to figure it out from up top is sometimes tricky hard okay all right so there's my 45 there's my 13 and A2 so my ruler is basically intersecting there I twist that just slightly all right and then I'll cut it beautiful all right so then if I'm doing two of those I'm going to measure one measure the other one all right at this point we're going to go ahead and sew it right sides together to create a little Loop all right do have a couple pins what should we do with those all right and I am sewing it with a quarter of an inch seam allowance I'm going to eyeball it that's all right we're just going to put this in here like this I have found especially with these dark bindings if I don't pin it it will twist slightly and I'll never have noticed and then that's a problem so we're going to start at the valley end at the valley okay so sew right in between those so again you can see we've just looped this around um and Teresa's pinned it in place and so we're going to stitch from the Valley here to the valley here just a quarter inch seam allowance correct okay make sure I'm staying lined up okay all right so now you're just going to trim off those little Tails okay the little babies here M beautiful okay and then I'm just going to finger press this open and then I'm going to push it up and we're going to pin it around here so let's have a couple pins and I'm just going to keep folding it in half as I go trying not to stretch it because it is bias right um I do prefer a bias binding on everything and so I ask in the pattern to do that we'll need it for going around the neckline you need the bias otherwise you end up with some weird little puckers that we really don't want it's true all right so I'm going to show you my trick for doing binding so now you're going to take this and you're going to stitch about an eighth of an inch away from the edge and we're just going to base it okay okay you can open your Stitch length if you want to make it a little faster cuz it really is just a basting stitch okay I'm just about an eighth of an inch away mhm and I'm going to do that instead of pressing CU I think it makes a nicer finish all right and now through the magic of Television we flipped this over so you guys can see see a little better y exactly all right so now I'm going to put it on the inside sew it and bring it around to the outside okay all right so I'm G to turn my sleeve Inside Out pop this over the top so get my seam allowance open and we have the clips there we go somewhere we've got them oh and I opened it up the right way how how many times I've opened that box upside down I Know It's Tricky it really is it's trigger than it should be just for a box I don't know why all right so we're just going to clip around this top here I'm sewing it to the inside and bringing it around to the outside because we're going to machine Stitch it perfect and do you want me to do this part know I would love that actually I will let your expertise take over do it so this makes it a lot easier SO sewing it in that Circle first gives me the opportunity to pin it on and sew it on and not have to do that whole combining the ends no kid we'll do that on the jacket and that's it so we're not going to do it on here all right so I'm going to go ahead and change this back to a normal Stitch length I'm going to get that underneath here there's the foot I'm going to have to move that little Wonder clip there we go you're a faster sewer than I am am I oh man I don't know when I sew at home I sew pretty fast but yeah it really depends on what I'm doing that's what I was going to say I felt like I was going pretty slow this time around just cuz it's new and I think that's okay it's a good reminder that we can slow down take our time even if we're Speedy on all of our straight scams this is a little different this is a little different exactly especially when we're sewing those curves and that sort of thing yeah and like The Sewing in a circle is not always the easiest yep a little more tedious got to take your time yeah if you want to you can always take off your free the expose the free arm take off the tray that works pretty well yeah it really does I sewed with a flat bed machine for a long time and so I'm kind of used to sewing it in a circle like this so it's always my default but absolutely that free arm is there for you to do this sort of thing yeah okay I'm going come around here this is one thing where you're just keep twisting it and twisting it because it's going to twist in a circle and it's going to be a little funky and that's okay and I made sure that my seam was open I hope it stayed that way back stitch and clip my thread okay great beautiful so now it should stay open fabulous so now take this finger press it up and we're going to wrap it around to the front and Stitch it down okay I'm going to do the same thing and just clip it so that it stays where I need it to and then I'm definitely going to put my stiletto to use for this part this is also one of those projects that you need a lot of light because of all the black oh for sure yeah the black gets a little harder to see when it's black on black there okay the great thing about that is though it hides all your stitching it's true so if my binding isn't perfect no one will know no one will know and I also start stitching at the under seam because then it's hidden it's hidden yep okay so I'm going start under here and I'm just going to stitch right next to the edge and this is definitely one of those things we're just going to kind of work our way around twisting as we go I I say when you have a longer coat it's even more I can imagine so definitely make sure that you know taking your time with it I know that that's something that you can absolutely do is just twist it throw it up on the table keep working your way around but I will say this is a much easier way of putting the binding on than trying to get those ends to finish somewhere I love this yeah I this was one of the questions I had how in the world are you going to make it easy to bind those little sleeves and you've really done it it's pretty awesome yeah I combining the ends is is kind of one of my least favorite parts of Bing I think we talked about earlier that you kind of like too I do too I like it but that B that ending especially in a small space like sleep you know yeah exactly when it's on a bigger space like the back of the jacket we're fine but it's this part that I'm like it's a little it's a little tiny yep and then because it's circular it's even yeah even crazier okay so there we go snip a couple of stitches or couple of threads no stitches we're not taking out any stitches all right so now we'll turn this inside out oh it looks so good and you've got your bound sleeves your finished sleeve that looks amazing super duper easy and then we're just going to bind the rest of the quilt just or the rest of the coat just like you would have quilt same so the same way we're going to bind the corner or do the mitered corners whatever you'd like one of the um design elements that we didn't talk about at the beginning was you can round the edge and I noticed with this one this would be a super easy one to just follow the Curve and I think that will actually add a really like a cute finish to it so I'm thinking that we might trim this out a little bit so that the binding will come around there I think it'll be really cute so we're just going to finish that up and you'll have a coat to wear do you want to walk through the collar yeah let's do it okay let's walk through the collar really quick okay we can sew it on the other one so that you can see the difference so perfect you can you can try it on with the hood now if you want to I would love to so exciting super cute oh gosh so fun look at that so cute so cute I really love that too so I'm just doing the same thing here I'm just clipping my binding okay I'm going to base it and then I will attach it to the collar so the collar is um is a little different it's a funky little shape yeah I see and uh one of the the questions that people have is which side do they bind and so that's often a place that people get a little bit confused it's going to be the straight sides so there's three sides that are straight one side that's curvy the curvy side is yep that one sewing exactly so that one's going to get left just the way it is we'll bind the outside edges okay so sometimes I can so fast you yeah you're doing great those straight seams are much easier you know they are all right I think I've got enough okay okay so so again I'm going to sew it to the back bring it around to the front and top Stitch it if you want to hand Stitch it I would usually sew it to the front the other direction yeah so it kind of just depends on what you want to do um I prefer to hand Stitch it but I don't always have time that makes sense when I have a vintage quilt I almost always will hand Stitch it just because I feel like that's what grandma would have done I want to want to make sure that happens all right so now I'm going to I'm going to stitch along here quter of an inch and I'm going to show you the funky little miter because you'll notice this isn't a 45 okay so we have to do things just ever so slightly different all right so I'm going to grab a pin here and I'm going to stick a pin in about a quar of an inch from the end cuz that's where I want to stop sewing okay now I'm going to lift my foot do the pivot right sew off the corner all right so normally we would do like a Flip Flip and it becomes just a nice corner right because this is an angle we have to do it a little bit different but it's really following the same idea so we're going to we're going to make this line come this way right so it's going to follow straight line here and I'm going to hold this and make it even along here along the bottom okay so you can see this ends up being a little bigger a but that's going to work out fine because it has to come around and do that over there so I'm going to go ahead and pin that again here and then I'll work my way around the edge and do the same thing at the other Corner beautiful so same idea just not exactly the same angle okay so again as I get close to this corner I'm going to mark my quarter inch so up to that pivot come on there we go all right clip it and do the same where again it's going to come off straight this direction and then get flipped back that's a great tip it makes those Corners we'll see they'll turn out pretty sharp where I found that when students want to do it the other way it ends up kind of rounding the corner on them I can see that going back stitch at the end there and I'll clip off my extra okay that was a pretty good guess on how much I needed look I feel like I played Bob and Chicken in one You definitely won that's amazing okay so now I'm going to again flip it over and this is where we're going to kind of Tuck this stuff out make sure it's going to lay the way we want to and I'm going to actually pin or clip this right here at that corner so we can see it come together yeah and it works really really well and just takes a little a little thought in making the lines go the right direction but not a difficult not a at all especially if you've already you know understand binding a 45 so exactly it's a little different just a little bit different all right and I'm going to come down here this another time those stilettos are super handy so we're going to hold this Point pivot and come down that other side we'll clip this just a little do you use Clips when you blind or do you use sometimes yes I do and this part needs to be done before we put it on so with the hood and the collar we have to do a little bit of binding before you so in the pattern I tell you to create your binding first or you can use prepared binding if you want but have that at the ready cuz you want to do that Mak sense yeah you won't want to make it in the middle of the project you just want to keep going you know that's the way I am even when I'm making quilts I try to have my binding done before it's finished being quilted so then I can just like at least sew it on yes before I sit and do all my final stitching well and especially if you're going to use something that coordinates it's nice to have that at the ready exact just in case you know the Quil shop doesn't have it next time that's right better to be prepared yep I am just so excited about this the whole thing feels so approachable which up until today I was so overwhelmed by the idea of it even though I've made clothing before like that was actually what I learned to sew first was clothing too but sometimes it's been so long that I forget that I can yeah yeah and and it does seem like it's harder but there's just a little a few things we need to do differently but not a lot not a lot okay so can you grab the other jacket sample that we got you do ready to go great all right so same ideas that we're going to we're going to bind this and put it on because then we'll bind the whole thing at the end again all right but the collar this was something that I kind of went back and forth on because I wanted the collar to flip out and not be here and then The Binding be across the top does that make sense so I wanted the binding to be over here which means we have to sew it this direction which is weird um it's it's just a good thing to call out right like at first glance you're like you're sewing it where but it actually does make a ton of sense gives you the final result you're wanting it gives you the final result because the binding will be hidden underneath the collar instead of on top of the collar Mak sense so again we're just folding here's our pens oh you've got I got one right here good okay so I've got the center of my collar and I'm going to put it right sides against the wrong side of the collar okay and I'm matching my centers this is where you would put in a tag too if you want to put a little label in those cute little things you'd put one in here underneath this um and so that it base that in first then put your collar on same with the hood okay we're going to do the same thing where I'm going to going to pin out is the one that goes through both yes Dar it okay and then I'm going to do the same thing and pin out to the edge measure make sure the other one is the same beautiful okay and then this is also going to be a quarter of an inch seam allowance because we're going to bind it yep so any place that we bind it there needs that so this is where you're going to have to be a little um like pin a little bit more because we've got this curve here that we're trying to curve this and this to get them to match up we're just going to pin them a little bit more frequently makes sense it will make it so you don't have to fight it so much as you're sewing it which is great I want the sewing part to be fun so I try to do the pinning part so it will help me I'm all about pinning when it makes life easier yes and when I don't have to I totally won't exactly all right My Philosophy as well okay so now we're going to do the same thing and it should be about the same distance as the hood was so we'll have this cute little lapel here so we'll do the same thing let's let's flip this back make sure they can really see what we're okay doing so give me another pin yep there we go okay and I'm going to put that right here where this needs to bump up to okay so the other end of my collar is going to come around and I'm going to make it match there so that it's the same as the other side and then keep pinning all right I'll let you pin that side if you don't mind you got it and then we'll go ahead and sew that on and that curve is what when they get sewn together it makes it makes it so that the neet curve works it seems weird to sew around to a the opposite round but it actually does give it the shape that we need makes it easier in the long run have everything lay nicely exactly okay and clothing with it being 3D sometimes feels a little weird for Quilters but this one I've made it as little 3D as possible was still having some shape to it has a little bit of an a-line flare yeah which I think makes it kind of girly all right so now I'm going to stitch it again and this one we're going to do the same thing where it's going to be a a little funky because we're kind of going to have to sew in a circle okay and again I'm going to sew it with a little bit less than a quarter of an inch just so that when I do the binding it'll be hidden it'll be hidden nothing frustrates me having those first line of stitching show yeah I don't want to unpick it and then I have to that's right it's funny the things that will bother you you know I I Noti that the longer I sew I'm like no I better fix that now I'm not going to be happy later right cuz at the moment you really don't want to yeah I totally know that feeling but I'm always happy I did exactly okay again shifting weight and this is one of those parts that we want really kind of want to keep keep your hands here so that we're feeling what's happening CU it's really easy to get a little a little pucker under there but if you're feeling it you can feel where there's two layers and if there gets to be more under there we just move things around all right almost there almost that little tight curve at the end is is the part to be the most careful about do a back stitch there we go so now the both jackets are at the same point where we're going to we're going to M the whole outside of it like I said just like a quilt but now you can see after we bind this the will the collar comes right over here like this looks beautiful yep that makes so much sense I'm so glad you called that out because if I was making this off the pattern I would probably still do it wrong just because my brain would tell me right that they need to be together exactly and right sides together is what we're so used to and this is a wrong side to a right side but it does in the end it works out really beautifully Gorge the thing is that if you do it wrong you end up just with a collar that's an accent in I guess that's true yeah that's true it could be worse it could be worse so um I like that you can actually make design choices like this in there and kind of play with the fabrics and make make them work out great so there we go now we've got the collar and the hood so it really is that easy you've made this so simple and approachable and we've touched on some of the variety but let's go ahead and look at it down ABS yeah so let me bring in this one so this is the coat that started it all oh I love it all right so this one is made with my friend Sam hunter from Hunter's Design Studio she sent me a quilt to cut up so that I could wear to a show and that was where it all started was with this and I absolutely loved it and I got so many compliments on the the coat that I decided to make the pattern right but then I realized that not everybody wants to make this whole quilt and then cut it up so we created something else called quilted elements that are part of the elemental coat so I brought those today we have two of them so I have a a lone star and a wild friends but this is The Wild Friends so it works really well you just make the parts that you need that you need okay exactly so this is a fun little addition it's a compliment to it this one has an open front and the full length and 3/4 sleeves love that so all all the options we're going talk about them all okay perfect so that one is a new quilt and then it was made just it was um a pattern cover that's what it was also so it was for her pattern and that's what I use that but you can also use vintage quilts so here's here's one that I got at a antique store beautiful in Kansas City actually and I cut it up it's all hand pieced I did a little little fussy cutting isn't it cute so cute I absolutely love it and I did a little um placement so that it was down the middle I really love this one that one's full sleeves and this is the button closure that's included in there if you want to do it this one has the round corners at the bottom that we talked about little curve that you can absolutely do and then these are full length sleeves so you can see it's it's nothing fancy I just surged the edges I left all of it I love the softness of this I'm going to say this is so Co yeah so really they change a lot depending on the fabric yeah depending on you know if it's new quilt and old quilt might not be a quilt at all um this one is the short version so this is the actually the hip length version is what this is so again with we talked about cutting off your pockets y there it is so this one it looks like a vintage double wedding ring right it do and I bought this at a vintage store an antique store in Kansas City and I was very excited about it cuz I love double wedding rings they're one of my favorite quilts and I was really excited about it and I cut it out and then I found the tag from a big box store oh my gosh no way so while it looks like it's actually a vintage quilt it is not it even has we marks I think it must have been bought probably in the ' 80s and it's just been used a well loved wow yeah so it has it has the look and feel of a vintage quilt without being one but this one I cut it out and then I accidentally had a big stain on the front cuz it was an older qu been used and so I just overdyed it oh I love that so I love the way that this turned out I I dyed some cotton fabric it ended up being the same as the lining which I think is a crazy coincidence could you have planned that any better I don't think so no I could not so that turned out great this has the rounded Corner the collar and the long sleeves I really this is one of my favorites I love the way that it turned out it's so good so these are all quilt versions and like we we just did with quilted fabric you can do that with cheeter cloth it's great but you can also use other Fabrics so this is one that I made using a denim fabric love which is lovely so this one makes me very happy I really love it it's just one layer of denim I did some Hong Kong finishes to make it look a little bit nicer in here and then I bound it with linen beautiful which I think just really kind of sets it apart FL on the hood and then I mixed a plaid in and what the thing that I did different with this one is I wanted to make the call or the Cuffs a little bit longer and so I just added a bit of the same plid from the hood onto here and I did that at the end I was like you know what I want those longer I just added a little bit on so I think I measured maybe four inches tuck that on there so it's a great way to lengthen sleeves if you've gotten to the point that you've already cut it out and you need sleeves longer well and that denim is such a great weight for like a work jacket and it just or a spring jacket where you just need something to break the wind a little bit I love that yep exactly and then of course you know I had to do one in cuddle of course oh my gosh how cute is this so this one turned out just great I absolutely love this look I think it's super fun so this is a cropped one as well and this one I created a lining for it and then I just sewed them right sides together okay turned it inside out so I did this one a little bit different because I thought I'm yeah why not I'm not binding this and I wanted to keep the real luxurious look and then I did a little hook and eye up here makes a very fancy jacket to go out so fancy I love that so much Teresa this has just been so fun I love how approach you made this and how now we can see you know really whatever fabric we choose we can use this pattern and make an adorable coat so thank you for being here thank you and I hope you guys enjoyed this I can't wait to see all of the elemental jackets that you make can't wait we'll see you later hey everyone thank you so much for watching at home we're so excited to be almost a million Quilters strong here at Missouri Star and so if you haven't already joined our family be sure to subscribe and hit that notification Bell so you can be notified of all of our future tutorials and we'll see you soon [Music]

More Fabric by Yard tutorials

See all