
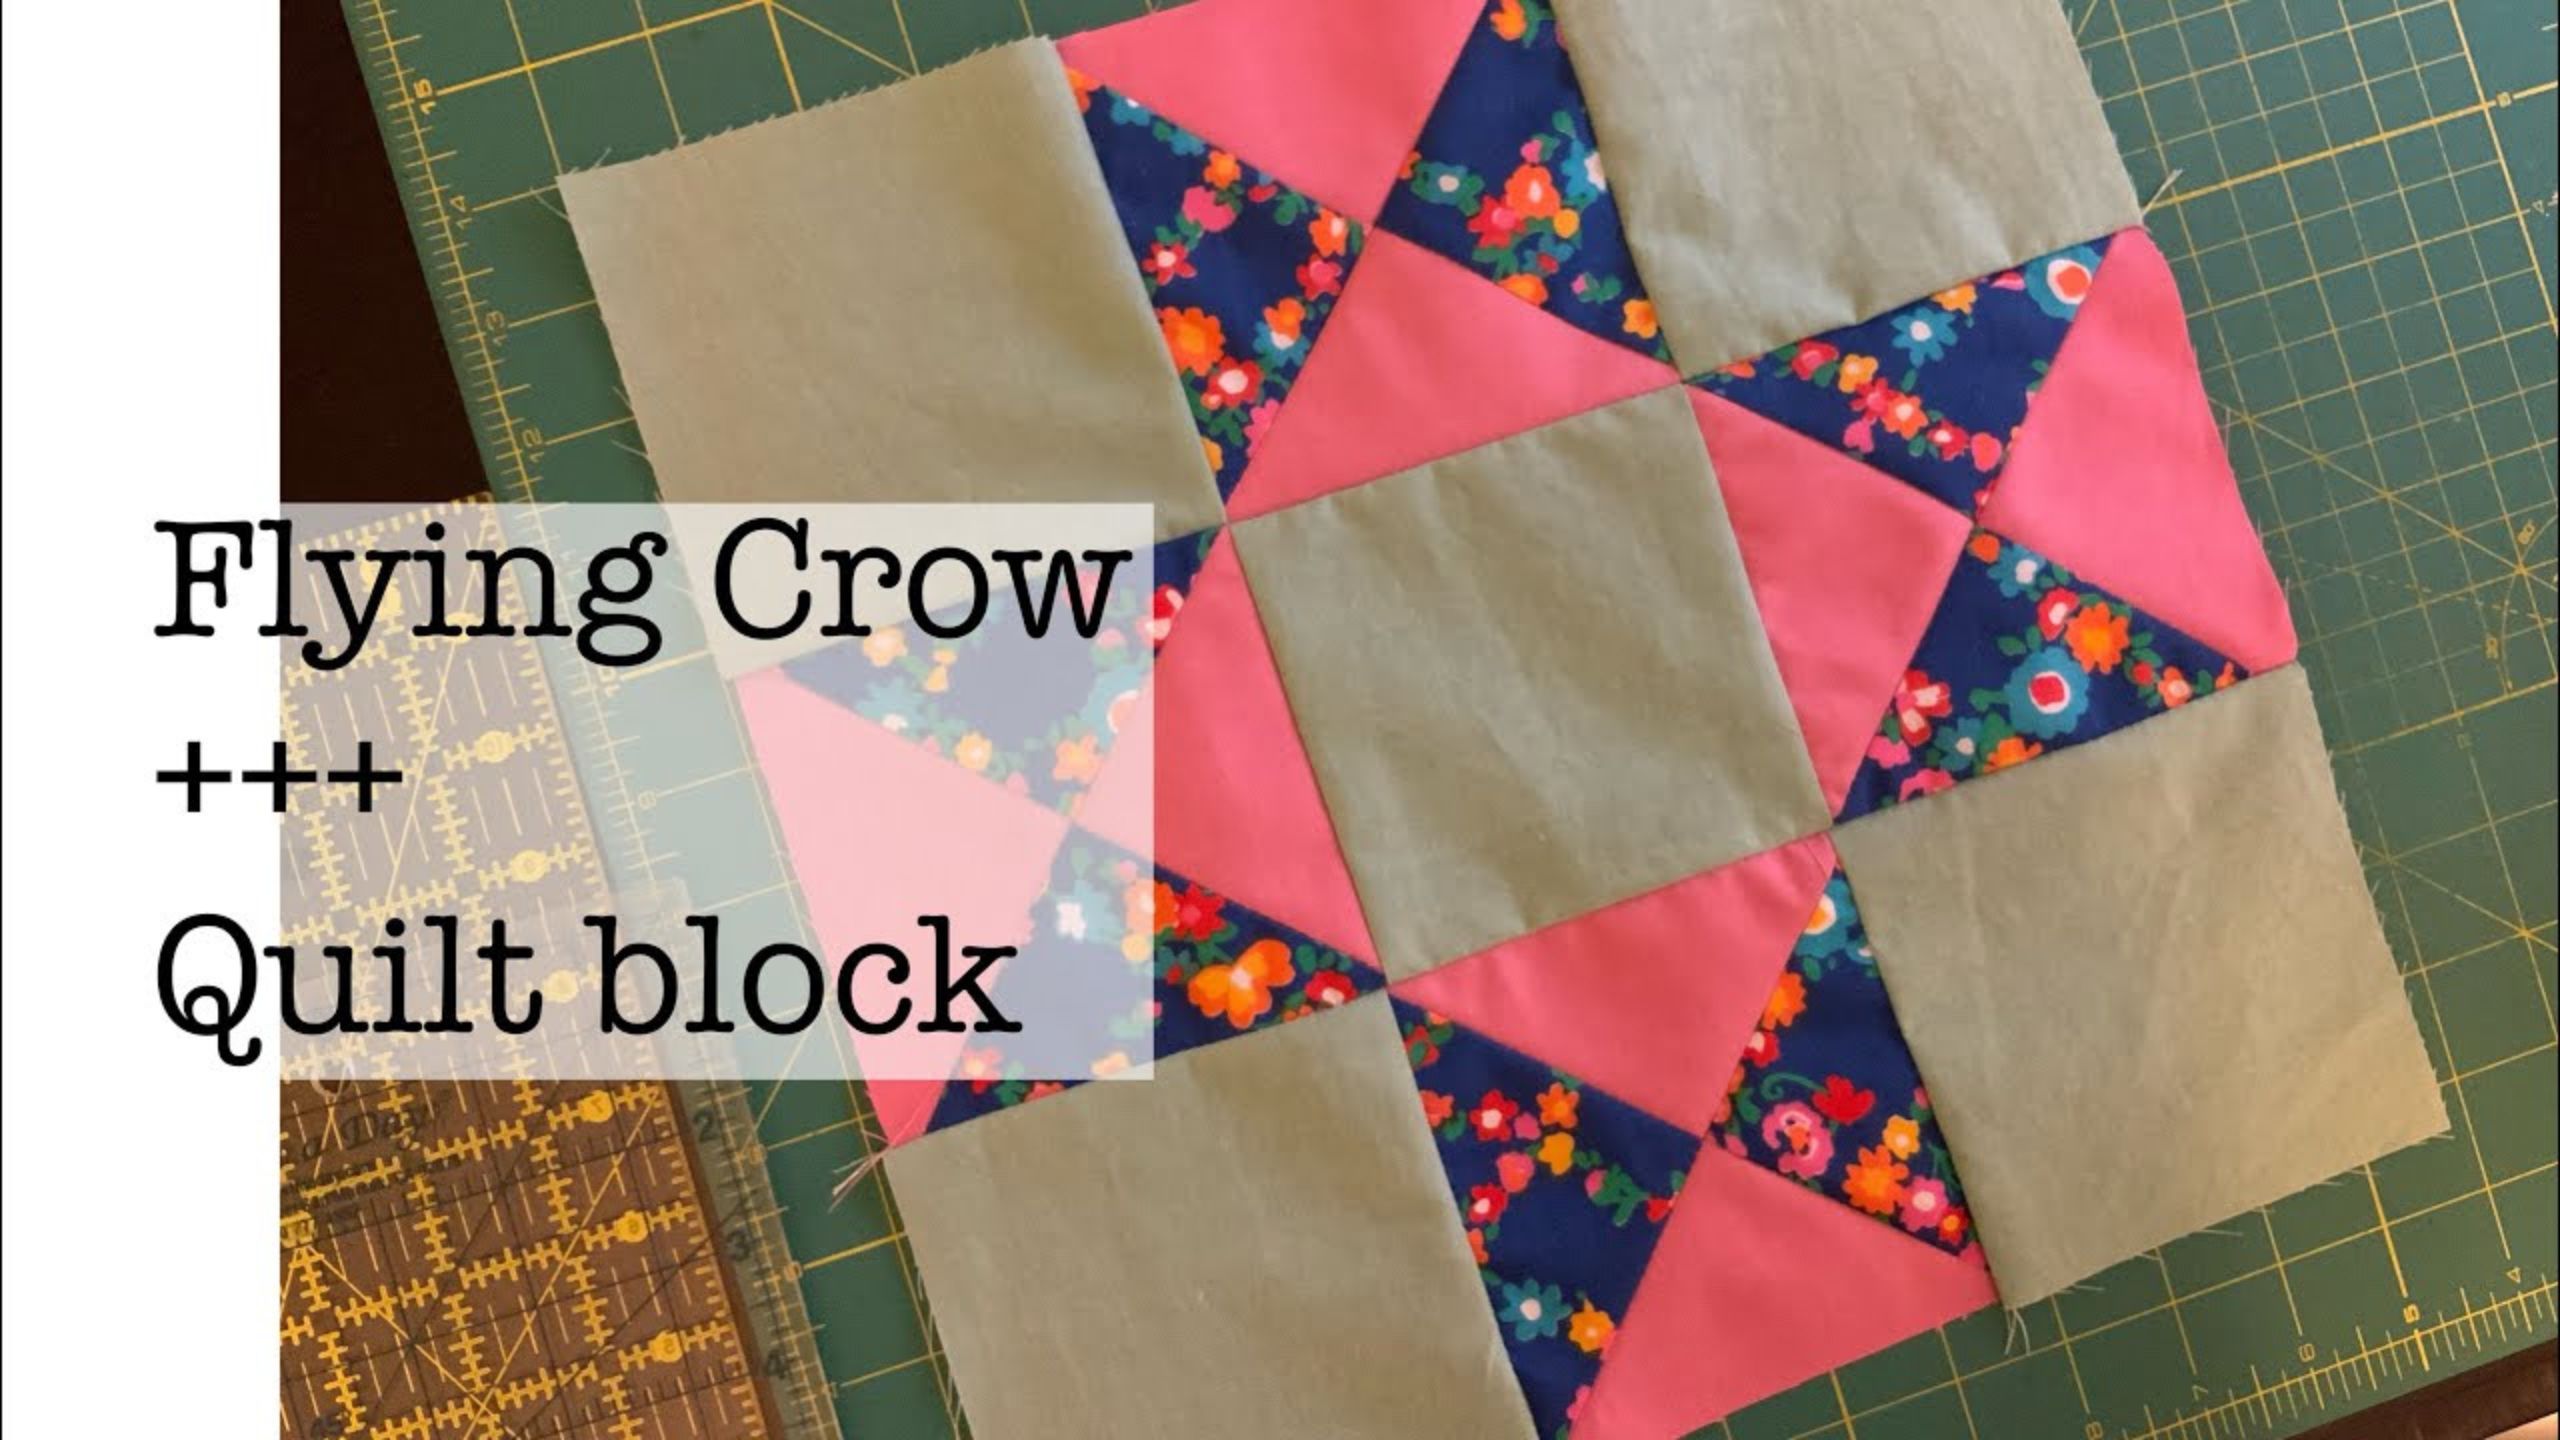
Friendly Sampler block 7 | Flying Crow quilt block with Beth Shibley
 Beth Shibley
- Fabric by Yard
- Traditional
- Lap / Throw
- Beginner
- Quilt size 12" × 12"
Today Beth is adding another block to her Friendly Sampler quilt. The Flying Crow is an easy, classic pattern based on the Ohio Star quilt design. Let Beth show you how it's done!
Instructor
Beth Shibley
Beth Shibley loves to create and share her adventures in quilting. Simple patterns and practical gifts are what she loves most.
Shop this tutorial


Common Questions
What is covered in Friendly Sampler block 7 | Flying Crow quilt block with Beth Shibley?
Today Beth is adding another block to her Friendly Sampler quilt. The Flying Crow is an easy, classic pattern based on the Ohio Star quilt design. Let Beth show you how it's done!
How long is the tutorial video?
The tutorial video is 00:06:53.
Are supplies listed for this tutorial?
Yes. The tutorial page includes the supplies and materials connected to this project.
Is a transcript available?
Yes. A written transcript is available on the tutorial page.
Video Transcript
This is an easy nine-patch block constructed of 4 hourglass units and 5 solid patches. When you're done your block will be 12.5" unfinished.
You'll need:
2 squares in each of 2 prints at 5.5" (Beth uses 2 pink squares and 2 blue squares)
5 squares of background fabric at 4.5"
First Beth draws a diagonal line on the back of the pink fabrics. She sews two seams, 1/4" to either side of that diagonal line, creating 2 half square triangle units from each set of squares.
Then she'll place the half square triangle blocks right sides together with opposites together, with the seams nestled. She'll draw another diagonal pencil line and then sew on both sides of the line with 1/4" seam allowance. Then she cuts these open to reveal her hourglass units. She presses the hourglass blocks and trims them down to 4.5" square.
Now it's just a matter of laying out her nine-patch block and assembling in rows and then in columns.
You'll need:
2 squares in each of 2 prints at 5.5" (Beth uses 2 pink squares and 2 blue squares)
5 squares of background fabric at 4.5"
First Beth draws a diagonal line on the back of the pink fabrics. She sews two seams, 1/4" to either side of that diagonal line, creating 2 half square triangle units from each set of squares.
Then she'll place the half square triangle blocks right sides together with opposites together, with the seams nestled. She'll draw another diagonal pencil line and then sew on both sides of the line with 1/4" seam allowance. Then she cuts these open to reveal her hourglass units. She presses the hourglass blocks and trims them down to 4.5" square.
Now it's just a matter of laying out her nine-patch block and assembling in rows and then in columns.


