
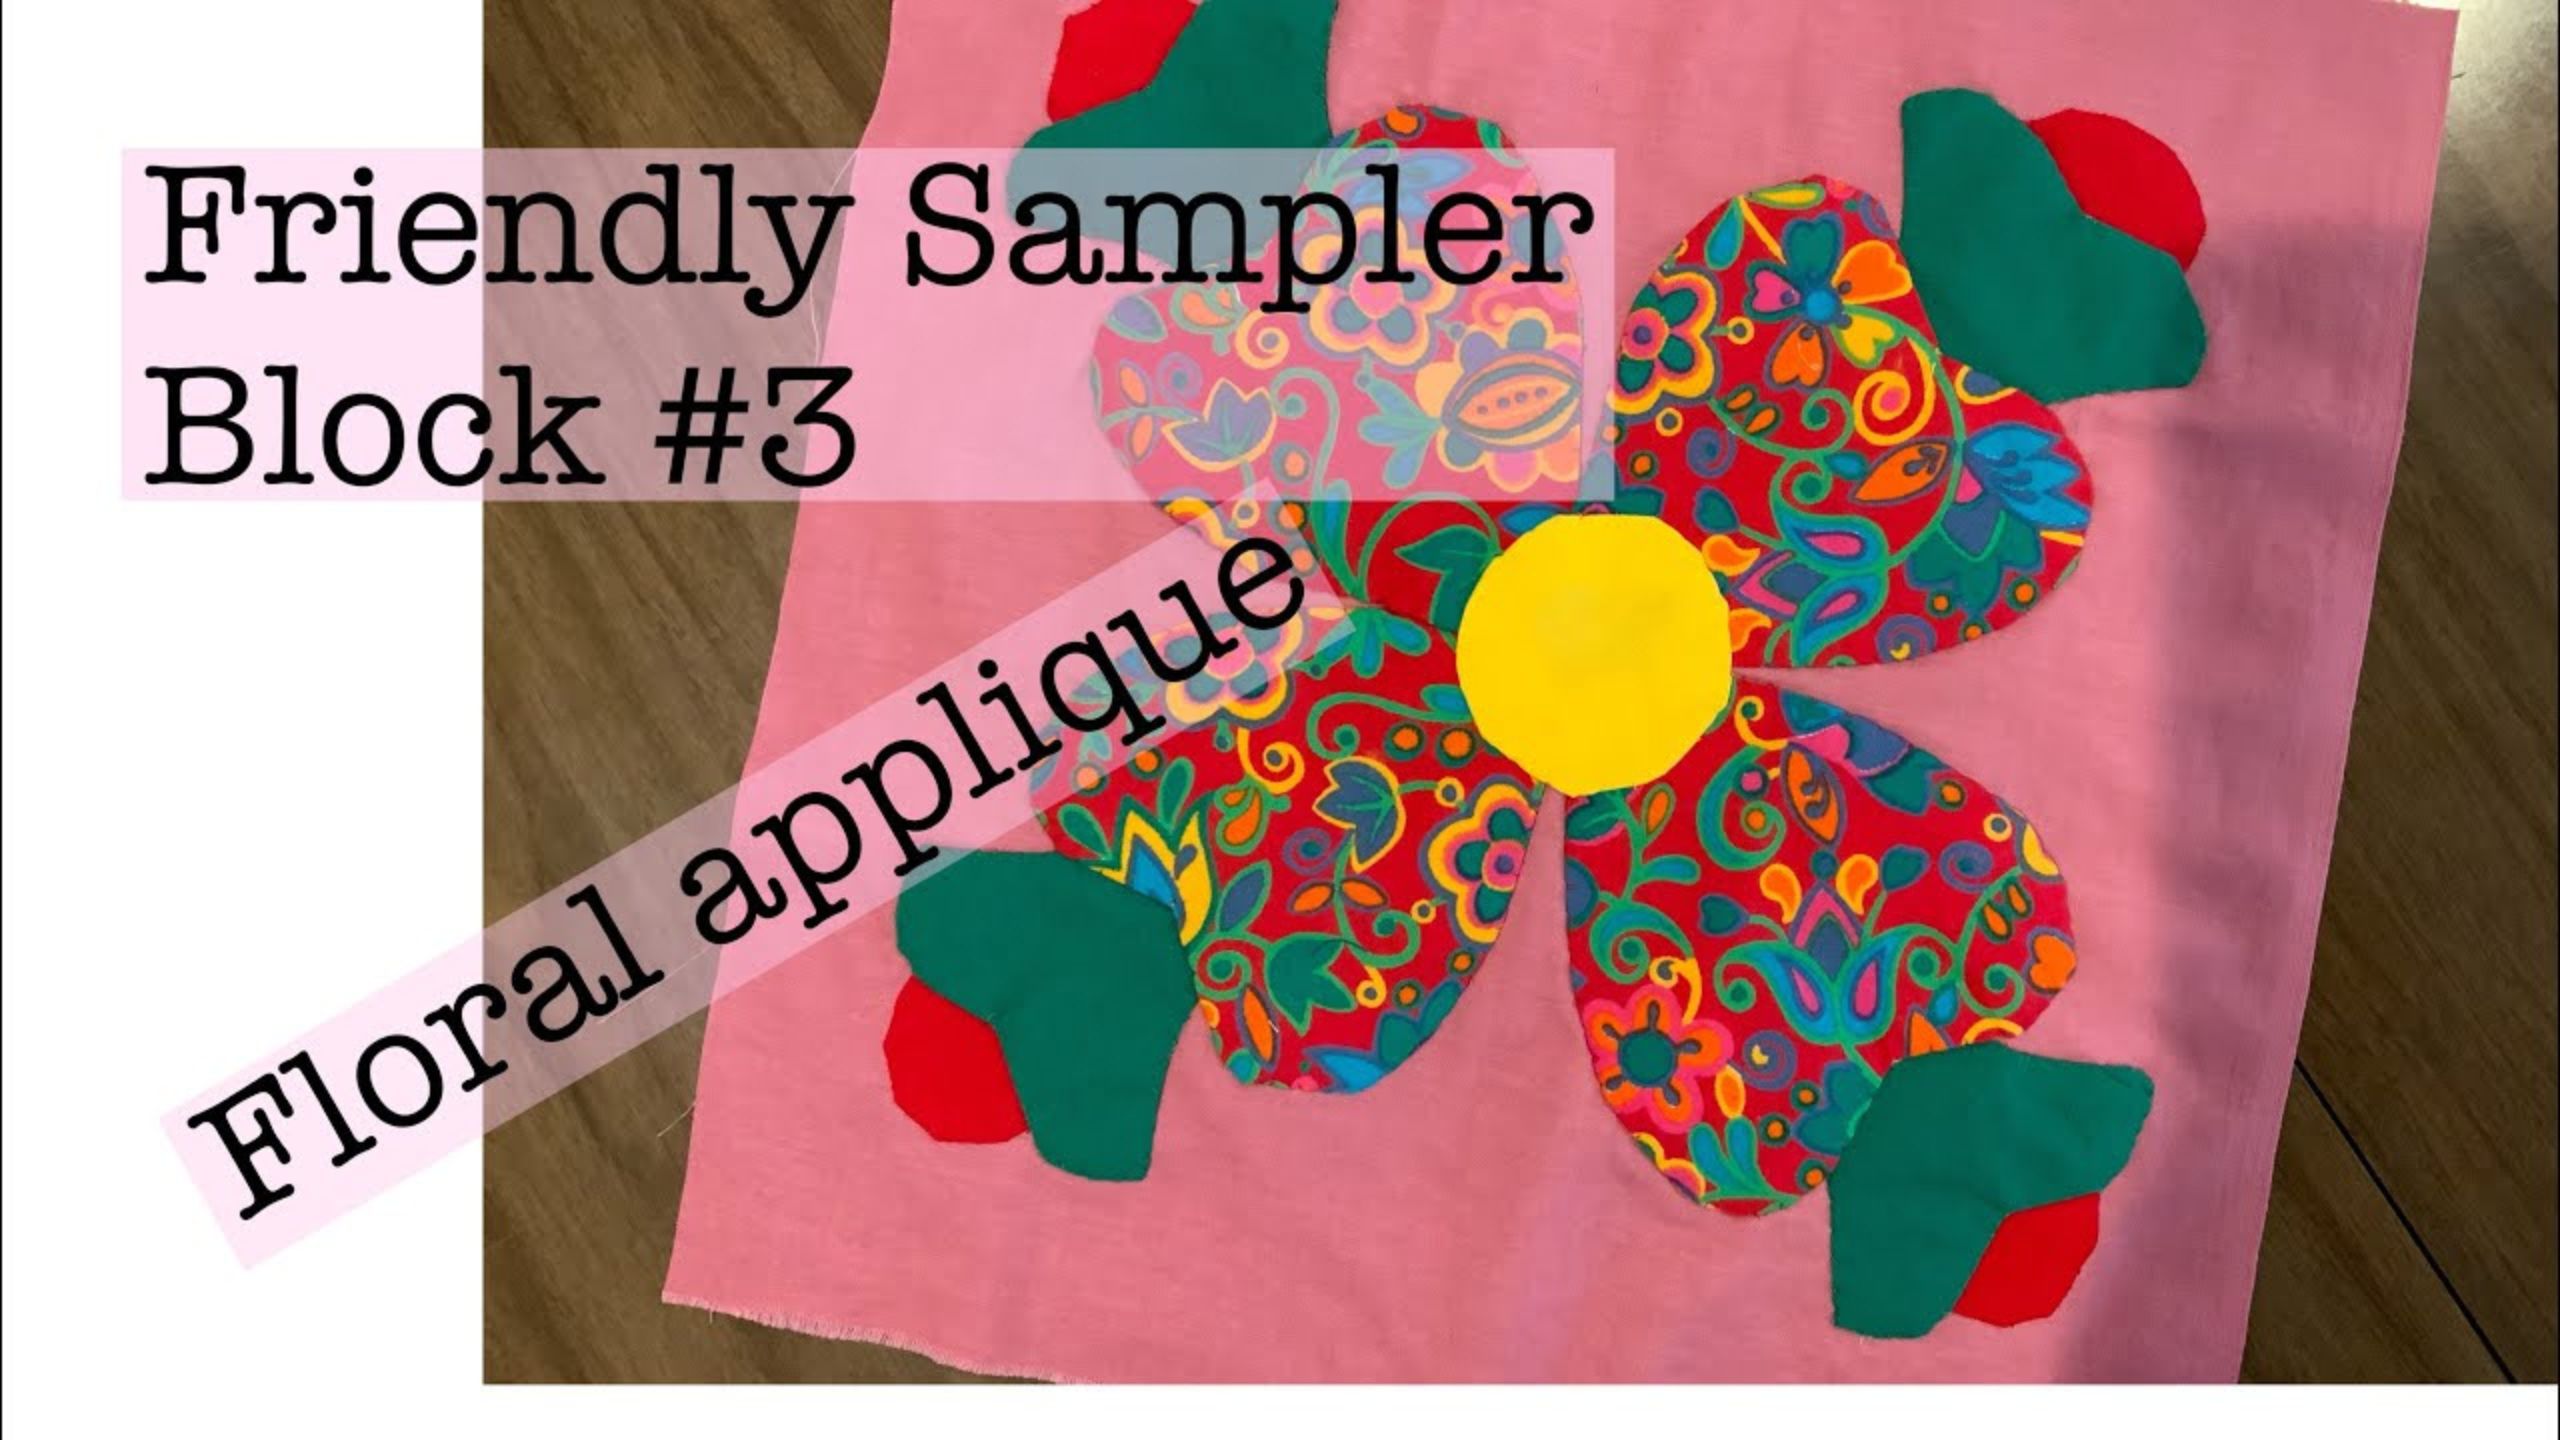
Friendly Sampler floral applique quilt block | A hand applique tutorial with Beth Shibley
Today Beth Shibley is working on the third block for her "Friendly Sampler." She uses an easy hand applique floral design - let's give it a go!
Instructor
Beth Shibley
Beth Shibley loves to create and share her adventures in quilting. Simple patterns and practical gifts are what she loves most.
Shop this tutorial

Common Questions
What is covered in Friendly Sampler floral applique quilt block | A hand applique tutorial with Beth Shibley?
Today Beth Shibley is working on the third block for her "Friendly Sampler." She uses an easy hand applique floral design - let's give it a go!
How long is the tutorial video?
The tutorial video is 00:23:23.
Are supplies listed for this tutorial?
Yes. The tutorial page includes the supplies and materials connected to this project.
Is a transcript available?
Yes. A written transcript is available on the tutorial page.
Video Transcript
To make her block, Beth uses the following:
- Background fabric - pink - 12 1/2" x 12 1/2"
- Floral fabric 10"x 10"
- Green fabric 8" x 8"
- Red fabric 7" x 7"
- Yellow fabric 5" x 5"
- Lightweight interfacing - approx 15" x 15"
- Thread to match applique pieces
First Beth cuts out her applique shapes (shown in the pattern) to use as templates on her fabric. Remember that you'll need 4 of each shape except for the flower center - one for each quadrant.
Next Beth traces around her templates on her fabric, leaving 1/4" extra around the edges for seaming. Then it's time to cut the shapes out!
Now pin your fabric shapes to your interfacing (holding right sides together) and sew the seams all the way around your shapes. Cut a small slit in the interfacing and turn your applique pieces right side out, enclosing the raw seams.
For the small circles, Beth uses a piece of cardboard and starches and presses her fabric into shape (kind of like English Paper Piecing). She removes the cardboard once the edges are pressed under.
Next comes the fun part - arranging your applique pieces on your background! When you are happy with the arrangement, pin everything securely in place (or press if you're using fusible interfacing!)
For this project, Beth chooses to hand applique the pieces using whip stitching. You could also machine applique with decorative stitching around the edges or simple top stitching.
Before you know it, your quilt block will be done!
- Background fabric - pink - 12 1/2" x 12 1/2"
- Floral fabric 10"x 10"
- Green fabric 8" x 8"
- Red fabric 7" x 7"
- Yellow fabric 5" x 5"
- Lightweight interfacing - approx 15" x 15"
- Thread to match applique pieces
First Beth cuts out her applique shapes (shown in the pattern) to use as templates on her fabric. Remember that you'll need 4 of each shape except for the flower center - one for each quadrant.
Next Beth traces around her templates on her fabric, leaving 1/4" extra around the edges for seaming. Then it's time to cut the shapes out!
Now pin your fabric shapes to your interfacing (holding right sides together) and sew the seams all the way around your shapes. Cut a small slit in the interfacing and turn your applique pieces right side out, enclosing the raw seams.
For the small circles, Beth uses a piece of cardboard and starches and presses her fabric into shape (kind of like English Paper Piecing). She removes the cardboard once the edges are pressed under.
Next comes the fun part - arranging your applique pieces on your background! When you are happy with the arrangement, pin everything securely in place (or press if you're using fusible interfacing!)
For this project, Beth chooses to hand applique the pieces using whip stitching. You could also machine applique with decorative stitching around the edges or simple top stitching.
Before you know it, your quilt block will be done!


