
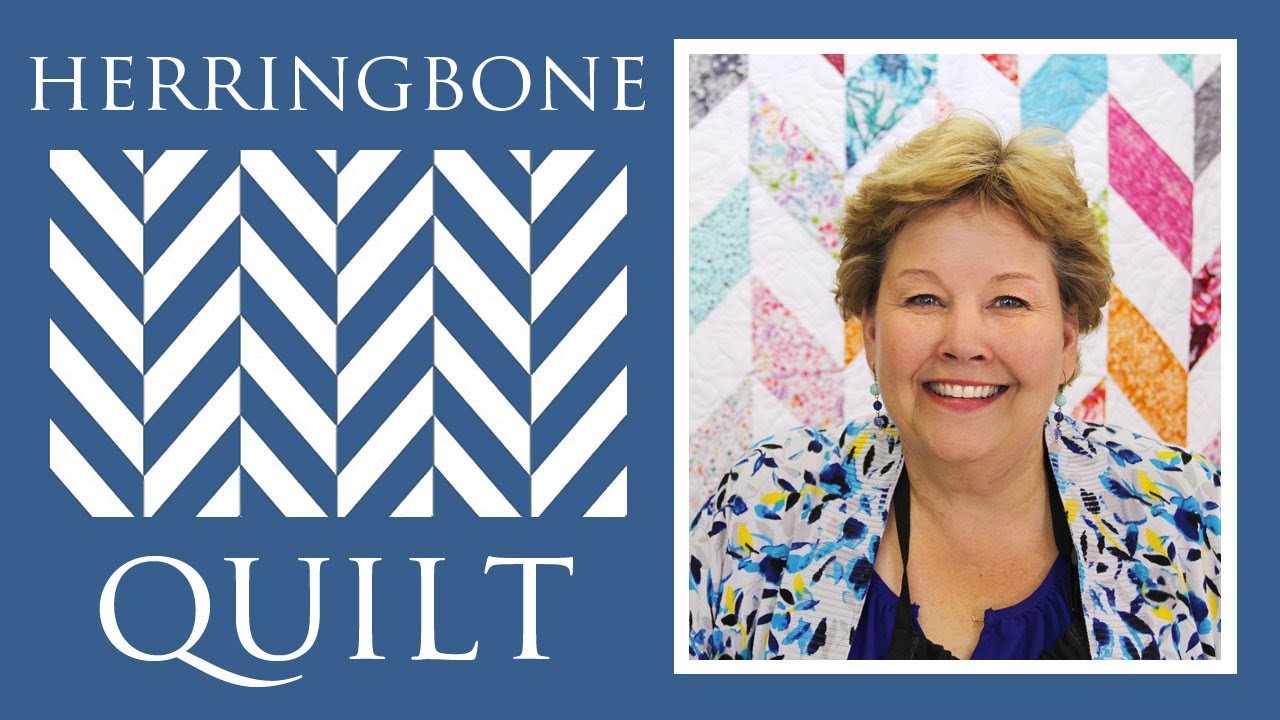
Herringbone Quilt
MSQC's Jenny teaches us how to make a quick and simple herringbone quilt with half square triangles made out of 10 inch squares of precut fabric (layer cakes).

Instructor
Jenny Doan
Jenny Doan is an American quilter, author, and YouTube personality. Jenny started Missouri Star Quilt Company in 2008 and today it is the largest quilting supply vendor in the United States.
Shop this tutorial



Common Questions
What is covered in Herringbone Quilt?
MSQC's Jenny teaches us how to make a quick and simple herringbone quilt with half square triangles made out of 10 inch squares of precut fabric (layer cakes).
How long is the tutorial video?
The tutorial video is 00:10:56.
Are supplies listed for this tutorial?
Yes. The tutorial page includes the supplies and materials connected to this project.
Is a transcript available?
Yes. A written transcript is available on the tutorial page.
Video Transcript
The Herringbone Quilt: Easy Quilting Tutorial with Jenny Doan of Missouri Star Quilt Company
MSQC's Jenny teaches us how to make a quick and simple herringbone quilt with half square triangles made out of 10 inch squares of precut fabric (layer cakes).
Hi I’m Jenny from the MSQC. And I have a fun project for you today. Today we’re talking about the ever popular Herringbone Quilt. And I’m going to show you how to do that. So let’s take a look at this quilt behind me. Isn’t this gorgeous? I just think this is really fun. It’s very popular right now. People love making it. And I just want to show you an easy way to do that. So to make this quilt what we’re going to need is one package of ten inch pre cut squares of white and one packet of ten inch pre cut squares of color. For our quilt behind us we have used In Bloom by Valerie Wells for Robert Kaufman fabric. And it’s just a beautiful line of fabric. You can see all these different fabrics, all these different designs lend itself perfectly for a quilt like this.
So the way we’re going to make it is we are going to be making half square triangles. This is another half square triangle quilt. They’re in so many of the quilts we make. And I just want to show you how I do it. And so to make the half square triangles what we’re going to do is we are going to take one of our ten inch squares right here and, of a color and one of white, like this. We’re going to lay those right sides together and we’re going to sew all the way around those squares a quarter of an inch just like this. So let’s go to the sewing machine and do that.
There are lots of different ways to make half square triangles and, and I think that you’ll find that, find one that’s just right for you. This is one of the ways I like because I like the size they turn out. They come out to be about 6 ½ inches. So let’s swing around the corner. People ask me all the time, Do you stop and pivot or do you just swing around the corner? I think sometimes it depends on how fast I’m going. If I can get my brakes on fast enough, if not I just sew right off the edge. Now if you have squares, you know honestly on pre cuts you would think the size would be universal. But if you have squares that end up being a little bit different sizes, just choose one to follow. And I generally, I just choose like one of the squares, like the background and I line up my, my sewing machine foot right along the edge of that. There we go. And sometimes when you hit the corner of your block you even get a little bit tiny fold. That doesn’t matter because we’re going to be cutting through this diagonally both directions. So we’ve sewn all the way around this and then we’re going to cut this diagonally both directions. Just like this. Cutting this way and cutting this way. Then we’re going to take these to the ironing board and we are going to press these open. I like to lay my color on the top so that the, so that the seam allowance is hidden on the dark side which hides your fabric. And we need to do this to our whole pack. So you’re going to be doing this 42 times.
Alright now there are loads of ways to put this quilt together. Lots of different ways to put it together. But you guys know I’m a little angley challenged so I have to have it make sense in my brain. And the easiest way for me to do that was to sew these in long rows like this. So what I did was I divided my layer cake in half. I put two squares in one pile and two squares in the other. And I did that with the whole thing like this. Because then we’re going to sew together two of these long diamonds like this. But half of them have to go one way and half of them have to go the other. So of course I’m going to do one set and I’m going to do them all the same. And I’m going to do the other set and do them all the same. So what it works out to is 36 of these, of these half square triangles are going to be sewn together going the same way. And so you can see right here this is what you want. You want this long diamond going this way. And you’re going to do 36 of these just like this. So this long diamond. So what we’re going to do is we’re going to put these together like this and, and you’ll know you’re right if you can see like half of the other one through here. I don’t know if you can see that on the camera but you can see the white here and the color here. And you’ll know that’s right because when you open these up they make that long, that long diamond shape. So we’re going to do that with half of them so I’m going to line this up here. And I’m also going to line this one up here. Wait a minute, there we go. That’s right. And we’re just going to chain piece these. So you can actually stack all your pieces like this one on top of the other and do the whole, the whole set of them, you know that’s going one direction. If you’re sure about where you go. You want to make sure that you don’t mix them up though because you’ve got have a whole set going one way and a whole set going the other way.
Alright. So we’re just going to sew our first couple of them this way. And when you chain piece you just load another one right in below, just like this. And you want to make your pieces fit. Because you have a little bit of bias you can actually make them fit. So you know if you have to actually, you know they have some movement to them, which I like because you can make them fit and make them work. So you want to make sure that your, your seams are straight on the sides like this which is what we’ve got. Ok so here’s these and they’re going to go in this pile because they match. Now we have to do these going the other way. And it’s really important that you, that you figure out your directions. So here’s this one and it matches this one. And I always make one block and then have it set so that I have something to look at. Otherwise, you know, who knows what shape it’s going to end up. But I know I have one set going this way and one set going this way. So I’m, I lay mine out so that they match that. Let’s make sure that this one is going to do the same, just like that. I’m going to fold these back on themselves just like this. And then we’re going to lay these right together. Take them over to the sewing machine and sew those together. Alright, here’s this one coming down the side. If you have one side that is larger than the other side, you know ideally they should be the same size but if you have a block, you know, where your seam wasn’t perfect because sometimes we’re not, and, and it’s larger, if you’ll put that piece on the bottom then the feed dogs will help take in that extra fabric too. So that’s just a really cool little tip. Alright let’s press these like this. Here we go. Alright. And then again I’m going to check to make sure we’re all in the same direction right here like this. And then once we get our whole stack sewn together then we can put our quilt together.
Now how I did this was by row because, oh I forgot to tell you, you’re going to need like 12 of these half blocks that are not sewn together. Because let’s take a look at this. What we do when we put the rows together is we stagger them so every other row has a half block on the top. And you can see those little half blocks on the top and on the bottom. So you can just say six sets and we’ll split those apart on the top and the bottom. So when we go to put our rows together we’re going to line this one up and I just sew, I sew a whole row like this. Where I sew one to the next, to the next. And you can tell if you have it right because your white pieces will also form that same diamond. And you’re going to sew them together just like this. So let’s sew a couple of these together end to end. Alright so there’s one row. And you’re actually going to, you’re actually going to put these sets, let me see how many sets, I think it’s six. Let me look to make sure. You’re going to sew six sets of these together but let’s count, one, two, three, four, five, six, seven together. And then, yes seven together when the pieces are together it’s seven, when they’re apart it’s six whole sets with a half at each end. So it’s seven sets either way. So this next row then, we’re going to start and we’re going to put this whole block, we’re going to stagger it down one. So let me show you right up here so make sure you can see this. We’re going to add another block up here on the top like this. And so we’re going to start with half block and then sew our whole blocks together. And so it ends up giving with this staggered look. So let’s sew a couple of these together.
Ok so once you get your strip all ironed and it’s nice and flat you’re ready to put your quilt together. So you can see here I have this one extra block up here. I’m going to have a single at the top and a single at the bottom so the whole row offsets. And you can see how that’s going to happen here. You’ve got your color and your color, color, you know how it just offsets one block. And you’re going to make your rows. So let’s take a look at the quilt behind me. We’ve got this one here, one, two, three, four, five, six, you have six rows that have seven or six full blocks and a half block in them. So every other row you’re going to stagger. And you’re going to start with a single block. The rows in between are all full blocks and there are seven in each row. So earlier I said 36 but it’s really 42. So it will use your whole, your whole pre cut packs up. It will use the whole thing which I love. I love very little waste. You can see right around this edge here we have put a little 2 ½ inch border. You’re going to need about eight strips of those. And so that’s about ¾ of a yard of fabric. And for the binding we actually took all of our little pieces and made a scrappy binding because we thought that would be really fun. So we hope you enjoyed this tutorial on the Herringbone Quilt from the MSQC.
MSQC's Jenny teaches us how to make a quick and simple herringbone quilt with half square triangles made out of 10 inch squares of precut fabric (layer cakes).
Hi I’m Jenny from the MSQC. And I have a fun project for you today. Today we’re talking about the ever popular Herringbone Quilt. And I’m going to show you how to do that. So let’s take a look at this quilt behind me. Isn’t this gorgeous? I just think this is really fun. It’s very popular right now. People love making it. And I just want to show you an easy way to do that. So to make this quilt what we’re going to need is one package of ten inch pre cut squares of white and one packet of ten inch pre cut squares of color. For our quilt behind us we have used In Bloom by Valerie Wells for Robert Kaufman fabric. And it’s just a beautiful line of fabric. You can see all these different fabrics, all these different designs lend itself perfectly for a quilt like this.
So the way we’re going to make it is we are going to be making half square triangles. This is another half square triangle quilt. They’re in so many of the quilts we make. And I just want to show you how I do it. And so to make the half square triangles what we’re going to do is we are going to take one of our ten inch squares right here and, of a color and one of white, like this. We’re going to lay those right sides together and we’re going to sew all the way around those squares a quarter of an inch just like this. So let’s go to the sewing machine and do that.
There are lots of different ways to make half square triangles and, and I think that you’ll find that, find one that’s just right for you. This is one of the ways I like because I like the size they turn out. They come out to be about 6 ½ inches. So let’s swing around the corner. People ask me all the time, Do you stop and pivot or do you just swing around the corner? I think sometimes it depends on how fast I’m going. If I can get my brakes on fast enough, if not I just sew right off the edge. Now if you have squares, you know honestly on pre cuts you would think the size would be universal. But if you have squares that end up being a little bit different sizes, just choose one to follow. And I generally, I just choose like one of the squares, like the background and I line up my, my sewing machine foot right along the edge of that. There we go. And sometimes when you hit the corner of your block you even get a little bit tiny fold. That doesn’t matter because we’re going to be cutting through this diagonally both directions. So we’ve sewn all the way around this and then we’re going to cut this diagonally both directions. Just like this. Cutting this way and cutting this way. Then we’re going to take these to the ironing board and we are going to press these open. I like to lay my color on the top so that the, so that the seam allowance is hidden on the dark side which hides your fabric. And we need to do this to our whole pack. So you’re going to be doing this 42 times.
Alright now there are loads of ways to put this quilt together. Lots of different ways to put it together. But you guys know I’m a little angley challenged so I have to have it make sense in my brain. And the easiest way for me to do that was to sew these in long rows like this. So what I did was I divided my layer cake in half. I put two squares in one pile and two squares in the other. And I did that with the whole thing like this. Because then we’re going to sew together two of these long diamonds like this. But half of them have to go one way and half of them have to go the other. So of course I’m going to do one set and I’m going to do them all the same. And I’m going to do the other set and do them all the same. So what it works out to is 36 of these, of these half square triangles are going to be sewn together going the same way. And so you can see right here this is what you want. You want this long diamond going this way. And you’re going to do 36 of these just like this. So this long diamond. So what we’re going to do is we’re going to put these together like this and, and you’ll know you’re right if you can see like half of the other one through here. I don’t know if you can see that on the camera but you can see the white here and the color here. And you’ll know that’s right because when you open these up they make that long, that long diamond shape. So we’re going to do that with half of them so I’m going to line this up here. And I’m also going to line this one up here. Wait a minute, there we go. That’s right. And we’re just going to chain piece these. So you can actually stack all your pieces like this one on top of the other and do the whole, the whole set of them, you know that’s going one direction. If you’re sure about where you go. You want to make sure that you don’t mix them up though because you’ve got have a whole set going one way and a whole set going the other way.
Alright. So we’re just going to sew our first couple of them this way. And when you chain piece you just load another one right in below, just like this. And you want to make your pieces fit. Because you have a little bit of bias you can actually make them fit. So you know if you have to actually, you know they have some movement to them, which I like because you can make them fit and make them work. So you want to make sure that your, your seams are straight on the sides like this which is what we’ve got. Ok so here’s these and they’re going to go in this pile because they match. Now we have to do these going the other way. And it’s really important that you, that you figure out your directions. So here’s this one and it matches this one. And I always make one block and then have it set so that I have something to look at. Otherwise, you know, who knows what shape it’s going to end up. But I know I have one set going this way and one set going this way. So I’m, I lay mine out so that they match that. Let’s make sure that this one is going to do the same, just like that. I’m going to fold these back on themselves just like this. And then we’re going to lay these right together. Take them over to the sewing machine and sew those together. Alright, here’s this one coming down the side. If you have one side that is larger than the other side, you know ideally they should be the same size but if you have a block, you know, where your seam wasn’t perfect because sometimes we’re not, and, and it’s larger, if you’ll put that piece on the bottom then the feed dogs will help take in that extra fabric too. So that’s just a really cool little tip. Alright let’s press these like this. Here we go. Alright. And then again I’m going to check to make sure we’re all in the same direction right here like this. And then once we get our whole stack sewn together then we can put our quilt together.
Now how I did this was by row because, oh I forgot to tell you, you’re going to need like 12 of these half blocks that are not sewn together. Because let’s take a look at this. What we do when we put the rows together is we stagger them so every other row has a half block on the top. And you can see those little half blocks on the top and on the bottom. So you can just say six sets and we’ll split those apart on the top and the bottom. So when we go to put our rows together we’re going to line this one up and I just sew, I sew a whole row like this. Where I sew one to the next, to the next. And you can tell if you have it right because your white pieces will also form that same diamond. And you’re going to sew them together just like this. So let’s sew a couple of these together end to end. Alright so there’s one row. And you’re actually going to, you’re actually going to put these sets, let me see how many sets, I think it’s six. Let me look to make sure. You’re going to sew six sets of these together but let’s count, one, two, three, four, five, six, seven together. And then, yes seven together when the pieces are together it’s seven, when they’re apart it’s six whole sets with a half at each end. So it’s seven sets either way. So this next row then, we’re going to start and we’re going to put this whole block, we’re going to stagger it down one. So let me show you right up here so make sure you can see this. We’re going to add another block up here on the top like this. And so we’re going to start with half block and then sew our whole blocks together. And so it ends up giving with this staggered look. So let’s sew a couple of these together.
Ok so once you get your strip all ironed and it’s nice and flat you’re ready to put your quilt together. So you can see here I have this one extra block up here. I’m going to have a single at the top and a single at the bottom so the whole row offsets. And you can see how that’s going to happen here. You’ve got your color and your color, color, you know how it just offsets one block. And you’re going to make your rows. So let’s take a look at the quilt behind me. We’ve got this one here, one, two, three, four, five, six, you have six rows that have seven or six full blocks and a half block in them. So every other row you’re going to stagger. And you’re going to start with a single block. The rows in between are all full blocks and there are seven in each row. So earlier I said 36 but it’s really 42. So it will use your whole, your whole pre cut packs up. It will use the whole thing which I love. I love very little waste. You can see right around this edge here we have put a little 2 ½ inch border. You’re going to need about eight strips of those. And so that’s about ¾ of a yard of fabric. And for the binding we actually took all of our little pieces and made a scrappy binding because we thought that would be really fun. So we hope you enjoyed this tutorial on the Herringbone Quilt from the MSQC.



