

Add Netting to a Landscape Quilt for Easy Quilting
Rob demonstrates how to attach a nylon netting overlay to an applique quilt. This adds texture and makes machine quilting much easier.

Instructor
Rob Appell
Rob Appell is a creative force to be reckoned with. When he is not behind a sewing machine, you might find him catching some waves on his surfboard or playing the guitar. Rob's quilting journey began while he was working at his mother's quilt shop, the Cotton Ball. Rob has designed fabrics for Free Spirit and quilts for Michael Miller, and spent several years as host of Man Sewing for Missouri Star Quilt Company. He travels across the globe, teaching his unique quilt designs, and sharing his expertise. Find out more on his website!
Shop this tutorial

Common Questions
What is covered in Add Netting to a Landscape Quilt for Easy Quilting?
Rob demonstrates how to attach a nylon netting overlay to an applique quilt. This adds texture and makes machine quilting much easier.
How long is the tutorial video?
The tutorial video is 00:11:36.
Are supplies listed for this tutorial?
Yes. The tutorial page includes the supplies and materials connected to this project.
Is a transcript available?
Yes. A written transcript is available on the tutorial page.
Video Transcript
Scientifically speaking there is a very specific reason why we are using the netting on top of our landscape quilts. It was originally started to make it so you didn’t have to stitch around all of those little odd edges you’ve created while you’re building your trees or your mountains or whatever you’re doing in your landscape, right? Some of those spots are really tough to machine quilt on. By adding the netting on top of the quilt you can see over here that basically I can stitch wherever I want to hold down the background. Now the entire quilt itself is covered in netting. But some of the tricks I want to talk about is that there’s blue netting on the blue water which you hopefully cannot see. And there’s also a white netting on the rest of the quilt really. And you can see that on some of the colors. So the reason we do it is to make the quilting easier on the quilter. But what happens is it does affect the color process within the quilt. So back to my science lab I went. I took all of my fabrics from my Eagle Over Alaska kit and the fabrics you see on the quilt behind me. And what I did is I mounted them to the background I was going to use. And then I covered all, I’ve covered all with basically white and no and black. And the reason I did that I was originally told that the black would act as a no show like our window screens, right? But the white would be a little bit more opaque. But through my scientific process I found that is not at all true. My personal opinion is that you should be using the dark nettings on the dark fabrics and the light nettings on the light fabrics. Look at this right here. You can see the black netting completely over the white fabric. But you can’t see it at all on the black. Conversely speaking you can’t see the white at all on top of the white. But you can totally see the white netting on top of the black. So as you’re choosing your netting I also want to point out they come out in awesome colors, right? So the blue you see here I chose to put on top of the water. And it is very easy to do different colors of netting in different sections on your quilt. I’m going to show you how to do that right now.
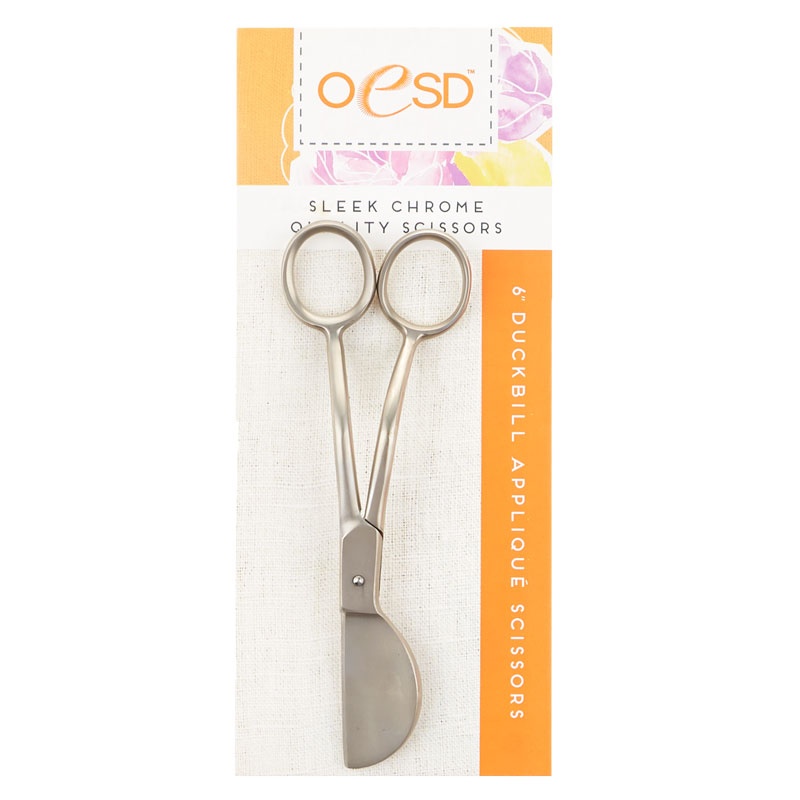
During the wardrobe change back into quilter mode I did do a little bit of machine quilting on this base sample landscape quilt. What I’ve done is I’ve laid the black netting already on to the black mountains but I don’t want it to be on the white of the snow. Hopefully you can see that. So once you’ve machine quilted not only the outer edges but actually also added in all the texture on that section of the netting. Then you want to remove the excess netting. And I should say that you really should do your small sections of netting colors if possible, and the reason I say if possible, we still want to respect it like a quilt. So if this was a very large quilt we would definitely be working in the middle. It’s a very small quilt. I can manage all of the pucker situation no matter where I start. So that’s why I was able to start on the mountain. So that’s the disclaimer. Now back to what we’re going to really do. Put your small sections in. That way you can cover the last section with like that white topper and then just cut away the negative spaces. You can use your small little scissors. It works pretty darn good. The tip might get caught on the netting a little bit but again you’re just working around in the area that you just stitched. So I’m just kind of pulling up at the netting and nibbling away with my scissor. Now how many of you have seen these funny looking scissors before? These are kind of called a duckbill applique scissor. The reason this has developed is the rounded part actually works to go in and make it much more difficult to cut into your base layers. So these scissors may be a little large for this job but this is what they’re intended for. See that working nice. And you can also see that I’m able to now pull up on the netting as I cut through with that blade. And I’ve removed all of the excess netting that I don’t want on the lighter colored fabrics that I don’t want the netting to show up so much.
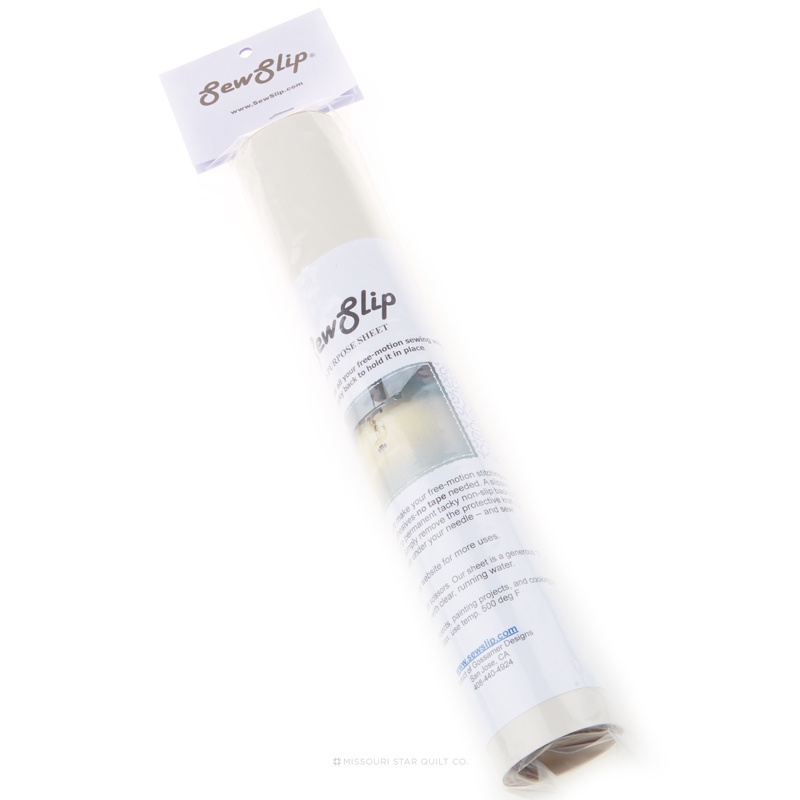
Now that that is already done and prepared now I’m ready to go ahead and add another layer of netting. And I will tell you, you want to keep your netting as, gosh, flat and stored as wrinkle free as possible. Some of the wrinkles may show up in there. And so I’m just going to lay this over here hopefully to a point where you can no longer see it. I already have my machine loaded with green thread. So the first route of travel I’m going to do is across this mountain line where I’ve added the black before and now I’m going to start to anchor the white down. So I’m going to come right over to my machine. I have a Sew Slip mat down on the bed of the machine and I normally have on my Machinger’s gloves when I’m quilting big quilts. I’m not going to take the time to put them on at this moment because this is just a small little piece but if any quilting trick you normally do you’ll do the same. We’re just adding a new element, that’s all. And the other reason you might be looking at this blue netting right here, I just pinned that. I forgot to point out there’s already blue on the water as well. But that blue/aqua was what I used there. I sure liked the effect of that.
Ok so now I’m going to go ahead and drop a few stitches to anchor myself. And now I’m just going to quilt my best line right along. Oop I want to loosen my tension a little bit. I just saw some bobbin tension coming through. So we’re going to anchor that top line first. Do your best to keep your netting flat while you’re working in that area. And then I’m going to machine quilt away from the stitch line. As to not create extra pucker. And then I will quilt the bottom line along the water where the blue netting is already in place. You might find there’s some negative space maybe between tree branches or something like that. You can stitch around it if you choose to cut it out. You don’t have to. You can leave a little netting in spots. Remember it adds highlights or shadow as well so you could use it as a design element as much as a technical element for holding down your applique pieces. Ok so now that we’ve got that base layer across the top, to make my life easier one of the things I really could do is I could cut this line back out with the scissors. But I want you to think through it. I want you to just slow down a moment and think. Well, if I cut this then I have to come back and do the whole same thing for the sky. So what I’m really going to do like I was trying to point out earlier is I’m going to pull this taut. I would then put in either black thread and stitch along the mountain again like this or I would put in purple thread and stitch along the bottom of what was kind of my cloud line to anchor this. And then later I’m just going to cut the white netting off of where the black is. I’ll definitely be using these scissors for that so that I’m not catching on the first layer of netting. I hope you’re understanding just the cut and trim, add and trim technique. I want to talk about finishing the machine quilting though before we go much further. So as I’ve said I stitched this line very nicely. This is all loose. I do not want to just stitch this line because I might get a bunch of pucker built up in there. So now what we’re going to do is we’re going to quilt our character, our texture, our lines of the mountains, our lines of the trees into the green area. Then we’ll stitch along the bottom here. Now the rocks don’t have netting either. So eventually I’ll have a line of stitching that comes along the green and along the gray. And therefore the whole quilt will be covered in netting when we’re done but not all the same colors of netting.
So now I”m going to go back to the middle of my quilt. Make sure I’ve got my thread here behaving a little bit. There we go. And ok here’s a great place for me to start. I’m going to go ahead and begin down one of my trees. Presser foot is down. Ok, here we go. Now the best part is I don’t have to stay right on the tree anymore. If the netting wasn’t there I’d have to stitch right on those perfect edges of the tree. But I don’t. I can just stitch wherever I want close to the tree. The only edges that really matter is where the netting stops. Now I can come back up the side of that tree. I can add in more trees this way, right? Even where there aren’t trees because I’m now adding in new texture.
Ok quilt fans I couldn’t resist. I had to put in my super close up camera after I finished quilting the green section. And now we’re onto the gray of the rocks, I want you to come in really close and see how we’re doing this. So yes I did quilt the green line right along the top of the green. And I’m coming back in and I’m just tracing out the rocks also just because I like to and I can. It’s not necessary here because I’m not going to be trimming this line. And as I was trying to say earlier yes we can use this wall quilting down our highlights or shadows. But I don’t need to stay as accurate. And I can also add other new lines of character into my quilt. And you can see now that I don’t have to be accurate because the netting will effectively hold down all of the pieces. I’m going to cheat over here to get into my next section. So this is how you can also come in here and add your own detail whether it was done with applique or thread. Now I do need to quilt along this edge because I’m going to trim this line back because I have blue netting on top of the water. Alright we’re just about done I just can’t stop. You know I love my machine quilting here. Let’s give ourselves one more little character line right down there and we’re done.
Ok so I’m not sure if you kind of heard what I was saying. The machine was roaring away. I love that. But I just want to point out again, I used different colors of nettings. So I had a blue netting on the water. The white was used on the gray of the rocks but also on the green. I’ll do it up here in the sky. I had the blue down, I had the white on top so now I can take out those scissors again. And I”m going to come up in here. I’m going to get myself an easy path right back in. And I’m going to trim away the white to expose the blue netting that is on top of my blue fabric for the water. And I’ll just do that each section as I go. So before we finish today’s video I want to take a moment and say a big thank you to one of my quilting heroes, Susan Carlson. You all have to check her out. She is all over the internet. She has been using a technique with these laces and these nettings and things. She does incredible work. She’s very inspiring. And I got to meet her recently. And she encouraged me to try a bunch of this. So thank you, Susan for being an awesome, inspiration to us all. I hope I’ve inspired you all also a little bit today to try something new. And we will catch you right here next time at Man Sewing.


