

How to Make 3 NEW Half-Rectangle Triangle Quilts - Free Quilting Tutorial
 Jenny Doan
- Layer Cake
- Modern
- Lap / Throw
- Beginner
- Quilt size 57" × 57"
Triple Play is a favorite tradition here at Missouri Star Quilt Co. Once a month, Jenny, Misty, and Natalie each demonstrate their own, unique spin on a favorite block, technique, or template. In this episode, the talented Doan ladies show off three fabulous new quilts made with the half-rectangle triangle quilt block.
Instructor
Jenny Doan
Jenny Doan is an American quilter, author, and YouTube personality. Jenny started Missouri Star Quilt Company in 2008 and today it is the largest quilting supply vendor in the United States.
Shop this tutorial
 Beaming Quilt Pattern by Missouri Star$6.95Shop →
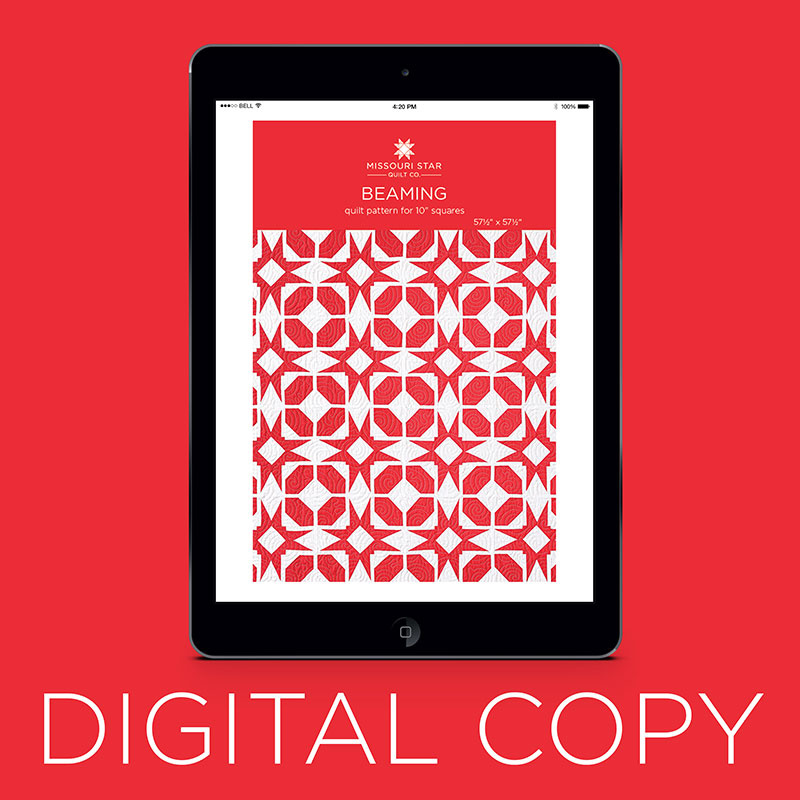 Digital Download - Beaming Quilt Pattern by Missouri Star$4.95Shop →
 Kona Cotton Color of the Year 2023 Ten Squares$30.95Shop →
 Kona Cotton - White Ten Squares$30.95Shop →
 Kona Cotton - White Yardage$7.28Shop →
 Kona Cotton - Color of the Year 2023 Yardage$6.76Shop →
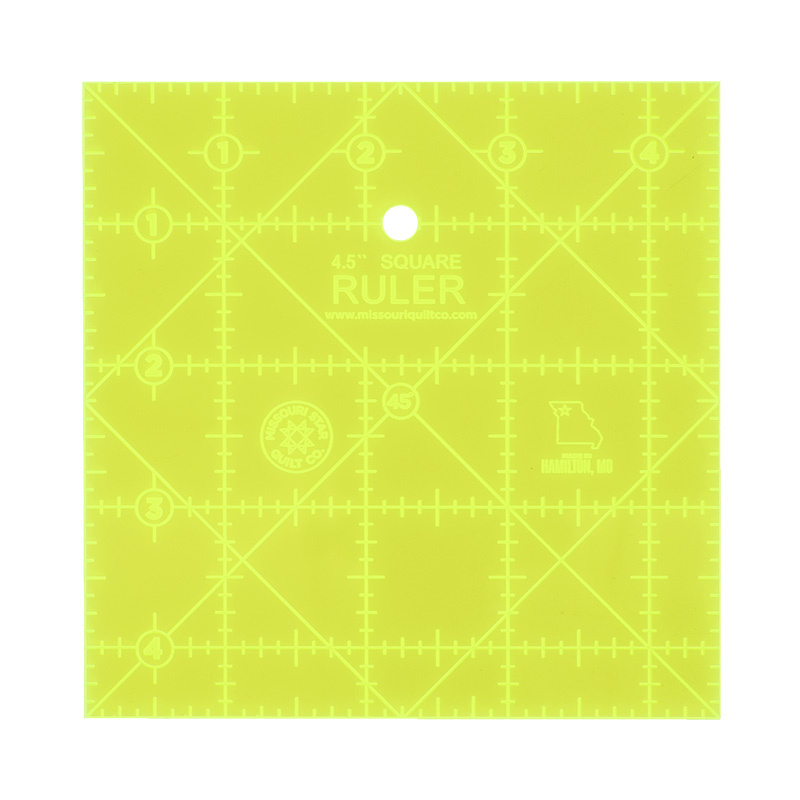 Missouri Star 4.5" x 4.5" Square Ruler$6.95Shop →
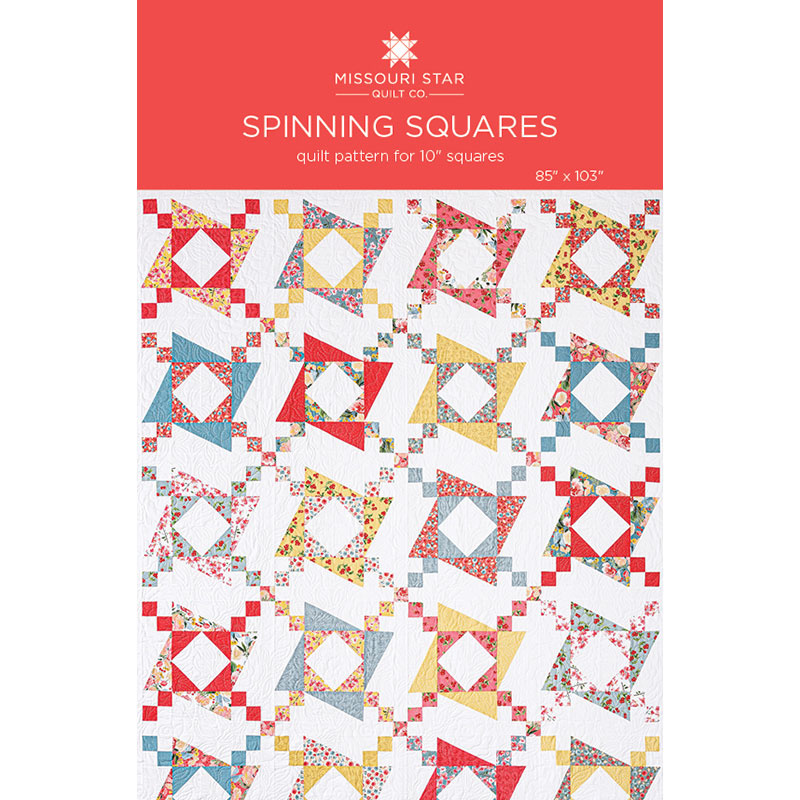 Spinning Squares Quilt Pattern by Missouri Star$6.95Shop →
 Digital Download - Spinning Squares Quilt Pattern by Missouri Star$4.95Shop →
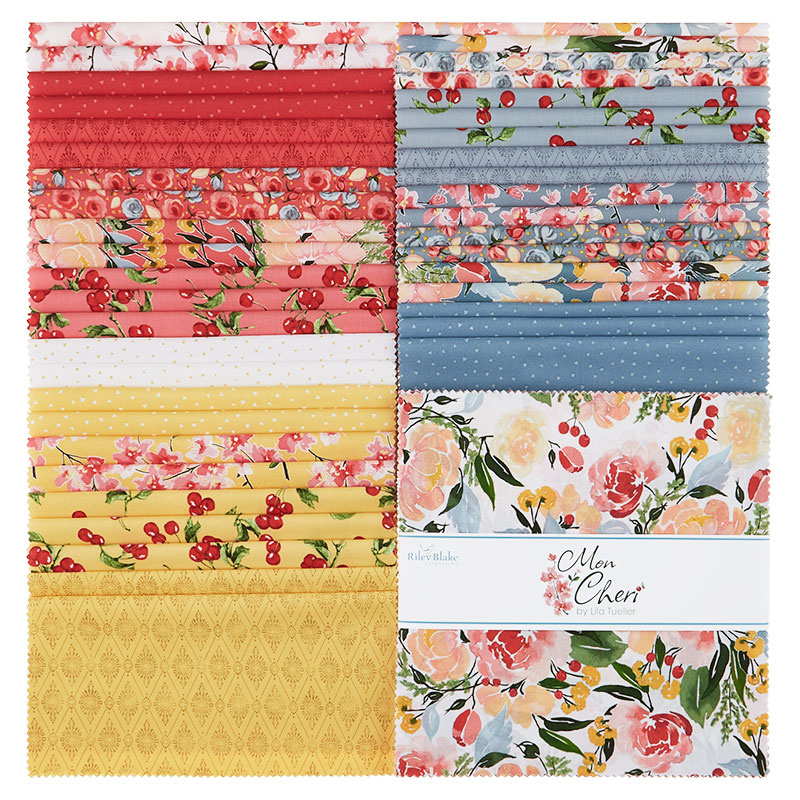 Mon Cheri 10" Stackers$39.95Shop →
 Bella Solids White Layer Cake$40.95Shop →
 Bella Solids - White Bleached Yardage$8.24Shop →
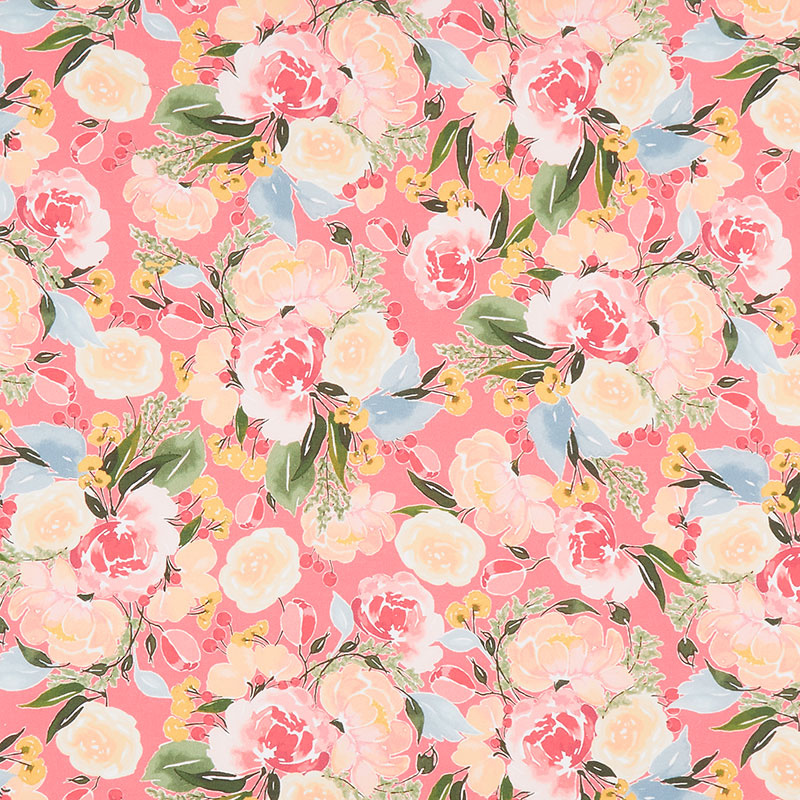 Mon Cheri - Floral Raspberry Yardage$11.96Shop →
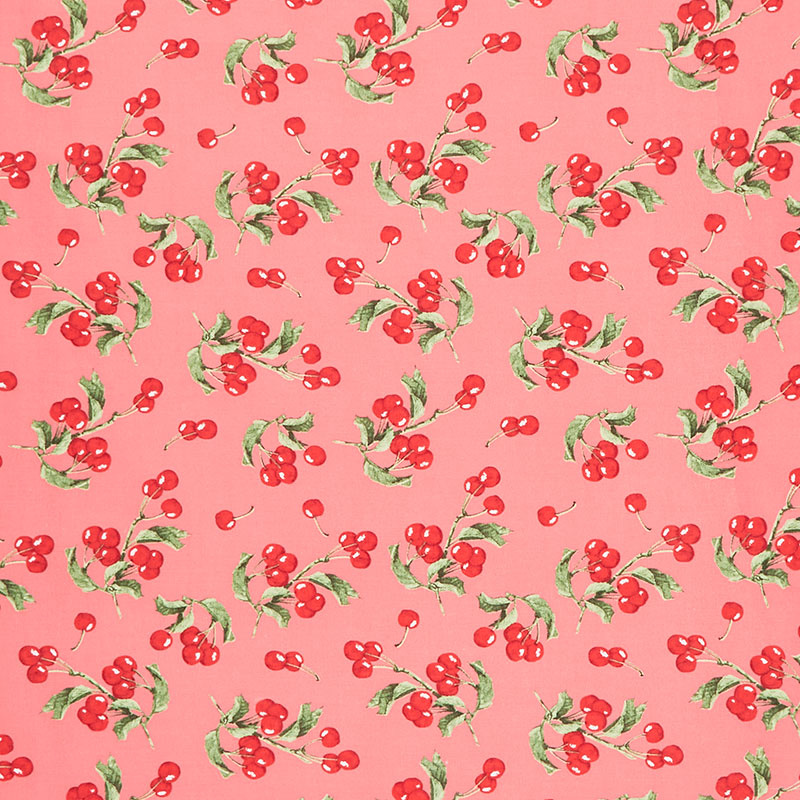 Mon Cheri - Cherries Raspberry Yardage$11.96Shop →
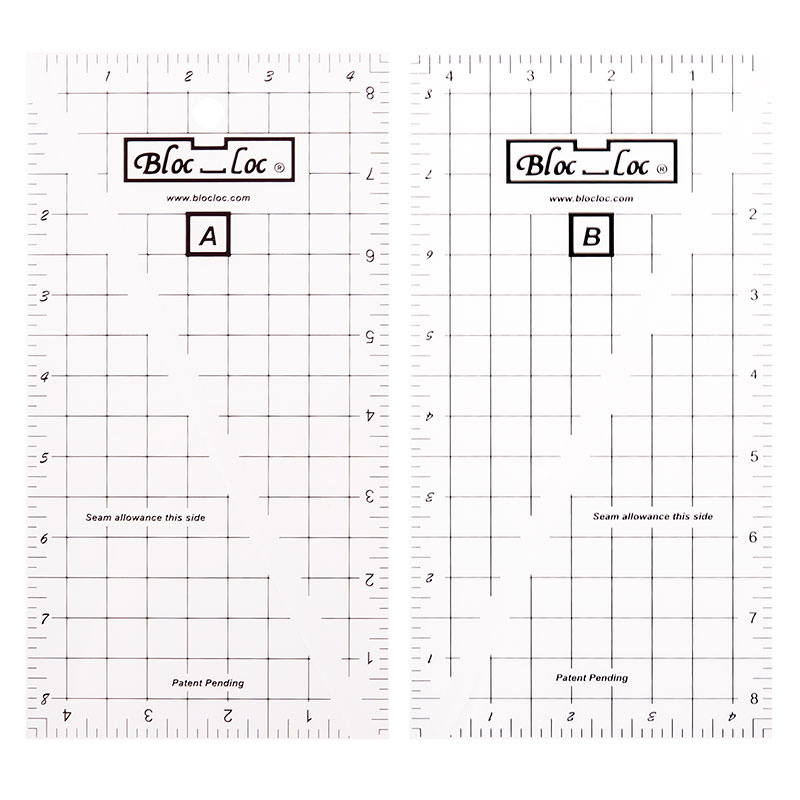 Bloc Loc Half-Rectangle Triangle 2:1 Ruler Large Set$56.20Shop →
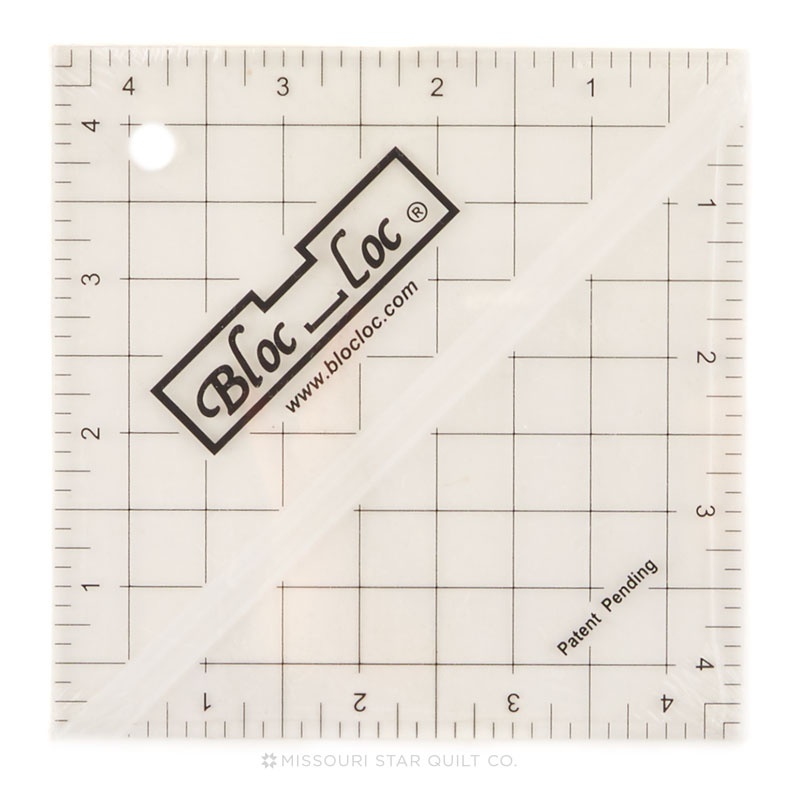 Bloc Loc 4 1/2" Square Up Ruler$23.60Shop →
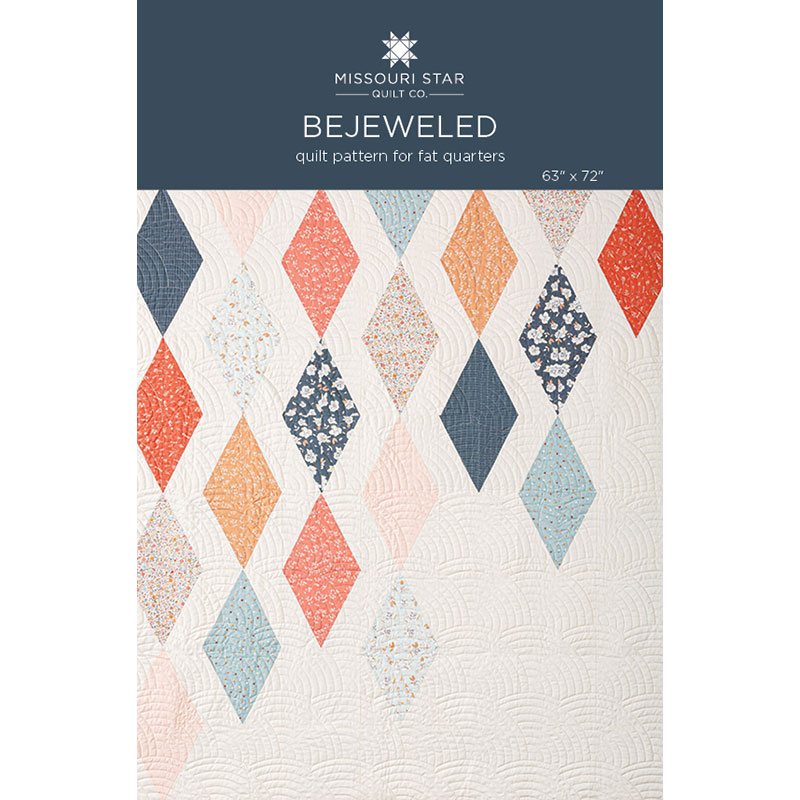 Bejeweled Quilt Pattern by Missouri Star$6.95Shop →
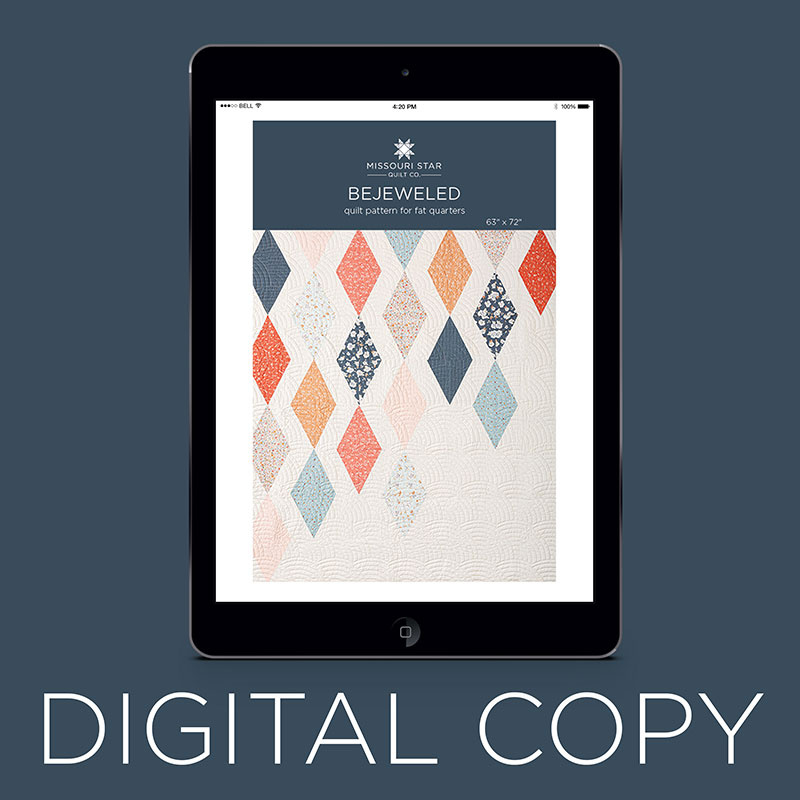 Digital Download - Bejeweled Quilt Pattern by Missouri Star$4.95Shop →
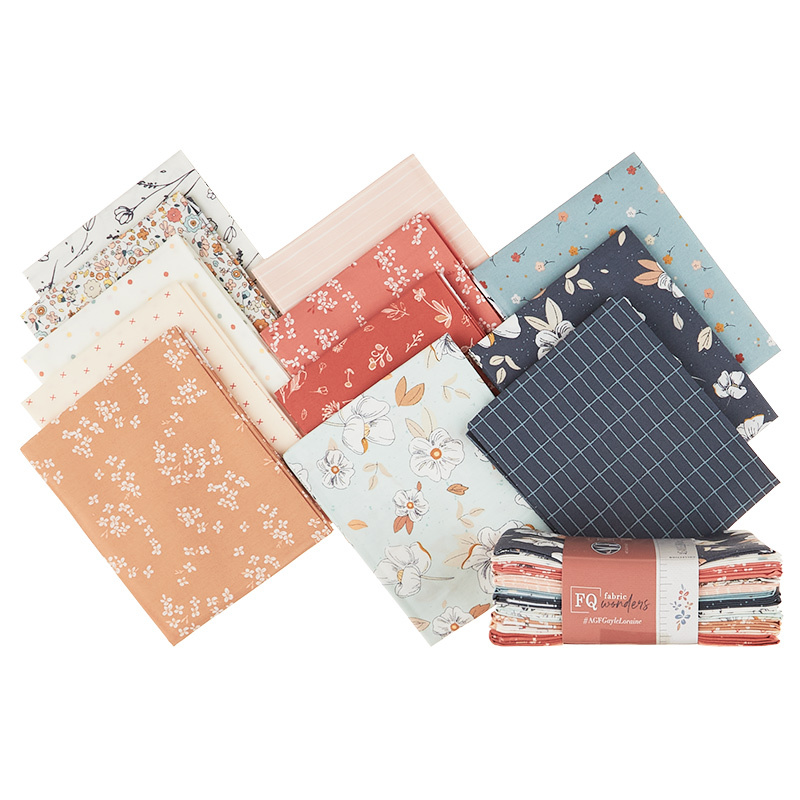 Gayle Loraine Fat Quarter Bundle$49.00Shop →
 Bella Solids - Snow Yardage$8.24Shop →
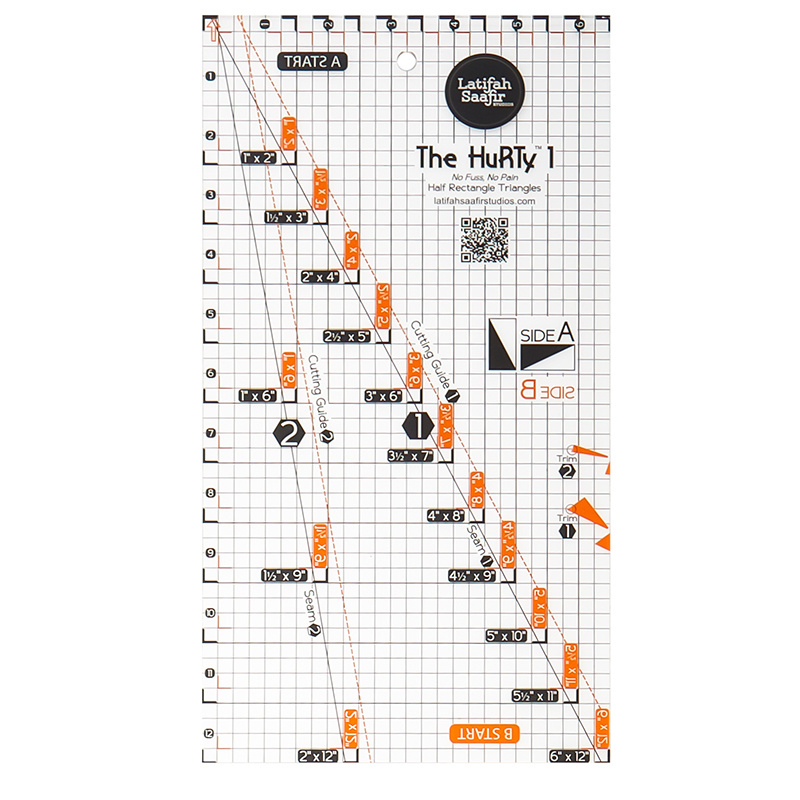 The HuRTy™ 1 - Half Rectangle Triangle Ruler$35.75Shop →
 Gayle Loraine - Magnolia Dreams Day Yardage$12.44Shop →
Common Questions
What is covered in How to Make 3 NEW Half-Rectangle Triangle Quilts - Free Quilting Tutorial?
Triple Play is a favorite tradition here at Missouri Star Quilt Co. Once a month, Jenny, Misty, and Natalie each demonstrate their own, unique spin on a favorite block, technique, or template. In this episode, the talented Doan ladies show off three fabulous new quilts made wi...
How long is the tutorial video?
The tutorial video is 00:41:27.
Are supplies listed for this tutorial?
Yes. The tutorial page includes the supplies and materials connected to this project.
Is a transcript available?
Yes. A written transcript is available on the tutorial page.
Video Transcript
Hi everybody, it's Jenny from the Missouri Star Quilt Company. And yay, it's Triple Play day.
Misty:
Hooray!
Natalie:
Yay!
Jenny:
And I'm here with Misty and Natalie, and we have three great projects to show you, all using the half square triangle block.
Natalie:
Half rectangle triangle.
Misty:
Half rectangle triangle.
Jenny:
Half rectangle triangle.
Misty:
That's right.
Jenny:
Okay, Misty, you get to start this time.
Misty:
All right, awesome. I'm super excited. This is my quilt.
Natalie:
It's so cute.
Misty:
Thank you.
Jenny:
It is really cute.
Misty:
It's so simple. I called it Bejeweled. I've been listening to a lot of Taylor Swift, so it seemed right.
Jenny:
That seems perfect.
Natalie:
Of course.
Misty:
And I just love this fabric line. It is called Gayle Loraine by Elizabeth Chappell for Art Gallery Fabrics. And you are going to need one pack of fat quarters. There's 12 in this bundle. You're also going to need three and a half yards of background fabric. And then four and a half yards of backing. I used the same for my binding, so an extra three-quarter yards. I also use Latifah Saafir's HuRTy ruler, and it's really awesome. I can't wait to show you how to use it.
Jenny:
That's awesome. I love that you're using a fat quarter bundle because that's the original precut.
Misty:
Exactly. It was fun to mix it up a bit. I'm excited to show you how this works, so let me move this stuff out of the way. Like I said, there are 12 fat quarters in the bundle. There were a couple that were pretty light, these two here, so I just left those out. You really only need 10 to make the quilt that you see here. And I have a couple here.
Jenny:
They're so cute.
Misty:
It's such a beautiful line. And let me just show you how I cut this. Here's our fat quarter all opened up, but I'm going to fold this in half long ways, so the shorter width of my fat quarter is running this direction.
Jenny:
Do you need me to iron this line, so it's different? Or-
Misty:
You can. Actually, if you want to press that in half, that would be great.
Jenny:
One of the things that's interesting to me is the half rectangle triangle is a little iffy for people.
Misty:
Yes, it can be.
Jenny:
And it's fun that she's come out with a ruler.
Misty:
And I have to admit, it was a little bit of work for me to figure out, but once I did, she has thought of everything. Truly. She gives you a little bit of extra room when you're cutting, and then there's all the things you need on there to square it up. So, it's just really great.
Jenny:
Will it matter that this isn't lined up straight? I just happen to notice that.
Misty:
Yep, I'm going to trim it all down anyway, so that is just fine. I'm going to make a straight edge here. There we go. And I want this folded in half. That's on purpose, just keep that in mind. And we're going to go over six in a quarter. One, two, three, four, five, six, and a quarter. Make sure that's right, and make a cut. And then, I'm going to do the same thing again. One, two, three, four, five, six, and a quarter. There we go. And this is extra, we can set that aside for now. I'm going to stack these up. And now I'm going to trim these, so that they are six and a quarter by 10. I'll cut off my folds down here. And then, over 10, just like so. Now, I'm going to leave this stacked exactly like it is because this is going to give me the different angles that I need so that half of my rectangles are going one way, and half are going the other way.
Jenny:
Okay, so they're up, down, up, down?
Misty:
Yep, exactly. We're just going to leave it like this. And now, I'm going to take my HuRTy ruler, and our cutting guide is the orange line. That's what we're working on. And you actually want to flip this over, so where it says A, start. You can read it. And then, I'm going to lay that orange line along the edge of my fabric. And I do want to point out that in the ruler instructions, she has all kinds of size information of what you need to cut, so that this works without lots of thinking. Just pay attention to that. For this, we have six and a quarter by 10. I'm lining my orange line up, and then there's a little orange arrow here at the top, and I want to slide, and make sure that that's touching the top of my fabric. And then, we're going to make a cut.
We can pull that aside, and then I'm going to flip this like so, and do the same thing. Line up that orange edge, and we just have a little bit to trim here. And there are all of my print half rectangle triangles. And you'll see when we open these up, they're going to be going in opposite directions, which is what we want, so that we can make our diamond just like that.
Jenny:
Very cool.
Natalie:
Very cool.
Misty:
Super cool. By doing this, you actually get enough-
Natalie:
So, you that again with your background?
Jenny:
You get two blocks?
Misty:
Well, kind of. Except for, because I have yardage with my background, it's a little bit different, so I just have a 10-inch strip. And I'm going to leave it folded. It's probably not the most economical way to do this, but it's going to work. If you had a print, obviously, this maybe wouldn't work every time because again, you need opposites.
Jenny:
Both sides, yeah.
Misty:
Yeah.
Jenny:
But with a solid edge you can use both sides?
Misty:
Then you can flip it over. Exactly.
Jenny:
Okay, that makes sense.
Misty:
I'm just going to cut this edge, and then, cut a few so we can get started.
Jenny:
Natalie, hand me those scraps. And I'll just toss them in the-
Natalie:
Scrap bin?
Jenny:
Yep.
Misty:
Remember, we're starting with the A start where we can read it, lining up that orange edge. You can see that line really well against the background, and the orange arrow at the top. And then, we'll make a cut. And then flip this over. And... Oops, make a cut. There we go. And now we have our background pieces.
Natalie:
Very cool.
Misty:
Super simple. And now let's just sew a few of these together. We're just going to put those just like that, and sew down the side. There we go.
Jenny:
That is nice because it gives you that little bit of edge on the bottom, so you don't lose your quarter inch.
Misty:
Totally. And like I said, the way that she's designed this, you're actually able to trim it up at the end so that they all fit beautifully and nicely, and you have a little bit of wiggle room. It's way more forgiving than I thought it would be when I started.
Jenny:
Should we let Natalie sew some of these, and you can actually hand me the ones that are coming through to-
Misty:
Yes, absolutely. You want to cut this one, Nat?
Natalie:
Oh yes.
Misty:
Perfect.
Jenny:
And then, I can iron.
Misty:
There we go.
Jenny:
The girl's got to have something to do, you know?
Misty:
That's true, absolutely.
Jenny:
There's that one.
Misty:
Okay. Let's just do two because really the block is just two of these together, and I have a bunch made already-
Jenny:
Okay, cool.
Misty:
... so this is perfect. If we'll press that one, then I can show you how to trim this. Now for trimming, we're actually going to be looking at the black line on the ruler. And let me get myself oriented straight. I'm going to line the seam up right along the black line, and I am looking at this four and a half by nine-inch measurement. I'm going to slide this down until that number matches along the bottom edge. And then, I'm going to keep that black line right on my seam. And then, I can just trim off these two sides, just like so. And now, I'm going to rotate this, and just check it from the other side as well. Because see, I have a little bit more to trim off of this edge. There we go. And then, that is ready to go, and we can trim up this one too.
Jenny:
It's always good to see it a couple of times.
Misty:
It is, especially because they go different directions, so you actually have to-
Natalie:
Flip the ruler.
Misty:
... flip the ruler, and think about it. So then, this comes down to... Actually, I need to rotate this because I'm right-handed. So, flip that over. Black line comes down to the bottom. And I am just going to start this way, and trim off this first edge. And then, I can flip this around, and do the other. Hold on, my brain is not working. There we go. That's it. It takes a little bit of figuring. There we go. Here's my four and a half by nine. There's that cut edge that we just made, and now we can trim these two sides. Whoops. There we go. Just like so. Now they will match up perfectly.
Jenny:
Perfect.
Misty:
And we can-
Natalie:
Sew them together?
Misty:
... sew those two together. And that is actually our block. And the reason that I did it that way is because we have these half diamonds up at the top.
Jenny:
Oh, very cute. Yeah.
Misty:
And the rest is all in the layout, and your squares end up measuring nine and a half inches. And you have these pieces that all go together. And then, the open spaces are just nine and a half-inch squares, which I have here.
Jenny:
I got so wrapped up in watching her-
Misty:
I know.
Jenny:
... I forgot my job.
Misty:
You're fine. Let's do a little bit of the layout here. Here's one of our diamonds, and then, we'll start with a half up here. And then another one can come in below. And it just offsets it, just a little bit. And then, these are just our background squares. They're nine and a half inches. And those fill in these open spaces down at the bottom of the quilt. So, it finishes up at 63 by 72. It's a great lap or throw size. I hope you guys enjoyed it. I used the Baptist fan to quilt it, and this beautiful fabric on the back. I just love it.
Natalie:
It's so soft and pretty.
Misty:
So pretty. I used-
Jenny:
Yeah, I love it too.
Misty:
... the same for the binding.
Jenny:
Really pretty.
Misty:
It's really quick and easy. So, I think Nat, you're up next.
Natalie:
All right.
Jenny:
So, Natalie, I guess it's your turn, and I love your quilt.
Natalie:
Oh, thank you.
Misty:
It's so pretty.
Natalie:
I called it spinning squares. And-
Jenny:
That's very cute.
Natalie:
... let me tell you how I made it.
Misty:
Awesome.
Natalie:
To make my quilt, you're going to need a package of 10-inch print squares and I used Mon Cheri by-
Jenny:
Would that be Mon Cheri?
Natalie:
Mon Cheri by Lila Tueller for Riley Blake. It's fun. It's really beautiful fabric.
Jenny:
It is gorgeous. She always does a great job.
Natalie:
Yeah. You also need a package of 10-inch background squares. You'll need a little bit of sashing and inner border, a yard and three-fourths. You'll need an outer border. I used an additional yard and three quarters, exactly the same as your sashing and inner border. And then, backing is nine and a quarter yards because this is a giant quilt.
Misty:
Yes.
Natalie:
It's 85 by 103. I keep getting those numbers mixed up for some reason.
Jenny:
Can we look at some reason that back?
Natalie:
Yeah.
Misty:
Look at those cherries.
Natalie:
And the back is this beautiful cherry print. It has so many fun, just bright fabrics.
Jenny:
It's really good. I feel like [inaudible 00:11:17] needs this.
Misty:
It's beautiful.
Natalie:
It's springy-
Misty:
I agree.
Natalie:
... and beautiful. And I love this-
Jenny:
It's so happy.
Natalie:
... one that's like little dogwood blossoms. That's one of my favorite prints in the line of hers.
Misty:
They are so pretty.
Jenny:
Very good.
Misty:
They are so pretty.
Natalie:
Okay, the other things that will be helpful are some Bloc Loc tools. I have half square triangles and half rectangle triangles in this quilt. So, I've got the Bloc Loc that's four and a half. And then, this comes in a set, but we're only using the B ruler for this quilt.
Jenny:
Okay.
Misty:
Awesome.
Jenny:
It's nice that they come in a set though.
Natalie:
Right. Because in lots of quilts like Misty's, you're going to go-
Jenny:
Two sides.
Natalie:
... opposite directions. But for this quilt, they're all going the same direction.
Jenny:
And it is interesting that when you make a block that goes the same direction, it spins it.
Misty:
Yeah.
Jenny:
I think that's fun. All right, well, let's get onto it.
Natalie:
Yeah, it turned out really cute. So, let's get started. What we're going to do, to make this block-
Jenny:
I'll stay here.
Natalie:
... we're going to take two... Well, I do need a couple of those background squares.
Misty:
Okay.
Natalie:
You'll select coordinating prints. You'll notice in all of these, I tried to do something that would contrast a little bit, so a darker with a lighter, or a red with a yellow. Something like that so that you can tell them apart. We select two.
Jenny:
Let me get my chair out of here.
Natalie:
And then we're going to make the same cuts with our print and our solids. From the print that you want to be on this... This is the block we're going for, just to be clear.
Jenny:
And you actually have three different blocks in there.
Natalie:
We do. We have three blocks, and I'm going to show you how to cut these fabrics, so that you can get everything that you need.
Misty:
Okay.
Jenny:
Very cool.
Natalie:
All right. Select the one that you want to be your spinning block, and then the opposite color is going to do your four patches, and your half square triangles.
Jenny:
Oh, I can see it now.
Natalie:
It makes sense?
Jenny:
I couldn't see what you were going to do, and all of a sudden my brain went, "Oh." Very nice.
Natalie:
All right, we're going to stack our prints with-
Jenny:
Let me move these for you.
Natalie:
... our backgrounds. We're going to use our five-inch ruler to cut this one just in half. You'll have two five by 10-inch rectangles. And then, on this next one, we're going to cut it in half like this, and we're going to leave these. And these ones, we're going to cut in half again. All right?
Jenny:
Okay.
Natalie:
Okay. This is our cutting for the whole quilt. So, if you wanted to go ahead and cut your entire layer cakes into sections and set them aside, that's awesome. We're going to do our block in steps, so we're starting with our half rectangle triangles first. Now we're going to mark a line. Need to grab a little pencil. We're going to mark top left to bottom right. And that matters because that's the way the block spins, so that's how you're going to get that... The thing is, if you're making your own quilt, as long as they're all going the same direction, it makes no difference.
Misty:
It'll be fine, yeah.
Jenny:
Well, and for me, that's a really good note because if I were not thinking about it, I would just be drawing lines, and sewing. And I would have some going this way and some going that way.
Natalie:
Right. Just make sure they all go the same way.
Jenny:
Okay, that's really a good point.
Natalie:
Okay, we're going to line this up. It goes opposite corners, just like that. And then, you're going to stitch on both sides of the line.
Jenny:
Okay. I'm just looking to make sure we're actually doing it. The-
Natalie:
We are.
Jenny:
I'm getting it right.
Natalie:
It's going to be just fine.
Jenny:
Well, for those of us who have my brain-
Natalie:
Oops, sorry.
Jenny:
... sometimes it takes a minute for things because I'm angly challenged, you know?
Natalie:
And these do look a little funny. We don't usually stitch with our fabrics kind of going opposite directions.
Misty:
Crisscross, yeah.
Jenny:
Yeah, there's a lot of trust to this. And for me, I just check, check, check. I'm going to fold this over and go, "Okay."
Natalie:
Yeah, I love that there are so many different ways to get the same result too though.
Misty:
I do too.
Natalie:
We can do this the way Misty just taught and I think you're teaching it a totally different way.
Jenny:
I am. Well-
Natalie:
It's really cool.
Jenny:
What comes into play with that is we all have different brains. We all learn differently.
Misty:
Absolutely.
Natalie:
Okay. These all come out going the same direction. So we're going to use Bloc Loc, half-
Jenny:
Rectangle.
Natalie:
Half rectangle, triangle. I say half square triangle so often that it's easy to get that-
Jenny:
It is, and it's fine.
Natalie:
But these are cool because they come out exactly the size that I needed, which made making this quilt so easy.
Misty:
That's amazing.
Natalie:
Yeah. I just line it up. We're going for a four and a half by eight and a half inch block, and we're just cutting typically, the edges because they should come out to be just about four and a half. It's nice to see them all-
Jenny:
It working.
Natalie:
... square up so beautifully though. So yeah, that's about it.
Jenny:
Now, can you slide it one way or the other, and-
Natalie:
You can.
Jenny:
... make one cut? Or do you always end up making two cuts?
Natalie:
I like centering it up. It gives you just a tiny bit on both edge that's about the same. Because if you slide it all the way down, you're going to end up losing that-
Jenny:
Oh, okay.
Natalie:
There's fabric that's missing down there and I like it to be completely centered, so that you get about a quarter of an inch of overhang on both ends for your points.
Jenny:
Okay, perfect. I just wanted to ask the question.
Natalie:
No, that's a great question. Yeah, I center mine up. And I found that if it's off a little bit, it really doesn't show because these all-
Misty:
It's so forgiving.
Natalie:
... kind of go into that point. And it's not exact, but it's close enough. It typically, just looks pretty good.
Jenny:
Well, and for those of you who don't know, the Bloc Loc ruler has this raised edge on it, so it snugs right up to that seam, and it does really help with that little bit of-
Natalie:
Yeah. It's super, super-
Jenny:
It just makes you feel a little bit more secure when you're cutting.
Natalie:
So quick and easy. Okay, these are done. We're going to set them aside.
Misty:
Awesome.
Natalie:
And next, you can decide if you want to do your half square triangles or your four patches. Let's do our half square triangles next. And these are very similar to our half rectangle triangles. There it is. We're going to draw another line, and sew on both sides of the line.
Jenny:
And you could also use your diagonal seam tape.
Natalie:
You totally can. Or you could fold them and press them, whatever kind of line you want for going right down the middle.
Jenny:
And then, this one, you will square-
Natalie:
To four and a half.
Jenny:
And use another Bloc Loc ruler.
Natalie:
That's right. The four and a half-inch tool.
Misty:
It's so awesome.
Natalie:
Bloc Loc makes this particular project so easy.
Jenny:
We're really trying to mess you up because it's Bloc Loc half square triangle, Bloc Loc half rectangle triangle.
Natalie:
Yes. All of them. Whoops.
Jenny:
All the things
Natalie:
It didn't cut through that. There we go.
Misty:
Awesome.
Natalie:
All right. And this, as you know, is just to put that edge up against the edge of your seam line, and trim around it. I like to spin it because it's easier for my right-handed wrist.
Jenny:
You always want to cut so that it's safe. If you're ever this way or you know... It's just not worth the trip to the emergency room.
Natalie:
No, not at all. All right, I'm going to keep squaring these, but I'm going to let you start on our four patches. So, we're going to put our print side to our solids so that it's... And we're going to stitch on either side. Sorry, on both sides of the-
Jenny:
We get in trouble with that E word.
Natalie:
... rectangle. Yep, you're going to stitch on both sides. And I'm going to continue squaring these up real quick.
Jenny:
And this is a four-patch hack that we like to use. It's just an easy way to make them.
Natalie:
It's very, very convenient. Well, aren't you fast?
Jenny:
I'm speedy.
Misty:
She's so speedy.
Natalie:
Yeah.
Jenny:
I know. Everybody sews differently and people are always like, "You're so fast." I'm like, yeah, well I-
Natalie:
Practice does that.
Misty:
It does.
Natalie:
It helps you get quick and-
Jenny:
And that ADD brain I think also just does it for us. We just move faster.
Natalie:
Yep. There's very little trimming, but it's worth it. It's so much easier.
Jenny:
It is worth it. And I didn't trim for years. I didn't square for years because I just made it work. But once you start squaring, and all of a sudden you're like, "Oh, that was perfect," it gives you real feeling of satisfaction.
Misty:
It's so satisfying. Absolutely.
Natalie:
All right, our next step on these four patches is to cut them into two and a half-inch strips going the same direction as your seam lines. We're going to press these open.
Misty:
Okay.
Natalie:
Pressing the-
Misty:
To the dark side.
Natalie:
... dark fabric to the back, yep.
Jenny:
Oh, that's interesting. I always cut before I press.
Misty:
Do you?
Jenny:
Yeah. I don't know why. I just always do. Probably because I'd have to get up and move.
Misty:
Oh, maybe. Whatever's convenient.
Natalie:
Well, I like to line them up because sometimes I'm not an exact-
Jenny:
Well, and if you line them up-
Natalie:
... sewist.
Jenny:
... this way, you can actually just sow the line. I mean, if you line up the opposite way, right side's facing
Natalie:
I'm doing it this way right now.
Jenny:
Okay. All right, we're good. We all have our own ways.
Natalie:
This is just how I did it. And then, I just cut them into two and a half-inch strips. And this way I know that they're all lined up, and they're not going to come out wonky.
Jenny:
Perfect.
Natalie:
And then, I just take each of these sets, flip them, and stitch them together.
Jenny:
All righty.
Natalie:
And you need all of these. Every bit of this fabric.
Misty:
Love that. No Waste.
Natalie:
None. Very low-waste quilt. I used all that I could.
Jenny:
Well, you know I love that. So, when you start putting this together, what's the first block you put together?
Natalie:
The first thing I do is I put together the center block.
Jenny:
Okay.
Natalie:
You're going to put your half square triangles together to create this little white diamond in the center.
Jenny:
Here you go, Misty.
Natalie:
And I'll have you stitch that down.
Jenny:
Iron these. Okay.
Natalie:
Stitch those. And this one.
Jenny:
And when I'm stitching these, I like to always start from the non-seamed edge.
Natalie:
Yeah. That, for some reason, stops it from making that little nest that you get sometimes.
Jenny:
Yeah.
Natalie:
I struggle with that. But you can go ahead and sew the whole thing together to create that little white square, and a square diamond.
Jenny:
All right, like a four patch.
Natalie:
Uh-huh.
Jenny:
I have to concentrate for this, so I'm like biting my lip.
Natalie:
This is it now. You're doing it.
Jenny:
All right.
Misty:
Press that back.
Natalie:
Press that, and we'll assemble the whole thing.
Misty:
All right.
Natalie:
We're so close now.
Misty:
There we go.
Natalie:
All right, this is our center. And then, each of these go around the edge with the prints touching. That's the little mantra. Keep your print sides to the print sides. And then, our four patches all go with the print to the middle.
Misty:
Such a fun block.
Natalie:
Just like that.
Jenny:
Really fun.
Natalie:
And we assemble in rows and your block is done.
Jenny:
Perfect.
Misty:
Beautiful.
Jenny:
And then you got-
Misty:
Poof, magic!
Jenny:
... this. That's awesome.
Natalie:
Magic.
Jenny:
Then you said you have a sash?
Natalie:
These are set all exactly the same way, four by five, I believe? One, two, three, four, five? Yep. And then I have a two and a half-inch sashing with little two and a half inch square. And that connects all these cute little four... Yeah, the four patch blocks.
Misty:
Gives you that chain through.
Natalie:
And makes it look like it chains all the way through.
Misty:
It's beautiful.
Jenny:
It's gorgeous. I love it.
Natalie:
Two and a half-inch inner border and six-inch outer border. And you're good to go. You've got a great... I think it's about twin size. Perfect for a bed.
Jenny:
Yeah.
Misty:
Beautiful.
Jenny:
And if it's not the exact size, you could extend your borders.
Misty:
Your borders.
Jenny:
Always remember.
Natalie:
That's right. Make them bigger or smaller as you wish, but that's it. That's how this block is made. So, I hope you guys like it.
Jenny:
I do love it.
Misty:
I love it.
Natalie:
And it was fun because it's very traditional, but it also looks really cool.
Jenny:
Well, it has a bit of whimsy to it, right?
Natalie:
Yes.
Misty:
Which is always great.
Jenny:
Yeah. Well, I guess it's my turn.
Natalie:
All right.
Misty:
It's on you now.
Jenny:
So, I guess it's my turn to start. And I'm super excited about my quilt. This is it right here behind us.
Misty:
It's so beautiful.
Jenny:
It has some tiny pieces in it. I went out of my comfort zone to make some tiny pieces.
Natalie:
It does a little bit more complicated.
Jenny:
It really isn't.
Misty:
It's gorgeous though.
Jenny:
And it's the color of the year. This is crush, and it's by Robert Kaufman. And it's just kind of an orangy-pinky watermelony, kind of color.
Natalie:
It's a really pretty color.
Misty:
Yeah.
Jenny:
It's a little bit hard to describe, but to make my quilt, I used one packet of 10-inch squares of color, one packet of 10 inch squares of solid. And by the way, I love two-color quilts.
Natalie:
Yeah, I do too.
Jenny:
We need a little bit of extra of both because we need some for our inner border, and our one-inch sashing strips. I know you're dying, but it's one inch. And then our outer border is four inches and it's of course, this color. Binding, three quarter of a yard. And then our backing, I just used the color for the back, and that is three and three quarters of a yard. And I also needed this little squaring tool. You can see mine is just a regular ruler. And I used this for the whole thing because I'm a make do girl, and my brain works completely differently than these two girls' brains. And I can't wait to show you how I did it.
Misty:
I'm so excited.
Jenny:
Okay, this is my block right here. And it just looks so cool.
Misty:
It's just beautiful.
Natalie:
It looks beautiful.
Jenny:
It looks like it's a little bit of work.
Natalie:
You're going to make me one of these, right?
Jenny:
No, you're going to want to make one yourself because you're going to be surprised how easy it is.
Natalie:
Okay, all right.
Jenny:
This is made of three blocks. Our center block is made exactly how Natalie made hers. Oh, this is it. It went over here. You take a regular five-inch white square, and you corner every corner. So, let's go ahead, and do one of those.
Misty:
Okay.
Natalie:
That's completely different-
Misty:
I was going to say.
Natalie:
... from how I did mine.
Jenny:
No, it's not.
Natalie:
Because mine is four half square triangles.
Misty:
Yeah, it looks the same at the end.
Jenny:
You're right.
Natalie:
It looks the same. It's very similar, but
Jenny:
Looks the same, but they're very similar.
Natalie:
... totally different construction.
Jenny:
All right-
Natalie:
So, you cut these to five inches?
Jenny:
All of our blocks end up measuring four and a half. Because when you add corners to one, it doesn't change the size, we're going to go ahead and start with four and a half. So, I'm going to cut a four-
Natalie:
Oops.
Jenny:
I'm going to cut a four and a half-inch strip here. And I'm going to cut a four and a half-inch here to make a four and a half-inch square. These little ones are two and a half. Misty, I'm just going to go ahead and have you sew these on. And you can use the diagonal seam tape.
Misty:
Yep.
Jenny:
And the easiest way to do this is sew one to each side. I have 16 blocks on here, so I just went ahead and made 16 middles, and put them in a stack so that I have them done. I'm kind of a rote sewer, which is good if your brain works in that orderly fashion. It's not good if you make mistakes because you literally make the same mistake-
Misty:
Too many times.
Jenny:
42 times. For me, I look at it, I check it, I make it. And then, we're going to put two more of these squares in the other corner. And then, that's our center. It's just that easy.
Natalie:
Awesome.
Jenny:
Yeah, really quick and fast. And then, I'm just going to start cutting on the next block, which is also a four and a half-inch square. All right, let me trim these off. And then, Natalie, you can iron this.
Natalie:
Okay.
Jenny:
And then, I will start on the next block because it is also a four and a half-inch square, but it is done with the color. So, I have one cut here, and it's four and a half inches. And then, we're just going to snowball the corners on two sides for this block. And you will need four of these for each block. So, one center, these are our four outside corners right here. And we'll just set this up here with those. And I have-
Natalie:
Can you square anything as you go here?
Jenny:
I do. For this, I did, because the one-inch strip made me a little nervous. And so-
Natalie:
The smaller it gets, the more exact you have to be.
Jenny:
The more exact it has to be.
Misty:
It's true.
Jenny:
So, really what I did, I would take these, and we're just trimming these off, pressing them back. And I squared right before I was ready to put my block together. It doesn't matter when you do it, you can do it whenever, but that's just how I did mine. Now, in the pattern, there are loads of cutting diagrams, and I wanted to show you how I did mine. And I love that you girls used the rulers because everybody has a different brain. Everybody's doing it differently. But what I did, was I just cut my strip in half like this. I have my two colors together, my white and my crush. I cut it in half like this. Then, I literally cut this in half in two and a half-inch strips like this. I had one, and two, and three, and four, like this.
Natalie:
Sometimes there's a little extra room with those peaks.
Jenny:
Sometimes with the peaks. Half of them, I just cut this way, like this. These first two, I'm going to cut this way like this. And then, the second two, I'm going to cut this way. Now, hands down, it doesn't matter when you're using solid fabrics because you can use either way, but this-
Misty:
Yeah, that's true. You can flip it.
Natalie:
But, this would matter if you were using a print.
Jenny:
If you were using a print, this would matter. So, I'm just training your brain to think ahead because I think you're going to want to make this quilt in all kinds of fabrics. All right.
Natalie:
Every holiday, every-
Misty:
Yes.
Natalie:
... birthday.
Jenny:
All right. Then, what I did was I just rotated one up and one down this, put them together. Matched point to point, just about as close as you can get.
Misty:
Okay.
Natalie:
So tiny.
Jenny:
I know, right?
Misty:
They're so little, this is so different.
Jenny:
Different for me for sure. But when you're given a challenge... That's what I love about Triple Play. You're given a challenge. The challenge is half rectangle triangle blocks.
Misty:
Yeah.
Jenny:
I'm going to put a few more of these together because this will make all that you need for one block.
Natalie:
Okay, and I can press?
Jenny:
Wait a minute.
Misty:
Oh, sorry. I didn't pass it to you.
Jenny:
I'm angly challenged here. I was having a flipping moment where they were flipping. And you do want to make sure... What I do is I rotely sew four together. And then, I see which direction they're going. And then, I purposefully sew these together to make sure that I have one going this way and one going this way. Let's look and see where I'm at with that. I make a little stack, and this one is the opposite way. Like I said, I just make a little stack, and make sure I have four in each pile.
Natalie:
I hope this one's okay. It slipped a little bit on me.
Jenny:
That's all right. So, let's look. All right, this one goes this way.
Natalie:
So, we need one more.
Jenny:
Now, I would intentionally make these go the other direction on this way. Let's look at how we do that. What I do is I actually lay my fabric here like this on the ones I need to make more of, and fold it over, and do that. And again, it's a brain thing, and it's just how you do it. But, this is what works for me. So then, I lay this piece here, make sure that this piece is right because I need four of each. And actually, Misty, I have some already made.
Misty:
Oh, okay.
Jenny:
So, actually Natalie-
Misty:
We can just stop there?
Jenny:
... press that one.
Natalie:
Okay.
Jenny:
Now what I'm going to do is I'm going to make sure that these make legs, which means I'm going to turn them this way, so they make star legs that come out like this. And I'm going to sew my two legs together like this.
Misty:
Okay.
Natalie:
Cool.
Jenny:
And we'll do two of those. Again, we're looking to make sure that we have legs. Oh, there's my other one. See, the red becomes the star legs, and we're sewing those together.
Misty:
There's one.
Jenny:
And you can press that.
Natalie:
Okay.
Jenny:
And then somewhere I have some one-inch strip. Oh, here they are right here. All right. Once I got my star legs all done, I very bravely cut one-inch strips of fabric. And I just went ahead, and... Actually, do we have a little scissor? We do right here. I just went ahead, and trimmed these little points off like this because I felt like anyway to ease up some of that fabric was okay with me. And then, I just took my little pieces, and I ran this strip down the side, and I did a whole bunch of them at once. Let's go ahead and do a couple of those. And I just trimmed these little points off.
And then, we're going to put those on both sides. Mine's a little less fussy actually, because I'm just I'm not measuring them yet. I'm not worrying about him yet. I'm sewing them together. I'm doing this. Actually, the reason I added the inch piece is because... And you're going to sew this strip on the other side as well.
Misty:
Oh, awesome.
Jenny:
And the reason I sewed this inch piece is because when I got finished making those legs, they weren't four and a half, and every block has to be four and a half to fit. I added this tiny little piece not knowing what was going to happen. And I actually love how it makes it step back.
Natalie:
That is, I think my favorite thing about the block.
Jenny:
It's such a great detail.
Misty:
It's so beautiful.
Natalie:
It looks so complex.
Jenny:
And I had no idea that was going to happen. And when people ask me, oh, what's your favorite quilt block? I don't have a favorite block. I had those moments where something happens that is unexpected. All right, Natalie, now what I want you to do is I want you to press these back.
Natalie:
Okay.
Jenny:
And I just clipped these apart. I would do a whole set of legs for my block, and sew a little inch on either half. Then you grab this ruler because it's going to be your best friend because we want everything to match. What I did on this, was I was looking at how much room was up here, and how much was there. And you lay this on here, and I tried to keep quite a bit of room at the top, so I wouldn't lose that point. And I literally, just took this then, and I shaved off this side, shaved across the top. Again, flip it. So, we got the sides, and then we've got this side over here. Because as careful of sewers as we are, sometimes those pieces wing out, and then-
Natalie:
Totally. Especially, when they're little.
Jenny:
Yeah.
Misty:
Oh, absolutely. It's not hard.
Jenny:
So, the same on this. I would often use these lines to line up this inner edge right here to make sure that I had about the same on either side. And I think it's about-
Natalie:
An inch, or a half-
Jenny:
Like a line over the half inch mark, and then, across the top.
Natalie:
Five eighths.
Jenny:
Five eighths?
Natalie:
Mm-hmm.
Jenny:
The line over the half inch. You know what that is. I'm such not a math girl. And then, this one over here going to kind of keep it the same. And you're going to do this to four of your blocks like this.
Natalie:
I love it.
Misty:
So fun.
Jenny:
And then we're just going to put our block together. We need four legs, and I've got them here. We need four side blocks right here. One, two, three, four. And then, we need one middle. Now, when I was ready to put my blocks together, I don't know if you can see this middle, but you can see that it's a little bit wonky? Which, we're just going to lay this block on here and we're going to trim it up. And I can see that this edge right here, it's not perfect. It's not all the way out to the edge. And I'm not going to worry about that. I'm just going to remember that when I put this block together, it's going to have these legs on here, and I'm just going to give it some grace. We're going to do this. We're going to put it on here, and we're going to sew that straight across, and it will catch that in that quarter inch seam. But let me show you how I lay this apart.
And let's look at, if we have another block, it's probably going to be just right. Actually, still really close. We need a little bit of room. Don't be afraid of that. Don't be worried about that. All right, let me show you how the block goes together. Let's just go ahead, and lay it up here, and assemble it. We've got legs on all four sides like this. Actually, let's do this leg right here. And then, we've got some corners. And our corners go white to the middle. And this gives it... It almost has a British look for me, and I don't know why.
Natalie:
It does a little bit.
Jenny:
But it feels a little bit like that British star.
Natalie:
The flag, yeah.
Jenny:
So, these are going to go like this. What we're going to do now is we're just going to sew this together normally like you normal would. So, we'll make a column like this, and we'll sew all the way down this side like this. And then, we'll open them up, and add these other blocks. It will already have the thread in between that holds it and keeps it together. But I have a block done over here, and I want to show you how I did the sashing on these because anytime you add sashing, it can distort a little bit. And what I did was I just took my fabric, and added a sash to the side, and across the bottom like this.
Natalie:
Oh, okay.
Jenny:
And what that does, when you get ready to set them together... Let me show you these right here. When you get ready to sew these together, what it does is that it means that this tiny sashing, which it could get stretched or something like that because it's so small, it's already anchored on here on this side. So then, we're just sewing these blocks together. And when you're done, the row is all sashed, and you have your sashing row between. So then, when you put your next row in, remember it's only this side and the bottom, then it will automatically-
Misty:
Oh, that's perfect.
Jenny:
... sash up. And all you've had to do is sash your corner sash. That was my trick on this.
Natalie:
So then, it's automatically-
Misty:
You just do the top on one side?
Natalie:
... bordered on one side.
Jenny:
Yes. Like this block right here, this would sash this way, to this way, to this way. And then, when you come back, this side is actually all sashed. The bottom is all sashed. And then, I just took one long piece, and added it out here on this side, and across the top to finish it off, and added my border.
Misty:
I love that.
Natalie:
That's great.
Jenny:
I think it came out so cool.
Natalie:
It's beautiful.
Jenny:
I love the idea that by adding these strips to make my block four and a half, it gave us this added little cool detail right here.
Natalie:
That is such a cute detail.
Misty:
I love it. It's magical.
Jenny:
I was not expecting it, and it made it really fun. And this is just how I did the half square triangle rectangles. Just with no ruler.
Misty:
Exactly.
Jenny:
I was living on the edge. So, this quilt ends up being 57 by 57, and I love the size because I have a stairway hall that I hang things in, and it's just the perfect size for that. Oh, the quilting pattern on it is called sticky buns. And anytime you have tiny pieces, it's good to use a little bit denser quilting pattern to make sure that everything is held together, and it looks just great.
Natalie:
That's beautiful.
Jenny:
So, that's my quilt.
Misty:
I love it, Jenny.
Natalie:
I love it.
Jenny:
So, these are our three projects. They're all so diversified. The ways we made them, how they came out at the end, and I think they're so cool. But wait, there's more. Misty?
Misty:
Yes. I made this little mini version of mine.
Jenny:
It's identical, but tiny.
Natalie:
It's so cute.
Misty:
But tiny. It ends up one by two little half rectangle triangles.
Jenny:
So cute, I love it.
Natalie:
Oh, that's adorable.
Misty:
So fun.
Natalie:
I love it.
Jenny:
Anyway, don't be afraid of these half rectangle triangles. Have fun with them. And we hope you enjoy this Triple Play from the Missouri Star Quilt Company.
Hi everybody, it's Jenny from the Missouri Star quote company, and I am here with Natalie and with Misty, and we hope you enjoyed watching our latest Triple Play. You can find us together on the third Friday of each month as we hit another tutorial out of the park. If you aren't already part of the Missouri Star Quilt Company family, be sure to subscribe and click that bell to be notified each time we release a new video. See you next time.



