

How to make a Carry All Tote Bag - Free Bag Tutorial with Misty Doan
 Misty Doan
- Fabric by Yard
- Totes, Bag, Purses
- Beginner
- Quilt size 14" × 20"
Why carry a little when you can carry it ALL? Misty has your back with today's tutorial, where you'll learn how to sew the spacious and sturdy Carry All Tote Bag! Featuring a magnetic snap, an inside zipper pocket, and outer slip pockets, this tote has plenty of slots for your sewing accessories or whatever you need on the go. Choose your fabrics wisely, because you’ll never want to be without this handy sidekick!
Instructor
Misty Doan
Misty Doan grew up surrounded by sewing and quilting. She loves spending time sharing tutorials each week each week, and when she’s not stitching up one of her fun sewing projects for home decor, most likely you’ll find her hanging out with her husband and three awesome kids or working on a house project.
Shop this tutorial
 Digital Download - Carry All Tote Bag Pattern by Missouri Star$4.95Shop →
 Quilt Town - Missouri Star Large Floral Mint Yardage$11.96Shop →
 Quilt Town - Tossed Quilt Notions Teal Yardage$11.96Shop →
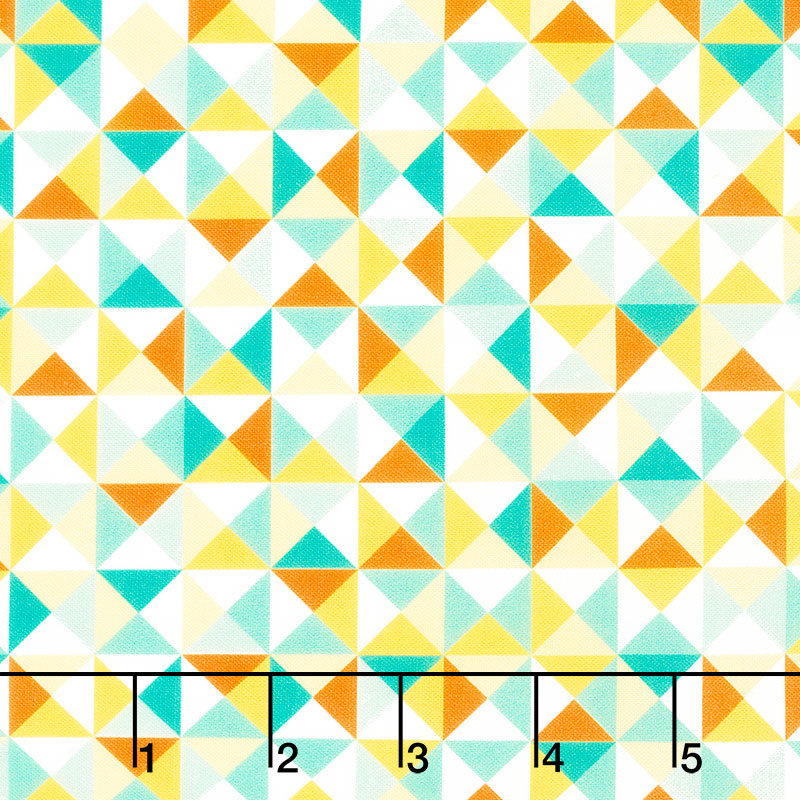 Quilt Town - Quilt Triangles Multi Yardage$11.96Shop →
 Bosal Craf-Tex Double-Sided Fusible Plus - 30" x 36"$16.75Shop →
 Missouri Star Fancy Zips 24" 6-pack$16.95Shop →
 Pellon Shape-Flex Woven Cotton (White) Yardage$5.75Shop →
 Sallie Tomato Magnetic Snaps - Set of Two 3/4" Nickel$2.85Shop →
 Missouri Star 2.5" x 8" Ruler$10.95Shop →
 Missouri Star 2.5" X 15" Ruler$13.95Shop →
 Olfa Splash Aqua 45mm Rotary Cutter$18.75Shop →
 Olfa Splash 24" x 36" Cutting Mat Navy$68.95Shop →
 Exclusive Missouri Star Jenny TG1600 ProPlus Oliso Smart Iron$199.99Shop →
 Missouri Star Wooly Betty Board - 17.25" x 25.5" Orange Border$98.95Shop →
 Missouri Star 50 WT Cotton Thread White$6.95Shop →
 Elan 8" Dressmaker Scissors$20.95Shop →
 Missouri Star Colorful Quilting Clips - Pack of 12$5.95Shop →
Common Questions
What is covered in How to make a Carry All Tote Bag - Free Bag Tutorial with Misty Doan?
Why carry a little when you can carry it ALL? Misty has your back with today's tutorial, where you'll learn how to sew the spacious and sturdy Carry All Tote Bag! Featuring a magnetic snap, an inside zipper pocket, and outer slip pockets, this tote has plenty of slots for your...
How long is the tutorial video?
The tutorial video is 00:31:51.
Are supplies listed for this tutorial?
Yes. The tutorial page includes the supplies and materials connected to this project.
Is a transcript available?
Yes. A written transcript is available on the tutorial page.
Video Transcript
So like I said I decided to design my own bag for retreats and let me just tell you kind of what I was thinking. I wanted it to be big enough to hold my little travel size cutting mat to be able to fit my project bags for the designs I was working on and then also things like my rotary cutters, scissors, my favorite ruler, clips, you know, just the usual. There's also a big zipper pocket inside so there really is a place for everything and it's really really simple to make.
So let me show you how we're gonna do this so to make this bag you're going to need some of the beautiful prints from our Missouri Star Signature Collection. It is so fun and these are the three that I chose. This is my exterior fabric; you'll need one and a quarter yards of it. I went with this one for the lining; you'll need three quarters of a yard. And this is what I chose for the accent fabric which is your pockets as well as your binding; you will need one and a half yards.
So in addition to that you'll also need a package of your inner form. Double-sided Bosal foam, so that will give this bag some stability. I also use this ShapeFlex iron-on woven cotton interfacing for the pockets just to add again some more stability to it. We want this to hold up! You'll need these three quarter inch snaps from Sallie Tomato and a 24-inch fancy zip to go along with it. So let's dive into making this!
All right. To begin, we're going to make one of our exterior panels. This is actually the back panel of the bag and so this is our exterior fabric and I cut it 14 by 20. I cut a piece of my lining fabric the same size and then I went ahead and cut out my Bosal foam a half inch smaller. So it's 13.5” by 19.5,” and you can see I have that quarter inch of overhang all the way around.
And so now before we fuse this exterior fabric to it, we need to install our snap. So let me show you how we're going to do that. I have the snap here and if you're not familiar it looks like this. There's a little washer and then the snap unit itself. Of course this is just one of the sides and we are
going to use our ruler and measure down three inches from the center and make a mark.
So let me grab my ruler here, okay, and so I know that this is 20 inches wide so I'm going to measure over 10 inches to begin with and then I can make a mark. This is going to be close to where I need it but at least I'll have an eye for where the center is and then we're actually going to measure down three inches from the top of my fabric. So one, two, three. So mark right there - I'll put an x on it where I want to install my snap.
So in order to do that I can now set my washer on top of that little X and the circle in the middle will of course go right over that. Then I'm going to draw a line on both of those long sides: see it leaves it looking just like that. So now we can take…I like to use my seam ripper for this and we are just going to poke all the way through now. Remember, I've already fused the lining fabric on the other side so we're going to poke through all of those layers and just barely slide the seam ripper so it creates this little cut through the fabric. This seems to work the best for me, it's very forgiving. Now that I've done that I can take my snap and I can poke it through from this side just like so and then place the washer over the top of that and fold these back to hold that in place just like so.
Now that that's done, we can go ahead and put our exterior fabric over it.
I'm going to hit this with the iron and then we are going to quilt this and we're just going to be really careful to go on either side of the snap. You can totally feel it through your fabric so you just want to be mindful of it when we get to quilting. So let's go ahead and fuse it over here at the ironing board, move this out of the way for a second, make sure it's all lined up. Hit this with a nice hot iron just like so. All right now we are ready to quilt it!
Let me show you what I'm planning to do. I'm going to quilt this an inch and a half apart at a 45 angle so it's going to look just like this when I'm all done. I'm going to go ahead and quilt this and I'll meet you back here when I have it ready to go.
All right, so I have quilted this entire thing. As you can see I just avoided my snap and went on either side of it with my quilting and so this is my back panel. Remember it is 14 by 20 and the front panel is exactly the same size, just no snap on this one. I have that one ready to go.
Then you're also going to have two side pieces that are 4.5” by 14”. Remember we cut the Bosal a half inch smaller than that on the inside. Then the bottom section of your bag is 4.5” x 20”, so I have all of those ready to rock and now we can move on to making our pockets.
I'm going to set these aside for now and let's make the outside pocket. I have that here. So I cut actually three pieces from this accent fabric that you see here that measure 13” by 20”. Two of those you're going to use for the inside pocket and one of them we're going to use for the outside. I have backed this with that ShapeFlex stabilizer all the way across and now we are just going to press this in half. I'm going to take this over to the ironing board and make sure I have it all ready to go. If I can slide over there my chair didn't want to move, there we go. Just have this folded exactly in half and we will press this all the way across just like so.
Now the first step I'm going to take is actually do a line of top stitching
across this folded edge. I'm just going to do a nice narrow stitch. I like
to lengthen my stitch length just a little bit when I'm top stitching. I
just think it looks nice.
There we go. All right, so now we're going to take this and we're going to grab that front panel that we made. Remember that's the one without the snap - you want to double check and make sure of that. And then I am going to set this along one of the long edges of that panel.
You can put a pin in it if you would like or you could use clips, but I am just going to hold this in place and then I'm going to use my ruler and I'm going to measure over five inches and every five inches I'm going to make a little mark. I'm going to use a micron pen so that you guys can see. Typically I would use a chalk pen or something that wouldn't show up, so just keep that in mind because you will probably see this. I'm just going to make a tiny little dot every five inches.
That is going to create four pockets because I'm going to sew a straight line down on each of these to create the pockets so that I can slip my rotary cutter or things like that in there. So you would just, you know, lay your ruler along that edge you could line it up with the top of the pocket and draw all the way down with your chalk marker just like. So I'll go ahead and do it for you, it's not a big deal and so we'll just work our way across just like so. You could even use a pencil if you wanted. I just marked those really lightly and now we're going to take this back to the machine and just stitch right on those lines that we drew.
So I am going to back stitch at the beginning there because that's where we could run into you know some wear and tear on the pocket. Move over to the next one, remember to back stitch. There we go, and one final pocket. There we go.
So now you can see I've made those pockets. You could absolutely go back and baste this outside edge if you want. That just means you really lengthen your stitch length and we just tack that down. I'm just taking a super narrow seam there because I want I don't want that to show later on
so I've basted that edge. I can flip this around and that's just going to help to make sure that that doesn't flip up and get caught where we don't want it later on. It's always a good idea if you don't want to mess with that.
There we go so now our pocket is added to our front panel and we can move on to making our inside pocket. So let's take a look at that. Like I said, remember you cut two more of those pieces that were 13” by 20”. I have those here, and we have backed those with the ShapeFlex just like before. I'm just going to put these right sides together and I'm going to sew a quarter inch seam along one of the long edges. Now we are just going to open this up and we are going to press this so that our raw edges are inside.
The way that I'm making these pockets and this bag will finish up with no raw edges inside which is what we want for a beautiful finish. So I just always kind of roll this with my fingers, then we'll go across and press as we go. I make sure I don't have anything tucked up there and our seams are laying nice and flat there we go, just like that.
So now I have the first one done and I'm going to do the exact same thing I just showed you with these smaller rectangles. They measure 10.5” by 20”. Same idea though they are backed with the ShapeFlex and we are going to sew them with a quarter inch seam on the long side. So I will do that, press them just like I did the other, and I'll meet you back here.
All right. So I have done that with both of these sets of rectangles; here's the larger ones and the smaller ones. Now what we're going to do is we are going to add our zipper where we have that seam and that is so we don't have any raw edges. We're not setting the zipper in because I'm using one of our 24” Fancy Zips and I am just going to lay this along the edge here and top stitch it down.
Let's take this to the machine and we'll add one side and then the other. We will Begin by making sure that this is just right along the edge of that seam, because we don't want it to get caught in the way of the zipper itself. Typically I would switch out my thread here and use a matching thread so that it's not so obvious, but this way you guys will be able to see. So I'm just going to press this under here, under my presser foot and top stitch. A lot of people like to use a zigzag here. That's totally an option if you prefer it, but you can see why you would want to match the thread.
Okay we have that side done and so now we're going to add the other side. On here you do want to make sure that your fabric edges are lined up when you're starting so that this will all work out the way we want it to. Now I can just stitch down this side and kind of roll this up out of the way as I go.
There we go - we have added our fancy zip. All right, let's bring this over to the cutting mat now and I will show you how this is going to work. So, of course, first things first. We want to open our zipper and make sure that the zipper head is in the middle before we proceed any further because we do not want to cut that off or we'll have to redo everything that we just did. But once we have moved that to the middle, now we can take our ruler and our rotary cutter or scissors and we can just cut the zipper off even with our sides, on both sides here just like so.
Now we are going to fold this in half and it's going to create this little top piece like you see here. That is going to be the top of our pocket. So let's go ahead and take this to the ironing board and we're going to press this. I'm going to put a few little pins in here to hold it in place and then we will top stitch along the top edge and baste these sides.
All right, so like I mentioned I pressed along this top edge and I've put a pin on either side by my zipper to hold that in place exactly where I want it. Now we're going to run a line of top stitching along the top edge of our pocket. This is going to be what forms a little slip pocket that our cutting mat can slide behind. Here we go, that top edge is done.
Now I'm going to go ahead and pull the pin out of this side. I'm going to lengthen that stitch length again - you always want to remember when you do this. So you can turn it back and I'm going to baste these sides. Again, we're just doing this because we don't want any of these layers to flip up and cause problems later.
All right. Then we're going to make sure I turn that stitch length back down so it's ready to go for next time. We have this inside pocket ready to go and the only thing we have left to do is to add that snap that's going to go on the back. Remember we have already installed our snap on the back panel. So let me find that for you here and so now this is going to lay just like so and we need to figure out exactly where our snap goes. What I like to do is just kind of feel with my finger and I can fold this back and see where the center of that snap is. Hopefully you guys can see that right there. On this back fabric I'm going to make a tiny little dot right there and now I can flip this over. Remember, because I can still access this through the bottom we can add the snap afterwards.
So that's what we're doing right now. So now from that center dot I'm going to lay my washer just as we did before, and use my Micron pen and we are going to draw those little lines on either side just like we did before, grab our seam ripper (which I have over here). We just want to make sure we're only going through this outside layer because of course that inside layer of fabric is our pocket. So just very carefully slide your seam ripper in and along those marks gently.
Once we have those slits made we can take the other side of our snap and the little prongs are just going to go right in those slits. We can turn this whole thing inside out so you can double check and make sure and see that it's gone through, and it looks great. So then we take our little washer just like before we're going to slide that over there and fold these back and it does help if you kind of have this against the table when you are pushing those prongs back. It's just nice to have something to push against and now our snap is in.
You can see how that's going to line up beautifully with our pocket and now we can baste these sides to this panel and then we can put our whole bag together okay. So I have basted this pocket down and now we can assemble our bag all together.
So we have our side and our bottom panels that we quilted earlier and then our front section and our back section. So let's go ahead and put this together.
To start with, we are going to take one of our side sections and we are going to sew it like so along this edge. We are keeping our raw edges out because I'm going to finish this off with a binding all the way around the outside edge so let's take this to the machine and begin by sewing these two together with our quarter inch seam.
Just make sure everything stays lined up and if you have a problem with this bulk on your machine you can switch this out for a walking foot. But because we cut our Bosal smaller you should be mostly just catching fabric. If you have a problem you can also cut your Bosal even you know
smaller than a half inch less than the outside panels because you really don't want to have all that bulk in those seams.
So there is our first one; you can see how that looks on the inside. It's going to be nice and clean. Then we'll take our other panel - remember the pocket goes on the inside on this one. We can sew these together. Make sure my pockets are all opening the same way (ask me how I know!). Make sure you get that right then we'll lay this on here and sew this side together.
There we go. And now we will add the other side just like before. Just take your time here. Okay, attach this so we have a big loop, just making sure everything is staying lined up along that edge.
There we go, all right, starting to take shape. So now we're going to set in the bottom. This is really the same idea and honestly one little tip that you can do to make it just a smidge easier is cut out these outside corners just like so, that will get rid of some of the bulk in those corners. When you go to sew them, it will make it much easier for you. So I'm going to go ahead and do that on all of my sides, just a little quarter inch that we're getting rid of.
Now we will match this up. I like to start along one of the long sides and then sew down. Then when I cut out that little box - I'm not sure if you guys can see here or not - you'll notice where I cut out that box, it's going to line up right with my seam edge there. This little bit over here is what I'm actually going to attach to this shorter side piece when it comes to that time.
So I'll actually start stitching right at that part that I cut out; back stitch a little bit just to make sure that this is staying all lined up. It's easy for things to shift so if you want to pin or use your clips for this, this is a great opportunity to do that. Like I said, a walking foot because of the bulk could be helpful. Whatever you find you need, make sure my pocket stays where I want along the bottom here. This is the side that has the most layers so take your time and then we are almost to that other side.
Again, we're going to stop where that little tab that I cut out ends. Now I'm going to do the opposite side and then I'll come back and do the short ends.
All right, so all that I have left is one of these short sides and I want
to show you how it really gets easier the farther along you go because we notched out those little corners. So now I can just pinch this last side nice and straight. We'll put this under the machine, and again we want to start right where that little notch is and sew straight across. You just really want to take your time for this part. Straight across and back stitch at the start and the stop. It is taking shape - look at that, it's starting to look like a bag now isn't it? I love it!
Okay so now as far as finishing this off goes let me talk to you about the binding. I have this one all bound and then I'll talk to you about the handles at the end. For the binding I did straight sides on all four corners and bound those edges first. I did sew them on by machine on the front and I pulled them around back and finished them by hand, but you could totally machine bind the whole thing.
Then once I did all four of these sides, I did the top edge and then the bottom edge all the way around in one continuous loop. Hopefully that makes good sense to you.
Then I added these nice long straps because I wanted to be able to throw this over my shoulder, and I'm really tall. So for that you are going to need a 7” by 40” rectangle of your fabric just like so. I did go ahead and add some of that ShapeFlex just to give it some extra strength. Then we're going to take this over to the iron and we are going to press this in half long wise all the way down. Then once I have all of this pressed in half, I'll open this up again and I'll fold each side into the center.
So I have this all turned under and now I've got this nice wide strap like I wanted. Now I'm just going to top stitch along this open end and then on the other side as well to match. So let's go ahead and do that.
All right. So now we have our strap all done and remember you'll need two of these so you'll just repeat that again for the other side. Let's talk about how I attached it to the bag. You can see here that I folded this under about 1.5” and then I boxed all the way around and then added some stitching in an X across just to really anchor that in place. I measured 5” from the outside edge to place those straps on both sides. You can see 5” in, and then a nice box with an X front and back and then that is it! It is
so simple.
Now you've got this great bag to hold all your projects, your cutting mat, store things in the zipper in there, and these outside pockets for you to use as well and take on your next retreat.
I hope you enjoyed this project and I'll see you next time on at home with Misty


