Skip to content

Free quilting video tutorials from Missouri Star

Quilting Tutorials
How to Make a Just Keep Swimming Wee One Cuddle Quilt - Free Project Tutorial

How to Make a Just Keep Swimming Wee One Cuddle Quilt - Free Project Tutorial

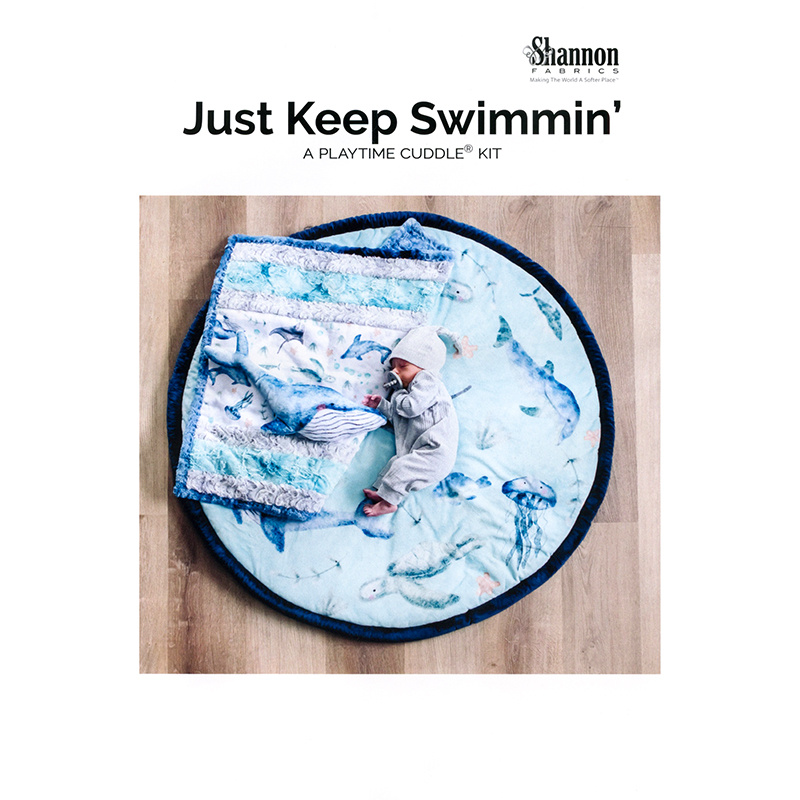
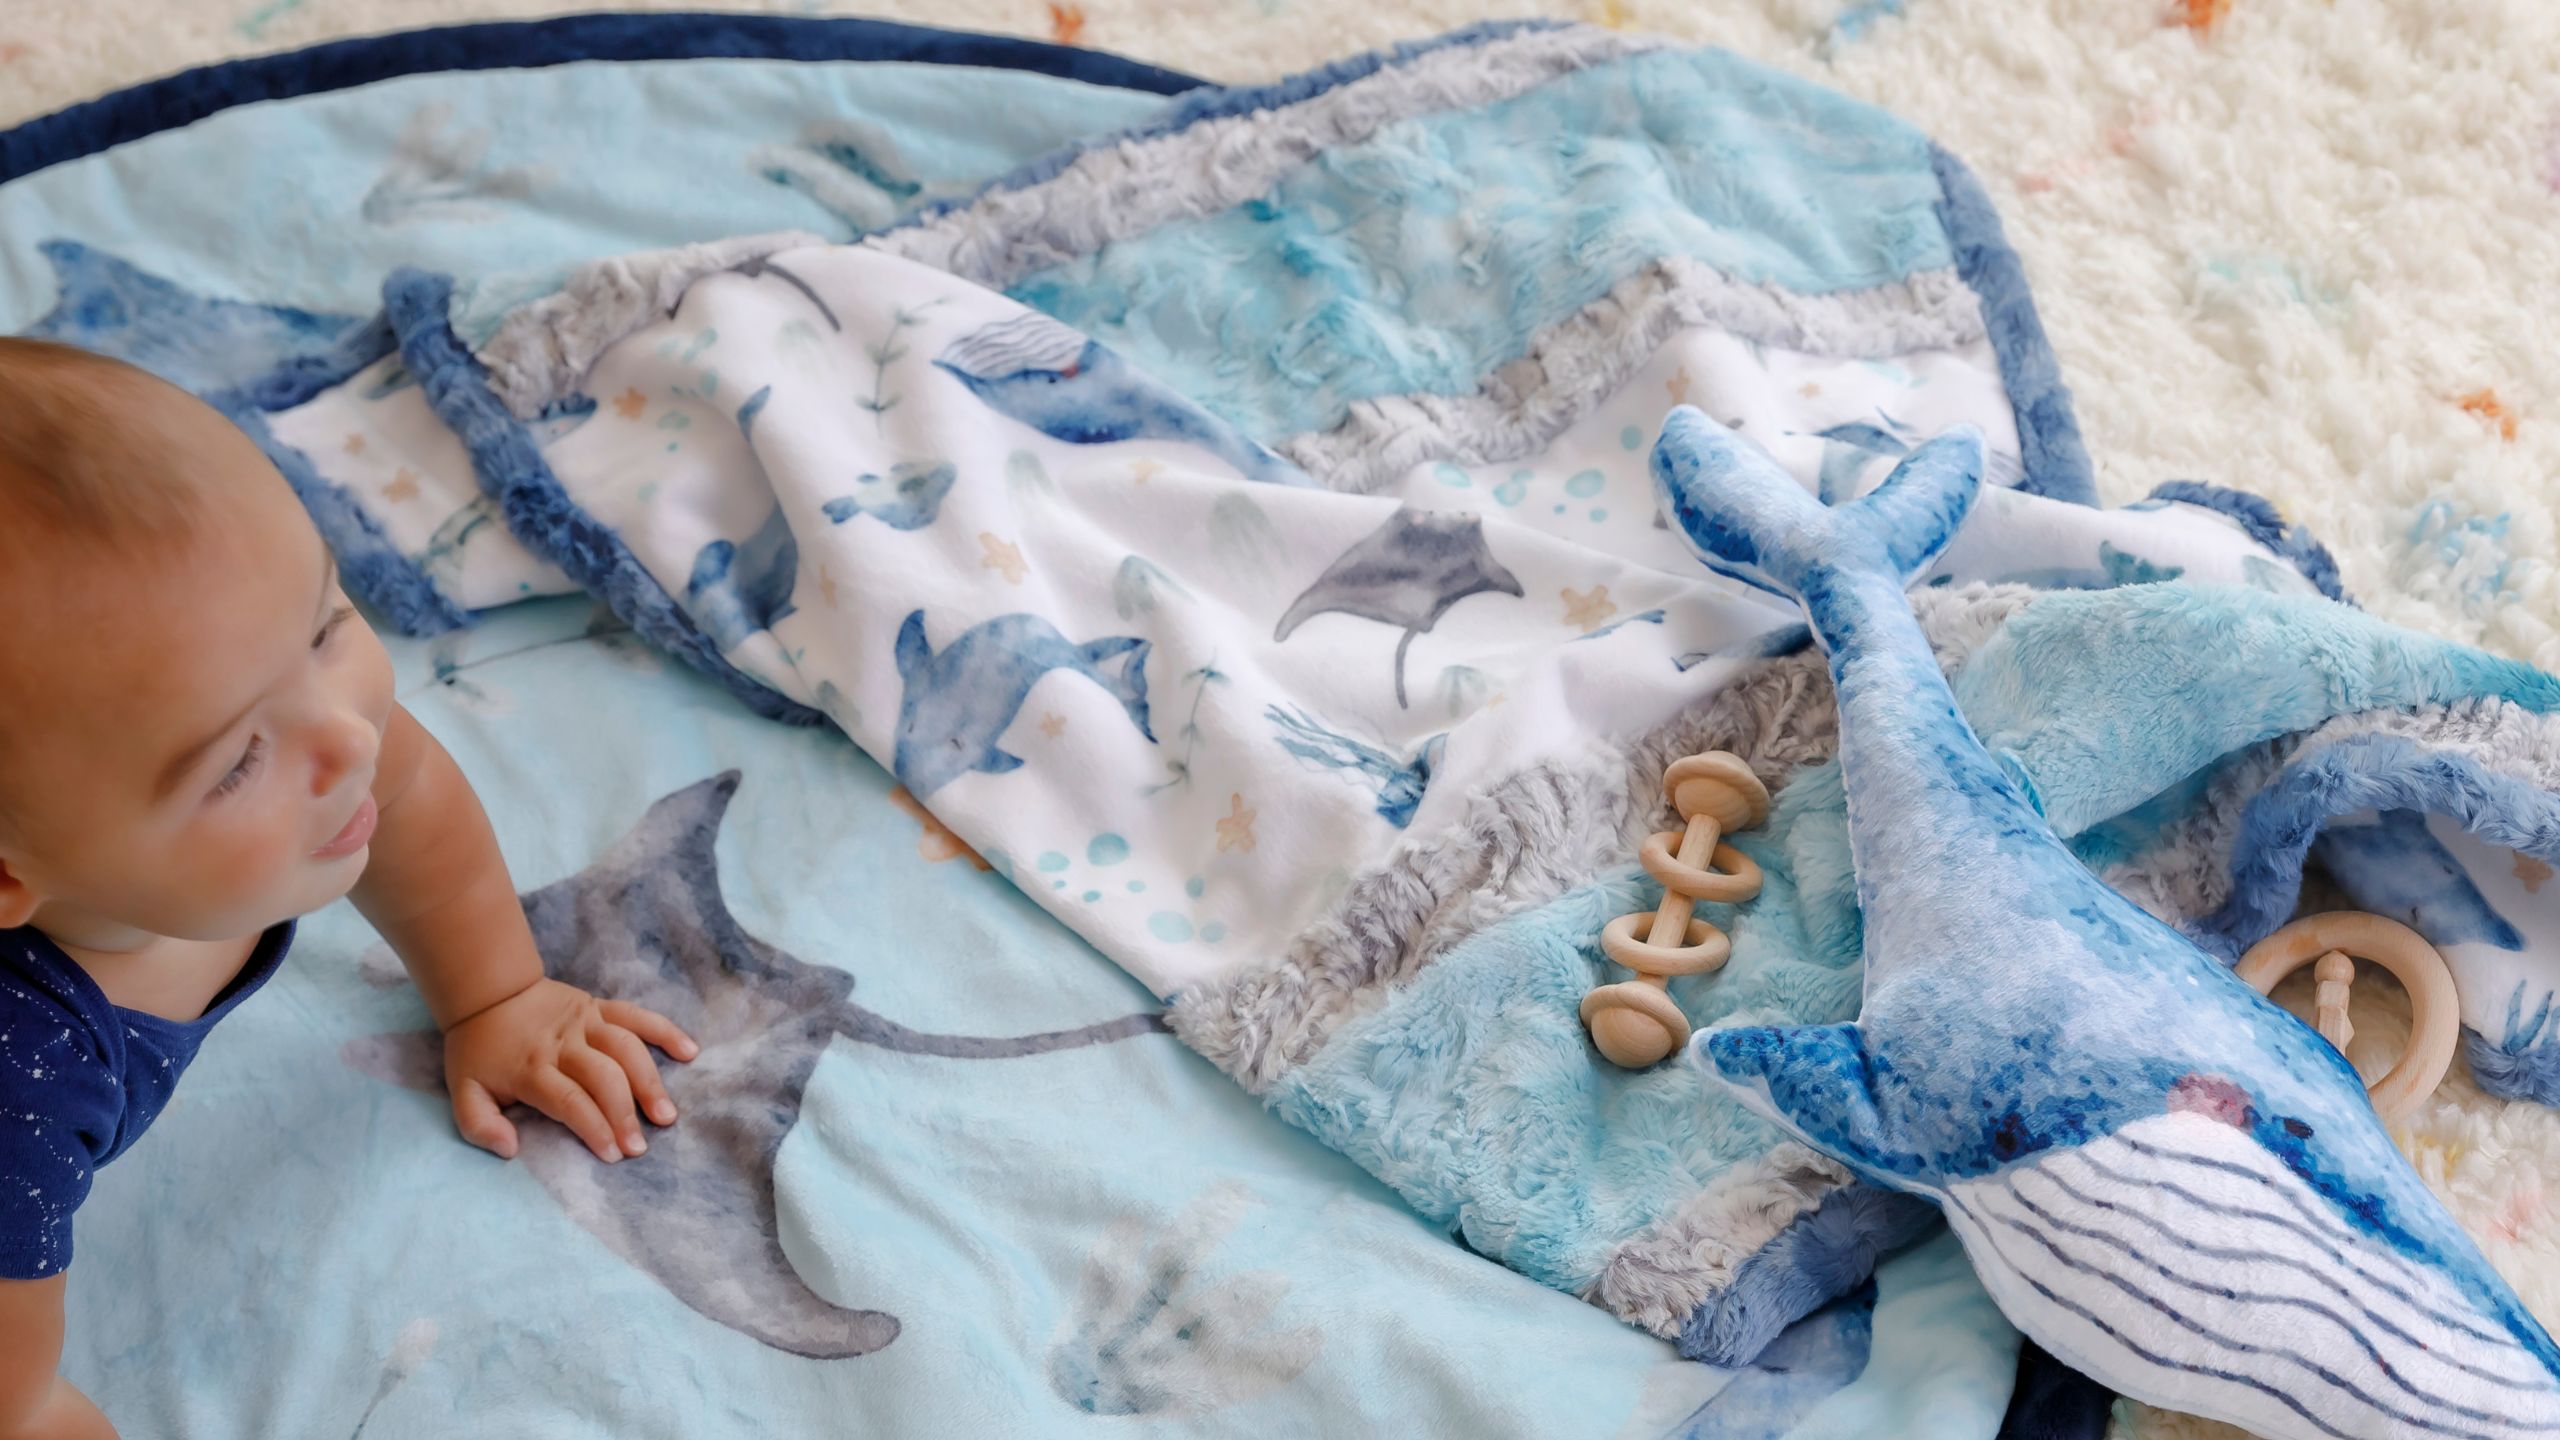
Whale, whale, whale, what do we have here...another set of fun projects using Cuddle?! Join Teresa Coates as she shows you how to make an fin-tastic strips blanket using the Just Keep Swimming playtime Cuddle kit! This kit comes with all the basics to create three s'whale baby projects. The oh-sew-cozy blanket is shore to be a real pleaser for baby showers and ocean-themed nurseries!

Instructor

Shannon Fabrics/Teresa Coates

Shannon Fabrics imports and distributes several different types of fabric, including super-soft Cuddle® minky plush fabrics, Embrace® double gauze fabrics, terry cloth and other novelty fabrics. Teresa Coates is a writer, editor and maker. Currently she is the National Educator for Shannon Fabrics and the host of Sew Together Tuesday.

Common Questions

What is covered in How to Make a Just Keep Swimming Wee One Cuddle Quilt - Free Project Tutorial?

Whale, whale, whale, what do we have here...another set of fun projects using Cuddle?! Join Teresa Coates as she shows you how to make an fin-tastic strips blanket using the Just Keep Swimming playtime Cuddle kit! This kit comes with all the basics to create three s'whale baby...

How long is the tutorial video?

The tutorial video is 01:16:33.

Are supplies listed for this tutorial?

Yes. The tutorial page includes the supplies and materials connected to this project.

Video Transcript

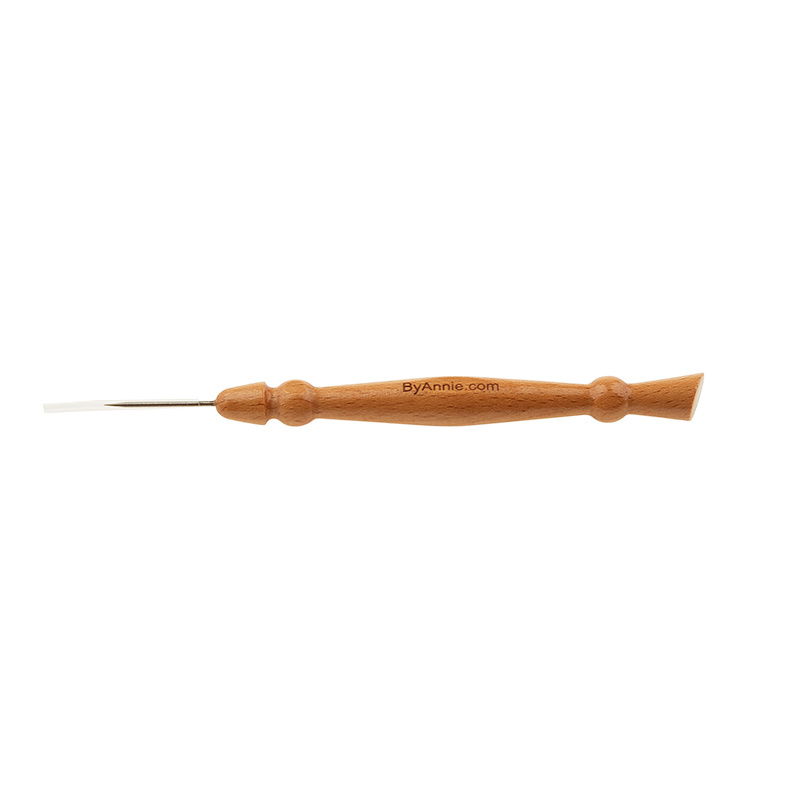
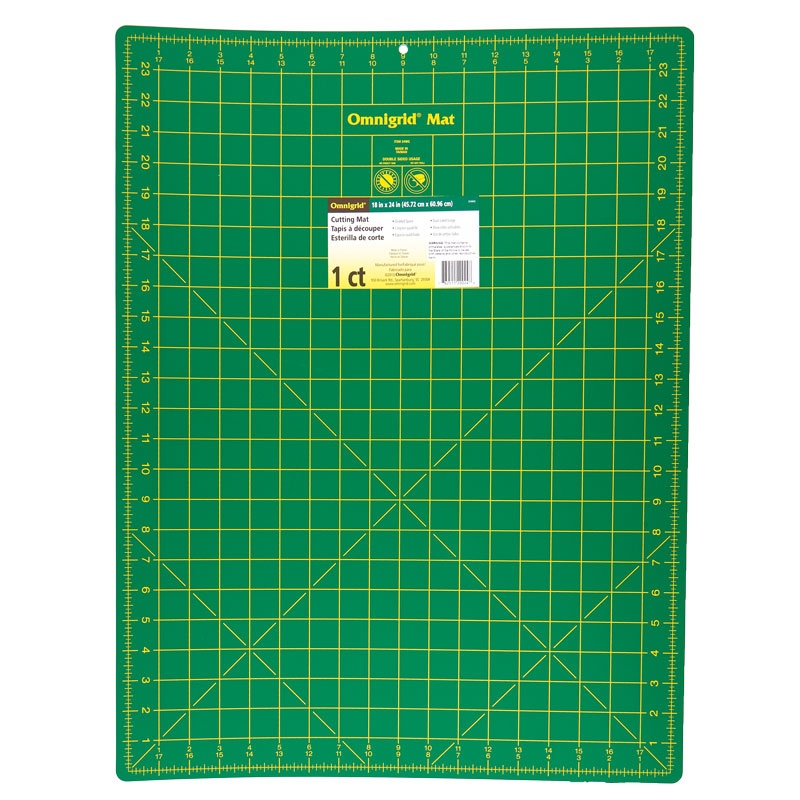
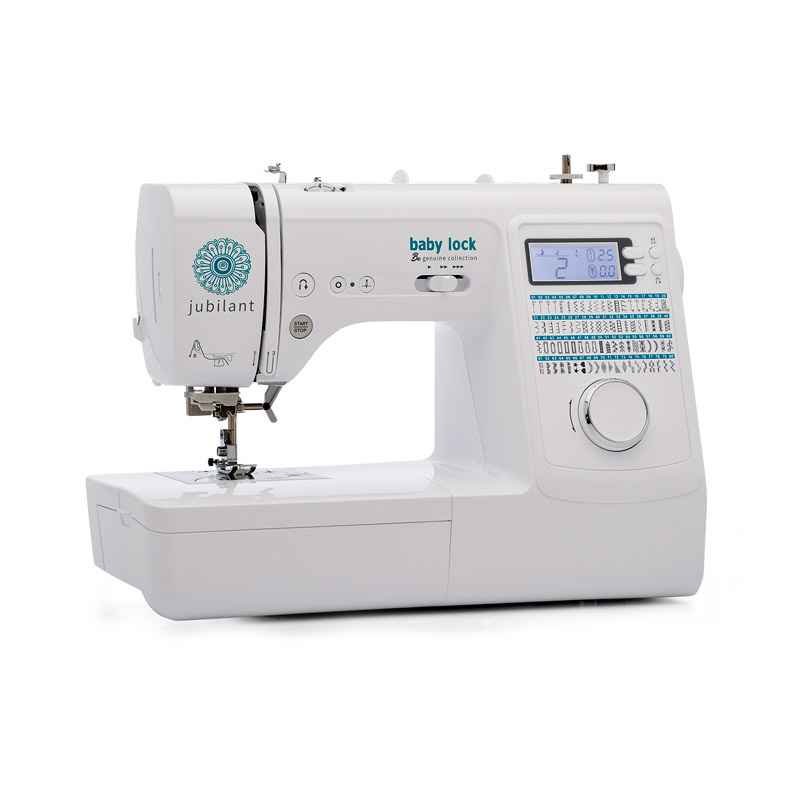
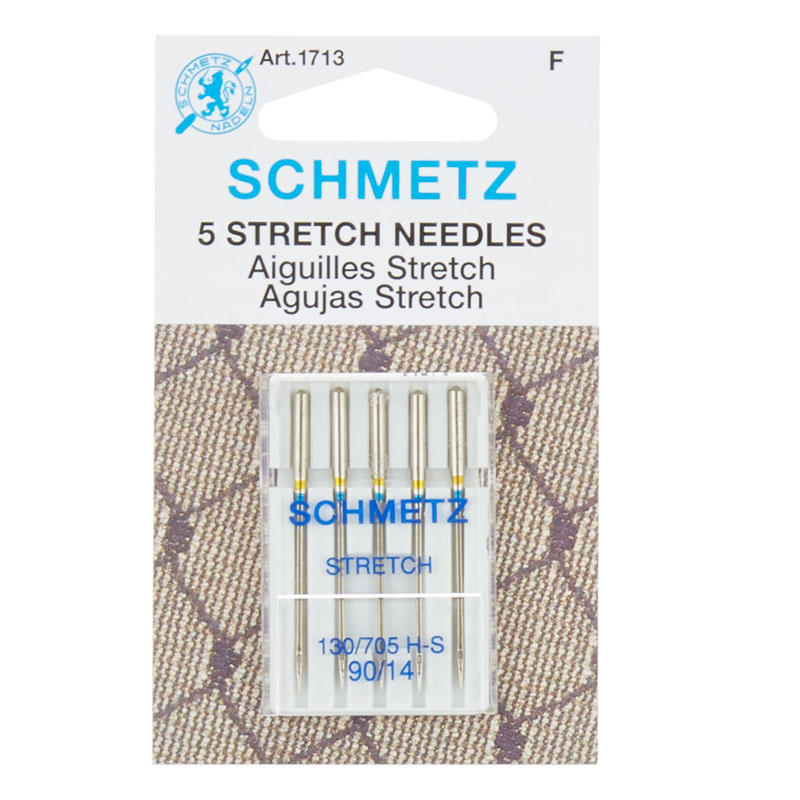
[Music] what's up hi I'm Theresa Coates I'm the national educator for Shannon fabrics and I am excited to be here at Missouri Star Quilt Company we are working on the just keep swimming kit this kit has three projects inside of it so it has a quilt a play mat and a little whale stuffie you can find tutorials for the other two but today we're going to do the little quilt that's in here so I'm gonna go ahead and unpack this so inside I've got all the materials for all the projects I'm going to go ahead and pull the ones out that I don't need including the panel and the backing for that play Mount so make sure there's nothing tucked inside sometimes they get built that way so I'm going to put those aside and we're going to work on these Fabrics oh and this blue one too that goes over there pretty sure if I'm wrong we'll go find it all right so I've got the little pattern in here we're going to work with a variety of different Fabrics I'm going to lay these out here for you so we have the print it is the sea life print we have one for the backing one for the middle of the quilt this is the Lux cuddle Paloma and that's going to be for a couple of strips we have two five inch strips for that we've got a strip of the Galaxy that is for The Binding so this is one way that you can tell your binding is generally speaking especially on the smaller kits it's going to be the full width of the fabric so it's going to be the whole 60 inches wide that will be the binding so I'm going to go ahead and put that to the side too because I don't want to tackle that quite yet when we get to The Binding I'll do that okay and then I've got this galaxy which is the shorter strips so I need to know that these are part of the kit because they are smaller okay so I'm going to put those aside as well we're going to start with the backing so the the strip quilts are made as a quilt as you go sort of technique and you can do these with batting without batting or today we're going to do it with a flannel interior to give us some stability to that so you can use pre-washed flannel pre-washed cotton you just want to make sure that you've washed it and get any sort of shrink out of it that's going to be there and we're just going to use the white flannel for this to give it a little bit of stability while I'm working with it okay so I'm going to get these put aside and I'm going to go ahead get this open the first thing I want to do is get my batting or the flannel which I'm using today and the backing together so they will work as one piece so I'm just basically going to combine the flannel and the backing fabric by using the basting spray so what I want to do first before I spray anything is get some fabric or some get some fabric out here so that I can over spray and it won't be a problem so I've just got some some plain cotton that I put out and this is what will cover the area so I don't over spray any of my other Fabrics or my board or my sewing machine I don't want to get basting spray on any of that stuff if I don't have to I'm going to go ahead and I'm going to lay down the part that has more stability which is going to be the flannel if I were using batting this is when I would lay that down first too I'm going to lay this out okay and this is a little bit bigger than my backing which is what we want it to be so lay that out nice and flat get my fabric to lay flat underneath there just so I can't see too many bumps or it will get confusing I'm going to lay this so that I can tell which one is the top and which one is the bottom so this one is pretty easy because it's a print so I can tell it's a directional print there is definitely a top and a bottom to this if you don't have a directional print you're going to want to to pet the fabric along the length of the fabric so the width of the fabric will have a little bit of stretch the length of the fabric does not have any stretch but that's where the nap is so you would want to pet that where it's smooth that's the nap going down where it kind of Ruffles up that's the nap going up so you always want to make sure you know which way the nap is going down all right so like I said this one is pretty easy because it's directional it's easy I can just look at it and tell which way it goes all right so I'm going to go ahead I'm going to pull this whole thing back so I can reach it a little bit better go ahead and pull this back toward me now I want to spray the back of this but I want to make sure that I'm not spraying the right side of this fabric so I'm going to go ahead I'm just going to use a piece of scrap paper that I had and I'm going to tuck that right into the edge so that it covers up anything I don't want to spray and then I've got the fabric on the other side so that if I over spray anywhere else it's getting onto that extra fabric and honor to any of my stuff okay so I'm using the od505 spray which I really like because it washes out it doesn't smell it's easy to use I'm just going to go ahead and spray the back of this and I'm going to push this up and get this to stick down to the flannel fabric I'm gonna give it a little Pat so now the easiest way to continue spraying it is to actually turn this around so I'm going to go ahead and do that I'm going to just grab all of it because it's a pretty small quilt if it were a larger quilt it'd be a little bit more work I have to be real careful to get it turned around nicely but this one's an easy one to start with okay so I'm going to go ahead and pull this back so I'll meet up my flannel pull this back just to the point that it starts to stick a little bit I'm like okay I reached the edge so then I'm gonna go ahead and I'm going to spray this section and I will push that up sleeve just call that swimming it up which I think is funny for this kit but it's true I'm going to go ahead and do the same thing okay so I don't have to use that pant the paper panel until I'm going to spray where it's going to hit the right side so at this point I can just kind of spray it go ahead and make sure and cover my machine and then again I'll put my hands under here and just kind of roll it up what that does it keeps it nice and smooth and then if I have any areas like here it kind of did a little pucker for me I'm just going to pull that straighten it back up and reposition it and one of the things that I really like about the 505 spray is it is totally repositionable it kind of has the tackiness of a Post-It which I like so there you put them down pull it back up it's very very repositionable so we'll go ahead put that out you're going to have to come back to here so this is a part that if I sprayed now I'm very likely to get it on here so I'm going to go ahead and put my paper back under [Applause] and just under that edge so that it's covering up the right side all right so I'm going to go ahead and I'm just going to spray the back of this last little bit that way any overspray is on my paper just going to roll it up Pat it down okay so now these two pieces of fabric both the flannel and the cuddle piece are going to act as one piece I want to kind of turn it over see how it is make sure that there's no puckers in this part if there are I can just reposition the fabric this is totally fine so now what I'm going to do is I'm going to go ahead and find the center of the fabric so this is the lengthwise center so I'm going to fold it so that top to bottom I'm just going to fold it in half so that these match flatten my fabric there because I can see it got a little pulled so then I'm going to just match up my corners of the cuddle fabric bring it over here and I'm going to go ahead and just mark right on that fold where that's at and do the same thing over here and measure it from corner of fabric to the fold and Mark it right on that edge so I'm just using a fabric marker that'll come out in the wash no big deal okay then I'm going to go ahead and lay this out because I'm going to do one more spring here we're going to kind of lay it out take it away lay it out I'm going to start here now sometimes when I'm doing this it can get confusing which one is the top and which one is the bottom so there's a couple of things that you can do you can write top up here I like to draw a little arrow and that helps me remember which way my nap will go so when I'm putting all of the pieces on here I'm going to make sure that the nap is all going in the same direction so I'm going to start out with my Center piece which is also the same print as on the back a little tag that we'll keep for later so this print again is directional and it's nice enough to be folded in half for you so you already have half marks on here that you're going to line up here so this fold line will come out when you wash it you can also steam it or press it from the back if you really want to to get it out but it should come out just fine in the wash so I'm going to take my Center fold put it right along those lines that I marked to make the center of my strip here match with the center of my backing go ahead and fold this over here make sure that I've covered all of my right side so that when I spray this I'm only spraying the backing and I'll bring that over and kind of just lay it down gently and get my centers to match up Pat and then I'll do the same thing on this side sure and keep everything covered that doesn't want to get some spray and again I'm just going to kind of roll this down get the centers to Mark to match right so we've got the first strip down so now we're going to kind of go back and forth with the basting and the stitching so I'll have to lay that out a few times make sure that we're covering our area so we're not getting basting spray on anything else but the next thing we're going to do is put on our strips so to put the next strips on I'm actually going to have to cut them in half so when they come they come in larger strips you can cut them in half or you can leave them as larger strips and that's totally fine too I'm going to show you how to cut them in half so that we can make them just like the pattern go ahead and fold this over here and bring out these strips so these are the Paloma which is just a really pretty really pretty Luxe cuddle fabric it has a very fun design in it so this is the width wise of the fabric which has a little bit of stretch to it this is the lengthwise which doesn't have any stretch and has the design that goes that direction so we're going to cut this in half width wise basically so along here so we can get two thinner strips and we'll do both of these one of the things to note is that when they do these strips when they cut them they're supposed to be a five inch strip and generally they're a little bit more than five inches so this one is just about at five and a half inches I just cut it in half I don't try to straighten it up and we just give you a little bit extra so that you don't have to be too exact one of the great things about cuddle is that you don't you generally don't have to be too exact which is great so I'm going to go ahead I'm going to measure it just past two and a half inches straighten it up on the end let me see what this is a little bit why so I'm going to do two and a half and then slide it up so it'll be just about even okay so I'm going to go ahead and Mark this with just a Sharpie pen I'm just going to draw a line right down here I could see nice and clearly on the back of that okay so this piece I could see this gets a little bit wider up here it's going to kind of measure it and see where we're at so it's a little bit bigger and I'm going to try to even these up just a little bit mostly because I found that if they are too uneven it's visible it's a little more uneven so I'm going to go ahead I'm going to mark it I'm going to trim both of those okay I'm going to measure this one so let me measure this one at both ends we've got almost six inches and almost six inches I'm going to divide that in half I'm going to do just under three inches so you can go ahead and trim it to five inches and then divide it in half if you want to I just go with the less cutting if I can all right so I've got both of those marked okay so then I'm going to use my blade which I like it's kind of a craft knife to be able to cut this so I'm just going to hold some tension on it I'm going to drag it Right Down the Line and what this does rather than using a rotary cutter this leaves a lot more of the nap on the fabric so that when I pull it apart it doesn't make such a mess so this is my favorite way of cutting Luxe cuddle works much better to me than the rotary cutter you absolutely can use the rotary cutter you can also use the scissors I really like the Karen K Buckley scissors for working with Lux cuddle and I'm just going to slide these right underneath the backing and just cut just the backing and that works very well in the same way that it will cut less of the nap I find that the blade works best so we'll go ahead and I'll cut all of these with that the biggest key with this is to keep some pressure on the fabric so it doesn't just pull okay so we're holding some pressure against it and then just dragging it as flat as possible down that line so not really using the point but using the flat of the blade a little bit more make sure that these are pulled apart go ahead and give them a shake put those aside and then I'll do the other ones okay so this little one I'm going to need to use my scissors with this as I get closer I'm going to start up here it's cut so I have to hold it a little bit tighter to get these thin areas so sometimes this is a little bit easier to take the rotary cutter or the scissors to I'll take the scissors to it make sure I catch all these little areas part because I can't get as good of a hold on it the cut won't be quite as perfect there we go and I'm just going to come down the rest of this hold that out of the way and trim this little bit off just to even that strip up a little bit now I can throw that away and I will go ahead and divide this into using the craft knife again you can see it just makes such less mess so a little mess comparatively when you cut it with a rotary cutter it really can get a little bit messy when you're doing this at home once you've made these Cuts you can also go throw it in the dryer with a wet washcloth and it will tumble around for a few minutes and knock off a lot of that cuddle dust it'll end up in your lint trap and then it makes it very easy to sew if you don't have a dryer to throw it into you can kind of vacuum the edges or give it a good Shake and most of that cuddle dust will kind of fall off as you go you do want to make sure that you've gotten rid of the cuddle dust before you start sewing it's really important you don't want to get that near your machine you don't want to yeah get any of the cuddle dust into your bobbin case if you can avoid it so we always do recommend that you clean your machine after making something like this we also recommend that you clean your machine often so people are often surprised at how messy they can get under there all right so I've got four of these two and a half inch strips two and a half ish okay and I'm going to go ahead and put the first two on so I'm gonna lay this back out again and I'm going to put a couple of strips on here and I'm going to use the pear because they were exactly the same size because my two strips were slightly different so those two pairs of strips are slightly different sizes so I'm going to put a pair together and a pair together so this first one they go ahead and put it up here and I'm going to try to see if I can figure out which way the nap goes this when the nap is going this direction so I'm going to turn it because I've got my arrow that tells me my nap needs to go this direction like I said I can also tell that because of my directional print so I've got that one up here let me go ahead and flip that over so always give it a check first put it in position how I want it that seems right now I can flip it right sides together so I'm going to pin this by starting at one end and I'm just going to lay it flat not stretching it where does it land that's where I'm going to pin it here so I can see just a little bit of the back fabric I'm going to lay it flat not stretching it and then I'm going to pin it over here at this end then I'm going to go ahead I'm going to pin it in the middle I'm just going to make sure that I can see a little bit of that back fabric so that it doesn't pull and when I Stitch it it'll catch both layers so once I've got the end the end the middle pin I'm going to go ahead and pin in between so I'll divide this up again I'm actually going to pin quite a lot just to keep the cuddle in position as we sew for me I find it a lot easier to pin more to keep it in position than I like to fix the seams later I'd rather pin more now so once we've gotten this first layer done the first row of pins you kind of want to think that you could just take it to your machine and sew right now but honestly if you do a double row of pinning it makes it so much easier so the first row will be taken out as we sew and that second row of pins will hold it in position as we're sewing it to keep the fabric where we want it to be and stay there as we sew it and we take that first row of pins out so I'm going to add a second row in all of our patterns including the kit instructions here you'll see instructions for double pinning and this is what we mean by that is this second row of pins so that first one is usually a quarter to a half an inch away usually less than a less than a half and then the other one is about an inch away so there's no prescription for that exactly it doesn't have to be perfect but that's what we're going for all right so now I'm actually going to flip this around I'm going to pin the other side as well you can pin both sides you can do one at a time I'm going to do both so I'm going to turn it around so now my nap is heading this direction so I want the nap on my next piece to do that same thing someone look at it see what it's doing wants to go that way so I'm putting here the nap flows from one to the other I'm going to turn this over put this strip down so we'll do the same thing pin an end and end the middle and then we'll pin in between there all right so now I've got both sides pinned and I'm going to go ahead and I'm going to go sew them so the nap is running from top to bottom when it flips over it'll be smooth the whole way if you push this way it'll feel a little bit rough and that's just the nap of the fabric is kind of the way the direction of the fibers as they lay down and each of the Fabrics is a little bit different so you'll kind of need to pet them and see but it always runs lengthwise so you want to make sure that it runs top to bottom on the quilt if it ends up being messed up somewhere it's okay I promise all right so we're gonna go set up my machine it should be on a straight Stitch where you use a 3.0 Stitch length okay make sure that that's right we've got polyester thread a 90 14 stretch needle I'm going to grab my stiletto because I like it so much and I'm just going to stitch all the way down this I'm going to use the side of my foot as my guide It's a half inch seam allowance that's given to you but I usually use the side of my foot because it's easy to tell where it's at and I always want to make sure that I can see a little bit of fabric sticking out on the side so I always want to be able to see it as I'm sewing so I'm going to take my first pin out now that my machine or my fabric is in position in my machine I'll back stitch just a little just to secure it and then we'll go forward okay so as I'm sewing I'm going to kind of help it through just a little bit I don't want to help it too much we're not going to pull it the biggest thing that you can do is keep the weight off the needle by keeping the fabric on the table I'll keep being a little bit weight up this direction as it's sewing and I usually keep a hand in the back just to guide it through I'm going to stop before I get to the pin so I don't hit any of the pins while I'm sewing but that second row of pins over here that double row will stay there and the heads will slide right underneath the walking foot so that they stay there they secure the fabric and I don't have that fabric shifting on me at all so here I feel like I'm getting a little close to this green pin so I'm going to go ahead and take it out because I don't want to hit it and I don't want to go too slowly around it so if I'm careful I can leave that whole second row in sometimes I have to take out a pen or two the first row will all come out as we go again I feel like that's going to be a little close so now as I see as I get close to this I'm going to take the pin out it'll be my last one so I'm going to go ahead and put a pin across the bottom here to hold this in position so that when I take this pin out my fabric still isn't going to shift on me [Music] so we get down to the end do a little back stitch get out right now this is why I like to do a pin both sides because now I'll take these pins out I can just turn it around and pin the other seam while I'm here so I find this makes it a little bit easier because I can pin two rows than sew two rows come over here do the same thing where I stick it underneath it down so I can see a little bit of the fabric over there if I put my needle down it'll hold the fabric even better then I can backstitch and work my way across all right so now we've backstitched it we'll take it out cut my thread and again take out the rest of my pins I'm just going to use these pins over and over today to do these strips and since all the strips are the same width I should be using about the same amount of pins on each row so now I've got my center strip and I've got two strips sewn on so at this point we're just going to keep doing the quilt as you go method and we'll Stitch the next one out but it's really important that as we go we're actually going to spray base down each of these rows to keep it nice and flat what it wants to do is kind of curl up so you can see because it's a knit fabric it wants to curl the easiest way to keep it flat is actually the spray based and not just pinning it all right so this will protect those edges as we come off so I'm gonna go ahead and put this scrap paper under there just under the edge just to protect all of the right side of the fabric and I'll go ahead and spray that and then I'm just going to push it up and kind of tug it just a little bit As I push it down to get it to lay nice and flat [Applause] just a little pull okay so we're not really stretching it this is the lengthwise of the fabric so it won't stretch very much anyway but we do definitely want to not not pull too much okay so I'm going to flip it around because I always have an easier time pushing the fabric away from me flip this reposition and do the same thing here spray the back of this strip you can tell I'm not spraying a whole lot it doesn't need a lot it's just keeping it in position until we get the next strip sewn on I also sew the back of the strip and not the batting as I or the flannel as I found that if I spray on the back of the fabric it tends to sit on the top and stick better than if I spray it to the backing or the batting or the flannel whatever is back here sew it to the or um spray it on the Strip instead okay so now if I flip this over you can see how this is working and it's going to stitch through the entire thing it's sewn those two layers on as well as quilting it so if you use batting this will quilt it enough for you but since we're using the flannel it doesn't matter how much it's quilted but it does make it go together really easily all right so I'm going to flip this so that it is right side up for me and we'll do our next strip so our next strips are going to be these blue ones here okay so we're going to put these on I want to make sure the nap is going in the right direction I'm going to tell you that with these galaxies and with hide some of the other Fabrics it's really hard to tell which way it's supposed to be going so you can pet it and you get to pick which one feels nicer it really doesn't matter too much it can go either way it won't make any difference you just want to make sure that when you're working with the fabric you know that width wise is the stretch lengthwise is the nap and no stretch is on here with the right sides together I'm going to go ahead and move this closer so I can see it a little better as a right-handed person I want to pin it further away from me so that I can put my pins in this way so that they can come out easily as I sew if you were left-handed you can pin closer to you and it'll be a little easier so on the last strip we uh we Mark or we didn't mark it we just pinned it I'm going to go ahead and I'm going to mark this one show you how you can do it if you have a hard time keeping that half inch seam allowance so I'm just going to put my ruler on here along the edge I'm just going to mark a guideline for me to sew a half an inch okay because that edge isn't perfectly straight I'm just going to even it up find a basic half inch finish up that line okay so now I'm going to pin this just like I did before and as we sew it I can follow this line to stitch it so that it has an even half inch seam allowance for some people finding that half inch is a little bit hard and this is a great way to be able to keep it nice and even the other thing is it does is it lets you pin so that you can carefully make sure that it's not going to hit your sewing line so again the end the end the center and then in between so next we're going to go ahead and sew both of these sides I'm going to sew this one first to show you how to do it with the stitching line already drawn on there so I'll go ahead and put that underneath my foot and get the needle centered right above that line we're just going to follow that line all the way down with our seam [Music] so by following that line I was able to keep all of my pins in position because I've been able to put them so that it wasn't going to hit them and just followed the line the whole way all right stitched it all the way through so I'm going to leave the pins in there while I switch it around and do the other side thank you all right so now I've sewn both of those seams this one with just the half inch seam allowance using my walking foot and this one I used the line so either one of these are totally usable for you whichever works best I say give them both a try because you never know which is going to be your favorite technique until you give it a shot go ahead take all these pins out you can see how easy that was to just sew all the way across having that double row of pins that you pin and be that you can sew in between and I found that that technique works really well for a lot of projects with cuddle is that pinning on either side of where you want to sew will keep the fabric really in check is what do you want take these pins out I'm going to do the same thing spray base those down and get ready for the next row so again I'm going to put the little piece of scrap paper underneath make sure that I'm not going to hit any the right side of my fabric with any of my basting spray make sure that my machine gets covered it's really ideal if you can have a separate place where you can go over do all your spray basing come back and sew but this works in any area that you have to do that go ahead and spray it and again I'm going to do the same thing where I kind of push it up give it a little tug make it lay flat I want to make sure my backing fabric is as flat as possible as well so as you're working your way you're going to want to make sure and check that make sure that everything is looking right nothing got puckered or pulled and then we'll just keep working our way through go ahead and turn this around so that I can access it a little easier so feel free to kind of pick up move the quilt put it back where you want it to be it really does make it a lot easier if you control the fabric like that all right go ahead and spray it one more time all right okay on to our last two rows so all of the quilt kits that are from Shannon Fabrics all of the Stitch and flip quilts are made this exact same way this is the smallest version but they do go up to 60 they do go up to 58 by 70 inches so they become very large bed size blankets that are made the exact same way so you can do those once you've learned this technique you can really take this and do all sorts of fun things with it right the last row all right one more time I guess technically it's two more times all right I'm gonna go ahead and take all my pins out as we sewed this together we used a 3.0 millimeter Stitch length on this baby lock machine generally it's what I use as a three or three point five it's really important more than the number it's more important that you're getting a nice clear Stitch so it should look more like this when you have the Stitch or when you've stitched it out it's going to be a nice clear Stitch that'll be easy to see kind of more like a top Stitch is what it looks like if you have too tiny of a stitch you definitely want to open up your Stitch length get it up to a 3.5 or a four sometimes machines have to be at a much larger Stitch length to actually Stitch well and that's totally fine it's not about the Stitch length it's about the Stitch itself and you'll need to kind of yeah probably play with it a little because in this Fabric in certain lights because the gray it almost looks like a tinier Stitch so I want to make sure that we can see really clearly how how big those stitches are all right so now that I've gotten all of the strips sewn on I'm going to spray base the last two strips and then we'll trim it up so as I've been working on this it's kind of come loose just a little bit here so I'm going to spray base the flannel onto the backing again so that that is secure now I can put that strip on there I know that it will all stay where I want it to again we're going to give it a little tug as we pull it up make sure it's flat make sure that seam is flat and then we'll move down to the other end okay so one of the things that I do when I'm working with these quilts is I will try to pile it up onto the actual table so that when I'm doing any of this work the quilt isn't falling off the table on me for the smaller one generally would be okay but when you start working with the larger quilts it's just a good habit to get into to keep all of the weight on the table as much as possible [Applause] okay so now we've got it all basted together which is great so now we get to trim it up so at this point it's been sewn together and quilted as the quilting happens as you sew those strips on let me clean up all my threads here so I'm going to go ahead and lay this out now we have a quilt that is approximately 27 by 27 inches in the pattern it tells you how big it's supposed to be and honestly we don't ever really care we just get it to a point that it's quilted together now we're going to straighten it up so I'm going to straighten each of the edges I start with the outside edges left and right edges and then I will trim the top and bottom mostly I want to make sure that it is going to be even with the stitching that is already on there so I like to line up the lines on my ruler with these stitching lines the seam lines here sometimes it's easier to do it from the back so you can turn it over and if it's easier to see your lines from this side sometimes it's less distracting so we're going to do it this way this time when there's this much color and fabric on this side sometimes it's a little hard and with the Luxe cuddle that line is a little harder to see just because it's hidden in with that fluff it's a great thing because it hides it if your line isn't straight but sometimes it does make it a little harder to see so I'm going to go ahead and lay this on my cutting mat so that one of my lines I'm going to line it up with I'm going to even it up here with this line here that I sewed I'm going to come down here and try to line it up with another one and get that side nice and straight so when I trim this I should trim a little bit of the front whatever I've used for the middle if I've used something that this is the flannel if you use batting it'll trim a little bit of that and then you're backing to get them all nice and even together I'm just going to make sure and hold my ruler really nice and tight as I work because it will want to slide on the plush Fabrics so I'm going to go ahead and line this up again make sure it stays nice and even make one of my lines of the ruler match with the seam lines see if I can get it to to match down here too hold it real well trim the rest of that side so do the same thing with the other side okay and I always kind of do a little double check to see how far off these are always going to be a little bit off and sometimes one will be a lot further than another these look like they'll be fairly even so be good to trim it from this side without a problem again I'm going to match seam line and sometimes we can kind of tug and pull and make things match up even better than we thought they did which is lovely when that happens trim that off slide it up now there's no way to trim this really with the craft knife so you're definitely going to get a little bit of mess when you do this but you can just trim it off give it a good Shake vacuum those edges you'll be good to go all right so now I've got the sides cut so the sides are nice and even and now we need to even up the top and the bottom so for me the biggest thing with this is to make sure that these are the same so put these closer to each other so here's my top strip and here's my bottom strip yes top strip and bottom strip I want to make sure that they're the same size so I'm going to measure them from the seam line like I said you can do it from this side you can do it from the back side and do it from this side so you can see how that works this time I'm going to measure it and see how big it is it's just about two and a half inches I look down this it's just about two and a half inches even I'm going to make it at two and a quarter inches just so that I can keep it nice and even so really I'm just going to look for where my seam is matching here here at the two and a quarter line and then I'm just going to trim it off and again I'll match up my ruler to where I cut before to where I'm heading and I just look for places where I can see that seam line a little bit better [Music] for it so what this does is just takes off any of your wobbly little edges makes everything nice and neat so now I need to remember that this was cut at two and a quarter so I need to cut the other end at two and a quarter as well so I'll lay this out put my ruler on here find the two and a quarter line find on here where I can actually see the seams matching a little bit it is definitely harder to see it with the Luxe cuddle I will say that this should be nice and square but you can definitely move this back over here so that it runs Square against the cut Edge you've already done so if you want to be sure that you've got a square corner on your quilt go ahead and do that and then pull it back to make sure that it's going to continue to be a nice straight line and again I can match this up at the other end make sure that it's a square and trim that off so next we're going to tackle The Binding before I get to The Binding I always want to put the little tag on it it comes with a really cute little made with love tag that includes washing instructions as well as what it's made out of which is 100 polyester so it's a great thing to add especially if you're going to give it as a gift that you already have an easy explanation about how you wash it which is in cold water tumble dry low and no fabric softeners all right so I'm going to go ahead I'm going to pin this to the edge of it and I'm going to stitch it on now with a little zigzag so that it's in there later when I do the binding what I found is if I don't take care of this now I'm totally going to forget about it later and then I have to take stitches out to put the put the tag back in when I should have put it in first all right so I'm going to go ahead and just Stitch It Down and I'm just using a straight Stitch with about a quarter of an inch seam allowance I'll still have a half an inch seam allowance on this on the back when I do the binding so if you want to be extra careful about where it goes you can absolutely line that up all right so now that my tag is on there I can go ahead and prepare my bindings we set those aside earlier so let's get those out all right so this is the fabric that we set aside earlier for the binding and again a reminder that the binding especially on these small quilts is always going to be a piece that is the 60 inches wide of the full width of the fabric so it's really easy to find it pull it aside put it away for later now we're going to use it now we want to make four one and three quarter inch binding strips so we're going to Mark those out and then cut them three so I'm just going to line my ruler up here and Mark my one and three quarter inch strips if your fabric is a little wobbly you can go ahead and trim that up before you mark your strips but it should be pretty straight every once in a while I find one that needs a little straightening okay so I've got my strips marked I'm just going to go ahead and pull this down and Mark some more I like to mark them one layer at a time and cut them one layer at a time helps me be a little bit more accurate now to cut out these strips if you want to keep the softness on the edge of the binding it's really important that you cut them out with the micro serrated scissors or the craft knife if you want to just cut them quickly you can absolutely use a rotary cutter and cut them that way I'm going to go ahead and use the craft knife because I really like that soft binding the results from using that oh all right so as I get these cut cutting the Lux cuddle will always make a little bit of a mess so we want to be very gentle with how we're moving it around so as I cut it I'm just going to carefully push it to the side when I'm all done with this I'm going to take it to the dryer throw it into the dryer a few minutes let it toss around and all the cuddle dust will end up in the lint trap just like we did with the strips for the quilt which is very helpful way of dealing with it if you don't have a dryer like I said just give it a good Shake that's what we can do but you do want to make sure and get the cuddle dust off as much as possible before we start sewing our binding so I'm going to give these a good Shake okay so once I've got the once I've got my binding strips cut and I've got them cleaned off so they're ready to sew with I'm going to go ahead and sew them into one long strip that will work for the entire binding and I'm going to sew those together just like I would for regular cotton binding I'm going to lay one out and I'll lay the other one at a 90 degree angle with the Luxe cuddle Galaxy which is what this fabric is it's really hard to tell the nap so I'm not going to really care this time when I'm doing it but if you're using a fabric like a cuddle three or some of the other Fabrics that have a very visible nap that you can really tell which direction they're going make sure that you place them end to end so the Naps match then we'll fold them with 90 degree angles I like to use my ruler or my I like to use my board to make sure that I've got those at a pretty good 90 degree angle and I'm going to go ahead and pin on either side of where I'm going to sew so this is very much like we were doing before with the seam marking the seam and then sewing on that line pinning on either side that's what we're going to do here and we're going to sew from here to here you could go ahead and Mark that line or you can sew we have a silver Sharpie is what I use for these marks when they are on a dark fabric so I'm going to line up my ruler so it goes from corner to corner I'll draw my line on there and I can see it much better on the Navy so I'll pin the other one and then we'll sew both of those Corners together all right so I'm going to sew these binding strips together again 3.0 Stitch length straight Stitch and I'm going to back stitch the beginning and the end of each of these seams just to secure them follow the line that I drew to mark that 45 degree angle the next one now if you're sewing and you're having any difficulty with it getting through the Stiletto is great for being able to hold down the fabric feed it underneath that foot so now we've got the corn or the now we've got the strips sewn together go ahead and take my pins out and kind of check those binding strips make sure they connect nicely they don't I can take them out these work out great so I'm going to go ahead and trim off my Tails so these I want to trim it about a half an inch or a little bit less I'm just going to trim them carefully throw away my scraps right away do the same one here throw those away give our binding a little Shake all right so now we've got all of our binding strip we're going to go ahead and put that on so I'm going to start on a side and I'm just going to pick a side doesn't matter we're going to start somewhere along here I tend to choose my middle section that I want to leave the tails at and it's really just personal choice there's no specific Rhyme or Reason for it it's just what I like so I'm going to find the end there we go and I'm going to go ahead I'm going to pin this so this is on the wrong side or the back side of the quilt and I want to leave my tail in here somewhere so I'm going to pin it here to keep that tail from flopping around and then I want to leave about an eight inch tail so I'm just going to kind of come down here and pick a spot and this will be my starting point at that point I can pin a little bit but I'm going to use my Clips more I really like my Clover jumbo Wonder clips so I use these for binding and I only need a few of them to hold it in place while we go so then I can go ahead give my quilt a little tug make sure everything is where it's supposed to be then I'll go ahead and clip that on so I'm going to cover up my tag Stitch that in while I'm doing my binding okay and I'm going to put a pin in in between so I kind of like to pin and clip pin and clip we do this on a couple of the other projects because this is my my Mo for being able to keep my fabric where I want it to be so again I'm going to sew with a half inch seam allowance using the side of my foot as the guide come in here get it positioned and I'm going to back stitch there because I do want to secure that spot so with the binding we cut this at one and three quarter inches and at that size we need to make sure that we're actually doing a good half inch seam allowance so if you have a hard time keeping a half inch seam allowance you can cut your binding a little bit wider you can cut it at two inches and that will work as well but I do like to cut mine the one and three quarters like it says in the pattern and sew it with a half inch seam allowance so all the way down this Edge I like to use my stiletto to keep the fabric flat as I'm sewing so I'm going to get down here and I need to stop a half an inch from the end one of the things that I noticed is so when I trimmed the back this is a little bit short this is fine because what we need is a half inch seam allowance which is going to be about here and we still have enough that we'll catch so this happens sometimes and it's really no big deal we're going to sew down to this pin and go off the edge and lift my foot pivot and sew right off that corner I'm going to do this mostly like a traditional cotton binding except we're just doing it with one layer so now once I've gotten it to here I'm going to pull this over so I can show you guys a little better so once I've got it to here I've sewn down and off the side and now I want to take this pull it straight up this way and then I'm going to pull it back I like to use my stiletto I'll hold that here where I need it to be pull all my binding over keep it nice and tight so that the fold is here and I can see raw edge here so I want to still be able to see that raw Edge if I don't see it I'm more likely to get a little pocket here so now as we're going we're going to sew with a half inch seam allowance we're going to double check later to make sure that we cut that all but I could measure that and I can see it's a little around a quarter of an inch we're all right okay if it's a little bit short you'll just have to take um and trim it again and sometimes that does happen do I have an answer to why no no all right so as I take it back to the machine I'm going to put it in so that I am going to start on the fold okay so I want to start up here at the corner and I'm going to sew from this fold down the side so I've kept a pin here to make sure that my binding all stays exactly where I want it but I'm not going to sew across the top we're sewing across the side it's really important I'm going to get underneath the foot there we go get it with my quarter or my half inch seam allowance take a few stitches back stitch as well and then continue down that side and we'll do this on all four corners okay so they get down to the bottom again I'm going to stick a pin about a half an inch from the bottom from the far Edge go ahead and clip this make that clip out and we're going to sew all the way to the PIN and then turn and sew off again so as you get there I'm very careful not to sew over the pin I don't want to break any needles okay now that we've gotten that sewn on let me go ahead and do the same thing I did before I'm going to pull the binding up use my stiletto pull the binding down pin it so it stays in position and then clip this and pin it down the next side and when I get to these seams in The Binding I'm also going to clip those open all right so let's sew the next one [Music] all right so we've got all four corners done and we're coming back to our beginning so where we started here we want to sew down to this point so when I've gotten to this corner I'll always kind of unpin this tail and re-pin it where it ended so that I know that this strip needs to end here so I'm going to go ahead and do the little flip for the miter here so I'm going to pull it straight up so it comes straight off the side of the quilt hold it down with my stiletto along that edge pull it back get it nice and tight and then stick a pin in now I'm going to go and I'm going to sew it oh I'm so close I'm gonna land right on a seam darn it okay so I'm going to end right here I'm going to stop right here so I'm going to stick a pin in here aim for this one okay and then we'll deal with the tails foreign as I come over this I'm going to try to keep that seam open with my little stiletto get up to this pin and do a little back stitch now we'll tackle the tails okay so as I get up here I've got most of another strip and excuse me that is left over okay so these two strips are going to overlap so I've got most of a strip here and I'm going to go ahead and I'm going to cut it off just a little bit short find my scissors here and I'm going to cut it before it hits the stitching on this side so I'm going to go ahead and just clip up the backing try to make as little mess as I can and I'm going to keep this nearby because I'm going to want to use it in the next step so I've got my two pieces that overlap now to get them to join in a nice bias sort of seam I want to get them to overlap the right amount which is one and three quarter inches you could measure this but I like to use my piece that I just cut instead so somewhere about in the middle of this Gap I'm going to stick my scrap piece down I'm going to go ahead let me use my Sharpie and a mark on one side I'm going to mark on the other side so you can leave these two together and Mark one layer and then the other layer but I have an easier time if I move them apart I can see them a little bit better okay so we're basically making it so that this side of the bias or this side of the binding goes one and three quarter inches past this one so I'm going to trim one off you'll be able to see how that works so now this will end yes just the same amount so I'll go ahead and trim this one off so I always kind of do a little double check when I do this just because if I mess it up the wrong direction I don't have enough fabric to make it happen so one of the things that I like to do is cut this a little bit short so I'm just going to take a tiny bit off of one end here I always make it about an eighth of an inch shorter than it needs to be and that way I can sew it and kind of stretch it into place and it's never too big which works well so at this point I need to get these two to come together at a 45 degree angle like no need to come together at a 90 degree angle like we did before so I'm going to go ahead and pin this corner together and then we need to pin on the other side of where we're going to sew so I'm going to pinch this pin over in this corner now one of the things about sewing this seam that's difficult is that I can see this corner but I can't see where this corner is so I like to go ahead and add a third pin in here you could also Mark a line down here where it matches okay but now what I'm going to do is I'm going to sew from here to here and I'm just going to kind of aim for that you can go ahead and Mark that if that works better too so this part is one of the more difficult parts for me just because I have all of this quilt and I've got to get it bunched up over here leaving a little bit longer Tails makes this a little easier so this length is fine eight inches is about optimal if you do them a little bit longer especially if you have a larger quilt it's definitely easier so if you're doing the 68 by 70 no 58 by 70 quilt you're definitely going to want to leave a bigger Gap in there to be able to do this easily just because there's a lot of quilt to deal with so I'm going to aim for that pin where it lands on the edge the back stitch all right so now I'm going to take my pins out and I'm going to check it to see if it works and it does lay flat in there so I'm going to go ahead and trim these I always do a double check definitely been known to think it would work and it didn't it's a way to foolproof myself double check it now okay so that's going to work out just fine I just trimmed it it doesn't really matter the length it's about a half an inch then I'm going to go ahead I'm going to put pins in here like this so I can see better so I'm going to put pins right in this Edge and hold this down so when I did the other part of The Binding I relied a lot on the actual clips and they worked fine for here about for this part I need to keep this exactly where I have it so the pins will do better with that than the clips so now I will sew this down the remainder of the way so I'm going to be careful along here to not let that binding grow at all it's a bit exactly where it needs to be not let it stretch and I can do that with the pins and also with my stiletto here and as I sew I'm using my half inch I started overlapping the first line where I had stopped before and now I'm going to go over where I started so that it's a seamless join okay so on The Binding here we had two spots that ended up it was a little I was a little disappointed because I had a binding join right here but truth is the reason that happened is because I didn't measure it carefully and make sure that it was 27 by 27 which is fine so I needed to add a little bit more binding on that third one which is why we give you three strips so that you can do that the other thing is that when you turn this over you'll never be able to tell there was actually a binding join there so it's not like a cotton binding where it's very visible these will just blend together and no one will be any wiser so really not a problem like it can be in a cotton binding all right so once that binding is all sewn on I'm going to make sure that I've got my thread Tails clipped and I've got my pins out that I've put into those corners to hold it nice and tight for me and then I'm going to go ahead and I'm going to check all of the edges as well to make sure everything caught especially on the one end where it was a little short I just want to make sure everything was caught if it's not I can go back and fix it now before I finish the binding this all looks good looks like it's all caught working well okay and there's my little tag that we got stitched in all right so now we're going to go ahead and finish the binding the cuddle bindings are all done with a raw Edge which is a great way of doing it it's so much faster because we don't have to turn anything under and there's no hand stitching so we're just going to go ahead and zigzag this in place with a raw Edge because it's a knit it's never going to fray it's never going to wear and because it's a Luxe cuddle we can fluff up those fibers and totally hide the stitches it'll be beautiful in the end so I'm going to start at a corner it doesn't matter which corner I will often choose a bottom corner just so that if it doesn't turn out very nice I have a Tiding down at the bottom so I'm going to go ahead and clip this I'm also going to pin my tag down because I have been known to have it flip and then Stitch it down in the wrong place so I'm going to go ahead and pin it over to the side so my my machine is never going to hit this it just pins it out of the way and lets me not accidentally top Stitch it in position in the wrong position so I'm going to clip this a little and then we'll go ahead and Stitch a little bit at a time so I don't clip the entire thing I only do a little bit and then I move those clips as I go that seems to work really well for me all right so I'm going to reset my machine to a zigzag do a nice big zigzag so I'm going to do four by four and that should work really nicely to stitch my my bias no to stitch my binding in place so I'm going to go ahead and turn the hand crank so that my needle is on the left side and now as I get it in the machine I want that needle to come down just to the left of my binding fabric because what I'm going to do is cut catch just the edge of it as I'm stitching around here it's down so it goes right into the seam where the two meet up at the corner and put my foot down do a little Stitch see how that's working does that seem to be right it does so now I'm going to go all the way around I'm going to zigzag so basically my Zig is going to come down on my previous stitching line and then the zag is going to come over onto the binding because I cut this with the craft knife this Edge is really nice and soft which means it'll be a little bit harder to see so I'll just keep checking it make sure it's in the right place and I'll use my stiletto to hold it where I want it to be and then just Stitch all the way around nice and slow so this is one part that I will definitely take my time with make sure that it's where I want it to be the end result is worth it and even though it can take a little bit of time it's definitely faster than hand binding again just holding my stiletto in place and stitching all the way around so when we get down to these Corners I like to stitch all the way to the corner finish my seam and then restart the next corner you can fold the fabric and turn the corner but I have had not as good of luck with having a nice Corner that way so I go ahead and end each seam do a little lock stitch thread and then start over the next corner trim that close then I'm just going to fold this over nice and tight put a clip in here and then I can start that corner up again I'm going to use my stiletto hold that where I want it to be make sure it's nice and tight in there Smash It Down push it underneath the foot so I'm going to raise my foot just a little bit again my needle is going to come down on the left side I'm going to do a little I'm going to do a little lock stitch and I'll take a couple of stitches and then I'm going to clip some more down this side I want to get it going before I tackle this next step here all right so that's secure now I can go ahead and Stitch this side [Music] okay I'm going to fold that corner over nice and tight took a clip in there to hold it put another clip down here just to keep things where I want them to be while I get that next Corner in here settled stick it under I'm gonna lift my presser foot up a little bit higher make sure I can get that under there make sure it's down do a little lock stitch go ahead and sew that side all right now as I come around to this corner I need to get this corner tucked in so I'm just going to kind of push the fabric up and make it miter the other direction and then just hold it in place aim for that let it Stitch just past the corner tiny bit and do a lock stitch to secure that and right now I can take it out and trim all my threads you can dig my little pin out that hold my held my label in position go ahead and take that out and I I have the whole thing bound so I need to make sure and trim everything and one of the things that people like about the cuddle binding is how fast and easy it is but one of the things that happens when you do this zigzag Stitch is that you can see it right now so if you look carefully you can kind of see the zigzag tucked in here All Along The Edge and because we used a gray thread it's a little bit easier to see the great thing about this stiletto that I love so much is that I can come back over these and I can just kind of stretch up those fibers and it pulls it right out of the zigzags and hides that you can do this so that you Stitch it on this side so stitch stitch it on the right and then bring it around to the back but I think it's easier to hide your stitches back here if it's not perfect so that's my stitching on the back and bring it around to the front and then I hide the stitches here by just fluffing up these fibers and then you're never really able to tell that it's just a raw Edge again you don't have to be super gentle as long as you're using a polyester thread it's going to be nice and strong and not pop on you as you're doing this little scritching you'll kind of do this all the way around make it nice and soft and beautiful it's a lovely finish all right so that's it now we have our own little wee one blanket that goes with the just keep swimming kit so again it's part of that it's one of the three projects that are in the just keep swimming kit it's adorable and much easier than you might have thought thank you for joining me today at Missouri Star Quilt Company hi everybody it's Jenny from the Missouri Star Quilt Company we hope you enjoyed watching this video if you aren't already part of the Missouri Star Quilt Company family be sure to subscribe so you won't miss a thing and if you click that Bell it'll notify you every time a new tutorial comes out see you next Friday [Music] foreign

More Fabric by Yard tutorials

See all