

How to Make a Lattice Arrows Quilt - Free Quilt Tutorial with Misty Doan
 Misty Doan
- Layer Cake
- Traditional
- Double
- Intermediate
- Quilt size 88" × 88"
Like an arrow through the wind, this quilt soars above the rest! Follow along with Misty as she shows you how to stitch up the Lattice Arrows quilt from the Best of Block. This project uses fabrics from astronaut/quilter Karen Nyberg showcasing the views she saw of Earth from space. You’ll have a blast stitching up this quilt while you learn more about Karen Nyberg and her work in an exclusive interview.
Instructor
Misty Doan
Misty Doan grew up surrounded by sewing and quilting. She loves spending time sharing tutorials each week each week, and when she’s not stitching up one of her fun sewing projects for home decor, most likely you’ll find her hanging out with her husband and three awesome kids or working on a house project.
Shop this tutorial
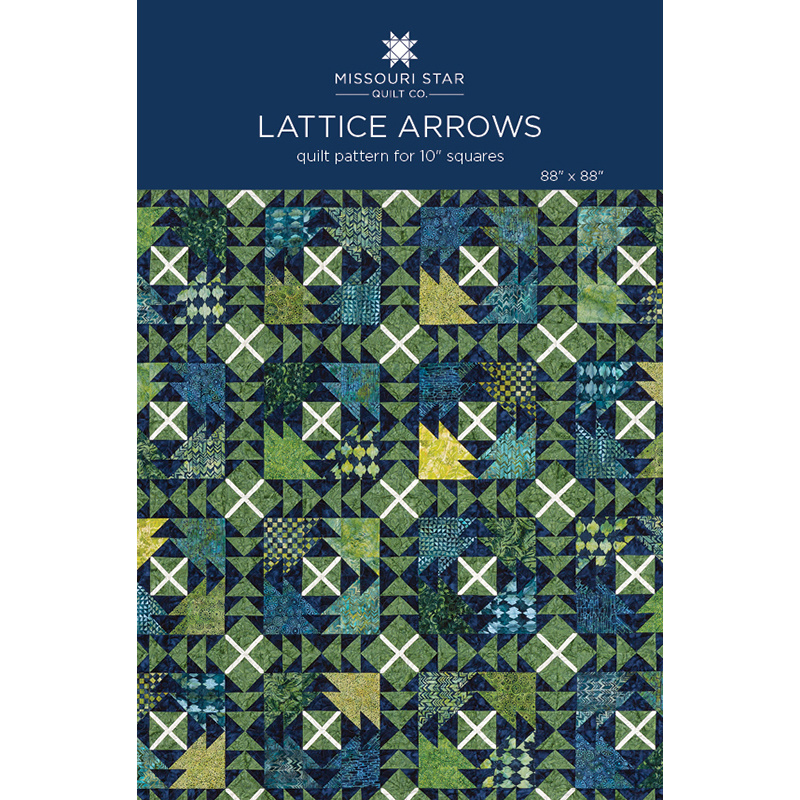 Lattice Arrows Quilt Pattern by Missouri Star$6.95Shop →
 Digital Download - Lattice Arrows Quilt Pattern by Missouri Star$4.95Shop →
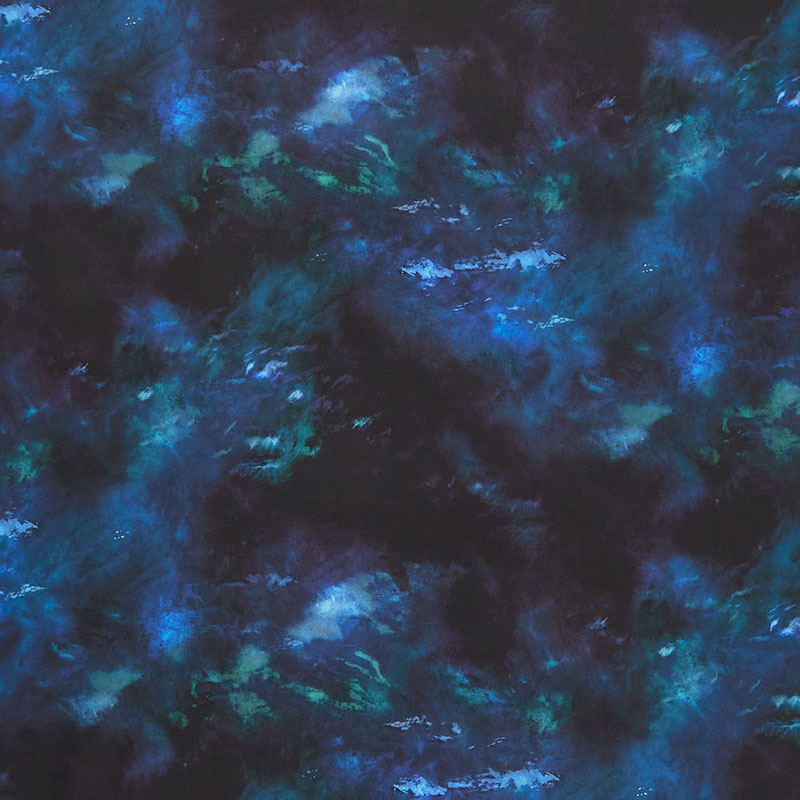 Earth Views - Clouds Marine Yardage$11.96Shop →
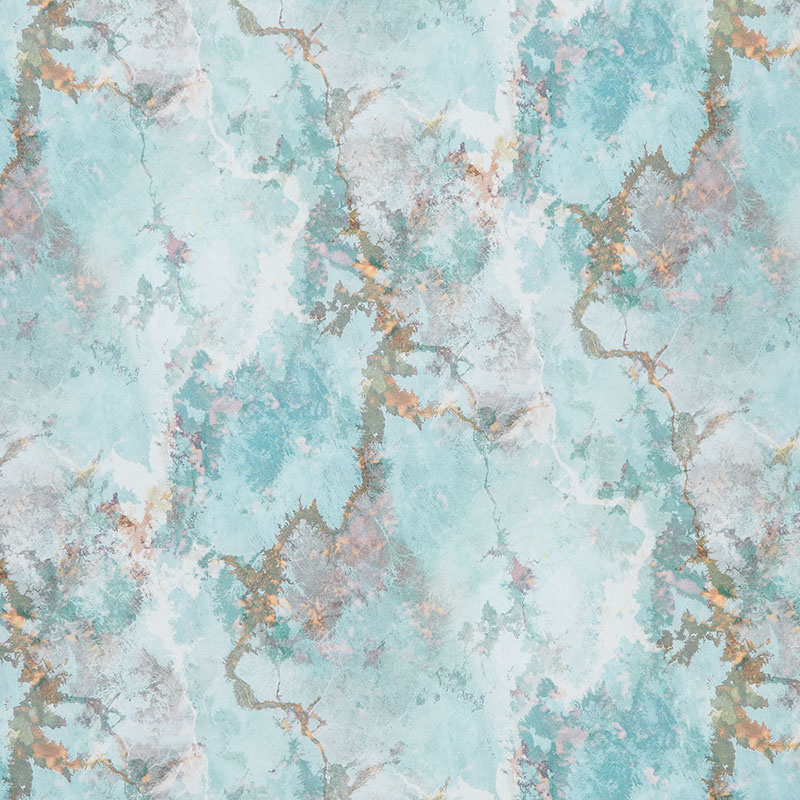 Earth Views - Marble Sea Glass Yardage$11.96Shop →
 Earth Views - Clouds Lagoon Yardage$11.96Shop →
 Earth Views - Clouds Ocean Yardage$11.96Shop →
 Earth Views - Clouds Waterfall Yardage$11.96Shop →
 Earth Views - Space Astral Yardage$11.96Shop →
 Kona Cotton - White Yardage$7.28Shop →
- Earth Views - Space Astral Yardage$11.96Shop →
- Earth Views - Space Astral Yardage$11.96Shop →
 Missouri Star Quilter’s Best Blend Queen Batting$37.45Shop →
 Missouri Star 5" X 24" Ruler$22.95Shop →
 Missouri Star 5" x 15" Ruler$15.95Shop →
 Olfa Splash Aqua 45mm Rotary Cutter$18.75Shop →
 Olfa Splash 24" x 36" Cutting Mat Navy$68.95Shop →
 Exclusive Missouri Star Jenny TG1600 ProPlus Oliso Smart Iron$199.99Shop →
 Missouri Star 50 WT Cotton Thread White$6.95Shop →
 Missouri Star Wooly Betty Board - 17.25" x 25.5" Orange Border$98.95Shop →
 Baby Lock Accomplish - 1500 SPM Straight Stitch Machine$999.00Shop →
Common Questions
What is covered in How to Make a Lattice Arrows Quilt - Free Quilt Tutorial with Misty Doan?
Like an arrow through the wind, this quilt soars above the rest! Follow along with Misty as she shows you how to stitch up the Lattice Arrows quilt from the Best of Block. This project uses fabrics from astronaut/quilter Karen Nyberg showcasing the views she saw of Earth from...
How long is the tutorial video?
The tutorial video is 00:21:19.
Are supplies listed for this tutorial?
Yes. The tutorial page includes the supplies and materials connected to this project.
Is a transcript available?
Yes. A written transcript is available on the tutorial page.
Video Transcript
Alright so this is Best of Block. It features a bunch of our favorite quilts
from block magazine throughout the years and there are even some exclusives in here. So that is one that I'll be teaching you today, it's called Lattice Arrows and you can see my version hanging behind me. I love this quilt. I think it's absolutely beautiful. I did switch it up a little bit from the
pattern and Block. The pattern in Block is designed to work with a layer cake and I decided to use yardage because I had these beautiful cuts from Karen Nyberg's Earth Fuse fabric collection.
All right to make this quilt you need three quarters of a yard for each of the fabrics you choose for your arrows. These are the ones I selected. You're also going to need two and a half yards of your accent fabric, this is the blue that kind of makes that sashing around each of our blocks. Then
you'll need one and a half yards for your outer border and four and a half
yards of your white background.
Alright so this is the block we're going to be making today and it's really quite simple. You're going to start by taking your four prints that you select to make your arrows out of and we're going to cut those all into
10 inch squares since we're working from yardage. If you have a layer cake
obviously they would already be 10 inches. I'm just going to go ahead
and grab one and we are going to cut this in half both directions so that we have four five inch squares. Just make sure I've got it all centered. Just like so and as you're cutting all of your fabrics you're going to want to
keep the like colors together. So I'll just stack them up like so.
And then to start off with we are actually going to make our little
lattice piece. That's the top and bottom of our block here that kind of forms the x's in the quilt behind me. So let's actually use our accent fabric which is this beautiful teal that I have here and we're going to cut a two and three quarter inch strip and sub cut that into two and three quarter inch squares which you can see I've done here. Then I drew a line diagonally corner to corner - if you don't want to draw the line you
can skip this step but it's great if you just need a little extra guidance for
your eye. Then I have an inch and a half by four and a quarter inch
rectangle we're going to take this over to the iron and we're going to press it in half long ways. So I'm just going to make sure this is folded right in half, press that down, there we go.
All right so then now once I've done that I can lay this right along that line that I drew. You can see why if you just wanted to set it point to point you could skip drawing that line. And now we're going to sew a quarter inch from the raw edges that we've just folded so let's take this to the machine
just make sure this is centered up corner to corner. I have everything straight before I start stitching. There we go.
So once I've done that I'm going to go ahead and flip this back, press it with the iron again. Here we go now. On the pattern it actually just has you top stitch on this side that's open. I like the look of top stitching on both sides so I'm going to go ahead and do that but I'll start with this open side. There's one. I just think it looks really nice when both sides are stitched, so this is just decorative
Just like so and now we can bring this back over here and square our block back up. Remember these are two and three quarters so I really just like to use the corner of my ruler here. Since we're not changing the fabric that
this was sewed to we just need to cut off that little bit of excess in the
corner and then do this other side. There we go. So you're going to need two of these for each of your blocks. You can see there's one at the top and the bottom.
So let's go ahead and move on to the next step. Now we're ready to move on to our half square triangles. So in order to do that we are going to pick
our accent fabric and our background and we're going to have five inch squares. We'll place those right sides together and we're going to sew all the way around on all four sides a quarter inch in. If you want to you can go ahead and do whatever color you're using for your arrow. You can do the exact same thing so five inch squares right sides together.
I'm going to go ahead and take both of these to the machine and sew one
right after the other. All right, so once we have all of those sewn on all four sides we can take our ruler and we are going to cut these corner to
corner in both directions, just like so. I'll set these aside. Keep your
colors together, do the same with our other set, there we go.
Now let's take these over and press them open and then we'll square them up. So all of these I'm going to press to the dark side. So I'll hold the darker fabric, and roll that back, so that my seam is nested underneath
that. There are those four we can go ahead and press these as well.
Once we have them all pressed we're going to go ahead and square them. I like to use the Bloc Loc because we're going to need to square these two is two and three quarters. So I am just going to set this on her, see if I can slide it down to the three-quarter inch line. It looks like I can. We'll just trim this one side and I'll slide this down and trim off this little corner there so I have less bulk,
So I'm going to go ahead and repeat that with all of these half square triangles. All right if you don't have a Bloc Loc ruler that's okay. Let me show you how we'll square that with a regular square. So I just have a six inch square ruler here and we are looking for this diagonal line, and then I want it to measure in two and three quarters. So one two and three quarters one two and three quarters - just making sure that that diagonal line is right on my seam line. And then we'll trim off here and here and then come back and trim off that little corner, just like so.
All right once you have all of your half square triangles squared up, now we can start assembling our blocks. You are going to need six of your
background half square triangles for each block and four of whatever color you chose for your arrow. So since I use that blue I'm going to take a five inch square of that same color and I'm going to start with that.
And we're going to lay out our block. I think find this to be the easiest it also helps if you make one block and have that as a reference because this one does have a lot of angles that you're working with. So we're going to start by making our arrows just like so. And these are going to work around and then I know my little lattice blocks are going to go in opposite corners and then my background half square triangles are going to build around these like so. Gotta make sure I turn it right. The thing you can keep in mind once you get this lattice corner right is that the half square triangles then follow the same direction on each side of your block and so I'm going to go ahead and pull these apart now.
I'm going to sew these two together and these two together then we'll add
this to the center square and then we'll sew these in a row and put those
together to make our block. And we can press these back and then make sure that our angles are still going the right way. And we'll sew these to our center square. All right, you give this a good press. Here we go and now we can sew these rows of four and then add them to each side.
All right now we have both of those sewn - you can see how this is going to fit together perfectly. So let's just lay one on each side and sew these down to finish up our block. You do want to kind of watch and make sure your seams are nesting as they're approaching that center square. All right, I love this block. I think it comes together so pretty and in these
blues and greens it looks like fish swimming in the sea which is super fun. When you're laying this quilt out, I found it easiest to take four blocks at
a time so you'll have four arrows coming together and then you'll put four of those across and down. All right, once you get all of your blocks together then you're going to add your two and a half inch inner border and your six inch outer border and that will give you a great size quilt - it ends up 88 by 88!
I used this beautiful free swirls pattern for the quilting it looks like ocean
waves that's why I went with it and I also chose this fun variegated thread
which just adds a little bit more detail to the quilting. I really loved working
with these fabrics. I think they're absolutely beautiful and if you're not familiar with Karen Nyberg and her story, be sure to stick around because I got to sit down and chat with her and hear about her time and space and how she ended up designing this beautiful fabric, collection so you won't want to miss that.
Misty: All right everyone, I am so thrilled to be joined by Dr Karen Nyberg. Karen thank you so much for being here.
Dr. Nyberg: Thank you so much for having me Misty!
Misty: Oh absolutely! It was a pleasure working with your fabric line - it is just absolutely gorgeous. Let's start and have you tell everyone a little bit about yourself.
Dr. Nyberg: Wow yeah so where do I start? Um I was an astronaut. It's something I wanted to do my entire life. So I was a little girl and I worked towards that and finally became an astronaut in the year 2000. I studied mechanical engineering, but when I was a little girl, even more importantly I think, was I liked creativity and I liked sewing. I liked drawing and making things. But anyway, so I then did a 20-year career as an astronaut. Flew to space twice. My first flight was on spatial Discovery in 2008 and then I flew again on a Russian Soyuz in 2013 and lived on the International Space Station for almost six months.
Misty: Oh my goodness.
Dr. Nyberg: I finally decided that I was you know done done with the flying and retired from NASA in 2020 and then since then kind of went full circle to my passions as a little girl. Sewing and creating things and that brought me to where I am today.
Misty: I think that's so don't need to because you got to live basically both of your passions from childhood. You loved creating, you wanted to be an astronaut you got to do that and now it's come full circle and you're back to that creativity element which is so so neat!
Dr. Nyberg: I'm so lucky.
Misty: Yeah absolutely. So as you can see behind us these are some of the
quilts made using Karen's Earth Views fabric. So tell everybody obviously where this inspiration came from, how you came to design a line of fabric?
Dr. Nyberg: Yeah so one of my favorite things to do when I was in space is of course look out the cupola which is the window that faces Earth and and take pictures. Because the Earth is incredible and there's so much
beauty. So I would try to fame the pictures very artistically and that being one of my favorite things to do. I wanted to also share it with people
yeah and so you know after I retired I started working with a woman Marsha who helped me get in contact with Robert Kaufman fabrics and get working with them for a fabric line. And the idea of using some of these amazing pictures that I was able to take and share what I did in space with everybody. So yeah so I picked several pictures that I really like
showing different textures and ecosystems of Earth, and worked with a
couple designers at Robert Kaufman and we we turned it into these
beautiful fabrics.
Misty: They're incredible. I have to say when I saw them online I thought they were beautiful, but when I got my hands on them it like felt like such a treasure to see all of those different like wondrous things. Because I think you can peek out and say oh that's over the ocean oh you know that's over the desert and to to see Earth in that beautiful unique way and to be able to put it into quilts is really really cool.
Dr. Nyberg: Yeah I'm so excited about the line yeah.
Misty: It's amazing and you have another one coming up as well, right?
Dr. Nyberg: I do. We're working on a second line in batiks.
Misty: Oh how cool, that'll be amazing! So then what would you would you say to someone who wants to be an astronaut or someone who wants to you know explore their creative hobbies? What words would you share with them?
Dr. Nyberg: I think for being an astronaut, for anything it's you know
people often ask me like how did you how did you do it and how you know
especially being an astronaut in the STEM fields I was one of few women and that sort of thing. I think I was so motivated for my goal and it's setting the goal and and just keep pushing forward. And you will fail
and when you fail just pick yourself up and keep working for that goal and get outside of your comfort zone. I'm still doing that now and and you know imposter syndrome sets in. It did throughout my entire career. It's like do I really belong here, should I be doing this and now it's happening in the quilting world. I see some other people's quilts and I'm like do I
really belong here? But just pushing through all that I think is really
important.
Misty: Absolutely. I mean I've experienced that in the quilting world myself just because I grew up sewing with my mom and my grandma. My whole life I've been at a sewing machine but when I started teaching it's like wait am I actually qualified to do this, you know? And so I can totally relate and you're right you just kind of have to allow yourself to be uncomfortable right and move through that and then you hit those goals which is pretty cool to see and people are generally nice and encouraging and supportive.
Dr. Nyberg: They really are!
Misty: That's so so wonderful! Karen will you share a little bit more about the patterns you design and the quilts that you've made yeah so using this Earth Views fabric?
Dr. Nyberg: I have a few different ones. The one in the cupola views and this one is really special because the cupola is the window right that we would look out from the space station and it faces down towards Earth and it it really does look like that. And that one just really is a good way to kind of show all the fabrics and the textures of Earth. Another pattern that I have is called The Challenge Star and that one came from a project I did when I was on Space Station where NASA helped out. We worked with Quilts Inc and came up with this challenge, the Astronomical Quilts Block
Challenge where we invited quilters around the world to submit a star block. And then we ended up getting over 2800 of those and so or 2400 it
was a lot anyway. I made one block in space and so the Challenge Star
Quilt is is designed after the block I made in space. It's not exactly it but
it's inspired by it inspired by it and we made one that uses all the fabrics from the line.
Then I have an Endangered Animals quilt that I picked some endangered
animal species um and appliqued that. And then Orbital which is basically applique circles that kind of give it the spacey feel.
Misty: I love that and so we carry these patterns that Karen mentioned here at Missouri Star. We also carry these beautiful fabrics but I do want to point out that this fabric is perfect whether you are a space lover or not. This is a traditional quilt that I just taught you guys on this tutorial and it looks beautiful in these Earth Views fabrics.
But I'm just so thrilled that I had the opportunity to sit down and talk to
you and be inspired by your journey what an amazing life you have LED so far. So thank you so much for sharing with all of us and if people want to follow along and see what you have coming up next where can they find you?
Dr. Nyberg: I have Instagram at AstroKaren and also a Facebook
page (Astronaut Karen Nyberg) and Twitter which I don't use as much. And then a website karennyberg.com.



