

How To Make A Sea Glass Quilt - Free Quilting Tutorial
 Jenny Doan
- Layer Cake
- Batik
- Lap / Throw
- Beginner
- Quilt size 65" × 65"
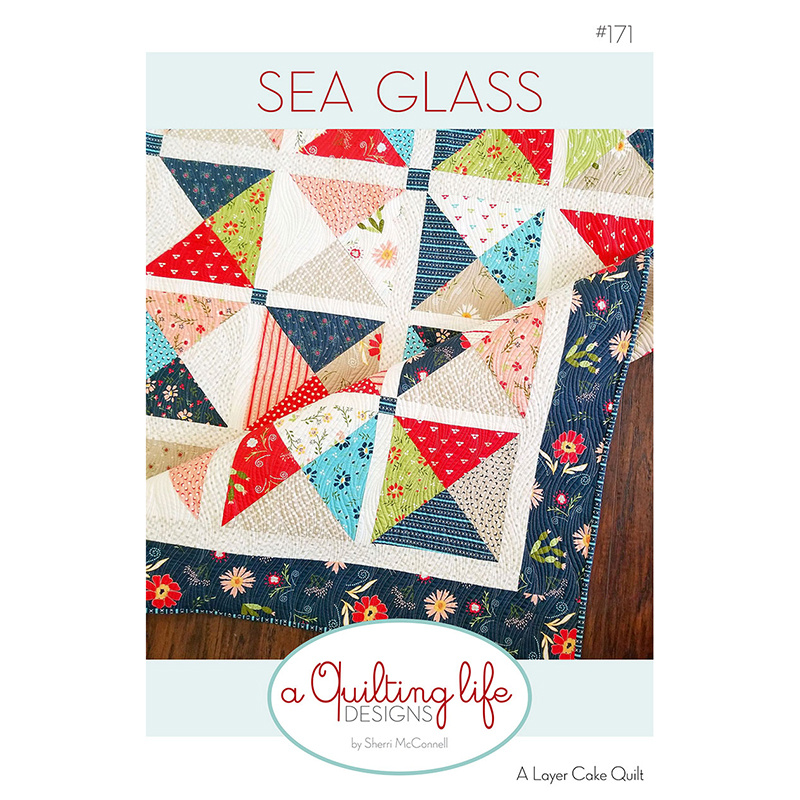
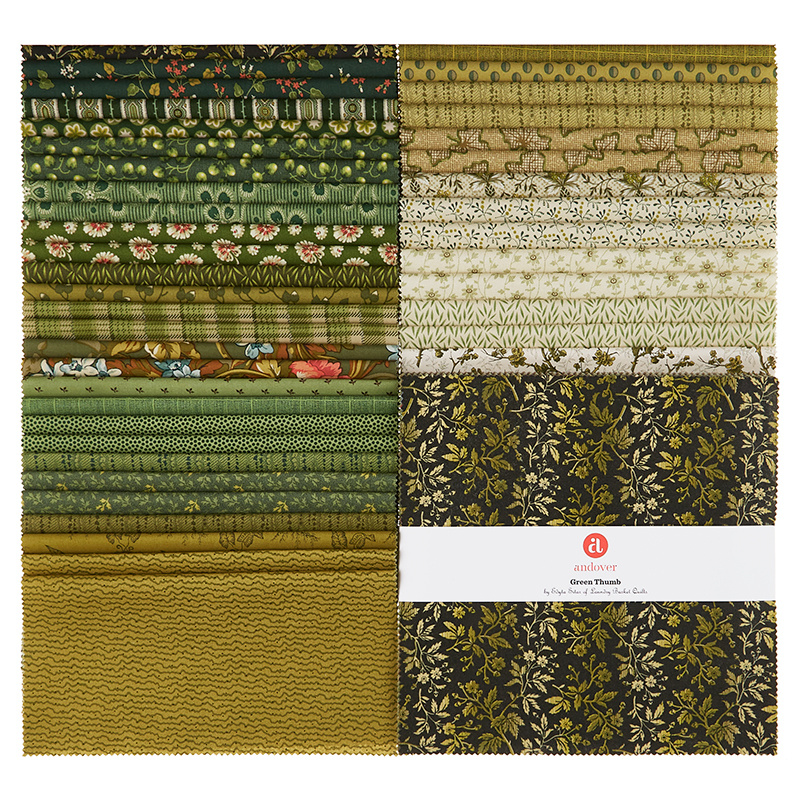
Jenny Doan demonstrates how to make a beautiful new hourglass quilt with precut layer cake squares. She's using fabric from the Green Thumb collection by Edyta Sitar of Laundry Basket Quilts for Andover Fabric and the Sea Glass pattern designed by Sherri McConnell of A Quilting Life. These pretty quilt blocks are trimmed to perfection and framed with easy sashing and cornerstones.
Instructor
Jenny Doan
Jenny Doan is an American quilter, author, and YouTube personality. Jenny started Missouri Star Quilt Company in 2008 and today it is the largest quilting supply vendor in the United States.
Shop this tutorial


Chapters
Common Questions
What is covered in How To Make A Sea Glass Quilt - Free Quilting Tutorial?
Jenny Doan demonstrates how to make a beautiful new hourglass quilt with precut layer cake squares. She's using fabric from the Green Thumb collection by Edyta Sitar of Laundry Basket Quilts for Andover Fabric and the Sea Glass pattern designed by Sherri McConnell of A Quiltin...
How long is the tutorial video?
The tutorial video is 00:14:21.
Are supplies listed for this tutorial?
Yes. The tutorial page includes the supplies and materials connected to this project.
Is a transcript available?
Yes. A written transcript is available on the tutorial page.
Video Transcript
Hi everybody, it's Jenny from the Missouri Star Quilt Company and I've got a fun project for you today. Take a look at this quilt behind me. Isn't this a great one? We've got a little bit of a new direction on our set, so it's fun to see it from this way. The pattern we're making today is called Sea Glass, and this is a pattern that's been written by Sherri McConnell of A Quilting Life. And when I saw the fabric that I had for this tutorial, I was just like, "Oh my gosh, this pattern will be perfect with that." I think it looks great and I can't wait to show you how to do it.
So to make this quilt, you're going to need one packet of 10 inch squares, and we have used Green Thumb Sundays by Edyta Sitar for Andover Fabrics. You're going to need some sashing fabric, and for that you're going to need one yard. And if you want to include your border out here, that first border is an additional half yard of fabric. Your outer border is also one yard, and this is a nice little four inch border. And then let's take a look at this back. The backing is really cute and you're going to need four yards for that. So let's go ahead and get started.
Now, a couple of things I wanted to mention about her pattern, because I'm doing version one, which is this size right here, there's a version one and a version two, and version two is just a little bit longer, you add another row on, and it uses the entire layer cake, version one only uses 36 squares. So on the directions in the back, she has you using one layer cake and one pack of mini charms. If you do version one, you have some leftover squares so that you can cut these little corner squares out of those fabrics and you won't need that little mini charm, so I just wanted to point that out.
But let me show you how to make this, because this is just hour glass blocks and it's so darling. But I love sea glass, I don't know about you guys, but sea glass is probably one of my favorite things to find and to see, and I just think it's so beautiful. So what we're going to do is we're going to look through our layer cake and we are going to find some contrasting fabrics. I've got one here that is a little bit lighter and a little bit darker. We're going to put two of those together and we're going to draw a line diagonally on here like this. Let me grab a pen. We're going to do this to 18 sets of fabrics, so we're going to go ahead and put them together, draw the line, and sew on both sides. Let's go ahead and do that.
I'm just a quarter of an inch on either side of this line. We're going to do this to all of our pairs so that we have some other ones to choose from when we start putting them together. So go ahead and do all of this first, we'll press these open, and then I have some other ones made here that I can show you how this next part works. Hour glasses are fun, I enjoy making them. I just think they're easy to work with and a lot of fun here. I have another one done here that I'm going to go ahead and cut right in half, and then this will give us some different pieces to work from. All right, let me press this.
All right, so now we have these two pieces and you want to kind of mix them up. You can see when you make these blocks, it's four different pieces of fabric and I like how that comes together. What we're going to do next is we're going to draw a line diagonally again, but we're going to go right across the seam. Let me go ahead and do that. I just use a regular pen for that because it's going to be cut, you're going to cut on that mark anyway.
What you want to do is you want to make sure that your seams are going sideways so that you'll end up with four different colors like this. So what I'm going to do is I'm going to lay this on here and I'm going to feel for where this matches up. Now, my seams are actually both going the same way, so I'm going to come over and press this seam the other direction, so that my seams will nest nicely and I won't end up with bulk right there in the middle. All right, so we're here and you can feel, oh, turn, always check. All right, so we've lined our seams up and we're going to pull this back and make sure that we have four different fabrics. What we're going to do, just feel right there. There shouldn't be any play in between there, they should be snugged up really tight.
Now we're going to sew on either side of this a quarter of an inch. And on the other side as well. I always say sew on either side and I should say sew on both sides. All right, so now we're going to line our ruler up and we're going to make this cut. We should have a block with four different fabrics that looks just like that.
Now, I'm just going to press this open and then we're going to square this to eight and a half. We want all of our blocks to end up eight and a half, and so there's a couple of ways to do that. You can use a squaring block. Right here, I have an eight and a half inch block and it has a diagonal line on it, and it has the center mark. The center mark you're going to see right here, you're going to line that right up where all those seams intersect. Then this diagonal line is going to be right on this seam and that will help you line that up just like that. So you can do this one this way and then I'll show you how to square the other one with my other squaring tool. There's lots of ways to square a block, this is just one of them.
I'm going to go ahead and turn this a little bit and realign it back up. Make sure my diagonal stays in the diagonal and my center point stays right in the middle. There we go. And just cut this last side, so now you have an eight and a half inch block. So even if your seams aren't exactly perfect, we're going to square this up and it's going to be perfect.
Let me show you then how I do this one. So this one, it's easy to use the Clearly Perfect Slotted Trimmer if you have the larger one. These are eight and a half and so I'm going to look on the eight and a half line, and I'm going to lay my stitch line on their stitch line. The cool thing about this ruler is that it also has this up and down line, and so you can line that up on your stitch line as well, it comes up the middle here. And we're just going to hold this down and then we're going to trim this off. This is before you iron it, before any of those things, and you can come in here and trim off your little corners so that you have less bulk as well. Then you can press this open and this will also be eight and a half. So there's lots of ways to square block, you just do what works best for you.
Once you get your hourglass blocks done, what we're going to do is we're going to put the block together. This is what the block looks like, and it's put together with sashing and a cornerstone. So what we're going to do is we're going to take our sashing strip, and the middle sashing strip right here on the block, this is the one and a half inch strip. So you'll go to your background and you'll cut your one and a half inch strip, and we're going to cut this the same size as our blocks. So I'm just going to trim off this little edge right here, and then I'm going to come up and cut this eight and a half. So I'm going to turn my ruler this way and slide it up here to eight and a half. You'll get four of these out of each strip, which is enough to do one block.
So then what we're going to do is we're going to sew our sashing to the block just like this, and it will come over here to the next one, like this. Then we're going to sew the bottom two together as well. And then we'll stick these in here this way. We still need that cornerstone. Now, on the pattern, she talks about cutting it from a mini charm, which is a little two and a half inch square, but we have some leftover blocks, so I'm going to go ahead and cut a one and a half inch strip off this block, and this will give me several blocks for my sashing cornerstones. I'm going to cut a one and a half strip, and then I'm going to cut a one and a half inch square, and that will be my cornerstone.
Let's go ahead and put these blocks together. I'm just going to lay this sashing on here. I know you've squared your blocks, but it will help keep them squared up as well because we've cut the sashing to the size of the block. So we're just going to sew a quarter of an inch right down this side. Then I'm just going to finger press this over. Then we'll add that other block like this, lay it right on the edge and stitch it down. Then we'll do that to the bottom two as well. Now, I want to make sure that these all look different, so I'm going to put that guy over there and this guy over here, and we're going to sew that to these two. Sashing is such a great way to show off a block. It sets it apart and just shows it off. Again, I'm just going to finger press that down and add this other block right here, line it up.
All righty, so now you want to press these, and I like to press these to the middle, like this, and then this one to the middle as well. But what we're looking for is a nice flat block, so either way you press is okay. So we'll push this one to the middle and push this one to the middle. All right, and now it's time to add our other sashing, which is going to go right here, and then this one's going to go here, and we're going to add this little inch and a half cornerstone right here in the middle. So we're going to sew that to our sashing piece first and then put this strip on here like this. Then we'll go ahead and we will add this to our block set, and we'll be lining up this middle part right here. So if you've ironed in, these two pieces can be pushed to the outside, and that will reduce bulk on your seam as well.
So we're going to come over here, line it up, and then I just sew along and I nest these middle seams, because that's what I want to nest up. And this one. Then we will add this top part on here in just the same way. We just sew along this edge, making sure we're lined up on the edge, and sew across. Check our middle so our seams nest up with that little tiny baby block. And then we'll sew right down this side.
All righty, so now let's press this open and see how we did. It's looking pretty good, you guys. All right, so this is what it's going to look like right here, and that's how it fits in the quilt. Looks pretty good, right? I mean, I like it. So when you get all your fours together, that have this small inch and a half seam, inch and a half sashing strip, then you're ready to add your bigger sashing strips. It's done exactly the same way. You're going to cut a two-inch strip and two-inch cornerstones, and you'll just block up your big blocks, and then you'll add that to the border out there as well, and it's just a two inch.
So the pattern comes together really easy, really quickly, it's fun to do. I think it even looks like sea glass. And I love that Sherri gave us permission to use her pattern Sea Glass, from A Quilting Life. Thanks, Sherri. We hope you enjoyed this tutorial from the Missouri Star Quilt Company.
Hi, everybody, it's Jenny from the Missouri Star Quilt Company. We hope you enjoyed watching this video. If you aren't already part of the Missouri Star Quilt Company family, be sure to subscribe so you won't miss a thing. And if you click that bell, it'll notify you every time a new tutorial comes out. See you next Friday.



