Skip to content

Free quilting video tutorials from Missouri Star

Quilting Tutorials
How To Make Cuddle Plushies - Free Project Tutorial

How To Make Cuddle Plushies - Free Project Tutorial

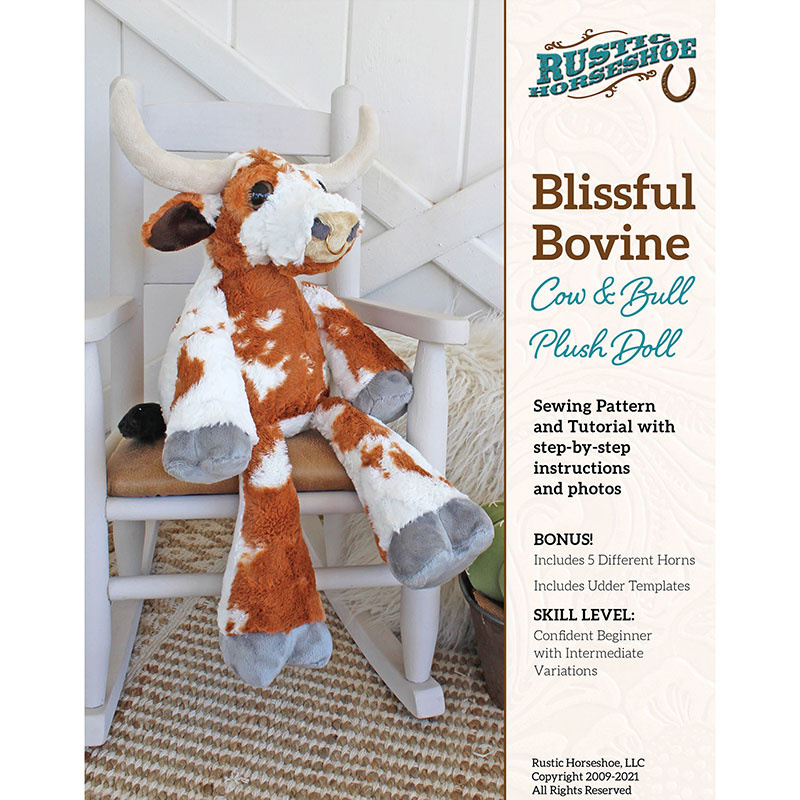
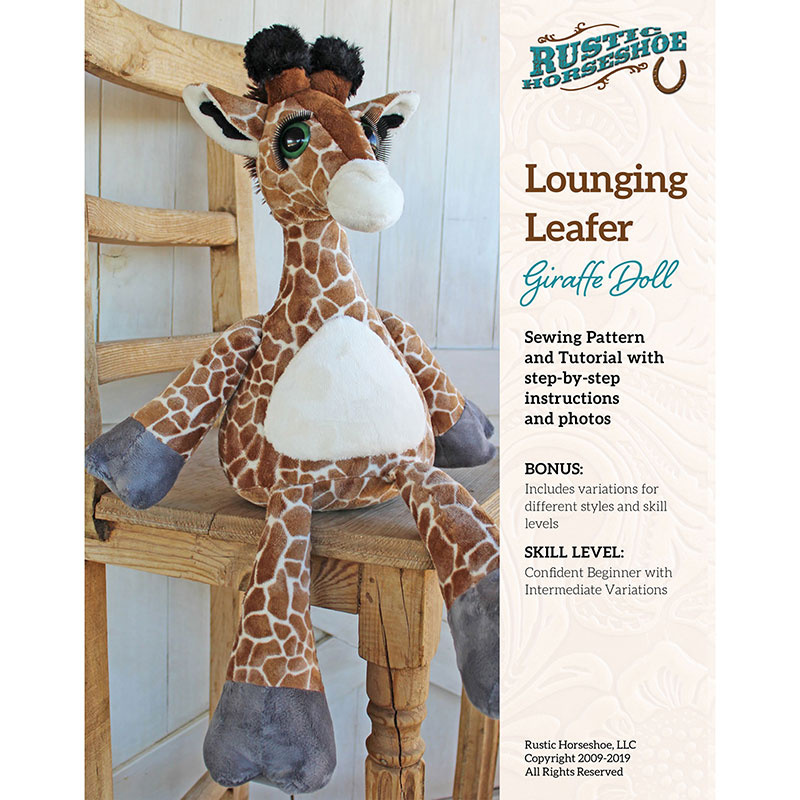
Plush, cuddly, and perfect! Join sewing specialist Teresa Coates as she demonstrates how to make extra special plushies for the littles in your life using Cuddle minky fabrics. You can make fluffy giraffes, elephants, hippos, and sew much more! Kids and adults alike will absolutely love to snuggle with these adorable plushies!

Instructor

Shannon Fabrics/Teresa Coates

Shannon Fabrics imports and distributes several different types of fabric, including super-soft Cuddle® minky plush fabrics, Embrace® double gauze fabrics, terry cloth and other novelty fabrics. Teresa Coates is a writer, editor and maker. Currently she is the National Educator for Shannon Fabrics and the host of Sew Together Tuesday.

Common Questions

What is covered in How To Make Cuddle Plushies - Free Project Tutorial?

Plush, cuddly, and perfect! Join sewing specialist Teresa Coates as she demonstrates how to make extra special plushies for the littles in your life using Cuddle minky fabrics. You can make fluffy giraffes, elephants, hippos, and sew much more! Kids and adults alike will absol...

How long is the tutorial video?

The tutorial video is 01:46:46.

Are supplies listed for this tutorial?

Yes. The tutorial page includes the supplies and materials connected to this project.

Video Transcript

[Music] hi I'm Teresa coats I'm the national educator for Shannon fabrics and I am thrilled to be here today at Missouri Star Quilt Company to teach you how to make this bow Vine from the pudgy plushies collection from the rtic Horseshoe these are some of my favorite stuffed animal patterns and I'm really excited to share all of the insights that I have about them so we'll be making the bow Vine today which is part of the pudgy plushies collection but I wanted to share with you some of the things about it that make it part of that so there's a a sort of a theme throughout these patterns that are the same and you can see some of them behind me they have this typical sort of pyramid body shape the legs come out at the bottoms the side the arms come out of the sides and then they have very different facial features and that sort of thing to distinguish them between each other and she has a wide variety that are available here all right so let's take a look at the pattern I'll show you some of the things that I really particularly love about this one this one is the Blissful Bine the one that you see on the cover here is just like the one that I made but there are a variety of other choices that you can make to make it essentially yours all of these will be included in pictures you can see the variations and all of these different features are available to make in the pattern she'll show you how to do all of those so the pattern includes an introduction to it it will include lots of pictures to show you different ways that you can make it all the supplies that you would need which we're going to talk about and then color pictures throughout the entire pattern which is just fabulous and I love that she gives you lots of choices that you can make to make the animals specifically for you including one of my favorite which is the eyelashes putting in the eyes all sorts of stuff and then she also includes at the back she'll include more inspirational photos for you to see to see if you want to make yours similar to that as well well as a list of actually the products that she used to make the ones in her samples so I think this is a great way to be able to recreate exactly what she's done or to set you off on your own creative adventure of making stuffed animals so the pattern also includes full-size template pieces that you'll be able to use to make the pattern when I do this I actually cover mine with a laminating sheet to keep them more durable for all the tracing that I'll do and all these are 100% and available for you to use just cut them out and we'll Trace them as we go so for the Blissful Bine today I chose the same Fabrics that The Rustic hor she used in their pattern to just recreate it basically exactly like she did but you can use your own choice of Lux cuddle and cuttle fabrics for the body it's the Lux cuddle calf but you could use all sorts of Lux cuddles if you're curious what a lux cuddle is it's just the longer napped cuddle so a Luxe cuddle is 10 mm nap or more so some of them are very very very long a couple of inches long and then we also have the C3 or the cuddle 3 which is what I used for all the Hooves the horns and the muzzle and also the inside of the ears and cuddle 3 or sometimes I'll call it C3 is just the cuddle that's actually a 3 mimer nap so sometimes people refer to it as the regular minky or a flat cuddle that's all that is so those two vary uh between and you can have the flat one or you can have the fluffier one depending on which look you're going for and I love playing with them together to create a really fun textural experience so beyond the fabric here are some other tools that you're going to need to make this project I've got 24 mm safety eyes that I'll be using as well as polyester thread some stretch needles we want to always make sure that we're using 914 stretch needles when working with cuddle Fabrics because it's a knit will help you not skip stitches which is really important I also have a marking pen for tracing out my patterns a by Annie stiletto which will help me a lot when I'm trying to work with those small pieces I use also use a craft knife this is one from olula that will help me cut out Fabrics to make less of a mess I've got my point Turner and a water soluble marker I also have my Ken k Buckley scissors which are micro serrated which are my favorite and we'll need those for cutting out the cuddle as well and then long flower head pins so to start with this plushy we're actually going to start with the ears and I've already made one but we're going to cut out and sew together another one I'm going to show you how we do it with this one we need one side that's the Lux cuddle and one side is the charcoal cuddle three so we're going to use those and we need to cut out opposites of either one so I'm going to go ahead and I'm going to trace around them first and then we'll cut them out okay so I'm just Trace all the way around it this says nap Direction on it and this is important to make sure that you are taking care of that when you are using something that is very clearly napped this fabric isn't quite as obvious because it has a lot of embossing and texture so this one doesn't matter quite as much we do want to make sure that it's going the widthwise of the fabric which is the stretch is widthwise on it when I'm tracing that out so I've gone ahead traced it I'm going to mark my fold line very lightly this is the top Edge knp bottom and then I have a little F right here that I'm also going to mark on my pattern to do that very lightly with the Sharpie it won't show through to the other side and we'll go ahead and mark the opposite the reverse over on the cuddle three so I'm just going to flip my pattern over trace it out this one I want to make sure because cuddle three you'll be able to tell the nap if it's wrong so if I kind of pet it down and I pet it back up you'll be able to see a difference in what the nap does this is the nap heading down so I'm going to go ahead and put my pattern on there and then Trace right around that go ahead and Mark my corner again and then I believe my little F was down here in this corner so I'm going to mark that sometimes on these pieces I'll go ahead and Mark what it is so I can remember when I've cut everything out and if there's white on the fabric I try real hard to put the writing in an area that has a little color even though it won't show through I just want to make sure all right so now we've got these both traced out out I keep my pattern here and I'm going to cut these out because they are different lengths of nap this one is 3 mm this one is 10 I'm going to cut them out a little differently so with my micr serrated scissors this is what I'm going to cut the Luxe cuddle with and the reason I do this is because I cut just the backing fabric as I come around so I'm going to start up here and I'm just going to stick the tip of my scissors underneath the backing and snip my way around the whole thing being careful not to cut too much of the nap so if you've worked with cuddles before sometimes people get worried because it makes a mess but if you cut it carefully you will have less mess still have a little bit of mess because it's soft and fluffy so work my way around I'm also going to show you how I can do this with the blade which is also like a craft knife and I can go ahead I just hold a little pressure and I'm going to run it along the back along those those lines I just carefully drag it and it will cut the backing only which allows me to make less of a mess as I work my way around so I'll finish that up come all the way to the other side just making sure I keep some pressure on it as I pull it so for me I think the blade is a little bit easier for me but I also have a lot of practice if you're new to it use the micr serrated blade on the car K Buckley scissors and you'll have just easy of a time all right go ahead make sure all of those little bits are trimmed and go ahead and move that okay so now with the cuddle three ear I'm going to go ahead and cut it with my rotary cutter it doesn't make nearly as much mess I've traced the line just going to go ahead and cut all the way around it I could also cut these with my scissors but for me the rotary cutter is a little faster so I prefer that okay and you'll see that it makes much less mess all right so now we've got it to this point we don't want to take it and just go sew with it yet we need to get rid of the mess so I'll show you my favorite technique for getting rid of cuddle three mess is I'm just going to take it over here and I'm gonna flick it because we want to get rid of this mess before we get it over to our sewing machine we want to keep that stuff out of the sewing machine machine so I'll always get rid of the mess away from that same goes for this you can also if you're going to make a an entire plushy which obviously you're going to you're going to take it to the you're going to cut out all your pieces then take it to the dryer throw it in the dryer for about five minutes with a wet washcloth in there let it tumble around and at the end all of that extra cuddle dust we call it ends up in your lint trap and not in your sewing machine so that's very helpful way of making this a totally doable project so now we're going to go ahead and we're going to sew these two together and I'm just going to start pinning on the pattern it shows me here that I'm going to leave this Edge open so when I put these two together I'm going to make sure and not pin that section because that's what I want to leave open as I sew so I'm going go ahead and pin where I want it to start or stop and do the other end as well that's the way I always pin cuddle is I pin the important parts that I want to keep together and then I go ahead and pin into between so I'm just going to pin in larger chunks here and then I will come back and pin in between and I'm just going to kind of feel you can see that the Luxe cuddle goes right over the edge because we didn't cut all that off if you don't want all that fuzz you can cut it with the scissors or with the rotary cutter and just cut it off but I kind of like it being there because I can fluff it up from the outside later so I just kind of do a little double check make sure I'm getting both sides and go ahead and pin all the way around so on these parts that are the curves I'm going to go ahead and pin another part in here just to keep it exactly where I want to coming around the curves on a knit can always be a little a little dicey there so we're just going to add another pin in to keep it in position so I go ahead and I'm going to sew this on the sewing machine so I've got my machine set up with polyester thread and my 914 stretch needle I also just have it on a straight Stitch I have it at a 2.5 Stitch length which is actually smaller than I usually work with with cuddle normally we make it a three or a three and a half Stitch length but when I'm working with a plushy I want to make sure that that Stitch is a little bit tighter because it'll hold it better especially when you give it to a child who is going to love it and give it an extra little test of your durability so we try to get a little bit smaller Stitch length and I'm actually using a quarter inch seam allowance which is also different from when I usually work with cuddle fabrics and that's because the the stuffed animal is made with the quarter inch so I'm just following the pattern for that it works out fine we just do want to make sure that we're catching all of those seams so I'm going go ahead and put my foot down I've got my needle ticked over so I've got a quarter inch underneath the foot I'm going to go ahead and sew do a little back stitch catch that seam I'm going to want to do that with all of the seams that I'm making just going to stitch all the way around kind of lift that foot make sure that the fabric will slide under nicely okay so stop and pivot as you need to around those Corners it can get a little bit tight the the pins will help keep it in place but you'll definitely want to adjust a little bit sew all the way around and back stitch at the other end all right so now we're going to go ahead and turn this Inside Out turn it right side out clip my threads and then I'll just go ahead and turn this because we're working with cuddle which is a knit fabric you don't actually have to clip any of those curves which makes it one of my favorite aspects of making the stuffies with cuddle okay so now I'm going to go ahead and as I work through this you're going to see that in your seam allowances it gets kind of caught in there so I just use my stiletto and I come in here and I fluff it right out and I'll do that as I'm working through the project so that by the end of it it's all lovely and I'm not really not pulling out those threads I'm just kind of scraping at them which makes them pop out of the stitches there okay so I'm going to go back and where I have the little marks for my fold line I'm going to put a pin in right there you can see the line is right here on my on my pattern I traced it and now I'm just folding along that same line on my actual fabric pieces so stick a pin in fold it right tight along that pin go ahead and stick a pin in here then I'll move this pin rearrange it go back and I'm going to zigzag that edge as a basting stitch all right so we're going to go ahead and change this Stitch over to a zigzag I'm going to make it a nice big wide zigzag because I'm just using it as a basting stitch so this is a three and A2 by three and A2 go ahead and just Stitch this down along that edge and just going to hold it in place until I Stitch it to the actual head all right so now I've got my ear I've got my other ear and I'm going to set those aside so following along in the pattern The Next Step we're going to do is to make the horns and I've chose to make the nub horn this time with just just a small little horn we're actually going to sew this together and stuff it before we put it onto the face in the next step so let's go ahead and make this we're just going to put these together they're cut opposites of each other put them right sides together I'm going to go ahead and pin them the same way that I did before I'm going to leave the bottom open I'm going to go ahead and pin the start and stop of my seam I'll pin the center and then I'll pin in between one of the things that I found that works well for pinning with these is these three I pinned from this side if I go ahead and pin from the other side it tends to help it make it lay flatter as I sew it go ahead and pin there and there that should be enough I'm going to sew around this seam here tells me on the pattern that I'm going to leave the bottom open so that's what I'm doing then I'll come back in and I'll use the marks that are on here to tell me where the placement is so I haven't transferred those marks because sometimes they'll show through more on the cuddle three we're going to go ahead and sew that now so we're going to go ahead and Stitch all the way around again with a/ quarter inch seam allowance do a little back stitch and work our way around and again as I use these sew these little curves I'm going to kind of use the pins as steering wheels and then take my time and kind of adjust as I need to go it's really important to keep these curves nice and smooth so take your time with them and again we're doing this at a/4 inch seam allowance with a 2.5 Stitch length so nice and smooth easy to go around those corners for a nicer finish get to the end back stitch equip okay and again because this is Cuddle we don't need to trim those curves we're just going to flip it inside out now I can go ahead and I can take my point Turner and kind of run it along those seams make it nice and smooth so now we're going to stuff it I've got some silky polyfill here today which is my favorite kind of polyfill for using with the stuffed animals and mostly because it's just super duper soft and it doesn't ever Clump I'm always kind of surprised at how much you actually have to put in there so I say a little bit and it's going to seem like a lot okay so we're going to go ahead and put this in just shove it right in there it's super duper easy and I love how smooth this stuff is makes it really just a lovely finish for your stuffed animal we'll do that for both sides I'm going to go ahead and I'm going to actually so I'm going to push the stuffing in extra far and then I'm going to pin so that the stuffing stays back just a little bit so that I can sew that closed along this Edge to keep the stuffing where I need it to be for right now so we're going to go ahead and zigzag this Edge I've got it set up at a nice big wide zigzag again go ahead and stick the needle down on the left side put the foot down and then then I'll take my pin out as I start sewing so that I make sure I not hit that pin I'm just trying to base that edge shut like I did with the ear as well okay so I keep wanting to call these ears and I just realized it's because it says ear down here and I keep messing that up but we want to be clear these are the horns and here are the ears and the next step is to put these onto the face so on the face I've got the pieces cut out and I've got them labeled and marked just like it says here we want to make sure and follow these instructions and she has very clear guidelines in the pattern that you can follow but she does give you placement lines for where you want the pieces to go so I'm going to go ahead and I'm going to put the ear and the horn on we're going to put them in the right order so we're going to start with the horn and then place the ear if we look at the patterns we can see how they're going to come together so the ear is going to go here the horn is going to go here and the ear is going to go below and behind it so first I'm going to put the horn on matching the E with the top of the horn and I'm going to come over here and pin that in place and I'm actually going to base it on on both sides before I place the ear for me when I'm trying to do too many layers it can get difficult so I just do one layer at a time I'll base and then I'll base the next one on so this one I know the ear goes on the same way same shape put that in position I'm going to go ahead and pin it in place and I'm going to pin that twice making sure that the raw edges are basically matching okay and I'll pin it twice just to hold it there really nicely for me all right then we're going to go ahead and base these down with a zigzag [Music] [Music] so one done here's the other one again just basting it in place I find it a little bit easier to do the zigzag Stitch as a base because it will hold down a wider area and I might be able to catch a little bit more than I would if I just tried to straight Stitch so when it gets a little bit tight sometimes like this under here I'm going to go ahead and I'm going to use my stiletto to kind of poke through the one layer and into the bottom layer to keep them together and just try to guide it toward the needle we'll clip our threads and add the ears so again I'm place these down just like I had the pattern so we can see where these go so the ears go next in the bottom of the ear Place bottom of edge of ear here so that's how I know where it's going to go all right I'm going to can come put it on here and I always like to do a double check so I'm going to pin this in place as if I had sewn it so I'm kind of going to put a pretend quarter inch seam in here turn it and make sure yes that ear is facing the right direction now all right It's always important because you can put those on backwards because you can't see the inside of the ear which sometimes can seem a little bit confusing a lot of times we want to kind of put the ear on so we can see it but that's wrong so always make sure and do a little double check okay so I'm going to repin this perfect L now or at least as close to it as I can and it's going to just barely overlap the bottom of that little horn and that's what we want so go ahead and pin that I'll do the other one make it match the same way I know it's going to work CU we we have one ear for each okay so again I'm going to match the f mark here with the bottom of the ear pin it in position position there first and then head up and pin the top of the ear in position and again we'll base that in position let's go ahead and sew these on so again I'm just doing that zigzag Stitch and the zigzag Stitch not only does it base it but it also helps kind of Squish down that edge a little bit so when we do the next see it's a little easier just going to do a double check make sure that my PL pieces are all in the right place that I want them to be nothing shifted on me which can sometimes happen I'm going to go ahead Stitch that down making sure to keep this as flat as possible I can kind of use those pins to help me guide it along all right okay now we can see it's starting to come together we've got two sides of the face so now the next part we're going to sew the top from A to B and C to D so I'm just going to put those together try to keep the those horns and ears out of my way and I'm just going to pin along the top and then we'll go back to sewing with a straight Stitch so again pinning a corner in a [Music] corner and then in between when I'm doing these shorter seams to I'll often pin perpendicular to it and if you've seen other tutorials we do longer seams a lot of times I pin parallel to these edges but on these small especially curved ones I will pin this way and it does tend to hold the fabric a little bit better so C to D and then in between all right let's sew those so we're going to switch this back to a straight Stitch and I've actually got it pushed over to the left hand side for the needle because it gives me a little bit extra room under there where I can see my quarter foot and where I can actually keep a lot of the bulk outside of the foot this see I'm going to go ahead and back stitch because that one I need it to be nice and strong we're no longer in a basting stitch this one is going to hold it together back stitch and I'm going to go ahead and I'm going to check my seam on both sides just make sure that it caught a lot of times it'll want to kind of shift on you a little bit so if you can notice this seam is not exactly a quarter of an inch it's much more accurate over here it's totally fine as long as both sides are caught we're good make sure that it's nice and nice and snug seam right there and we're go ahead and the bottom seat do it the exact same [Music] [Music] way so my dirty little secret is that I don't really clip my threads ever but it looks terrible on camera you have these threads everywhere but when I make plushies for samples the insides are just crazy so don't open up the v b Vine that's all I'm saying don't do it all right so now this is when it starts really starting to come together my favorite part about making the plushies is you really can start to see it kind of come together and become a thing pretty quickly and it really is super fun so now now we've got his face together we're going to do his muzzle next so the next part is we're going to be making the muzzle and this is actually in two pieces we've got well it's actually in four pieces but there's two parts to it there's the sides and then the actual part that comes around the front of the muzzle so we're going to create this first and it's got three pieces it has a top muzzle the nose panel and the bottom muzzle these are all part of the gusset when you're doing the bll ring for the nose you're going to do this part a little bit differently and that pattern is those instructions are in the pattern we're going to do it without the nostrils again we're going to pin each end to make sure that those match and then pin in between because this is a nice straight seam not going to do the extra pinning should say just fine it's a very short straight seam okay straight Stitch quarter inch seam allowance go ahead and back stitch again these are all going to be important seams that need to stay together so we need to make sure and secure those with the back stitch so we've got the top muzzle sewn to the nose panel okay so top muzzle gusset sewn to the nose panel and now we'll sew the bottom muzzle gusset to the bottom of the nose panel for me it's very helpful to kind of lay these out and really look at them and compare them to the pattern Pieces Just so I can make sure I'm doing it right with sewing the plushies sometimes you'll be making pieces that don't actually make any sense visually until you start to put them together into more of a hole so make sure to follow the actual pieces and the pattern carefully [Music] all right so now we have the completed muszle gusset which is going to go on the side with the muzzle sides all right so on here we have some marks that tell us is where our nose seam is the nose seam that's what this is so we're going to match this seam and this seam here all right so as we're putting it together we're to make sure it match those places as well as the end pins and then pin in between there might be a little bit of easing that has to be done you'll notice that on the Lux cuddle it's a little harder to see where those are on this side because the edges are so soft if that is a little bit of a a barrier to you you can absolutely go ahead and trim off those edges I just leave them fluffy so that I can keep the seams nice and fluffy and also I've gotten used to working with this but if it does bother you go ahead and trim that off okay so we're going to go ahead and pin this on this we remember right on the pattern this one is going to this seam so I'm going go ahead and pin that there and then I'm going to pin this to this corner up here the top Corner then I'll pin the next seam which was that H Mark goes to the other seam on the nose and then the last one will curve around down here on these pieces it definitely seems like it's not going to work when you first start pinning it you'll be surprised it'll work itself in just fine so trust trust the process trust the pattern they're well well designed and they will definitely work out even when it seems like it might not besides the fact that cuddle especially the Lux cuddle is really really forgiving in this so if you your seams aren't perfect they don't match up exactly it's all going to work out just fine you're still going to end up with a lovely lovely little p plushy so lots of [Music] pins I just kind of deal with little visual double check make sure that my raw edges are matching and you end up with all of these pins and it can seem a little bit crazy on seams like this if there's too many pins and this starts to feel a little overwhelming you can go ahead and handbase this and then take it to your machine and sew it and sometimes that's a little bit easier and I find myself doing that for certain seams but this is one that is to they're all totally doable on machine all right but we're actually going to sew it from this direction so that's one of the things when you're working with the plushy patterns is you want to make sure that anything that has bulk is on the top and that the flatter part is against the foot or against the feed dogs of your machine all right so I'm going to go ahead and Stitch quarter of an inch all the way around all the way around a little back stitch and just work my way around I'm going to try not to get any little pleats in there can kind of stop readjust things make sure that they go where you want it to just make sure that you have lots of pins and that you're not actually stretching the fabric as you go as I work my way through I can keep my still Toto handy and kind of feed it underneath the foot just a little bit if you get the tiniest little pleat you're fine I wouldn't worry about it but try not to get too much in there so I'm going to stop when I get to the seam I'm and I kind of readjust make sure because this was actually like a corner so I want to make sure that I'm going in the right direction it's going to turn just a little bit as I come up that nose I'll just take it nice and slow and then just adjust as I go if you have a pivot function on your machine this is a great time to use it you'll be able to kind of just work your way around so again I'm going to go ahead and double check my seam make sure I caught everything if I didn't I'm going to go back which you see I missed a little bit right here just came to the edge take it back in take a little bit bigger take a little bit bigger seam allowance make sure that I'm catching it so I'm going to sew it from this side where I missed it before so I can see it make sure I catch it because we're working with the Lux cuddle it's kind of amazing how much you can hide in here that we'll be able to stitch this over take a little bigger steam allowance and no one will be any [Music] [Music] wiser okay so now we've got one side of the muzzle sewn on we're going to go ahead and do the same thing on the other side all right so now we've got a cute little muzzle all right so the muzzle my little mom voice comes out it's just so cute okay so now the muzzle is going to get sewn onto the face the way that this is done is this is kept this direction this is kind of oops folded over let's try that again so this is going to have to get sewn on to here so the muzzle is going to get sewn on to the face we need to bring these right sides together so we're going to kind of fold the face over the muzzle okay so I'm going to go ahead I'm going to Mark the I'm going to match the center Mark for the top with the B here to Mark the center of the top of the head and the B that's in the top of the muzzle and these are going to match together so as you go through the pattern make sure that you have transferred all of those numbers the lines all of that sort of markings that are on there as they will help you put that together accurately sometimes it's very hard to tell where things are supposed to go except for those markings so down here we have the same thing we have a center line that's going to go with the bottom chin spread that seam allowance open as much as we can just get it nice and flat and we're going to go ahead and pin this circle again this is another place that if this feels a little too small for you to sew you can go ahead and handbase it and then put it under the sewing machine and that makes it a lot easier this tiny Circle can be a little bit intimidating but if you just take your time with it it'll be okay so I'm going to go go ahead show you how I hand base this when I need to we're going to do that just to give you an idea so I just have a double threaded needle so I've got uh the double strand of polyester thread on just a needle and I'm going to go ahead and I'm just going to take nice big basting stitches all the way around this at about a quarter of an inch so I'm not going to use this as my seam allowance and I'm not even measuring it I'm just trying to to get a basting stitch in here so that I can then take my pins out so just nice big stitches all the way around and as I get an area covered I can go ahead and take these pins out because now the basting stitch is going to hold it in position for me and after I do this I can check to make sure that I caught both sides make any adjustments as needed before I take it to the sewing machine so while it's a little bit of an extra step it can be very very helpful on these small curves or on things like this where we have a we have a full circle that we have to sew sometimes that can be a little bit a little bit extra so this stitching makes it so we're not fighting pins and we're just able to smoothly sail all the way around okay so I'm back at the beginning going to go ahead and Stitch past where I started just a little bit just so it'll catch go ahead and take the rest of those pins out kind of double check it all the way around make sure I can see those basting stitches now I can just kind of Follow that follow that path I'm going to actually make sure that I've got a quarter of an inch seam allowance but I'll follow that whole path and if I need to take out any of the stitches afterwards so they don't show I can do that okay so again quarter inch seam allowance I'm going to go ahead and I'm going to stick it under on the side of his face because it's a little bit easier place to start there's a a longer straight Stitch or straight seam that we're going to do and then we'll start working around that that curve and again I'm just going to take my time with this and just try to flatten things out as I go work my way around and just be very careful with it and if I start to see it get a little bit off I can just kind of readjust fix things as I said the Lux cuddle cuddle in general is very very forgiving fabric so if there are any little issues they're generally going to be just hidden in all of that fluff just perfect okay so take my time kind of guide it with my stiletto here make sure it's going where I want it to and again keep kind of flattening it as I go make sure I'm catching where I need to work my way all the way around so as a spot down at the bottom where the seam allowances didn't match up perfectly and I just made sure it caught on it and that's all that matters if there's a little bit bigger seam allowance on one side than another it will all come out in the wash or you know stay there after we've stwn it all right let me make sure it's all good and go ahead and kind of come around give it a little pull make sure everything is caught and that my finger behind it isn't going to pop out so if I'm coming around here and I I can feel my finger kind of come through the seam that's when I know I have to go back around now I can't see anywhere in here where my basting stitch is showing so I'm just going to go ahead and kind of FP up those edges while I'm here make that all nice and smooth okay you can kind of just pull it open and you can see where the the fibers have been caught into the seam allowance and then just go ahead and fluff them out see for those side seams we'll see if there's anything make sure it's all looking good all right there we go getting a little face so now we're going to sew the face onto the front body so I'm just going to to take the front body piece which has a section here that you can actually create an applique if you'd like to which is common in M many of the pudgy plushy patterns there's an actually an applique that you can make it more personalized so that it's looks like your favorite Catt cow or your favorite horse depending on the pattern that you're using um so this is a very common applique area so I've gone ahead and I've traced this it's done on the fold and I will tell you when I cut it I make sure to cut it so or trace it out I make sure to trace it out so that I trace one side and then I flip it and Trace the other side I don't actually fold it so it's really important that when you're tracing this you do it one layer at a time and cut it one layer at a time when you do it two layers at a time it's much more likely to shift because of the layers of the because of the depth of the nap it'll kind of move and you won't get an accurate cut so make sure you trace and cut this one layer at a time then I've gone ahead and marked it because the front and back body panels are exactly the same shape so I've gone ahead and Mark this as the front and then I left the marks for where the leg front goes the markings for the back are the leave open on back and the tail marking so there are some variances between the front and the back panels make sure you mark those on there all right so I'm going to go ahead and I'm going to turn this over this is going to get sewn onto here here's his neckline and again we're going to mark we're going to pin it at the end and the end and then pin in between okay so I'm going to go ahead and I'm going to just kind of stretch that make sure not really stretching it just kind of keeping it taut make sure that it's where I want it to be and go ahead and put those pins in there try to keep that nice and straight because the because the neckline is kind of a curve because it's two pieces that come in v and this is a straight one you'll have to kind of adjust it just a little bit play with it a little make it sure it's nice and flat all the way across then we're going to go ahead and sew this seam so I'm going go ahead and back stitch so the place you want to make sure that it's really nice and secure keep this nice and flat let me get my letto in here and kind of hold that in position where I want it to be sometimes because of the depth of the nap of the the fabric it'll kind of want to move around on me so I just have to keep an eye on it and then control it as I sew and the Stiletto makes a big difference in how well I can kind of control where that fabric is is going all right it's getting better all the time okay so now we've got the head the ears the horns and the front of the body so our little cow is coming right together now we've gotten the front done so now we're going to move on to doing the back we're going to go ahead and do the back head the tail and the back and put that together so first we're going to do the tail and the tail comes in two pieces it has a tail tip and the tail itself okay I've gone ahead and sewn one part together we're going to do that with this one I'm just going to match up the bottom seams pull them together and sew this little seam right here so one of the things that I found can be helpful too when you see these little pieces and they don't quite seem to match because of the difference in the Fabrics is if I look at the pattern and I can kind of see where things go is very helpful for me that I'm like okay this is where this is where it's at so make sure that you're keeping track of it like it'll tell you attach tip here is the tip it goes here the nap Direction always make sure that you're looking at that especially when you're cutting it out all right so we're just going to sew this one little quarter inch seam allowance and making sure to back stitch on this [Music] so I've got two tail pieces with the tail tip sewn on there I'm going to go ahead and put these right sides together and sew all the way around leaving this part open just like it says on the pattern piece that's what we'll turn it out through this is a part I've used the cuddle three for the tail tip which is that dark gray in the pattern she actually has a variation that you can do that uses a longer faux fur which you if you can find some scraps of it works really really well to make it an extra fluffy one you could also use a different kind of Lux cuddle that had a longer nap if you wanted to give it that extra extra fluff I don't even know what you call the tail part the extra little fun part down here some of her patterns some of the rtic Horseshoe patterns will include instructions for using yarn for different parts like that on the The Nutty nag that's the way the man can be done is with yarn which is super fun so I like the way that in the rest of coroe patterns she often includes variations that add different textures and make it just a little extra fun okay so we're going to go ahead there's my the tip is pinned nice and well because I've got a lot of curve to go around there I'm going to go ahead and pin up here those side seams are going to be a little bit easier to sew because they're just straight so so I'll need a fewer pins but I do want to make sure that the edges are staying together as I go so kind of doing a little Flip Flip look to make sure that those raw edges are actually matching and as with all the seams we'll sew it we'll check it make sure it caught both sides if it doesn't just go back over Stitch it again make sure it catches all right so again we're going to start at the top because we're going to leave that top Edge open so start up here secure the seam Stitch all the way [Music] [Music] around I'm going to kind of pivot when get to this tail tip seam kind of sew to the seam and as soon as I get to that edge where they meet I'm going to go ahead and lift my foot pivot out a little bit to add a little extra roundness to that tail [Music] tip come around to the corner and stop it about a quart of an inch out and I'm going to Pivot again to give it a nice sharp ending there and then continue to work my way around do the same thing when we come up here make sure it's curving in nice and sharp stopping again at that seam line between the tail tip and the tail pivoting and head straight back up back stitch take it out all right so I've sewn all the way around the tail now I'm going to clip off just the end of the tail just to make it turn extra nicely I'm going to go ahead I kind of pop that bottom in and I just use a pen of some sort to push it up there we go don't want to lose that cap in there I can go ahead and kind of use this stiletto to to pull out the edges make sure everything is nice and round pull out that end and again we can run the Stiletto up that edge pull the fibers out of the seam allowance and make it all just a really soft lovely finish and now we got a tail okay so once the tail is done we're going to sew it onto the body the tail is at the center back I'm just going to fold this real quick find my Center back pin the tail on totally doesn't matter which direction you want to do it we're just going to nudge the raw edges up to each other and then I am going to pin it twice so one one of the things that I found when working with cuddle is that if I pin it once on a place like this the tail is likely to kind of shift on me and move before I get it to the sewing machine or as I'm sewing it so I'm going to go ahead and put the two pins in there and I'll put the two pins in there and then I'll be able to sew it in it's not going to move on me all right again we're putting the tail in I would normally base this in most situations but this one we're actually going to be sewing the bum shut later along this Edge so I'm going to go ahead and I'm going to use a regular straight Stitch to make this a secure seam so it's a little bit different than we did with some of the other when we were attaching things together and I'm actually going to go all the way across with a back stitch and make sure that it's really secure one it will help it so that when I'm hand sewing it shut I have a line for where the quarter inch is but also if I were give this to a kid I am quite sure they're going to pick it up by the tail at some point so this makes that nice and secure on there and isn't going to come out Okay so we've got our back our tail now we're going to sew the back heads together side head so we've got two pieces like this marked I and J at the top at the top and bottom we're just going to sew along this whole back swoop of the head right sides together so we'll match that I'm going to get the end here matched and then make sure that that little swoop here at the back of the head I'm going to make sure that that matches as well stick a little pin in then I can go ahead and go all the way around and if I do this kind of like pinning further apart and then in between it really does help with the cuddle to avoid any stretching that can happen a lot of times people when they're they're pinning they kind of want to flatten it out and it will stretch it as you go around so doing this kind of further apart pinning and then coming back in between and pinning helps a lot to keep it from stretching and also keeps those edges nice and even all right I think that's enough pins so we'll go around and we'll sew this whole Edge right here all right I'm going to back stitch just a little bit do my Straight seam I'm going to secure that really well and then just work our way around this curve so I kind of need to Pivot every once in a while and make sure that the fabric doesn't kind of gather up on me you can absolutely do that just take your time make the fabric do what you want it to do now it's pretty easy with using using the tools that you've got the Stiletto and like I said the pivot function or just pivoting your foot like I'm doing you just lift the foot just a little bit pivot your fabric make sure it's going in the direction you want it to go all right so as we get this together there's one other place that I want to actually clip a curve so this is the back of the head one of the things that I found when I'm working with the cuddle is these round down curves will fold out just fine and be super smooth but sometimes these convex curves can be a little bit of an issue so I'm going to go ahead and I'm just going to clip just a little bit in here on either side so we allow that to open up and now we have the back of the head and again we're going to do the same thing that we've done before just kind of fluff up those seams pull that lux cuddle out of the seam allowances make it nice and pretty all right so now we're going to sew the back of the head onto the back of the body and we'll have a kind of a matching front and back and an edge an edge the middle all between okay I've got that and again I'm going to do that where I have to kind of pull it so this part here because there is a seam it wants to v a little bit more than I want it to so I'm going to go ahead and I'm just going to kind of pull it so that it actually goes where I need it to go and then pin it in position there so I'm not actually stretching the fabric but just getting it to be taut where I need it to be but because it's a knit sometimes the fabric will do some other things that are unexpected but there's always ways of controlling it and making it do what you need to so don't be afraid to kind of give it a little little pull make it be where you want it to be so we're going to go ahead and sew this seam to sew the back of the head to the back of the body all right so we're just sew this with a straight Stitch and again this is an important seam so we're back stitching we'll go ahead and sew across this whole seam then I'm going to double check it because this is another important seam that I want to make sure is caught really well so that when this gets played with it stays together so I'm go and check the back so my quarter inch is totally fine here it got a little small here but it's still caught you can open it up give it a little tug totally fine I'm just going to leave it as is okay so now we've got a back and we've got a front but now we got to make the legs all right so let's tackle the legs the legs are one of the options in the Blissful B Vine pattern that has two different options that you can use you can do a clov and hoof pattern like the sample here or we're going to do the round hoof today which is a little bit easier but if you're up for the challenge the clo and Hooves are absolutely adorable putting the legs together is one of the very common ways the pudgy Plushies are put together so it's a very common technique there we go it's a very common technique for the pudgy plushies the way that these legs are put together so I'm going to show you how we how we're going to do that I just want to show you the pattern pieces first for the two variations and how they're going to work if you're going to do either one of them all right so there are two leg sizes this is the important thing to remember when you're cutting out these patterns so sometimes it can seem like you have way too many pattern pieces and that's because you're going to have two legs and two arms is the way that they're referred to in the pattern the legs are the lower ones the arms are the upper ones legs are bigger arms are smaller so you're actually going to have a whole bunch of variations for all of these so if you decide at the very beginning which one you want to do it's a lot easier so you'll need to have two arms two legs and then it starts to get a little bit differently because starts to get a little bit different because you're going to decide do you want the cloven hoof or do you want the round hoof so we're not going to use these today so I need to put them aside which also means that we're not going to use these sidewall pieces that are for the cloven hose so we're going to take those away so today were're only using these patterns to create the arms and the legs so I've got my pieces I'm going to move these out of my way and show you the pieces that I've got so we're going to work through one of the legs today and here are the real pieces so I've got two of the hoof sidewalls this is the round hoof sidewall I've got the foot pad which is circular and then two of the legs so you'll have two two sets of these for the legs and two smaller versions for the arms to create all of the appendages the first thing we're going to do is sew the sidewall to the leg piece we're going to do that on both of those so I'm going go ahead and pin those together and they're going to be right sides together at this point it doesn't matter which one is right and left you've traced out two that are two that are right side up patterns and two that are reverse patterns and we'll put those together so that you have a turning Gap if you do it and you accidentally put the wrong pieces together don't worry about it it will be fine sometimes it can be a little bit confusing for folks but it really doesn't matter too much so I'm going to go ahead and I'm going to flip this over because this is a little bulky so I'm going to go ahead and flip it and I'm going to pin from this side and just pinning in between between to make sure that that the cuddle three part that's on the back the hoof is up to the raw Edge and wants to stay where it is I found that sometimes when I'm folding these together because the nap is going this direction on this piece and this direction a little bit on this piece they'll fight together so when you have pieces that are actually the opposite direction of nap sometimes it'll be a little bit of an argument between them and you'll have to pin sometimes a little extra and that's just to keep the edges even it's important to do so again pinning end end in between I'm using my Clover pins which are really my favorite for working with the cuddle Fabrics they're really nice and strong and they go right through okay so again I got it pinned I'm going to go ahead and flip it over pin from this side make sure everything is kind of where I want it to be move these just a little bit if you look on here you'll see the markings that I made that correspond the markings on the pattern for the leave open sections that's what these are you want these to correspond so that they're mirrored of each other if it doesn't work and you mess it up so that one is over they're both over here it's fine remark it it doesn't matter there's no real right and left of this pattern it's it's it's symmetrical completely except for this little Mark so those are transferable okay so now we're going to sew the Hooves on okay I'm going to go ahead and sew it with the cuddle the cuddle three side down I will say that sometimes it works better with the cuddle three down and sometimes it works with the Lux cuddle down so what I would recommend is that you give it a try see what happens if you need to redo the next one so that it goes through a little bit easier flip it over see what happens this seems to be working through just fine but I do know that sometimes it can cause some variances so go ahead and try it both ways see what works better for you all right we'll do the second [Music] leg all right so now I'm going to double check my seam allowances make sure not that they're even but just that they've both caught totally fine so now we have a front and back of the leg so now we've got the two leg Parts we're going to sew them together but before we sew them together I want to do a special little stay stitching seam I call it along these edges and I do it because it's turn it helps make that turning Gap a little bit easier to turn and to hando later so I'm going to show you how I do that basically we're going to take a stitch just along one layer a quarter of an inch Just Between the Lines for the Turning Gap so it's again it's just one layer and this is just something I have found works really well when I am needing to create a turning Gap with cuddle fabric because it's a knit it's hard to see where the turn is supposed to be or to get an accurate seam allowance when I'm just folding it from the front but when I do this little stitching line I'm able to see exactly where I need to turn it so I'm going to do that with both sides [Music] okay so now I've got two mirrored legs they both have the stay stitching right here and then they're going to just match up just like this okay so I'm going to match the top and then because those turning gaps are important places to make match I'm going to pin that next so one line should basically match the other other all right we want to make sure that those Edge match each other and I can go ahead and kind of shift things around slightly if they need to if they need to move and I'm going to come down and I'm going to actually match the hoves together where the seam is for that then the bottom seam and then I will come back up okay and because this seam is one that I really want it to try to match really well I'm actually going to pin diagonally from the corner and that seems to help me hold it a little tighter than if I just pin it straight down I'll go ahead and pin in between now for me because when I'm sewing a lot of times I will forget that this pin is actually marking the end of my turning Gap that I don't want to sew here I'm going to go aad head and put a second pin in just to remind me that when I get to the two pins that's where I'm going to stop okay so then I'm going to sew this side and we'll come back and pin the other so we're going to sew this from the top I'm going to back stitch and then I'm going to come down to the Turning Gap where I have my two pins to remind me and I'm going to make it match the seam that I did before it's not imperative that it has to match but that's the goal is to try to get it it to match up I'm pivot and I'm just going to sew right off the edge then I'm going to cut my thread and move down to the next turning Gap the end of the Turning Gap so I'm going go ahead and I'm put my needle down right at the end since I can match that up nice and easily I put my foot down take out my pins and then I'm actually going to lift that turn off the edge sew to the raw Edge and then I'm going to back Stitch to get back to where I started one more back there we go turn this pivot and just head on down to the end okay now when I get to this part here where there's all these seam allowances and I have the seam from the Lux cuddle on the front or on the top of the leg and the cuddle three on the on the bottom and we've got it both layers it can get a little bit bulky right here so make sure you take your time you can kind of Squish it down and I do try to open those seams just a little bit just to kind of spread out the bulk a little we're going to go ahead and just take our time through that if you need to hand crank totally fine and get to the end back stitch and take it out all right so now we're going to go ahead and pin the other side we're going to match up the seams where they come together on the hoof the end of the hoof and all along that side all right so now we're just going to sew this whole side one more [Music] [Music] time so now we've got the leg sewn together and now we need to put the foot pad on so this is the part that can be a little intimidating for foot folks but it's really not too hard I do have a secret little tip that I use that I fold the hoof in half again and I find these centers of the the gray part of the hoof okay and I'm just going to go ahead and I'm going to mark it with my my pen so I've just folded it it's not super accurate but it's accurate enough I'm just matching my seam allowances on the side kind of bring it over make a little Mark now I've got four parts to match up with this with the hoof so I'm going to do the same thing with the actual the foot pad is what the pattern piece is called so I fold it in half matching my notches on the side I'm going to carefully come up and mark the center there I'll do the same thing here mark it this is not required but it does give me an extra set of places to match as I'm pinning this in so I'm going to go ahead and I'm just going to grab it it does not really matter which way you do it if I'm trying to be very careful if I'm trying to very be very careful I'll make sure that the hoof nap goes down on each hoof half the time it's luck and half the time I tried so it just depends on how careful you want to be all right so I'm going to go ahead and I'm going to match up the center with the center in the hoof so the center of the foot pad with the center of the hoof I'm going to put a pin in here and we're just going to pin the quarters and then come back so the side Notch is going to match with the side seam and we'll go basically to six o'clock we'll match that mine with this one one of the ways of doing this too is that I sometimes we put a little pin in here so I'll put a pin in this Notch this line so I can see it better from this side and then when I have my notch here I can actually just line it up with the pin and sometimes that's a little bit easier than trying to do the Flip Flip and then again we're going to match a notch with the side put a pin in and now I have to make these sides match so this is the part that can also be a little bit intimidating for folks but once you get this down it's actually pretty easy it's going to kind of go like this so truthfully your edges of the hoof are going to kind of flare out a little bit as you pin them in and again I'm going to pin in between and then I'll go back in between those so I'm going to turn this around because I want to pin from this side right now and then in between those I'm going to go ahead and pin from the reverse side to keep that where I want it to be just a little bit better so I'll pin the quarters and then I basically I pin the eigh and then I pin 16 30 seconds not sure what it is after that I'm go ahead and pin more and more and more we're to pin a whole bunch around here this is another one of those seams that if you want to you could go ahead and handbase it I would definitely suggest if you do the cloven hose that that's what you do is take your time with those do a lot of hand basting you'll need to clip those curves a lot more this when we won't clip any curves at all the cloven hoves are adorable but they are def a little bit more time consuming so again in the middle and then in between each of those okay so this should help keep it so that it's fairly evenly distributed and I found that making that quarter Mark at basically 6 o' and 12:00 helps a lot in getting those foot pads on very nicely using The Notches at the side seams so now we're going to go ahead and sew this you'll want to make sure that you're always sewing it with the flat of the foot pad down against the sewing machine makes it much much easier than trying to sew it this direction when people try to sew it with the leg down toward the foot when you sew it with the leg down toward the feed dogs it tends to get more pleat or little puckers in here so make sure that you flip it over and sew it flat okay so I'm really going to take my time with this make sure that it's not getting any little puckers in it that I can kind of pull it nice and taut as I'm sewing around and really take my time to lift the foot adjust it as I need to [Music] [Music] okay I'm going come back around to the front Stitch over it one more time make sure it's nice and secure I'm going to go check the bottom make sure that I've caught everything my steam allowances aren't even but that will not matter at all okay just kind of double checking it's an important little place got a tiny pucker there I think I'm going to let it go we'll see how I feel when I turn it inside out that's always my my test is will this matter so when you're doing with this with cuddle fabric this is one of the perks about cuddle is I can leave all of this unclipped and it's going to turn and be just fine if you to do this out of cotton fabric and have to do a lot of clipping so one of my favorite Parts about sewing the Plushies with cuddle is they're just just so easy there's none of that clipping curves really all right so I'm going go ahead and turn it inside out see how that works so I turned it through the Turning Gap okay not through the end but through the Turning Gap I'm going to go ahead and pluck that out so this is the this is the top of the leg so this is I saying make sure that you're not trying to turn it out that hole it's way too small to do that okay so now I've got my side seams so here's the Turning Gap that we did so from here you can see this is the little stay stitching line that we did for the Turning Gap that actually lets this just pop right in if we give it a little a little tug it'll turn right in that line that's there that we can kind of see is going to be my guideline for the hand stitching this closed later so that's what makes this actually very very helpful is now I know exactly where to where to stitch to take my Stitch just to make this a nice clean closure when I get it stuffed so now before I do anything else I'm going to go ahead and I'm going to zigzag the end of this make sure it's nice and secure and I'm going to do that with all four of mine so I've got all of my legs and my arms made I'm going to go ahead and top Stitch the or I'm going to go ahead and base down the top of those with a zigzag so I did I did the leg today which is the easiest one to start with so I would recommend that you start with the legs move to the arms do both legs then do the arms the circles get smaller and a little bit more the arms are require a little bit more f fous is that the right word u but they turn out they turn out beautiful too so this was the one that had the pucker in it let see if I can find where where the pucker was this is this is really it this is what I what I kind of love about it I can't I can't find the pucker from the out oh there it is I found it I found it um and the only reason I can tell it's there is because I can feel it I can feel it gets a little thick right there it's right right there there's a tiny little pucker totally invisible so this is how I decide whether or not I need to do anything about it if I can get to this side and I can't find it I don't see it easily I'm just going to leave it there if I have to I can go ahead and take out some stitches redo it stretch it a little bit and make it make it fit a little better I usually end up taking about an inch on either side of that little pucker out to make sure that it'll smooth out but always do do a double check and make sure that it actually is showing that it is a problem before you go ahead and take it out you'll be surprised how often you can get a little pucker in there and never ever see it all right so we've got all of the legs and arms based together so now we get to sew them on to the body so we're going to go ahead and sew the arms and legs onto the front body again the arms are smaller than the legs and we want the Turning Gap to be at the bottom so I'm going go ahead and kind of place these where I want them to be and then I'll sew them on okay so on the legs we want the Turning Gap to be on the inside so I've marked it here then I want to check the nap to make sure that the nap is both going down on the Hooves so I'm going to go ahead and I can pet that one and I see it's nice and smooth when I do that I'm going to check this one and when I pet this one I can see that the nap is going in the wrong direction so the nap is actually running bottom to top instead of top to bottom so I can make a choice of leaving the Turning gap on the inside which is easier to hide or I can make the decision to make the nap the same on both feet and I'm going to turn it so that the nap is running top to bottom on both feet okay so now I'm going to match the legs with the notches on the front of the body and again I'm going to use two pins I'm going to go ahead and do this for both legs and both arms and then just zigzag them on to hold them place [Music] [Music] okay so now we'll sew those on and I'm going to sew these from the wrong side so that I can see the fabric a little bit better see where I'm sewing and make sure that it's all caught nicely [Music] all right so now all the arms and legs are tacked into place they're basically basted in position and now we can sew the front to the back this is always a little bit confusing because the back seems so small compared to the front so we're going to go ahead and we're going to fold all of this stuff in and these are going to get pinned together and I promise it will work all right we're going to match the first thing I'm going to match is the top head seam with the top head seam on the front so back to front center head seam we're going to pin that in position and then just going to work our way around the body pinning the parts that are supposed to match first and and then in between so that top part is one I'm come around the neck part is the next one that's need to match so on these sections you can go ahead and you can Nest your seams or you can spread them and try to keep them open sometimes I find it a lot easier just to Nest the seams in places like this so that's what I'm going to do so putting one seam allowance One Direction one seem alow it's the other way they'll fit together really nicely so I've pinned the top middle the neck seam the bottom I'll do the same thing with the other side and then go ahead and pin all the way around all right now that there's a million pins in it we can sew [Music] [Music] okay so when we get up to this head it gets a little bit tougher because we've got a lot of stuff going on right here so we need to make sure and take it nice and slow this is definitely one of those places is that you could handbase it first but honestly if you just take it slow you'll be fine the biggest part is when we get to the ears and the horn there's a lot of thickness here so if your machine struggles at all just go ahead and hand crank it do not try to force it through because we've got a lot of layers okay so I felt it get caught a little bit and let go so I'm going to have to go back in got this lovely little pleet right here which is not right so I'm going to go in and take this out the easiest way for me to do it is with a little craft knife so I'm going to go in here and I'm just going to kind of feel around until I I find the seam come on little guy there we go I want to try to take those stitches out and try to take them out with a regular seam seam ripper is not any fun but if I kind of can go between and I can kind of feel it where the thread's going to pop for me I'm going to go ahead and kind of take out those stitches I'm just going to take it out until I see where the the pleat has stopped and then I'll just redo that little part okay so I've gone ahead taken that out I'm going to repin this [Music] we did it we stitched all the way around we got the legs in there the ears the horns we're g to turn this guy right side out see if we can do it here comes his little face all right there we go he looks a little limp still all right so everything is where we want it to be we've got the arms on the legs I forgot to mention earlier and I want to kind of bring it up now is that one of the things that I really love about this pattern is that throughout the pattern she'll give you illustrations on what it should look like now so you as you sew each piece you'll be able to tell am I on the right track do I have this in the right order and that's really fabulous so that's one of one of the spots is here you can see this is what it'll look like so the last thing we need to do is sew on the bum which is another part of the pudgy plushies collection that is actually very Universal is this whole the triangle sort of body the arms the legs and this bum so we're going to do that next and get that so that he can sit up okay so I've got the bum pattern here which is made out of the the Luxe cuddle here got s SE notches and then I've got marks to have my Center back my front center and then the leave open section so these little tabs here are where I'm going to leave it open and we mentioned that earlier that we're going to leave it open as a turning Gap at the tail so I've got the marks as well on my fabric piece so I'm going to go ahead and I'm going to make that fit on here so I'm going to kind of turn it inside out mostly just shove his arms and legs and tail to the inside so before we get this sewn on I want to go ahead and I want to do that stay stitching on both the body and the bum so that when I sew them together doing that stay stitching to or when I do the lad Stitch to close it up it's a really easy seam to close so we're going to do that first so I'm going to go ahead and I'm going to Stitch just the quarter inch between those [Music] [Music] gaps so now that I've done the stay stitching along the back of the body and the back of the bum between The Notches where on the pattern it tells us to leave open so I've gone ahead and stay stitched that you don't have to it's really just a an extra thing that I like to do to make it a little bit easier now we're going to match it up so we've got a notch at the center back that I'm going to match with the tail okay and then I'm going to come over and match my notches I'm going to go ahead and I'm going to put two pins here because this is again where I want to start and stop my sewing so that I will leave that turning Gap I'm going to go ahead and take this pin out of the tail because for me that's a way to tell that I'm not supposed to sew there so I'm going to take that out I'm going to stick a pin in here where my Notch is so that I can easily get that to match here pin that in position and then I'm just going to work my way around finding those important spots okay get my leg on here match up the [Music] middle and go ahead and pin in between and again it will seem like one of those seams where it doesn't seem like it's going to match and then it just will and again it's in the Lux cuddle so if there's any issues with a little pucker or anything cuz it didn't match perfectly you're going to be fine fine so I'm going to put a pin in here at my Notch because it's easier for me to see and match it with my side [Music] seam and then go ahead and even this [Music] up and this leg construction leg BM body construction is the same for all of the pudgy plushies they're all basically built with this sort of pyramid style body with the arms and legs sewn into the side seams and then the bum sewn on last with the Turning gap for stuffing so once you have this construction down pat the other styles are super easy to do [Music] all right more [Music] here okay and again I'm going to try to sew this this direction it's just going to work through take our time and work our way all the way around leaving that turning Gap open [Music] [Music] so now we've sewn it all the way around we'll go ahead and check that seam make sure that we caught everything go back and catch something if we didn't okay I kind of come around the whole thing my seoun will be a little bit wonky and we don't really mind at all right so now I can go ahead and turn the whole thing Inside Out flop there he is he's super cute look at that all right so now we're going to go ahead and put his eyes in and that'll add a little bit of extra Dimension to him one of the things when we were at the face you'll remember maybe there are little little black marks here that are where the eyeballs go so when you're in here and you can see when you're doing the face you can see the eye Mark but you don't actually put the Eyes in until the end and that's really important is you don't actually do anything about that until now so I just go back in I find it all right so I'm going to take this little spot that's marked and I'm going to go ahead and I'm going to clip it just the tiniest little bit okay just a tiny little eigh inch hole and then I've got my 24 millimeter eyeballs that I'm going to take right side and I'm just going to push them up here until I find that hole so I just kind of push around till I find it there it is I push it through I'm going to get the backing the backing is shaped sort of like a little hat so it has a a top on it and I'm going to go ahead and I'm going to put this on just like that till it clicks all the way down then I'm going to come over here and I'm going to find the other side of his face her face I'm not sure let me see which side did I get it on that side so it's going to be over here here we go so somebody takes a little bit of searching there's the spot and I'm going to clip it just the tiniest and push this up here so I can again I can find the I can find the little post and then I just make the post get to where the where the hole is there we go there we go push it through put on the little hat push it all the way down okay now he's got big beautiful eyeballs super fun I love the way that they just sort of come to life at this point all right so now we can go ahead and stuff him we're going to start with the head and work our way down the body and then we'll stuff all of the legs we're going to stuff our Blissful bow Vine with silky polyfill which is a softer version of the polyfill that you're probably familiar this is great for stuffed animals and will make it super squishy and lovable so we're just going to start we can take decent size handfuls and we're just going to start basically you're going to stuff from the top to the bottom and then the arms and legs so we're going to start and push some up to his top you're going to be surprised at how much polyfill you can actually get in there we're just going to keep on stuffing until he's nice and sitting tall we're going to push out to the nose first and then keep going right very is look at that he's super cute I absolutely love these guys so once you've gotten to the point that I feel like he's pretty well stuffed there's a couple things that I like to do to kind of make him a little extra so one of the things is that when they sit here they tend to do the little fallover thing so I actually make a pouch and I make it using the pattern I use the pattern I cut it out of cotton I sew all the way around it a couple of times and i stuff it full of poly pellets and then I sew it closed and this can go right into the bottom and I'll just kind of push that stuffing down and then work this guy in and then you kind of just get it to smooth out just enough to fill up that bottom of it so when he sits he'll have a little weight down there to hold him in place so once I get that switch it around here see if I can push that toward the front a little so once I've got that in there then I'm going to go ahead and I'm going to finish stuffing him a little bit extra it's amazing how much stuffing we can get in these guys we use the rest of the bag in here and get him nice and firm so I usually leave a little bit of room in there before I add in the poly pellets and then I just finish up the bag we're gone okay so at this point he'll sit a little bit better which is great and then we can also we can also add eyelids the eyelid piece is just a funny little piece that will actually create a nice big eyel eyelid that sits over his eye that we in a hand sew on after afterward but the way that this is constructed is pretty clever if you ask me so you're going to cut out your eyelid piece trace it onto a piece of the Lux cuddle and then you're actually just going to fold this in half and then we're going to sew all the way around there so it seems like a very weird way of doing it because you're actually going to sew it closed but then we're going to go ahead and cut it open on the back and turn the right side out so let's Stitch around this I'm going to go ahead and stitching it so I'm going to stitch it right on the line that I've drawn it's not a cutting line it's a sewing line so I'm going to go ahead and just sew on that okay so it's sewn all the way around go ahead and take my pins out then I'm just going to trim around this trim the seam allowances down to about a quarter of an inch or a little bit less go ahead throw that in the trash then I'm going to take and pop a little hole in here so it's just one layer and I'm just going to cut a little hole in the backing I'm going to go ahead and cut a bigger hole and I'm going to use that hole to turn it inside out so the reason that this works is because cuddle is a knit fabric so it isn't going to fray and it isn't going to cause any issues on the back because we're going to hide it underneath the eyelid so that cut part is actually going to be on the back of his eyelid against the eye and honestly even just looking at it here I can't really tell where the hole is so easily which is a lovely perk of Lux C so now we can go ahead position these on the eyes [Music] however we want to and I'm going to go ahead and just pin it in place and we'll go ahead and hand Stitch those after so here's here's I two let's see better make sure I've got the the hole on the right side there all right does that look even I think he's pretty cute I think he's pretty cute all right so we're just going to go ahead and do all the hand sewing so I'll hand sew on the eyelids and I'll go ahead and hand sew all of the Turning gaps closed and then he'll be ready to cuddle okay so I'm going to go ahead and hand Stitch this closed so this is the Turning Gap that we left on the leg where we did the stay stitching beforehand so I know exactly where my seam is supposed to be I've just got a long needle long sharp needle with two strands of polyester thread and a big knot at the end and I'm going to come in here I'm going to find the top of the hole and I'm just going to get that knot to kind of stay in the seam allowance there go ahead and trim that out of the way so it doesn't confuse confuse me and I'm just going to do a ladder stitch down this taking in one side where the stitches are and then switching to the other side so a stitch on this side a stitch on this side and I'm going to do kind of big stitches at this point and then I will come back across it one more time and really seal that turning Gap with smaller stitches so these are probably about a quarter of an inch long going to go back and forth so basically I'm going across going under where the uh where the stay stitching was so I go underneath that one layer of fabric I come up again about a quarter of an inch later pull it across go straight down on the other side basically creating rungs which is why we call it a ladder stitch let's see if I can do this big enough that you guys can see what I'm doing and I'm going to do this like I said one one time down here with nice big stitches just to get to close up give it a little tug and then I'll work my way back with much smaller stitches to hold it nice and tight so that those seams don't pop open all right so all the way to the end I'm going to do a little knot right here and then work my way back up [Music] [Music] all right so once I've gotten back up to the top where my turning Gap started I'm going to go ahead and do another little knot I'm going to do that twice and I'm going to go ahead and I'm going to stick the needle in make it come out the other [Music] side I cut the thread so that the thread tail is buried inside there and I can go ahead and I can fluff up that edge just a little bit where the stitching was and no one is any wiser so I'll go ahead and doing that with the rest of the body so I'm just trying to fix fix the little eyes arrange them how I want them to be then I'm going to go ahead and I'm going to sew those on as well with a ladder stitch just taking a little stitch on the outside of the eye I think I think it's pretty good now I'm going to go ahead and I'm going to stitch this down all the way around lock and do a little knot on either end hold them in place feel free to rearrange the eyes make them be a little sad a little perky you can also add eyelashes in here which is very fun she has all sorts of ideas in the pattern on how you can make this pudgy plushy yours and I think that's one of the most fun Parts about it is just the variations that you can do to make it your own stuffy so once you've gotten these techniques down for working with the pudgy plushies you're going to be able to make a ton of the other on she's got a whole they have a whole pudgy plushy collection here at Missouri Star you can make the giraffe the elephant the hippo all sorts of fun things and I hope that you have a great time making your own pudgy plushy thank you for watching this tutorial from Shannon fabric and Missouri Star hi everybody it's Jenny from the Missouri Star Quilt Company we hope you enjoyed watching this video if you aren't already part of the Missouri Star Quilt Company family be sure to subscribe so you won't miss a thing and if you click that Bell it'll notify you every time a new tutorial comes out see you next Friday [Music]

More Fabric by Yard tutorials

See all