Skip to content

Free quilting video tutorials from Missouri Star

Quilting Tutorials
How to Make the Misty Bag - Free Project Tutorial

How to Make the Misty Bag - Free Project Tutorial

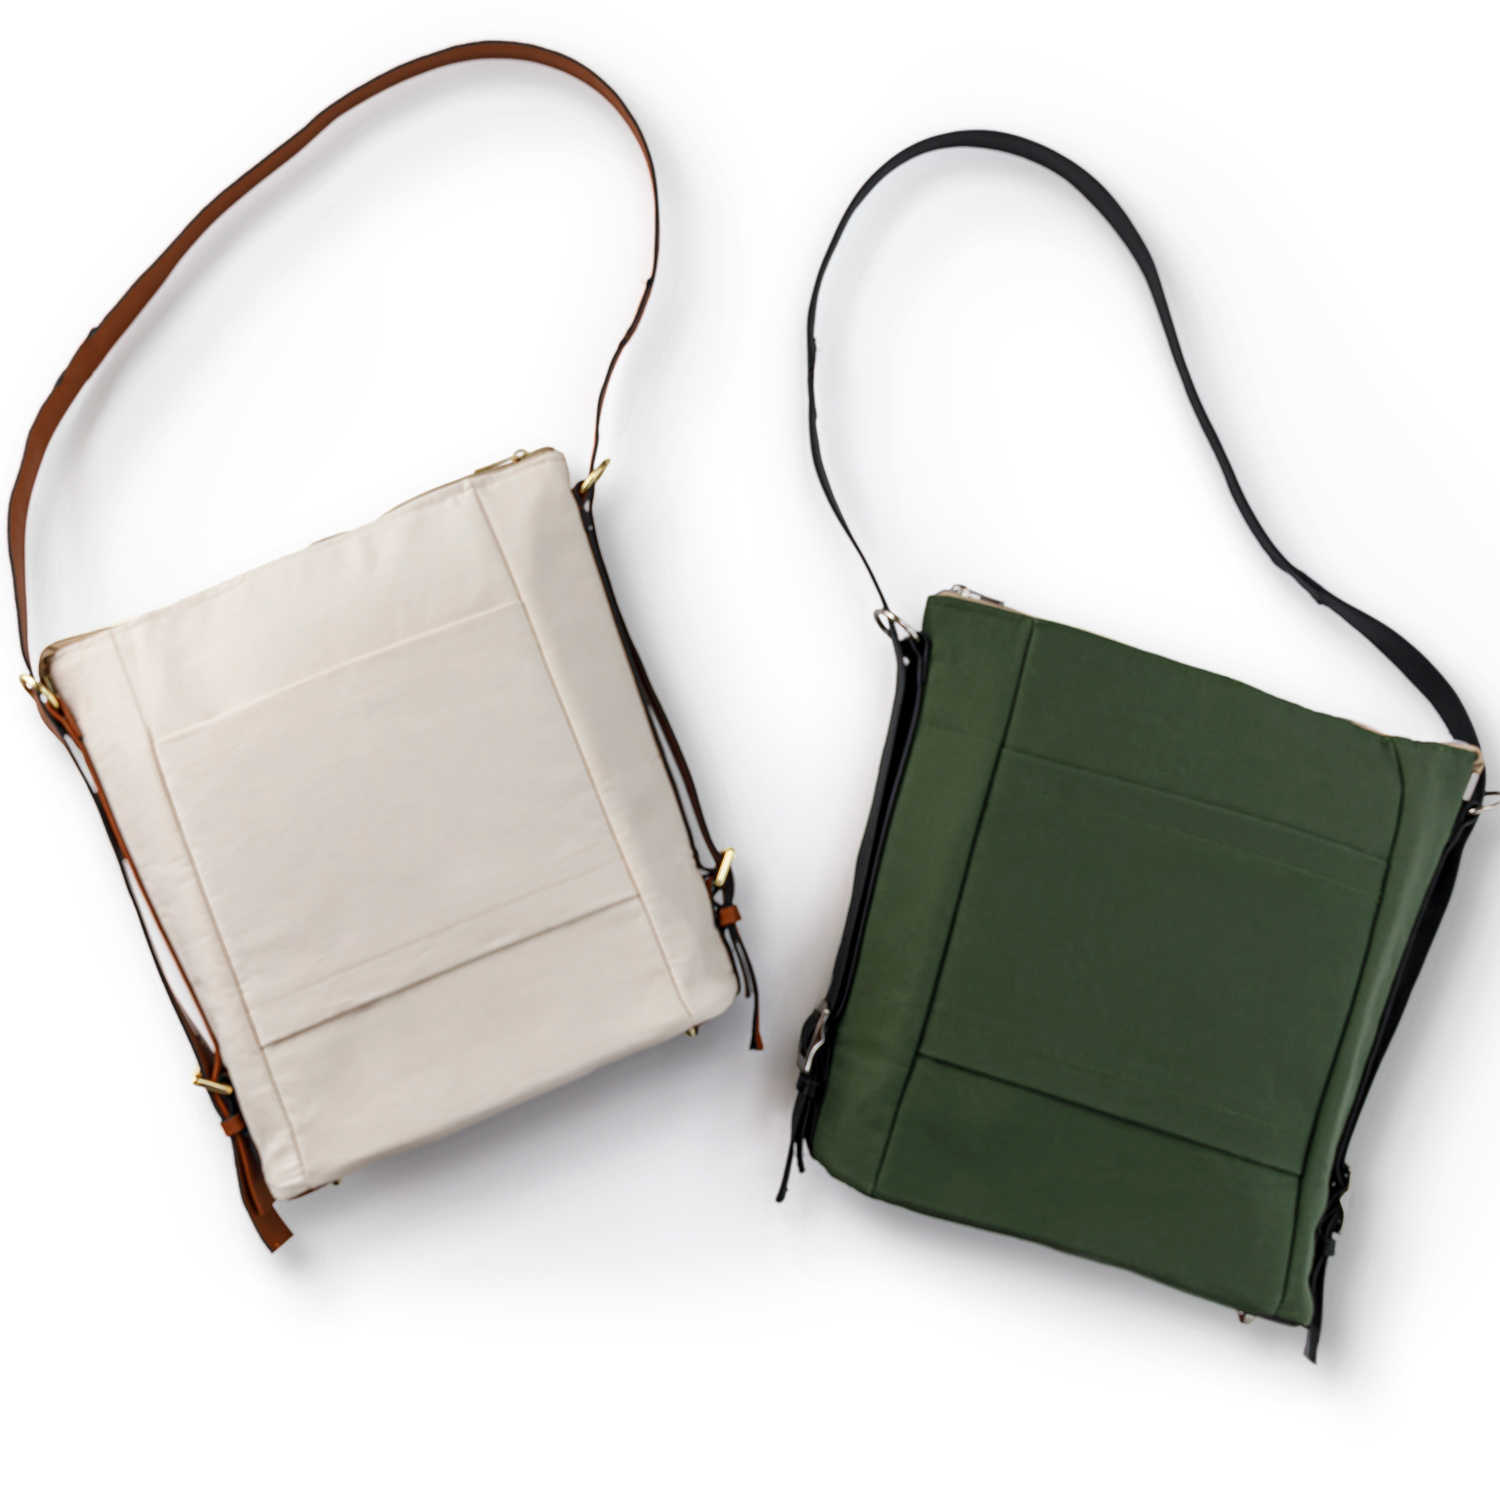
Misty loves a good bag, and we know you do, too! Sew up The Misty with Jessica Barrera of Sallie Tomato. This sleek and stylish bag can be worn as a shoulder bag or a backpack and it even comes with a pocket to slip over your luggage handle. Swoon!

Instructor

Misty Doan

Misty Doan grew up surrounded by sewing and quilting. She loves spending time sharing tutorials each week each week, and when she’s not stitching up one of her fun sewing projects for home decor, most likely you’ll find her hanging out with her husband and three awesome kids or working on a house project.

Shop this tutorial

Common Questions

What is covered in How to Make the Misty Bag - Free Project Tutorial?

Misty loves a good bag, and we know you do, too! Sew up The Misty with Jessica Barrera of Sallie Tomato. This sleek and stylish bag can be worn as a shoulder bag or a backpack and it even comes with a pocket to slip over your luggage handle. Swoon!

How long is the tutorial video?

The tutorial video is 01:40:27.

Are supplies listed for this tutorial?

Yes. The tutorial page includes the supplies and materials connected to this project.

Video Transcript

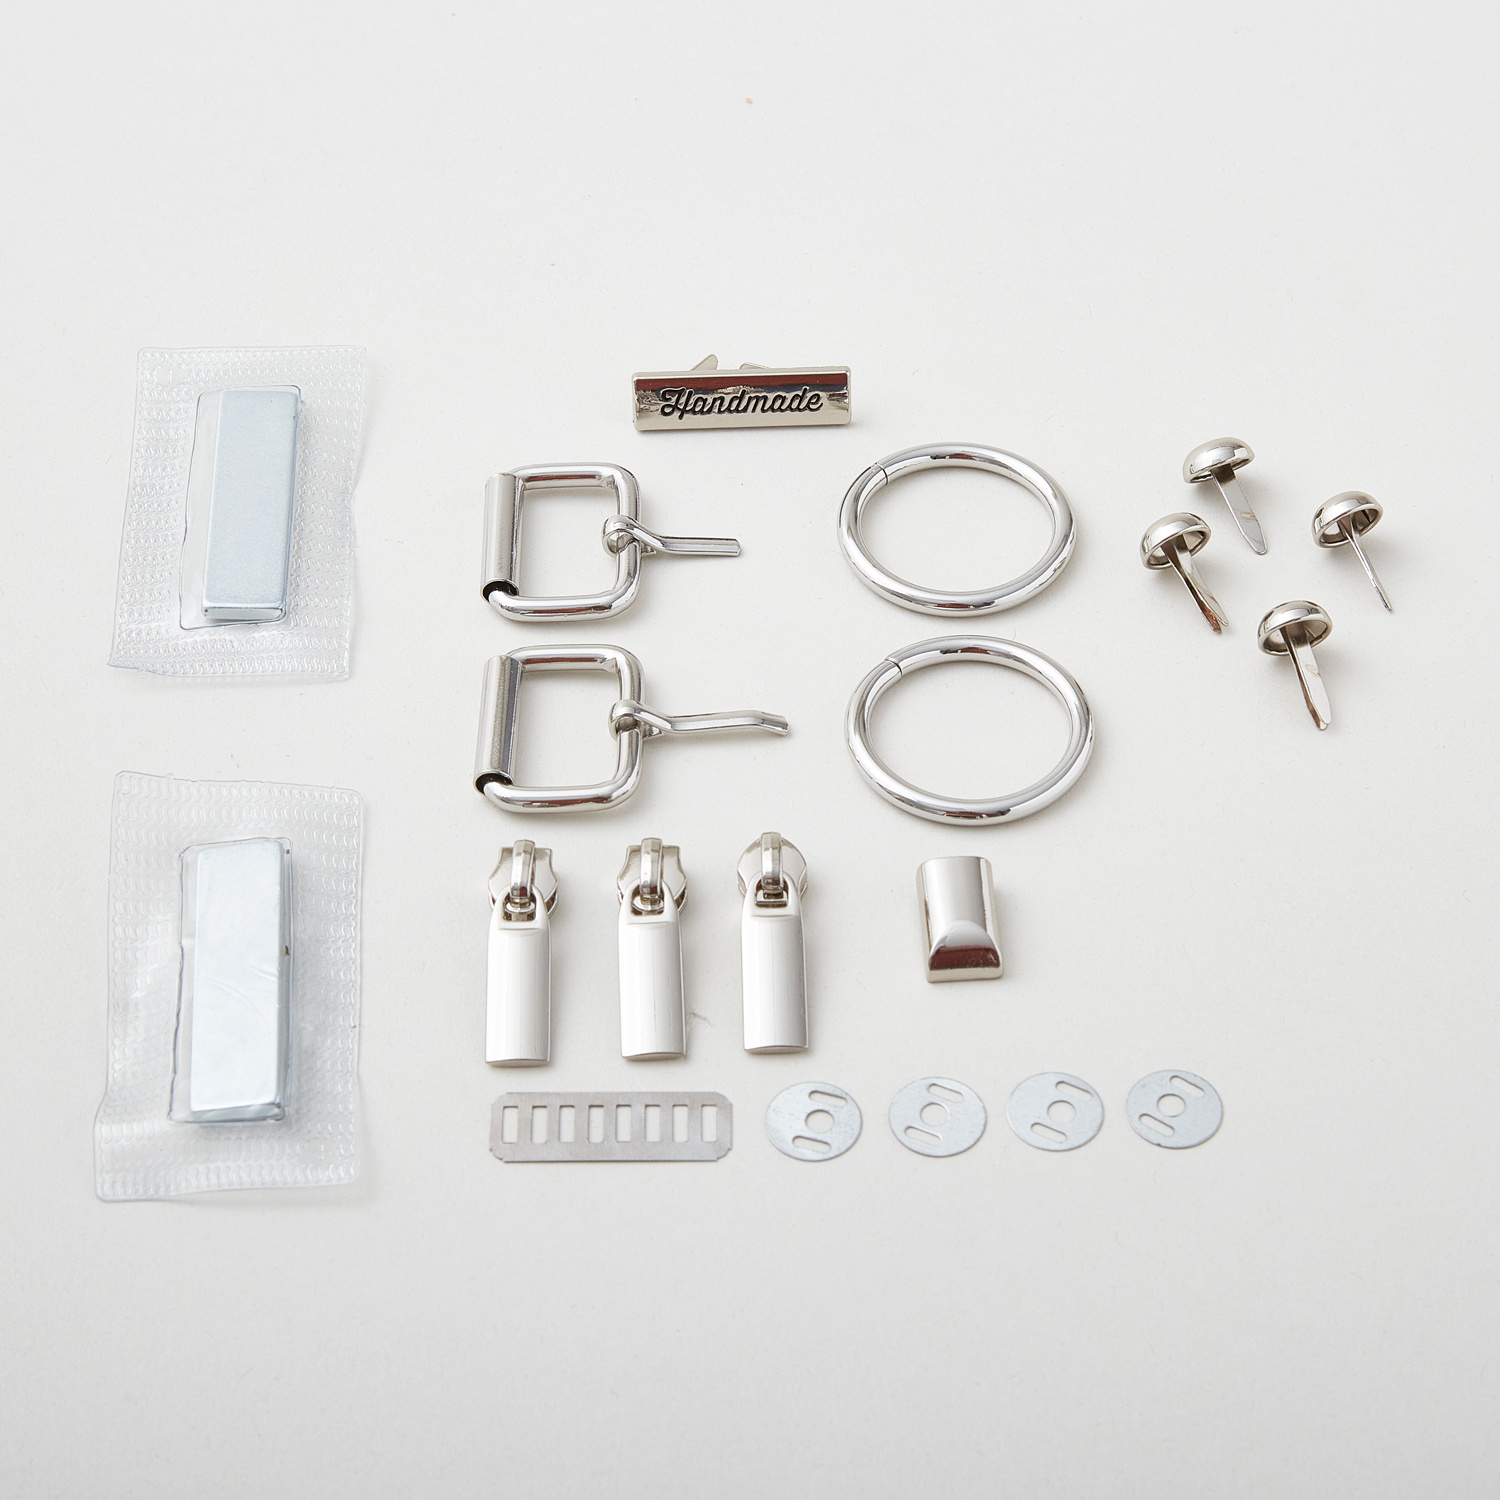
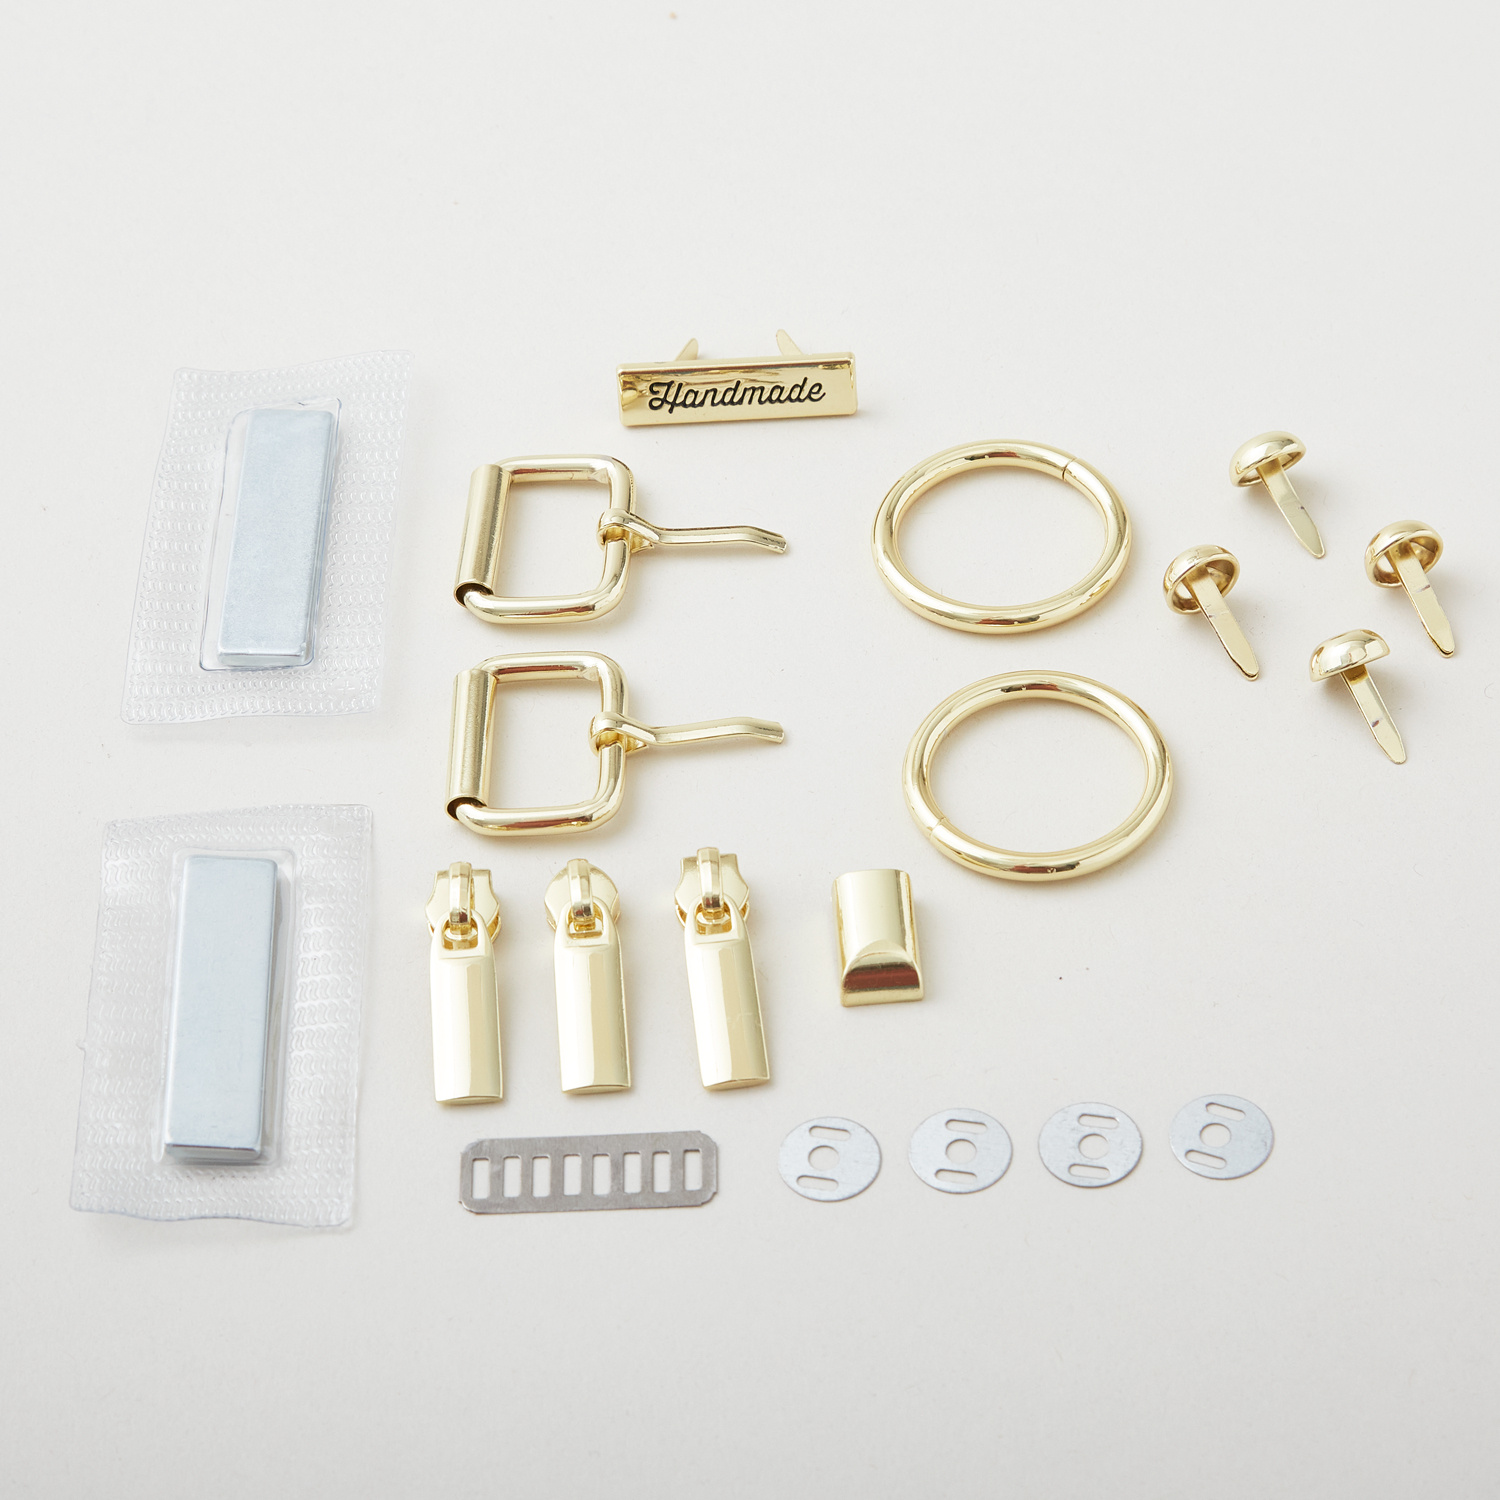
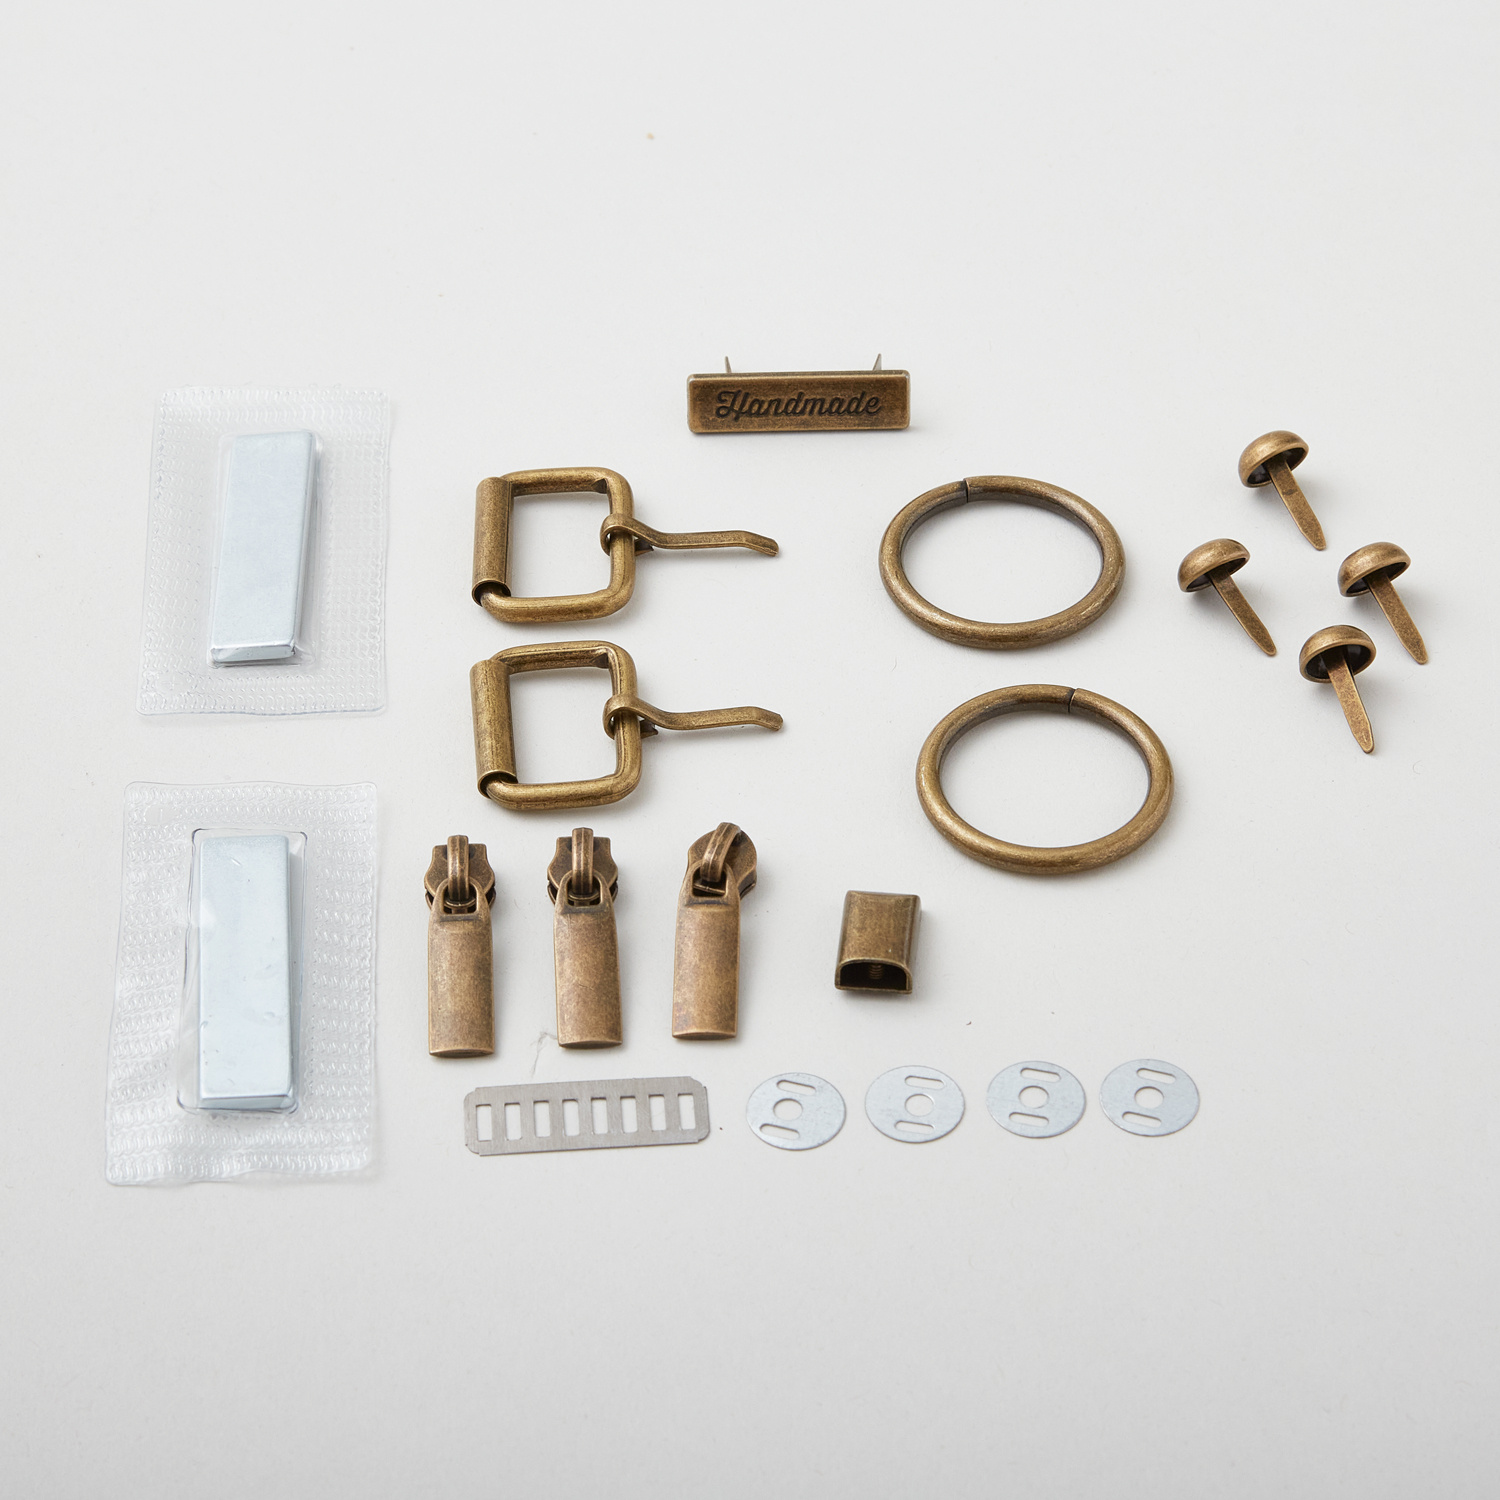
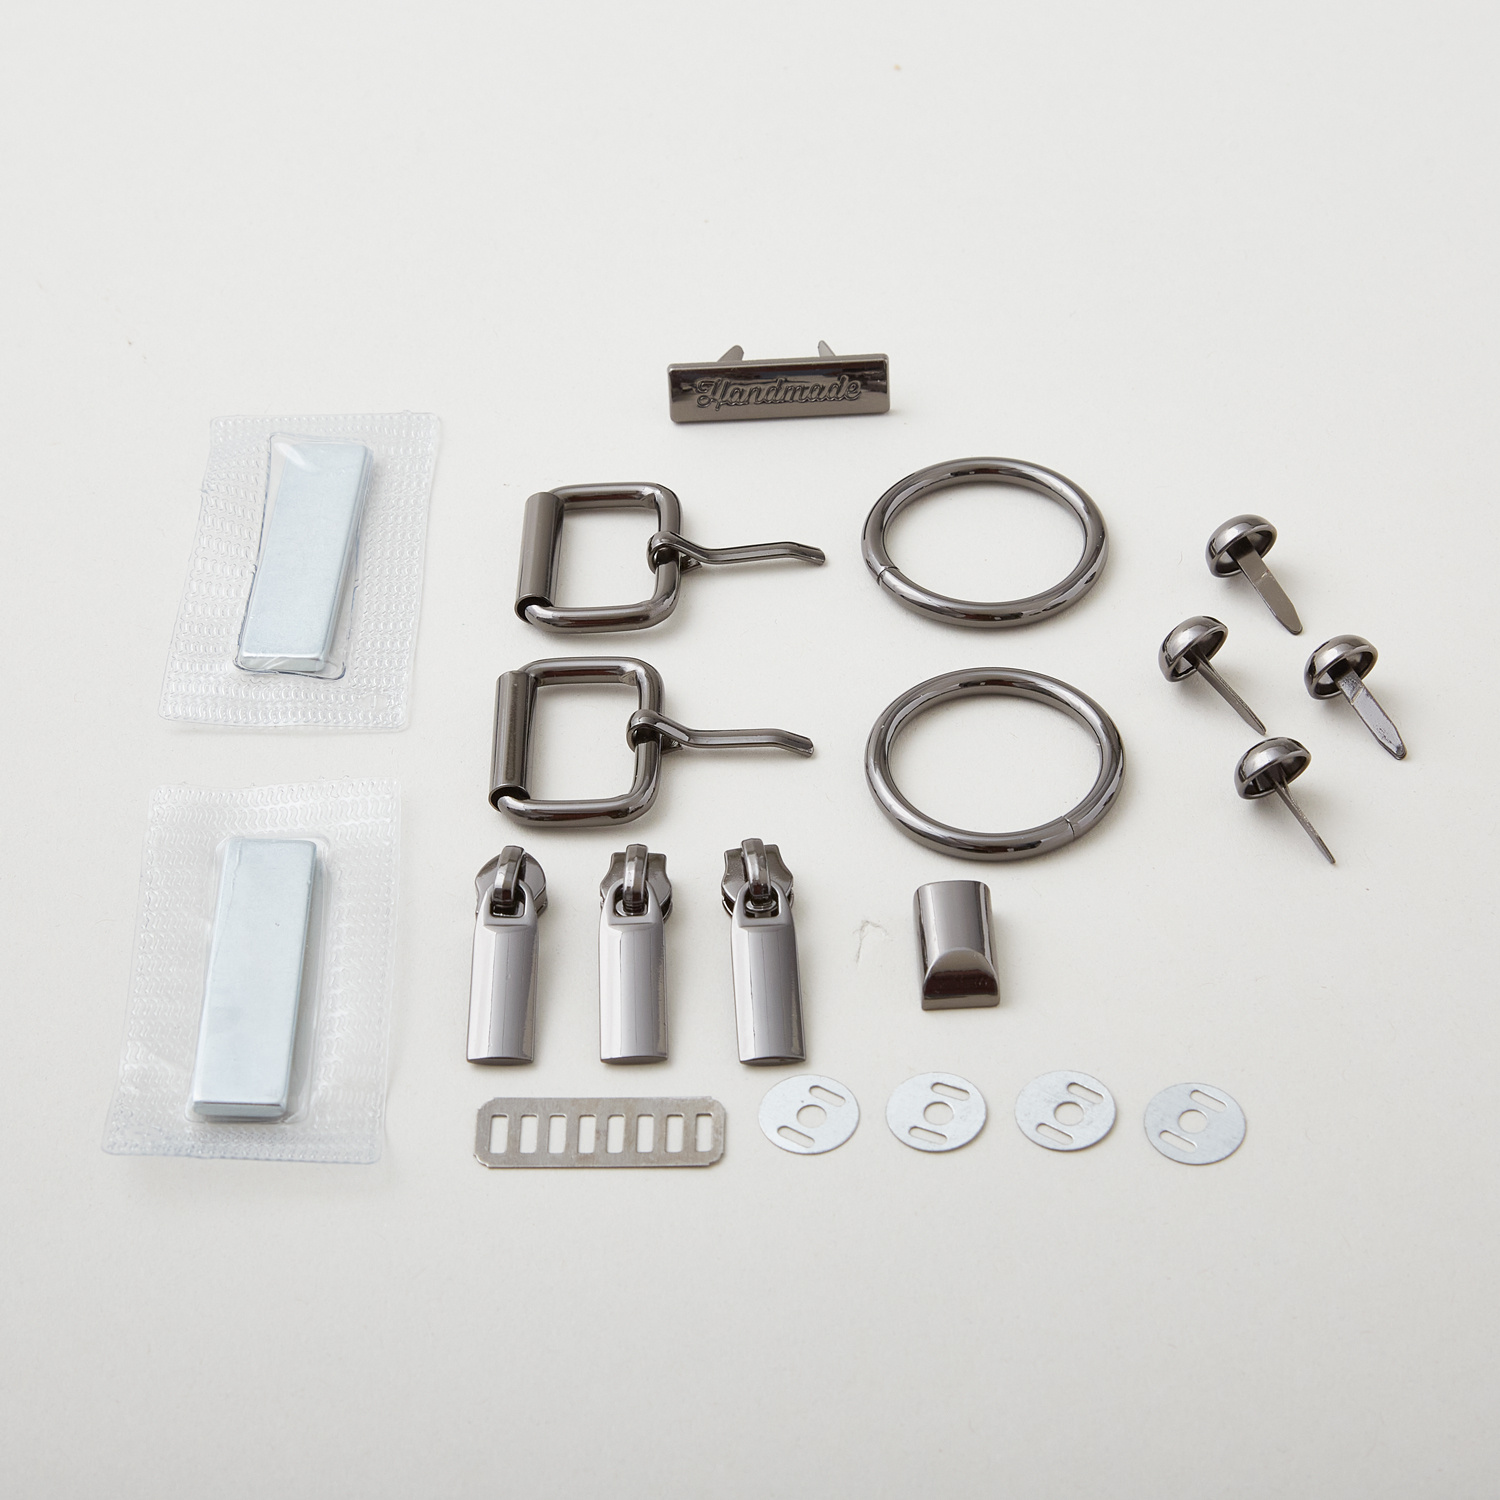
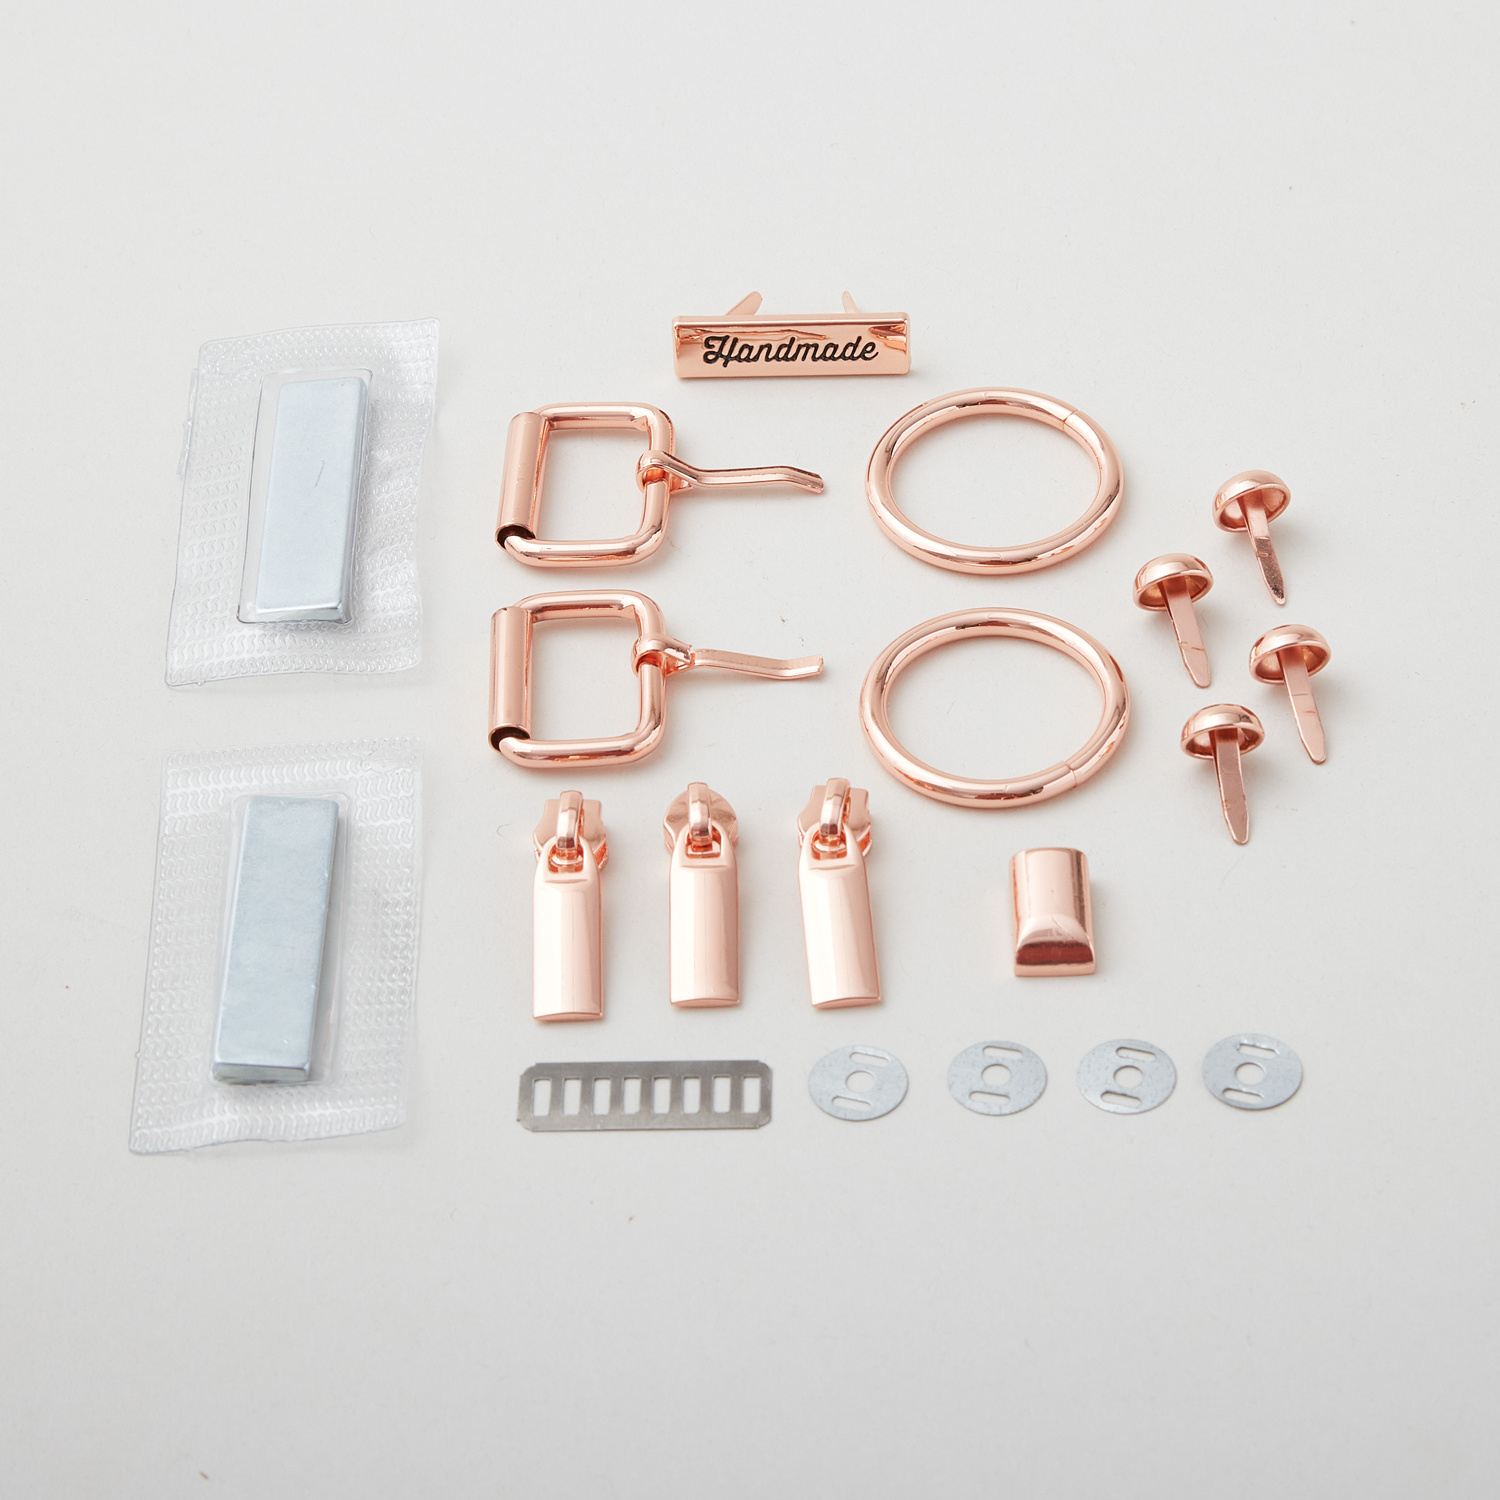
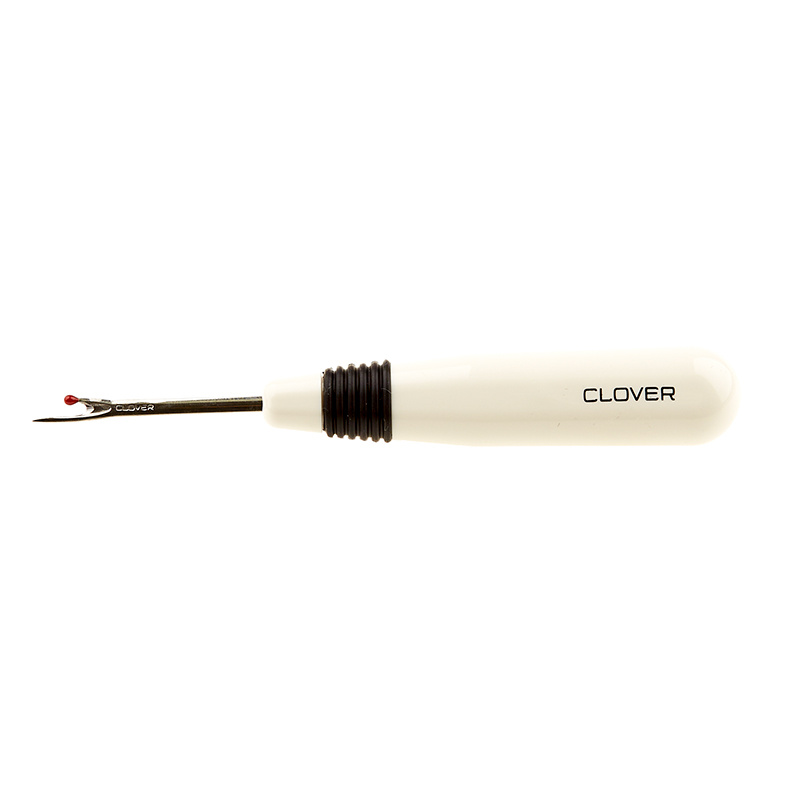
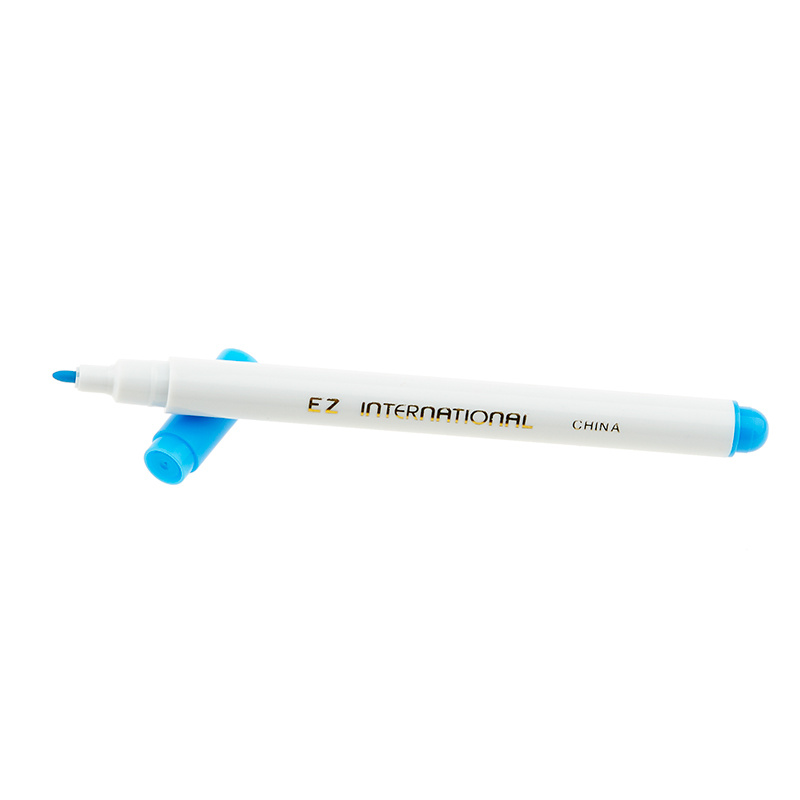
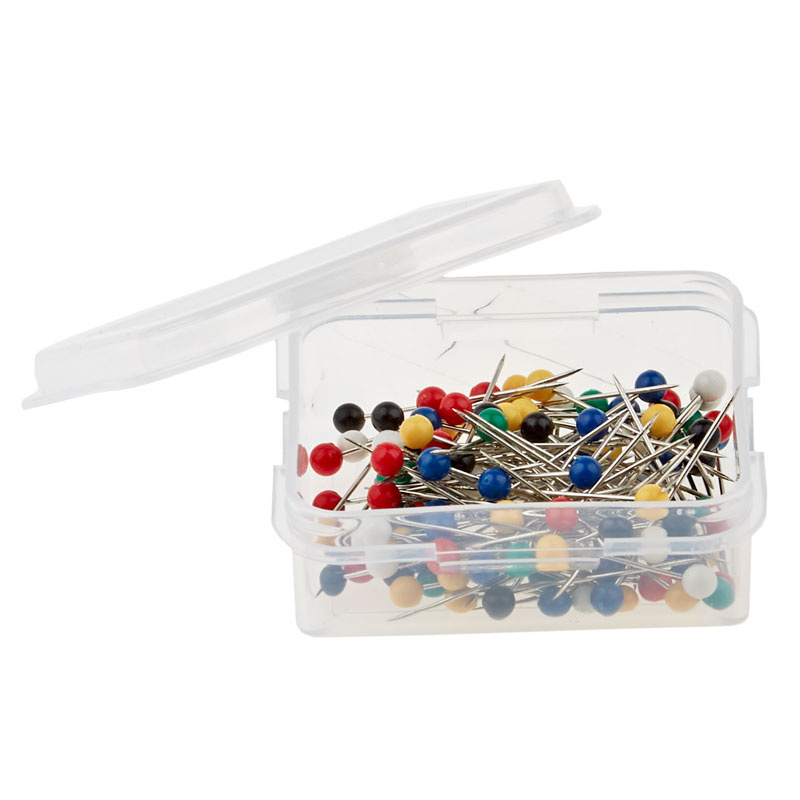
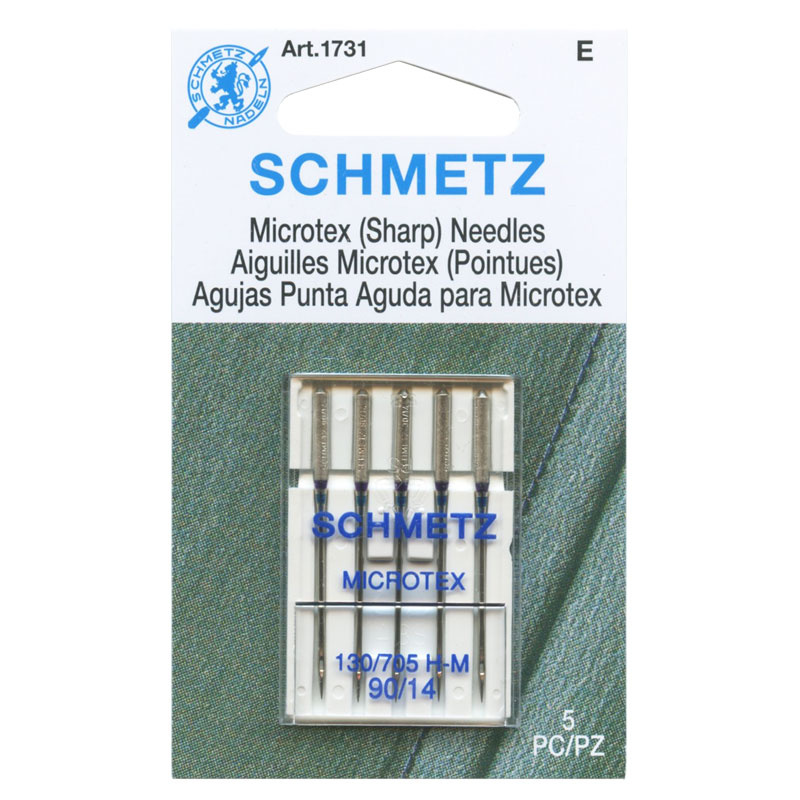
hey everyone it's Misty and I am here with Jess Barrera from Sally tomato just thank you so much for being here again oh I'm so excited to sew with you today I am so excited too and we are pretty pumped because this is the Misty bag that uh Jess has helped me design and we're going to teach you how to make it [Music] so like I said I'm so excited uh Jess you kind of asked me what all I wanted in a bag and you just knocked it out of the park so do you want to talk a little bit about all the features of this bag yes I love this bag I love all the additions that you added onto this pattern so there's a front slip pocket there's a luggage handle strap on the back so this bag is great for travel it's great for work and using every day the straps are adjustable and this is like one of the greatest parts of the bag because you can carry it shoulder over your shoulder or you can just pull on the side straps and then you can wear it as a backpack yep I love that so when you open it up there is a large slip pocket for either a tablet or a laptop yeah my laptop fits perfectly in there which that was one big thing that I wanted I wanted a laptop bag that wasn't huge and I think this totally fits the bill there absolutely and then on the laptop sleeve there's some additional Pockets there's a zipper pocket and then a slip pocket too yep hold your phone and all those goodies and then also the zipper pocket so that's awesome it holds all the things you could possibly want and like just said it's perfect for work travel or just every day and so I am so excited [Music] awesome so we're gonna get started and the first step of the pattern is to cut out all of your pieces and most of the pieces are rotary cut so you'll just measure and cut according to the pattern and then we add on some interfacing so for this pattern I recommend a lightweight woven fusible interfacing so just follow along with the pattern diffuse on the interfacing and then we're going to add some foam stabilizer so that's what's going to give it the nice body and stability to hold your laptop and all your accessories okay perfect so here we have the side panels of the bag and I've already went ahead and fused the interfacing on each piece and then on the wrong side you'll Center a piece of foam okay and also on the wrong side you'll Center a piece of foam stabilizer on each of the side panels and you'll notice that it doesn't reach the top and the bottom and that's intentional so that way it reduces some of the bulk later on when we're sewing the bottom and the top of the bag so you just Center these you can use some sewing Clips or basting spray to hold them together and then I just stitched on each side edge with the eighth inch seam allowance to hold them down okay so super easy that's all we have to do for the foam okay so those are ready to go so then we're going to work on the exterior slip pocket so here we have one of our Center panels and this is the lining for the slip Pockets I love this fabric me too lots of colors and yet it's still neutral yep so you're going to take your Center panel and just place it right sides together with your lining so if you're using a directional fabric just make sure that each print is facing so the top Edge would be there is there yeah and then you're going to line up those and just sew across here according to the pattern okay I can use a couple pins or Clips to hold the layers together do you use pens a lot I use pins for the lining fabrics and then once we add the faux leather or cork fabric then the sewing Clips are really nice yeah that makes sense it's always a good idea to back stitch just helps reinforce everything so then we're just going to press the seam allowance towards the bottom here okay do you press it from the back or the top usually the back really or the top whichever okay I feel like I would have to do it this way and then I'll flip it over but that's just my brain I think yeah either way works so then you because you want that bulk to go down towards the print right yes okay I see what we're going for here oh just the seam allowance okay so not this whole thing I was getting ahead of myself so just like that perfect and then I'm just going to top Stitch right here to keep it nice and flat perfect and usually when I top Stitch I like to increase the seam allowance it looks a little bit more professional yep and whenever I do top stitching I like to increase the Stitch length and I think it looks a little bit more professional with the longer Stitch so next we're going to add this invisible bar magnetic snap which is very strong and durable so this will be added to our lining piece and then this will be the end up being the pocket piece so we'll attach it to both of the lining pieces okay so we're going to go ahead and mark the placement for the snap on the wrong side okay so we'll flip this over and you'll measure up from the bottom Edge according to the pattern and just Mark a small horizontal line okay like so about like that all right so I'm going to open up our snap and we have the two halves of the snap we'll want the attracting sides to be facing each other so we'll want it against the wrong side of the fabric okay and then if you want to Mark the placement on this piece as well in the same way okay perfect I'll give you that one and I'll measure up here all right there we go okay so then the snap is going to go above the placement line in the center and you could use some washi tape or some basting tape to hold it down I'm just going to hold it as I sew and I'm going to sew an eighth inch from the magnet and then go back and sew an eighth inch from the outer edge of the plastic okay yeah I've never used one of these before so this is pretty cool and they do like to stick to the bed of the sewing machine too so oh that's true the machine does guide it with the feed dogs as you sew okay that's good to know it's a very strong magnet but I love these magnets because once you have them installed then they're really good at the fabric yeah which is what you want why go to all this trouble if it's not going to hold right yes okay so there's one side it looks great and then we can just double check again that the magnets match up match up yep okay we're good all right and usually I like to start on one of the straight edges and not exactly on a corner I noticed you were doing that and then when you come all the way around to the starting point you can backstitch over your beginning stitches and it just reinforces a little bit better than it keeps it cleaner than having it in the corner too that's a great tip all right another tip too if you're having trouble with the magnet sticking so much to the needle plate you can add a scrap of foam Just Between the magnet and your fabric Just Not underneath the foot and that'll help prevent it from sticking slide around so then we're going to take our exterior slip pocket piece and place the Fabrics right sides together here awesome and then I'm going to sew along the top Edge okay this time we're going to press the seam open okay see if I can do it I don't press my seams open very often I'm sure I can do it though all right so we just kind of open that up do you have to worry about that plastic with your iron yes I wouldn't touch the plastic all right I'll be very careful I didn't know if it was heat resistant so if you have a scrap of fabric that you want to lay over top of the plastic just to make sure I'm able to avoid it but yeah if you wanted to be extra safe that makes sense get that little end all right there we go so now we're going to match up the bottom edges and fold the entire slip pocket in half with the wrong sides together and then just press along the top Edge so that seamed Edge will be folded onto the wrong side and kind of hidden yeah that makes sense sure my bottom Edge is straight and then we'll give this a press there we go that works so now I'm going to top stitch in the ditch of the seam here okay and that'll have some really nice half stitching on the outside of the pocket perfect foreign so now is the time to add a handmade label okay we want so I think we're going to add it let's do it and it's going to look really pretty on this front pocket here we're going to center it up from the bottom Edge okay and our Hardware comes in five different colors so I thought the gold would look really nice with this rifle paper coat print yes I agree and just pop so yeah I love that you can find whatever suits you and suits your project so great very customizable yes so the handmade label comes with your hardware and then also a washer okay and we're gonna Mark the placement two inches up from the bottom just Mark a little dot okay Azure app right in the middle make a little dot like that perfect okay and I'm gonna set this piece aside for the moment okay and we can fold away the lining because we're only going to install it into the main fabric okay and then you're going to Center the washer above that placement mark up here and we're going to take the piece of hardware and just make a note which prom which holes that the prongs will poke through so it looks like in one on each side and then you'll just Mark each of those holes with your marker okay perfect and then we're going to take a seam ripper okay so I use a seam ripper all the time for installing a hardware yeah and you're just going to cut a short little slit and poke that sharp end through there and just slide it up just like so I love this trick it makes all the difference perfect so then you can push your Hardware through the slits okay and then flip it to the wrong side and place the washer over the prongs and then I always bend the prongs away from the center to just help distributed milk there we go perfect all right there we go how cute is that and it only took a few seconds a great little detail to add love it and you could also add some permanent glue to the wrong side or if you have a scrap of interfacing you can cut a large scrap and just iron it over the wrong side just to give it some more stability yeah okay great all right so now we're ready to attach the pocket so we can snap the magnet together and then we're going to line up the side edges and the bottom edges and I saw that crooked we'll just make it slide and now we're getting into a little bit of thickness so we can use some of the clips to hold the layers together and you're going through all of them right yes clipping all the layers all right there we go okay so now I'm just gonna sew the sides and the bottom Edge all right be using a narrower seam here or just the normal seam allowance okay and I like to backstitch at the top edge of each pocket inside of the pocket that's where all that wear goes um so now that we have that attached we're going to add a little bit more stability okay so we're going to Center our fabric over the foam okay do you work from the back side or the front side so you'll have it right side up just like that okay and again it'll be shorter on the top and the bottom yeah I can see we've got a little bit hanging over on both edges so then we can add some clips to the sides okay and now I'm just going to base the edges with the eighth inch seam allowance perfect I'm going to increase the Stitch length just to help tack it together we only need to do the sides okay so this is just to make your life easier later on right to base it all together like this you have then all the layers just stay together stay where you want them so we have our exterior front prepared so we can set this aside and work on the luggage strap on the back okay awesome okay so here we have one lining piece for the middle and then we have our main fabric on the top and bottom okay and we're gonna line up the 10 inch edges so we're going to sew these to the center panel okay and the reason why we're using the lining fabric here is it'll help be less bulky than if we had one continuous piece that makes sense all right so we're just going to fold those right sides together and sew them down yes okay there's one and here's the next one when you're ready okay perfect you can certainly pin this together I'm comfortable with just lining it up and sewing so there's one side and then we'll attach the top and then the seam allowance naturally wants to go towards the lining and that's the direction we're going to press it that's great move this ruler out of the way roll that over there we go okay and then I'm gonna further secure that seamless with a top Stitch perfect foreign so this has become our back panel and that's prepared so here are the pieces for the luggage handle sleeve okay so we have one lining one main Fabric and I'm going to line up the 10 inch edges and sew along one Edge first perfect okay so then we're gonna make a tube by just lining up those opposite edges just matching them up so it's a little easier to press the seams open at this stage so okay go ahead and press those you can kind of move the seam to the center okay if needed or you can make it go where we want right yeah okay let's do that there's the first one and come around and do this other one as well all right there we go okay and then you can turn it right side out okay that I can do I'm confident [Applause] all right there we go okay and now we're gonna Center the lining panel in the middle okay and just flatten it down and give it a good press just make sure those seam allowances stay open and open okay here we go I don't feel any bulk in the wrong place so I'll go ahead and press it there we go and we work together to design this pattern so that way you could use the thicker materials for the exterior fabric like faux leather or cork or the canvas yes that's why the construction is using the lining to help reduce the bulk as we go which I love because I think it's it's fun that you can add those details along the way and so I appreciate you working with me to make it happen oh absolutely my pleasure and I'm going to do a little bit of top stitching next right here perfect to just secure those seams so just like before I'm stitching right in the ditching okay it's a great guide to make sure it you know is all even and straight on the front side too yes my top stitching has been known to get a little wonky so the seam as a guide is great yeah usually I sew a little bit faster on the construction and then slow down for the top exactly perfect looks great that looks awesome so then this gets centered over our back panel and get some clips in there yes just clip it in place there we go all right perfect so then I'm gonna just Stitch it down okay on each of the side edges all right so then just like before we're going to add our foam okay this time to the back of the bag we're just centering it again right yes okay Center it and we'll clip the side edges all right I've got it after a while it'll feel kind of natural yeah second nature there we go all right and then we'll just base the edges again perfect foreign so now our back side of the bag is complete so we can set this aside okay and we're gonna move on to Preparing the straps so we're going to start with the longest strap so there are three pieces and we're going to join them together to make one long continuous piece so we're just going to start with two pieces and we're going to join them just like you would with binding oh awesome so on the 45 yes so I like to overlap the ends and that'll just account for any shifting at all and I'm going to take a sewing clip just clip one Edge and you could certainly mark from corner to corner because we're going to sew a diagonal line I'm just going to eyeball it yep and I have that diagonal seam tape on this machine too which helps oh that's perfect yeah so just make sure to backstitch at the beginning and I love that I'm gonna have to set that up for myself pretty great foreign we can just cut the seam allowance to measure a quarter of an inch okay let me grab my do you use your rotary cutter or scissors what is your preference either way I usually use the rotary cutter and the ruler that's the way I like to do it too there we go and do I need to do anything with this little bit of bulk here should I turn that off not yet not yet okay I leave that for the time being all right so I'm just going to finger press it since we're using faux leather this doesn't hold a crease very well and you don't want to iron the faux leather because it'll melt right and with cork fabric it's not going to hold the crease well either so I just finger press and then I'm going to stitch down the seam allowance on both sides okay just an eighth of an inch thank you foreign so now we can trim that seam allowance even with the side edges okay perfect there's one and two perfect okay and I love using the faux leather for straps because you don't have to worry about interfacing it and it's very durable yeah so then we would piece the other piece to make the continuous strap in the same way okay so once you have that pieced on then you can fold the strap in half and just line up those raw edges and use some sewing Clips to hold the layers together usually I just align it as I sew to keep the edges even okay and then we'll sew down each of the length sides with the eighth inch seam allowance okay and for this step I definitely recommend a Teflon foot and a micro text needle to sew through the faux leather so that it has that really nice crisp top Stitch perfect with projects like this it really does make a difference it makes your whole experience better yes yeah you don't want to be frustrated you want to have fun exactly so I went ahead and finished my strap and so here's what it looks like all pieced together sewn on both sides yes that looks awesome so then we'll repeat the same process for the strap connectors on the sides so there are two pieces of fabric and instead of joining these we don't have to worry about that we're just going to fold them in half and half Stitch both sides and here's what they each look like finished awesome so we can set our strap connectors aside for the moment okay add it to our growing pile and then we have these small Buckle strap connectors as well so these ones will be folded in half and top stitched an eighth inch from each side and here they are finished okay we'll add those over here so that's it for preparing our straps and now we'll work on adding them to our side panels okay the Buckle strap connectors awesome so these are the Buckle strap connectors and this will allow us to add that pin buckle on the side to adjust the strap length if we need to yes so there are two of them and I've already went ahead and marked the placement so you'll measure in from each side Edge and Mark a vertical line and then in from each of the longer edges and Mark a horizontal line and this will create a box okay and to cut out the box I recommend to use a seam ripper to get started and then use your scissors to cut it out if you use your rotary cutter you just have to be careful that you don't cut past the corner I'm just going to say it's it's a pretty small area you're working with yes so here we already cut out our little boxes okay here's our buckles this is the fun part when we get to add more Hardware and then we're going to need our little Buckle straps oh okay these little guys perfect so we're going to take one of our Buckle straps and fold it to overlap the ends by about a quarter of an inch okay and then we've already marked the placement in from one side edge for the Buckle strap and we're just going to place it below the placement line okay and I'm just going to hold this down and Stitch the little ends in place here okay and it might be easier to just sew one side at a time too so I'm going to open it up and line it up and I like to have the folded edge of the little strap towards the cutout area because when we look down on top of the strap it'll have that finished Edge and this will be towards the bottom just a little detail yeah it's a good tip so I just did a few back stitches to hold that down and then I'll Loop it around and just hold it in place and just backstitch it really good okay we're just kind of pushing that top part out of the way right yes trim up those threads and I'll attach the other strap so now we're ready to add the hardware so we're going to take one buckle and one of your Buckle straps and thread it through so that way the pin is against the the wrong side of the fabric okay and then we can poke the pin through our opening and thread the strap so it's wrong sides together through the little Buckle strap perfect and it looks so cute look at that do you want to do the other one sure absolutely so we go this way and our pin this way and slide that through and through our little holder it looks super professional I love the details too great and then we're going to grab our side panels okay here's those and we're going to Center one strap along the bottom Edge of each side panel okay and then we can just clip the bottom Edge all right if you want more reinforcement you can take some double-sided basting tape and just apply some down the center here and help Stick It Down I'm just going to hold this one as I sew and we're going to sew down from the folded Edge to make sure that the hardware doesn't wiggle around okay and then I'm also going to sew a box down here just to keep the strap in place great foreign and I like to start along the top Edge close to this strap here and then stop about an eighth of an inch from The Edge and pivot and then we can continue to sew our box and we can trim those threads all right also the other connector down it's looking so great okay okay so the next part of the strap is to add the tap connector okay so we're going to grab the two shorter pieces of faux leather strap okay and our O-rings and if you want to do one I'll do the other okay and we're just going to thread the O-ring through the top of the strap and fold it down so it's about an inch or inch and a half from the folded Edge to the raw Edge okay you can just clip it together and for this part I am going to add some double-sided basting tape because it is quite long so I'm just going to place a piece down the center okay and not all the way because it will go into our Buckle here so about halfway is enough to hold it you can just trim that and then do the same thing on this other one yes okay and we are overlapping that part that we folded right yes okay so like about there is good perfect all right there we go and I love this thin eighth inch wide outside basing tape oops there we go okay so then we'll have one strap on each side panel and we'll want to center it and have that top folded Edge about an inch and a half down from the top raw edge of the panel I come down here so we're we're close as long as they match and the bottom edges should line up so that's a good medication so you can just press down in the middle and that tape holds it really well yeah it's amazing for being so thin how well it works so I'm going to sew this down I'm going to start about three quarters of an inch from that top folded Edge just be careful of your Hardware so if you need to adjust that you certainly can so I have my presser foot aligned where I'm going to start and you'll want to refer to the pattern for how far down to sew you can certainly Mark a line across okay so you know where to stop I'm just going to sew and I've already went ahead and marked it okay thank you [Music] foreign you might have noticed I originally used a matching thread which is really beginner friendly too so if you happen to go a little crooked then it hides that but more forgiving yes and it's kind of fun to use the contrast I'm just gonna say I really like it yeah and then I'll repeat to attach the other side okay so now we're going to punch a hole in our strap for the PIN to go through so I love using a rotary punch okay and this has the dial that you can turn to the different sizes and you'll want about an eighth of an inch diameter just enough for your Hardware to poke through okay and you'll want to make a note of where the pin will poke through the fabric once it lays flat it actually goes through the center of the pin okay so you'll want I usually just Center like eyeball and Eyeball right over the middle of the hardware okay and then you just squeeze there you go and you'll come from underneath that roller bar and poke your pin through look at that and thread it through that strap beautiful and then repeat for the other side I love it so much I love it too I think it's it adds a lot to the bag just to have that extra detail definitely so the next step is to add a little bit of shape to the side panels okay so we're going to measure in from each top Corner a half of an inch and do a mark along the top Edge all right does it matter is this marking tool fine perfect okay something that we will be able to see all right let me move some of this out of the way for now and so on both sides at the top right yes a half inch okay there's one two perfect and then you're going to draw a diagonal line from this Mark to the bottom corner okay and then the same for the opposite side and the other panel so just all the way down that full length yep my ruler is just the right length pretty Magic all right there's that first one okay so while you mark the other one I'm gonna sew a quarter of an inch in from each of those diagonal lines to attach my fabric to the foam perfect and I'll work on this one thank you there you go okay so now you're going to cut along that marked line I can do that okay and the same for that one perfect thank you so we have our side panels prepped and we can set those aside okay and then there's one last piece to the exterior to prepare and that is the base of the bag all right so here I have our base pieces and included in the pattern is a template and you place the template in the corner and Trace the outer edge just to give you that curve to give you that curve and then you do that to the heavy stabilizer piece your lining piece and your foam piece and all four corners so you'd Mark the corner curve and then you cut along the marked line okay so I'm going to set this piece aside so I've already went ahead and cut the corners for the contrast fabric okay and against the wrong side you'll take your heavy stabilizer piece and Center it and it's intentionally smaller so that way it's not within the seam allowance later on reduce that bulk yes and then you just top Stitch an eighth inch inside that heavy stabilizer and you can use basting spray to hold the heavy stabilizer down as you sew or if your Clips reach you can use the clips okay and another optional piece of Hardware that we can add are pursed feet so we've went ahead and marked the placement for the purse feet so you just measure in from each of the short edges and Mark a line all the way across and for me to the long edges and then at the intersecting marks then you punch a hole and I usually use the smallest hole on the rotary punch because you want a nice tight fit for your purse feet perfect so that's all ready to go here's one purse foot okay and you'll poke the prongs through from the right side to the wrong side okay and then place the washer over the prongs and then fold these back if I can get them to separate it's the downside of having nails they don't always help and if you push both prongs to One Direction they'll actually operate a little bit easier oh okay that's good to know then you can kind of get that other one I see that good tip there we go just like so perfect and then again you can add some glue or interfacing and it looks super perfect such a great detail all of these little things make a big difference in the overall finish of the bag I think great we'll just quickly add the last of these and it's so easy to do too it just takes a couple more steps yeah I think it's scary when you see all of those components but once you get started it's really not difficult at all and a lot of Hardware is installed the same way too either with the prongs or sewed in yep and so once you figure out how to do it you're good to go for all those different bags and the last one okay all done perfect so then we're gonna take the foam stabilizer to add a little bit more stability we really want that strong stable base and the heavy stabilizer is kind of bumpy so it kind of helps grip the foam otherwise you can use your basting spray and I'm going to sew the two layers together okay and you can sew from either side since I just have a standard foot I'm a machine I'm just going to sew from the foam side so it sews a little bit more smooth sounds good and this is just the eighth inch base basting stitch all the way around just to hold all the layers foreign so we can add these pieces to our pile of pieces that are prepped yep and now we're going to work on the interior padded pocket okay so let's get started on the interior all right we're going to take it step by step first we're going to work on the slip pocket that will be attached to our padded pocket okay so we're just going to fold this piece in half and I'm going to sew along the raw edges so then very similar to before okay you're going to press the seam open and turn the pocket right side out alrighty all right this little bit doesn't want to fold over there we go okay all right and are we centering this up again so this time we'll just position it up from the bottom Edge a little bit okay and this will become the wrong side of the pocket and then just press it and then it has that crisp attack and bottom Edge all right how about that perfect so the side with that seam will end up being the bottom okay so I'm going to flip it over to the right side and I'm going to top Stitch from that top folded Edge okay and this is the lower half of our lining for the pocket and we've already marked the placement so I'm just going to position it below that placement line so you'll refer to the pattern to mark that horizontal placement line and you line up the side edges and make sure the bottom is even add a couple Clips to hold the side edges together there we go I'm going to sew the sides and the bottom edges just with the eighth inch seam allowance all right so one extra step if you want you can stitch either a single line up the center or maybe you want a line over here for a smaller section of the pocket if you plan to put pens in here or large enough for your cell phone so I'm going to stitch a dividing line up the center okay great and you can kind of just customize that however you want right okay so if you do want to mark that Center sure okay and that'll be an easy visual just to follow along that line right on that line thank you you're welcome and you'll definitely want to back stitch foreign and sometimes I even pivot and sew back down just for a second line for reinforcement but I'm just going to back stitch really well at the top here a couple times so here's what the lower half of our pocket looks like and I'm going to set this aside so now we're gonna make the zipper pocket for our padded pocket and we have this little fabric tabs to finish off the raw ends of our zipper so this is a Sally tomato zipper and it has a nylon coil so we can cut and sew directly so this is one of my favorite products that you make because it looks like a heavy duty metal zipper but it's so versatile and you can sew and cut right over it really amazing and I love that you can cut the exact length that you need so you buy a whole roll and then you just put a zipper pull on yep and then cut the length that you need so it's it's perfect perfect yes so then we're going to position the tabs on each raw end and you're going to line up those short edges and the side edges so that way the right side of the fabric is against the wrong side of the zipper okay and then another one right sides together to clip these so they don't shift it's going to clip this side so it stays out of the way and I'm just going to sew this with 3 8 inch seam allowance all right and then I'm going to fold these tabs away and just top Stitch a quarter inch from the seam great and then we'll repeat for the other side it wasn't so bad right not bad at all so now our zipper is prepped and we're going to attach it to the top panel of our pocket okay so there's two pieces one for the front and one for the inside and you'll want to position your zipper so that way it opens According to which hand is your dominant hand so if you are right-handed you'll want the zipper to open towards the right and then if you're left-handed you'll just want to flip it around and have it open to the left okay and I'm right-handed right-handed so we'll position it this way and usually I keep the zipper away from the edges too it just makes a little bit easier to install sure and so this will be the top panel in our zippers positioned correctly so we're going to line up these two matched edges right sides together okay and if it's easier to see you can flip it over to sew it and we're going to sew with a quarter inch to baste it down so if you want to baste it you can I'm just going to grab the other piece right away okay and place it right sides together with your other lining Fabric and make sure that those tabs are even with the side edges I'm going to clip all three layers together at once and just skip that basting but if you want a base to make sure nothing shifts and go for it you totally can so I have this narrow foot attached to the machine so it'll be just fine to sew next to the zipper but you could certainly attach a very narrow foot or a zipper foot for this set I'm going to sew with 3 8 inch seam allowance and you want to make sure that you know where your zipper pull is so you can just slide it out of the way as you get to it all right and I stopped with the needle down and I'm going to slide it out of the way again and just lift it up my presser foot make sure those edges stay even and then you can just continue sewing so now you can press away the Fabrics so they're wrong sides together okay you can zip that zipper closed if it helps that makes it a little easier yeah out of the way just make sure it's not flipped up there in the back too there we go perfect taking the time to press just really makes it look finished yes it does and crisp so now we're going to top Stitch a quarter inch from that seam that we had just sewn and then I'm going to grab our two lower panels and we're going to repeat the same process that we did before but this time we're going to attach to the raw edge of the zipper okay and we want to make sure that our slip pocket is against or facing up just like our zipper so we're going to make sure that these are right sides together okay and then this is going to come around yes and this will be the interior of the pockets there we go so then we can either pin or clip these together so with the 3 8 inch seam and then press and top Stitch okay great so here's how it should look all done beautiful so we just folded these so they were wrong sides together here's what it looks like on the top and then the interior all finished off beautiful now we need to finish off all these raw edges so here we have another interior piece because we need an inside to our pocket our zipper pocket yeah so we're just going to have our fabric right side up and our pocket right side up line up all those edges and I'm going to baste all the way around there are a lot of layers here okay so you can use pins or Clips to hold the layers together got one little clip over here I can help with perfect thank you you're welcome going to add a couple anyway even a few makes a big difference from shifting yes and I'm going to start along the top edge here just to keep those top edges even okay so now when you open your zipper there's the lining inside then we're going to take another lining piece okay and layer it right sides together with the front and align all the edges and this time we're going to sew just the sides and the top and leave the bottom open so we can turn it right side out the bottom thank you so now we can turn this right side out and I like to use a turning tool to help poke out the corners and to smooth the seams so this is the Sally tomato essential turning and creasing Tool so we're going to use the curved side and just run it along the side edge okay so that way we have that nice smooth corner sorry just bring it inside and then just run it along each side of the seam works really nicely and the other side of this tool is a stiletto too so you can always use this to help guide absolutely absolutely so we can give that a good press okay and you can use your fingers to just roll the seam to make sure it's right along the edge and then same thing on the sides yes okay foreign all right there we go perfect so now we're going to add a piece of foam in between the layers for that stability okay so just slide it right in so it's tight against that top Edge and then I'm going to top Stitch a quarter inch from the top Edge and that'll help hold that foam in place awesome okay next we're going to take one of our lining panels and the pocket is going to get centered along the bottom Edge and then I'm just going to sew with the eighth inch seam allowance on the sides in the bottom make sure to leave that tab open for the laptop yep and you can certainly add some pins in the side edges here to hold it in place [Music] these pockets are going to be so useful inside this thing yep absolutely so we're done with one half of the lining and then we have to install one more zipper pocket on the opposite half all right all right so now we're ready to make the interior zipper pocket so we'll start by pressing the bottom edge of each of our zipper pocket lining pieces a half inch to the wrong side so you're just going to fold it up about a half of an inch for both pieces along the bottom I can do that move my scissors out of the way have you gotten pretty good at eyeballing measurements I have yeah I feel like you do it enough times and then all of a sudden you know you don't have to worry about it too much anymore well and I I have figured out too that if you get it close it's usually good enough yes yeah I'm the same way yeah early on you worry about all those little things but you don't have to yeah it'll all turn out in the end yep looks good so then we're going to measure and Mark a placement box for our zipper so we've already went ahead and done that we measured in from each side edge and marked a line and then down from the top Edge and marked two lines so we're going to start with this piece that's already marked we're going to take one of our lining panels so this is the one without the pocket attached okay and you're going to place your marked pocket against the lining right sides together and Center the pocket along the placement line so you're going to measure down Mark a placement line across and you can either take your ruler and find the center or fold each piece in half and match up the centers again I'm just going to get about equal distance on both sides and sew along the placement box okay and whenever I sew along a placement box for a zipper I decrease the Stitch length to two millimeters okay and that'll just help have a nice clean Edge when we turn this right side out for the zipper so okay it'll help in the next step and I usually like to start along one of the straight edges versus the corner again just like before and after a while some of these things will just become habit yep the first time I saw this zipper method I was so confused I have to be honest but now I get it it makes sense yes yeah the first time through you'll be a little hesitant probably because it seems a little strange yeah but it works beautifully thank you I'm just gonna sew right over my back stitching from before and back stitch again so now we're going to cut a horizontal line through the middle of this placement box okay and you'll want to start start and stop about a half inch from each of the edges so you can use your scissors or rotary cutter okay and the ruler I'm gonna go with the rotary cutter that's what I do too nice and close for time yep okay I think I got close enough there yeah it looks good and then take a scissors and cut a diagonal Cut Up To Each corner it's careful not to cut through the stitches okay just right up to that all right there we go okay and then we're going to push this fabric through our opening and press the Fabrics along sides together but what I like to do is kind of press it first along each of the edges to get it started yeah and then we'll fold it through so okay I'll let you press the pressing all right and I usually end up pressing it from the right side and the wrong side just to make sure everything stays where it's supposed to that makes sense okay yeah you can see why the first time you do this it it feels a little funny but it gives you such a beautiful finish and we'll do this top Edge same thing just kind of roll it under your fingers and then once you do those two long sides the ends kind of just behave on their own at least that's what I found there we go yeah you got it yeah I got there eventually right awesome so next we're going to take our 10 inch zipper and again you'll want to position it so it opens towards your dominant hand and then we're going to take some basting tape and apply a small little piece just along the very raw Edge okay the top and bottom of the zipper you went all the way across or just okay sure it's wasn't sure we've got this skinny little tape so I'll get it started so we have The Zipper right side up our fabric right side up the edges of the pocket lining should be even with the raw edges of the zipper and then you're just going to center it in that placement box and what's great about the tape is you can just readjust it if needed exactly there we go all right so then I'm gonna sew around the placement box all the way around just with an eighth inch seam allowance okay and if you need to move the zipper out of the way you certainly can just make sure that that pocket lining stays down out of the way you wouldn't want it to flip up sad so you can certainly leave your pocket as is like this and then continue on with the pattern to add the opposite lining piece however you can take it a step further and we're going to add on this extra little accent oh I love that and it also helps hide that seam a little bit from before too so we are going to add a little bit more tape just along the center of the long edges okay and peel that paper off and Center it over the zipper so the opening of this box is a little bit smaller just to help cover that up so just try to center it the best you can just gives such a beautiful finished look and I love how it ties in the straps and the outside of the bag too so now we're going to sew from this inner box along all four edges with the eighth inch seam allowance and then I'm also going to sew just above this lower curve here okay and sew an eighth inch across the bottom and stop just before that upper curved Edge okay foreign and around the curves you can just lift up the presser foot and pivot around the curves usually I just go one stitch at a time it's another place where taking your time pays off yes okay and we can trim those little thread tails of course there we go all right so then we're gonna flip this over and we're gonna match the lining Fabrics right sides together and you'll want the sides and top and bottom even and I'm going to grab only the layers of the pocket lining and we're going to first sew along this top Edge so it's actually a little bit easier to flip it and then just fold away that front and you want to make sure that those side edges are even awesome and I'm so used to lining it as I sew but again you could certainly pin it so then I'm going to flip up that top Edge just make sure that your pocket is flat and aligned and then I'm going to continue sewing that accent down okay foreign thank you then to finish off the pocket we're just going to fold away one of the side edges to start and just sew that side seam of just the pocket Linings together with a quarter inch seam allowance and make sure that those bottom edges stay folded all right thank you and to sew the other side you're going to start at the bottom Edge this time and I was a little crooked but that's okay it's just the lining right you can catch that in the seam yes and we're going to leave the bottom Edge unsewn this is going to be our turning opening for later on just make sure that you unzip your zipper after your side edges are complete okay and now we're ready to move on to prepare the top zipper okay let's do it all right so here we have The Zipper for the top closure of our bag okay and first you want to decide if you want to add a piece of Hardware to the end okay to finish off the end otherwise you can follow along with the pattern to add a fabric tab the hardware is super easy so all you have to do to install the hardware it's called a zipper cord end because you could either use it for the end of zippers or the end of the drawstring cords okay and you just fold the end of the tape in thirds about you can just tuck everything in I usually add a little bit of glue to the inside first just to really hold it together and then on the back side there is a small screw that comes with the hardware so you just kind of get it started and screw it in place perfect that's a really nice little touch and it's all finished off I love that so then on the open end of the zipper you can separate each half of the tape and you're going to fold each of the ends of the zipper tape at a 90 degree angle and you're going to sew just about an eighth of an inch and back stitch a couple of times to attack it in place and you'll do the same on the other side so here's what it looks like all sewn just holding it back like that okay and our zipper is ready to install so we can set this completed one aside and we're ready to assemble the bag oh my goodness let's do it so we are going to start with the front panel in both of our side panels okay and we're just going to place the side panel right sides together with the front and line up the side edges and that angled Edge will be even with the side and here's some clips perfect and I'll clip the other side right away too certainly just do one at a time so you want to make sure that the O-rings are towards the top so the top is the end that has the open part of the slip pocket okay I'm going to sew the sides together with 3 8 inch seam allowance so this will cover up any of the basting stitches that we did before I'll turn it around and do the other side okay so then we can grab the back panel okay that's this one and we're going to just repeat to attach the remaining raw edges together right so just line up the side panels with the back panel do you do one side at a time or should I go ahead and pin both we can go ahead and do both all right there you go thank you you're welcome thank you okay so now we're going to fold the bag and match the side seams to find the side Center okay and really it's where the middle of our strap connector is okay so that's already marked and then we'll match the seams in the opposite direction to find the bottom Edge Center so if we want to Mark the center point where did I put our little marking pin there we go so we just match these here and then make a mark if I can get a hold of it out here yep on both sides yes in the front and the back there we go all right and then if we want to grab our contrast base piece yep so this one I would recommend to use your ruler and measure to Mark okay the center on the front the back and also the sides so now we can match up our Center points okay and just triple check that you're attaching the base to the bottom of the bag start by matching up those centers and just clip the centers first and then also on the side edges and then I just clip the straight edges and then clip the curves last okay so that way we those will ease into place cursed what is happening they've been well used and here's where we probably want to use a lot of Clips to make sure nothing shifts hold everything together there you can see all of the clips that we've put on just to ease all of that in hold everything straight and I find it's easier to sew with the base against the bed of the sewing machine okay that's good to know because our fabric is now curved around the corner so it behaves a little bit better when it's upright like this that makes it so you can just fold it out of the way and then we're going to sew all the way around the base to attach it once you get to the seams I just recommend to finger press them open okay and here's where the Stiletto comes in handy to help hold it all in place foreign so then we can turn this right side out okay and now's a good time to make sure that you cut all the edges yeah so if you have any holes go back and fix those oh it's looking so nice though look at that that's so pretty it's so pretty great so then we're going to assemble the lining so we can grab both of our lining panels okay there's those okay so make sure your top edges are at the top and then place them right sides together and this time we're going to start with 3 8 inch seam allowance and then we're going to gradually increase to 5 8 just about an inch or two down okay and then sew 5 8 inch seam all the way down to the bottom okay that way our lining is a little smaller towards the inside and it'll be less bulky sounds good so I'll flip it over and sew the opposite side together then we're gonna trim the seam allowance to a quarter inch wide either with the scissors or okay approximately with the rotary cutter just to get that bulk out of the way yeah all right so I've already went ahead and marked the center point on the front back and sides of our lining base piece okay and then to find the bottom Edge centers you can just match those side seams and Mark again too perfect just like how we did before we'll start by matching up those Center points it's a little thicker on this side so I'm just going to grab a clip perfect and then match the sides so here's how it'll look and then we can sew all the way around the base again to attach those two pieces together okay so this time because of the foam instead of having it up like this I'm just going to have it down and sew around this way okay yeah that foam kind of dictates which way it wants to go exactly yeah foreign foreign just gonna catch this corner here a little bit better okay then we can trim that seam allowance on the corners okay to just help reduce some of the bulk [Applause] just to narrow it up a bit or yes okay yeah to about a quarter of an inch okay yeah that one I got really crooked and that's okay it's the lining no one will ever know and so you're only trimming the corners though yes yes okay oops missed a little bit there we go Perfect all right we can turn the lining right side out and just double check we caught all the edges again okay okay it looks good and then just double check that that zipper pocket is unzipped for turning and now we're ready to attach our zipper so let's see inside the lining and we'll grab the exterior okay I'm gonna Mark the top Edge for the placement of the zipper closure all right I'm going to start by matching up those side seams and mark the center along the top edge of each of the side panels and then when you're when you have the bag against you you'll want to decide which direction you want the zipper to open okay so I think we'll want the open end over here yep and I'm going to measure a quarter of an inch from each side of that Center foreign end will be on the closed end I'm going to Mark a half inch away and then also one inch away from the half inch marks okay so only attach the zipper we're going to start tapering the zipper out of the seam allowance and then once we hit this quarter inch Mark we'll want to make sure that it's completely out of the seam allowance at that point okay and this will be for the closed end so we're going to start with the open end here's our zipper all right so if we want to position our zipper right sides together it's going to flip it and start with one half of the zipper tape and I'm going to unzip it it's going to be a little bit easier to install and then we'll want the very raw end of the tape even with that quarter inch Mark okay and then that top raw edge of the zipper will be even with the raw edge of the top of the bag and I'm going to add a pin just to make sure it stays in place so then you can continue to add Clips or pins to attach that raw edge of the zipper all the way across okay and you can clip up until that one inch mark it's perfect all right so I think it's going to be a little bit easier with the extension table removed so we went ahead and took that off to do the top stitching and if you have a free arm on your machine it's really nice to just fit the entire bag right over that free arm to do this step so we're going to sew with a quarter inch seam allowance and back stitch over that Zipper at the beginning and then continue sewing across the top foreign we're going to keep the raw edges even up until that one inch mark I'm just going to add a pin just to help me recognize where that Mark is and then just take the pin out of the fabric and then taper the zipper away from the seam allowance and back stitch so it should be completely out of the seam allowance by that half inch mark okay and then we're going to align the opposite half of the zipper just like before so I'm going to start with the open end and I don't want this to move at all so I am going to use pins all the way across okay pin the tapered end in place too because this time we're going to start at the tapered end it's a little bit easier yeah that makes sense just to sew from this direction instead oops I bent your pins okay thank you and now is a good time to test the zipper to make sure that it closes evenly okay and if it doesn't if one side seems shifted then you might have to seam ripping them okay okay it looks good though yeah it looks good so then we're gonna unzip it and turn the exterior wrong side out and then we're going to take the lining and insert it into the exterior okay so the right sides of the fabric are together and then also the padded pocket should be against the side with the luggage strap okay line upper Center marks along the top Edge all right there we go all Clips together all right so then just sew around the top Edge all the way around okay this is so exciting foreign and just make sure as you sew around to remember that your O-rings are at the top on the sides okay and then also your zipper pull and that cord end if you decide to use that so I'm going to stop because I feel that O-ring I'm just going to make sure that it's pushed down it's a good call out yes I don't want to break any needles today [Music] all right Miss tea we're ready to turn it right side out oh my goodness so I like to pull the lining through first and then I reach in and grab that base that's the thickest part you just have to kind of take your time and make it work yes and before the lining goes down into the exterior I'm going to grab that unsewn edge okay of the zipper pocket and just sew across with an eighth inch seam allowance to close that up all right just move that all out of the way this is way better than hand sewing oh my goodness absolutely [Music] that can go back into the zipper pocket and just work to push the lining inside look at that so we're nearly there we just have to top Stitch along the top edge with a quarter inch seam allowance all the way around okay oh my goodness I love it and to do the top stitching I usually start on the back or the side panel just the way our back stitches aren't showing on the front so just as you go make sure the lining is down inside and you could press it before you top Stitch if you wanted to [Music] all right look at that now our zipper can close it looks so great awesome so then the last step is to attach the strap all right let's do it so it's pretty simple from here all you have to do is measure from each end of the strap and mark the placement for all the holes and then you see rotary punch to punch each of the holes and now we're ready to thread it through the bag so I usually like to have that finished folded Edge towards the front Okay and then if you want to thread through that O-ring through the Buckle as well yep nice down to the buckle so I'm so excited about the Misti bag just thank you so much for all of your help designing and putting this together I could not have done this without you obviously oh absolutely it was my pleasure it was so much fun to design and it was a fun challenge for me to make it easy for everybody else absolutely and so let's just recap some of the great features as you can see you can wear it as a backpack like I have right now you can also wear it as a shoulder bag and then just you want to go through some of the pockets yeah so then you can slide it right over your luggage handle yep on the back you have that nice magnetic closure slip pocket on the front Zips open nice and wide so you have access to your laptop or tablet all sorts of pockets for organizing while you're traveling and on the go so I loved sharing and I hope you enjoyed learning the process of making all the different types of pockets using the different hardware and all the techniques yeah definitely you have some new bag making skills so thank you guys so much for tuning in and we will see you next time bye hey everyone it's Misty thanks for watching at home if you aren't already a part of our Missouri Star Family be sure to subscribe and hit the Bell if you want a notification every time we release a new video I'll see you next Monday on the newest episode of at home [Music]

More Fabric by Yard tutorials

See all