Make a "Candy Bag Zipper Pouch" with Jenny!
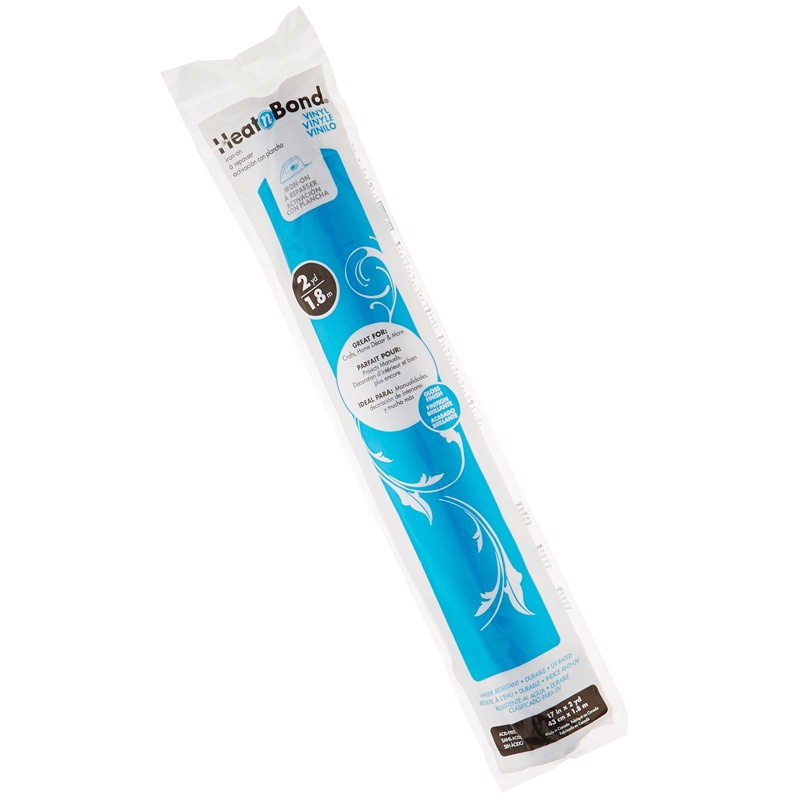
Create a super sweet Candy Bag Zipper Pouch using your favorite candy wrapper (or a fat quarter!), Heat N Bond Iron on Vinyl, a scrap of batting or fusible fleece, and a zipper!

Instructor
Jenny Doan
Jenny Doan is an American quilter, author, and YouTube personality. Jenny started Missouri Star Quilt Company in 2008 and today it is the largest quilting supply vendor in the United States.
Shop this tutorial


Common Questions
What is covered in Make a "Candy Bag Zipper Pouch" with Jenny!?
Create a super sweet Candy Bag Zipper Pouch using your favorite candy wrapper (or a fat quarter!), Heat N Bond Iron on Vinyl, a scrap of batting or fusible fleece, and a zipper!
How long is the tutorial video?
The tutorial video is 00:21:35.
Are supplies listed for this tutorial?
Yes. The tutorial page includes the supplies and materials connected to this project.
Video Transcript
Hi everybody, it’s Jenny from the MSQC. And today we are making dreams come true. A while ago I did a zipper pouch tutorial and then I did a Facebook live where I did the same tutorial but I used candy bags. And so many of you have asked for the full tutorial. So today we’re doing that for you. So to make this what you’re going to need is a candy bag. You’re going to need some, a scrap of batting. A scrap of backing material. A zipper and you’re going to need some of this iron on vinyl, this Heat N Bond iron on vinyl. And, and this is so fun because once you realize that if you iron vinyl onto a candy wrapper you are going to be able to make anything, a bag or a pouch. So this is really cool. I mean you could have a potato chip purse, you know. I mean it’s just like, it’s really fun to do this. So here’s some samples of what I’m talking about. So this is like a little pack of Tootsie Rolls. Now this one is really fun because I actually found and maybe you can or can’t see this, I don’t know. But I actually found Tootsie Roll fabric to line it with. How cute is that? So I have a little bag of M&M’s here. And they all have the zipper in the top just like the zipper pouch. And you don’t stress about the zipper because we’re going to make that easy for you. Here’s a little Dove chocolate. I’m not going to, you know, admit to anything but well pretty much I ate that whole bag of that myself. These are M&Ms and I actually went looking for some of these, had a hard time finding these. They’ve actually changed the shape and they’re taller which I actually thinks makes a cooler pouch. So let me show you how to do this. So the first thing you’re going to want to do is get your candy bag and empty it. And I don’t care how you do that. There’s no judging here. You do whatever you want to do. Mine is in a baggie at home. And then what we’re going to do is we’re going to cut the ends off of this and the bottom off of this. It’s easier to work with if it’s two separate pieces, the front and the back. So let me grab my ruler here. There we go. And I’m just going to lay this on, right on this very edge right here, right where all this, where they fuse it together. I’m just going to trim that part off right there. Then what I’m going to do, I”m not going to worry about this seam back here because that’s on the back of all of mine. You can see. I mean, it’s on the back of all of these so we’re not going to worry about that. And then I’m going to cut just the bottom off. And watch my ruler. I like slide to just the very edge. I’m just very, just right at that fold and just going to peel that little part off right there. Alright see how tiny that is. And then we’re going to do the same thing to the top because it’s so much easier with two pieces. Alright, just a little peel. There we go. Alright so now what we’re ready to fuse our, our bag. And we want to fuse it with the iron, the iron on vinyl. This stuff is so cool because you could iron it on fabric. You could iron it on anything and it instantly will make your fabric waterproof. It comes in several different ways. It comes in, I think it comes in mat and shiny. I’m not sure. Oh ya this is the gloss. I like the gloss. Alright so here we go. It has a grid on one side. And the other side it has this vinyl just like this. So what I’m going to do is I am going to cut a piece of this that’s just a little bit bigger than my candy bags. So I’m going to lay those on here like this. And they’ll fit two so. Oh this take a little, let me get one more ruler out here so I can have a hand to hold this down. There we go. Alright. Now I”m just going to use my little ruler and I’m just going to use this grid line and go along. There we go. Alright you want to turn your iron on a medium setting. And I turned mine down a little bit. You know usually I’m pretty much iron on high all the time. So I’m going to turn that down a little bit. And then, then we’re going to peel this off like this. Take these apart. And I like to just kind of fold back that edge and just kind of roll it and it should come undone pretty easily. Alright, now you’re going to lay your shiny side down and the sticky part up. And we’re going to put the sticky or the part that we want fused to the sticky part like this. I”m just going to lay that on there like this. And this one is a little bit bubbly because it has that seam in the back. This one should lay nice and flat on here just like that. I’m going to try to get all the little bubbles we can out. The front is always pretty. The back always has a few little bubbles in it. But we’re going to quilt that down so it won’t matter. Then I”m going to lay this up here on my ironing mat, just like this. And I”m just going to lay that down on there. And I”m going to let it go ahead and you know if it wants to stick a little bit to my mat that’s ok. Now the paper that you took off the back, that’s going to be your pressing sheet. And I like to do it sideways so that I’m sure that my iron doesn’t touch any of the plastic on the sides because you don’t want that on your iron. And then we’re just going to iron this. And you hold it for like eight seconds. And then I’m just going to move this over like this. Be careful not to let your iron get off the edge. I know I’m a fast counter to eight. Alright so now this is done for us, just like that. Now we’re going to trim these. So and I’m actually just going to trim them in half for now like this. And then I’m going to go ahead and get them ready to quilt. So I’m going to take my batting. And I’m going to lay these right on the batting. And you can trim off the plastic if you want. And see this is seriously, actually you know what I’m going to trim off the bottom of this because it has some, some little bits of fur from my ironing mat and I don’t want that to lay over on the other one. So this is really just a scrap of batting. You can see it even has a cut in it. And then we’re going to put the bottom, our fabric our inside fabric. And we’re going to put that pretty side down so we have the fabric down, the batting and these little top pieces. Now it’s easiest for me to quilt these one at a time. And so I”m just going to, but you know if you just decide you want to quilt the whole thing you can. But I’m just going to go ahead and cut this piece in half right here like this and have two pieces for this. And you can see I’m, I’m being a little bit wasteful because I’m cutting the whole thing. And I probably should just trim these down. Because every bag is different, you know, I just say use scrap fabric because you don’t know, you know, it’s not like you, I can say every candy bag you buy is going to use this much yardage. You know it’s all going to be a little different. Now one thing I will tell you is that when you trim them down to quilt you don’t want to get too small because if they shift or slide you don’t want them to go off your fabric. So I”m leaving probably two inches on either side. And then when I get them all quilted then I’ll just trim them right up and they’ll be exactly the same size. Alright so we’re going to bring this piece over to our sewing machine. Now I’m not a major machine quilter so for me I”m just going to straight line quilt this which means I’m going to start at one side here. And I’m going to lay my presser foot right along the edge of the bag. And then I”m just going to sew straight lines about a half an inch apart from each other all the way across. Ok so now I’m done with all my little machine quilting. And you can see I went right through this seam. It won’t matter. You can see my lines aren’t perfectly straight. They aren’t exactly the same distance apart. None of that is going to matter. You can do it close. You can do it far. You can come back and checkerboard it. You could actually outline all of these things. You know there’s so many ways to quilt this, it can be really fun. So what I’m going to do, the front of my pouch matters to me most so this is the one I’m going to trim first because this is going to determine the size of the back of my pouch. So what I’m going to do is I”m going to lay this right along the edge, trim this. Now I”m going to use this straight edge as my straight edge for the other side as well to make sure that it’s nice and square. Alright so now I’m going to come over here and trim this edge and then these sides as well. So get this lined up straight on your line and put your ruler right on the, right on the edge right there. We don’t want to change the size too much because well I don’t know I guess it doesn’t matter, that’s up to your personally. But I love the, I love the size they are because some of them are little and some of them are big and some of them are tall. Alright now I’m actually going to cut out this one just the same but then I’m going to lay them together to make sure that they actually line up exactly. And I don’t know why I do always do the ends first but I’m not sure if that matters. You can do it however feels best to you. Make sure my, I’m square here. Alright now I’m going to lay these on top of each other, make sure they’re exactly the same size. And they are pretty close. I think they’re, I think they’re, I would say very close. I may not even need to trim those. Alright so now you can see these are ready to go. They’ve been quilted. They’re lined. They’re ready to go. And we’re going to tackle our zipper. Don’t fear this zipper. The zipper just is not at all as hard as you think it is. For our zipper what we need is a little inch and a half piece of fabric. So I”m just going to come over here and cut an inch and a half. And I’m going to move these down here because we’re done with them. Oop I guess I better keep this up here because I’m going to need that. And we’re going to choose a zipper. And I think I’m going to go with red for this. I think that will be fun. And to prepare our zipper what we need to do is we need an inch and a half by maybe six inch long piece of fabric because we’re going to make little tabs on the end of the zipper that will hold it down. So what I’m going to do is I’m going to fold this in half like this. And then I’m going to fold these edges in like this. And then press it together to make just a tiny little folded, enclosed piece of fabric that I can slide my zipper into the end there. So we’ll do that here at the, at the ironing board. First I”m going to fold it in half like this. Make sure it stays right in half. And I’m probably ready to turn that iron back up. And then I’m going to fold these to the middle. So I’ve made a middle crease line right there. Now the edges are going to be folded to the middle like this. And this is just an easy way to enclose your zipper ends and make it look a little bit more finished. And there’s lots of little binding tools to use to do this that would make this part a lot easier. There we go. Alright now I’m going to fold this over and just press this down right here. Easier for me to go from this direction. Probably easier for you to see as well. Alright so this is going to hold our zipper. Now we’re going to take our bag and we’re going to take our zipper and what you want is a zipper, you want a zipper that’s about the same size or a little bit shorter. So we have to allow for our seams out here. And so I’m actually going to cut this, make sure you leave the head of the zipper in here. And, and then we’re going to cut this about maybe ¾ of an inch shorter. So just about like this and I’m going to end up trimming off these little pieces right here. So let me trim those first. Now don’t cut, don’t cut through your little, your metal clips right there, those little stops, don’t cut through that. But I’m going to go ahead and lay this on here and cut just right on the other side of those. There we go. And this is a nylon zipper so it’s super easy to cut. And then what we’re going to do is lay this up here. And I’m going to move this in a half an inch. And I’m going to move my, my ruler in a half an inch over here and I”m going to make this cut right here. Now this is now an open cut so if I opened this zipper it would slide right off. We don’t want that to happen. So what we’re going to do is slip our zipper in here. And we’re going to take this to the sewing machine and we’re going to sew this down. And that will make a stop so that we can’t, this zipper won’t come out, come open from that. So, line this right up under your foot and make sure your zipper is pushed all the way to the fold and just sew across. And I’m just going to backstitch right over that thing, the whole thing. Now I’m going to pick it up and make sure I caught both sides. And I did, hooray. So now I’m going to trim this off the same size as the zipper, just like that. And then I’m going to look at this other end and do the same thing down here. So this one is a little trickier because this one is together. This one you kind of have to hold together with your fingers. And, and right now I’m actually going to cut right beyond this stay because if I try to go through that with my needle it will break. So I’m going to do that. And then I’m just going to come and slide this right in here. And, and hold it. You’ve got to hold your, your, your lip just right. You know you’ve got to bite your lip like that just to get it all in there, right? I’m forever, I’m forever having chapped lip down here because I’m like when I sew. Alright hold those together and sew. Alright there we go. Now this is, it’s caught on both sides so I can trim this off. There we go and over here. Alright so now our zipper is ready and we get to put our zipper in. And how we’re going to do that is we’re going to lay our zipper on here right sides down like this, just like this. And what I”m going to do is I’m going to open this up but about halfway through my sewing I’m going to zip it the other way. So I”m going to sew to the zipper head. And this zipper is actually a little short. See right here. I”m going to lose about a half an inch on either side but it’s still going to work. Alright I”m going to go along here. And I”m going to set my presser foot right on the edge of this zipper. Now I”m getting down close to this end so I”m going to lift up my presser foot right there and I”m going to slide this zipper head closed down here. And that way the head of the zipper, the zipper pull it won’t get in your way. Alright so now that we’ve sewn this seam on there what I’m going to do is I’m going to fold this back like this. And now I’m just going to topstitch right along that edge ok? So just right along the edge. And the zipper pull doesn’t seem to be in my way at all. Alright now what we’re going to do is we’re going to come along here and we’re going to put the back on. And the back you want to make sure that they’re still going to right direction. And so we want to lay this over like this. And make sure the sides of your bag are matched up and then you’re going to put this on your zipper just like this. So one more time. Open it up. Look and make sure that these are laying the right way. Lay it back on this edge. Make sure your sides are lined up. And you can put a pin in there or you know some people use a glue stick, you know, to glue on that zipper. We’re just going to come across the end here and come across and sew it down. Now I”m getting to where my zipper head is going to bother me so I lift up my presser foot and I slide that zipper pull past where I”m sewing. And we’re good. We’re going to do the same thing over here where we bring this back. And I”m going to close my zipper and I”m just going to kind of finger press this down and we’re going to topstitch on the other side of that zipper. Alright here we go. Make sure that your piece is folded under because that will help secure it. And the topstitch on these isn’t, isn’t for decoration or anything. It’s because the bag tends to be, it just lays down nicer when you topstitch it down. Alright so now what we’ve got to do is we’ve got to sew all the way around this side. And if I do that and my zipper is closed I won’t be able to turn that. So we have to make sure that our zipper is open. And then we’re going to lay this down. And we’re going to sew, we’re going to line these up just how they are. And see this one, this one is a hair off over here. And so I”m just going to go ahead and not worry about that and just sew right in here. And sew across the bottom and up to the top of the other side. And then we will trim that as we go. So you want to sew pretty close to where your zipper tabs are. And then I”m going to come across the bottom. Make sure it stays lined up like this. And come up the other side. And I think I can go back a stitch. Just back up a little bit. And then when I get right up here at the top I’m going to backstitch because I do not want that coming out. Alright now with a scissor or your rotary cutter you can trim off this excess. That will make it a lot easier to turn. So see I just trimmed close to the edge of that. And I’m going to trim off this little corner right here. And I think my bottom is ok. I”m just going to go ahead and trim this other side up over here, just a little bit. There we go. Alright so now we get to turn our bag. And I”m just using my finger to push out that corner. And then also my finger to push out the tab. See how finished that makes that look. Well I’ll show you in a minute. I’m in the middle of the big reveal so I can’t actually, I can’t actually stop and show you that corner. But I will. It’s a little bit of work to turn these.. Alright, use my finger to poke out that corner. And then I’m going to poke this zipper tab right up there. Alright so now take a look at that. And here, you see how your little zipper tabs come up and they’re all finished. And then you can just zip this closed and use it for whatever you need. Is that not the coolest thing? And it still smells like chocolate. So anyway, this iron on vinyl is awesome. You can use in on fabric, candy bags, whatever you want. We hope you enjoyed this tutorial on the Candy Pouch Zipper Bag from the MSQC.