Triple Play: 3 New Crumb Piecing Quilts with Jenny Doan of Missouri Star
 Jenny Doan
- Fat Quarters
- Lap / Throw
- Beginner
- Quilt size 74" × 83"
Triple Play is a favorite tradition here at Missouri Star. Once a month, Jenny, Misty, and Natalie each demonstrate their own, unique take on a favorite block, technique, or template. In this episode, the talented Doan ladies show off three fabulous, scrap-busting crumb pieced projects.
Instructor
Jenny Doan
Jenny Doan is an American quilter, author, and YouTube personality. Jenny started Missouri Star Quilt Company in 2008 and today it is the largest quilting supply vendor in the United States.
Shop this tutorial
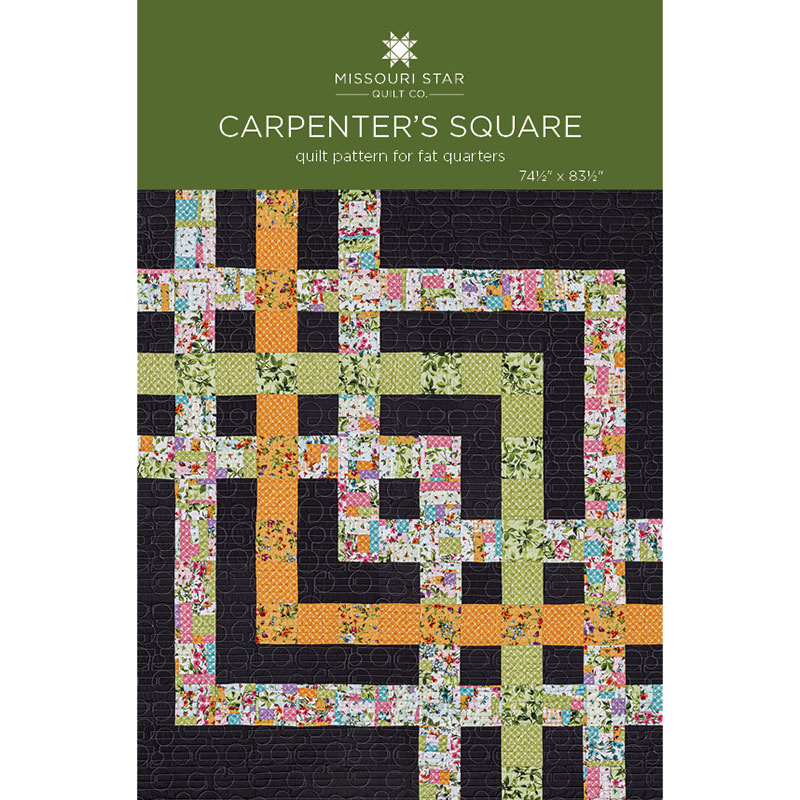 Carpenter's Square Quilt Pattern by Missouri Star$5.95Shop →
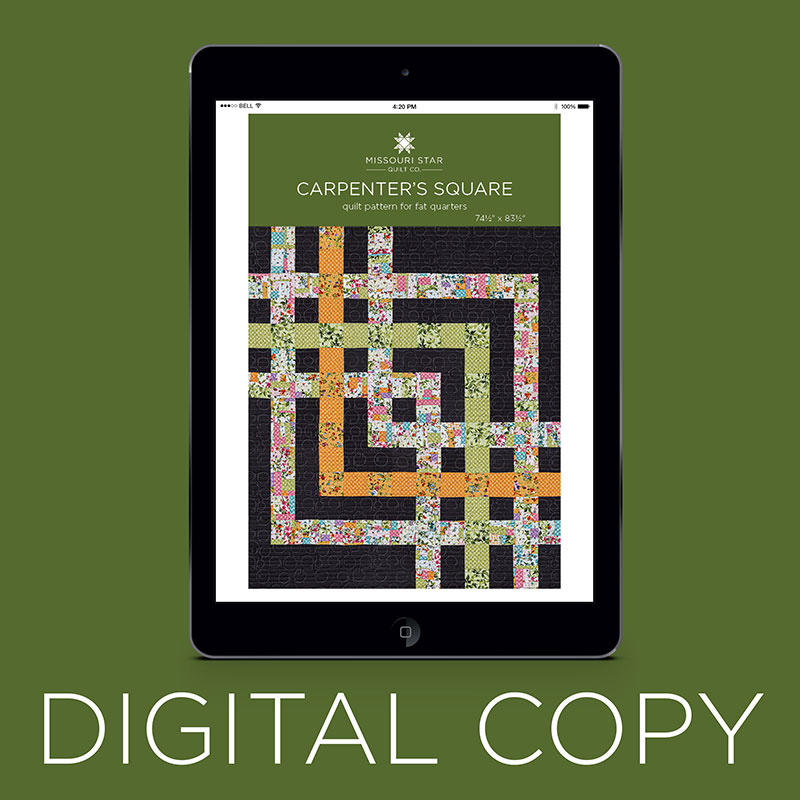 Digital Download - Carpenter's Square Quilt Pattern by Missouri Star$4.95Shop →
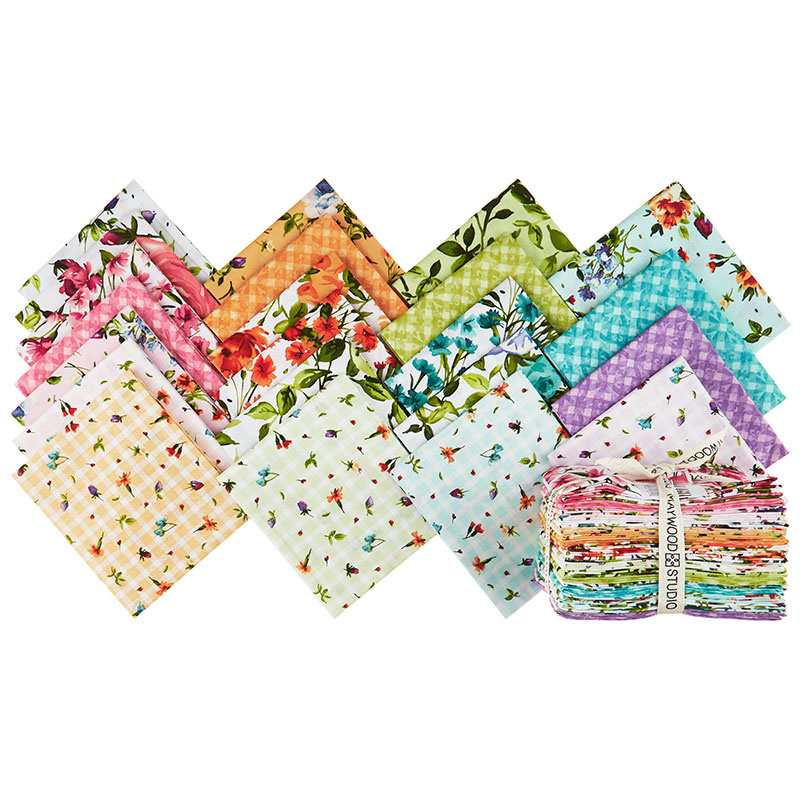 Bloom On Fat Quarter Bundle$74.95Shop →
 Bella Solids - Galactic Yardage$7.24Shop →
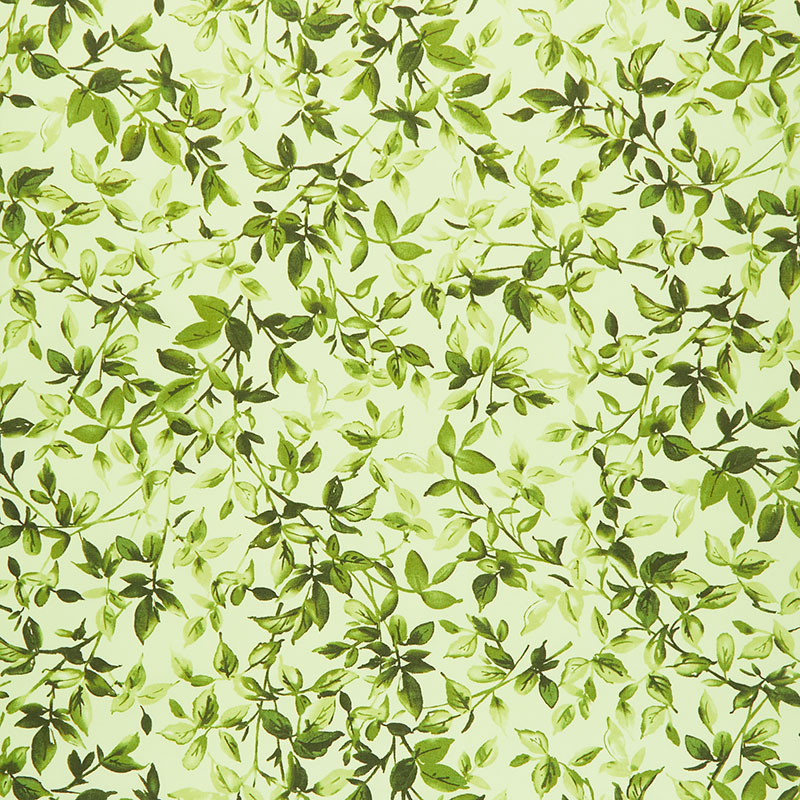 Bloom On - Leaves Green Yardage$10.96Shop →
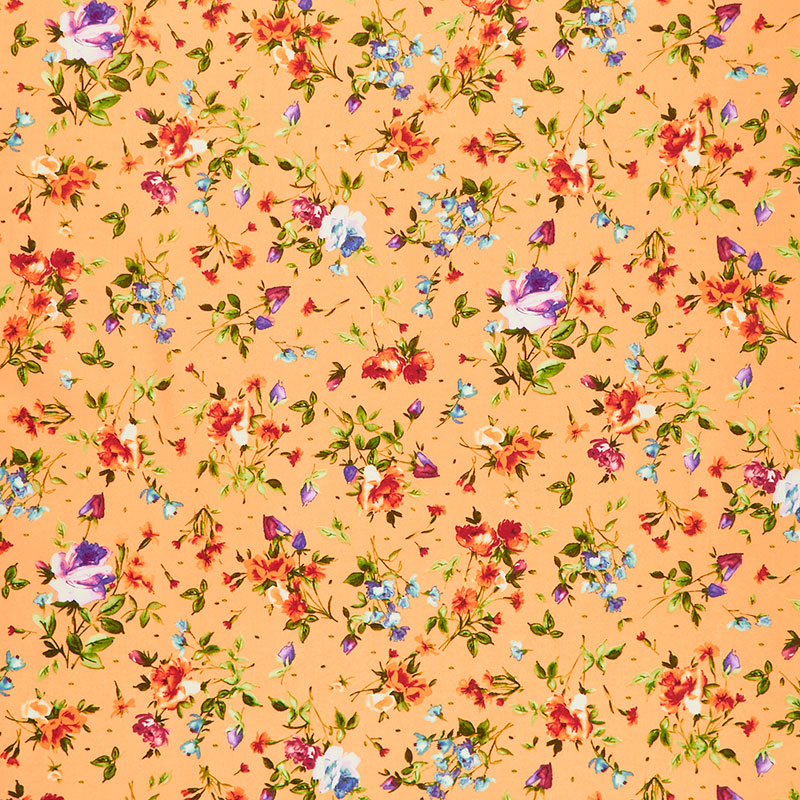 Bloom On - Spaced Floral Orange Yardage$10.96Shop →
 Full Circle Quilt Pattern by Missouri Star$5.95Shop →
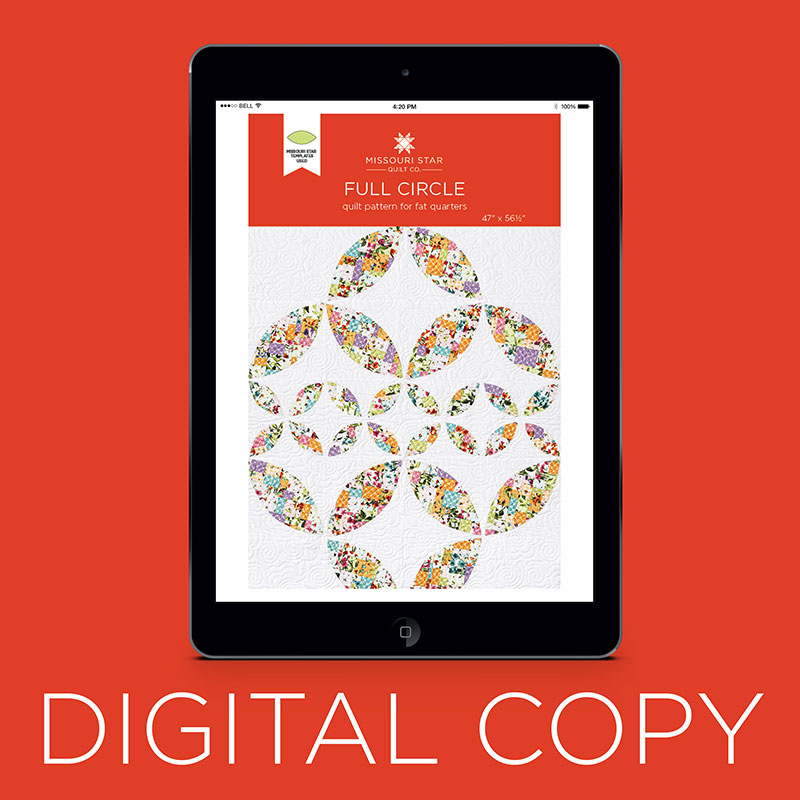 Digital Download - Full Circle Quilt Pattern by Missouri Star$4.95Shop →
 Kona Cotton - White Yardage$6.76Shop →
 Heat N Bond Fusible Interfacing Light$3.15Shop →
 Missouri Star Bamboo Creaser Tool$1.95Shop →
 Missouri Star Large Orange Peel Template for 10" Squares$16.95Shop →
 Missouri Star Small Orange Peel Template for 5" Charm Packs$7.95Shop →
- Bloom On - Spaced Floral Orange Yardage$10.96Shop →
- Bloom On - Leaves Green Yardage$10.96Shop →
Common Questions
What is covered in Triple Play: 3 New Crumb Piecing Quilts with Jenny Doan of Missouri Star?
Triple Play is a favorite tradition here at Missouri Star. Once a month, Jenny, Misty, and Natalie each demonstrate their own, unique take on a favorite block, technique, or template. In this episode, the talented Doan ladies show off three fabulous, scrap-busting crumb pieced...
How long is the tutorial video?
The tutorial video is 00:35:05.
Are supplies listed for this tutorial?
Yes. The tutorial page includes the supplies and materials connected to this project.
Is a transcript available?
Yes. A written transcript is available on the tutorial page.
Video Transcript
Misty: Sure.
Jenny: So you’re going to start with some kind of a strip. And then we’re going to put pieces next to it. And you can put them any ways. This is totally random. So this is all totally random and its however you want to do it. So which means I could put my piece on this way or I could put it on this way. It doesn’t matter. And you’re just going to sew that on and you’re going to add another piece. And we’re going to add another piece like this. And then this, oh this might be big enough for this right here. Oh sort of.
Misty: Not quite. Do you need a smaller one?
Natalie: You can always trim it.
Jenny: Yes, alright so I’m just going to sew that right there. And then Natalie if you want to kind of press those back and hand me another strip. We’re going to make some pieces here.
Natalie: Do you want me to trim them apart first?
Jenny: So when you have a piece that’s already formed like this you want to try and find another piece that is almost that size.
Misty: Do you want this long one?
Jenny: Ya, let’s do that.
Misty: It’s very wonky.
Jenny: Oh ya maybe you can iron that one. How about this orange?
Misty: Ok.
Jenny: and so then I’m just going to sew this along the side. Now I do have to tell you. When you’re making crumbs you have to determine for you what is a crumb. So I had a bunch of these up on my design wall and Natalie said, those aren’t small enough to be crumbs. And so I brought the whole blocks down and whacked them up again. And sewed them back together. And so you’re just going to sew little pieces like this until you get enough to make crumbs with. And then we’ll start building around a crumb. Ok so Natalie you’re going to want to cut this apart a little bit and maybe shorten up that one strip because it’s kind of, you know, it’s kind of wide, that red one.
Natalie: Ok
Jenny: So you know, if you have some skinny pieces like this and you sew them together what you’ll end up doing is you’ll end up sewing a piece along this and then just cutting the whole thing and using smaller pieces. So I’m just going to sew this piece on here. And it doesn’t matter if you put Halloween fabric next to Christmas fabric, none of that matters. And so I love this. You can see in my quilt, it’s almost a little bit like an iSpy because, you know, I’ve got little Christmas things in there. I’ve got. And to be honest I’ve made some, oh we’ll want to press this. I’ve made some blocks that were because I had just done a Halloween project and so the whole block ended up being Halloween. And I didn’t like so much Halloween in a section so I cut that up and it got cut up again. So it’s, you know, it’s fun to do. Oh that’s a really big piece. Let’s see. Let’s make this smaller.
Misty: OH! Wild woman!
Jenny: Yeah. Well we don’t want a piece that big. And Natalie would not like that for sure. Alright so when we get some of these pieces and you honestly can sew long strips together and then, you know, you’re just going to do some cutting and some sewing and some cutting and some sewing. And I’m hoping that I get enough together to make a piece
Misty: Cut that off.
Natalie: Like that?
Misty: Ya why not?
Jenny: Because this is such a long piece together, I consider this like seeds. You know, so this will be chopped up and because you don’t want a piece this big in one block so it will be chopped up and it will be the beginnings of another block.
Misty: So what about this one with these long strips? Would you cut this again?
Jenny: I would cut that again, ya. I would cut that again. So I’m actually going to put this piece here, I’m going to sew it onto here. And actually I’m going to sew it onto this way.
Natalie: I do whatever I want.
Jenny: And then you’re going to, then you’ll have to trim off this red because I only sewed that far.
Natalie: I already cut them down once.
Jenny: And here’s another trick , here’s another trick. On this, say I don’t want this big piece well I can sew my next piece on right here and then just trim that off, you know, so it just makes, you know, it just makes a smaller, so rather than a whole big 2 ½ inch strip, and I actually can come and sew along this side as well. And just cut those two in half. How tricky am I? Now also there’s a lot of little seams on this quilt and let me tell you, you know, machines will go through. So you’ll need to cut this off here.
Misty: Oh, ok.
Jenny: It’s a little tricky.
Natalie: This one has got me a bit confused.
Misty: There’s a lot happening.
Jenny: It’s alright, all those little pieces will add to something else.
Misty: You can trim that off.
Natalie: Oh. Right in the middle, huh?
Misty: Yep. Fold that back, I think.
Natalie: Ok, alright then.
Jenny: And then this piece and I can put this over here. Nope, I can’t put that there.
Misty: Perfect.
Jenny: Put this, alright I need another piece for this long end. I’m going to put this across here. So we’ll end up chopping this one. And a lot of times I took off something, you can actually keep your scissors right close because you won’t have, you know, cutting fairies and ironing fairies like I do.
Misty: Everyone should though.
Jenny: Everyone should! Truth right there.
Natalie: This is definitely a good time to make that little nest
Jenny: Ya it truly is.
Natalie: Having your ironing station and your cutting station close by.
Jenny: Your seams do not have to be straight. They do not have to be
Misty: Hopefully you don’t have to cut straight either because we’re not.
Jenny: No you don’t have to cut straight. The seams don’t have to be straight. Nothing matters. It’s super freeing on this.
Misty: It is. It’s really fun.
Jenny: Alright so I think this piece enough now is to add to this. So I’m going to put it on this, nope these two will match up. Alright if you will trim, the reason I can’t do this
Natalie: Will this piece work?
Jenny: It will work eventually. But, wait, I’m going to do one more little row down here. So this row.
Natalie: That should go there for sure. I could definitely build it out.
Jenny: Alright so then we’re going to come up here. And I’m going to put this piece here. And you just, can you see I have this piece that is hanging over. I don’t worry about that. I’m just going to sew straight down the side and then I’m going to make sure this is long enough here.
Natalie: You might want to add something to that end unless you’re going to trim off the other.
Jenny: I think I’m going to trim it off. So press it and trim it. And then I’m going to sew this. And I think this may go on that other side, perhaps, maybe.
Natalie: Do you want this back then?
Jenny: Yes of course I do. Trim me off a side I can add it to because it should be getting close to ten so keep your eye, I have that ten inch ruler right there. Keep that handy and as you’re adding and trimming it you’ll see oh I need a little more here or I need a little more there.
Misty: We’re going to have to add to the top
Jenny: Well I’ve got a piece right here
Natalie: Just keep adding.
Jenny: Alright. So I’m just going to stagger this a little bit because I want a little bit of this. And it looks like I don’t need any of that row but I will turn it this way. I’m not worrying about what way my seams are laying. I’m literally not doing that. Alright so then you’ll trim that. And I’m going to start another long piece here, keep going. That’s a cutie patootie. So basically, honestly what you’re doing is you’re making your own fabric. You’re just putting your pieces together, not a single thing can go to waste in the sewing room. And so I suggest that you always keep a little bin of
Natalie: Should I trim that opposite side?
Misty: A couple more?
Jenny: Let’s see. I probably want to put just one more on here. Ya we’ll add one more up to the top this way. And then I’m going to put this over here.
Natalie: You could put it on the other side if you want.
Jenny: On this side?
Natalie: On that whole other side
Jenny: That’s a good idea. Alright and I am going to start. This end comes up a little bit so I”m going to start this way and just sew down the side. Make sure my pieces are semi lined up. Alright now Natalie I want you to press that really good, nice and flat.
Natalie: Ok
Jenny: And Misty I’m going to swap places with you.
Misty: Alright.
Jenny: And you just want to make sure it’s pressed nice and flat. I can move this down here now.
Natalie: Alrighty, let’s see if we actually got it.
Jenny: Look how fun this is. Alright. So then what I do is I take this piece that’s obviously bigger than ten. And I’m going to put my ten inch ruler on it. And I’m going to look and see if there are, if I can scoot it over here and save this big strip. That, you know, goes on a whole other block. And so I think I’ll do that. And I’m just going to square it up. And it doesn’t matter if it is squared to any of this. It doesn’t matter if I’m cutting right on the seam because the needle will go through that. And so I just don’t worry about it. So let me twist this around. And so I’ve got it lined up on these two sides and I’m going to trim this one and I’m going to trim this one. Now this guys, this is real waste. You’re not going to use that again. That can go in the trash. This however is big enough for another piece. So then what I have are these ten inch squares.
Misty: They’re so fun.
Jenny: So then what I did on the quilt behind me is I just sewed rows together like this. You know, randomly piecing rows together. And let me see how many. Can you tell how many I have?
Misty: I think it’s five
Jenny: Probably five by six.
Misty: Five by seven.
Jenny: Then it must be, let’s see, one, two, three ya five by seven. I was going to say that’s an odd number for me but maybe I thought it looked the right size and it was great. So yours obviously can be any size you want. And this makes my heart so happy. I don’t know what it is about a crumb quilt but it literally makes my heart so happy. So then you’re just going to make, you’re going to sew a row of these together and then you’re going to sew your rows together. Now on this border out here, I wanted to have, you know, this is about a 4 ½, five inch border and so I just wanted it to stand out from the rest so I took all lights. And I just sewed little strips together and made long, it’s like a piano key border.
Misty: But they’re all different size strips, right?
Jenny: They’re all different size strips and they’re all, you know, I just sewed them as long as, I actually sewed a giant long piece and started putting it on and I actually had enough to go all the way around it because I just kept adding to it and adding to it. But you’ll see, really skinny ones and then wider ones. And oh my gosh this was just so much fun. And so I have just about enough here to put together another quilt. I think I used, what did I use, 30, five times seven is 35?
Misty: Yep.
Jenny: Ya so I have just about enough here for another quilt and I just work on these in the morning and make a couple and it just makes my heart happy and then I go on and sew for Missouri Star for the rest of the day. So my quilt ended up being 60 by 74 and so it’s a nice size. Because it’s a crumb quilt I could put any backing on it that I want so I used this great Kaffe Faucett giant floral.
Natalie: It’s beautiful.
Misty: So pretty.
Jenny: I also, if you’ll notice, the pattern I chose was a more tightly, a smaller pattern, a pattern that covered more area. So this is a stipple or a meander. And I did that because there’s a lot of little pieces on here and we want to hold all those pieces together. And maybe if your seam what’s imperfect or whatever but this will hold it all together, the quilting will. And so I bound it just in this little blue. You’ll need about ¾ of a yard for binding. And how much backing did I use Natalie?
Natalie: You used four yards.
Jenny: Four yards and so
Natalie: The other thing about this that would be cool to talk about is this stitch color. When you pick your thread color on a crumb quilt you really can pick any color that you want because it’s bright and it will blend in but also just to note that anytime you put a cream or a white or something like that that’s a neutral it kind of fades to the back.
Jenny: It really does fade to the back.
Natalie: Even on the darker fabrics it doesn’t stick out.
Jenny: So on this I chose a white thread because I wanted it not to show up in my white border. But like a light gray and anything would have worked on this quilt.
Natalie: Well you could have even put bright orange or green
Jenny: Or even the threads that are variegated threads would have been good.
Natalie: This is a quilt you could have really played with that thread color and have it be really fun.
Jenny: You really can, you really can. So once you get, this becomes very addicting. It’s very fun to do.
Natalie: Can’t stop.
Jenny: So now we just want to see what you girls have up your sleeves. So who’s next?
Misty: Natalie:
Natalie: Either one
Jenny: Alright who’s next?
Natalie: Alright, well this is my quilt. I call it Carpenter’s Square. It’s actually a traditional block name for this pattern. And I decided to just blow it up and make a giant quilt out of it.
Jenny: It looks awesome. People are going to love this.
Misty: I love it.
Natalie: Ya and it’s super simple. It’s all five inch squares and a bunch of crumbs that I cut into five inch squares as well.
Jenny: I love that.
Natalie: Ok, so to make my quilt you’ll need a fat quarter bundle and I used the Bloom On by Maywood Studios. You’ll need 2 ½ yards of background and I used this dark gray because I thought it would stand out really nicely against this fat quarter bundle.
Jenny: It really does.
Natalie: But you can, you know, adjust your colors to whatever fabric line you’re using. And then my outer border and backing and binding is this lovely green. You’ll need a yard and a half for your outer border. Backing is 5 ½ or 2 ¾ yards of a 108. So 5 ¼ is your total yardage needed but I ended up piecing mine because I didn’t quite have enough of the yardage and Misty and I are sharing a line this time. So you can do that. Feel free to piece your backing and do whatever.
Jenny: Well it’s a crumb quilt, right?
Natalie: Ya exactly. Let your imagination go wild.
Jenny: Even the backing can be pieces.
Natalie: It just needs to be big enough to cover the size of your quilt. This quilt is 74 by 83. And this stitch pattern is one of my favorites that we have on our site now. Well we’ve had it awhile, but we just don’t use it very often. So I thought let’s give it a look. It’s called Circles and Lines and I think it’s very modern and you know, fresh.
Jenny: I think it’s perfect for this pattern.
Natalie: I love it, I love it.
Jenny: So show us how you did this.
Natalie: Alright, so this is super simple. I started by taking out a couple of fat quarters that were solid-ish that could make these lines of color through here. So I picked a couple of green ones and a couple of orange ones. And I didn’t intend to do every other one but it kind of just looked better that way when I laid it out.
Jenny: And that’s how designing works, isn’t it?
Natalie: So you’ll cut, ya you have an idea and then it’s like, oh ok so that works really well. So just take two green and two orange from your bundle. And you can obviously use whatever colors you want. They could be pinks or purples or whatever.
Jenny: Even if they did it my way, it could be like a solid red and a solid, you know, whatever.
Natalie: Yep. You just have to decide which colors you want to put in those places and then cut those fat quarter bundles into five inch squares. Your background is also all five inch squares. Just cut five inch strips and then sub cut them and then you’re ready to go.
Jenny: So basically you could use charm packs if you could get the color you want.
Natalie: Totally. Ya this would be great out of charm squares as well. Alright so I’ve cut some of these. These are just some of the fat quarters that I have cut up and honestly I would just do all my cutting ahead of time and set everything aside until you’re ready to lay it out.
Misty: Ya because it probably is all in the layout with this, right?
Natalie: Totally. Everything is a five inch square including your crumbs. So having a fat quarter bundle was a little bit trickier because it’s not how you traditionally do crumb piecing. Crumb piecing usually starts with a bin like Mom did.
Jenny: So fat quarters though, let’s explain this. A fat quarter is a piece of fabric that is 18 inches wide and it’s cut at the fold. And fat quarters were the original pre cut. Let’s give them some love.
Natalie: It’s a good way to get a lot of different fabrics.
Jenny: And so you get, a fat quarter which means, you know a quarter yard is nine but this twice that so 18 by 20 piece. And a lot of times, you know, quilters will buy and round up the fat quarters. And so the fact that this is, well any quilt is actually fat quarter friendly. Even our pre cuts, you could cut those squares out of the fat quarters.
Natalie: Ya you’ll have some waste because, you know, you’ll need a ten inch square instead of a nine so you’ll only be able to get one cut there.
Jenny: But then they come in packs like this and they’re so pretty and we like to record them and put them on our shelves.
Natalie: Yes.
Misty: And just look at them and smile.
Jenny: Anyway I just wanted to explain about fat quarters in case we have somebody who doesn’t know what that is.
Natalie: So I just took them because I needed a box of scraps. I took them and I decided I was going to cut like a crazy person with no rotary cutter.
Jenny: You mean with no ruler?
Natalie: Ya, no ruler. I just started cutting pieces, different widths. And then some of these I cut the opposite direction and then I took all of these pieces and mixed them all up and put them in a little box just like your little bin.
Misty: So you just made crumbs?
Natalie: I made crumbs, yep. I didn’t make them too small because that’s extra sewing. But then I just started piecing them together in pieces like this and then I added pieces just like Mom did.
Jenny: Here’s a whole bunch of little pieces.
Natalie: Ya so you just build up as you go. Same process really.
Jenny: And a lot of these fabrics are mediums and so you don’t have a lot of contrast between them but when you look, you know, at the end of the day, when you look at this up close you can see the crumbs and it’s just adorable.
Misty: It’s really fun, yeah.
Natalie: Do you want to just go ahead and add this piece to this one and then we can cut a five inch square out of that?
Misty: You bet.
Natalie: I do have some of those already leftover.
Misty: Oop, where did the pedal go, there it is.
Jenny: So for this one the trick is kind of really is in the layout.
Natalie: The trick is totally in the layout because all five inch squares.
Misty: There we go.
Natalie: Alright. If you’ll do a press on that.
Jenny: Absolutely. I got wrapped up watching her. Alright, there we go. Let me put this back over.
Natalie: Ok. So then just like Mom, you’re just going to, we’re cutting five inch squares out of these so I’ll slice that off. Flip it around and use my ruler as my guide because it is five inches wide.
Misty: Now did you try to get big enough to trim to five or did you make a bunch?
Natalie: I did because, so yes and no. I mostly just tried to get them over five inches because it saved me time in sewing. And then I didn’t end up with, you know, I didn’t end up over doing it. So just get where you think it’s a little bit bigger than five inches. You can keep your ruler handy and check on that.
Jenny: And these all go back into the pile.
Natalie: They all go back into the box and make more squares.
Jenny: So if you’re not going to do anything with this I will put those in my crumbs box.
Natalie: I have a goodly sized box of crumbs leftover.
Misty: We probably have a lot to donate to you.
Natalie: That you can have. You’re not going to use the entire fat quarter bundle to make this quilt for sure.
Misty: There’s something about crumbs that I think they just multiply. And get bigger scraps.
Natalie: They do. It’s crazy.
Jenny: When you’re not looking they just grow. If you share them it’s even worse. Then they really grow.
Misty: It’s a little quilting miracle.
Jenny: A little quilting miracle for sure. So show us how this comes together.
Natalie: So really it’s just a diagram. You’re just going to lay it out. And, you know, so we have one, two, three, four, five, six, seven, eight, nine, ten, 11, 12, 13 across by one, two, three, four, five, six, seven, eight, nine, ten, 11, 12, 13, 14, 15 down.
Jenny: So 13 by 15.
Natalie: Yep. And honestly you can just look at the picture. You don’t even have to lay this out on your floor. You can just say I need a gray and then a crumb and then a gray and whatever your color is. You know, you can piece in sets of two and then just sew those rows together by looking at it.
Jenny: And one of the things I love that Natalie does is she regularly does this. When you use a background color those are, and your squares are five inches, those are all just five inch squares. And so you’re not like, I need a piece that’s five by 26.
Natalie: Although you could figure that out if you wanted to. I just don’t like to do that.
Jenny: The simplicity of brain work with just I need six five inch squares sewn together. It’s a little more simple.
Natalie: I find that it helps line, keep things lined up though too because you have seams to match up and they stay really straight.
Misty: I love those little points where it can come together.
Natalie: Ya and that’s this. It’s as simple as that. I added a 2 ½ inch border or inner border and then the outer border I think is six. It looks like a six inch border. And that’s it. I mean, simple charm quilt with a little bit of design added to it. A little pizzazz.
Jenny: Alright, very cool. So now let’s see what you’ve got. Alright. So Misty, you’re up.
Misty: That’s right. So this is my quilt. And I really have always loved the orange peel quilts so I decided if I was going to work with crumbs and I could cut it to any shape I wanted, why not try some orange peel.
Natalie: It’s so cute.
Misty: Thank you. I really like it. And so it is 47 by 56. I called it Full Circle. And to make this quilt you are going to need that same Bloom On fat quarter bundle that Natalie and I both used. You’re going to need 1 ½ yards of background fabric. And that’s all going to be cut into ten inch squares. For your border you’re going to need ¾ of a yard. You’ll need three yards for your backing. And for this you’re also going to need both the small and large orange peel template and some lightweight iron on interfacing. Ok so because I worked with that same fat quarter bundle I also had to make scraps from full fabric but I did mine a little bit different than you.
Natalie: It was so tricky to figure out how we were going to do that
Misty: Yes!
Jenny: Can I also just say that it is amazing to me how using the same fabric these two quilts are so completely different. It’s just really cool to see.
Misty: They are, it was cool to see that because at first we were a little worried working with the same line and then they look so different. I love it.
Jenny: Completely different.
Misty: So what I did is I did kind of the same thing you did where I just cut random size strips from my fat quarter bundles but then I went ahead and sewed those strips together in big pieces like this. And so you can see I have a few leftover. Just like Natalie’s you’re obviously not going to use, right? You’re obviously not going to use the whole bundle.
Natalie: She’s excited.
Misty: And so then once I had these strip sets that were about the same width I cut those down again into these strips. And so then I could just pull a couple strips and put them together. And sometimes they lined up and sometimes I had an extra and I would just rip that off and sew those together. Then I ended up. I actually just sewed mine up, I just made you a big rectangle but I kind of made a giant long strip.
Jenny: A big piece of fabric.
Misty: Ya because then I knew I could take my templates and I could just set them on here. And it’s like ok well I can get my big one here and maybe I can get a little one down here. And so then I could just use that.
Natalie: That makes a lot of sense too because then you’re not cutting and having waste because it doesn’t fit in that corner or whatever.
Misty: Exactly. And so because I was working with an odd shape anyway, I was like if I just make a long strip I can go one after the other after the other.
Jenny: That’s great.
Natalie: So smart.
Misty: So let’s just go ahead and cut one of these big orange peels. And so you’re going to need, I think it is 12, yep six and six of the big ones. And then you’re going to need 16 of the small orange peels.
Natalie: Very cool.
Misty: So let’s just cut this big one out of here.
Jenny: And the curve on the template is, it just makes it really easy to cut.
Misty: It’s so easy. And then we’re just going to flip this around.
Jenny: Rotating mat would come in handy.
Misty: It does and I used that when I was cutting all of these.
Jenny: And I love how by throwing this, you know, by putting that petal on the diagonal your pieces are going to appear way more random.
Misty: Ya, exactly because then now look at that. It looks like I went and
Jenny: Did all kinds of crazy things.
Misty: Yes, exactly. So I was really happy with that result.
Natalie: All the crumbs.
Misty: So then you’re going to need a piece of interfacing that matches to the exact sizes of your orange peels that you cut out. So the same number of big and small. And then we’re going to put that right sides together so the bumpy side of that interfacing is going to the right sides of your fabric.
Jenny: And if you cut your slit before you sew it it’s already done.
Misty: Oh that’s true. I just used a seam ripper to slide through mine and works so fast.
Natalie: You could just do this.
Misty: Ya there you go.
Jenny: I just do that.
Misty: That works too.
Jenny: So bumpy side to the right side and do not iron it once you do.
Misty: Don’t press it.
Natalie: Because that adhesive is going to come in handy later but it will cause you trouble if you press it now.
Misty: You will be so mad at yourself.
Jenny: And I’m just sewing right along the edge of this and actually did not have to cut that thread but that was automatic habit.
Misty: There go. And so then now we can just turn this right sides out. And I like to start by kind of putting my finger in the point and pushing that through.
Natalie: Do you want a pressing or a, like this bamboo stick?
Misty: Yeah. That would be great.
Natalie: To poke out your points.
Misty: Thank you
Natalie: I can’t find our little creaser tool. Oh here it is. This one will be really helpful. If you wanted to go along the edge of the inside.
Misty: Any type of tool
Jenny: These presser tools are really handy. So just remember across the board this is a great way to do applique. You are putting your interfacing on there so now all your edges are turned under and then you’re just going to press it in where you want it to go and then you can hand stitch it or machine stitch it. Either one.
Misty: Ya I did this by machine because I’m not crazy about hand work at this phase in my life. I just don’t have time for it.
Jenny: I get that.
Natalie: It’s a little tricky.
Misty: But there we go. And again, don’t press it because this is now the adhesive size and so it will either stick to your pressing mat or to your iron. So I just kind of finger press until I’m happy with it. And then I just put that on ten inch squares. I had a pack of pre cuts so these are pre cut ten inch squares. But it’s written for yardage.
Natalie: Which is only because we don’t use the whole pack on this quilt. So if you have some pre cut squares at home you can use them for this project. But if you’re buying yardage for the quilt it will actually be cheaper for you to buy the yardage and cut the squares yourself but you can still totally buy a layer cake.
Jenny: I actually keep several rolls, you know, when it goes on sale, I pick up the layer cakes and everything and I just keep them there because I often don’t use the whole thing but, you know, we always use white, we always use beige. We always use black.
Natalie: Just make sure to keep your colors in the same tiles because if you have different brands even though one is white, you know if they’re both white then they might be a different shade. So just keep your manufacturers and your packages in the same stacks.
Misty: Ok, good tips. So now we’re going to press that on.
Natalie: Ok.
Jenny: And you’re just eyeballing it, right?
Misty: Just eyeballed it corner to corner
Natalie: Alright. This looks really pretty.
Misty: I really loved watching it come together. It was super fun. And I think it would be absolutely beautiful in print fabric. You don’t have to make it out of crumbs.
Natalie: Exactly. I feel that way about all of our quilts. Mine in particular because you could weave those colors and make it look very plaid. And depending on which color you put on top or if you did a medium where they go across.
Jenny: Well it would almost look like buffalo check.
Misty: Yes a little bit.
Natalie: Ya so it’s a great one to play with color.
Misty: You do have to really press because of all the seams on this. Turn it over.
Natalie: Ok, I was going to say, it’s not wanting to stick very good.
Misty: Because of all those seams.
Natalie: I’m also not very patient.
Misty: You do have to take your time to make sure that it will fuse. And then once it’s all set you can either just topstitch, hand stitch like Jenny said. And I did a little blanket stitch on mine all the way around.
Natalie: My suggestion would be to go ahead and just stitch them as you go because then it won’t come back up later and you won’t have to wrestle.
Jenny: Not only that you don’t have to wrestle a whole big quilt under your sewing machine.
Misty: Exactly. And so then you just turn these to get the different directions.
Jenny: See she did this little blanket stitch all the way on the edge.
Natalie: You could do a zig zag or a feather stitch.
Misty: Exactly. And so then for the small ones, they’re cut out and done the exact same way but you put four on a square and you can see I just pressed a line in half both directions so that I could eyeball each of those and point them better.
Natalie: To have them spaced exactly you want. That’s really smart.
Misty: Exactly. And so then these are your two blocks. And I blanket stitched those just like the large ones. And it’s just as simple as that. The small ones run down the center and then you build out your large orange peels on top. And you have solid ten inch squares in your four corners.
Natalie: That’s so great.
Misty: So quick and easy. Really simple. It’s just a five inch border on there.
Jenny: Really cute. What about for your back?
Misty: I used the green. And then the quilting pattern is the Curly, Twirly Flowers which I love.
Natalie: It’s so cute.
Jenny: Ya that’s one of our favorite patterns. Alright well there you have it.
Misty: That’s it.
Jenny: So we hope you enjoyed today’s tutorial on crumb piecing. It’s been really fun for us, stretched all of our creative minds a little bit. We’ve enjoyed it a lot. We hope you have fun with it too. And we hope you enjoyed this Triple Play from the Missouri Star Quilt Company.
Jenny: Hi everybody, it’s Jenny from the Missouri Star Quilt Company. And I am here with Natalie and with Misty and we hope you enjoyed watching our latest Triple Play. You can find us together on the third Friday of each month as we hit another tutorial out of the park. If you aren’t already part of the Missouri Star Quilt Company family be sure to subscribe and click that bell to be notified each time we release a new video. See you next time.