Skip to content

Free quilting video tutorials from Missouri Star

Quilting Tutorials
Make a Convertible Floor Cushion with Misty Doan on At Home With Misty!

Make a Convertible Floor Cushion with Misty Doan on At Home With Misty!

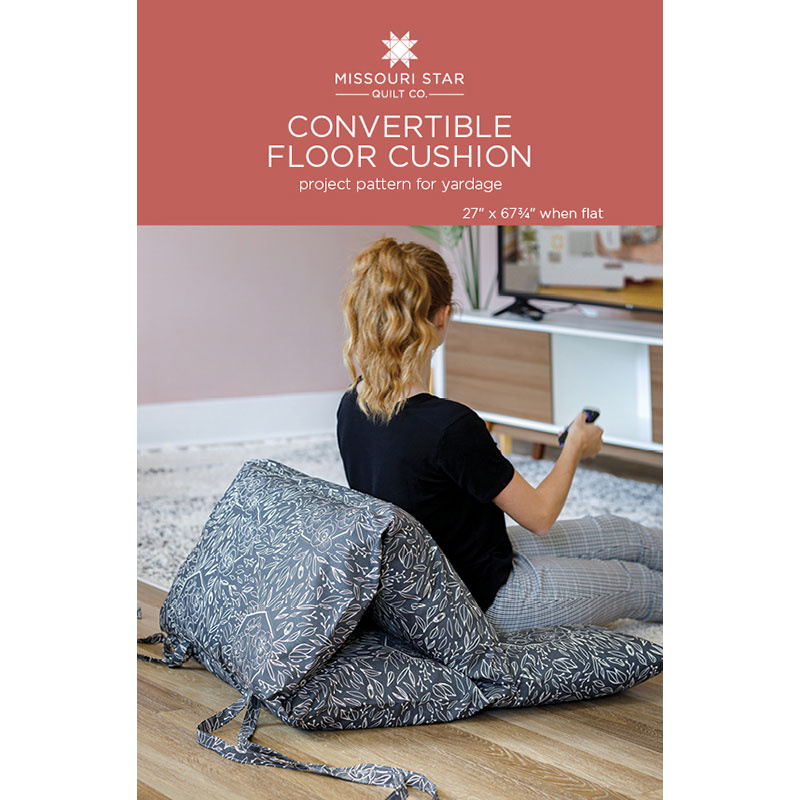
Don't you just love things with multiple uses? Then you'll love stitching up this convertible floor cushion! Follow along as Misty shows you how to make a floor cushion using four standard/queen-sized pillow forms and fabric from the Geo Florals collection! Prop the finished product into a seating position to use as a gaming chair or lay it flat for a comfortable napping spot on the floor. It can also be used as extra padding for furniture! Great project for family sleepovers!

Instructor

Misty Doan

Misty Doan grew up surrounded by sewing and quilting. She loves spending time sharing tutorials each week each week, and when she’s not stitching up one of her fun sewing projects for home decor, most likely you’ll find her hanging out with her husband and three awesome kids or working on a house project.

Common Questions

What is covered in Make a Convertible Floor Cushion with Misty Doan on At Home With Misty! (Video Tutorial)?

Don't you just love things with multiple uses? Then you'll love stitching up this convertible floor cushion! Follow along as Misty shows you how to make a floor cushion using four standard/queen-sized pillow forms and fabric from the Geo Florals collection! Prop the finished p...

How long is the tutorial video?

The tutorial video is 00:40:51.

Are supplies listed for this tutorial?

Yes. The tutorial page includes the supplies and materials connected to this project.

Video Transcript

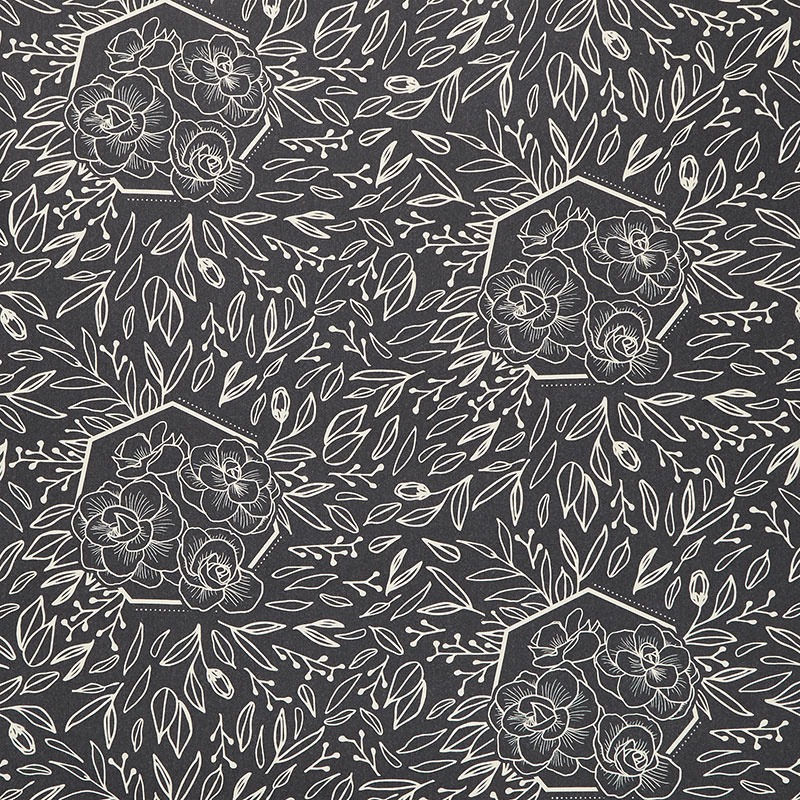
if you have kids or grandkids in your life you're gonna love this week's project we're making a convertible floor cushion [Music] so this week's project is a little out of our norm but i think you're really going to love it so my kiddos are always having friends over and you know piling up in the living room watching movies or reading books and so i wanted to design this floor cushion after i saw one that my friend audra made for her daughter so i put my own little tweaks on it and i'm excited to share it with you so really what you need for this project is two and a quarter yards of some canvas or heavy duty fabric that is 60 inches wide by the width of fabric so your standard quilting cottons are not quite wide enough but we do carry some beautiful canvas here at missouri star i'm using this geo florals by rosa v designs for paint brush studios and it's just gorgeous and they have a few different color ways of this geo florals that you can check out so the reason that we did this is because we need that 60 inch width to go around our pillows so the idea here is we all have those old bed pillows that you know aren't really comfy to sleep on anymore but we can repurpose those and use them for this convertible floor cushion so that if you have you know friends over they can have a little palette on the floor or just be cozy and comfy hanging out in the den or watching a movie so it's really quick and easy what you're going to do to start with is we're i've already cut this down to 60 by 70. so remember it's 60 inches wide on our width and so i did a running cut of 70 inches so let's open this all up you can see this beautiful print and the first thing i'm gonna do is i'm going to fold it so that my selvages are together here because i'm only going to trim off this one side of selvage you can absolutely trim both if you want but you'll notice on this side the print goes all the way to the edge and that selvage is going to prevent it from fraying since this whole edge is going to be inside of my project i'm just saving myself time you absolutely could trim it and hem it the way i'm going to on this side if you prefer it but i just wanted to let you know what i did and why i decided to do that so let's go ahead and line this all up on this selvedge edge i folded it in half once and then i'm going to come back and fold it again just to make it easier for me to cut so i just want to make sure it's laying nice and smooth and we don't have any like tucks or weirdness happening in there because we do want this cut to be nice and straight so just take your time to line it all up see i've got this piece sliding under there and when you're working with larger fabrics it just takes a little bit of maneuvering that's just part of it let me see here that's better perfect now this is laying the way i want i've got this all nice and straight so we can make sure we get that entire selvage edge this one little piece at the bottom is wanting to slip on me and we don't want that to happen so just like i said take your time all right so now that my selvage edge is all lined up i'm going to make sure that this is straight across my mat i just don't want to accidentally cut this crooked and that looks good to me just like that so i have my 5 by 24 inch ruler if you have a 6 by 24 inch ruler you just need a nice long ruler since we're working with this wider width and so i am going to go ahead and just cut off my selvedge here just like so now that is out of the way so then now i have trimmed that up and we are going to take and we are going to turn this and press it twice so i'll fold it down about a half an inch and a half an inch again and we're going to hem this so i'm going to go ahead and take this to the ironing board over here the trickiest part of this project is just working with the large piece of fabric besides that every bit of this is so simple and it's skills that we're all familiar with so i'm just going to get this started and i'm going to turn under about a half an inch i'm just eyeballing it i'm going to go ahead and turn it under again i'm going to press this really good here at the top there we go so when i did mine i pressed it really well at the beginning and then i started stitching under my machine really close to the the edge of that fold not out here on the end i didn't want this to be flapping around so just about oh an eighth an inch from the bottom of my hem that i've turned under so just about an eighth of an inch from that folded edge i'm gonna take a few stitches and i'm gonna go ahead and backstitch and then i am just going to start sewing down that side and maybe this was just my own laziness or i don't know i just like things to be quick i just finger pressed and folded as i went on once i got that first little hem started so i just zoom a little way down stop again make sure i've got about a half inch fold and it's all staying lined up and keep sewing and i'm just going to continue this all the way down this side remember if you cut the selvage off of both sides you'll want to do the same thing on both of your long pieces all right we are all the way to the bottom edge of this you can see it's worked perfect to just fold and finger press a little bit as i go so i'm just going to finish up this last little bit there we go and now i am going to go ahead and press this edge just because i want it to lay really flat and since i didn't press it to begin with i'm going to come back with my iron and just make it nice and crisp which is much faster than turning every little edge and pressing although you will have a beautiful result either way there we go just like so perfect okay so now that i have that all done we are going to take this over here to my big table when i did this first i actually laid it all out on the floor so that i could have it all spread out but this table is a nice size so i think i can show you how to do it on a tabletop as well so we want our two our hemmed edges are going to be one towards us and one away from us and we are going to start by folding over the edge that's closest to us we're going to fold that up and i'm actually going to slide this down so hopefully you can see what i'm doing and you can see i'm just keeping this edge all lined up because we've cut it all straight and we don't want it to get wonky on us so then we're going to go ahead and fold this over okay so now i have this overlapped this is my nice hemmed edge i am actually going to pull this down so that it lines up exactly with the measurements on my mat so my bottom edge is right at the zero line my top edge is right at 24 and when i do that my hemmed edge that i made ends up at the 5 on my cutting mat so i actually want this folded width this overlap that i'm creating to be 27 inches and since it's technically folded in half i'm making this tube my fabric is doubling up so this is only 24 i need it to be 27 which means i actually need to move this six inches up so if i take my hem and i go from the five and i go one two three four five six i actually need to move this overlap up to the 11 just like so and i'll lay this again so my edge is nice and straight and now i'm going to put a pin in a couple of places here to hold this in place and we are going to sew this with a quarter inch seam and we're going to repeat the exact same thing on the other side all right so i've got those pins i'm just going to go ahead and pin right through that fold and making sure this edge stays nice and straight i'm going to put another one at both ends because i don't want this straight edge to slip on me so i've got that pinned in place now i can flip it around and do the same thing working in the other direction since the fold will now be going away from me we're going to line up our edge there at the top slide this down so i can see my numbers you can see why i did this on the floor the first time it just gives you a little bit more working room but if it's not easy for you to get down on the floor i wanted you to see that it is totally possible to do this on your table so there we go that's all lined up our 24 remember we need to move this down six inches it's at 19 which means it needs to come down to 13 just like so and i'll put a pin in there through all of my layers keeping our edges straight okay so now many of you might be saying misty you have the right sides out you're folding this wrong i promise you this is on purpose we are going to be doing some french seams today on these ends because if i know one thing about kids it's that they're hard on things and so if i'm making something with kids in mind i want it to be super washable and durable so if you have never made a french seam before today is your day this is the easiest way to do it because we're just doing two long straight seams so let me i'm going to put the bulk of this because this is heavy remember we're using canvas i'm going to put it up on the table so it's not pulling against my needle and we are just going to sew with our the right sides of our fabric out like we have here we're going to sew a quarter inch seam just like our standard quilting seam and we are going to back stitch at the beginning and the end and actually i'm going to go ahead and backstitch just a little bit over that junction just because that's you know where this overlap is that's where most of the tension is going to be on this project as we put the pillows in and out and then back stitching again there's that side now we'll flip this around and do the same thing on the other side remember our first seam is just a quarter inch seam make sure we don't have any other layers tucked under there back stitching again over that overlap there we go all right let's go ahead and pull those pins out put them back in here we will need them again in a little while oops grab the ones on this side and now we're going to flip this so that it's wrong sides out oh actually first i'm going to go ahead and trim off these little corners just to take away some bulk it's amazing what a difference that little bit of fabric makes but it really does so now i'm going to go ahead and turn this and i've got nails so it'll help me poke those corners out and we're going to do that down here as well make sure that corner turns out nice and sharp there we go then i'm going to go ahead and do the other end and we're going to turn that one out as well poke our corners through just like so make sure i'm getting that turned all right i think that looks really nice so now we're going to go ahead and take this and we're going to roll this edge and make sure it's pressed nice and flat and we don't have any extra tucks or anything happening so i'm going to go ahead and take this to the pressing mat here i'm just going to kind of put my fingers in here and then get this to lay down because we want a nice clean edge here we don't want this to be uneven so i'm just rolling this between my fingers until i i know i'm at the edge of the seam and once i'm there then i'll press this with the iron so same idea and i'm just going to continue rolling the fabric as i work my way down when you get to where that overlap is there is just a little bit more bulk that you're working with so you want to be even more aware of that at that point this one little spot does not want to slide out there we go now i got it see sometimes you just have to make it behave there we go much better now that i got through that tricky part the rest of this is going just great there we go almost to the edge here you know what i don't like how that one's laying so i'm going to poke that out just a little bit more before i press it that looks better and again rolling it between my fingers and hitting that with the iron all right so now i think you've figured out how i've pressed that i'm going to go ahead and do the same thing to the other side and then i'll meet you back here and we'll finish up our french seams all right we've got both sides pressed so it's nice and crisp and so now we have that quarter inch seam that's tucked inside here and we have our right sides of our fabric all together and so now on either end the next step is to take either i like to go ahead and just make this seem really wide so you could do you know a 3 8 a half inch i just like to give myself extra room so i'm taking a 5 8 inch seam this is for two reasons one i think that extra width is just going to add extra strength to this project and we have the room so i like that and two by making sure that it's you know even wider and i'm not just too close to that quarter inch seam that's tucked inside i run rest less risk sorry i couldn't get that out i run less risk of having a little phrase poking through my final seam so i want this to turn out really nice so i have a 5 8 inch line on my machine and we are just going to go ahead and back stitch at the beginning and we are going to zoom down i am going to watch when i get to this overlap because i want to backstitch at that point both on the side i can see and the side that i can feel inside just to give it lots of strength i'm gonna move some of this bulk up here so i'm not fighting against my machine with it and just make sure everything is laying smoothly there we go that's better continue on here's that first little seam i'm going to backstitch a good amount there a couple times and make sure this is laying nicely and down here i can feel the other seam so i'm just going to kind of keep my fingers here so i can remember that when i get close to here i'm going to back stitch again and that's just adding more strength to those tension points of this project all the way down to the end and back stitch there we go i went ahead and already took care of that on the other side so you see how that works out let's trim these threads and now we can turn this right sides out again and we have this beautiful edge no raw seams anywhere because we did a beautiful french seam so now we're going to go ahead and flip it back to right sides out press it good on both ends just like we did before and then we'll put some measurements for our pillow slots all right so we have both of these edges pressed now and turned and i just want to show you how clean and nice that looks and again it encloses all of our raw edges within that fringe seam so we don't have any surprises jumping out at us which is what we want it makes it super durable so i've gone ahead and i have this folded in half now lengthwise and i'm going to go ahead and press this center line and so let's take this back over to the ironing board and we're just going to put a press line in here and this press line is going to represent our first line of stitches so i really want to be able to see it make sure this side is all square looks good honestly the trickiest thing about a project like it this is just the bulk of the fabric and managing it so that you don't end up with surprises that you're not looking for but you just have to take your time and it works great so now we've pressed that okay now that i have that done i'm going to take this back over to our big working table so i have some more room we are just going to make sure this is all laying nicely the way that we want it we don't have any tucks and if it's all straight that's exactly what will happen perfect that looks beautiful and so now i am just going to double check everything feel with your fingers and see if you feel any like strange lumpy spots you just don't want that it's always worth it to be extra careful and so i'm going to go ahead now and pin a couple places just to hold my overlap in place because i don't want this to shift on me i want this to stay even all the way down if you're worried about it you can lay your ruler on here this is a 25 inch ruler there's my finger so this might be still a little wide let me double check my ends here because i was estimating so i want to make sure that it's no we're good this is perfect so i'm just going to go ahead again put my pin back in the middle just like so i'm going to put another couple across here just so that it lowers our risk of shifting this is one of those projects where pins really are your friend so doing the same thing down here making sure this is all behaving just going to keep sliding so i know that this is laying the way that i want it to lovely this looks great okay a couple more pins voila all right so now i'm going to move back to where i drew that or press that center line so i am going to now take my ruler i just want to make sure i don't have anything weird happening there we go that feels better to me my ruler is locked underneath my fabric and i'm going to line this up right square with the other edge the bottom edge of this the long edge since that should be straight and i'm going to take my chalk pencil and find a color that will hopefully show up here for you guys let's go with yellow and see how that does and i am going to draw a line all the way down here and then once i do that i'm just going to slide this up keeping it straight on that line and straight with this top edge and i'll continue that mark all the way across now hopefully i don't know if you guys can see it i can see this yellow really well so i'm just going to put a few more pins here just because i don't want it to shift and when i go to pick this up it could happen so we're just going to do everything we can to stop that from happening so then now i have that and now we're going to go ahead and we're going to find the middle between that center line that we drew and this outside edge and so you can fold it you can measure it if you have a mat big enough but it looks like right here is my middle so i just took my my end and i folded it to my center line i'm going to put a pin right there in the middle where that meets and now i can open this back up and slide it down and i'm going to do the same thing i did before to draw my next stitch line so again line my ruler up right here at the bottom pull that pin out now that i know i'm where i need to be draw my line where did that go i don't know draw my line slide my ruler up so that it is square with the top edge continue all the way off and put a few pins in it to hold it in place there we go now we move this and we'll do the same thing from the other end just a little bit of maneuvering here now we're going to fold this up to the center just like we did before that looks great make sure i'm all the way there put a pin in this bottom edge this is my our center mark move this this pin might not be quite right it's giving me a little bubble there that looks better there we go now we'll take our ruler and mark our last stitch line here if you're worried about this being crooked remember there's a couple places you can check to make sure that your lines are staying square so i've got it lined up along the bottom edge that seam line from our hem our hemmed edge there i've got that lined up as well so don't be afraid it will work out just fine go ahead and pull that pin and this step is pretty forgiving after all we're gonna stuff these with pillows and they're pretty moldable so you don't need to fret too much so we're just gonna slide this up making sure we're staying straight and whoops i keep breaking my chalk and finishing that mark just like so there we go put a pin in there you're gonna be really glad you took the time to put all these pins in but just don't poke yourself i say that from experience unfortunately but what are you gonna do and one more up here all right now that we have this all marked and pinned we are just going to take these over to the machine move this out of my way i'm going to keep the bulk of this up here on my table so again it's not pulling against my needle and making it harder on myself and we are going to slide this into the throat of the machine and i'm going to sew right on those lines that i marked back stitching at the beginning and the end so so that first one is all done move over to the center line now i'm just kind of rolling up the bulk of this under the throat of my machine so it's out of my way and i don't have to worry about sewing through layers that i don't want to sew through there we go and now since i have this other end i'm going to flip it around just to keep less bulk under the machine find my mark oops looks like i came unthreaded at some point you fix that really quick there we go now we'll do this last line of stitching one thing i forgot to mention to you earlier is i you do want to backstitch again over your your seam that overlap spot just to add some strength so when you get there make sure you backstitch there we go so our sew lines to make our pillow sections are all in place i'm going to go ahead and pull all of my pins out now so that i don't poke myself let's go ahead and get those out of the way and you can see how our we've got like four individual pillowcases now that are all sewn together as essentially what we've got going on here so now we'll just pull these pins out and then all that's left is i wanted to add a couple of straps to close this up so that it made it a little bit more compact for storage so let's move this out of the way for now it looks great and you can see all of these little pockets are exactly like we want them so up next we are going to cut two two and a half inch strips from our width of fabric so i have those here nice long two and a half inch strips so remember this is our 60 inch wide fabric i'm going to go ahead and cut my selvedges off so that's done and now i am just going to fold this right sides together and i'm going to go ahead and sew over one end so that it's closed we're just going to make a tube here so i'm going to sew over this narrow end here there we go okay and so now we can just sew with our quarter inch seam all the way down this long seam to make a tube all right we made our giant tube here it's ready to go and so now all i need to do is turn this right sides out this is a pretty narrow one and so i thought i would show you guys my favorite trick i have like these old metal knitting needles i don't use them to knit anymore but they're still hanging around in my craft room and so if you have one like this it's just a little bit longer than like a chopstick or the end of a wooden spoon and for a tube that is this narrow and this long they work just perfect and so i like to use my fingers and kind of get this started pinch the end a little bit and then i poke the the pokey side of my needle through there and we just start feeding this down over the needle and you can see it works really well now if you're worried about poking through your seam or anything like that you could totally use the blunt in but then you have to push against the pointy end so for me i just try to push gently and go this direction and i just work it down and we're just going to do that and i'll meet you back here once i have turned this and pressed it and we'll do a little bit of top stitching all right this one is all pressed and turned you can see i have this little open end so the first thing i'm going to do is just tuck that in because we don't want those raw edges hanging around so we're just going to make sure it's flipped in at least a quarter inch there we go and now i'm going to top stitch over that edge beautiful and it's all enclosed if you wanted you could totally stop at that point that is absolutely enough your tube is done and secure i really wanted this to look really nice and professional so i did go ahead and add just a top stitch edge to both sides so i'm going to go ahead and do that it's just about an eighth of an inch in we're just going to zoom down the side and back up the other there we go there's one side done now we'll go back and do the exact same thing on the other side there we go all done so remember you need two of these straps i have the other one all ready to go so now let's go ahead and figure out where they need to be placed on our project so what we are doing we have our pocket side face up and we are going to be working right on that center seam that we made so i'm going to take my straps and i want to make sure they're not twisted i'm going to fold it in half long ways just like so and i kind of just like to sit them folded in half so that when i'm ready to place them they're already ready to go so i'm going to do that with both of these oops that one's twisted we don't want that so i'll turn that right and i'm kind of just pressing it with my finger and those are now ready so now i can take my pins again and my ruler and i want to measure up from the bottom edge of my project six inches so you can see i've got the six inch mark of my ruler and so now this strap needs to slide down to there now that i know that's where it wants to be i can open it up i can still see my finger press line and i'm just going to put a couple pins on either side of this so it's out of the way of where i want to stitch but it holds this secure so another one on this side and we're going to stitch right in line with that big seam that we made earlier and we're going to back stitch over it a few times just to really strengthen those straps and i'm going to go ahead and do the exact same thing measure down six inches from the top there we go now i can see my center line goes right there put a couple pins in place to hold this and now we can take this to the machine and tack our straps in place so let's tuck this underneath here i have this all lined up and remember i'm going to back backstitch over this a few times just because we really want it to be strong there we go that first one is done you can see it's right in line with that first line of stitching that we did so let's slide this down and take care of strap number two making sure my needle is lined up with that stitch line and then back stitching across there a few times there we go beautiful now we can take those pins out and all that is left at this point is to grab four pillows and slide them into the pockets so like i said you could use leftover bed pillows that you have that you're ready to replace because maybe they're not comfy for your head but they're perfect if you're going to be throwing this cushion on the floor or if you're buying new ones there's cheap ones available at you know any big box store but i do recommend you get a little bit more firm i found when i was testing this out the firmer the pillow the better the result so i hope you enjoy this i hope you enjoy cozying up and watching movies and playing games with the kiddos in your lives and until next time have a great week and we'll see you soon hey everyone it's misty thanks for watching at home if you aren't already a part of our missouri star family be sure to subscribe and hit the bell if you want a notification every time we release a new video i'll see you next monday on the newest episode of at home [Music]

More Fabric by Yard tutorials

See all