

Make a "Corner Star" Quilt with Jenny Doan of Missouri Star
 Jenny Doan
- Layer Cake
- Heirloom
- Double
- Beginner
- Quilt size 80" × 80"
Jenny demonstrates how to make another beautiful star quilt using 10 inch squares of precut fabric from the Dreamscape collection by Josephine Kimberling for FIGO Fabrics. This pretty layer cake quilt is a recreation of a hand-sewn vintage quilt from Jenny's collection. It's an old pattern that is known by many names including Idaho Beauty, Corner Star, Devil's Claw, Cross Plains, Bright Stars, and Crow Foot!
Instructor
Jenny Doan
Jenny Doan is an American quilter, author, and YouTube personality. Jenny started Missouri Star Quilt Company in 2008 and today it is the largest quilting supply vendor in the United States.
Shop this tutorial
 Corner Star Quilt Pattern by Missouri Star$6.95Shop →
 Digital Download - Corner Star Quilt Pattern by Missouri Star$4.95Shop →
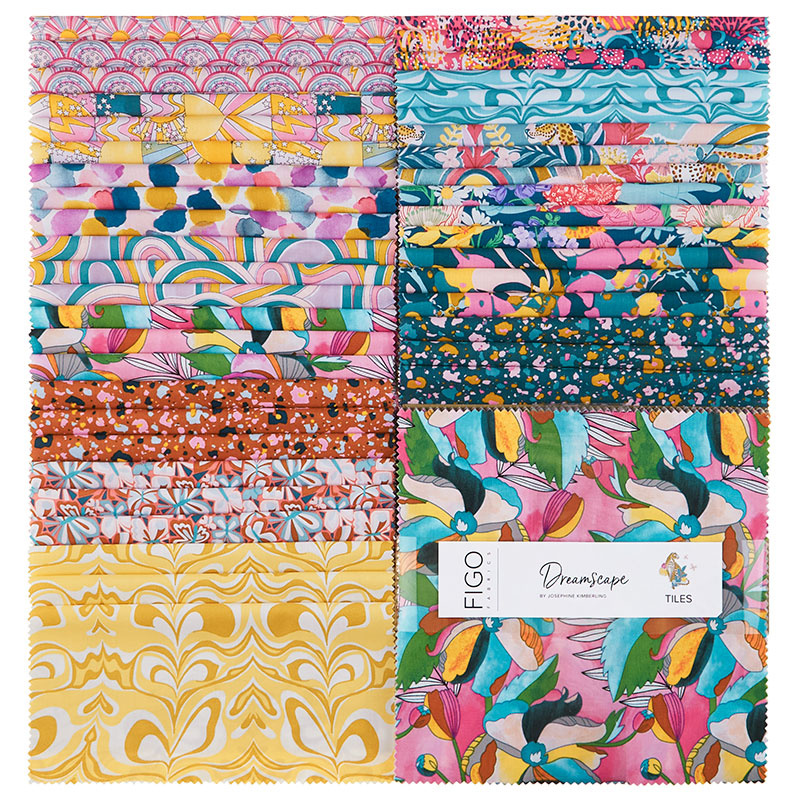 Dreamscape Tiles$37.95Shop →
 Bella Solids - Prussian Blue Yardage$8.24Shop →
 Bella Solids - Caramel Yardage$8.24Shop →
 Kona Cotton - White Yardage$7.28Shop →
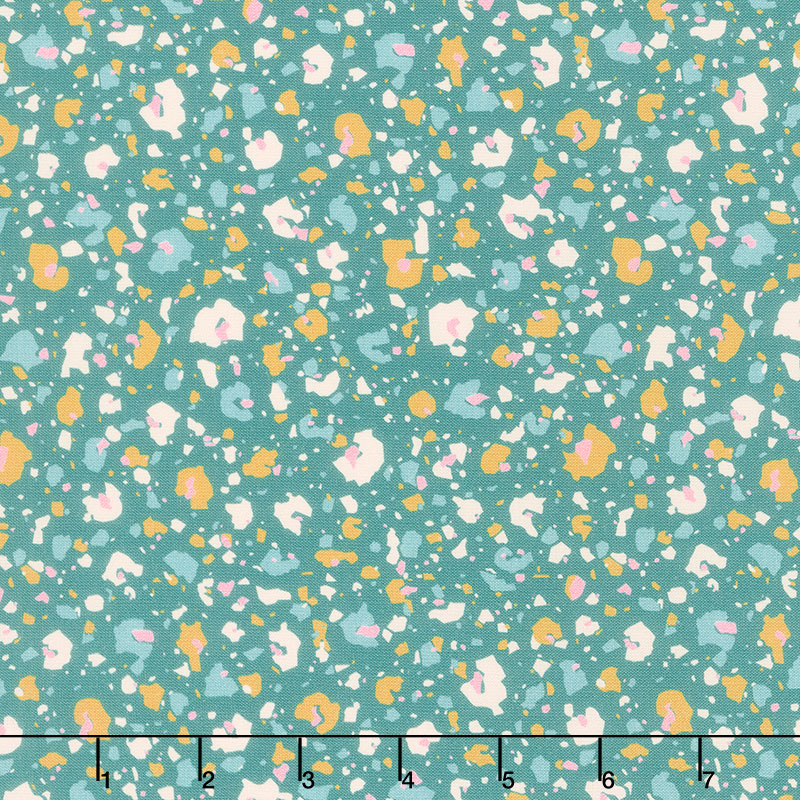 Dreamscape - Terrazzo Leopard Teal Yardage$11.76Shop →
 Dreamscape - Painters Pallet White Multi Yardage$11.76Shop →
Common Questions
What is covered in Make a "Corner Star" Quilt with Jenny Doan of Missouri Star?
Jenny demonstrates how to make another beautiful star quilt using 10 inch squares of precut fabric from the Dreamscape collection by Josephine Kimberling for FIGO Fabrics. This pretty layer cake quilt is a recreation of a hand-sewn vintage quilt from Jenny's collection. It's a...
How long is the tutorial video?
The tutorial video is 00:25:14.
Are supplies listed for this tutorial?
Yes. The tutorial page includes the supplies and materials connected to this project.
Is a transcript available?
Yes. A written transcript is available on the tutorial page.
Video Transcript
Hi everybody, it's Jenny from the Missouri Star Quilt Company. I've got a fun project for you today. Let's take a look at this quilt. So, this pattern is actually a very old pattern. I found it on an old quilt, which I'll be showing you in a minute, and we're calling it the corner star. So, let me show you how to make it.
So, to make this quilt, you're going to need one layer cake and we have used Dreamscape by Josephine Kimberling for FIGO fabrics. You're going to need some accent fabric. You're going to need one in a quarter yards of two different colors and these form our star legs out here. You're going to need some background three and one quarter yards, and this includes your sashing and your inner border. You're going to need a border fabric and your border is going to be one and a half yards in its nice big six inch border. And we use this beautiful watercolor print on the back. And for the back you're going to need seven and a half yards or two and a half yards of a 108, and look at that back. Isn't that gorgeous? Also, the quilting pattern that we used on this is called Variety.
Okay. So, now that I have all my stuff laid out here, I just want to tell you what's going on. First of all, this quilt was gifted to me and as you're looking at it, you're zooming in and you're saying to yourselves, "Wait, those are different blocks." And they are different blocks. This quilt is kind of one of those quilts that's a wealth of information and lots of ideas. This is the block we're talking about right here today, and I love being able to take an old block and make it super easy. I want you to notice if you can see this hand stitching, I will not make you do that. You will not have to do hand stitching on your quilt, but it's going to come out easily as cute as this. So, let me show you how to do it because I think the way they did it and the way I do it, I think I made it way easier.
So, the first thing I did was you're going to need four, four and a half inch squares for your outer blocks. And so, what I did was I went through my layer cake and I chose a middle and then I chose my outsides. And so what I did, let me scoot these out of the way. What I did was I cut those into four and a half inch strips. And so, let me show you right here, I'm going to line these two up. And I'm going to cut four and a half inches, like this. And then I'm going to come over and cut another four and a half inches like this. And this can go in your crumb piecing bin and then I'm going to lay these on top of each other and stack them up. And if I need to straighten an edge because they're not quite lined up, I can do that. So, I'll straighten this little edge right here. And then I'm going to come in four and a half, and four and a half like this.
And if your layer cake happens to have duplicates, you'll be able to get more out of this. I use 20 layer cakes to make this quilt behind me. So, I literally could make two quilts this size if I wanted to out of one layer cake plus all your accent and your backing. Now, if you were to double this, this would be a pretty cool king size quilt. All right. So, what I want to show you here is I have one middle and then I'm going to have my outer pieces be this small print right here. So, I have them out here like this and I'm just going to set those aside for now.
So, now what we're going to do is we are going to make these inner blocks right here and I am working on a blue one and I've got my pieces cut right here. And this is the block I'm talking about because it looks like we made all these little stars and put them together, but we did not. We put these next to our finished blocks like this and I'm going to show you how to do that. So, you're going to take your accent fabric and you're going to cut four and a half inch squares. We want all of our squares to match up.
So, four and a half and four and a half, which means you can use any size square you want and it will work. But we are working with four and a half here. And then what we're going to do is we're going to take this four and a half and we are going to cut it twice on the diagonal. This is giving us our corners, this is going to set our block on point. Now, there's lots of ways to do that and this is just the way that I did it so it would work in this quilt. So, we need two of these for the blocks I have. So, you'll need four of these, one set of these for each block.
Now, this is our background fabric, our white, and it is a three inch square. Out of your white, you're going to cut two and a half inch strips and put those in squares. You're going to cut three and a half or three inch strips and cut those in squares. You're going to have sashing strips, which are one and a half,. And then you're going to cut a nice big four and a half inch strip, and we're going to cut those in two and a half by four and a half inch rectangles. And that's going to form our little flying geese for the outside edges. But we'll get to all that in a minute. So, we're starting with our three inch strip cut in a three inch square. And what we're going to do is we're going to put our blocks on two sides like this, and then we're going to come back and add the top and bottom.
So, when I did this, literally you can chain piece these and you can do a whole bunch. I tend to work on one block at a time, so one star. So, I'm actually doing four at a time, but I've done two for you. So, we're going to start with these two right here. And I'm just going to do two, but normally I would just do four and get all of my little blocks like this taken care of. Line it up on the edge, make sure you have the same overhang on either side. If you want to, you can get your middle and check your middle here as well. I've been doing it so much that I just get into the habit of just laying it on there and I know that I have a little bit of wiggle room and I'll show you that in a minute too.
Now, so you're going to sew all of yours on and then we're going to flip them around and we're going to add a triangle to the other side right here. And I'm just eyeballing that they're about the same on either side. And of course, you can always put the fold in and make sure it's perfect.
All right. Then what we're going to do is we're going to clip these apart, just trim these little threads right here, and then we're going to press these open. I got a whole mess going on over here don't I? Press it open. Press it open. And I'm pressing to the outside so that the seam stays in the dark fabric. So, now we have these cool interesting blocks right here and we are going to add the side pieces on these. And so, we're going to bring this one over here. And again, we're just going to do one side of both of them. And this will be easier for you to see how much you have off each end because you're down to about a quarter of an inch hanging over.
So, we're just going to go down this side right here. And this one also. Let's see. Here we go. And then I'm just going to go ahead and clip those off and come back and do the other side. Here's this one and this last one over here. So, you need one four and a half inch square cut on the diagonal twice for your sides for each little three inch middle square. And you need four of these per block. So, let's press it open. All right. So, now you've got these and you can see no matter how perfect you sew, they're going to be a little bit wonky. And so, this little four and a half inch ruler literally became my best friend and I would just set it in the middle here. And whatever was sticking out the edges, I just trimmed off. And so we're going to trim this and this. We're going to flip it around and we're going to trim the other sides as well.
And so, there's our little four and a half inch piece right there, and we're going to come over here and do the same. And sometimes, depending upon how wonky your triangles are, you can get a lot to trim off and sometimes it's pretty close like this right here. So, we're just making sure they're four and a half. I love a ruler that's exactly the right size for what I'm doing. It makes it very helpful. All right. So, now we have four of these, one, two, three, four, and we can put the center of our block together. So, what we're going to do is we're going to put these out like this. Do you see how adding those corners throws that block on point? I love that. On point means when your points are going north and south and east and west instead of like this. And so I love that.
So, we are going to lay these out here like this and we're going to put our squares in. All we did was cut these four and a half. All of our squares are four and a half like this, and then here's our middle, just like that. And that's the whole center of our block. So, let's go ahead and sew these rows. And I'm just going to sew left to right. So, I'm going to take these two all the way down that column and I'm going to sew a column together, and one more down here. And then I can flip this around and come back up the other side because I know it's the exact same pieces go on. We won't get ourselves too confused on this one. Maybe a little confused, but not too confused.
All right. Here we go with this guy. And then we're going to add this one to this side over here, and then we're going to turn these. And if they're right, we can sew this together as a block. So, literally these are all kind of pinned together by my threads from chain piecing. And so, I can just lay this piece over here like this and they kind of work like secret little pins. And then I'm going to make sure that my center square here is pointing in, and just say that out loud to yourself as you're sewing so it becomes a mantra so that when I get to the other side, I want my center square to seams to go toward the middle. And if you say it out loud, you're more apt to remember it because right now I'm sewing those center seams again and I want them to go to the middle. So, I'm going to sew down here along this edge and I'm going to line up these two seams and this seam pointing to the out and my center seam is to the middle.
And that will just make it a little easier to iron. It will make your make your block lay a little flatter. And then we're going to go. And then this is our middle right here. And so, let's press that. And I like to press from the top so it makes a nice flat block. And then I can flop it over and if anything is really bothering me, I can go fix that. But generally if it's nice and flat from the top, I don't worry about the inside too much.
So, now we need to do our outside edges. The outside edges are all flying geese units. So, this one, whenever you have a piece of fabric to cut and it's like eight and a half by two and a half, whatever it is, if you cut the strip of the bigger number, you'll be able to get lots more cuts. And so, we have a four and a half inch rectangle here by two and a half inches. So, I'm going to cut a four and a half inch strip, that's my bigger number, and then I'm just going to cut two and a half inch rectangles like this.
Now, I love this little two and a half inch ruler for that because you can just lay it right along the edges like this and you can just make those cuts and you can stack up two or three strips and make those cuts and you'll get them all done at once because you need eight of these for your... Eight of these to go all the way around our block. So, I have two, four, six, eight, right there. And then you're going to need four two and a half inch corner squares, and I have those right there.
So, I have some of these started as well. And so, what I'm going to do is I'm going to take and make some of these little bitty, little bitty, they're not so little bitty, these flying geese units. And what I'm going to do is I have my little stack here of my corners and I have my little stack here of my two and a half by four and a half inch rectangles and I'm going to start feeding them under and I'm just going to line a square up in the corner like this. And you can press a line or iron a line or draw a line on this. I can't get that thing off of there. And you can lay it right in the corner like this and then you're just going to sew corner to corner now.
I'm going to use my diagonal seam tape and the diagonal seam tape works because you put your needle right in the corner up here and you line up your other corner with the red line in the middle and we're going to sew straight across there like this. And it saves you so much time because you don't have to put the line or draw the line or fold the line. You can just put them on there and sew straight across. And so, line my needle up with the point. My other side is lined up with the red line because that's when we're sewing right in the middle. And I'm going to do four of these, but I think I only really need two because I did some ahead of time. But why not? I'm almost another block in, right?
All right. Now, what we're going to do is we're going to clip off all of these. And we are going to press them open and then we'll add a square to the other side. All right. So, here is our little ruler. We are just going to clip off your outer corner like this. Now, if you are right-handed, you'll be doing that this way. You will lay your little corner on here like this and you will cut this way. I am lefthanded, and so I just do it this way. I just guess my quarter of an inch and I don't worry about it too much.
All right. So, now we're going to press this back like this. So, our seam, our dark seam is hidden in the dark, so we're pressing to the dark. And then we're going to add four more of pieces to the other sides. And we're just going to do the same thing. We're going to line it up in these corners. Our block should be two and a half of our accent fabric and so should our rectangle. So, it should line up real nice. And if by chance, say you're sewing one of these and it gets a little wonky on you, I'll show you how to fix that too because sometimes things happen. Wonkiness can happen at any moment.
All right. Now, we'll go ahead and trim these off. We're going to clip it and trim it. And you get the gist of this. We're clipping and trimming and clipping and trimming. And one more here, one more little thread. And then we're just clipping off this side and clipping off. Oh, see, this one's off a little bit right here. So, it's going to be off a little bit in the triangle, but it will fit in that quarter inch seam so I'm not worried about it.
And let me just show you how I take care of those. These all look pretty good, but let me show you how I do that. So, this ruler is two and a half and I can just lay my ruler on here and go two and a half by four and a half. And if anything is sticking over the edge, you can just trim that off. I love this little two and a half inch ruler for that. And if I put it on here at the four and a half and I see that something is sticking out or wider, I can trim it off.
If I see that something is a little shallow, it's just a little bit short, then I kind of put that off to the side so that I can remember to make sure and take a smaller seam right there. These all look pretty good, even the one I thought was going to be wonky. All right. So, now you're going to take some more of your four and a half inch pieces, and in between each of these, you're going to sew them together like this. So, you're going to have two geese, two four and a half by two and a half geese, and one four and a half by two and a half plane. And we're going to do two of those and actually we're going to do four of them. And then on two of them, we're going to put the corners on.
So, we have this one right here, which we're going to have this side and this side. Now, do you see how I just flip that over? It's so easy to not remember to flip over your geese and get a geese on there wrong. So, just look at it, make sure they're the same, and flop it on there. All right. So, now we're just going to sew this together and we're going to do this to all four of ours. I have two already done. And so, we're just going to put this in here. So, you'll have four of these like this. And then on two of them we're going to attach corner squares. Oh, here we go. I almost put that on the wrong side. Got to pay attention. Got to pay attention.
All right. Now, let me press this. And then we're going to look at our block right here. We're going to scoot these out of the way and we're going to look at our block right here. And so, we're going to have two here like this and two on this side. Let me press it down like this. And then our other two, let me just scoot this stuff out of the way. I feel like I'm getting mess everywhere, which is really, really not unusual for me. All right. So, this one right here, I have two end squares on, so that's going to go here. And then this one right here. Oh, right here. Here it is. I need to add two end squares. So, let's grab two, two and a half inch squares and we will put those on our ends and then we'll be ready to finish up this block. And so, it goes together much easier than you think.
All right. There's that one. We're going to flip this around. And so one on here on the end. There we go. So, then this goes this way now and that finishes our block. So, let's take these two and sew them to the middle, and then we'll add the top and bottom. Now, all these blocks should be four and a half. So, all your seams, yeah, when these blocks should are also four and a half. So, they should match up at each one of your junctions. And so, wherever your seams come together, just make sure that they line up. And if you're sewing good quarter of an inches, they should line up. So, there's that one. Now, we're going to flip it around and put one on the opposite side. Make sure that the bulk of your dark accent fabric is going toward the block. And then again, we're going to match up at every seam. And that keeps our block nice and square.
All right. So, let's go ahead and press these sides down, and then we'll add the top and bottom that have our little corner squares. All righty. Here we go. Here's our little corner sides right here. Again, make sure that the bulk of your blue fabric is facing your block, and we are going to line that up. It also meets up with the outer seam. And at every little seam, I just make sure they line up, keeps it nice and straight. Now, this is one of those quilts that I think would look amazing in Christmas or red, white, and blue. It's so versatile. We all love stars. And so, it just makes it a really fun quilt to do and not near as hard and only 20 layer cakes to make this one. This one has 16 blocks on it, and they're pretty good size blocks, so you're getting a pretty good size quilt for what you got going on.
All right. Let me just press those outer ones and then we will show you our finished block, which is much easier than we thought. Look how cute this is. So, this is our block. It's called Corner Star, and that's just one of the names. I looked it up in the Barbara Brackman book because I knew that it was from an old quilt, so I knew it had to be an old block. And it has so many names. It's called Idaho Beauty, the Corner Star, the Devil's Claw, Cross Plains, Bright Stars and Crow Foot. Well, I thought Corner Star was a pretty good name after reading some of those other ones. And so that's what we named it.
Now, what I did on these was I sashed them in between each block. And so let me hold this up here and show you. So, here's our block right here, and it has a little one and a half inch sashing. That's where you need your one and a half inch strips for. And you're going to put that in between every single block like this and sew those on. And then you'll sew one long strip in here. And so that makes you a little sashing and it just sets them apart a little bit. I had actually, originally, I had laid these all together so I could see if they would make some fun thing in the middle of it. And it just made it hard to see the stars. And so, I want to show you how laying these together like this. So, you see what's happening here.
So, this is your secondary block that appears here, and I just didn't think it added anything. So, I added my little sashing in there and I added a little sashing in across here, and it came out so cute. So, there are four, one, two, three, four, across and four down, and it makes a quilt that is 80 by 80. It's a pretty good size quilt. So, after I got them together, I continued my inner border. It's just a one and a half inch inner border all the way around the quilt. And then I put my outer border on and it's a nice big six inch border. And it just came together so cute. And again, I can see this in so many fabrics. So, I hope you have fun with this. I hope I made it easy for you. And I hope you'll try your hand at making the Corner Star. We hope you enjoyed this tutorial from the Missouri Star Quilt Company.
Hi everybody, it's Jenny from the Missouri Star Quilt Company. We hope you enjoyed watching this video. If you are an already part of the Missouri Star Quilt Company family, be sure to subscribe so you won't miss a thing. And if you click that bell, it'll notify you every time a new tutorial comes out. See you next Friday.



