Skip to content

Free quilting video tutorials from Missouri Star

Quilting Tutorials
Make a "Hands Free Diaper Bag" with Liz Gubernatis of Missouri Star

Make a "Hands Free Diaper Bag" with Liz Gubernatis of Missouri Star

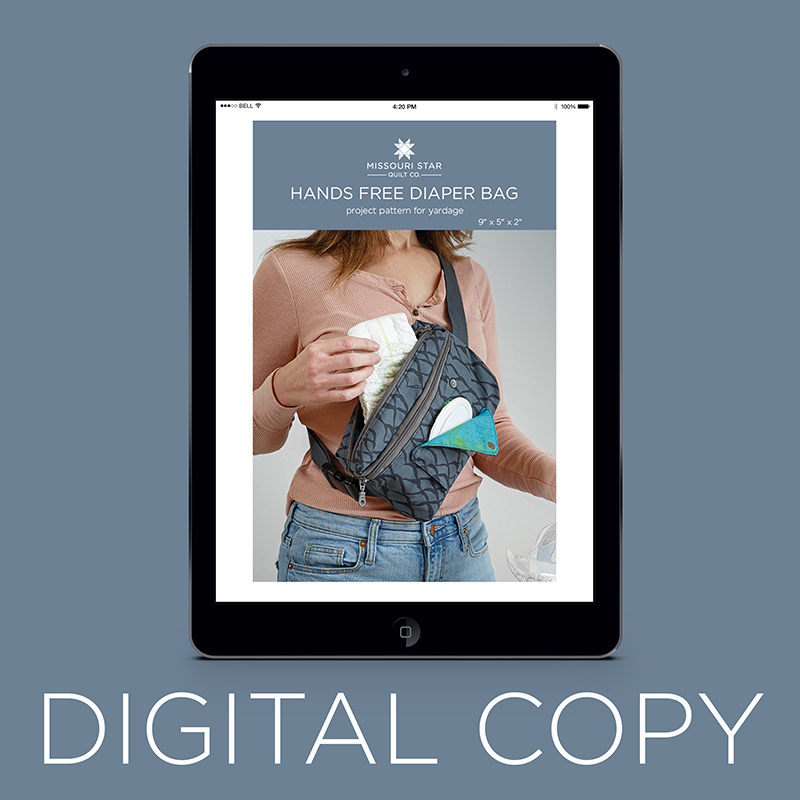
Mothers know how important it is to have a dependable diaper bag, especially when changing a wriggly little one outside of the home. This diaper bag outdoes the rest by offering you a hands free diaper changing experience! Join Liz as she walks you through the steps to creating your own hands free diaper bag. Seriously, this bag is the perfect project for expecting mothers and is a wonderful gift for baby showers!

Instructor

Liz Gubernatis

Liz Gubernatis is the Senior Manager of Education at Missouri Star Quilt Co. and loves teaching people how to quilt! She is a creative idea generator and champion. Colleagues, family, and friends know her for my creativity, can-do attitude, and common sense.

Common Questions

What is covered in Make a "Hands Free Diaper Bag" with Liz Gubernatis of Missouri Star (Video Tutorial)?

Mothers know how important it is to have a dependable diaper bag, especially when changing a wriggly little one outside of the home. This diaper bag outdoes the rest by offering you a hands free diaper changing experience! Join Liz as she walks you through the steps to creatin...

How long is the tutorial video?

The tutorial video is 01:17:44.

Are supplies listed for this tutorial?

Yes. The tutorial page includes the supplies and materials connected to this project.

Video Transcript

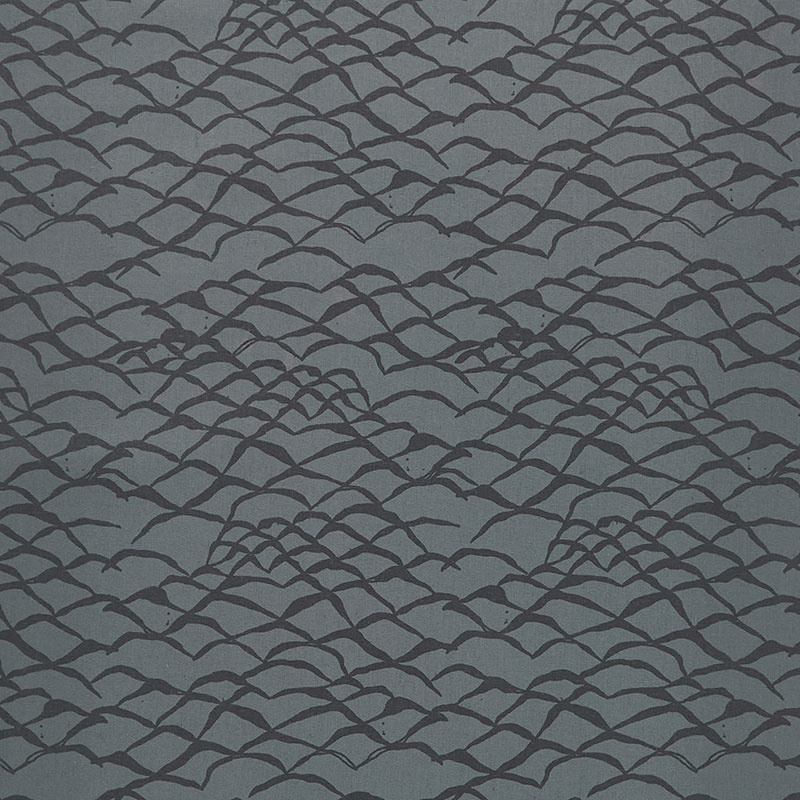
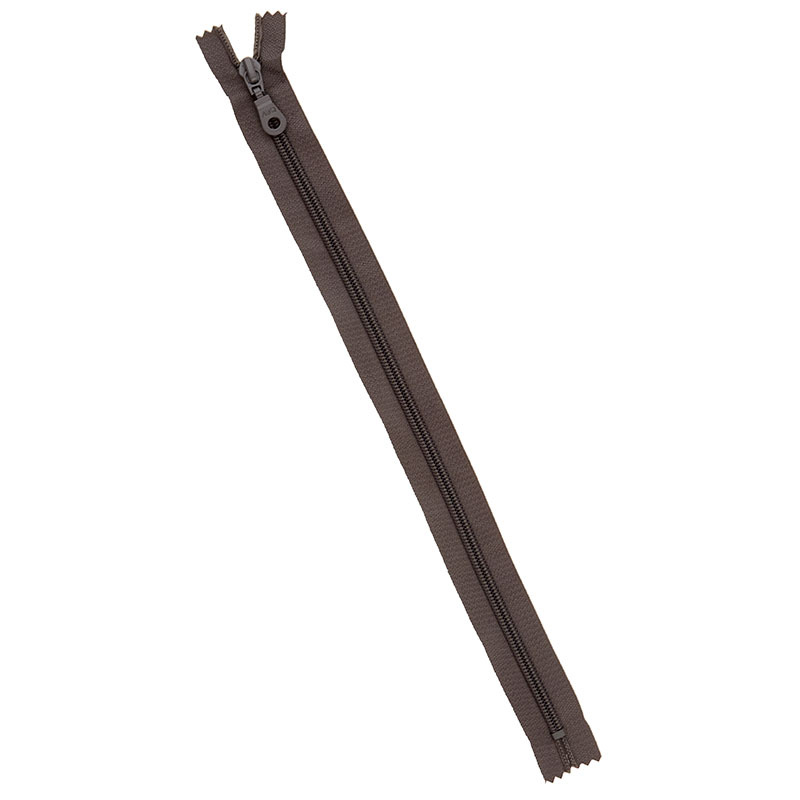
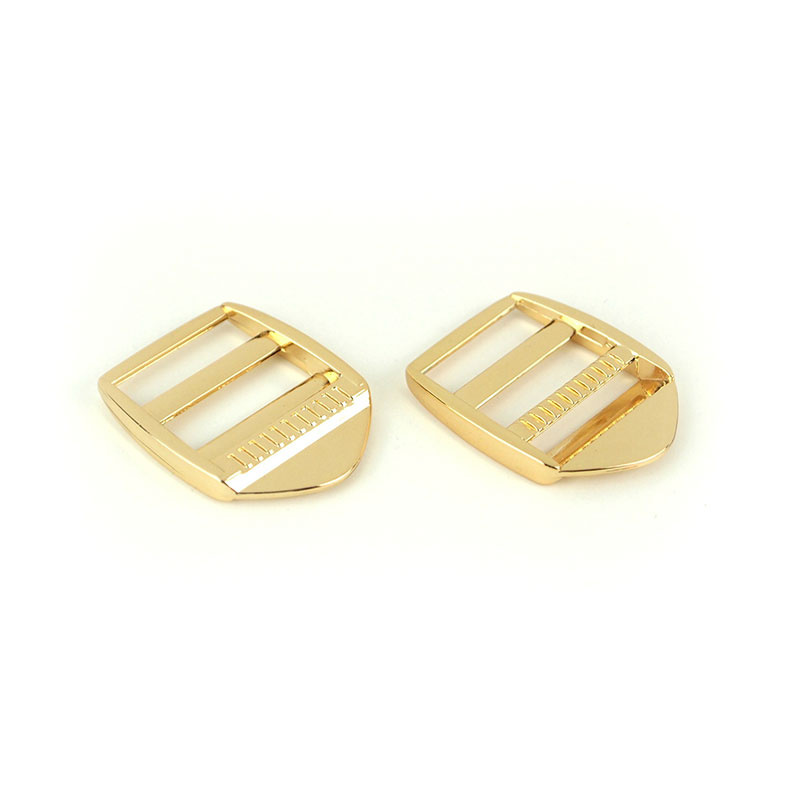
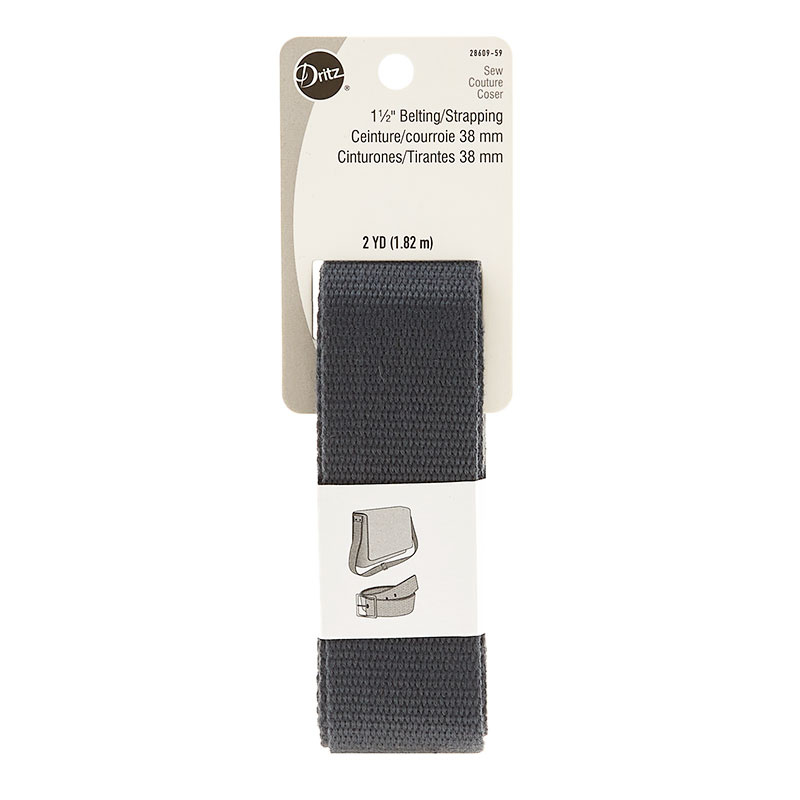
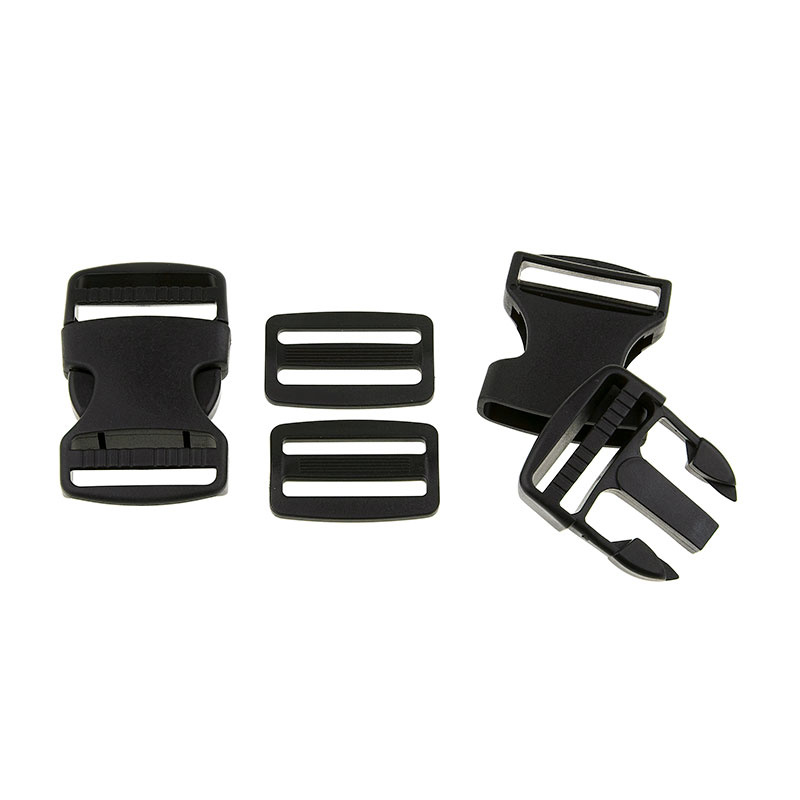
hi I'm Liz with the Missouri Circle company and today I'm going to show you how to make the hands-free diaper bag it's actually a wipes bag so it gives you easy access to your wipes there's a pocket for your wipes pack and a pocket for your diapers so this hands-free diaper bag is going to be fun and easy and can be worn like a fanny pack let's get started [Music] thank you what so to get started making this bag we need a little bit of interfacing we're also going to need a lining and an exterior fabric running two 14 inch zippers we're going to use some of this one and a half inch strapping we're going to use a half inch set of magnetic snaps to make that flap I've used this buckle and I've got some small scissors and some larger scissors and a long ruler and with that we're ready to get started okay The Cutting is very easy for this project it's all rectangles so we're going to need two 12 by nine inch rectangles of the exterior Fabric and two 12 by nine inch rectangles of the lining fabric you'll also need two 12 by nine inch rectangles of the interfacing and you'll want to go ahead and fuse that to the wrong side of your exterior fabric you'll do the same using one of the 12 by six and a half this will be our pocket and then our flap is six inches by four and a half so you need exterior interior and the interfacing and go ahead and fuse up to the wrong side of your exterior fabric on all those pieces once you've done this we're going to start by building the pocket and the flap so I'm going to set this aside I'm going to set the flap aside for a minute I'm going to start with this pocket so the interior piece the lining is going to hold over here for a minute we need to make some marks on this piece so what I've done is started by folding this in half to find the center and then I've drawn a light line using my favorite marking tool I use a pencil I used a darker pen for this this is all going to be on the inside so it doesn't matter what tool you use maybe I don't use a Sharpie you don't want it bleeding to the front but whatever marking tool you like use that then what we're going to do is from that Center mark we Mark over let me line that line up on my ruler I need one and a half inches I'm going to draw a line here and you can see I did that on both sides so one and a half away from this line and then I need one inch down from the top so I Lay My Ruler along the top and I drew a line here to connect those two then I'm going to go down two and a half inches which is conveniently the size of this ruler and you can see it's three inches there I'm going to finish this rectangle and then I rounded the curves just a little bit with my pen they're not going to be perfect that's okay but went around the corners and we want these markings so one and a half on either side gives us a three inch by two and a half inch opening that's one inch down from the top now we found that this is not going to fit every single wipes container so you may want to experiment a little bit with yours but I'll show you that I've actually used an oval opening in the wipes container and it still works through this hole just fine so don't worry about that part so much just make sure that this is going to fit what you usually use um next we're going to be cutting this out but before we do we need to actually sew along this line including the rounded corners so to do that we're first going to lay these right sides together and then we're going to stitch all the way around that round opening I've got one started but I'm going to show you how we go around the corners all right and I'm using today a zipper foot for just about everything because I don't always love to change my feet back and forth and the zipper foot I'm going to need for those zippers later and a couple of smaller seams so I'm just going to get used to it using it on all the seams so I'm just going along the lines because I don't need to be a quarter inch away from anything necessarily on these I'm going to be stitching on my Drawn Lines so it also makes using the zipper foot nice and easy I'm just going to line up the needle and then I can take off foreign okay I'm gonna go slow around the corner it's going to come right up to there and then I'm going to actually pick this up and pivot just a little bit and take a stitch pivot just a little bit take a stitch and I've just got my needle down in the fabric and I find it takes about three maybe four stitches to get around foreign and then I can just come down this nice straight edge and I like to start on a straight edge so you can see I'll finish on the straight edge as well and that's all we need to do there okay that's all we need to do so then I'll trim these threads all right so now that I've cut my threads what I'm going to do is cut out the inside of this box so again I can kind of fold it I'm going to get through all the layers so I'm going to take a little bite out of it and then I can come through here and cut to the place I want to leave about a quarter inch seam around there it does not have to be perfect um it's just to kind of remove bulk and you don't have to curve around the curves but you can you do you we're going to cut the inside of this Square out and away okay toss that aside for future list to worry about now we want to get the curves to curve nicely so what we are going to do is come in here and clip so I'm going to put the scissors up to but not across the threads and just kind of snip three four or five times around the curve and that will help when we fold this through so do that on all four corners and then we're going to do the magic of this pocket so I'm just going to clip that so it's going to remove some bulk what I'm going to do is take the lining kind of fold it all up wad it up and shove it right through there and now we have this nice finished Edge on this little pocket hole so it's a little rough and rumbled that's fine we're going to kind of pull back on the lining on the straight edges and give it a little bit of a finger press so you can see that we've got that seam right there on the edge now that's not going to work as easy in the corners but just do your four straight edges first so you kind of pull it away and match it up again to where it's going to go and a little bit of finger pressing so that's pulling your fingernail or the pad of your finger in my case my thumb across there a couple times it makes a weird sound sometimes that's okay no big deal if it's kind of the fingernails on the chalkboard thing for you don't do it you can get a roller you can just use the pad of your finger I find that my fingernail gives me a nice sharp crease now I still have rumpled corners not a big deal what I'm going to do is grab the two pieces I've already finger pressed pretty close to the corner and I'm just going to kind of wiggle waggle it and it will smooth down and then I can kind of give it a little press and it's much better so we'll do that around all four corners and just kind of press that down once you've done that all the way around then I want you to come back and top Stitch so you can see it I've used a black thread so it Blends in on my exterior you can see here it's not going to be super flat you can see I've got a little bit of crumpling that's fine it's not going to be a big deal and I'm just going to follow around close to the edge and I like to use a thread that's going to blend in but you can also use one that's going to stand out you do you make it yours once we've got this to this stage we're actually going to set it aside for a minute so now we're going to make the flat for this pocket we want to do this with the two pieces that are four and a half by six inches so I have a lining rectangle and I have my exterior fabric that has my interfacing already fused on for the manufacturer's instructions then I'm going to add these magnetic snaps to the lining of this pocket so let me show you how we do that so we have all these little pieces and there are two snaps in this pile and a bunch of washers and those are going to be super helpful for us in a couple ways so we have this piece that has the plastic attached in this particular package is the female end and then we have the male end of the snap and they will snap together and that plastic is really handy while we were still putting these together because otherwise they are a pain to take apart so don't take the plastic off yet good story okay Pro tip now what you want to do as you're putting this in is first Mark where these are going to go so what I want you to do is on the wrong side of the lining fabric we are going to mark again using whatever is your favorite tool three quarter inches in so I have three quarter inches and three quarter inches now you could go as far as an inch but it's a little tricksier so I'm going to put a little Mark here the corner of my ruler and then what I need to do is take this washer and I'm going to center it with that Circle over that Mark so you can just see it there's my mark now where the prongs go could not matter or it could matter a little bit I found that when I was sewing then this around the edge I didn't want the prong sticking into my seam because I made it harder for my foot to get around it's another reason the zipper foot is Handy but what I'm going to do is kind of turn this washer so that the prongs will end up going away from these little pieces but not into where I'm going to try to sew okay so I'm going to make a little Mark here and make a little Mark here oops and that's why the marks are really handy because you can maneuver them around so you can see I've got two lines and my DOT I'm going to do that on both sides so that's going to look a little something like this so now I can set the washers aside for a moment and what I'm going to do is use a seam ripper to put a tiny little hole where those are I don't want to take a big bite with that seam ripper because then the snap will come right back out the other thing that I recommend is getting a little scrap of something so here I've used peltex because it's extra sturdy I've used batting or something to give it just a little bit more body at this hole so you'll need to make the same marks on these little scrap pieces that you did here and we'll take a seam ripper to all of that so what do I mean when I say take a seam ripper to it while the seam ripper is essentially a little razor blade so we're going to take advantage of it in that way this time this is how Jack the Ripper is our friend so we're going to take just a couple of threads in the middle of that line and then we'll be able to rip through it it makes a tiny little hole in the fabric we'll do that same thing here okay and then I want to do that same thing on my buffer piece now here this can actually be a larger hole it's not a big deal so I'm going to stab it and use the razor blade part in that inside piece to just slice through that whole line so it's a little hard we're going to try to get nice and close for you or stab it and then slice through okay let me show you that one more time so we're gonna focusing more bread don't stab yourself take just a couple of threads you can see the little bite I'm taking there and just slide the razor end through there give me a little hole same thing right here just take a couple threads oops don't want to take too big a bite it's a little little bite a slice and then when I do the support piece I'm going to stab right through the whole thing and then run the blade you can almost hear it do this side we'll stab in and then slice through okay okay so now that we've made all the holes now we can actually start attaching these pieces so I'm going to do is take the middle end of the snap and I want it to come from the front side through the two slices we made so I'm going to kind of wiggle it through those two pieces you see it pops through there now we're going to slide this on here so there's the snap or slide this down over those prongs as well and sometimes on this piece I've noticed I need to slice it again that's okay we'll just slice a little bigger piece on that batting or peltex or whatever you're using as a support piece it's more important that you have a tiny opening on the fabric so that it doesn't rip and tear and then a larger opening on the support piece okay so now you can see everything's in place there now we're going to add a washer and We Know It Fits because we used it to mark and now we need to pull the prongs away and apart now my fingers and thumbs got very tired doing this so I'm going to show you what I did you're going to take a table Edge and you're just going to put one prong on and kind of smooth it along so I'm going to show you with the close-up camera how that looks okay so I've got one prong I'm going to use the edge of this table and I'm going to kind of smooth it down with my thumb and it starts to press it away I'll do that on the other side so I'm just going to kind of hold everything in place and then you put this side now on the edge of the table and kind of use that corner of the table once that started it's much easier to use the flat table to press down and those prongs going right into place so now that I've done that I'm going to use the edge of the table to kind of press them nice and flat I want you guys to be able to see that they are pretty close to Flat I might push this one a little further so they're really nice and close to Flat I'm going to do that on the other side as well once I both snaps done then we're ready oh snap to actually start curving and putting the flap together so as you can see I've got both snaps in place on these snaps I've placed them so they're going to the corners instead of to the sides I basically just don't want them to be running into one or the other side so I want them kind of turned one way or the other so I'm going to set this aside for a moment and we are going to curve the corners of our flap to make them even we're actually going to draw a line on one side fold it and then cut the other side so you can kind of freehand this you can use a spool or something small it's not cutting off very much we just want to curve the edges of the flap so I've done one side there's no chance I'm going to make the same one on the other side so what I'm going to do here is fold this like so and just trim both at the same time follow my line and that way they're magically even so now I can put these right sides together and I'm going to turn this over and the Snaps are not too bulky so this works great make sure it's nice and even and I'm just going to draw that line here and I can trim along those Drawn Lines and just take the little bit of curve off of here as well trim right along the trace lines okay and that's all we're taking off no big deal so we'll put these right sides together again you can pin clip whatever makes you happy I'm gonna live dangerously and I'm just gonna Stitch it so I'm going to do is I'm going to leave the bottom open and I'm going to stitch around the U shape here there's another place where the zipper foot's super handy because you want a nice close but not on top of this snap kind of seam so this is what it'll look like I'm going to put this here and my zipper foot can stitch on either side of the zipper so I'm going to switch this over okay and we will Stitch away and again on the curve we're just going to slow down kind of pick up and take a couple stitches and just pivot around this corner and then we can sail down the straight side again there's a little bulk with the magnet so you can see I'm getting a bit of a wrinkle gonna work out I'm just going to kind of smooth it under the foot and hold this in place if you're a Pinner you will be pinning and taking the pins out and that is awesome I'd love you to tell me in the comments do you use pins or do you use the quilt Clips I found myself using both I want to know what you use [Music] all right I'm going to sew right off the end trim my threads here and so we have sewn around this shape and now we are going to just flip it and you can clip around these Corners again to reduce some of this bulk so I'm going to show you up two but not through the Stitch line and I never used to know how far to go I kind of start and stop where it starts going straight again I find that helps everything just lay more smoothly once I flip it oh it doesn't go through there we go okay so we have that all clipped now we're going to I like to also put my thumb and finger on the snap so it doesn't kind of try to rip anything and I will smooth that through and then I can use my finger to help that curve so let me show you again on this one I'm going to use my thumb on the back my finger here I'm going to flip it through and I can use my fingernail to kind of push out that curve okay again we're not probably going to take this to the iron because we've got the metal snaps but we are going to smooth it so we're going to kind of I use the edge of my finger and my fingernail to kind of press that seam where it wants to go and then give it just kind of a little press so I'm going to use all my fingers to make this faster you can also smooth you can use a roller I'm really going to worry about the three sides because we've already used our fingernail to kind of push out the curves and then again I just want you to top Stitch around the flap so you can go from the top fabric or I find it easier to kind of keep my eye on this snap and then I'm just going to have you top Stitch real close to the edge here so I'll show you going around one corner and then we'll keep going and top stitching is great for a couple of things I used to kind of skip it but the fact is it kind of seals everything in place it puts it where it needs to be you can see I'm pretty close to the edge got a thread that's hanging out in there and I'm right up on you can kind of almost see the bulk of the snap in there that's okay it's not going to hurt we're just going to round it again we're just pivoting around okay so now you see us do that a couple times that's how we're going to Pivot around the snaps so you'll finish top stitching around the edge so now our flap is complete we're going to complete the pocket so to do that we want a nice finished Edge but we have a rough Edge so here's the trick we're going to flip this over so the exterior is face up and we're going to face this face up and we want to Center this over this so I'm going to fold both in half I give it just a little bit of a finger press so we find the center of each and I find that centering the pocket opening is more important than whether the edges are perfect so I'm just going to give a little finger press on that crease so I know where this is okay now this is super easy we're going to line up that crease all the way down and we're going to line this up with the top and that sounds crazy at first we're basically creating a tiny French seam on the edge of this so with this right here and kind of peel it back and you can see this centered if you're not happy with that you can kind of adjust it so it's nice and centered so when it flips up it'll be right in the middle and now we're going to sew really close to the edge like an eighth of an inch right along this rough Edge so again you can pin that in place and again I'm going to take advantage of my zipper foot I'm going to go ahead and backstitch at the beginning and end for a little extra security okay I'm going to take this off we'll cut threads and you can see it's right along the edge just enough to have caught everything but Liz it's way too close to the top I know now we're going to fold it down and we're really make sure this is nice and smooth finger press this you can if you really want to take this to the hot iron real quick but I'm gonna again lift Dangerously and now I'm going to come in a quarter inch and make another seam right here all right and I want to go ahead and back stitch at the front and the back again the beginning and end all right now check this out we'll cut and trim those threads and I did go through the lining you can lift the lining away if you are worried about it that's so deep in this pocket I'm never going to see it so it's not going to bother me and it just adds extra strength as far as I'm concerned so you can lift this up and kind of peel it back so that you're just sewing through this and not the lining it doesn't bother me though so I'm going to go ahead and sew through all the layers and now because that is a nice clean Edge when it folds up that is also a nice clean Edge and it's very lovely so it's going to completely close the pocket and now we know where to put the next snaps so that is also handy because now it's in place I don't have to worry about making sure everything matches up I already know where they're going to go so in this case I'm going to go ahead and peel this back up towards the top give it a nice press that it's smooth and I'm going to peel back the corners and Mark where I want the second snap piece to go so my trick is I'm going to use my pen to Mark where this is going to go because again we're going to be putting a snap over it you're never going to see it so here's what that looks like so I've got my pen tip on my snap I'm going to fold it down and then that's where I'm going to make a marker and I can see this I don't know if you can see on the camera but I can see where I'm going to put my snap and do that on this other side as well I'm going to pen tip here and follow down and this is where the snap needs to go it'll be easier to see here I'm gonna make a mark and then just like we did before I'm going to use a washer Center over that Mark and draw my lines for the prongs and that's where my snap will go so once again we're going to do the same thing to install the snaps on this side but instead of being on the lining we're actually on the exterior fabric so I'm going to peel the lining away on both sides so that I'm not cutting through the lining and I'm going to do what I did before taking just a couple of threads and making the holes with snaps so we're going to assemble these the exact same way and then we'll come back and we will add the next step okay so now we have added the snaps to both sides so this flap will snap closed and now we're going to add the zipper so you can see why we waited because we wanted to add the snaps to the inside so they wouldn't be Raw on this lining but it would have been very difficult indeed it had the zipper bin on there so now it's time for the zipper all we're going to do is fold down and press you can kind of see my line here a quarter inch on both the lining and the exterior and then we're going to sandwich the zipper in between so the zipper is 14 inches this is only a 12 inch project it's going to hang over both sides that is awesome so we just want to kind of line up the end of the zipper with the lining all the way down and then with the folded over exterior kind of sandwich that zipper between the two pieces now you can also use pins to hold this in place um some people also swear by using a strip of quarter inch adhesive tape but you're going to slide this in and then we're going to sew again the zipper foot is the best we'll Stitch right along the edge of this and that will hold both sides together and closing the zipper between the interior and the exterior so I'm going to do that real quick I'll show you what that looks like on the machine [Music] thank you [Music] so you can see I stitched really close to the edge of the fabric and that caught both sides there's a little piece I didn't quite catch I went back with a second line of stitching no big deal it disappears on the front and our zipper is attached now I can open and close that as I like so that's handy because what I want to do now is Stay Stitch the ends and trim the edge of the zipper so this side's easy we're just going to go over here and we are going to line the needle up right with the edge here we're going to go back and forth over the nylon zipper and that's so when we unzip in this stage we don't accidentally unzip the zipper head right off the zipper that would not be fun so now I can trim this Edge even with the Fabrics and I will do that same thing on the other side it's only slightly trickier because it's open so what we're going to do and you can clip or pin or you may have gotten the idea I lived dangerously and I'm going to kind of just hold this piece together do the same thing just kind of stitch right over this section so I'm going to get that right under here you can see my needles right there where the fabric is and this section is all lined up so I know it's going to go okay all right and then just back and forth I'm going to go about three times no magic reason just number sounds good to me always feels like that's secure I have a lot of threads to clip but this section is done so I'm gonna now I'm going to kind of just trim that off and it's again it's nylon so it's a very easy so you just throw those down over here so I'm going to take off all the rest of my threads and set this aside and we're going to start assembling the body of the bag so join me in just a second so to build the body of the bag we are going to use our largest rectangles now they are boxed and we're going to do that at the very beginning so what I've done here on the lining piece is marked one inch squares in all four corners so I just literally put my one inch here drew around that and then we're going to clean them all up and it doesn't bother me to cut all four layers at once but if you're nervous about it just cut two layers or even one layer at a time and these do not have to be perfect again everything is close and we're going to do something great with it but it does not have to be perfect to be successful so I'm going to line these up and I'm going to use my scissors to cut all these out and that's going to look a little something I like this so I've got all the four layers okay now we need to add our second zipper so I'm going to pull these apart into their piles what I want to do is take I want probably to decide that this is the top so I want all of my directional fabric here on the face the same way so that means this is the top so that all the curves kind of face that way for me so these are the top so I'm going to set that with top facing this way I want the top down facing this way with the top then the zipper I'm going to start it by facing the same way we did the pocket so since I'm sometimes visually challenged on this I want to set this here and make sure my zipper heads are in the same position and my fabric directions match up so now that I know my pattern on the directional Fabrics are lined up I know this is the top set that aside what I want to do is take the zipper again zipper head facing the same way I'm gonna flip it face down against the exterior Fabric and line it up with this top Edge and it's going to hang over on both sides now why is it face down because when we open it up we want the zipper to be facing the external fabric ask me how I know I know I may have done this backwards before time or two so zipper this time is face down then we're going to take our lining fabric and we're going to line it up here and again if you're a Pinner or a Clipper go for it I'm going to take this over the machine and I'm going to use my zipper foot in the more traditional way to stitch right down and put the zipper on so take just a minute here and then with all my layers all lined up here I'm just going to go a few inches at a time sew that zipper on and then I will line that zipper up here so it doesn't run okay I'm going to sew right off the edge and then we'll trim our threads and then the moment of truth so we're going to peel this open and we can see you can almost hang it by the zipper and kind of pull I like to line these bottom edges up and just kind of gently tug at the zipper to kind of pull that seam and I want you to go ahead and top Stitch right now on that side so the top Stitch we're going to slide it right back under here and we're just gonna run the zipper and again I'm kind of pulling gently away I'm not tugging it but gently gently pulling that away okay so now we've got a nice top stitched Edge nice top stitched Edge and now we're going to align the other side so to line the other side we're going to kind of set this aside for a moment we're going to pull this down we want the top Edge again right and now we're going to treat this whole thing as the zipper and put it face down we kind of want that to line up right so I like to kind of line up these cut edges kind of shimmy it up so that we're aligned on that edge and you can kind of see in your Corners too it's gonna like adjust so that you have everything lined up on the sides okay so we've got the zipper face down now the head is towards me on this other side and now we're going to lay this lining right sides down and again we can kind of maneuver it a little bit until it's in place and now we're going to do the same thing we're going to touch the zipper on this side and then we're in top Stitch so do that and then we'll join me for the next step okay so now that all of our pieces are attached to the zipper we'll do the same thing to Stay Stitch the zipper now I'm going to caution you make sure you don't stay Stitch with a zipper head on the outside that's going to not be fun to unpick so we're going to again open this up first and then pinch this together or Stay Stitch here and we'll stay Stitch here and we'll trim these pieces off [Music] so we're going to trim the ends of the zipper evenish with this box cut out foreign take off any extra threads okay all right so now we have the main body panel now the next step is going to be to sew the pocket on to the side now we want to kind of line up the zipper heads again right and we are going to pull the pocket flap up out of the way and what I want you to see is we're lining up the bottom edges here and here and you can kind of pin this in place or hold this in place and what we're going to do is Stitch inside the quarter inch so I've kind of folded so you can see where the quarter inch would be I want to be more like an eighth of an inch we're just going to baste this on for right now that way it doesn't move around when we're sewing the whole bag together so you can do a longer Stitch or I'm just going to do regular Stitch about an eighth of an inch so it'll be caught inside the quarter inch seam when we get that far thread cut no big deal you can see it's just barely holding that on and that's what we're looking for okay all right so now it's time to attach our pocket to the front of the bag so I'm going to make sure my zipper is closed because that helps me to line up both zippers so I know that I want the pocket on this side I'm also going to fold the lining away because I just want to attach this to the front of the pocket okay now we need to attach the zipper first so what I'm going to do is Lay My Ruler along the edge of the bag and I'm going to line it up with these two cut edges on the one inch mark and the zipper is in the way a little bit but I'm just going to kind of do my best to hold it there and what I want to do is line up the right side together along that line pull the ruler away and I want to make sure I'm holding that zipper head away because I don't want to try to stitch over that but now that this is lined up I'm going to stitch close to the edge of the zipper along the whole zipper and you can see I'm lining my needle up so it's going to be just on the edge I don't need to sew super close to the zipper and I'll still straight down the edge I'm going to backstitch at the beginning and end I think I'm going to hold the zipper head away the other thing you can do which I might go ahead and do is pull the zipper past the foot and then put this back in place you don't have to worry about the surprise at all [Music] and back stitch okay okay so you can see the Stitch line there and then the pocket is going to fold down and it's attached right there and it's going to line up now with the bottom of the bag so you line up the sides and the bottom of the bag and we are going to baste that in place so I'm going to start at the zipper and I'm just going to go eighth of an inch just barely grazing it you can do a longer Stitch and take it out later but what I want to do is go inside what will be the quarter inch seam and just tack that together so this whole piece is together and again my lining is pulled back out of the way so I'm just going to the exterior part here foreign [Music] it doesn't matter if you go all the way off the edge here because we're actually going to cut these Corners out as well so I can just flip around and keep going down the straight edge lining up those bottom edges and just basting in place [Music] now I don't pin in this section at all you notice I haven't been pinning a lot more at all this whole bag one of the reasons I don't worry about this bottom Edge in particular or the sides is that it's just basting in place and it's going to move on you and it's not going to be perfect and if I try to pin everything so that's perfect I'm just going to get frustrated with it and this is something that's supposed to be fun so we're going to go ahead and just slide down the edge of this and again because it's a nylon zipper I can sew right over it and just pin that in place basically okay now we'll trim threads and we're going to come back and flip over and now we can cut out these squares again so I'll come in here and I'm just going to put the tip of my scissors in that corner where I want it to stop and snip the corners away and that way I don't create an even bigger corner and then I'll trim up all my threads and then what we're going to do is we're going to peel these apart so that our Linings are together and our exteriors are together now here we want to make sure that the zipper is open because we're eventually going to turn through the zipper if the zipper is closed you can sneak your finger in there and wiggle waggle and use some words to get through that but what we're going to do is actually just open this about halfway and we're going to close this about halfway so when our zipper is about halfway closed and we're going to put these together now we're not going to sew yet because we want to add our strap we want to put our strap in on the exterior of the bag so it's not touching the interior of the bag and again is just going to go in as a lining so what we want to do is pause here and make the strap so I'm going to set this aside a moment and we're going to need our buckle and our webbing so I found one package was generously sized so that it made an easy fanny pack waistband for someone like myself you can also measure this to any size you like so if you're a recipient is lighter of build then you can make this part smaller but your first part of your Buckle needs to be about five inches so I'm going to measure about five inches and slice now you can finish this in a lot of ways I'm going to use a zigzag Stitch because that's the easiest one for me and I'm going to go through this and add the zigzag to both edges now this has actually been kind of torched a little and that's another method we are going to want to be able to put this through our machine so I'm going to switch my presser feet and hit the zigzag and we'll be right back so on my machine that I'm using now the baby lock jubilant I'm going to choose some uh where in here one of the zigzag stitches I like the look of the number eight and I want this to be kind of a wider Stitch and pretty close together so I'm going to actually increase this to about a two and leave it at a 3.5 so we're going to take a look at what that does here and it's we're just going to seal the edge of this so forwards and then backwards and what that's going to do is just prevent the webbing from fraying oops got a little bit of a thread nest foreign I'm sure that's never happened to anybody else out so you can see I've used dark on dark but you can see that basically a little bit of it wants to fray off the edge but this stays Stay Stitch will prevent it from going past that zigzag so trim up any of extra threads and you can do that to both sides or if you've used one end you can leave that end now we're going to take our buckle and it has two parts the receiving end is what we are going to thread our zigzag up through and then back down and that is going to create this part what we want to do then is Stitch this together again just kind of in a binding basting way you can create a whole box with an x on this side if you like I found that just doing another zigzag here is going to work so I'm going to do a zigzag to hold both pieces together and then we'll move on to the next part [Music] so we're going to set this Buckle side aside now and we're going to start with the longer piece this piece is nice you can make this any length you like so I'm going to use the whole length because it's adjustable and that way if it's someone around my size but if you have someone who's slider a filled you can cut this down to a smaller length and we're going to start by attaching this to the slide so that is this piece and it has kind of a right and wrong side we're going to thread this up through the slide and down through the slide like so and we want about two to three inches here and then what we're going to do is finish this with a zigzag like we did before and we're going to fold this back and then that zigzag will be on the inside I'm going to make a box with an X so let me take you through that at the machine so we start with our zigzag so again I'm going to switch over for me that's an eight and I'm going to zigzag up and down here [Music] and when I'm happy with that I'm going to stop somewhere in the middle and I'm going to cut my threads and again I'm going to trim close but not through those zigzags and that'll help all that fluff and fray okay so now I'm going to fold that not over the slide but back behind it and like I said I want about I've got about three inches there and I'm going to make an a box and an X through the box so I'm going to go back to a straight Stitch again and make a box where all the way around and you can either back up or spin it all the way around and make your box okay now we need to make the X so I'm going to point this and I've got this um seam tape so I'm going to just line that up here and then I'll pivot and go across the top again just adds a little extra security to the top and then I'm going to spin this around and again I'm going to kind of use my seam tape to draw my X and I'm going to get just a little bit of stitch on that and then we're good so one more time I'm going to trim threads I know I'm starting to sound like a broken record there but we just want to manage our threads as we're going through so we don't end up with anything catching or nesting and you can see we've got a nice clean box and it's not perfect it's not going to matter so we've got this now our slide is on I'm going to now treat this as the right side and this as the wrong side so I want the right side up and I'm going to make sure the whole thing is right side up and then I want this piece to be right side up so there's a wrong side and a right side and I want the prongs to face the slide then we're going to come up through this piece and thread down through this piece and we'll slide that a good chunk of the way towards the slide making sure not to curl it up okay then we get to the slide we want to make sure again we're not twisted okay we're gonna go through the slide and then through the slide one more time and that way the slide does all the work of adjusting the strap so now we can pull that through and we can check our slide and our Buckle are both on the right side and the wrong side is inside did I say side enough times so right side right side and the wrong sides on the inside okay now that we've got this we're going to kind of Fold It Up we want to make sure we know this right side and wrong side and you're going to decide which side you want the buckle on I would like to put this about a half an inch down from the zipper and I'm going to baste that in place on the machine just a straight Stitch along the edge and again just like we did adding the whole pocket to this we just want to keep it in place while we're doing everything else so sample basting stitch okay now here's the only trick I'm super proud of figuring out we're going to kind of keep this all folded up open our little magnetic flap and Tuck this all the way in here and the magnets will hold it in place so it doesn't get caught up in our seams it's a lot of bulk so there we go so that's going to hold this in place so that we don't end up accidentally stitching our strap to our bag we're gonna go to this other side and again the lining is still away so we're just basting this to the exterior I'm going to take this piece and again right sides together about a half an inch down and we're going to base this one in place too and I really like to base these in place as opposed to just pinning or or clipping them in place because there's a lot of layers going on and if this strap moves just a little bit it's not going to hold on and do its strap job it's a lot of layers just going to go slow and base that on okay or close Here Comes bag assembly so I'm just going to also tuck this in to my little magnet flap there and keep that out of the way now we're going to fold the extra pieces together and the lining pieces together and I'm going to show you a little Mark I'm going to leave about a five inch opening somewhere in the middle here so I'm just going to mark that where I want to stop and start so I'm going to be able to put my hand in here and turn the bag back around what we're going to do is line up the sides and sew down the sides line up the bottoms and sew down the bottom is leaving this gap on the lining so we're going to sew it on the sides and the whole bottom no gap on the exterior once we've got all those we're going to leave these all these little squares leave them for later so I'll start over here and we're going to do a little bit bigger than a quarter inch maybe 3 8 of an inch and we're just going to line these up and Stitch down okay and I might have even gone closer to a half an inch it's not a problem just be consistent [Music] and that Mark where I want to stop I'm just going to back up and give a little bit of back stitch [Music] so right off the edge and then for the exterior again we're going to line them up I'm going to show you here we're going to line them up and we're going to stitch right over the zipper and the strap so I'm going to just kind of make sure that's folded and out of the way I'm going to take a nice beefy 3 8 inch seam see what I want to do is make sure my seam is going to be chunkier than that basting stitch and that that's nice and flat so I'm going to use my fingers to hold this in place and take a nice beefy 3 8 inch seam and now I'm going to work and I'm working just with a couple inches at a time it's not a race so right off the edge and around the corner I'm managing the bulk and then lining up my seams manage the bulk all right now this is exactly why you got to tuck everything in man it wants to do its job and face outward so we're just going to tuck that in and this is going to be your bulkiest seam because you have two layers of the strapping so just keep your eye on that and go nice and slow over it so I'm coming up to it here I'm just going to slow down okay almost done so we've got all of those pieces before we turn it inside out we're going to box all these corners I'm going to show you how we box the zipper section first so that's up here because it's not boxing individual Corners exactly because you have The Zipper that's going to be part of the boxed corner at the top so here on the bag you can see the zipper is part of that box corner so I'm going to show you how to do that part so what we're going to do is reach hand in through our opening and now what we're going to do is pinch all of this together so you can see the zippers where everything is held together so we're going to pinch and you can open these seams like so we're going to pinch that together again I'm managing the bolt kind of towards myself so you can see this easier I would probably do it in my lap so I can see it easier but you're going to pinch that and you're going to Nestle the zipper teeth right in against this seam right there so you've got an open seam kind of press it open with your fingers nestled right up on the zipper teeth and then you're going to take the lining seam pinch it outward as well and line the zipper teeth up with that as well so you've got an open seam of lining the zipper and the open seam of the exterior you're going to pinch all those little Corners together out here and it takes a little finagling I'll be honest with you it takes a little finagling this is maybe the hardest part and it's not that hard it just takes patience so we're gonna just pinch everything nice and open and then once we've got that all together all the seams lined up like so I believe in me we can do it okay now we're going to stitch that same seam width right across there this will be a little hard for you to see I'm going to try to show you in the camera we're going to pull this back and away for the bulk and just Stitch over here now I never started that corner because it likes to pull deep into the machine what I'm going to do is start inside about a quarter inch back stitch out to that corner and then Stitch across here so let me see we can show you that and I'll do one more so you can see it so you can see here I'm lining these all up and the zipper teeth stick out a little bit and that's okay we're lining these all up and I'm holding the bulk so it doesn't try to use gravity to pull against me I'm going to start a little bit inside okay we're gonna take about two stitches then we're going to back stitch out and then forward stitching and we're just going to cross this and I'm going to backstitch it back and try to keep my fingers out of the way for you Stitch off and back stitch over the zipper teeth a little bit just gives it again Extra Strength so now I'm going to go ahead and trim my threads and trim the zipper teeth just a little bit so you can see here I'm just going to neaten that up a little make it less bulky when we turn it wasn't perfect but looks pretty good now all right so let's show you that with another camera a little bit closer so what I'm going to do is open the seam and I'm going to pinch these outward and then I'm going to use that seam and line it up with the zipper teeth and then I'm going to pinch the blue part of my lining outward as well so I've got out here is going to be the corner box of each side now here's me the corner box of each side and I'm going to sandwich the zipper teeth in between so what you can see is I'm taking the zipper and I'm lining up with the seam and I'm pinching the corners away and I'm doing the same thing with these so we are lining up everything set the seam and the zipper teeth and the seam all line up and that will keep us Square and like I said this part's a little fiddly it helps to open these seams that's why I'm going to take the extra seconds to do that and then we're just pulling these Corners away to box them so they form little angles that side and this side and we're just going to stack them so we've got zipper tape and they're stacking those corners and then we're going to stitch a seam line right across there so I'm going to take a couple stitches one back up and then I'm managing this bulk away and using my fingers to make sure all the seams stay in place and you can see this is not a perfect little box corner so I'm going to kind of pinch it and line it up and here we go and then I'll back stitch at the end so that's our two zipper Corners kind of four zipper Corners now we're going to do these outside corners so again I actually find it easier to reach up into the bag to help me and that's when having that zipper open is super handy because then I can actually get in here but you're basically going to pull these apart and you want the pocket so you can see the line where we attach the pocket zipper you want the pocket parts to join that part so in here you've got more layers on the external side so you're going to peel it apart and box the corners with the extra layers of the pocket you see that we've got the extra layers of the pocket towards the pocket side it's not the end of the world if it doesn't work that way but it just makes it that much easier so just pass you that hint so again we're going to stack the seams and we can kind of Nest them to where one goes one way and one goes the other way and then we're just going to stitch across here we'll do that on all four corners and then we'll come back and flip the bag out [Music] and one more hint as you're doing the second corner it's helpful to have the seam of the bottom of the bag all facing the same direction so when you do go to Nest those seams when it's time to Nest them you want to let this whole seam go this way and sew that way it doesn't try to twist on the bottom of the bag again not earth shattering but it's a fun tip so then we're Stitch across this side all the hard parts are done now we're going to do the lining pieces super easy to peel apart almost too easy because they're just a piece of fabric you'll line them up right at the seams Nest the seams One Direction or the other trim your extra threads so they don't get in the way and then we'll sew across that edge all right okay we'll take just a second and trim all the threads and then it's time for the magic all right we're ready so I'm going to reach in through the opening reach in through the zipper and actually kind of unzip it all the way open if I can there it goes haha I'm going to open the magnet flap okay I hear it and I'm going to grab the strap and pull that through the opening hahaha and now we're gonna just turn so I'm using my thumbs to kind of push that through and we're gonna have this big lining and then we can start using all the things we attached but we're still going to leave some room we don't want to necessarily push out the corners of the line because they're going to go inside the bag we do want to go ahead and push out all the corners of the bag there might be a few more threads I missed that's okay so I had the zipper here we're pressing out these corners and you can see the zippers in there just right in the Box corner this on this side too always check the zipper first that's the part I get nervous about looks good looks good and then this bottom corner and I'm just kind of making a peace sign with my fingers and pushing out both Corners at once so there we go and it naturally made this whole pocket in the front so now we're ready to close the lining and we're going to do is just kind of pinch the edges together and it'll fold in at our seam allowance and we can just Stitch along the side the bottom if you want to hand Stitch it you're welcome to if you want to change your thread to match your lining you're welcome to I'm just going to use this black thread I've gotten here and Stitch the tiniest little seam and trim my threads one more time and then I can push the lining down into the bag and again I'm going to make the peace sign and just push that down into the corners of the lining and that is the bag we made it and it has all the things so here this front zipper pocket I'll take the wipes out of this one so we can show you fits your package of wipes and so I actually even have a rounded one and it works just fine I'm going to stick that in the pocket voila sip that away and then I can actually just kind of maneuver this pocket around so I can get to the wipes I've got the magnetic closure for that part I can stick a couple diapers in there so that is our hands-free diaper bag you can wear it around your waist and you're off to the ball game anywhere you want to go enjoy thanks for watching this tutorial with the Missouri Star Quilt Company hi everybody it's Jenny from the Missouri Star Quilt Company we hope you enjoyed watching this video if you aren't already part of the Missouri Star Quilt Company family be sure to subscribe so you won't miss a thing and if you click that Bell it'll notify you every time a new tutorial comes out see you next Friday [Music] foreign

More Fabric by Yard tutorials

See all