

Make a "Live Boldly" Quilt with Jenny Doan of Missouri Star
 Jenny Doan
- Layer Cake
- Modern
- Lap / Throw
- Beginner
- Quilt size 54" × 72"
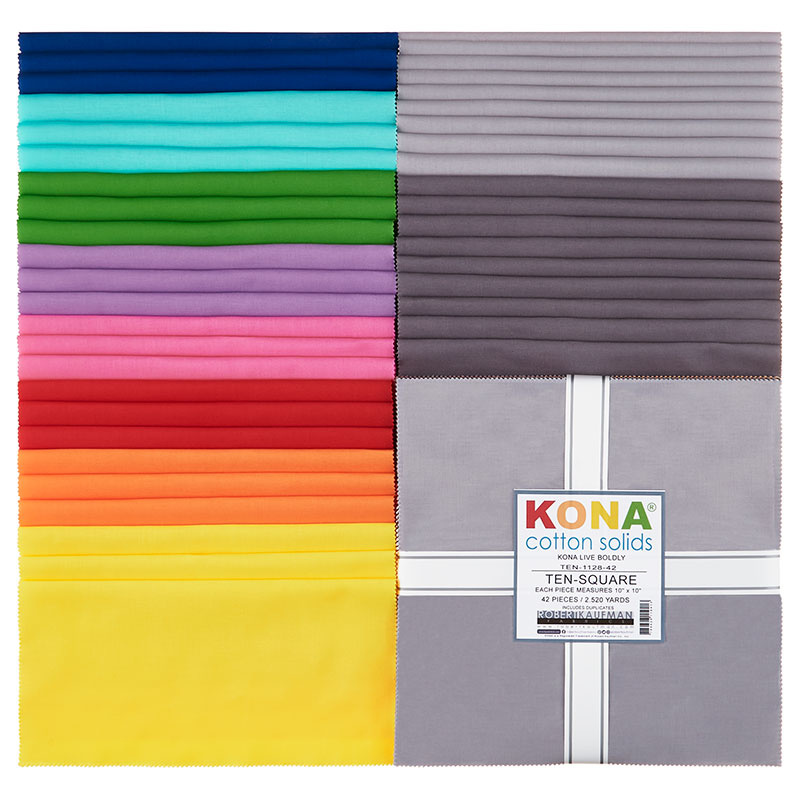
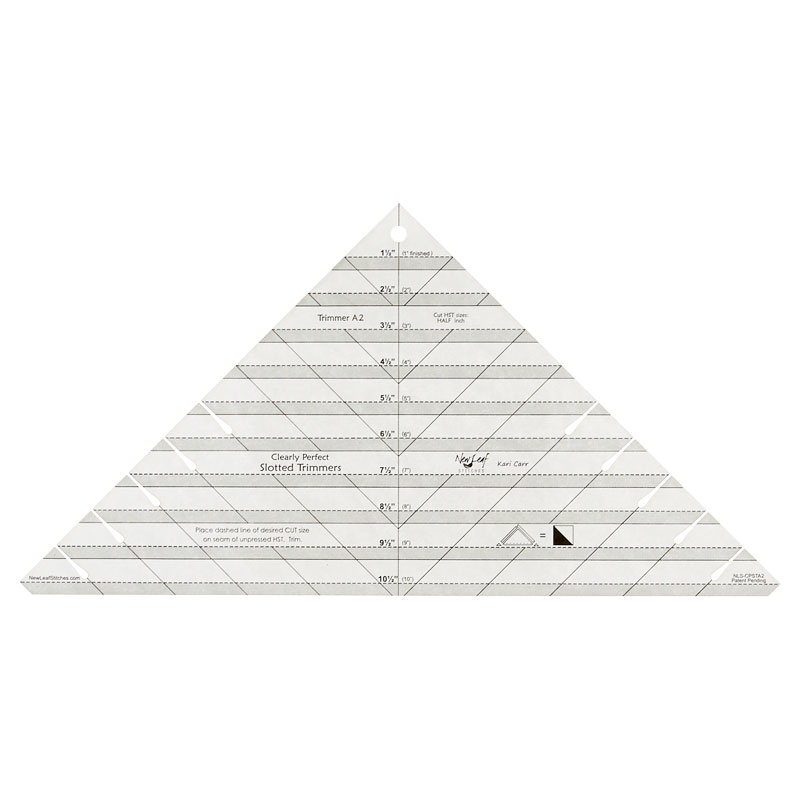
Jenny Doan whips up a gorgeous new star quilt using 10 inch squares of precut fabric. This jaw-dropping modern quilt pattern was designed by Charisma Horton. It's made with easy half square triangles and quarter square triangles, and each block is perfectly squared with the Clearly Slotted Trimmer A2. The fabric is a custom-made Kona Cotton Solids layer cake designed specifically for this quilt. It's filled with all the colors needed in just the right amount!
Instructor
Jenny Doan
Jenny Doan is an American quilter, author, and YouTube personality. Jenny started Missouri Star Quilt Company in 2008 and today it is the largest quilting supply vendor in the United States.
Shop this tutorial



Common Questions
What is covered in Make a "Live Boldly" Quilt with Jenny Doan of Missouri Star (Video Tutorial)?
Jenny Doan whips up a gorgeous new star quilt using 10 inch squares of precut fabric. This jaw-dropping modern quilt pattern was designed by Charisma Horton. It's made with easy half square triangles and quarter square triangles, and each block is perfectly squared with the Cl...
How long is the tutorial video?
The tutorial video is 00:15:48.
Are supplies listed for this tutorial?
Yes. The tutorial page includes the supplies and materials connected to this project.
Is a transcript available?
Yes. A written transcript is available on the tutorial page.
Video Transcript
So I thought, how cool would it be if we had a layer cake made just for this pattern, just for this quilt. So we got this beautiful layer cake. It's full of all the different colors that are in the quilt, the exact numbers that you need. And I just think it works really well. You're also going to need some background, two thirds yard of white and two thirds yard of black. You're probably really going to need this pattern Live Boldly. And it would be really helpful if you had the clearly perfect slotted trimmer A2. All right. So let's look at the quilt behind us before we get started. This is basically all half square and quarter square triangles. And so we've got half square triangles right here. We've got these quarter square triangles happening and you just have to know how to do it. And so, as we learn to make these, you're going to want to follow this pattern.
This is so helpful to me. Now I am not generally a pattern reader. I quilt by picture and if I can figure it out by picture, I'm great. If not, I hand it off to Natalie and I let her explain it to me. But on this one, it was really fairly easy for me. So on this first page, she has all the cutting instructions. She has all the colors listed here and then the size you need to cut them. And so we're going to take each layer cake square, and we're going to cut it to the size she asks for. And there are three sizes. So she changes the size of the block and then the quilt size changes. So it gets small, medium or large. And we are making the medium one.
Now because of the way everything, it looks jumbled to me I highlighted mine so I knew exactly what to cut and what the colors were. And so then as we start cutting those blocks, we're going to come to this page right here. And it gives you this diagram, which I love it. Every single one of these gives you exactly what to make, where the color placement goes and how many to make of each of these, some its make one, some its make 24. And so you just have to follow along. And I love that there's a box or you can just check it off as you go along. It makes perfect sense. So let me show you how to do some of these.
So we're going to go along on this one and we're going to take our layer cake right here. And the first thing we're going to do is we have a dark gray and a light gray, and I'm just going to pull these out of here like this. And she has us cut them down to nine and a quarter. So what I'm going to do is I'm going to stack my light and my dark gray and we're just going to cut them down to nine and a quarter. So I'm going to do that by using my big ruler here. Let me see. You can probably see it better if I put the light gray on top, and then I'm going to come over here and I'm going to lay my edge.
Now you have to decide if this edge is important to you or not. I mean, if the peaks are part of your fabric, or if they're sticking over the side. For me, they always kind of stick over to the side. So I'm going to go nine inches. So I have five, six, seven, eight, nine, and one quarter. We're going to come over here and we're going to trim this edge off like this, nine and one quarter. And I'm looking again to make sure I'm cutting the right size. And then we're going to cut this nine and a quarter too. So I'm going to come here. I'm going to count up one, two, hang on. One, two, three, four, five, six, seven, eight, nine, and one quarter. And we're going to trim this off just like this.
So first thing she has you do is cut all your squares in the right colors. And I have all my squares cut here and cut again. So it makes it a little faster for us. And so cut all the number of squares that you need and the right size. All right. So then we're going to come over here and, oh, wait, one more thing on this page back here. So right over here, it says here I have my black and my black, I just cut my squares out of my fabric, my white, I cut those squares out of my fabric because you need a lot of those.
And so what we did here is down as the dark gray and the gray down here, when you come over here to this end, it says cut in half diagonally, two times. So for our dark gray and our light gray, we're cutting both of those in half diagonally, two times. So what that means is we're going to cut them this way, and we're going to cut them this way. So in half diagonally, two times is corner to corner both times, both sides just like this.
Now you can keep, I kind of kept mine with their colors so that I was able to grab them fast. And I knew just what I needed, but literally when I went through and made it, I made all the gray and black ones, I made all of those at once. And then, so it just, because I'm a row sower and that just keeps me going in the right direction. So then once you've, and then for some of them down here, it's cut in half diagonally one time. And so when you get down here to the colors, it's cut in half diagonally one time, which is just... So here's our green square right here.
And you're just going to take the square you've cut to nine and a quarter and cut it in half diagonally, one time like this. And so just keep all those together so you have them where you need them and you can find them and then you're going to start assembling your units. And so that's on this next page here. Now we can go to the next page. All right. So this first one, this is the main unit of the quilt. You see this over and over. You have to make 24 of them and it's all through here. It's all through here. I mean, it's just what gives this quilt this pop. If you have not been to Charisma Instagram, you should go and look at the pictures of their quilts, because she does amazing things with colors. She just really is brave with color and lives boldly if you will.
And so what we're going to do now is I'm going to show you how to sew these four triangles together. And basically we're going to put these just like the picture shows. So here's our white and then we have our light gray here and then we have our dark gray here and our black here. And to be honest, I tried to figure out if there was an easier way to do this by sewing around it and cutting it. And there just really wasn't an easier way. It's easier just to follow her diagram and cut out the pieces.
So when you sew two triangles together, what you're going to do is you're going to fold them over like this and we're going to sew from this middle down, middle to the outside and we're going to sow quarter of an inch. And on this because she has you cut the size beforehand, she's hoping we're all hoping that we won't have to square later. And so you want to check your quarter inch, make sure that that is pretty accurate and just follow that quarter inch line down the side. Keep them lined up and then we're going to take these two and fold them right on top of each other.
Now remember the solids don't have a wrong side, so you're not going to get this wrong, but the color placement is important. And I always start from the wide part rather than the tip. If you start from the tip, the needle could grab it and push it down into your machine. And that is never fun. All right. So now we have these two pieces here. Let's press them open. I'm going to move this stuff out of the way.
All right. So we're going to press this open and I'm going to press this one here and I'm going to press it this way. Here we go. I just want to make sure the seams go opposite. So let me see if I actually did that right. Let me see. Oh, we got a look at the chart. So we've got black and gray and gray and white. Yes. So now we're going to lay these together. We're going to snug up these middles. You can put a pin in there if you want. And I'm going to start on this edge. Now when you start on an edge, it's kind of a good idea to start in just a little bit and then maybe just back up to catch that edge and then the needle won't grab it and push it down.
All righty. So we are going to, Ooh, look at that. That looks so good. So then you're going to go on and you're going to make 24 of these. All right. And so we'll show you how they go in the quilt and they, so right here, see how this goes like long like this? And these happen to all be going the same way. And then you're going to start cutting your blocks and putting them together. And so like this one right here, you're going to find your teal and your purple and they're in half square triangles and you're going to sew those together. So we'll grab one of those and just sew them together and you'll make blocks like this. And this says, make one and you'll just get all your blocks done and stacked up. So it's as easy as cutting out your triangles, cutting out your squares, cutting out your triangles and putting them together.
So once you get your block all together, you want to make sure that it's the right size. These are supposed to come out to eight and a half. So let's just do a spot check and see how close I am. So mine is eight and a half. My line runs with their line on the eight and a half line and I am pretty dead on. So the nice thing about using the clearly perfect slotted trimmer for this is that it has a line that goes up and down and it has a line that goes across. So you're able to check it very closely and make sure that you're exactly right. So do check your blocks to make sure they're eight and a half. And as long as they're all eight and a half, they're going to go together perfectly. So I have some rows done here and let me show you how we lay this out. And I am definitely going to refer to the picture.
And so here's my row one right here. And I am just going to clear some space here. I'm going to turn this guy. So we have some room to lay this out, because the layout is fun on this and I don't want you to miss it. All right. So we're looking at our picture and we're putting these together. And the little mantras I get in my brain are the white to the right, the white to the right, the white to the right. So three of those this way and I can still make a mistake because my brain is so angley challenged. And then this is the next block that goes in there and it goes dark gray in and yellow to the up.
And then the yellow goes to the down like this and then we have one more block, a blue and purple. That was probably the one I pulled out of the stack over here. Here we go. Oops. And then this one goes like this, blue up purple down. All right, let me scoot all these over just a touch so we can fit them all in. I don't know if you'll be able to see all these on the camera, but we will do our best. All right, next row. This is row two. And I literally, I don't know if you've ever seen in my studio on my design wall, but I have all these post-it notes stuck on there with little numbers written on them. I'm actually working on something that will eliminate those. But we shall talk about that at another time.
All right. So here's row two. And again, we've got one, two of these and look what's happening as all these pieces come together. It's just so much fun for your eyes. Visually, this is just really fun. All right. So then this one goes, these pieces up and then we've got the orange and red. And the orange goes to the orange.
Let's see. Yep. Orange up. And then we've got the pink and the blue and this goes pink down blue up. And so some of you may be able to go, oh look, I'm building a star. My brain does not do that. To my brain these are only blocks until I step back and look at it. And then I'm like, oh, there it is. There it is. And it's because I followed the directions that that matters. All right. Third row, we're starting to get into a little bit of color with our grays and whites and we go red down right here. And then over here we're going to go orange down. And then we have a gray and white and the gray and white to the right.
And then we have a red finishing off our star leg. See this star leg here? And then this one goes here, right here. And just like that, we have these first three rows done right here. Now I have to tell you, I love this so much that I actually made one of these for myself. And I made the small size because I love the name Live Boldly. And I feel like, as we get older, you have to be bold to keep going. You have to be old to keep trying. I mean, not old, but bold to keep trying. And so I love the name Live Boldly. So I thought I'm going to make a small one of these and I'm going to put it in my camper. So I want to show you what the small one looks like. And I did not have the layer cake when I made the small one.
And so I made it out of fat quarters and I'll tell you why that matters in a minute, but you can see the blocks are smaller and it's just this size. I mean, it's just a great size. This is a really good size for my trailer. And I may even hang it outside because it just, looking at it reminds me to live boldly, but I want to show you the back because you literally, some of these, you only need one orange square, but I had a whole fat quarter of it. And so I just sewed them all together and made this cool back right here. See all the patchwork. Isn't that fun? Now this small quilt is 36 by 48. And so it's a great little size and I love that she has three sizes on here. So this medium quilt here that we made today is 48 by 64.
And it's going to require about three and a half yards for the backing. And we just used a solid blue. Looks great. Our quilting pattern is called time warp and it's just a fun pattern that I think marries very well with the modernness of the quilt. And she also has a size on here for a large quilt and that large quilt, if you want to make it is 72 by 96. So I love that you get three different size quilts in one pattern. So I hope that you will live boldly. Enjoy this pattern by Charisma Horton and we hope you enjoyed this tutorial from the Missouri Star Quilt Company. Hi everybody. It's Jenny from the Missouri Star Quilt Company. We hope you enjoyed watching this video. If you aren't already part of the Missouri Star Quilt Company family, be sure to subscribe so you won't miss a thing. And if you click that bell, it'll notify you every time a new tutorial comes out. See you next Friday.



