

Make a "Lucky Penny Wallet" with Misty Doan on At Home With Misty!
 Misty Doan
- Fabric by Yard
- Modern
- Totes, Bag, Purses
- Advanced
- Quilt size 7" × 4"
Join Misty as she demonstrates how to make the Lucky Penny Wallet from Sallie Tomato. This pretty project is perfect for scraps and it's so much fun to make. Simple, slim, and stylish, the Lucky Penny wallet is specially designed for working with cork fabric, kraft-tex, or faux leather and it's fabulously functional with 6 compartments: one for ID, money, cell phone or checkbook, and it includes a secure flip lock closure. Create your own cute wallet from your favorite fabrics today!
Instructor
Misty Doan
Misty Doan grew up surrounded by sewing and quilting. She loves spending time sharing tutorials each week each week, and when she’s not stitching up one of her fun sewing projects for home decor, most likely you’ll find her hanging out with her husband and three awesome kids or working on a house project.
Shop this tutorial
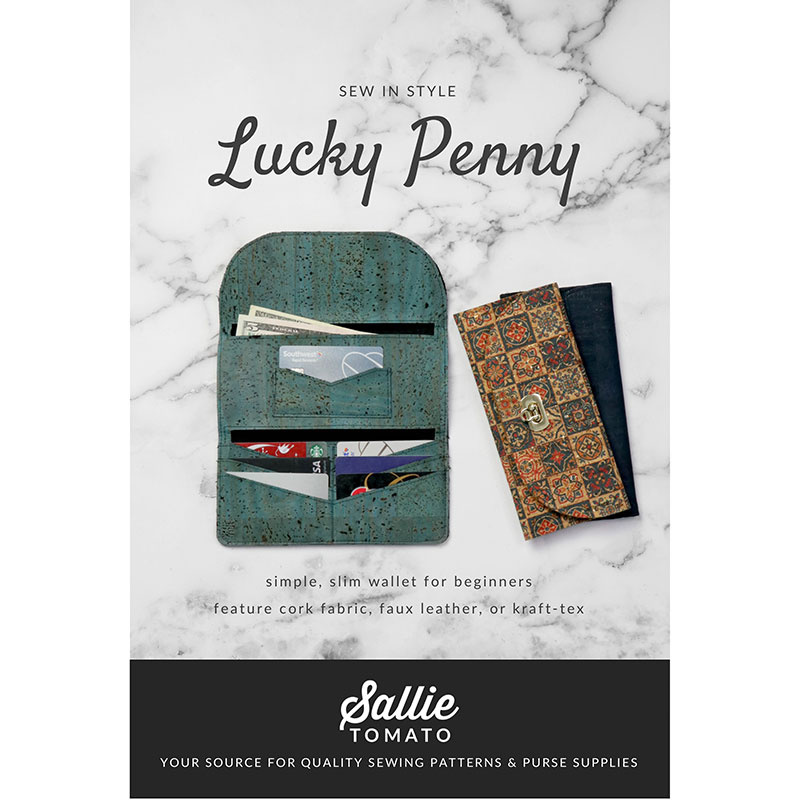 Lucky Penny Wallet Pattern$9.75Shop →
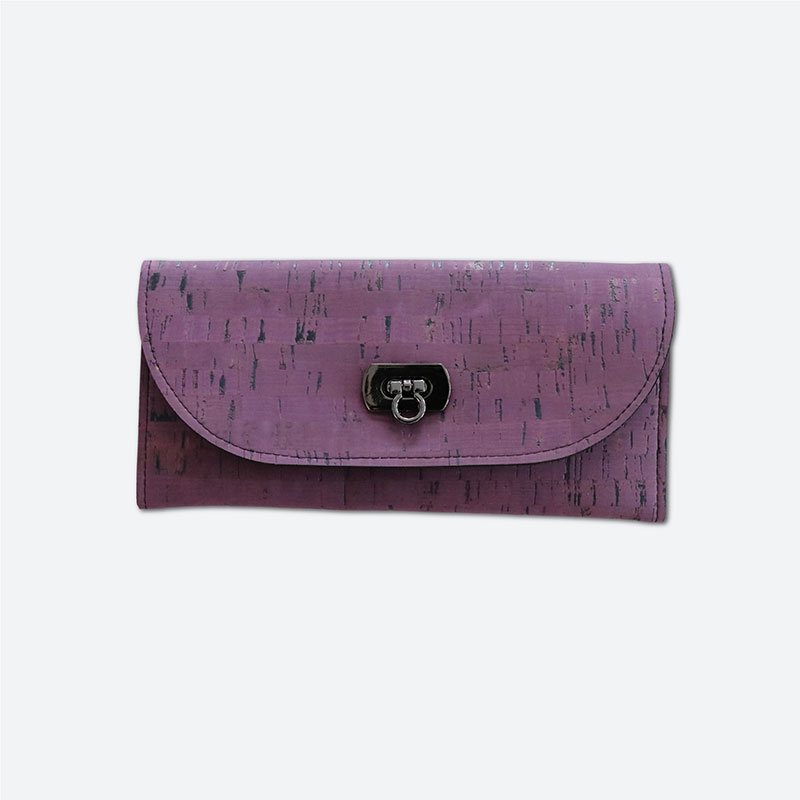 Lucky Penny Wallet Kit - Rustic Amethyst Cork$33.95Shop →
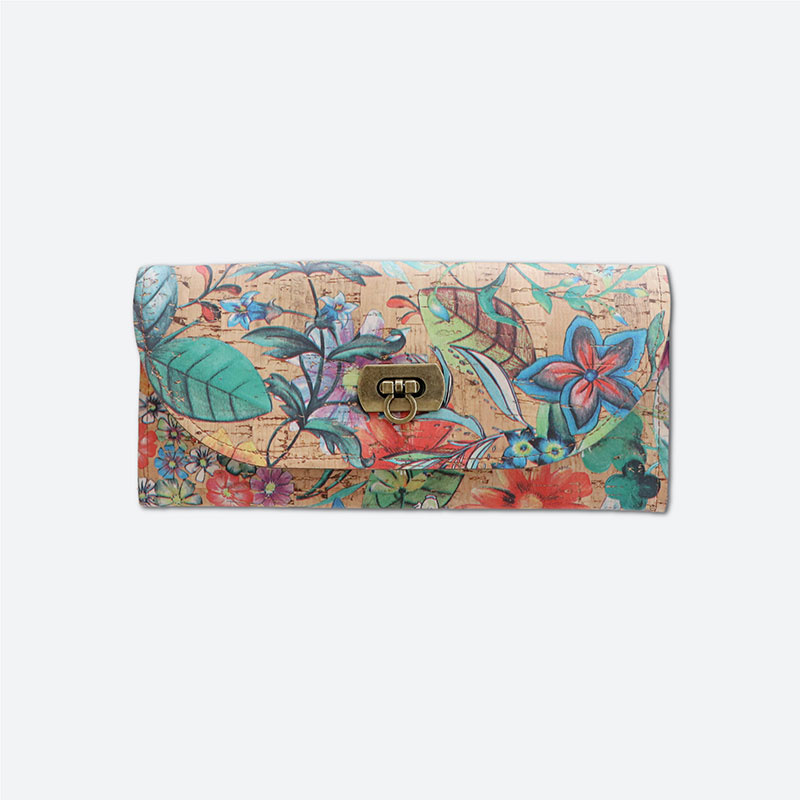 Lucky Penny Wallet Kit - Garden Party Cork$33.95Shop →
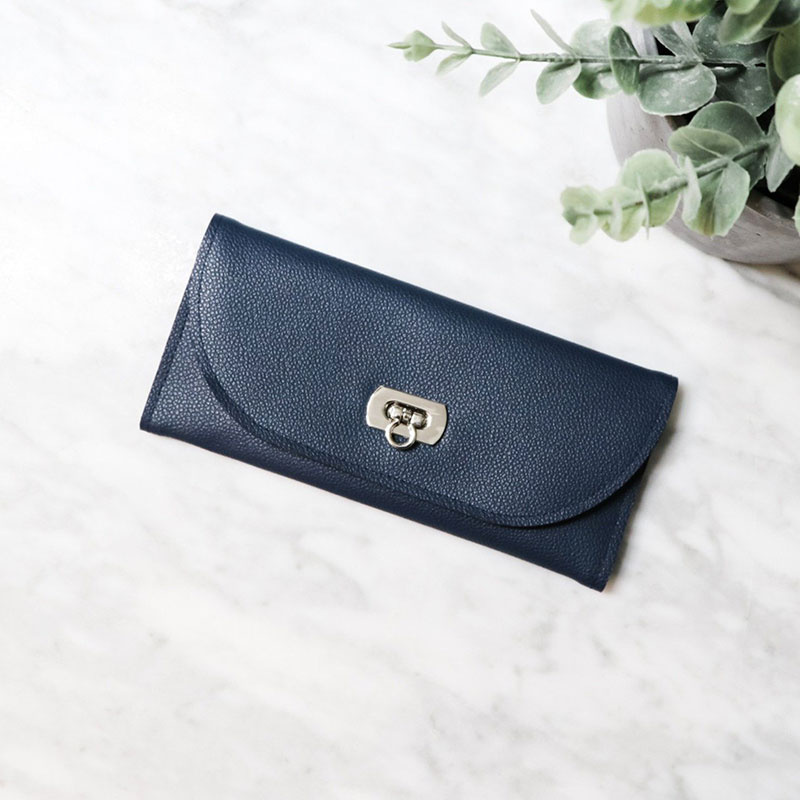 Lucky Penny Wallet Kit - Navy Pebble Faux Leather$28.95Shop →
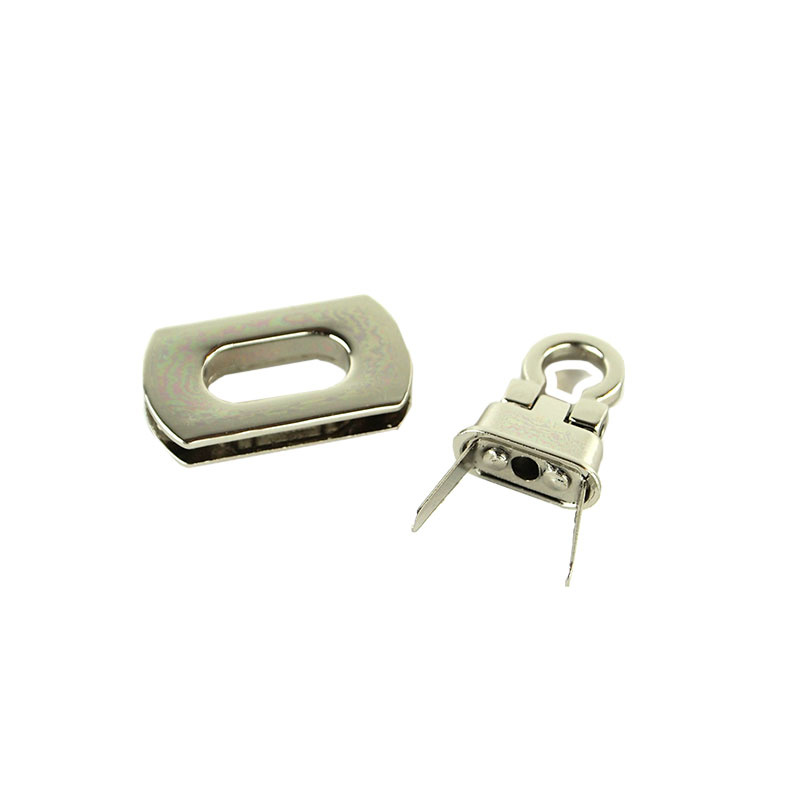 Sallie Tomato Pocket Flip Lock - Nickel$4.85Shop →
 Missouri Star 2.5" x 8" Ruler$10.95Shop →
 Missouri Star 5" x 15" Ruler$15.95Shop →
 Missouri Star 50 WT Cotton Thread White$6.95Shop →
 Olfa Splash Aqua 45mm Rotary Cutter$18.75Shop →
 Exclusive Missouri Star Jenny TG1600 ProPlus Oliso Smart Iron$199.99Shop →
 Missouri Star Wooly Betty Board - 17.5" x 17.5" Aqua Border$88.95Shop →
 Elan 8" Dressmaker Scissors$20.95Shop →
Common Questions
What is covered in Make a "Lucky Penny Wallet" with Misty Doan on At Home With Misty! (Video Tutorial)?
Join Misty as she demonstrates how to make the Lucky Penny Wallet from Sallie Tomato. This pretty project is perfect for scraps and it's so much fun to make. Simple, slim, and stylish, the Lucky Penny wallet is specially designed for working with cork fabric, kraft-tex, or fau...
How long is the tutorial video?
The tutorial video is 00:31:59.
Are supplies listed for this tutorial?
Yes. The tutorial page includes the supplies and materials connected to this project.
Is a transcript available?
Yes. A written transcript is available on the tutorial page.
Video Transcript
Hey everyone!I'm super excited about today's project! We're going to be making these great little wallets. They're called the Lucky Penny Wallet from Sallie Tomato. We're excited to be partnering with them here at Missouri Star to bring you some of their great patterns and products. This one in particular happens to come in a great pre-cut kit - it looks just like this. We're carrying a few different colorways. You can see here, this is this really cool purple cork. We have this awesome floral cork here, a navy
faux leather and then this great floral over here and this is what I'm going to be using today to make our sample. Each of the kits comes with the pre-cut pieces, the hardware like this version you see here, and great instruction instructions - the full pattern. So if you wanted to ever make another one of these out of fabric or any other you know extra cork or anything you have lying around, you could do that - it's all in the kit.
So let me show you how we're going to do this. Let's go ahead and start by opening up our pattern, because a couple pages in here is kind of our guide sheet for the shapes of all the pieces. When we're reading the pattern we're going to want to refer to this because it lets us know which piece is what. It gives you great tips here as well. If you're using kraft text, which is another great material, it shows you how to lay it out based on the size of that material. If you're using cork or vinyl it shows you how to lay out all of your pattern pieces so that they'll fit in the most economical way. I love that they've given that us that tip here in the pattern!
So because we're using a pre-cut kit we don't have to cut anything out. This is really just a guide. So this side here is for the inner panel. So I'm going to find the inner panel of my wallet itself - I lost the word there - and there's a few marks I need to make on it. I'm just going to use this as a reference guide and lay my inner panel right next to it and then I'm going to use my little ruler and measure up. So from a half an inch from the bottom of this panel I need to make a mark. Let me grab a pin and these marks that I'm making are all going to be enclosed inside of seams so you're never going to see them. You can use whatever kind of marking tool you want. I'm using a really fine micron pen to do that and I just want to make sure I have a few little guides. So I'm measuring up a half inch and I'm just going to draw a line. It looks like it's supposed to be about three inches long, so if I just center this up here, that's close enough, it's really just a guideline. Now I'm going to move up another half an inch from that first line and make a second guideline so I have both of those ready.
I know it's a little bit scary to mark on that beautiful cork but I promise you're not going to see any of those markings. Then we also need to find the placement for our little ID pocket, so I'm going to measure in and it's an inch and a half from the outside of this and it is up a quarter of an inch. So if I make my first mark, and these ones I'm just making a little tiny dot because you will see this part, but we just want a little guide of where
to put the pocket when we start stitching. So it's an inch and a half and a quarter inch so I'm just going to do one tiny dot that I can look for later.
So there we go! Now that I've got just a few guidelines, they recommend when you're using the cork or the faux leather to go ahead and take an eighth inch stitch line all the way around these inner cuts to prevent it from stretching. I've gone ahead and done one already but let's go ahead and do one together. So we're just gonna sew all the way around and pivot and I was amazed at how easy this cork is to sew. And I made this faux leather one and it was great too.
All right and we'll do one little back stitch to lock that in and there we go. I'm going to go ahead and trim my threads so I don't have those peeking through. I don't know if you can see, but I've used just a really kind of medium gray that blends in. I didn't want it to stand out too much against this pretty floral. So I've gone all the way around both of these pockets.
Now you also have these little pieces that are going to be the card slots that go in the wallet and you're supposed to do some top stitching on them as well. You can see a few of these I've gone ahead and done. It's the same idea - just an eighth of an inch. I have one left to do that top stitching on, so let's go ahead and move these out of the way and we'll top stitch this one as well. It's just this angled side that we're going to do. So I will set this under the needle. This one you just really want to take your time because you do need to make those little pivots. As you go come down to this point and pivot again and one last little pivot. So now the top stitching is complete on all of my pieces.
So let's go ahead and talk about how we're going to begin assembling this. As you can see here, there's really two different versions of this wallet. You can make this one, which this option is also included in the kit. You have this piece to add this strap. So there's not actually a buckle or any hardware that you have to install and so you can see here the top flap just tucks into this little strap and it opens up just like that. Whereas this one, if we want to add this hardware we need to focus on that now.
So I'm going to show you guys how to do the hardware, because I think it's super fun and it comes in the kit, so I want to make sure you know how to do it. I'm going to set these pieces aside for just a moment, and we're going to bounce over to that. So this is the piece that we need to use for our hardware. When you open the pattern, there is the standard pattern instructions which is to make this flap version, but then there is also a bonus. It says bonus Lucky Penny Closure hack. If you're going to use the closure that's enclosed, you want to make sure you read through that because it gives you all the tips you need in order to install it.
So to begin we are going to flip this over to the wrong side and you can see I've gone ahead and made a few marks here. But we're going to open it up because the first thing we need is this little washer. It's kind of a funny looking washer, but this is what we need. Then you want to test your closure, because some of these are different and figure out which of these slots the little prongs are going to fit into. Ours go one in on either side. Hopefully you guys can see that - I'll set it here so you can see these little prongs on the closure are going to match up with these right here. So one in from the edge okay. Just like that we know which holes we need now and so we can measure up.
Let me show you how I got these marks. We actually want to measure up 1 ⅝”, which that is just the little dash past the inch and a half line. So I've got that all lined up across there and then you take this washer and you center it up. So I know that I need to be right here on this line that is the center of my wallet right where my finger is. Then I can use that micron pen and I'm going to make a mark in those two slots that I know the prongs are going to fit into. So I've gone ahead and done that and now we can take our seam ripper - seam rippers are so handy - and we are gonna poke two little holes right on those little marks. So I'm just gonna poke my seam ripper through and slide it just a tiny bit, so I've got an opening and I'm going to repeat that here. Poke it through the bottom and slide it just a bit, so I've got two little holes that I've made in the cork.
So what that does is it allows me to take this hardware and find those holes on the front. It's hard to see in the cork. Then we can poke it through just like that. So then it pokes through on the back, so now we can take that washer and we know it's one in from the edge, and it slides down over it. If you want to get some pliers or something this is a really heavy duty metal, but I found I could just do it with my fingers, so I'm just going to now press these little tabs out to either side, almost like a brad. So you can see how that looks. Remember, this is all on the inside of our fabric. So that's just like so, and it's ready to go.
When you read on the closure hack that's included it recommends using a scrap of corks that's two by three inches high. Well when you do the pre-cut kit, you don't have any scrap cork but if you are using the closure you don't need this little strap. So I found a really good tip! I went ahead and cut mine three inches wide and. I know it's much skinnier than two inches, but if we just cut this at three inches then I can center this up over the back because all we're trying to do here is reinforce an extra layer behind the clasp so that it doesn't wear through our wallet. We want to make sure this is nice and sturdy and has enough stability behind it so that the clasp isn't going to ever pop loose.
So because this is much narrower I'm not going to sew on these long sides. I'm just going to sew a straight seam on these two ends. Let's do that really quick. Because it's three inches long I can get this under the machine without worrying about the clasp. I will back stitch a little bit, there we go. And now we'll turn around and do the other side and make sure it's as straight as possible since these stitches will show. You can measure this if you need to. All right and that is perfect!
And because this print is so vibrant you can't really even see the stitches so you don't have to worry about it at all. But I do like to trim my threads as I go on projects like this just so that they are not in my way later. So I'm going to take the time to do that. And now this piece is ready to set aside but that's how you put in the first part of the clasp and you can see it's really very simple and I didn't have to have any crazy special tools. We will need a small screwdriver for the other half of the clasp, so keep that in mind.
All right so now let's come back to this we have our markings that we made and all of our pieces that we have top stitched the little edge. We're going to begin by lining up this bottom piece, or the bottom of this piece I should say, with the line that we made. And then either end should line up with the sides of our wallet. So you can see right there, that's on our line and my sides are lining up. Then I like to use these little wonder clips because we don't want to pin and leave holes. So I'm just going to clip this in place, just like so. Then we'll add the next layer and this one I want to make sure you guys can see these shapes. There are two identical shapes that look just like this. So it's kind of this wide V and there's two of them. That's the first one I put down and then this one and so they just kind of butt up right next to each other. We're going to do the same thing - clip that one in place and over here. Oh actually I got ahead of myself. I'm glad I caught this. Before you add the second one we want to top stitch the bottom edge of this so that our cards don't go sliding through. Whew that was a close call! I would have been really frustrated with myself.
All right so just along the bottom end…it's easier to see on this piece that's not against the backing. We're just going to sew straight across here on this bottom edge, again with about an eighth inch seam and I am going to back stitch because we don't want these to come undone. There we go and now I can add that second piece just like so. We'll clip the sides so it stays nice and straight and we'll do the same thing - sew that eighth inch seam across the bottom. Perfect that leaves us one more piece for this bottom card slot area. I want to make sure my clips aren't in the way so I can get it lined up as close as possible. So really I like to focus mostly on this bottom edge because I want it to be as flush and straight as absolutely possible. Because it just kind of automatically lines up with the rest when you have that part right. So I'm just going to put a few clips in here and take my time. This is a project that goes together really quick but you don't want to rush yourself either, because it is a little detailed which is what makes it
so awesome.
So I'm just going to put a few in here to get started, so that you can
see how this looks. I'm actually going to move these off to either side because the first seam I'm going to take is straight down the middle of this. So if you wanted to have a marking pencil or anything like that to make this easier, you can see we just lay our ruler right down where those V's are straight across. Have to move this clip straight across those v's and you could just use a very fine pencil to give your eye a guide. I have found that I can eyeball this and I don't have to worry about it, so I'm just going to line this up and we are just going to sew straight down through that middle v.
There we go. I'm going to take the time to trim those threads so I don't have to worry about it later. It's always a good idea on projects like this with these little details. All right and now we're going to add this ID pocket that goes in the center here. Remember we made that tiny, dot that reference dot? I'm just going to line the corner of this up with that reference dot and I want to make sure that this stays about a quarter inch up. This is kind of in a tricky place to pin. That's why I like to have that one little spot that I can see and so that looks good to me. I think I have that centered. So I'm just going to sew on three sides here so that the top is open for our ID. I'm just gonna hold this in place, just like so, do one little back stitch ,come down to this point and pivot. I'm still lined up with that that mark I made myself, so we're doing great! Zoom all the way down this bottom side and then turn on the last side and back stitch at the top. There we go, we have that done! Trim those threads. Ok all of the components for the inside of the wallet are together.
Now we can sandwich the outside with the inside. We don't add the last part of the clasp until the very end. So we are going to sandwich this all together. I know I've got a wild amount of clips down here so I'm just going to ignore those for now and start up at the top. Just lining this top end up
and then I'm going to put a few clips there. Again, this is one of those projects that we're making it ourselves but when it's all done we want it to look as professional as possible, right?
So I'm just gonna put plenty of clips to try and make sure there's as little
shifting as possible while I line this up. There we go. Now because the center is sewn I don't have to worry about these not being in the correct place, but I I do have to kind of watch them as I approach the machine. I'm just going to take and only put one clip down here on this side, and that looks pretty good. I'm just making sure at the very bottom we actually have three layers of the cork. This is the thickest part down here and when I was making it, this was the trickiest part. There were a couple times when it shifted on me so I'm actually going to start with this seam, since it can be the most unforgiving. So I just want to make sure that that is lined up and looks good and it does. So that bottom edge is where we're going to come back and start. Once we finish pinning all the way around. I think I just need one more clip there. So you can see, we've got it all lined up and ready to go.
So I'm going to go ahead and take out this pin and I'm going to start here in this bottom corner and we are going to tackle this thickest part first, just because we might as well get it out of the way, right? And because it is a little bit thicker and I ran into some shifting I'm going to make this just a hair wider than that eighth of an inch. I want it to be as close as possible so that that top stitching looks even all the way through the project, but I just want to give myself a little bit extra room because I'm working with three layers. I think you will appreciate that tip - I found it was helpful for me.
So I did backstitch at the start and we're just sewing straight across,
and it is kind of bulky because remember that clasp is underneath here. So just watch and be patient and go slow. Now we're getting towards this other end and I'm going to keep my needle down as I get to this other corner, but I am going to check and make sure I'm happy with how it all turned out. That looks exactly how I want it. I've got even stitches all the way through all three layers. So now that I know that, I can pivot and we can continue all the way around the wallet. As you get to this curve, you just want to slow down a bit. It's a very gentle curve so you can ease it under the machine - my clasp is caught on my table - you do want to watch that. There we go. You can see we made it through there nice and easy.
Then we've got this straight stretch before we come into another curve. All right we're in the home stretch, there we go. Down to that bottom corner and we're going to back stitch again. Look at that! It comes together so fast. Again let's trim those threads so this looks nice and tidy and then let's add that last part of the clasp because that's all that we have left.
So I've got a small screwdriver here and I'm going to use that to open this up. On this back side there are two Phillips head screws. So let's just go ahead and open those. We need to take this apart. Sometimes they're kind of stuck, so you have to work them a little bit. You don't want to lose these, so I recommend putting it back in this little package because we don't have any extra screws. So I'm just going to close those back up in there so I don't have to worry about them running off. Now we have the two halves of our clasp, we've got our finished wallet. So let's go back and refer to our cheat sheet that tells us where this clasp needs to go.
It looks like what we're doing is, it says after the wallet is completely sewn unscrew the screws and center the bottom edge of the back plate three quarters up from the flap edge. So this is the flap - it's the curved part remember. So we are going to measure three quarters of an inch from this back edge and we do need to make sure we're centered, so let's do that. Looks like if we go up three quarters of an inch right in here should be my center, and we are going to take this part of the clasp where you can see the holes and we're going to set this right in here. Just up from the three-quarter inch mark. So you can see I've just set it on here and then we're going to use that same micron pen and we are going to carefully mark these outer holes and this inner oval.
Now I can remove this and you can see on the cork where I've made those marks. Now this was the part that was the trickiest for me because it says now draw an oval around all three markings only slightly larger and then we're going to cut out that oval. So you do have to kind of freehand this part and so I just went out a little ways around those marks and you can tell I'm not great at drawing, but I'm doing my best. This is the part we're going to cut out now. Remember, this is our sewn wallet so you can see my markings here. We have quite a few layers so I found again to get started just like we did when we installed this part of the clasp with the seam ripper, I found it really helpful to go ahead and through the first layer of cork right in the middle. I just ran my seam ripper and you can see that just gives me a starting point and then you can take little scissors in here and we can take our time and cut this out. I just worried about one layer at a time once I got through this first layer. Then I could kind of see where it needed to go for the second layer. Does that make sense? And I can poke through it with the seam ripper just like I did. So we're just going to cut around this mark that I made, just like so. Then I'm going to grab that seam ripper again. I can poke through the second layer so that my scissors have a starting point, just like that. See it leaves a little opening? Then we're going to cut right in line with that first one that we made. You do want to make sure your scissors are nice and sharp obviously because this is thicker than normal fabric, but easy to sew and easy to work with. Just make sure to do a little bit at a time.
There we go - ta-da! We've got our opening, just like so. All right so then the finished part of our clasp is this kind of beautiful antique, wrong side. So that needs to be on the outside, so I'm going to poke this through and what I'm looking for is that I want this to fit with just a little bit of excess. This worked out perfect the first time I did it. I had to go back and trim a little bit more so you can see now where we're going to add the screws plus the clasps. I have plenty of room there, so we're going to leave this just like this. This is the back side of that clasp and now we can get back out our little screws that we kept safe in their little container. I'm going to sit them here so they don't go rolling and we can add one at a time back to this clasp. So we don't have any crazy hammering or anything wild like that that we need to do to install it. It's all really manageable. And there's that first one and the second one. Just make sure they're nice and tight.
You guys - we did it! Look at that! So now this just closes up. We can insert that in the clasp and it is just as simple as that. This was such a fun project. I love that it's all pre-cut and I love all of the beautiful different materials that it's made out of. I want to make sure you guys notice these other beautiful Sallie Tomato projects that are hanging beside us. These patterns are available here at MissourI Star Quilt Company, so be sure
to check them out. As you can see they write wonderful patterns and make bag making very approachable and simple for every sewer so don't be afraid to dive in!
I also want to point out this adorable cork, they call this their coloring book cork. It's this floral that we've made this wallet out of here and I just think it's so darling. Remember this is the flap version of that wallet and so you can actually color these with your fabric markers or you know even a sharpie a permanent marker would work! But I thought I would pick a little flower on here and show you guys on the back how quickly we can just add our own little bit of ooh. So I'm just gonna color this little flower in red right here. So that's such a fun way to customize your own personal wallet even more!
I hope you guys enjoyed this project! I'm sure you'll be seeing much more from us and our friends over at Sallie Tomato. Until next time, I hope you have a great week.


