

Make a "Sew Powerful Cross-Body Purse" with Misty Doan on At Home With Misty
The purse that Misty is making today is more than just a purse. It's a badge of empowerment for young girls. The Sew Powerful Crossbody Purse is part of the Sew Powerful Purse program, a program committed to keeping girls of Zambia, Africa in school through hand-made purses specifically for carrying feminine hygiene products. The purses are sent to Zambia and distributed as gifts to young girls, so if you want to help empower these girls, follow along with Misty!

Instructor
Misty Doan
Misty Doan grew up surrounded by sewing and quilting. She loves spending time sharing tutorials each week each week, and when she’s not stitching up one of her fun sewing projects for home decor, most likely you’ll find her hanging out with her husband and three awesome kids or working on a house project.
Shop this tutorial
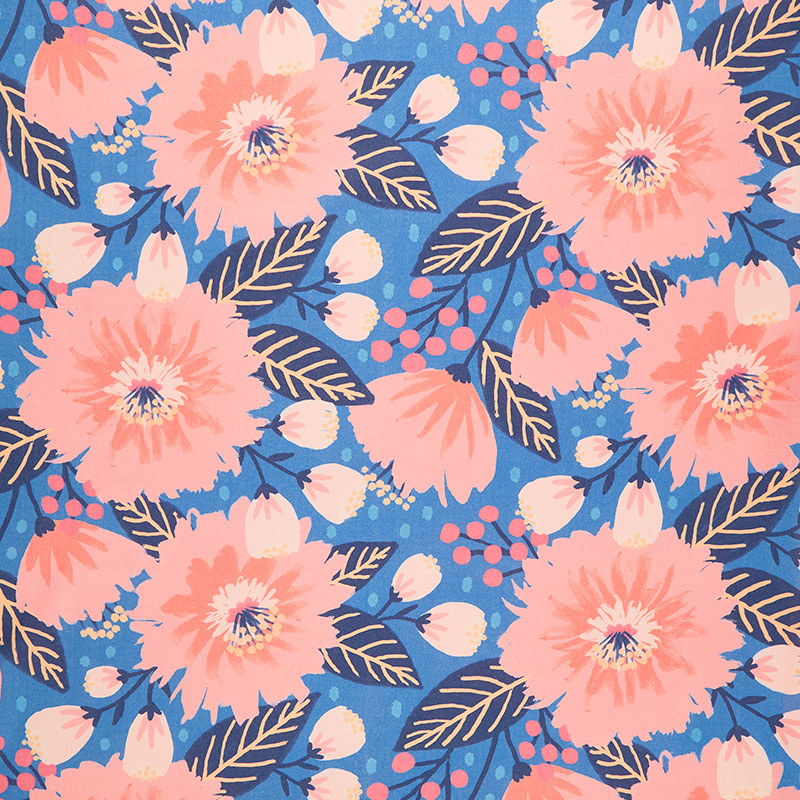 Vibrant Blooms - Canvas Dahlia Party Dark Blue Yardage$17.52Shop →
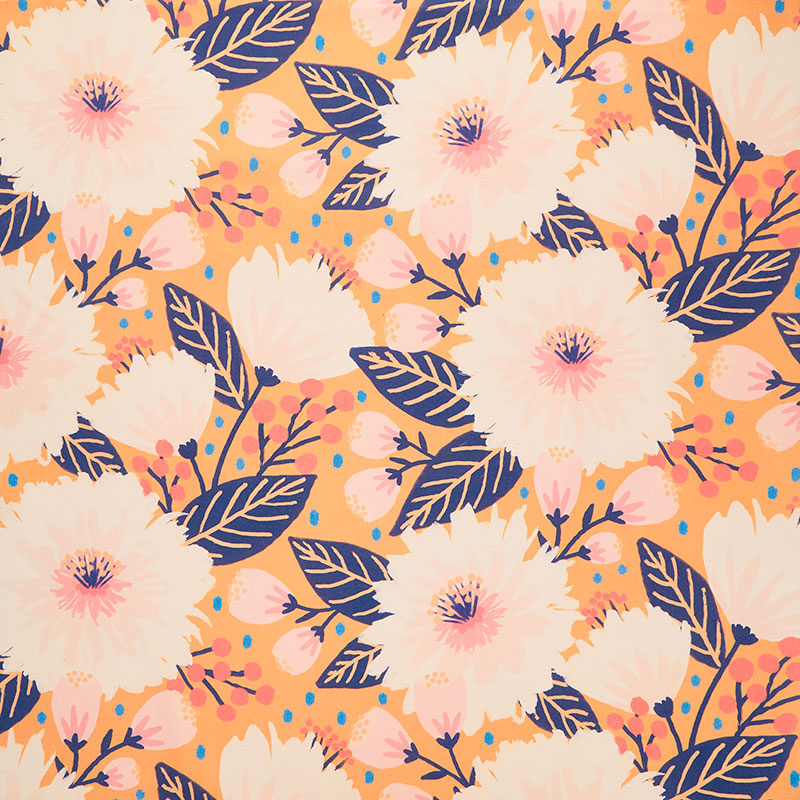 Vibrant Blooms - Canvas Dahlia Party Gold Yardage$17.52Shop →
 Missouri Star 2.5" x 8" Ruler$10.95Shop →
 Missouri Star 5" x 15" Ruler$15.95Shop →
 Olfa Splash Aqua 45mm Rotary Cutter$18.75Shop →
 Olfa Splash 24" x 36" Cutting Mat Navy$68.95Shop →
 Exclusive Missouri Star Jenny TG1600 ProPlus Oliso Smart Iron$199.99Shop →
 Missouri Star Wooly Betty Board - 17.25" x 25.5" Orange Border$98.95Shop →
 Elan 8" Dressmaker Scissors$20.95Shop →
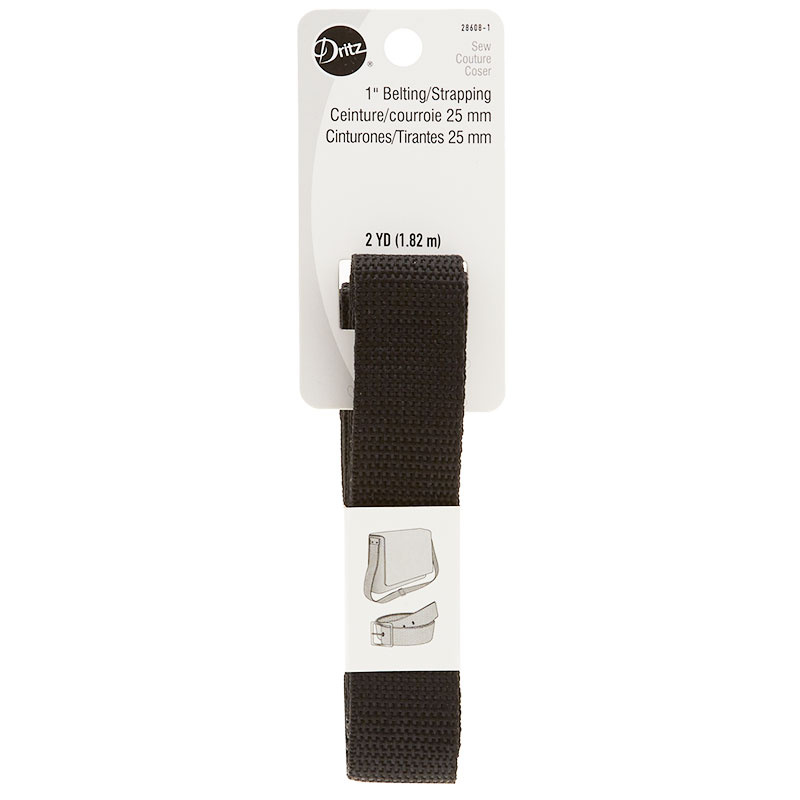 1" Polypro Purse Strapping - Black$5.95Shop →
Common Questions
What is covered in Make a "Sew Powerful Cross-Body Purse" with Misty Doan on At Home With Misty (Video Tutorial)?
The purse that Misty is making today is more than just a purse. It's a badge of empowerment for young girls. The Sew Powerful Crossbody Purse is part of the Sew Powerful Purse program, a program committed to keeping girls of Zambia, Africa in school through hand-made purses sp...
How long is the tutorial video?
The tutorial video is 00:34:59.
Are supplies listed for this tutorial?
Yes. The tutorial page includes the supplies and materials connected to this project.
Is a transcript available?
Yes. A written transcript is available on the tutorial page.
Video Transcript
I am so excited about this week's project. We're going to be making these great little crossbody bags that are designed by Sew Powerful as part of their organization. They believe if you sew a purse you can change a life. We will be making these purses to donate to the Sew Powerful organization so that they can serve young girls in Zambia.
First up, you want to download this free pattern. They actually have two patterns available: a beginner and an intermediate. I'm going to walk you through that beginner pattern today, but you can choose.
There's just a couple things you want to keep in mind. The pattern is incredibly detailed. It has photo steps that walk you all the way through it and then it has a summarized version of those instructions as well, so you can kind of choose which one fits your style. There are even specific pattern pieces that you can all print out right on your home computer
and have everything you need to make this.
One of the things I love the most about the pattern though, is there are different cutting layouts depending on what type of fabric you're using for the outside body of the bag. They do recommend using a little bit heavier weight fabric, so I’m actually making this out of this beautiful canvas today. You can see this pretty floral - we actually have two different colorways available and then I just picked a pretty pink quilting cotton for the inside. If you wanted to use quilting cotton for the whole thing, you would just need to interface the outside body of the bag so it has a little bit more stability.
You can also make the strap either out of fabric itself, or we have this great webbing that's already designed with this in mind. I used some black webbing on this sample here and I've got this great kind of natural color that we'll use today. That just saves a few steps and makes it easier to make these bags quickly.
To begin, I have cut out all of my pattern pieces. You can see I have them kind of organized across here. Pattern piece B is actually what you would need if you were making the strap out of your fabric so I'm not
going to use that today, but I have everything else ready to go.
This is pattern piece A and that's the flap panel - that's this front flap that you see on the bag. You need to cut one of your fabric, and one of your lining so I've gone ahead and done that. I have those here and then the first step is to stitch all the way around leaving the top open. Then we're going to trim these little curves, so I've clipped the curves. You can see I've gone ahead and done that stitching for us because I'm just trying to save us some time. Now we can turn this right sides out and now if you have like a chopstick or a fingernail something to just press along that inside seam to make sure it turns and lays really nice.
Then we're going to take this over to the iron and give it a good press before we top stitch along the top of this. I just like to take my time and really make sure that this is turned nicely, laying as smooth as possible and because we clipped those curves it really isn't too difficult to get it to behave and do what we want. I start with that bottom edge first and then we'll roll one side. I'm just kind of feeling it with my fingers and then we'll do the same on the other side.
Now that I've done that we're going to top stitch with the nice finishing stitch all the way around those same three sides that we stitched on before leaving the top open. You can see how that is still open. When I do top stitching I like to just lengthen my stitch length a bit. I find it just looks a little bit more professional and we're just going to do a nice narrow stitch on these three sides. This is just as narrow as you're comfortable with - mine's about an ⅛” away from the edge. I should point out I’m using this great pink thread in here so it kind of coordinates. We'll slow down as we approach that little bit of a curve. So the flap of our bag is ready to go. I'm going to go ahead and turn my stitch length back to my normal setting and now I can set this aside. I like to leave it with the pattern piece so that as I'm reading through the pattern it's easier for me to find all of the sizes that I'm looking for.
Up next, we're going to work on the pockets. I'm going to grab this small pocket here and I've gone ahead and done a little bit of sewing already just to save us some time. Let me grab my scissors here. You can see on this one, what I've done is I started on this bottom edge, back stitched, went all the way around leaving about a 4” opening across the bottom here, and now I’m just going to clip my corners, just to get rid of some bulk. Now we're going to do just like we did on the flap and turn this right sides out and this is going to make the inside pocket of our bag. You just have to take your time a little bit on this because we want these bags to be high
quality and last the girls a long time.
I'm just going to take this over to the iron and do the same thing we did before, but I'm going to make sure my little edges are staying turned under
because we will top stitch across there later. That's where I had that opening, remember, so just make sure it's hiding behind the cute fabric and then we will press this down. That one is ready - let's set that back there.
Now these pieces here, I want to point out because this is actually pattern piece C and F and so one of those sets of fabric and lining is for your slip pocket and one is for the purse body bottom of the back. You can see here
you would have two sets that look just like this. The main fabric and the lining and to do the pocket, which is what we're working on now.
You're going to place those right sides together and just across the top, you're going to sew with a quarter inch seam and then we're going to press that open. Then top stitch just like I've done here. I've gone ahead and done that. You can see I sewed it right sides together, opened it up, lengthened my stitch leg and top stitched that, so that is ready to go. Now my pockets are ready.
Let's go ahead and refer back to the pattern. I'm using the summary here just to breeze through it and now that we have the pockets done it says we can start working on the purse body parts.
With the right sides facing up place the small slip pocket (that's what we made right here) on top of the purse body front lining so the purse body front is right here. This is the piece that we haven't used yet. When you cut these, I want you to notice it says to cut one out of the fabric and two out of the lining and these are cut on a fold. So I have all of those stacked together and we're going to take one of the lining just like so, and we are going to center and align the top of the small slip pocket 1 ¾” from the top of the lining. I'm going to use my ruler here and measure down 1 ¾” and then I'm just going to eyeball and make sure that's centered. Then we'll put a pin in here just to hold it in place. Now we will stitch along the two sides and the bottom. By doing that it's going to enclose that little opening that we had earlier.
Let's go ahead and take this to the machine and do that. I do like to back stitch. We're just going to sew down to this corner, keep my needle down and pivot. Now we're enclosing that opening that we had. Needle down and pivot and back stitch there at the top. Now our pocket is attached to
the inside lining. You can see how that opens up just like that.
The next step is to take our purse body front, which is the exact same size as that lining piece that we had before. Now we're going to, based on the large slit pocket that we made earlier, we're just going to line these up right sides together. I'm trying to figure out how to explain that. Both of the right sides are facing up towards us and we're just going to baste these so that the pocket stays in place. I'm just going to do some really loose stitches as narrow as I can and I'm actually going to put a clip on either side to hold this pocket where I need it to go. That should be enough for me to take this over here and add those basting stitches. If you're not familiar with basting, those are just a narrow kind of like way to pin it without having pins in your way. We're just going to lengthen our stitch length a bunch and I'm going to sew a super super narrow stitch. If you do it less than a quarter inch then you don't have to worry about taking this out later because we'll catch this inside our final seam and it will not be in the way. This is just to hold all those layers together so we don't have to fight with them later.
Once we've done those big basting stitches it's ready to go inside of our quarter inch seam so that we can enclose it later on and not have to worry about it. I am going to turn down my stitch length before I forget so that's taken care of. Now we can set this aside for a minute.
We're going to take what is our pattern piece F on here - it says the purse body bottom of the back. Sometimes this pattern feels a little bit wordy, but as you work through it it really starts to make sense. That's why I recommend keeping everything labeled.
So I've got this piece here and what we're going to do is take our flap that we made just like before and we want to put those right sides together so that floral fabric needs to go towards the floral fabric. We're going to be looking at the lining, which is what I have here and then our last piece that we need is this pattern piece G which is the purse body top of the back. We're going to take this off and we're going to put that so that the florals are right sides together and I'm just going to put a couple of pins in here to hold these layers together.
Now I've just eyeballed this to make sure it's centered. You could absolutely measure on either side here to ensure that it's exactly lined up. Just put another pin so it stays where we need it and then I just want to double check my pattern and make sure this is right. Center in a line, pin all three layers, and stitch through all three layers. So yep that's what we're going to do.
Now this is back to our regular quarter inch seam. Remember we've turned our stitch length back to normal from that basting stitch and we're going to stitch through all three layers with a quarter inch seam.
Now it wants you to press your seam down towards the bottom large part of the bag so that's what we're going to do. I'm actually going to start with this down and just kind of roll this back to begin with so that I'm working towards that bottom section and then I'll flip it over again, make sure I don't have any pleats or tucks and you can see all of the right side of the fabric is showing which is what we're going for here. This looks really really nice!
Now that we've pressed that down we're going to go back and add our top stitch right along this seam. We're going to lengthen our stitch just a little bit and I'm just going to sew just a hair down from that seam and top stitch just about an eighth of an inch down all the way across.
So now we have most of the hard work done and we can start assembling our purse body. Let's take all of the pieces that we made…
Oh you know what we forgot one thing and that's to trim down the strap which we want to do. I'm going to open this up and the length we're looking for is 54 inches so I’m going to fold this in half and just set it on my mat
and 54 in half is 27. Let me just make sure I've got what I need here. Now I'm just going to cut off this extra fabric. Now our strap is the right length so let's go ahead and take all of our pieces and start assembling our bag.
The next step is to take our other inside lining piece which I have here. Remember that matches up with the piece that we've sewn the small
pocket to, and we're going to put those right sides together. If you had a print you would want to pay attention. We are going to sew our quarter inch seam down both sides and across the bottom leaving about a four inch opening. I'm going to go ahead and take this to the machine and do that now. Checking my stitch length to make sure I'm back to that normal length.
I'm just going to go ahead and sew off the end and pivot. So about to there and back stitch. This opening is how we're going to turn our purse later so we do want it to be a comfortable size. We don't want to have to work too hard to get that purse through it later. So we will sew up this side making sure our sides are lined up going all the way up that side there we go
now we're going to use the same idea but we're going to use our purse body back with our purse body front. Remember the front is the one that we've basted that pocket to. We're going to put those right sides together and the only difference on this one is we're going to go ahead and take that quarter inch seam on all three sides - we don't need to leave an opening.
Let's go ahead and take this over there. You could pin if you need to. I like to make sure my flap is up out of the way and I am going to back stitch just a little bit here at the front and I am kind of watching to make sure that my basting stitches are inside that seam allowance and they are.
Now the next step is we're going to add a little bit of a box corner on both of these pieces. The size is actually a ¾” box. Let me grab a pin here so I can show you how I'm going to mark that. I'm just going to take my ruler and in the bottom corner of each of these I am going to measure ¾” in on both sides. This is from the outer seam, so this is just a small box and I'm just going to draw that for you. I'm going to do the same thing on the other side
and draw that just like that and I'm going to go ahead use my scissors
and snip this. You could cut this out before you sew it all together but I like to wait till this point because I like being able to just sew off the end and come back and take care of this later.
Now we've trimmed that one and we're going to do the same thing on the body of the bag. With our three-quarter inch lined up we can draw that corner there and now I'll also cut through these ones. We're cutting through a few more layers here so just take your time. You don't want to cut too far.
Now that I have that trimmed I'm going to put my hand in here and I'm going to make sure that the pocket is staying with this piece here. I'm just going to pinch this, so that I can create this boxed corner. It just takes a little bit of maneuvering because I want to line up that center seam. Now all we have to do is take a straight stitch across here.
Let's take this to the machine and sew straight across on both sides. I actually like to backstitch quite a bit because we want this to have quite a bit of stability so I'm going to go across and back and across. just like that. Let me show you again on this other side. So we've opened this up. I'm putting my hand in here to make sure the pocket is going the way that I want it to go, and then I'm pinching this so my center seams are lined up and then pushing them in opposite directions and we're going to stitch
straight across there. I'm going to put that under the machine straight across backstitched all the way just like so. Now we've got these great little boxed corners at the bottom of the outside of our bag!
I'm going to go ahead and repeat that same process with the lining - it's a little easier. We've got less bulk on this one so we're just going to pinch this just like before, make our seams go in opposite directions so that center seam is lined up, and sew straight across.
We still have our opening - you want to remember that! Now we can turn the body of our bag right sides out. This is where we can check to make sure our box worked out the way that we want and you'll know because the side seam of the bag goes straight through that box corner across the bottom and all the way back up the other side which this does. It looks beautiful! I'm really happy with how that turned out.
Now the next step is to grab our strap - remember for this purse I'm using this pre-finished webbing that we carry here at Missouri Star, but it also gives you instructions on how to make it out of fabric if you choose.
So I am just going to line this up right along that center seam. Here, let me flip this over to see if this makes it a little bit easier and I'm going to measure up or eyeball, let's see about an inch and a half. I just used a little ruler on my table top here and I'm going to put a pin in here. Let's put a pin through the webbing on that side and now we want to make sure this isn't twisting. This is kind of an important step.
Then we're going to do the same thing and we're going to have this side
overhang an inch and a half as well. I'll put another pin in there and now I can double check and see that there's no twists in my strap. We are going to put our lining wrong sides together. I haven't turned this one right sides out and we're going to stuff our bag inside of the lining, so in this case the strap needs to be inside with it as well and the flap has to fold down inside. We need all of this inside of our lining. so it just takes a little bit of
maneuvering. Just take your time now.
I'm going to come back and I'm going to try and eyeball these side seams. I'm going to carefully hold my strap where it was. I've taken that pin out and I'm just going to use my lining now and line that up at the end. I don't know
if you guys can see here. It's hard to tell since the strap is sticking up, but I'm still trying to line up the side seam of my lining with the side seam of the bag. I've just arranged that and I'm going to put the pin back in through all three layers and we're going to do the same thing on the other side. Pull that pin out, line up the side seams kind of fold it back and check, making sure that the strap is staying in the middle, and then putting our pin back in place. Now if you need to add a few more pins you can, but we are going to go ahead and take a quarter inch seam all the way around the top edge of this bag and we are intentionally leaving this extra bit of strap because we're going to add some reinforcement stitches so we don't have to worry about that handle coming out.
I'm going to start on the side here and I'm going to be on just this side of the strap so my first stitches do not have to go through quite so many layers. You just have to watch as you go to make sure the bulk of the bag is staying away from the needle because you don't want to sew through more than you want to. Let's just take a few stitches here and I am going to back stitch for those first couple and we are just going to sew all the way around. I'm going to zip through this and i will meet you back here when that is done
All right, we are coming around the end now, just finishing up through these layers. I'm going to meet back right where I started, backstitch again and trim my threads. I'm going to make sure I don't have any pins in my way.
Now I'm ready to turn it. Remember we have that opening at the bottom so we're just gonna gently pull our bag through. Remember we backstitched on that lining so that makes it easier to put a little bit of tension on that seam. We're just going to work this through gently, oh my goodness, look how close we are!
Now this is the lining, this is going to tuck down inside the bag just like this and we want the top edge to lay nice and flat. I'm just testing it here to make sure that I'm happy with how this looks. I think this is going
to be great.
Before I get too far I am going to pull this back out and we can just pinch this opening. We're just going to do some quick top stitching to now enclose the opening that we left in the lining because we know that that part is done. I'm just going to straight stitch across here at the bottom of the bag. Nobody's ever going to see it! I want to make sure that's turned under all the way though. We can really tuck that down inside because it is finished.
I’m just going to take this over to my iron and I'm going to gently press around this top edge because I want this to be really smooth. Let me move this out of the way so you guys can see. I just want the lining to stay on the inside and have our beautiful canvas be the one that shows on the outside so I'm just kind of rolling that with my finger to make sure and then I'll come back and press and we'll do the same thing on the front.
You can see how nicely that is laying now! I'm going to go ahead and do my top stitching all the way around this top edge. Turn this back up to a longer stitch length and then we are going to start all the way around. For this, again, you want to make sure that the flap is out of your way and I am just going to start right here on the back and we'll zoom all the way around.
We are so close to being done! The final step is we can add a little box stitching here to reinforce those layers of the strap that are inside. To do that, I'm going to take this back over here. I'm going to use my ruler again
and open up this side seam and so this is where we're going to add just a little bit of box stitching. So I'm going to add a one inch square maybe a three quarter inch square…let's make it one inch. It should finish just right above this pocket, which it will.
I'm going to go ahead and use a pin so that you guys can see if you were, you know, making this yourselves you might want to make sure you're using something that will wash away, that you don't see the final stitching. But I want you guys to see the little bit of the square here and so I'm going to sew right on these lines that I've marked.
You can see the square that goes all the way around. I'm going to sew all the way around that and then corner to corner just to give this some strength. You would usually mark both sides but I'm just going to show you on one. The reason we're doing this is it just gives a lot of strength to the handle so that the girls can carry everything that they need and not have to worry about that handle coming loose.
So again, I'm keeping my needle down as I pivot there in the corner and again across this top here. And I will back stitch. I'm going to end right in that corner because now I can just rotate and come with my first side of stitches to that opposite corner. Hopefully you guys can see that under the machine, stitching straight across to this opposite corner now, back stitch and cut my threads. Then I'm just going to stitch one line in the opposite direction.
You'll repeat that on the other side but essentially our bag is done. Our little flap folds across just like that and now it is ready for you to send off to Sew Powerful.
One thing I do want to mention that they really encourage you to do is they
have these little note cards that you can print off or you could enclose a card of your very own and just share a message for the girl who will be receiving this. Send her a little bit of love, a special thought, a favorite quote, maybe a scripture, whatever it is that you feel called to send her and include that with the bag when you send it off to Sew Powerful.
They do an unboxing of all of the bags that they receive at the end of every month on their Facebook page and we are super excited here at Missouri Star to partner with them and challenge all of you to make these bags for such a wonderful cause and to send it to them. We would love for them to receive 500 of these purses in the month of June, so if you could do that I would just love it so much.
I would love if we could majorly exceed that number. I think we can do it but let's just send a lot of love and good out into the world by making these bags and be sure to share it with us by using the hashtag #sewpowerfulmsqc so we can see what you have been working on.
Thank you guys so much for making these amazing bags, for working on a wonderful cause. I hope you guys enjoy it and we'll just make thousands of them. I will see you next time!


